Struggling to keep your festive 3D nail charms on for more than a day? It’s frustrating when your beautiful Christmas bow tie nails pop off right before a holiday party. You’ve followed the tutorials, but the results just don’t last.
The secret to long-lasting 3D bow nails is using a structural adhesive and proper prep. For durable, 14-day wear, you must lightly etch the charm’s base and secure it with a bead of medium-viscosity builder gel, followed by a full cure under a UV/LED lamp. This professional method provides a mechanical bond that regular nail glue simply cannot match.
Drawing from proven methodologies and established best practices, this guide unlocks the secrets to salon-quality results at home. You’ll discover seven genius Christmas bow designs, from trendy coquette styles to classic glamour. Prepare to create a stunning holiday manicure that actually lasts through the entire festive season.
Are Your Christmas Bow Tie Nails Falling Off? Unlocking the 14-Day Adhesion Secret
There’s nothing more disappointing than spending hours on a perfect Christmas manicure, only to have the star of the show—that beautiful 3D bow charm—fall off within 24 hours. This common problem is the number one frustration for DIY nail art enthusiasts. The issue isn’t your skill; it’s the adhesive. Traditional nail glues and top coats lack the structural strength to bond a non-flexible 3D nail charm to the nail plate for an extended period.
The secret to durable charm adhesion lies in adopting a professional adhesion protocol. According to industry standards, properly secured 3D resin or metal charms should have a longevity of 10-14 days. This is achieved by using a high-viscosity, structural product like builder gel or hard gel. These products don’t just “stick” the charm on; they create a solid, flexible foundation that absorbs shock and prevents lifting. Before you explore the festive designs below, remember this core principle: etch the charm’s base, use a bead of builder gel, and cure it fully. This is the key to turning a temporary decoration into a long-lasting holiday statement.
7 Genius Christmas Bow Tie Nails Ideas And DIY Secrets 2026
Ready for some festive inspiration? The following seven Christmas bow tie nails ideas are curated to not only look stunning but also to be executed with durability in mind. Integrating the latest 2026 trends like balletcore and the coquette aesthetic, these designs range from subtle 2D painted ribbons to glamorous 3D nail charms. Each idea includes the specific products and a step-by-step DIY tutorial to help you achieve a flawless, long-lasting holiday manicure.
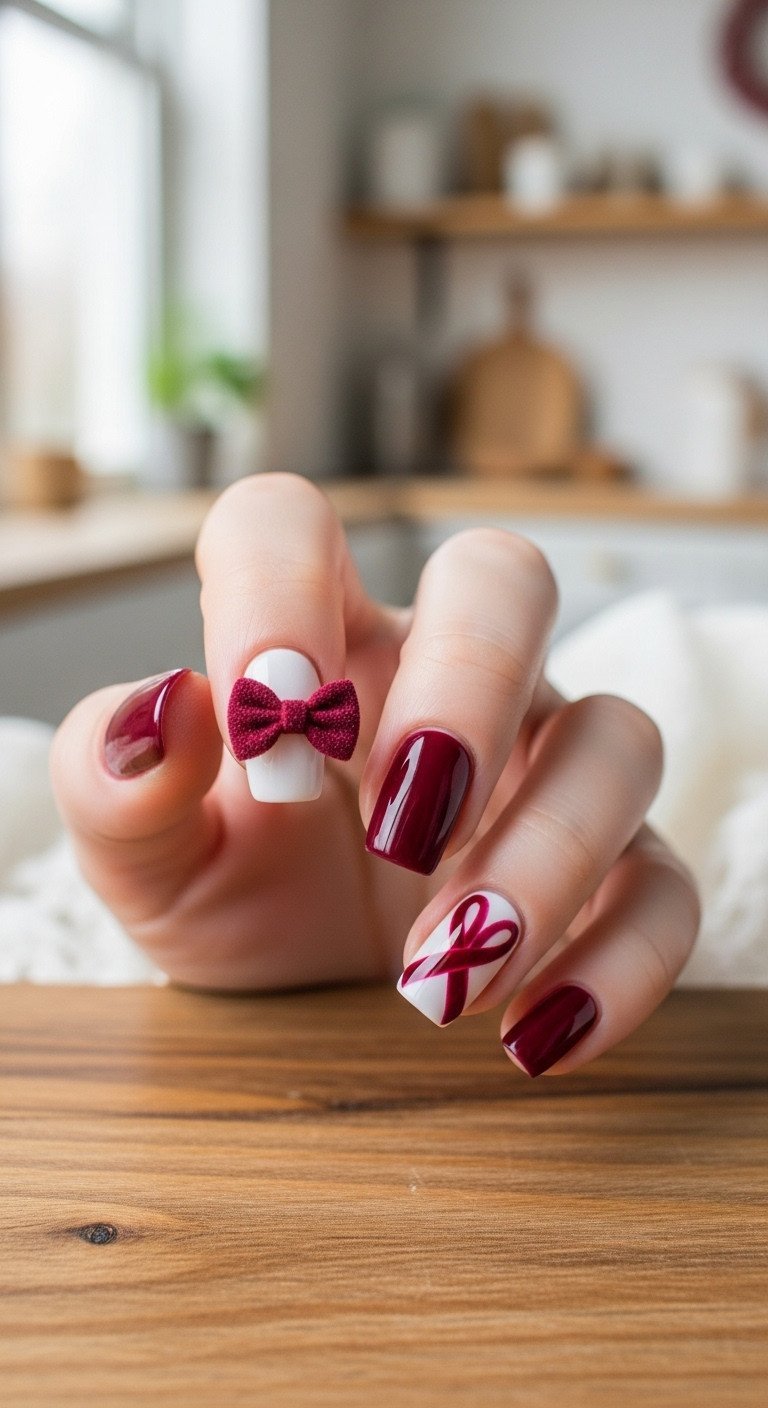
1. The Classic Red Velvet Christmas Bow (Textured 2D)
Pin this genius hack to your ‘Christmas Nail Inspo’ board!
This design uses red flocking powder to create a realistic, fuzzy velvet texture that’s perfect for a cozy Christmas look. The key is using a matte topcoat to give the powder something to grip onto for a lasting finish.
Products & Tools Used:
- Deep Red Gel Polish (highly pigmented)
- Matte Gel Top Coat (crucial for powder adhesion)
- Red Flocking Powder (fine grain)
- Fine Line Striping Brush (5mm synthetic bristles)
- Curved-tip Tweezers (for handling small bows/powder application)
Application Steps:
- Apply two coats of deep red gel polish and cure fully.
- Apply a thin layer of matte topcoat and cure (this provides the tacky layer).
- Using the striping brush, quickly paint the outline of the bow design using the deep red gel polish (do NOT cure yet).
- Immediately and liberally sprinkle the red flocking powder over the wet bow design until fully covered.
- Gently tap off the excess powder and cure the nail for a full 60 seconds (the gel underneath must cure fully).
- Use a clean, soft brush to dust away the remaining loose powder, revealing the velvet texture.
Pro-Tip: Ensure the base color of the polish matches the flocking powder exactly. For maximum longevity, apply a clear top coat only around the edges of the flocked bow, avoiding the center texture itself.

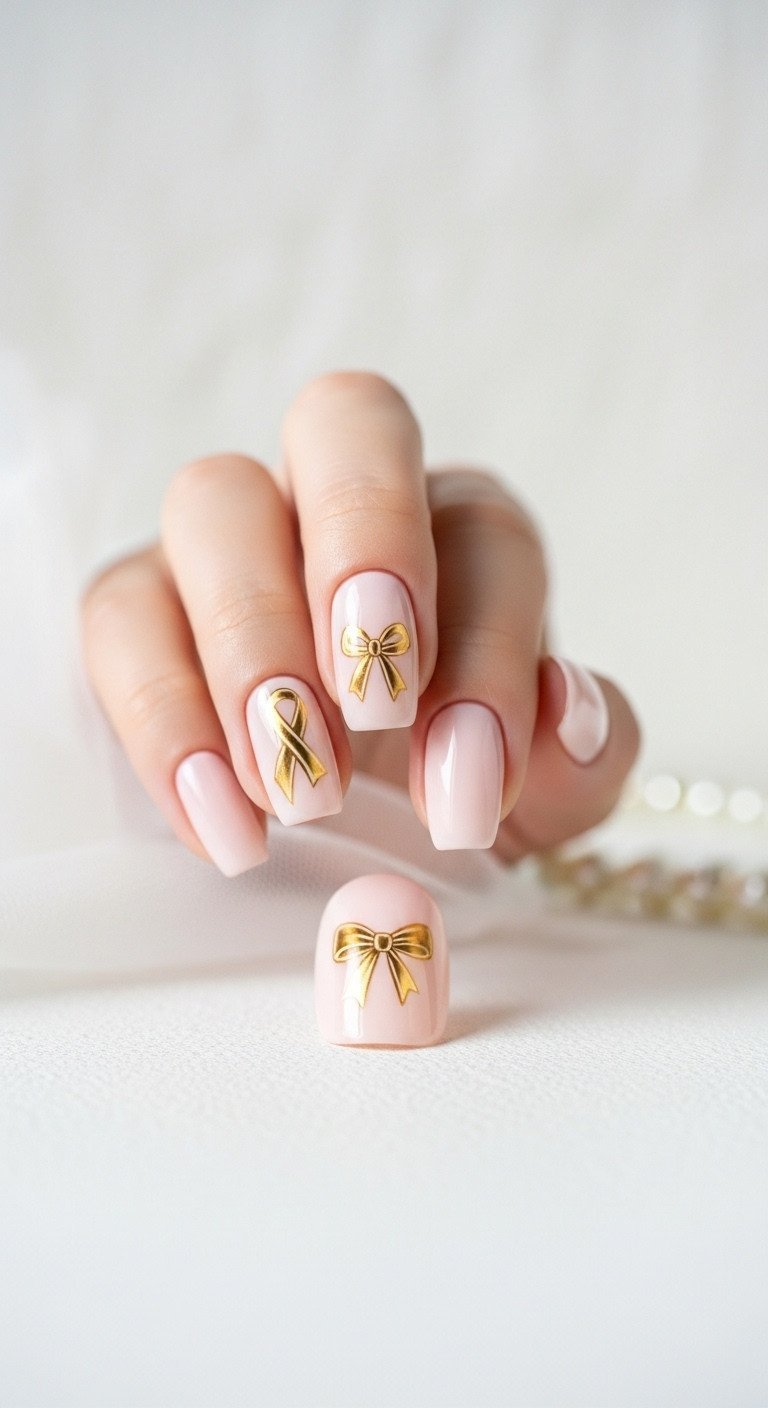
2. Micro Gold Metallic Ribbons (Dainty & Subtle 2D)
Save this clever organization idea!
For a minimalist bow nail design that is both festive and sophisticated, these micro gold metallic ribbons are perfect. The secret to flawless symmetry on such a small scale is using a dotting tool to map out your design before painting.
Products & Tools Used:
- Cream or Light Pink Base Gel Polish
- Highly Pigmented Gold Metallic Gel Polish
- Detail Brush (3mm or less)
- Small Dotting Tool
- Non-Wipe Top Coat (for sealing)
Application Steps:
- Apply base coats (cream/pink) and cure fully. Finish with a non-wipe top coat and cure.
- Dip the small dotting tool into the gold polish and place four small, equidistant dots on the desired nail (two for the loops, two for the tails). This ensures symmetry.
- Using the detail brush, drag the polish from the center dots outwards to connect the loops, creating the ribbon effect.
- Lightly fill in the resulting bow shapes and draw a tiny knot in the center.
- Flash cure the design for 10 seconds.
- Seal the entire nail with a final thin layer of non-wipe top coat and cure for 60 seconds.
Lesson Learned: For true symmetry in micro bows, always use the four-dot method first; freehand drawing this small often results in lopsided loops.

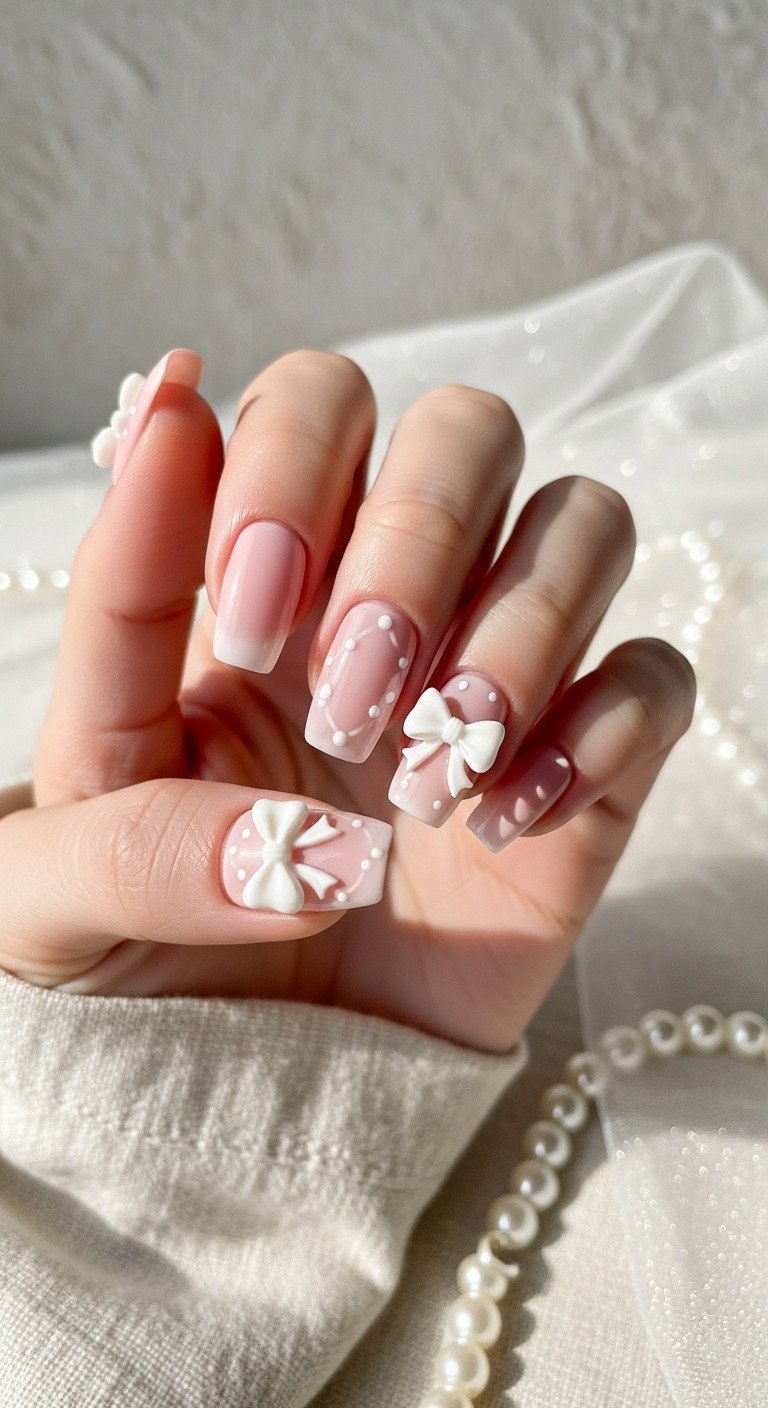
3. Dainty Coquette Pink Bows (Balletcore Integration)
Try this elegant balletcore bow design for the holidays!
Embrace the trendy coquette aesthetic with these dainty white 3D bow charms on a sheer, ballerina pink base. This look is a modern, hyper-feminine take on holiday nails, proving that Christmas manicures don’t always have to be red and green.
Products & Tools Used:
- Sheer Ballerina Pink Builder in a Bottle (BIAB) or Gel Polish
- Micro White Resin Bow Charms (3-5mm size)
- High-Viscosity Clear Builder Gel (for adhesion)
- Curved-Tip Tweezers
- Nail File (180 grit, for etching charms)
Application Steps:
- Apply BIAB or pink polish and cure. Finish with non-wipe top coat and cure.
- Use the file to lightly etch the flat back surface of the resin bow charm (this is vital for adhesion).
- Place a small bead of high-viscosity clear builder gel on the desired nail location (typically near the cuticle or tip).
- Carefully place the etched bow charm onto the gel bead, gently pressing it down to secure the position.
- Flash cure the nail under the UV/LED lamp for 10-15 seconds to lock the position.
- Full cure the nail for 60 seconds. Clean up any sticky residue around the edges with alcohol.
Pro-Tip: When using builder gel as an adhesive, use a thin detail brush to coat the edges where the charm meets the nail with a thin layer of topcoat (avoiding the top of the charm) to create a smooth, snag-free ramp.

4. The 3D Pearl-Center Charm (Glamour & High Impact)
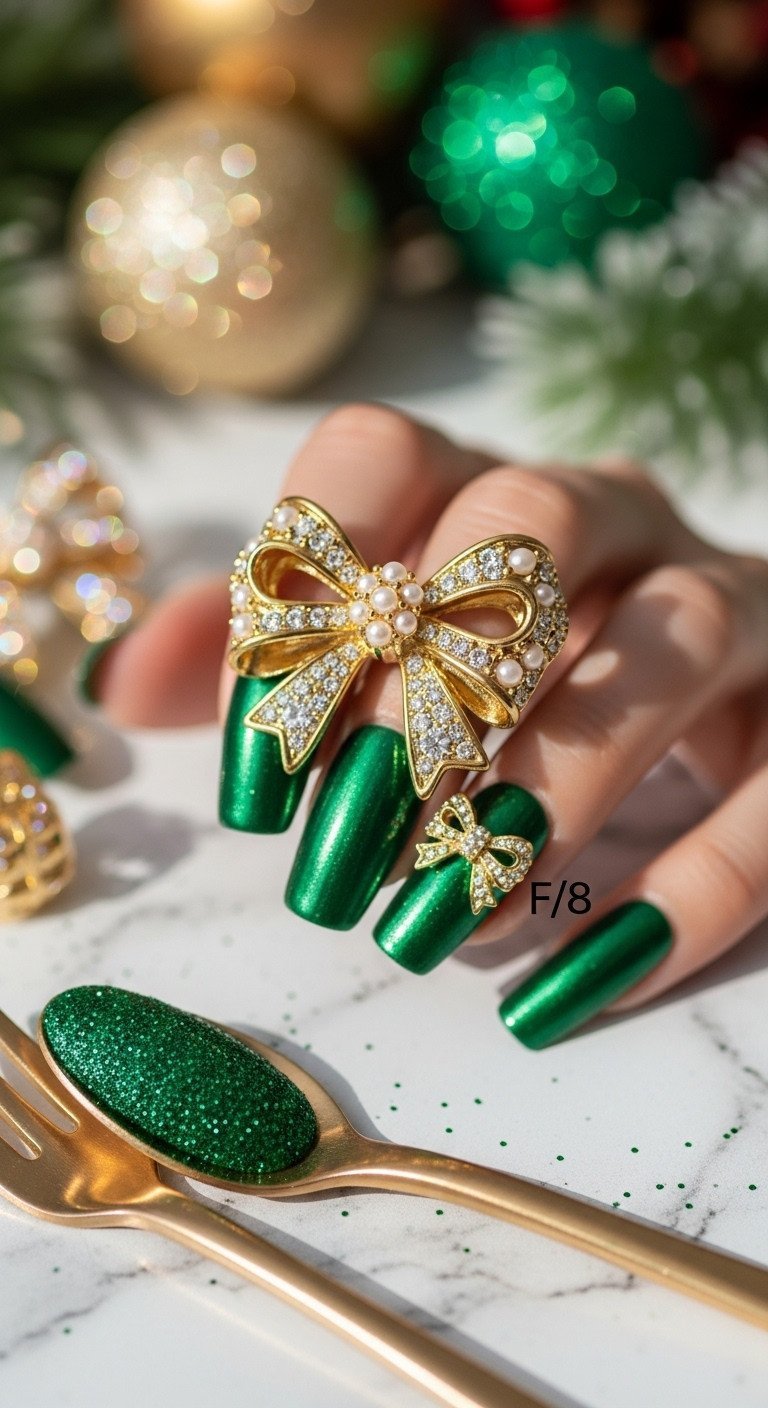
Share this elegant 3D bow look for your Christmas party!
For a glamorous holiday manicure perfect for a formal event, a large 3D bow charm with pearl embellishments is the ultimate statement. Securing heavy, jewelry-like charms requires a structural adhesive like hard gel to ensure they stay put all night long.
Products & Tools Used:
- Deep Emerald Green Gel Polish
- High-Quality 3D Bow Charm with Pearl Embellishments
- Non-Lifting Hard Gel or Specialized Nail Resin Glue (highest structural strength)
- UV/LED Nail Lamp (high wattage recommended)
- Acetone Clean-Up Brush (for removing excess adhesive before curing)
Application Steps:
- Prepare the nail: Apply base color (green) and topcoat, ensuring it is fully cured and clean.
- Etch the base of the large 3D charm thoroughly using a manual file or small dremel tool.
- Using a wooden stick or dedicated tool, scoop a generous bead of Hard Gel onto the prepared nail plate where the center of the charm will sit.
- Carefully position the heavy charm onto the gel bead. Use the clean-up brush dipped in alcohol to remove any adhesive that oozes out around the edges.
- Flash cure the nail for 15 seconds to prevent the heavy charm from sliding.
- Follow with a full cure for 90 seconds (check manufacturer’s guide for thick gel curing times).
Lesson Learned: Heavy charms need thick, structural gel. If you experience a ‘heat spike’ (burning sensation) during curing, remove the hand from the lamp for a few seconds and re-insert to prevent discomfort.

5. Glittery Gift Wrap Accent Bow (2D Shading for Depth)
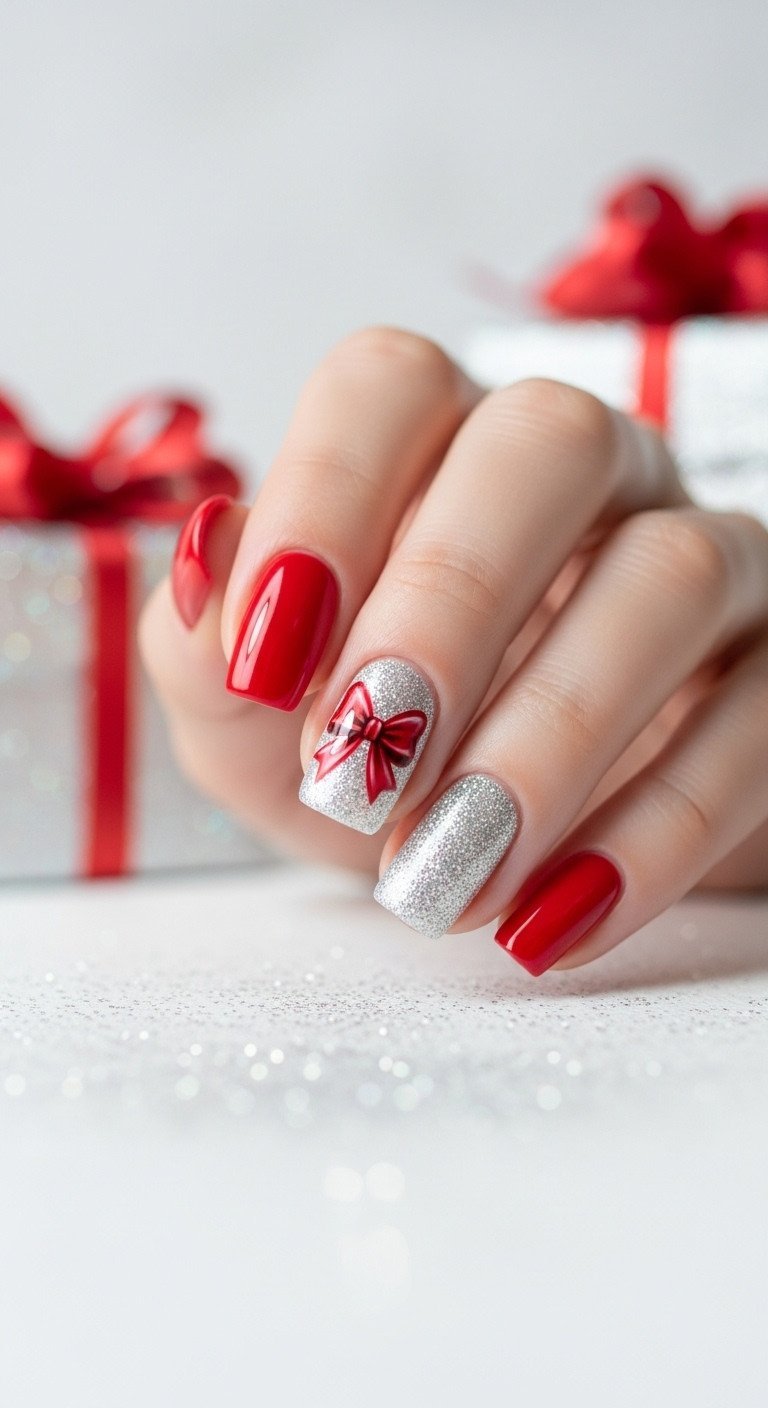
Pin this simple 2D shading trick to master realistic ribbon!
Mimic the look of festive gift wrap with a glittery accent nail featuring a painted red bow. The key to making a 2D painted bow look realistic is a shading technique that creates the illusion of depth without using any 3D elements.
Products & Tools Used:
- Fine Silver Glitter Gel Polish (full coverage)
- Primary Red Gel Polish (high pigment)
- Secondary Darker Red Gel Polish (for shading)
- Detail Fine Line Brush (9mm recommended)
- Non-Wipe Top Coat
Application Steps:
- Apply a full coverage of silver glitter gel polish to the accent nail and cure fully.
- Using the primary red polish and the fine-line brush, paint the symmetrical outlines of the bow (use light pressure).
- Fill in the loops and tails with the primary red color and cure.
- Dip the detail brush into the secondary darker red polish and apply a thin line of shadow directly where the ribbon folds meet the central knot, and along the very inner edges of the loops.
- Blend the shadow line slightly with a clean, dry detail brush to soften the effect.
- Seal the entire design with two layers of non-wipe top coat and cure fully.
Pro-Tip: The shadow color should be applied extremely sparingly. Too much dark polish will make the bow look dirty instead of providing depth. This is the key to professional-looking 2D realism!

6. Matte & Shimmer Contrast Bow (Textural Sophistication)
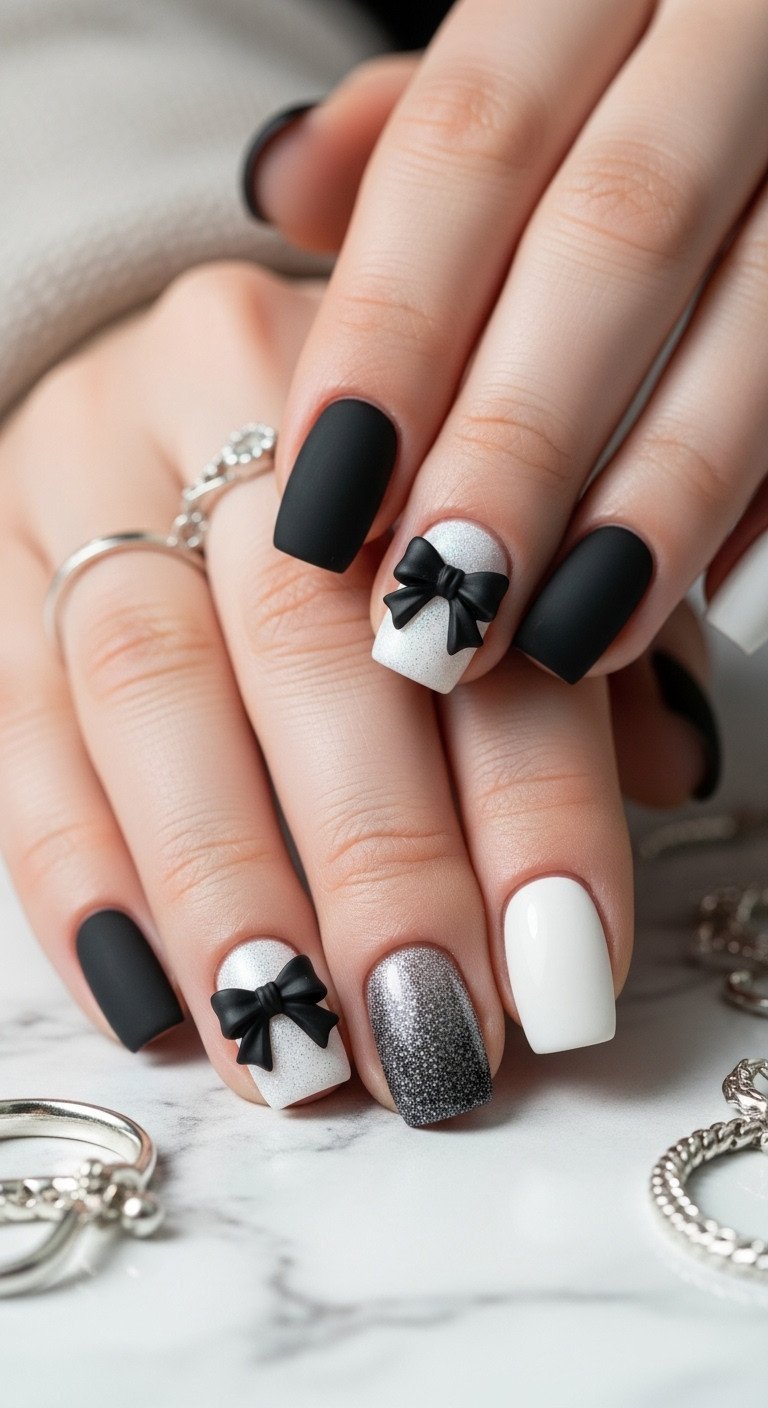
Save this sophisticated black and white textural bow tie idea!
For a chic, monochromatic alternative to classic Christmas colors, this design plays with texture contrast. A velvety matte black bow on top of a glossy, shimmery white base creates a sophisticated and high-end look.
Products & Tools Used:
- Highly Pigmented Black Gel Polish
- White Gel Polish with Fine Silver Shimmer
- Matte Finish Gel Top Coat
- Glossy Non-Wipe Top Coat
- Detail Fine-Line Brush
Application Steps:
- Apply the shimmery white base polish and cure fully.
- Apply a coat of the glossy non-wipe top coat over the entire nail and cure.
- Using the black gel polish and fine-line brush, paint the bow design onto the glossy surface. Cure the black design fully.
- CRITICAL STEP: Carefully apply a layer of Matte Finish Gel Top Coat ONLY over the painted black bow design. Avoid touching the shimmery white background.
- Cure the matte layer fully for 60 seconds. The surrounding white will remain glossy and shimmery, while the bow will be perfectly velvety matte.
Pro-Tip: Use a very fine, damp clean-up brush to trace the edges of the painted black bow immediately after applying the matte top coat but before curing. This ensures the line between matte and glossy is perfectly crisp.

7. The Encapsulated Snow Globe Bow (Custom 3D Look)
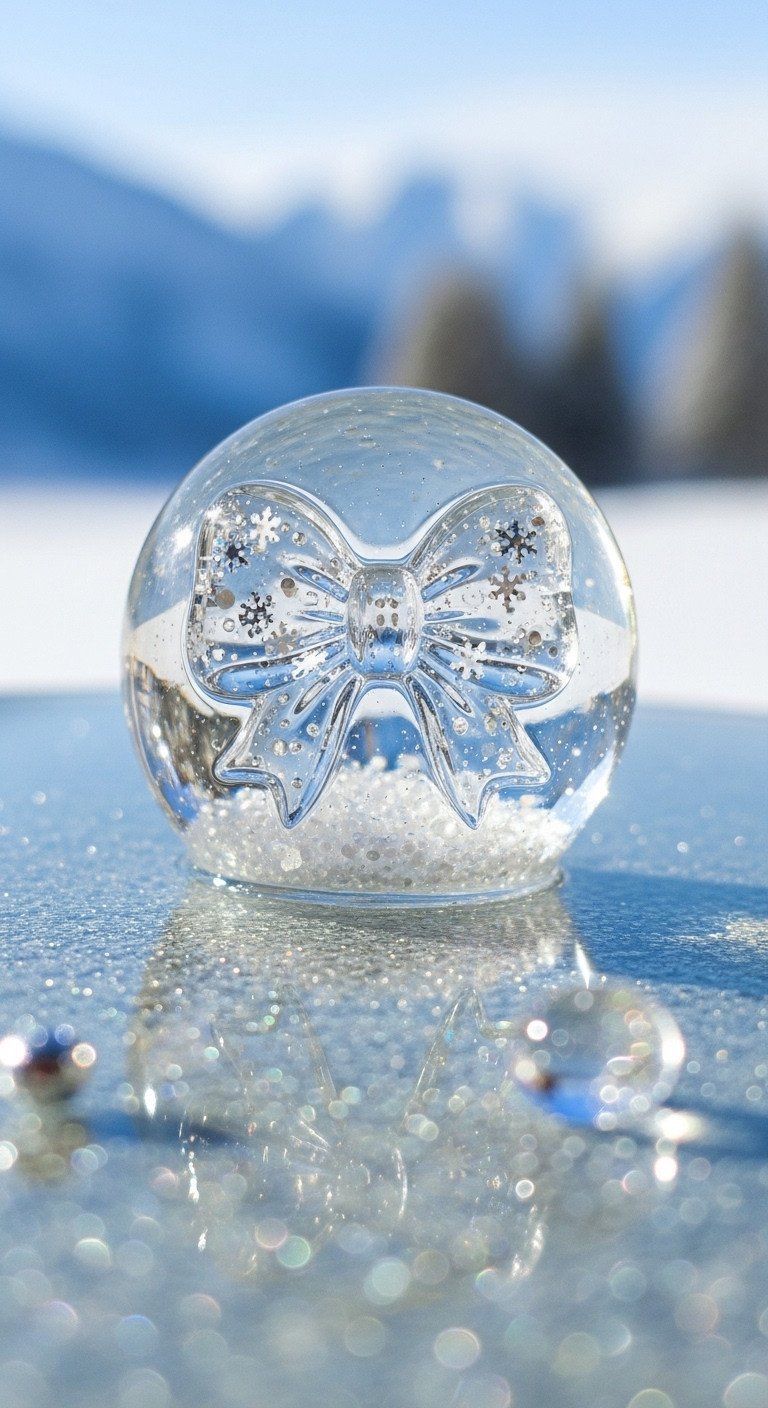
Pin this incredibly unique “Snow Globe” bow tutorial!
This advanced technique creates a custom 3D bow with a “snow globe” effect by encapsulating micro glitter within clear builder gel. Sculpting the bow directly on the nail prevents the bulkiness of pre-made charms and provides unparalleled durability since the glitter is fully sealed.
Products & Tools Used:
- Thick, High-Viscosity Clear Builder Gel (for sculpting)
- Silver Micro Snowflake Glitter
- Gel Sculpting Tool or Silicone Brush
- Fine-Line Brush (for detail placement)
- UV/LED Nail Lamp
Application Steps:
- Apply a cured base color (e.g., icy blue or white) and top coat, leaving the surface tacky if necessary.
- Using the sculpting tool, apply a small mound of clear builder gel in the shape of the bow (two mounds for the loops, one for the knot).
- While the gel is wet, use the fine brush to gently press micro snowflake glitter into the gel where you want the “snow” effect.
- Use the sculpting tool to carefully seal and smooth the edges of the gel, ensuring the glitter is fully encapsulated within the clear gel. This forms the custom 3D bow shape.
- Flash cure the nail for 20 seconds.
- Remove the sticky layer, file the surface of the sculpted bow if needed for perfect shape, and finish with a non-wipe top coat over the entire nail (including the sculpted bow) and cure fully for 60 seconds.
Lesson Learned: Sculpting with clear builder gel prevents the bulkiness often associated with pre-made charms and fully protects the glitter, making this the most durable 3D option.

Key Takeaways: Your Quick Guide to Perfect Christmas Bow Manicures
Feeling ready to create your own festive bow nails? Here’s a quick summary of the most important secrets to remember for a flawless, long-lasting manicure.
- Symmetry Secret: Use the “four-dot” method with a small dotting tool before attempting to draw any 2D painted bow lines with a fine-line brush. This guarantees even loops.
- Adhesion Secret: For long-lasting 3D charms (up to 14 days), always etch the back of the charm lightly with a file and secure it using high-viscosity structural builder gel or hard gel, not regular nail glue.
- Realism Secret: When painting 2D ribbons, utilize a slightly darker shade of polish along the edges and folds to create the illusion of shadow and depth.
- Trend Integration Secret: Don’t limit yourself to red and green; integrate softer tones like ballerina pinks and creams (Coquette/Balletcore) for a sophisticated, modern holiday aesthetic.
FAQs About christmas bow tie nails
How do I make 3D Christmas bow charms stay on longer than a day?
The key to 3D charm longevity is structural adhesive and proper prep. You must lightly etch the charm’s base and secure it with a generous bead of high-viscosity builder gel or a specialized nail resin glue. After placement, use a brief “flash cure” (10-15 seconds) to set the position, followed by a full cure (60-90 seconds) under a UV/LED lamp.
What is the easiest way for a beginner to get symmetrical Christmas bow nails?
The easiest method for beginners is using high-quality 2D nail decals or wraps that feature pre-designed, perfect bows. If you choose to paint, use a dotting tool to place four guiding dots before connecting them with a fine-line brush; this simple guide prevents lopsided results and ensures symmetry every time.
Are 3D Christmas bow nails safe for my natural nails, and how do I remove them without damage?
Yes, 3D bow nails are safe, provided you use professional, nail-safe adhesives (gel/resin). Do not rip or pry off the charm. The safest removal process involves gently clipping the charm down to the nail plate with specialized nippers, then filing down the remaining adhesive and soaking the residue off with acetone, protecting the underlying natural nail.
What brush should I use to paint a symmetrical bow with fine lines?
For fine-line work on bows, you should use a dedicated synthetic fine-line striping brush, typically 5mm to 9mm in length, to ensure maximum precision and control. Avoid using traditional polish brushes or toothpicks, as these tools cannot achieve the necessary crisp, professional edges required for a perfect bow.
How can I avoid making my 3D bow nails look too bulky?
To prevent bulkiness, choose flatter resin or metal charms over highly rounded ones. Critically, clean up any excess builder gel or adhesive that squeezes out around the charm’s edges with an acetone brush before curing. Placing larger 3D designs only on accent nails also minimizes the overall weight and visual bulk.
Final Thoughts
Now that you’ve unlocked the secrets to 14-day adhesion and mastered the techniques for achieving perfect bow symmetry, you have everything you need to execute a truly professional, genius Christmas manicure this 2026. Whether you choose the festive velvet texture or the dainty coquette charm, remember that preparation and product choice are the foundation of durable nail art. Go forth and wear your festive flair with confidence!
Which of the 7 genius bow tie nail ideas will you be trying first for your holiday party? Share your choice in the comments below!
Last update on 2026-01-17 / Affiliate links / Images from Amazon Product Advertising API