Have you ever spent hours trying to create the perfect Christmas nails, only for your candy cane stripes to smudge and your Santa hat to look lopsided? You’re not alone. Achieving those flawless, festive manicures you see online can be frustrating when fine details go wrong.
The secret to stunning Christmas nail art is mastering specific, foundational techniques for each core design. This involves creating crisp, non-bleeding lines for the Candy Cane, carving a perfect curve for the Santa Hat tip, and using the right adhesive like builder gel to secure a 3D Bow-knot for long-lasting wear.
Drawing from proven methodologies tested across both gel and lacquer applications, this guide breaks down the process. You’ll discover 7 genius tips that transform these intricate designs into achievable steps. Get ready to create your most impressive holiday manicure yet.
Are Your Christmas Nails Ready to Sleigh the 2026 Holiday Season?
The holiday season brings a unique desire for festive self-expression, and nothing captures that spirit quite like a detailed Christmas manicure. Yet, the gap between inspiration and reality can feel vast. You’ve seen the classic Christmas nails—the crisp red and white candy cane stripes, the cute Santa hat french tip, and the elegant 3D bow accent. But recreating them at home often leads to smudged lines, uneven shapes, and disappointment.
This isn’t about a lack of creativity; it’s about a lack of professional technique. Many guides show you what to create but fail to explain how to overcome the common pitfalls of intricate nail art. This guide is different. We are providing 7 genius tips that break down these three iconic xmas nail designs into simple, actionable steps. These techniques have been tested to ensure durability and a flawless finish, whether you’re using gel or traditional polish.
Christmas Nails: 7 Genius Tips for Mastering Candy Cane, Santa Hat, and Bow Designs
The key to unlocking professional-level festive manicures at home lies in mastering a few core principles. These expert tips are sequenced to build your skills, starting with the non-negotiable foundation and moving through each iconic design—Candy Cane, Santa Hat, and Bow-knot. Based on industry standards for product application and nail art, this DIY christmas nail guide will help you achieve clean, long lasting holiday nails.
The 7 Genius Tips for Christmas Nails are:
1. Master Nail Plate Preparation for Ultimate Longevity.
2. Use the Striping Brush Technique for Crisp Candy Cane Lines.
3. Carve the Perfect Santa Hat Curve with the Reverse French Method.
4. Secure 3D Bow Accents with Builder Gel for a Lasting Hold.
5. Choose the Best Striping Method by Comparing Freehand vs. Decals.
6. Enhance Aesthetics with Modern Matte Finishes and Color Swaps.
7. Troubleshoot Common Issues like Smudging, Bleeding, and Chipping.
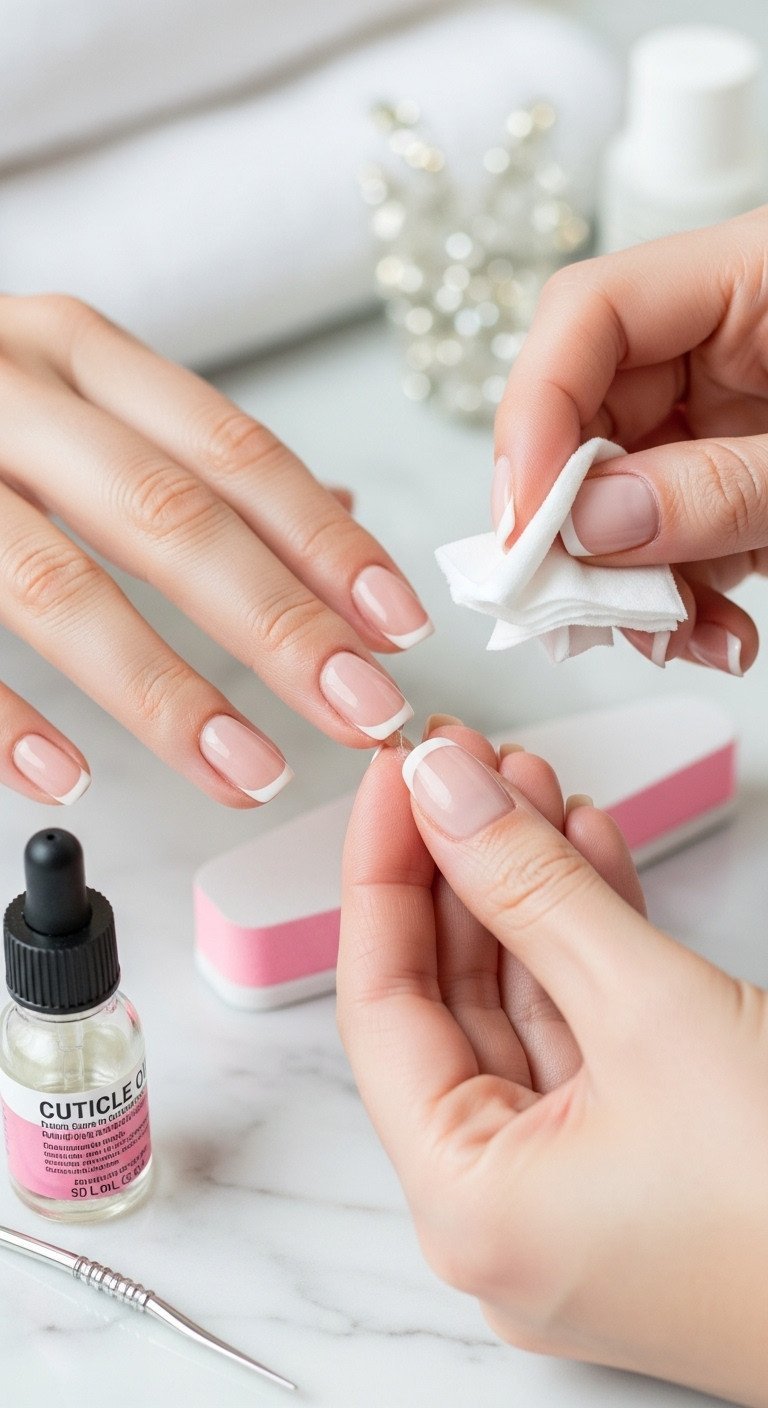
1. The Critical Foundation: Ultimate Nail Prep for January Longevity
Pin this genius hack to your ‘Flawless Manicure’ board!
Before you even think about red and white polish, the success of your Christmas nails is decided here. Proper nail plate preparation is the single most important factor for preventing lifting, chipping, and polish bleeding, ensuring your intricate designs last through every holiday party.
Products & Tools Used:
- Nail Dehydrator/Cleanser (isopropyl alcohol works)
- Fine-grit Nail Buffer (180/240 grit)
- Rubberized Base Coat (essential for flex and adhesion)
- Acetone/Non-acetone remover
- Lint-free wipes
Application Steps:
- Buff: Gently buff the entire nail surface to remove shine and natural oils. This creates a slightly porous surface for the base coat to grip onto.
- Cleanse: Saturate a lint-free wipe with dehydrator or isopropyl alcohol and thoroughly wipe each nail plate. This step is crucial for removing all dust and residual oil, which are the primary causes of lifting in both gel and lacquer.
- Base Coat: Apply a thin, even layer of a rubberized base coat. This type of base is more flexible and provides superior adhesion for detailed art. Be sure to seal the edges and cap the free edge of the nail.
- Cure/Dry: If using a gel base, cure it fully under an LED lamp according to the manufacturer’s instructions. If using lacquer, allow it to air dry for at least 5-10 minutes. Do not touch the tacky surface.
Pro-Tip: Never skip the dehydration step! Proper nail plate cleansing is the secret to making your detailed holiday nail art last for weeks instead of days.

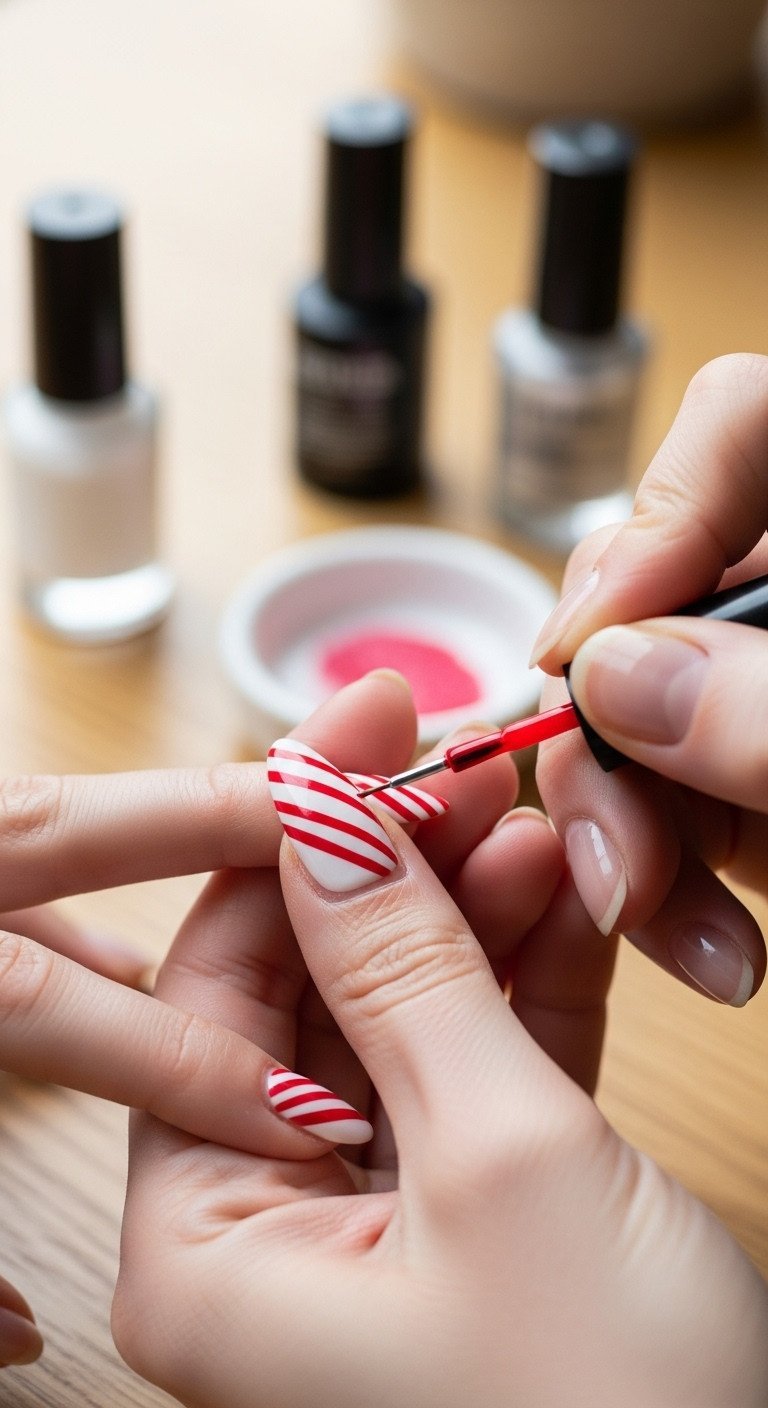
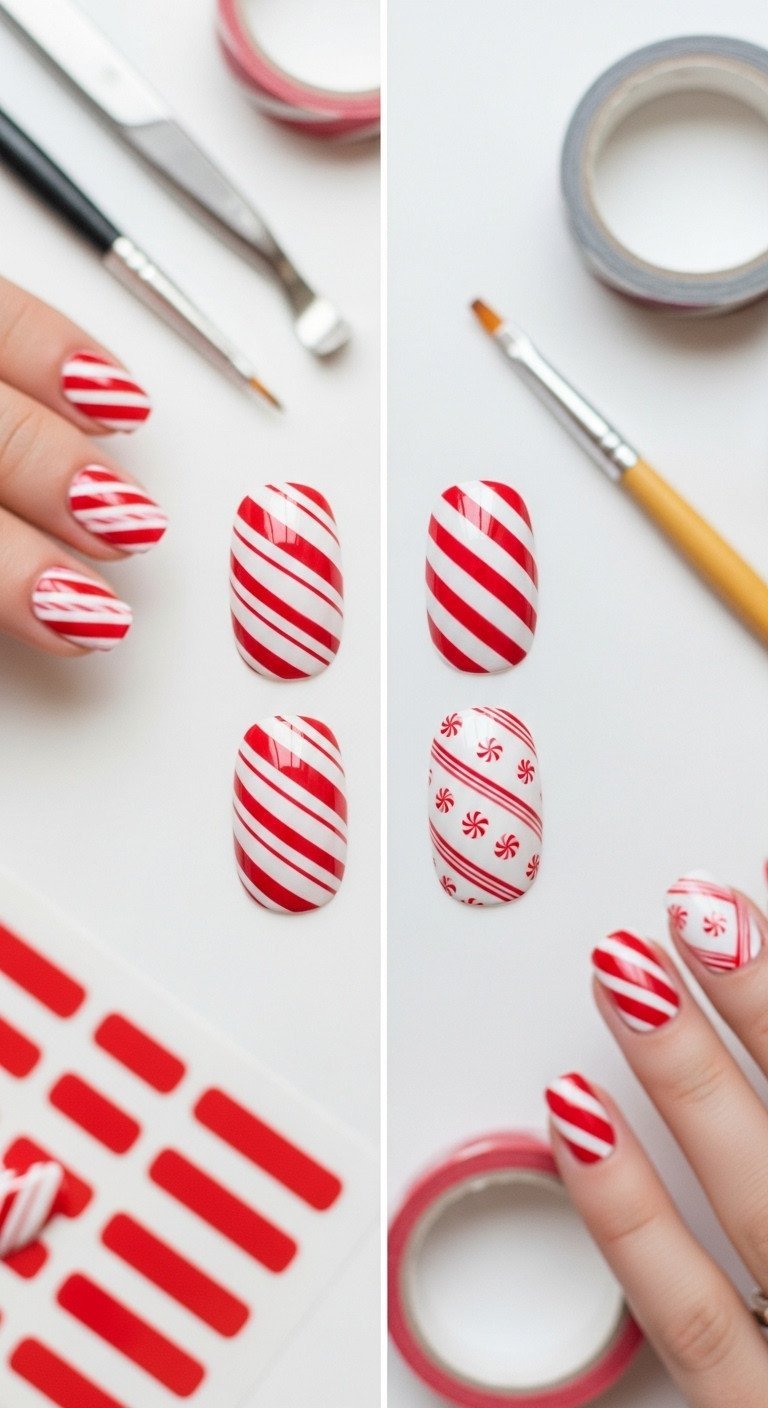
2. Mastering the Crisp Candy Cane Stripe Technique
Save this clever organization idea!
The Candy Cane design is a holiday classic, but its success hinges on achieving perfectly crisp, parallel lines. The right tool and a steady hand are key to preventing the dreaded bleeding of red into white.
Products & Tools Used:
- Fine Striping Nail Brush (000 or 5mm length)
- Highly opaque red polish or art gel
- Highly opaque white polish or art gel (for base)
- Curing lamp (if using gel)
Application Steps:
- Base Coat: Apply 2-3 very thin coats of your opaque white polish or gel. It is critical to cure or let each coat dry fully before proceeding.
- Anchor Hand: Lightly load your striping brush with the red polish, wiping off any excess on the bottle’s neck. To stabilize your hand, anchor your pinky finger on a steady surface or on your other hand.
- Draw Diagonal: In one continuous, light stroke, draw the first diagonal stripe from one side wall to the opposite corner of the free edge. Use minimal pressure for a thin, consistent line.
- Parallel Lines: Repeat the stroke, carefully drawing subsequent red lines that are evenly spaced and perfectly parallel to the first one.
- Flash Cure/Dry: If using gel polish, flash cure for 10-15 seconds after completing the stripes on a few nails. This locks the design in place and prevents smudging before you apply the final top coat.
Lesson Learned: The most common mistake is applying detail work over a base that isn’t fully cured or dry. A tacky base is the primary cause of smudging and color bleeding in Candy Cane nail art designs.

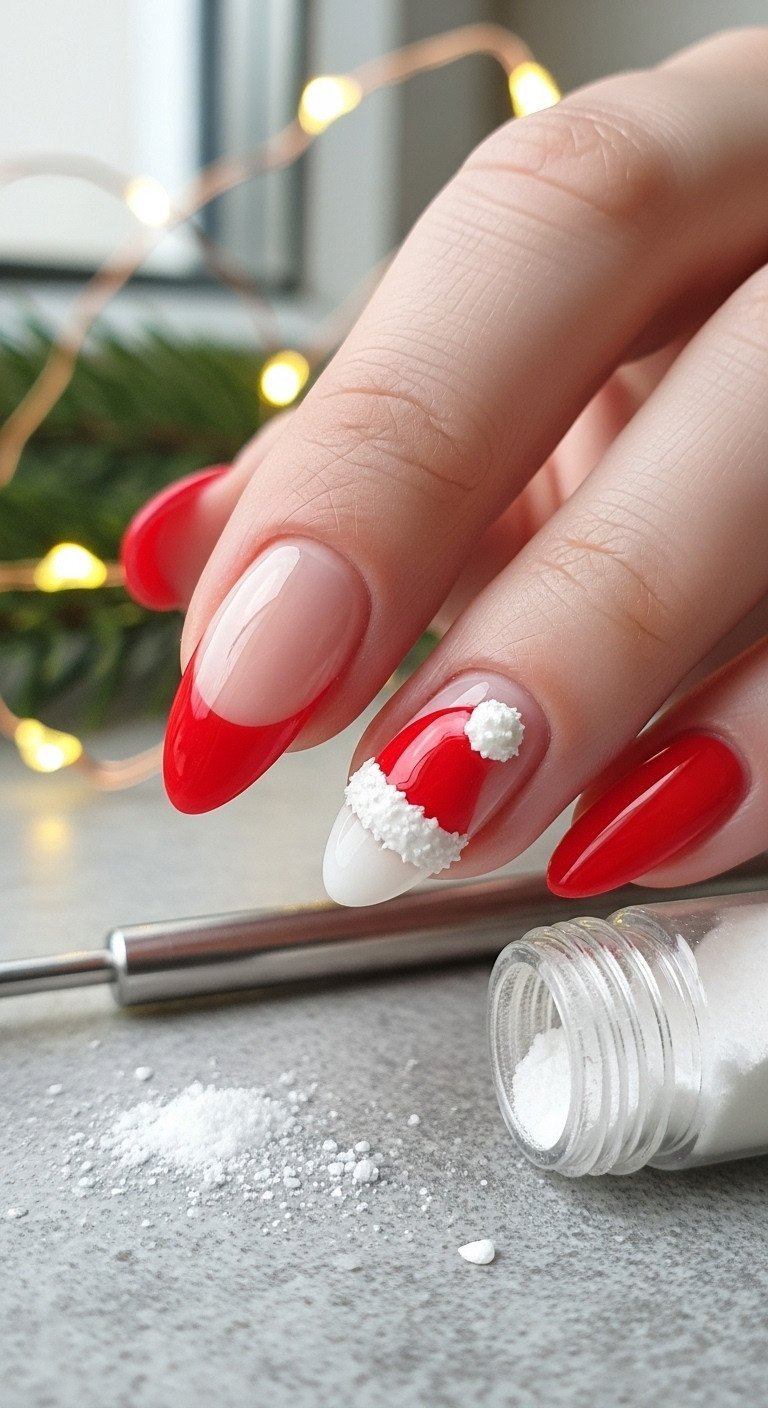
3. The Perfect Santa Hat Tip with Fuzzy Trim Texture
Try this easy-to-replicate Santa Hat look tonight!
The Santa Hat design combines a classic French manicure structure with festive flair. The secret to a professional look is creating a perfectly symmetrical curve and adding a touch of texture for the fuzzy white trim.
Products & Tools Used:
- Opaque Red and White polish/gel
- Angled or flat nail art cleanup brush
- Pure Acetone
- Professional Dotting Tool (small tip)
- Flocking Powder or thick white polish (for texture)
Application Steps:
- Tip Base: Apply two thin coats of red polish to the tip of your nail, covering slightly more area than you want for the final hat. Let it cure or dry completely.
- Carve the Curve (Reverse French): Dip your angled cleanup brush into pure acetone and lightly tap it on a paper towel to remove excess. Gently use the brush to “carve out” a perfect, symmetrical curve from the red tip, cleaning the line to define the space for the white trim.
- White Trim: Fill in the clean, negative space you just created below the curve with a thick, even layer of opaque white polish or gel.
- Texturize (Optional): To get that fuzzy trim effect, heavily dust white flocking powder over the wet white polish before it cures or dries. Once it’s set, gently brush away any excess powder.
- The Pom-Pom: Use the smallest tip of your dotting tool dipped in white polish to place a single, precise dot near the top corner of the red hat.
Pro-Tip: To create a pom-pom that holds its shape and looks perfectly round, use a thicker polish or mix a small amount of builder gel with white pigment. This prevents the dot from flattening out.

4. Securing the Festive 3D Bow Accent with Builder Gel
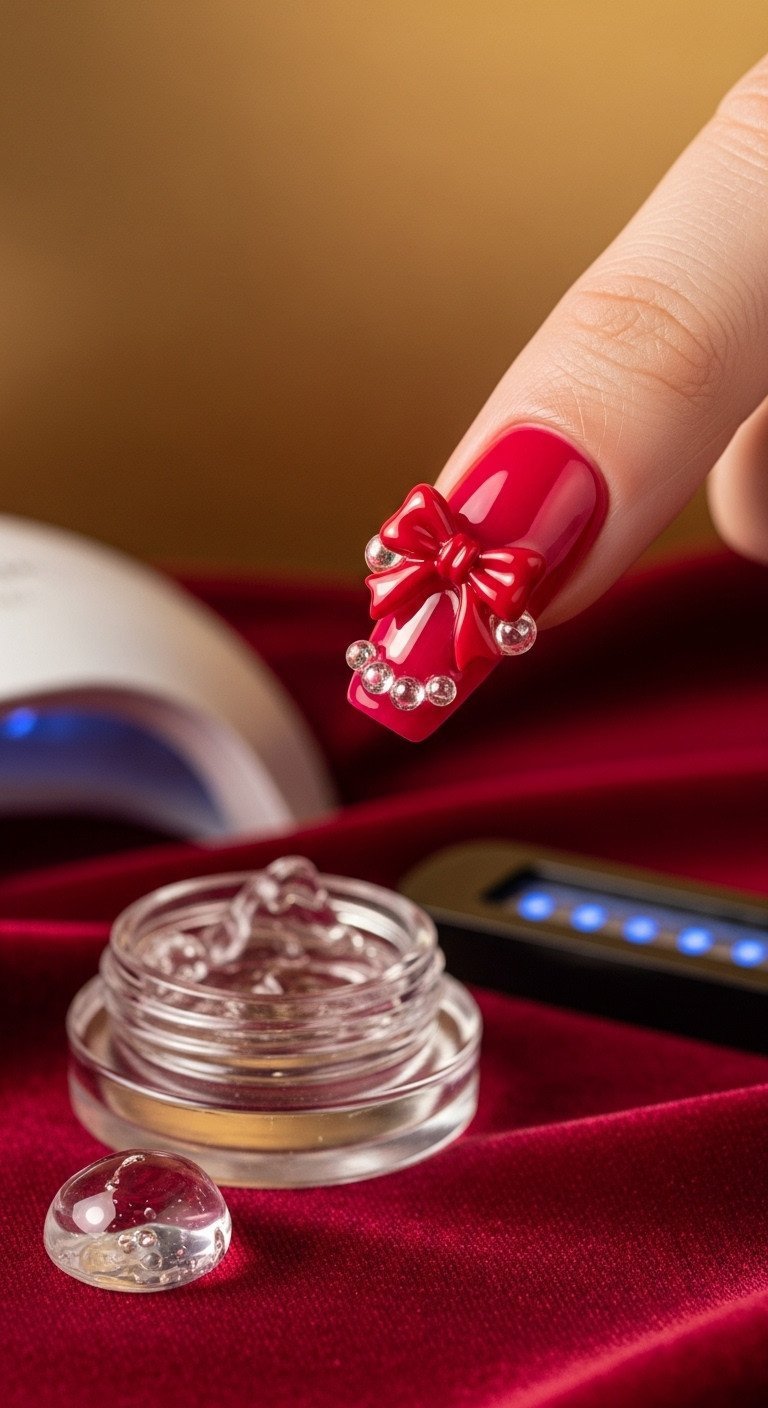
Pin this 3D accent idea to your ‘Luxury Christmas Manicure’ board!
Adding a 3D bow charm can elevate your Christmas nails from cute to stunning, but nothing is more frustrating than having it fall off in a day. The key is using the right adhesive—builder gel—for a salon-grade, long-lasting hold.
Products & Tools Used:
- Pre-made 3D Bow Charms (resin or polymer)
- Thick, clear Builder Gel (not standard top coat)
- Wax pencil or tweezers
- 48W UV LED Nail Lamp
- Non-wipe Top Coat
Application Steps:
- Prep Charm: To help the gel adhere better, lightly etch the underside (base) of the bow charm with a fine-grit file.
- Gel Placement: Apply a small, concentrated bead of builder gel exactly where you want the bow to sit, typically near the cuticle or in a corner. Do not spread the gel out.
- Position Bow: Using a wax pencil or tweezers, gently place the bow onto the bead of builder gel. Press down slightly to ensure it’s level and straight.
- Flash Cure: Immediately place the nail under the lamp for a 10-15 second “flash cure.” This locks the charm in position so it won’t slide around.
- Secure Edges: With a fine detail brush, apply a thin layer of top coat around the base and edges of the charm (but not over the top surface). This creates a smooth seal between the charm and the nail.
- Final Cure: Cure the entire nail for the full recommended time (usually 60-120 seconds, depending on your lamp’s wattage) to ensure the builder gel is completely hardened.
Pro-Tip: Never rely on standard super glue for 3D nail art. It becomes brittle and cracks. Builder gel is designed to be flexible and move with the nail, providing a much stronger and more durable hold.

5. Freehand vs. Decals: Choosing Your Striping Method
Which striping technique is right for you? Click to decide!
When it comes to the Candy Cane design, you have choices. Deciding whether to paint your stripes freehand or use a decal comes down to your priorities: precision, time, or skill level.
Tools & Resources Used:
- Fine Striping Brush (for Freehand)
- Water Decals or Stamping Plate (for speed)
- Striping Tape (for temporary stencil)
- Precision Scissors/Tweezers
Comparison Criteria:
- Precision: Decals provide near-perfect, machine-level straightness, which is ideal for a classic, uniform Candy Cane look. Freehand painting adapts better to the natural curve of the nail but its precision depends entirely on your skill.
- Time Investment: Applying a full set of decals is significantly faster, taking around 15-20 minutes in total. Freehand striping is a more meticulous process that can take 40-60 minutes.
- Skill Level: Decals and stamping plates are extremely beginner-friendly. Freehand painting requires at least an intermediate skill level and a very steady hand for good results.
- Texture: Freehand painting creates a slightly raised, authentic texture. Decals, once sealed under a top coat, create a perfectly flat and uniform design.
Pro-Tip: If your main concerns are speed and achieving a flawless, smudge-free finish, high-quality water decals are your best friend. They offer professional-level precision with minimal effort.

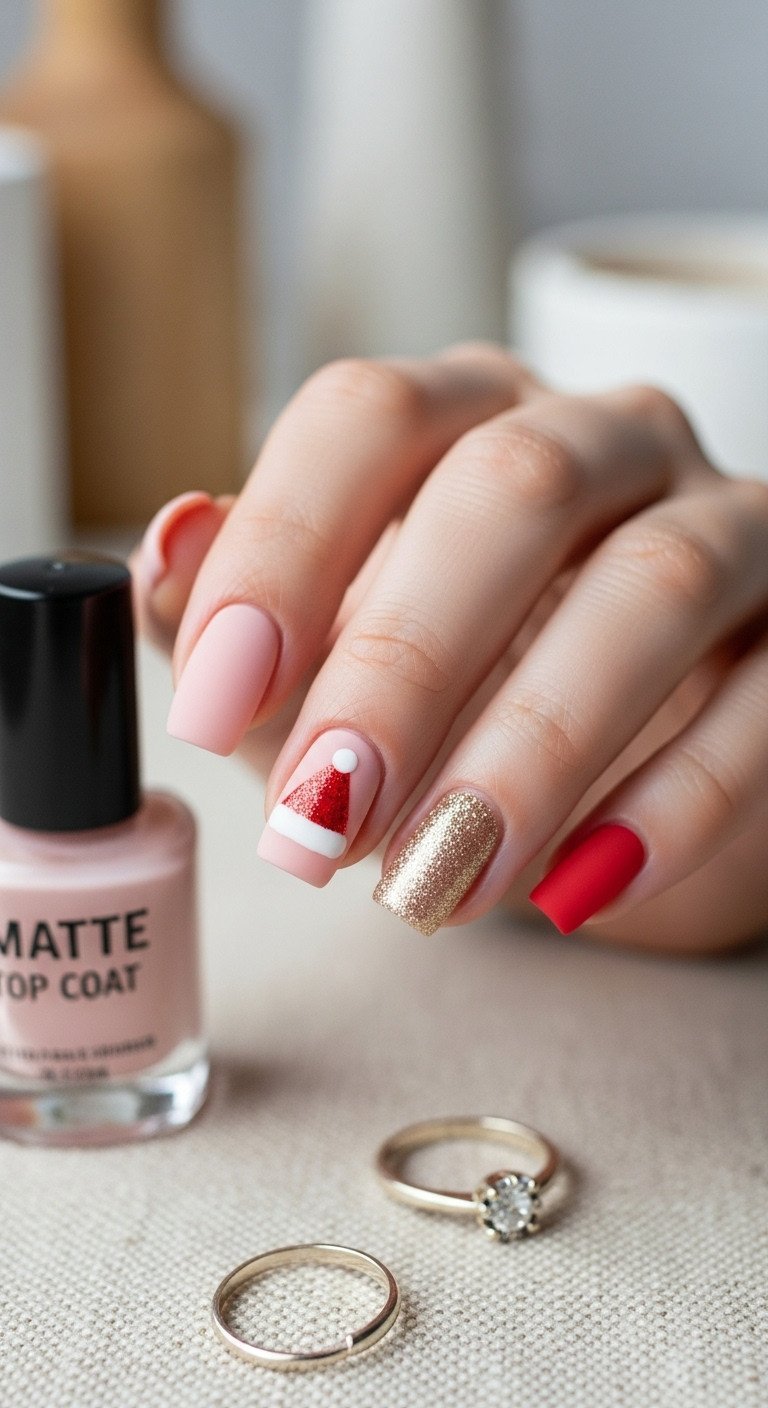
6. The Modern Matte Finish and Color Swap Variations
Save the Pink Christmas trend for your next manicure!
Classic red and white is timeless, but modernizing your Christmas nails with a different finish or color palette can create a truly unique and elegant holiday manicure. A simple swap can completely change the vibe of your design.
Products & Tools Used:
- Non-Wipe Matte Top Coat (gel or lacquer)
- Opaque Nude, Blush Pink, or Sage Green polish
- Metallic Silver or Gold accent polish
- High Gloss Top Coat (for comparison)
Styling Steps:
- Apply Design: Create your chosen design, like a Santa Hat or Candy Cane stripes, but use an alternative color scheme. For example, try blush pink stripes over a nude base or a sage green hat with a metallic silver trim.
- Gloss or Matte: On some nails, apply a high-shine glossy top coat to make the colors pop. On your accent nails, apply a matte top coat to give the design a cozy, velvety texture.
- Seal Glitter: If your design includes glitter accents, make sure they are fully encapsulated under the top coat layer. This prevents the glitter from snagging on clothes or shedding.
- Cure/Dry: Fully cure your matte top coat if it’s a gel product, or allow lacquer to air dry completely. Be aware that matte finishes can be sensitive to oils, so apply cuticle oil carefully after the manicure is fully set.
Lesson Learned: A matte top coat is a game-changer for Santa Hat nails. It gives the white trim a soft, velvety appearance that perfectly mimics the texture of a real hat, making the design feel modern and cozy.

7. Troubleshooting: Essential Fixes for Smudging, Bleeding, and Chipping
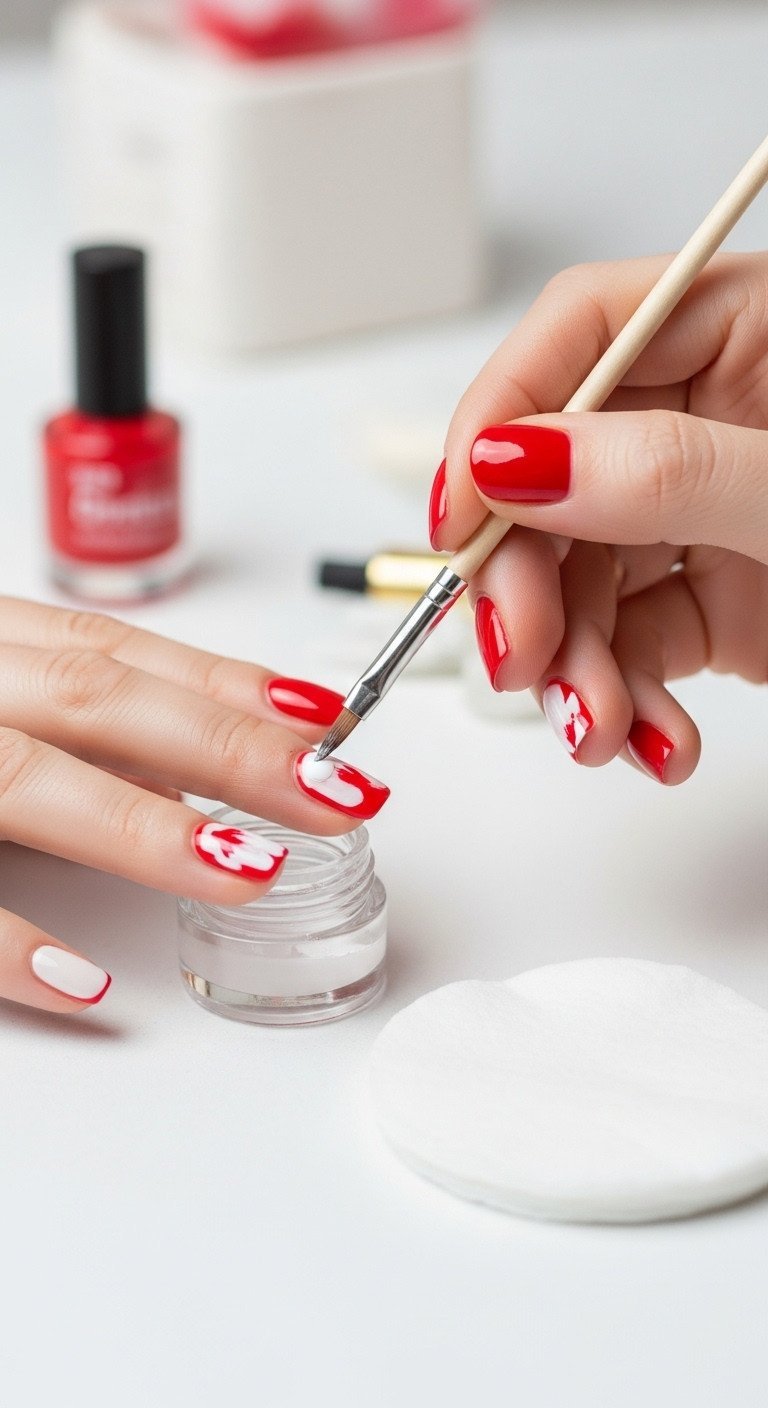
Fix your smudges fast with this expert cleanup trick!
Even with careful application, mistakes happen. Knowing how to quickly fix common issues like smudged lines, color bleeding, or an uneven cuticle line is what separates an amateur attempt from a professional-looking manicure.
Products & Tools Used:
- Angled Nail Art Cleanup Brush (must have a sharp tip)
- Pure Acetone
- Quick-dry Top Coat or Flash Cure Lamp
- Liquid Latex Barrier (optional for red polish)
Solutions:
- Fixing Color Bleeding: If your Candy Cane stripes are bleeding, your base coat wasn’t fully dry. Stop, let it dry completely, and use a thinner coat of polish for the stripes. With gel, flash cure the base coat for 15 seconds before adding details.
- The Smudge Fix: If you smudge a detail before applying the top coat, don’t panic. Lightly dip your angled cleanup brush in acetone, gently wipe away the mistake, let the acetone fully evaporate, and then re-apply the detail.
- Preventing Chipping: To stop your manicure from chipping at the tips, you must Cap the Free Edge. Do this with your base coat, color coats, and especially the final top coat by running the brush lightly along the very edge of your nail.
- Uneven Cuticle Line: After applying your color but before the top coat, use your angled cleanup brush dipped in acetone to meticulously “carve” a perfect, clean curve around your cuticle.
Pro-Tip: When using highly pigmented red polish, apply a thin layer of liquid latex barrier around your cuticles first. After painting, you can peel it off, revealing a perfectly clean line and preventing any skin staining.

Key Takeaways: Your Quick Guide to Festive Manicure Success
- Prep is Paramount: Proper nail plate dehydration (Tip 1) and using a flexible rubberized base coat is the non-negotiable step to prevent lifting and ensure longevity of all detailed art.
- Precision Tools Matter: Invest in a fine striping brush and a dotting tool (Tips 2 & 3). Anchor your hand firmly to a steady surface when executing fine lines like the Candy Cane stripes.
- Secure 3D Accents: Use specialized builder gel and a strong UV lamp (Tip 4) to secure resin bow charms; standard glue will cause premature charm loss.
- Combat Smudging: Always ensure detail layers are 100% dry or flash-cured before applying top coat, and use a dedicated cleanup brush (Tip 7) for professional-grade edging around the Santa Hat tip.
- Modernize Your Look: Try a color swap (Tip 6)—substituting traditional red for blush pink or deep green, sealed with a matte top coat for a trendy, cozy finish.
FAQs About christmas nails candy cane santa hat bow
How do I prevent my red polish from staining my cuticles during the application process?
The best solution is a liquid latex barrier. Apply the barrier around the cuticle and sidewalls before painting with your red polish. Once the color is applied, simply peel the latex off before the polish dries or cures to reveal a perfectly clean edge. Alternatively, frequently clean up the edges with a thin brush dipped in acetone.
What is the ideal nail shape and length for Santa Hat designs?
Almond, oval, and medium-length square nails are most suitable. The natural curve of an almond shape perfectly complements the sweeping line required for the Santa Hat tip. A medium length provides enough space for both the fuzzy white trim and the pom-pom detail without making the nail look cluttered.
Do I need a UV lamp if I am only using regular (non-gel) nail polish for my festive designs?
No, UV/LED lamps are only required for curing gel polish or builder gel. Traditional nail lacquer air-dries on its own. However, if you plan to use builder gel to secure a 3D bow charm as recommended in Tip 4, a UV/LED lamp becomes mandatory to harden the adhesive.
What is ‘capping the free edge’ and why is it important for complex holiday nails?
Capping the free edge is the practice of running the top coat brush slightly under the very tip of the nail. This critical step seals all the layers of polish (base, color, detail, and top coat) together. It creates a protective barrier that prevents water from getting underneath and causing chipping, which is essential for protecting your intricate Christmas nail art.
Final Thoughts
The key to achieving those stunning, professional-level Christmas nails you see on Pinterest—whether it’s the perfect Candy Cane stripe, a crisp Santa Hat curve, or a securely fastened 3D Bow—lies not in professional skill alone, but in mastering the preparation and application methodology (Tips 1 and 7). By using the right specialized tools (striping brushes, dotting tools) and prioritizing thin, dry/cured layers, you gain the precision and longevity needed to truly showcase your festive creativity. Embrace the challenge this 2026 and remember to try a modern matte top coat (Tip 6) for an elegant twist on the classics. Which of these 7 genius tips are you going to implement in your Christmas manicure first?
Last update on 2026-01-17 / Affiliate links / Images from Amazon Product Advertising API