
Struggling to Find a Teacher Gift That’s Both Heartfelt and Appreciated?
The holiday season is here, and with it comes the desire to show our children’s hard-working teachers just how much we appreciate them. But finding the perfect gift can be a real challenge. You want something personal and thoughtful, a gift that truly comes from the heart, but you also want it to be useful and genuinely wanted. The last thing you want is to spend time and effort on a homemade gift that ends up collecting dust in a closet. We’ve all been there—staring at the craft aisle wondering what to make, hoping to avoid the common pitfalls of another coffee mug or generic lotion.
Through years of talking with teacher friends and testing these ideas ourselves, we’ve curated a list of gifts they’ll truly love and use. The best homemade Christmas gifts for teachers are thoughtful, practical, and personal. Focus on items that support their classroom, like a supply kit, or offer a moment of relaxation, like a well-packaged pampering gift. A heartfelt, handwritten note is always the most cherished gift of all. This guide will walk you through easy, affordable, and teacher-approved DIY gift ideas that are guaranteed to bring a smile to their face.
13 Easy Homemade Christmas Gift Ideas Teachers Actually Want This 2025
This list is curated based on direct feedback from educators to ensure your heartfelt effort results in a gift that is genuinely wanted and appreciated. From the deeply personal to the delightfully practical, these ideas are simple to create and a joy to give.
1. The Ultimate Gift: A Heartfelt, Handwritten Note
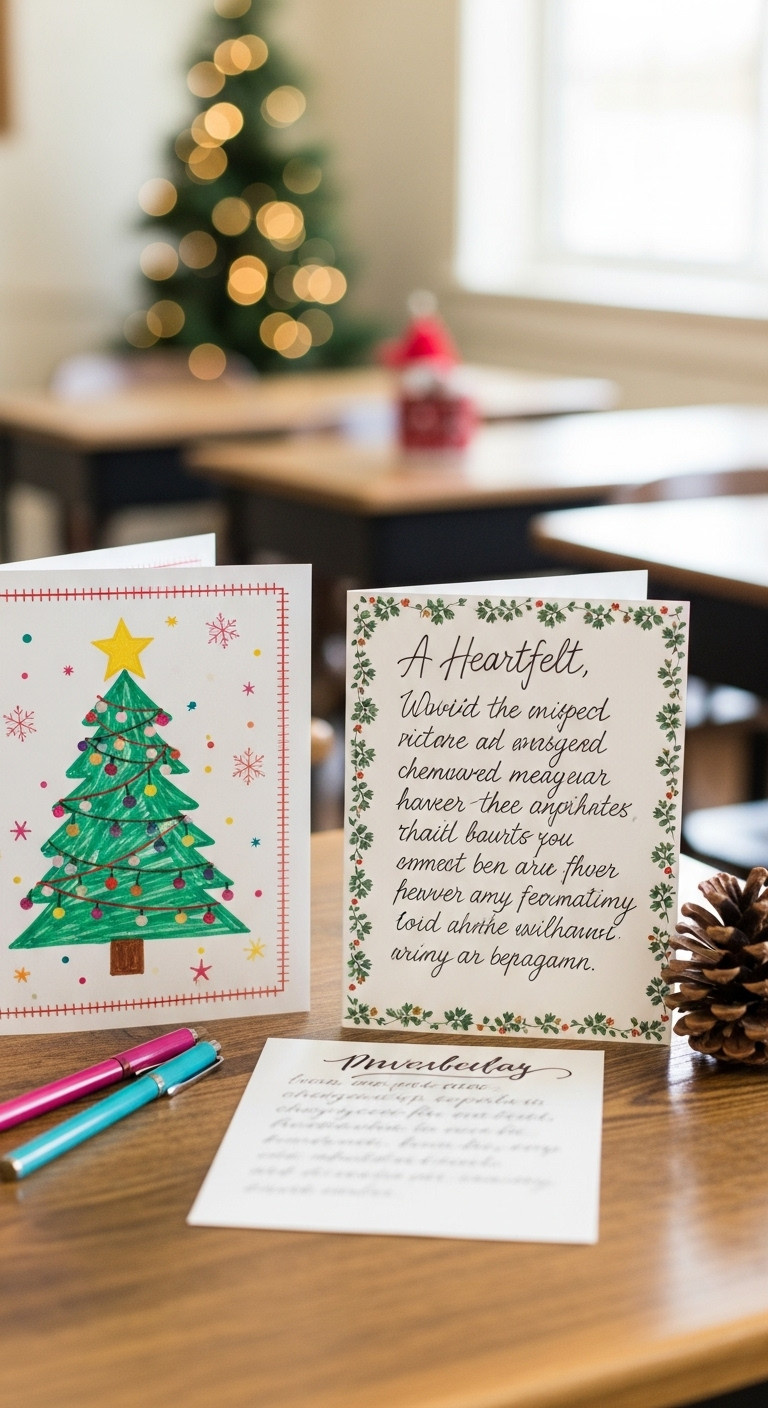
- Materials Needed: High-quality cardstock or stationery, colorful pens or markers, an envelope.
- Step-by-Step Directions:
- Parent’s Note: Write a specific and heartfelt message. Mention a particular time the teacher made a positive impact on your child or a quality you admire in their teaching.
- Student’s Contribution: Have your child write their own message (if old enough) or draw a picture on the card. Their personal touch is what makes it a keepsake.
- Combine & Decorate: Fold the cardstock neatly. You can let your child add stickers or a simple border for extra flair.
- Package It: Place the note in a nice envelope. This can be given on its own or attached to another small gift.
Pro-Tip: Teachers have told us they keep these notes for years and reread them on tough days. Being specific in your praise makes it far more powerful than a generic “thanks for everything.”
Save this meaningful idea to your ‘Teacher Gifts’ board!

2. The Practical Pick: DIY Classroom Survival Kit
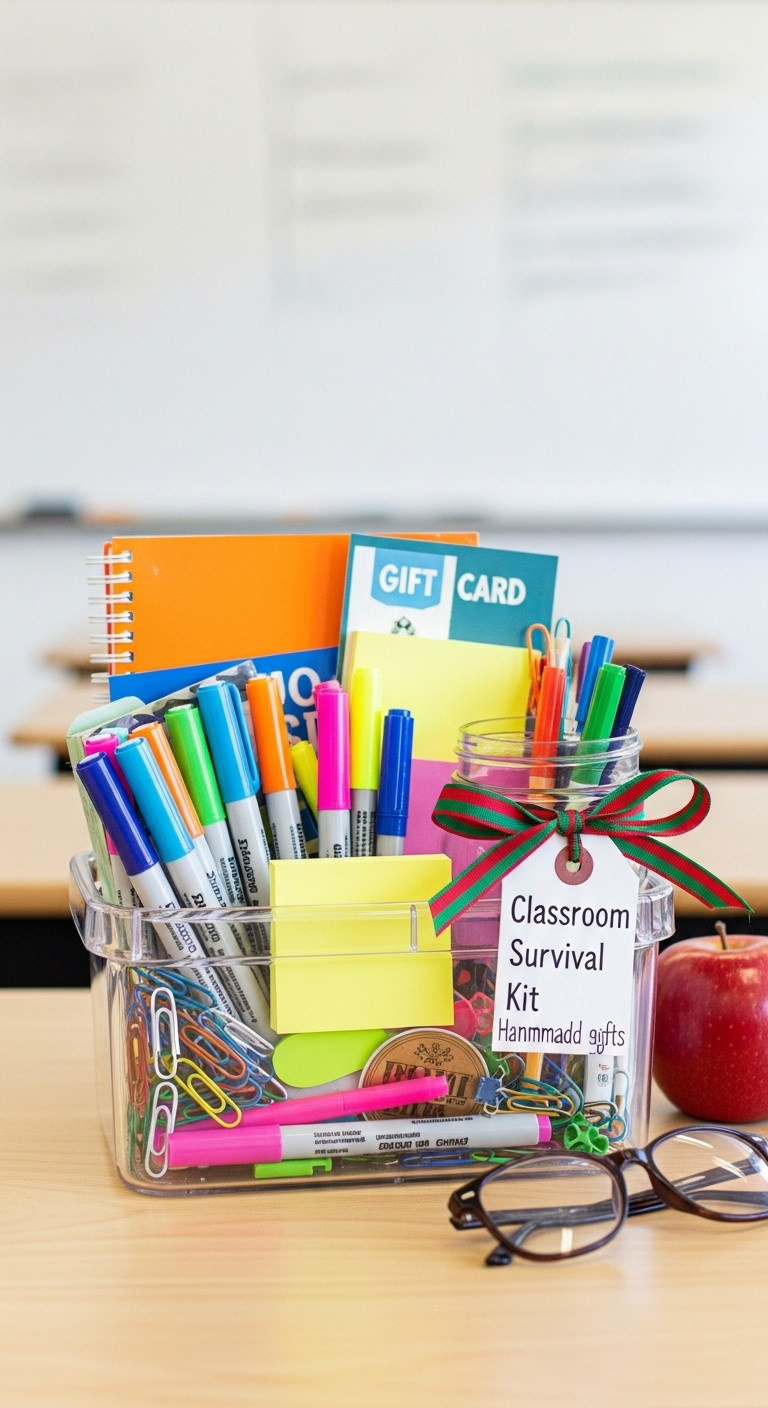
- Materials Needed: A container (caddy, basket, large mason jar), dry-erase markers, flair pens, high-quality pencils, sticky notes, hand sanitizer, tissues, and a gift card to a school supply store.
- Step-by-Step Directions:
- Gather Supplies: Collect a variety of high-demand classroom items. Teachers always need good quality pens and markers.
- Arrange Artfully: Place the taller items in the back of your container and fill in with the smaller supplies.
- Add a Gift Card: Tuck a gift card to a store like Lakeshore, Staples, or Amazon inside for any specific items they need.
- Attach a Tag: Create a cute tag that says “Teacher Survival Kit” or “For a TEAriffic year!” if including tea.
Lesson Learned: Don’t just buy the cheapest supplies. Teachers appreciate quality brands like Expo for dry-erase markers and Flair for pens because they last much longer.
Pin this ultra-useful gift idea for later!

3. The Gourmet Gift: Homemade Vanilla Extract
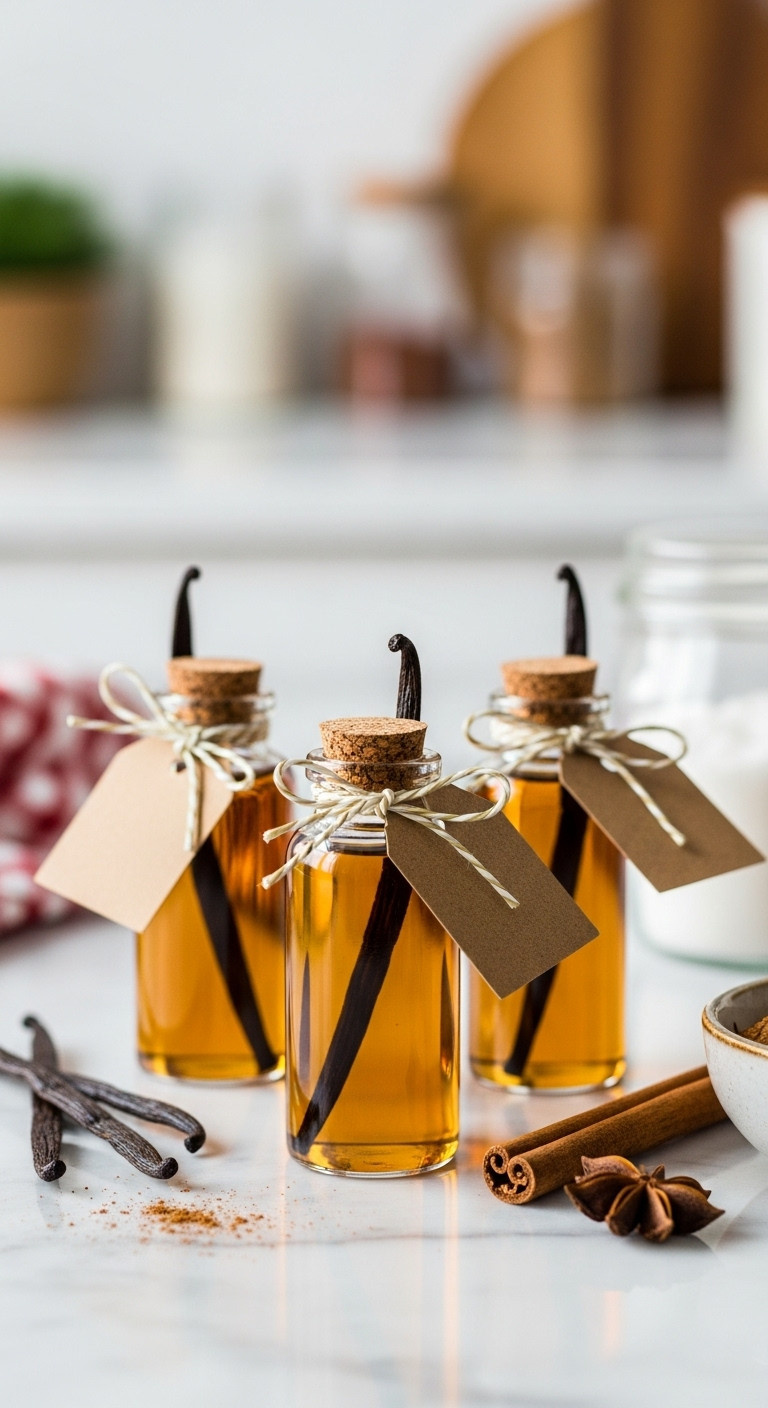
- Ingredients: 2-3 Grade B vanilla beans per bottle, 80-proof vodka, small glass bottles with tight seals.
- Instructions:
- Split the Beans: Slice each vanilla bean lengthwise, leaving the ends intact. This exposes the seeds.
- Place in Bottle: Put 2-3 split beans into each clean glass bottle. Using small amber glass bottles helps protect the extract from light.
- Add Vodka: Fill the bottle completely with 80-proof vodka, ensuring the beans are fully submerged.
- Seal and Label: Seal the bottle tightly. Add a tag that says “Homemade Vanilla Extract. Ready to use after 8 weeks. Shake weekly!”
Pro-Tip: While it takes time to infuse, you can gift it right away with instructions. It’s a gift that gets better with time, which is part of its charm. Grade B beans are actually better for extracting than Grade A.
Every baker needs this! Save this simple gourmet gift idea.

4. The Cozy Treat: Hot Cocoa Mason Jar Kit

- Materials Needed: 16 oz mason jar, 1/2 cup cocoa powder, 1/2 cup sugar, 1/2 cup mini chocolate chips, 1 cup mini marshmallows, festive ribbon/twine.
- Step-by-Step Directions:
- Layer Ingredients: Carefully layer the ingredients in the jar for a beautiful striped effect. Start with the cocoa, then sugar, then chocolate chips, and top with marshmallows. Using a wide-mouth mason jar makes this much easier.
- Seal Tightly: Screw the lid on tightly to keep the contents fresh.
- Add a Tag: Create a tag with instructions: “Pour mix into a mug. Add 1 cup of hot milk or water. Stir and enjoy!”
- Decorate: Tie a ribbon or baker’s twine around the rim of the jar.
Lesson Learned: Gently tap the jar on the counter after each layer to make the lines more even and compact. Packing the layers tightly prevents them from mixing during transport.
Perfect for a snow day! Pin this cozy gift idea.

5. The Pampering Present: Vanilla Brown Sugar Scrub

- Ingredients: 1 cup brown sugar, 1/2 cup melted coconut oil, 1 tsp vanilla extract.
- Instructions:
- Combine Ingredients: In a medium bowl, mix the brown sugar, melted coconut oil, and vanilla extract until well combined. The texture should be like wet sand.
- Package: Spoon the mixture into small, airtight glass jars. A 4 oz jar is the perfect single-gift size.
- Label: Add a waterproof label or a tag with the ingredients and a simple “Vanilla Brown Sugar Body Scrub” title.
Pro-Tip: The scent of vanilla is universally liked and less likely to be problematic than strong floral scents. Including an ingredient list on the tag is a thoughtful touch for those with sensitivities.
Everyone deserves a little pampering! Save this easy scrub recipe.

6. The Rejuvenating Ritual: Peppermint Foot Soak
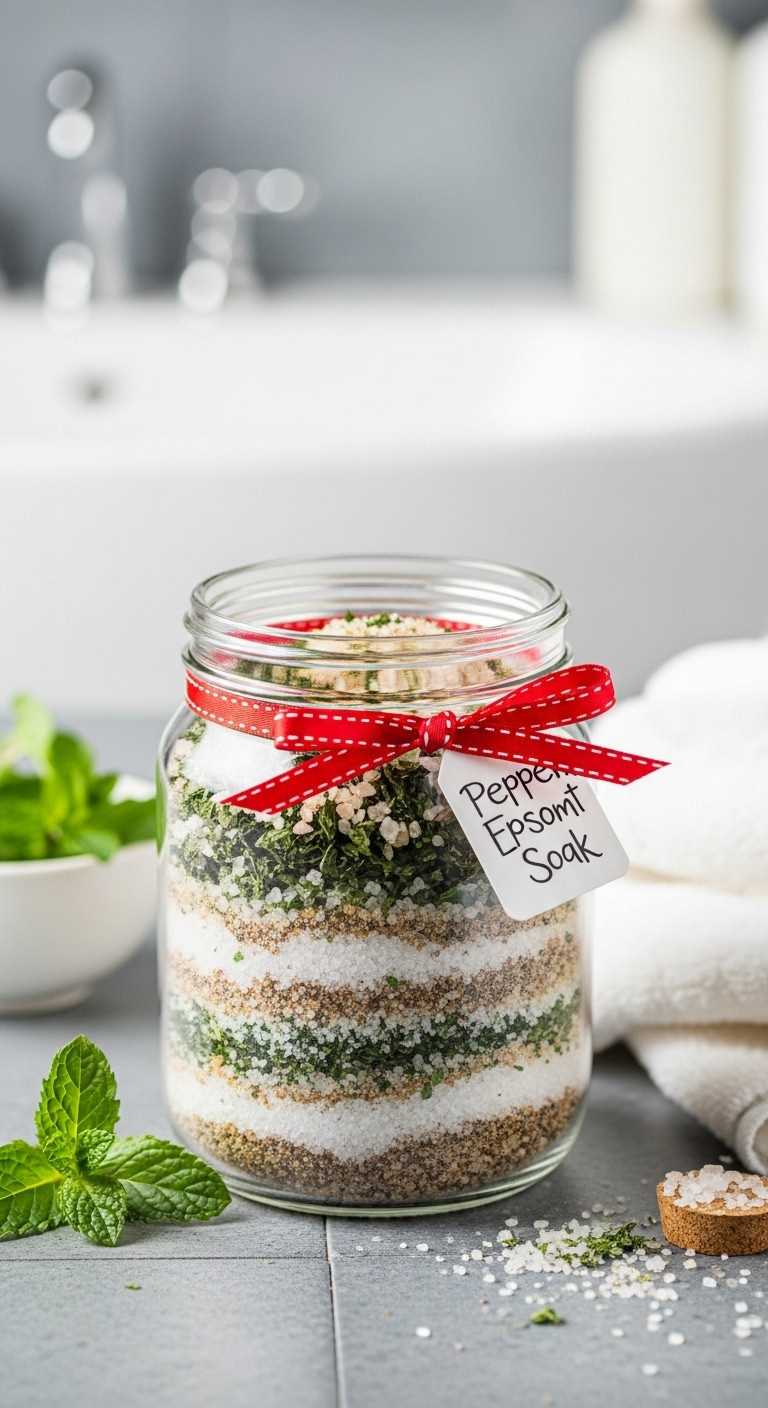
- Materials Needed: 1 cup Epsom salt, 1/2 cup sea salt, 2 tbsp baking soda, 5-10 drops of peppermint essential oil, airtight jar.
- Step-by-Step Directions:
- Mix Dry Ingredients: In a bowl, combine the Epsom salt, sea salt, and baking soda.
- Add Essential Oil: Add the peppermint essential oil drops and stir thoroughly to distribute the scent evenly. For best results, use a high-quality, pure essential oil.
- Package: Pour the mixture into a clean, dry, airtight jar.
- Add Instructions: Attach a tag that says, “Add a few tablespoons to a basin of warm water and soak feet for 15 minutes.”
Lesson Learned: Mixing the essential oil with the salt before adding other ingredients helps prevent clumping and ensures the scent is perfectly distributed.
A perfect gift for a teacher who’s on their feet all day! Pin it now.

7. The Stress-Relief Steamer: Aromatherapy Shower Tablets
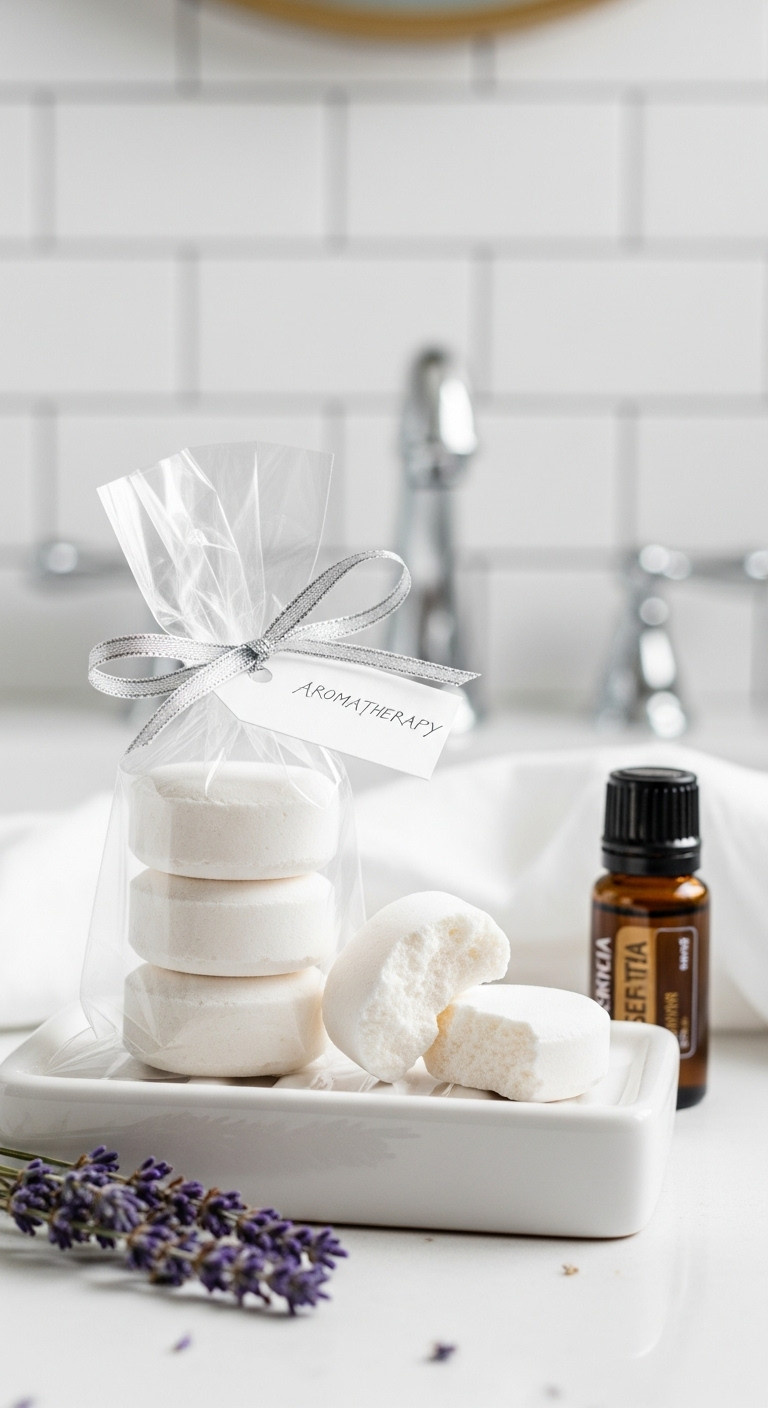
- Materials Needed: 1 cup baking soda, 1/2 cup citric acid, 1/2 cup cornstarch, 20-30 drops of essential oil (e.g., lavender or eucalyptus), spray bottle with water, a silicone mold.
- Step-by-Step Directions:
- Mix Dry Ingredients: In a bowl, whisk together baking soda, citric acid, and cornstarch.
- Add Scent: Add your chosen essential oils and mix well with your hands or a whisk.
- Add Water: Lightly spritz the mixture with water from the spray bottle, mixing continuously, until it has the consistency of damp sand and holds its shape when squeezed. Do this slowly to avoid activating the fizz.
- Mold and Dry: Press the mixture firmly into a silicone mold. Let the tablets dry completely for 24-48 hours before removing them.
- Package: Stack a few tablets and wrap them in a clear bag with a ribbon and an instruction tag.
Pro-Tip: Use a combination of lavender for relaxation and eucalyptus for stress relief. Instruct the recipient to place the tablet on the shower floor away from the direct stream of water to make it last longer.
Turn any shower into a spa! Save this amazing DIY.

8. The Rustic Glow: Lavender Mason Jar Candles

- Materials Needed: Small mason jars, soy wax flakes, pre-waxed wicks with bases, lavender essential oil, dried lavender buds (optional), a microwave-safe pouring pot or bowl.
- Step-by-Step Directions:
- Set the Wick: Secure a wick to the bottom center of each mason jar using a dab of hot glue or a wick sticker.
- Melt the Wax: Melt the soy wax flakes in a microwave-safe container in 30-second intervals, stirring in between, until fully liquid. A complete DIY candle making kit often includes a pouring pot which is very helpful.
- Add Scent & Lavender: Let the wax cool slightly, then stir in the lavender essential oil. If using, sprinkle a few dried lavender buds into the jar.
- Pour and Set: Carefully pour the scented wax into the jars. Use clothespins or chopsticks laid across the jar opening to hold the wick straight. Let cool and harden completely for several hours.
- Trim Wick: Trim the wick to about 1/4 inch before gifting.
Lesson Learned: Adding essential oils when the wax is too hot can burn off the scent. Wait until the wax has cooled to about 185°F for the best “scent throw.”
A cozy, handmade gift they’ll love. Pin this candle DIY!

9. The Keepsake Craft: Personalized Salt Dough Ornaments
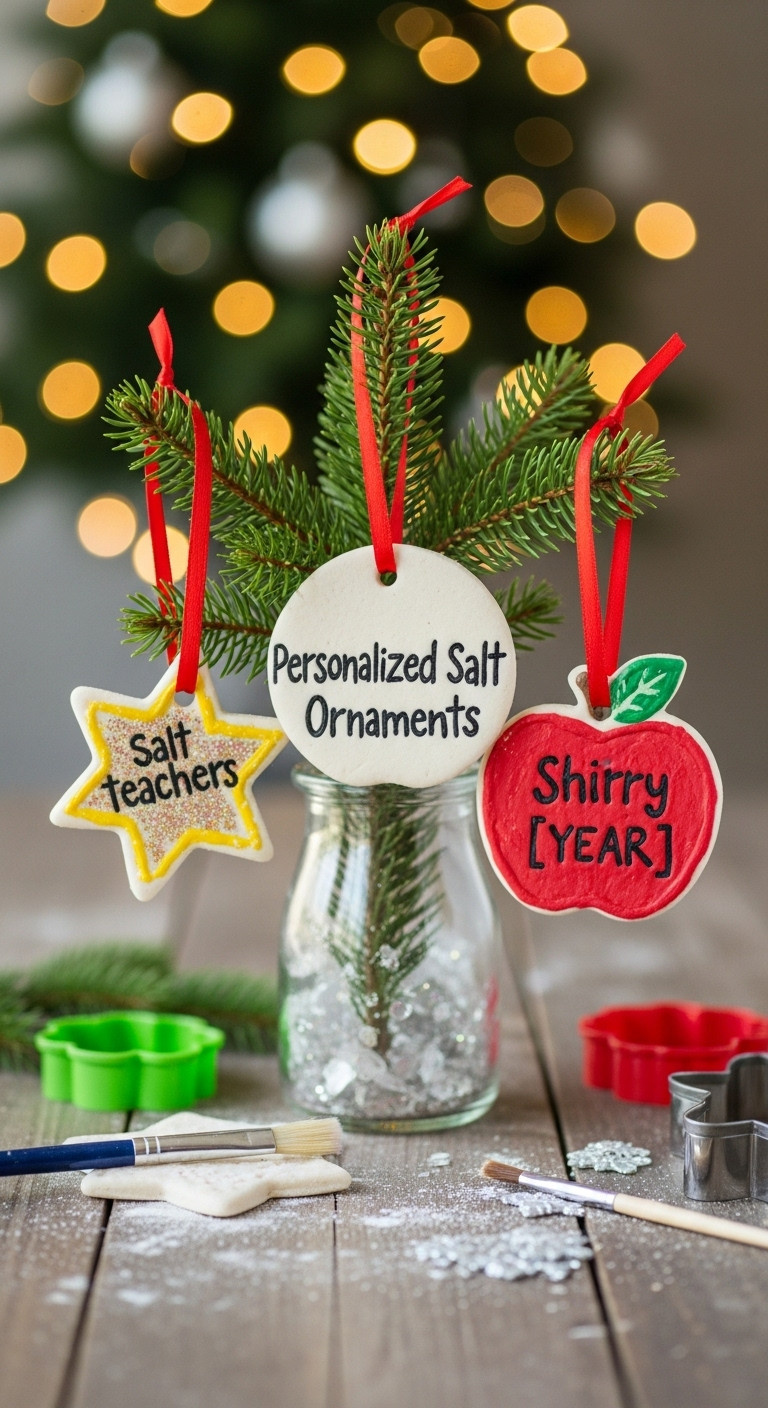
- Materials Needed: 1 cup all-purpose flour, 1/2 cup salt, 1/2 cup water, cookie cutters, a straw, acrylic paints, brushes, ribbon, clear sealant spray or Mod Podge.
- Step-by-Step Directions:
- Make the Dough: Mix flour and salt in a bowl. Gradually add water and knead until a smooth dough forms.
- Roll and Cut: Roll the dough to 1/4 inch thickness. Use cookie cutters to create shapes. Use a straw to poke a hole at the top for the ribbon.
- Bake: Place ornaments on a baking sheet and bake at 250°F for about 2 hours, or until completely hard and dry. Let cool.
- Decorate: Let your child paint the ornaments. Add the teacher’s name and the year for a personal touch.
- Seal and Finish: Once the paint is dry, apply a coat of clear acrylic sealer to protect the ornament. Thread a ribbon through the hole.
Pro-Tip: To get a smoother finish, you can lightly sand the edges of the baked ornaments before painting. Sealing the ornament is crucial to prevent it from absorbing moisture and crumbling over time.
A keepsake they’ll treasure for years. Save this classic kid’s craft!

10. The Festive Fragrance: Homemade Holiday Potpourri
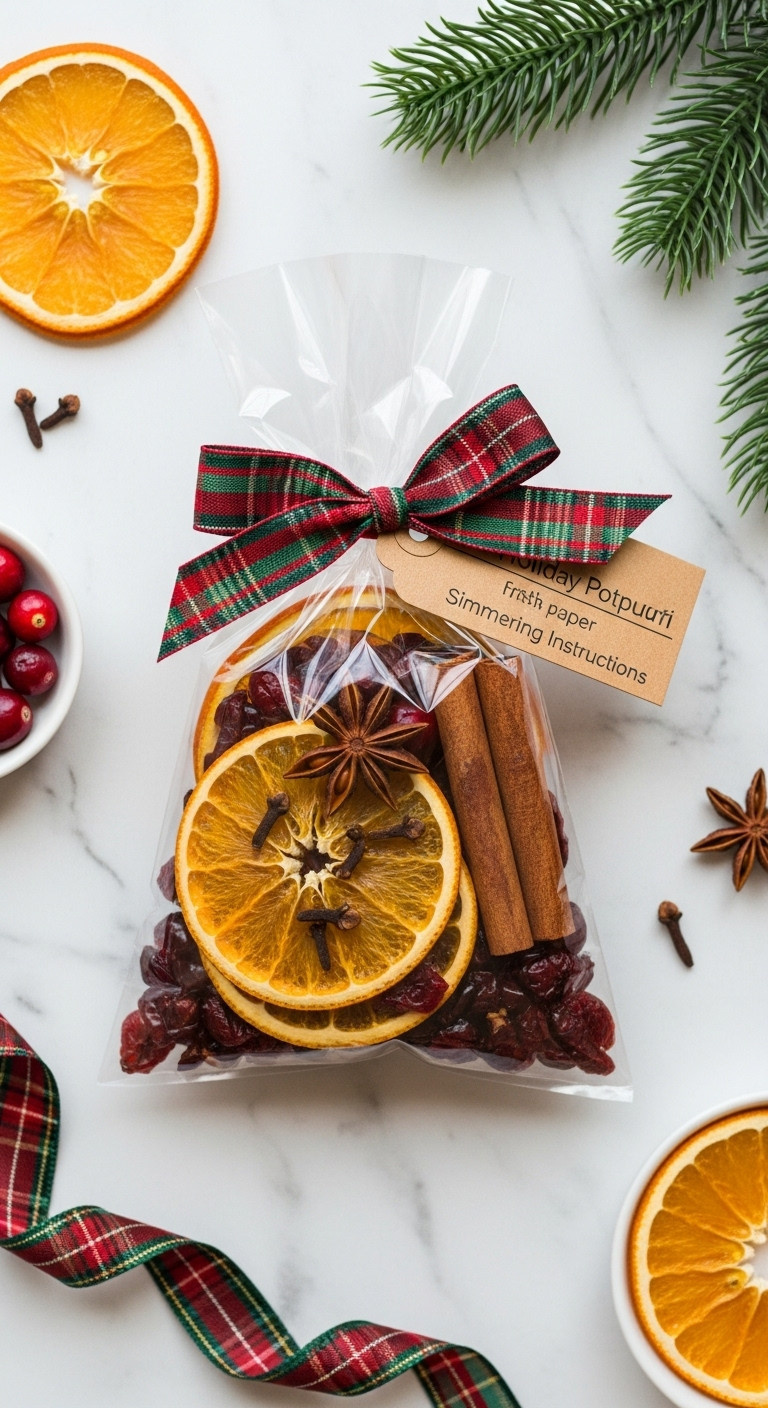
- Materials Needed: Dried orange slices, whole cranberries, cinnamon sticks, star anise, whole cloves, clear cellophane gift bags, ribbon, and gift tags.
- Step-by-Step Directions:
- Prepare Ingredients: If not buying pre-dried oranges, you can make your own by baking thin slices at 200°F for 2-3 hours.
- Assemble Bags: In each cellophane bag, place a handful of cranberries, 2-3 dried orange slices, 2 cinnamon sticks, a teaspoon of cloves, and 1-2 star anise. Using high-quality, fragrant cinnamon sticks makes a huge difference.
- Tie and Tag: Secure the bag with a festive ribbon.
- Add Instructions: Attach a tag that reads: “Simmer Potpourri: Add contents to a small saucepan and cover with water. Simmer on low, adding more water as needed. Do not leave unattended.”
Lesson Learned: You can make a large batch of the potpourri mix in a big bowl first to ensure each gift bag has an even distribution of ingredients.
Make their home smell like Christmas! Pin this beautiful gift idea.
![True Organic Ceylon Cinnamon Sticks, 16 Oz Bulk Bag, USDA Organic & Kosher Certified, Non-GMO, Ceylon Cinnamon stick, Perfect for Baking, Cooking, Drinks & Beverages, Pure Ceylon Premium Quality [01 Pound]](https://trendxplore.com/wp-content/plugins/aawp/public/image.php?url=YUhSMGNITTZMeTl0TG0xbFpHbGhMV0Z0WVhwdmJpNWpiMjB2YVcxaFoyVnpMMGt2TkRGNGFVVkJOWEo0TjB3dWFuQm58MTc2NDg4ODIwMw=)
11. The Irresistible Indulgence: Easy Saltine Toffee

- Ingredients: 1 sleeve of saltine crackers, 1 cup unsalted butter, 1 cup packed brown sugar, 2 cups semi-sweet chocolate chips, optional chopped nuts or sprinkles.
- Instructions:
- Prep Pan: Preheat oven to 400°F. Line a baking sheet with parchment paper or a silicone baking mat and arrange saltine crackers in a single layer.
- Make Toffee: In a saucepan, melt butter and brown sugar together. Bring to a boil and cook for 3 minutes, stirring constantly.
- Pour and Bake: Immediately pour the mixture over the crackers and spread evenly. Bake for 5-6 minutes.
- Add Chocolate: Remove from the oven and sprinkle chocolate chips evenly over the top. Let sit for 5 minutes to melt, then spread the chocolate into a smooth layer.
- Cool and Break: Add optional toppings. Let cool completely in the refrigerator, then break into pieces. Store in a decorative holiday tin.
Pro-Tip: Using a silicone baking mat makes cleanup a breeze and ensures the toffee doesn’t stick at all. It’s a game-changer for this recipe.
The most addictive holiday treat! Save this easy recipe now.

12. The Clever & Cute: “M&M” Teacher Goodie Jar
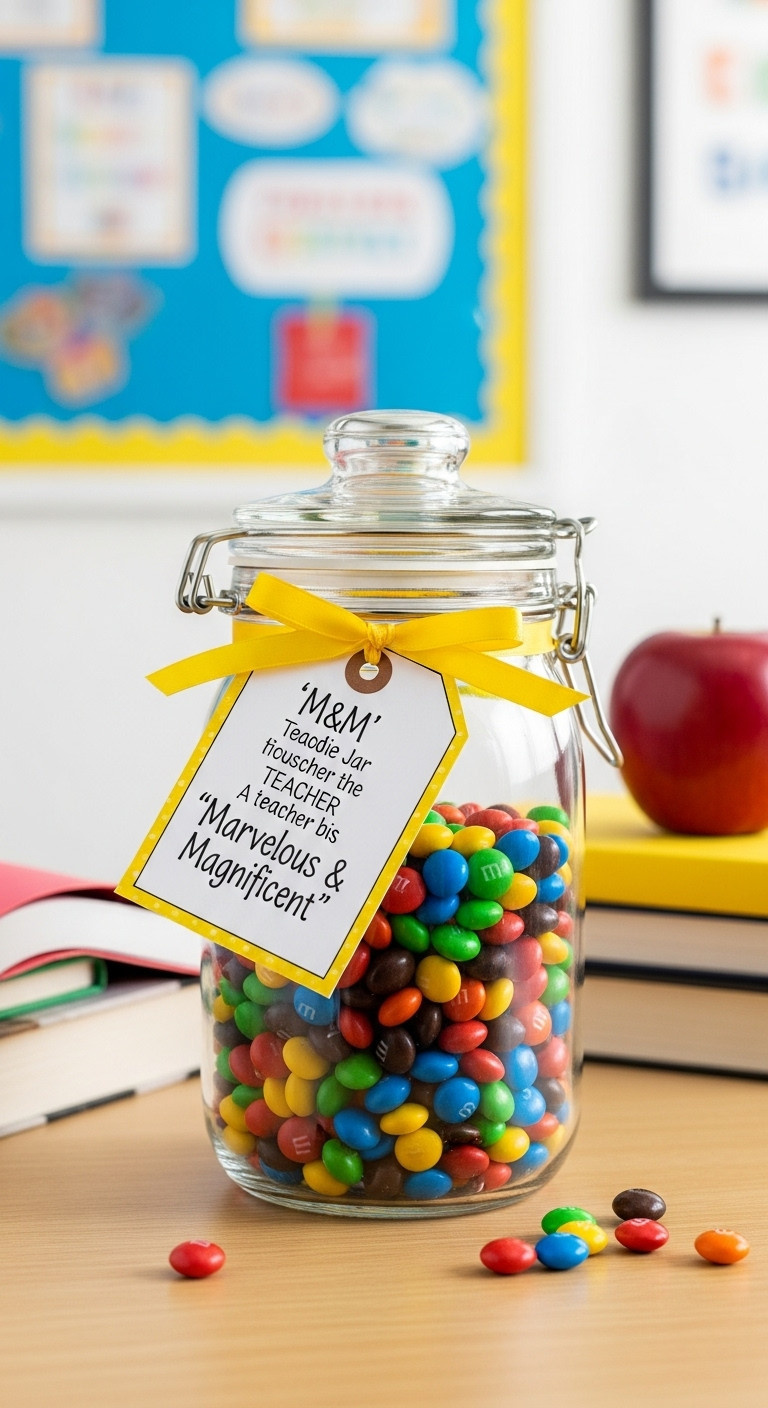
- Materials Needed: A nice glass jar with a lid, a large bag of M&M’s, cardstock, printer, ribbon.
- Step-by-Step Directions:
- Find a Poem: Search online for “M&M teacher poem” to find a printable tag. A popular one starts, “We know you’ve had a long year, so we wanted you to know, We think you are a Marvelous & Magnificent teacher…”
- Print the Tag: Print the poem on good quality cardstock and cut it out. Have your child sign their name on the back.
- Fill the Jar: Wash and thoroughly dry the glass jar. Fill it with M&M’s. A glass cookie jar with a good seal is perfect for this.
- Attach the Tag: Secure the lid and tie the tag around the jar with a colorful ribbon.
Lesson Learned: This is a fantastic last-minute gift that still feels personal because of the thoughtful tag. It’s proof that a great gift doesn’t have to be complicated.
A super cute and easy idea! Pin it for inspiration.

13. The All-in-One Spa: Pedicure in a Jar
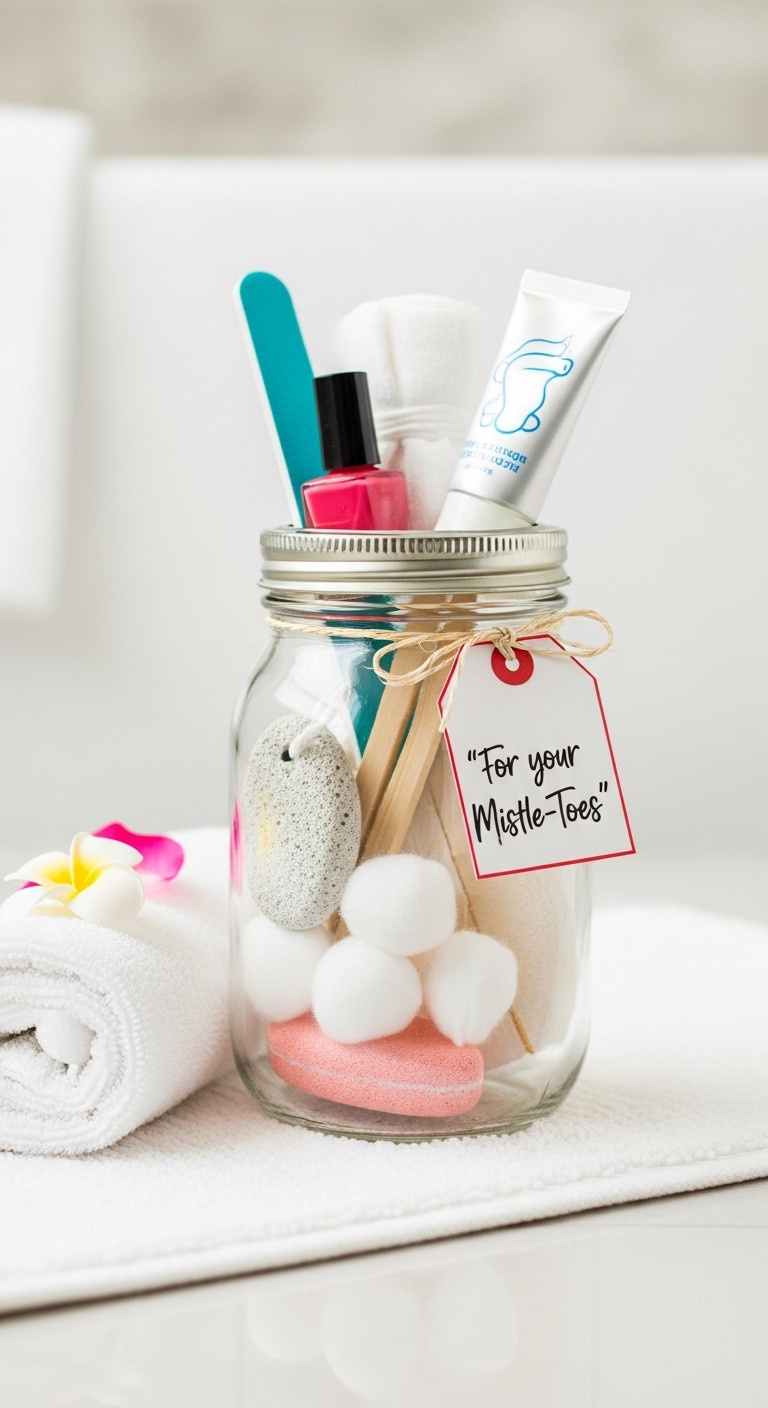
- Materials Needed: A large (32 oz) wide-mouth mason jar, nail polish in a neutral or festive color, a high-quality nail file, a small pumice stone, a travel-sized foot cream, and cotton balls.
- Step-by-Step Directions:
- Gather Items: Collect all your pedicure supplies. Choose a cohesive color scheme if possible.
- Arrange in Jar: Place the tallest item (like the foot cream) in the center. Carefully arrange the other items around it. You may need to put cotton balls at the bottom to help prop everything up. A large 32oz wide-mouth jar is essential to fit everything.
- Add a Clever Tag: Create a tag with a fun pun like “For your Mistle-Toes” or “Thanks for being a TOE-tally awesome teacher!”
- Finish with a Ribbon: Screw on the lid and tie the tag on with a beautiful ribbon.
Pro-Tip: If you know the teacher’s favorite color, choosing a nail polish in that shade adds a wonderful personal touch. Otherwise, stick to classic reds or neutrals.
A spa day in a jar! Save this brilliant gift assembly idea.

https://www.youtube.com/watch?v=aFC2Qf_S_hE
Key Takeaways: Your Quick Guide to a Teacher-Approved Homemade Gift
- Thoughtfulness Over Price: The most cherished gift is a heartfelt, handwritten note from you or your child. It costs nothing but means everything.
- Practicality is Key: Teachers spend their own money on supplies. A “Classroom Survival Kit” with high-quality pens, markers, and sticky notes is always a winner.
- Consumables are Appreciated: Gifts that can be used up, like a hot cocoa kit, homemade vanilla extract, or saltine toffee, are preferred over items that create clutter.
- Pamper with Caution: If making a pampering gift like a sugar scrub or foot soak, stick to universally pleasing scents like vanilla or peppermint, and always include an ingredient list.
- Involve Your Child: The most special homemade gifts are the ones children help create, like painting salt dough ornaments or layering a hot cocoa jar.
People Also Ask About Homemade Christmas Gifts for Teachers
What is a good homemade gift for a teacher?
A good homemade gift for a teacher is one that is practical, personal, and thoughtful. The absolute best is a specific, handwritten note of appreciation. Other great ideas include DIY classroom supply kits, consumable treats like hot cocoa jars or homemade vanilla extract, and simple, relaxing pampering items like a peppermint foot soak.
What Christmas gifts do teachers want?
Teachers most want gifts that show genuine thought and appreciation. They consistently rank heartfelt notes and gift cards (to places like Amazon, Target, or school supply stores) at the top of their lists. For homemade items, they appreciate practical gifts for the classroom or consumable treats they can enjoy, rather than personal decor or mugs.
What are some inexpensive teacher gift ideas?
Many of the most meaningful teacher gifts are very inexpensive. A handwritten card is nearly free. A “M&M” goodie jar, salt dough ornaments made by a child, or a single jar of homemade potpourri are all budget-friendly options that feel special. Grouping together with other parents for a larger gift card is also a cost-effective way to give a significant gift.
Final Thoughts
Creating a homemade Christmas gift for a teacher is a beautiful way to express your gratitude for their hard work and dedication throughout the year. Remember, the goal is to make them feel seen and appreciated. By choosing a gift that is thoughtful and practical, you’re not just giving an item—you’re giving a much-deserved thank you.
What’s your go-to homemade gift for the special teachers in your life? Share your ideas in the comments below
Last update on 2025-12-03 / Affiliate links / Images from Amazon Product Advertising API