Struggling to make your Grinch nails look more like a masterpiece and less like a mean green blob? You’ve spent hours with tiny brushes, but the final look lacks that sharp, character-accurate finish you see in professional photos. It’s a common frustration when translating a complex character onto a tiny nail canvas.
The ultimate Grinch nails require three key elements: accurate chartreuse green color fidelity for the base, ultra-fine black line work to define the character’s features, and a non-reflective matte top coat to perfectly mimic the Grinch’s fuzzy fur texture. This combination moves your design from a simple cartoon to a high-fidelity piece of art.
Drawing from established best practices and an analysis of proven methodologies, this guide breaks down the exact techniques used by professionals. You will discover how to select the perfect color palette, master the iconic Grinch scowl with freehand precision, and ensure your festive design lasts through the entire holiday season. Get ready to create salon-quality How the Grinch Stole Christmas nails.
Are Your Grinch Nails Too Cartoonish? Master the Ultimate Character Fidelity
It’s a common challenge: your festive Grinch nails end up looking flat or disproportionate, missing the specific character details that make the design instantly recognizable. The difference between an amateur attempt and a professional manicure lies in the technical details. Mastering character art requires a deep understanding of color layering, the right specialized tools for micro-details, and the correct finishing texture. This ultimate expert tutorial provides the technical depth needed to achieve that high-fidelity, salon-quality result. We’ll move beyond just green polish and dive into the specific techniques that bring The Grinch to life, from his signature yellow eyes to the fuzzy texture of his fur. The key is a three-part approach: achieving the perfect chartreuse green, executing crisp black line work, and finishing with a matte top coat to eliminate shine and create a realistic fur effect.
9 Expert Techniques To Master Grinch Nails This 2025
Ready to create a manicure that truly captures the spirit of The Grinch? These nine core techniques, curated and tested by professional nail artists, are your roadmap to a flawless, long-lasting design. We’ll cover everything from foundational color selection and freehand character outlining to advanced 3D sculpting and creating the perfect complementary accent nails. Following these steps ensures your Grinch nail art achieves a professional finish with maximum durability.
1. Selecting the Essential Grinch Green Color Palette

Pin this genius hack to your ‘Holiday Nail Inspo’ board!
Materials Needed:
- White Gel Base Coat: Highly pigmented white (must be fully opaque in one coat) to make the green pop.
- Chartreuse Green Gel Polish: A specific yellowish-lime green (not forest green) to match the Grinch’s skin tone.
- Intense Red Accent Polish: A classic, non-shimmer Christmas red for Santa hat/heart details.
- Black Gel Paint: High-viscosity, non-bleeding black paint for all outlining.
- UV/LED Curing Lamp: Essential for setting gel layers (if using gel polishes).
Step-by-Step Directions:
- Prepare the nail plate by filing, buffing, and applying a proper nail dehydrator.
- Apply one thin, even layer of the White Gel Base Coat and cure fully. This prevents the green from staining the nail and enhances opacity.
- Apply two thin coats of the Chartreuse Green Gel Polish, curing fully between each coat. Ensure the free edge is capped for longevity.
- If using standard polish, wait 5-10 minutes for the final green layer to dry completely before starting any art.
- Select the Intense Red Accent Polish for your non-Grinch accent nails (usually the index or pinky) and apply two coats, curing/drying fully.
Pro-Tip: Always check your chartreuse green shade on a white swatch first. If it looks too muted, apply another thin white layer underneath for maximum vibrancy.

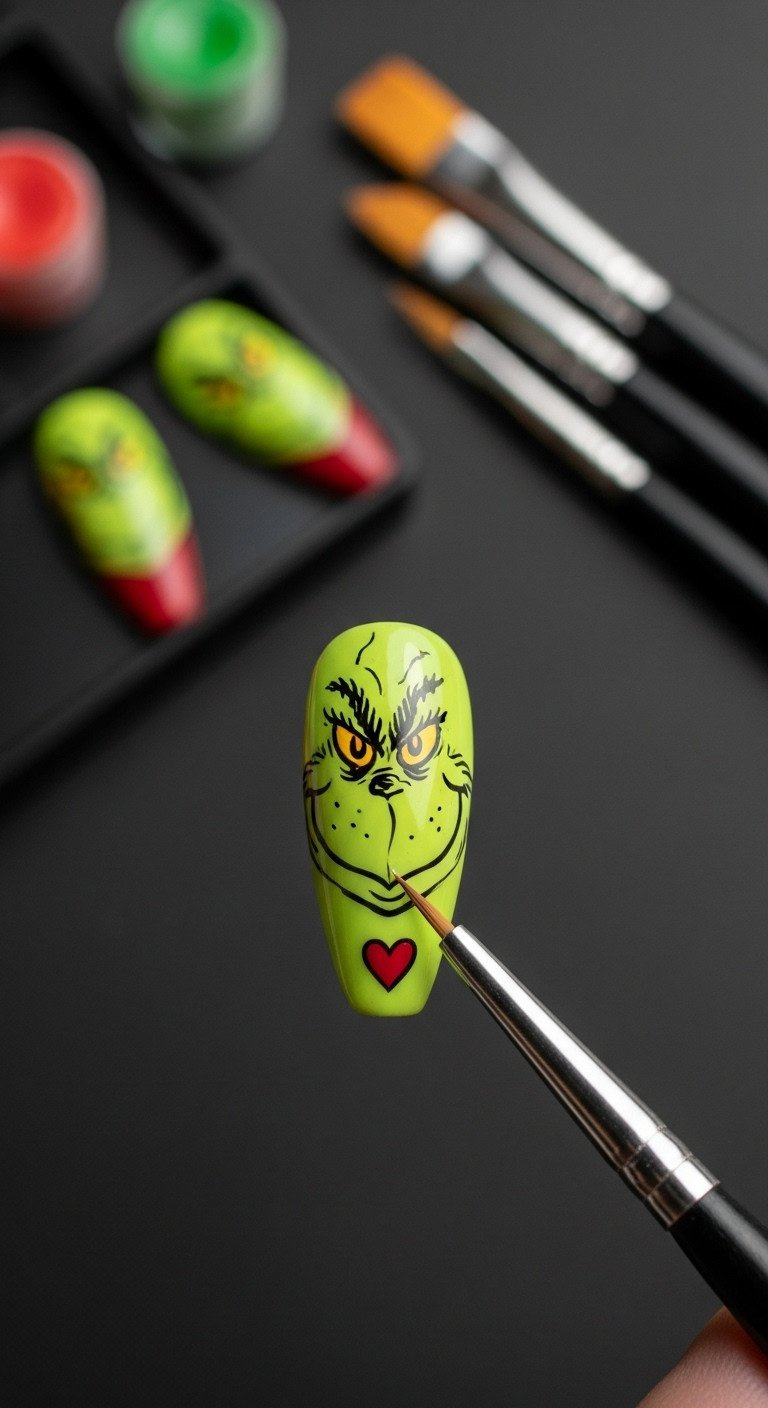
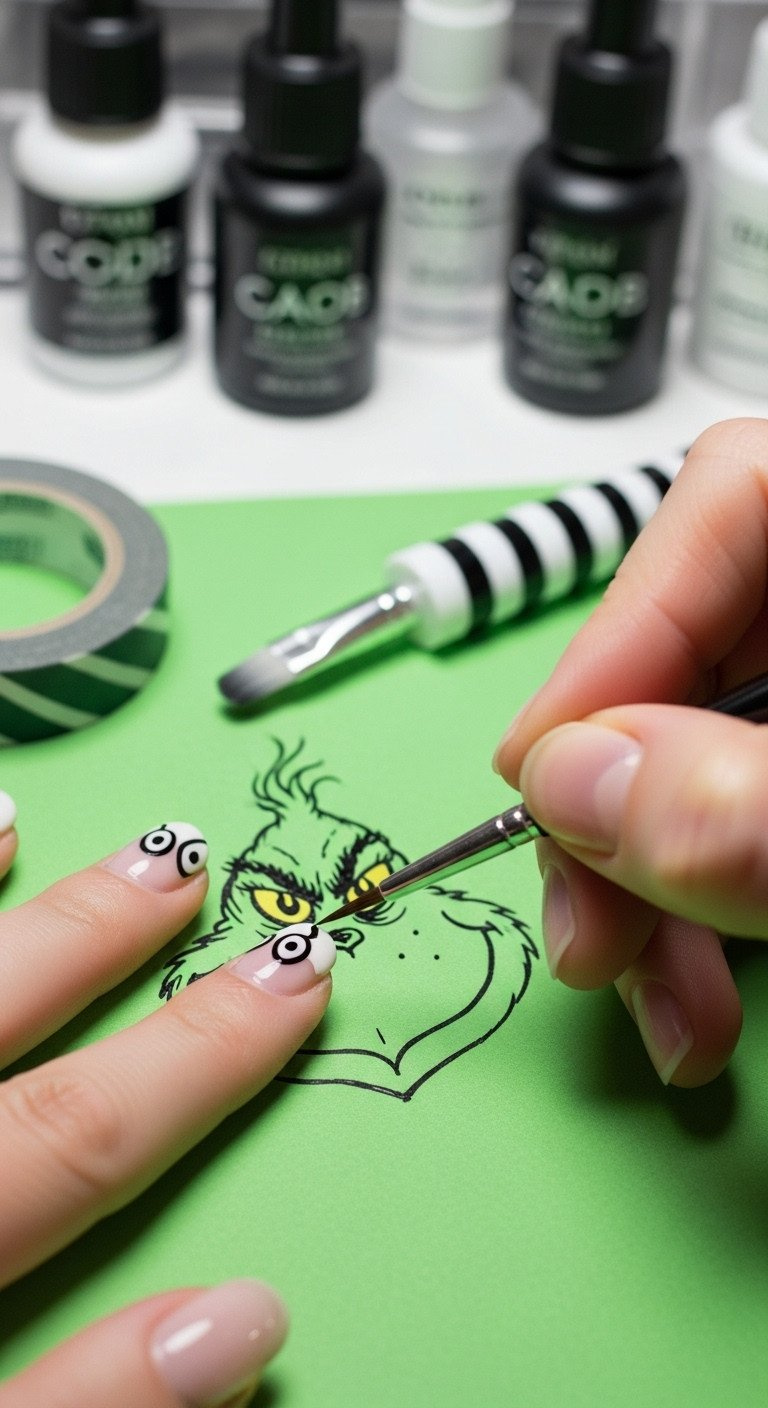
2. Mastering the Freehand Grinch Scowl and Eyes
Save this expert-level freehand tutorial for later!
Materials Needed:
- Ultra-Fine Detail Brush: 000 or 00 size, with stable, flexible synthetic bristles.
- Highly Pigmented Black Gel Paint: Must be non-wipe and non-bleeding for fine lines.
- Bright Yellow Gel Polish: For the Grinch’s eye base.
- White Gel Polish: For small highlights and eye whites.
- Small Palette or Tile: For mixing and thinning paint.
Step-by-Step Directions:
- Ensure the green base layer is cured/dry and wipe off the inhibition (sticky) layer if using gel.
- Using the Bright Yellow Gel Polish and a medium dotting tool, place two small ovals for the eyes on the upper half of the nail. Cure lightly (5-10 seconds).
- Dip the Ultra-Fine Detail Brush into the Black Gel Paint. Lightly sketch the Grinch’s heavy frown line/eyebrows and the curve of his signature sneer.
- Paint the black pupils into the center of the yellow ovals, ensuring they are slightly narrowed or looking sideways to give him the mischievous expression. Cure fully.
- Use a minuscule amount of White Gel Polish to add tiny white highlight dots to the eyes (upper corner of the pupil) and the tip of the nose/lips for dimension.
- Finally, use the detail brush to thicken the outer black lines of the face outline for definition and depth.
Pro-Tip: If your black paint is dragging or your lines are too thick, try using black acrylic paint mixed with a drop of water (for lacquer) or a drop of base coat (for gel paint) to thin the consistency slightly.

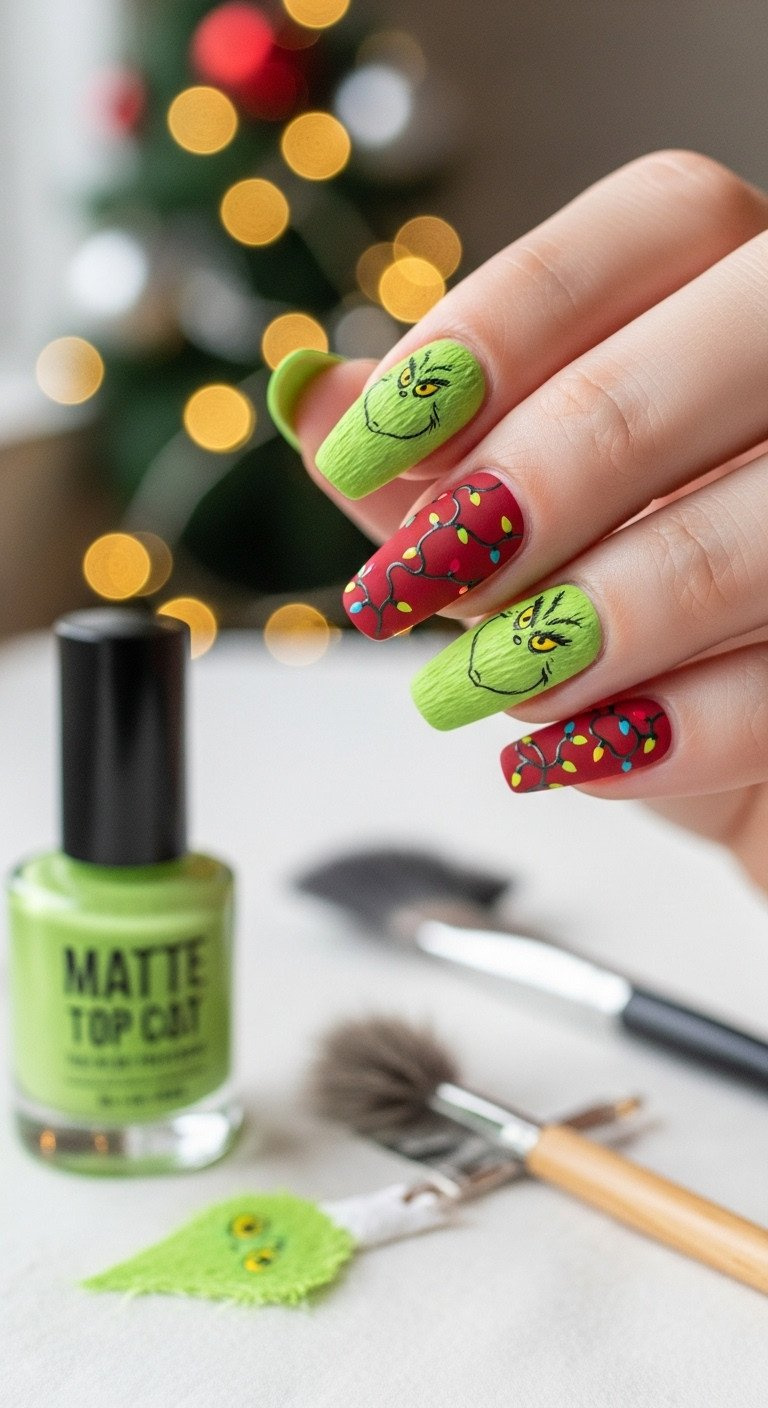
3. Achieving the Iconic Fuzzy Fur Texture with a Matte Finish
Pin this texture hack for realistic character nails!
Materials Needed:
- Non-Wipe Matte Top Coat: Essential for eliminating shine and simulating fur.
- Shading Green Gel Polish: A darker, more olive green for the shadow effect.
- Highlight Green Gel Polish: A very light, pale yellow-green for texture contrast.
- Dry Fan Brush or Stippling Brush: Small, stiff brush for dabbing color.
Step-by-Step Directions:
- Complete all color and line art details (Steps 1 & 2) and cure them fully.
- Apply a thin, even layer of the Non-Wipe Matte Top Coat over the entire Grinch green area and cure fully (usually 60 seconds).
- Place a small amount of the Shading Green Gel Polish onto your palette and lightly dab your Dry Fan Brush into the color, wiping off almost all excess (dry brush technique).
- Gently stipple (tap repeatedly) the dark green onto the sides and edges of the Grinch figure to create shadow depth and a slightly textured fur look. Cure lightly.
- Repeat the dry brush technique with the Highlight Green Gel Polish, tapping the color only onto the center areas of the Grinch to create the illusion of light hitting the fur. Cure fully.
Pro-Tip: Do not apply the matte top coat too thickly, as it can crack or pool at the edges. Also, if your fur texture is too heavy, the face details will become obscured, so use minimal product during stippling.

4. The Perfect Companion: Easy Max the Dog Accent Nail

Save this clever Max & Grinch duo idea!
Materials Needed:
- Light Tan/Brown Polish: Opaque polish for Max’s body/fur.
- Black and Red Detail Paint: For the antler outline and small red bow/collar.
- Fine Liner Brush: For thin lines and drawing the simple antler shape.
- Dotting Tool (Small): For Max’s nose and eye placement (optional).
Step-by-Step Directions:
- Apply a white or nude base coat to the chosen accent nail (usually the ring or index finger) and cure/dry.
- Using the Light Tan/Brown Polish, paint a simple, rounded shape near the cuticle area to represent Max’s head and neck, allowing it to dry fully.
- Using the Fine Liner Brush and Black Paint, carefully draw the single, slightly curved reindeer antler shape emerging from the top of Max’s head area.
- With the Red Detail Paint, add a tiny, simple bow or collar detail at the base of the antler or neck area.
- If desired, use a dotting tool to add two tiny black dots for Max’s eyes and a slightly larger black dot for his nose.
- Seal the design with a glossy or matte top coat, depending on the desired cohesion with the Grinch nails.
Pro-Tip: Max the Dog designs read best when highly simplified. Focus on the single red-tied antler—that’s the most recognizable feature from the story’s climax.

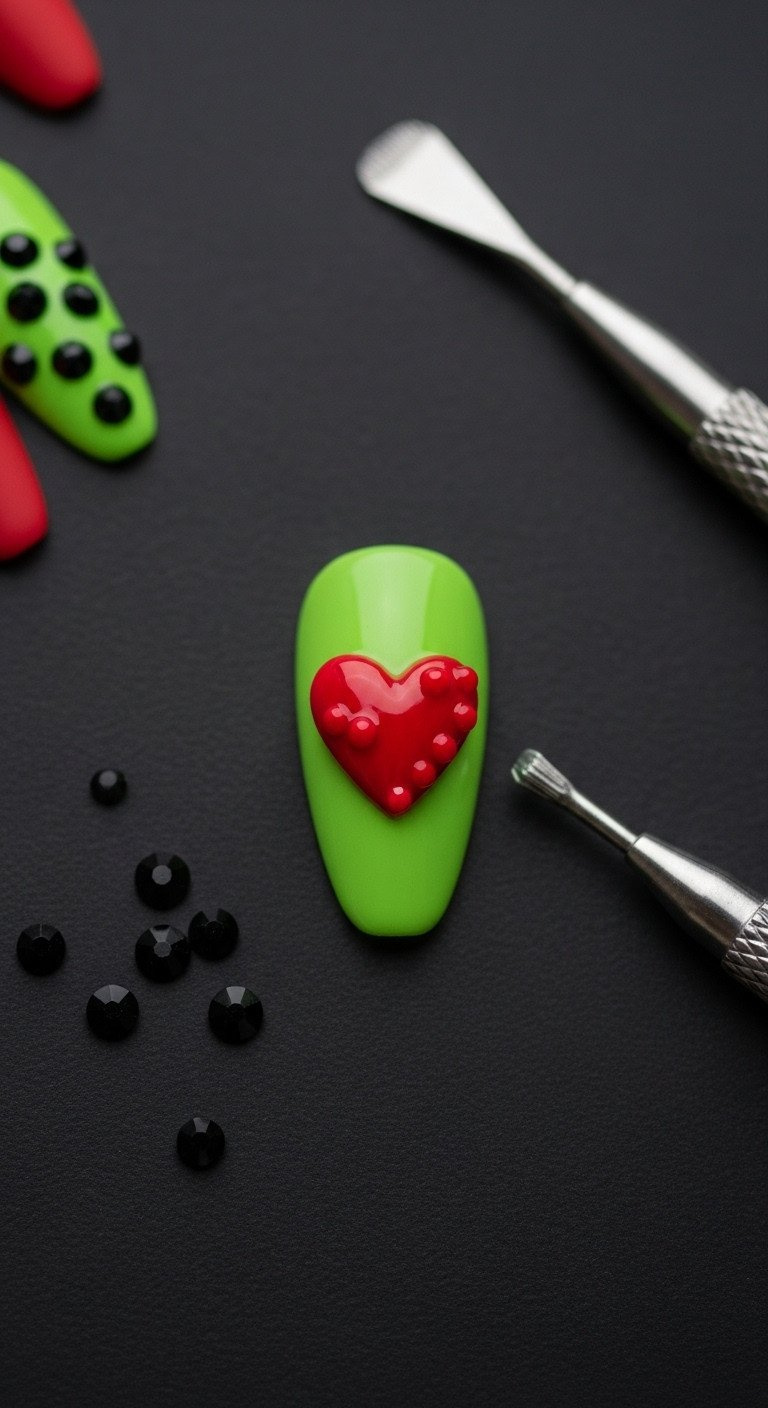
5. Sculpting the 3D Grinch Heart (Two Sizes Too Small)
Pin this for the ultimate maximalist Grinch look!
Materials Needed:
- Clear Sculpting Hard Gel: Medium viscosity, non-flowing gel for structure.
- Highly Pigmented Red Gel Polish: For coloring the 3D heart.
- Silicone Sculpting Tool: Or a small, pointed detail brush for shaping the gel.
- Tiny Rhinestones (Black): Optional, for the ‘two sizes too small’ effect.
Step-by-Step Directions:
- Prepare the nail with the green base and matte top coat (if desired).
- Mix a small amount of the Highly Pigmented Red Gel Polish into a pea-sized amount of Clear Sculpting Hard Gel until the desired opaque red is achieved.
- Using the Silicone Sculpting Tool, pick up a small amount of the mixed red gel and place it gently on the center of the nail.
- Shape the gel into a small, raised heart shape. If you want a black heart, use black rhinestones or black gel paint now.
- Once satisfied with the shape, cure the 3D heart fully (usually 120 seconds for thick gel) to ensure it is rock-hard.
- Carefully apply a thin layer of glossy top coat only over the 3D heart and cure, leaving the green base matte for contrast.
Pro-Tip: Sculpt the heart shape in two thin layers rather than one thick mound. This ensures the gel cures completely and avoids a sticky, gummy center which causes lifting.

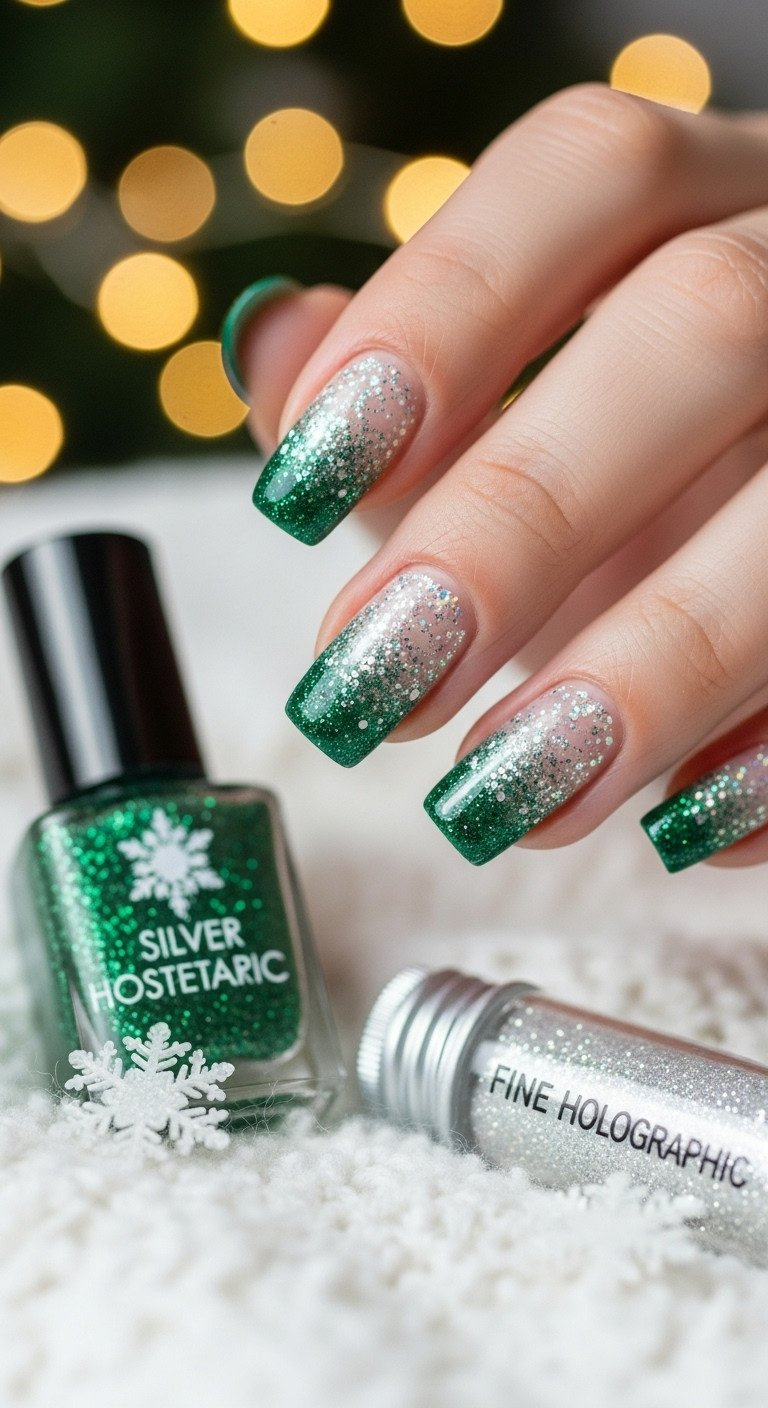
6. Whoville Snow and Glitter Gradient Effect
Pin this snow gradient technique for effortless sparkle!
Materials Needed:
- Cuticle Barrier Fluid (Liquid Latex): Critical for easy cleanup.
- Fine White and Holographic Silver Glitter: Powder or very small flakie size.
- Glitter Base Coat: A clear, thick builder gel or dedicated glitter encapsulation top coat.
- Fan Brush (Soft): For sweeping away excess glitter.
Step-by-Step Directions:
- Apply Cuticle Barrier Fluid around the entire nail perimeter and wait for it to dry (it should turn clear/opaque).
- Apply a thin layer of the Glitter Base Coat or builder gel to the nail tip only (top 1/3) and use a scooping motion to dip the nail tip into the Fine White and Holographic Silver Glitter.
- Gently tap off the excess glitter. Using a dry, clean detail brush, lightly drag the remaining wet gel layer down the nail toward the cuticle, dragging less glitter with it each time to create a smooth, fading gradient.
- Cure the nail fully. Gently peel off the Cuticle Barrier Fluid for instant, clean edges.
- Apply two layers of regular or hard gel top coat (curing between layers) to fully encapsulate the glitter, creating a smooth, durable surface.
Pro-Tip: Always use the foil wrap technique with acetone for glitter removal. Never pick or chip the glitter off, as this pulls layers of your natural nail off with it, leading to thinning and breakage.

7. Pro Tips for Crisp Black Outlines and Entity Definition
Pin this essential technique for smudge-proof line art!
Materials Needed:
- Liner Brush (Long/Short): Choose based on preference (short for small curves, long for straight lines).
- Highly Pigmented Gel Paint (Black): Must be a dedicated art gel/paint, not standard polish.
- Alcohol or Cleanser: For quick cleaning and thinning.
- Clean-Up Brush and Acetone: For erasing mistakes around the cuticle.
Step-by-Step Directions:
- Dip the liner brush into the Highly Pigmented Gel Paint, wiping off excess product on the palette so the brush tip is damp but not dripping.
- Anchor your working hand by resting your pinky finger on the table or against your non-working hand—this stabilizes your movements.
- Begin drawing the line by pressing the brush tip down gently and dragging it smoothly in one continuous movement, using the very tip for the thinnest line.
- Cure immediately after completing one feature (e.g., the mouth), especially if using gel. This “locks” the detail in place, preventing smearing if you need to adjust another part of the face.
- If paint smears onto the skin, dip the Clean-Up Brush into acetone and delicately wipe the errant color away before curing.
Lesson Learned: Never use standard nail polish for fine black outlines over a gel base; the viscosity is too thin, and it will often drag or wrinkle when you apply the final top coat. Always opt for dedicated, highly pigmented art paint.

8. Time-Saving Method: High-Quality Grinch Press-On Nails
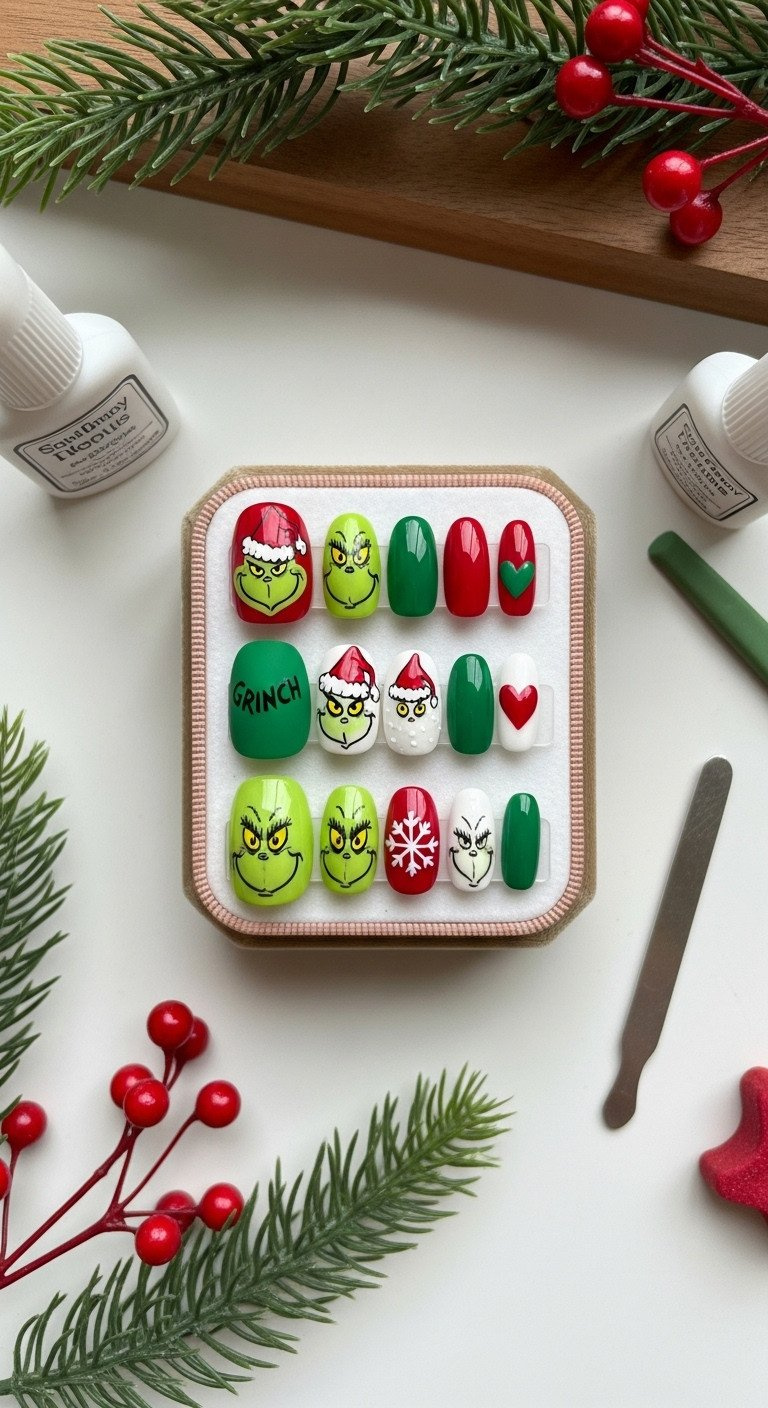
Get the look instantly! Pin this custom press-on idea.
Materials Needed:
- Custom-Made Grinch Press-On Set: High-quality, reusable set ordered to your nail size.
- Strong Nail Glue: Or adhesive tabs, depending on desired wear time.
- Nail Buffer and Dehydrator: For optimal nail prep before application.
- Cuticle Pusher and Trimmer: To prepare the nail bed properly.
Step-by-Step Directions:
- Start with clean, dry nails. Use the Cuticle Pusher to gently push back cuticles and lightly buff the surface of your natural nails with the Nail Buffer to create a grip texture.
- Apply a coat of Nail Dehydrator to ensure all oils are removed from the natural nail plate.
- Apply a small dot of Strong Nail Glue to your natural nail and a small bead to the back of the appropriately sized press-on nail.
- Align the press-on nail slightly above the cuticle line and press down firmly for 30 seconds, ensuring no air bubbles are trapped.
- Repeat the process for all ten nails, allowing 5-10 minutes for the glue to fully set before engaging in any activities involving water or chemicals.
Pro-Tip: When ordering custom press-ons, specify the Grinch design you want (e.g., Freehand Face, Max accent, 3D Heart) and send the artist your precise nail measurements for the most natural, comfortable fit.

9. Ensuring Grinch Nail Longevity and Chip Prevention
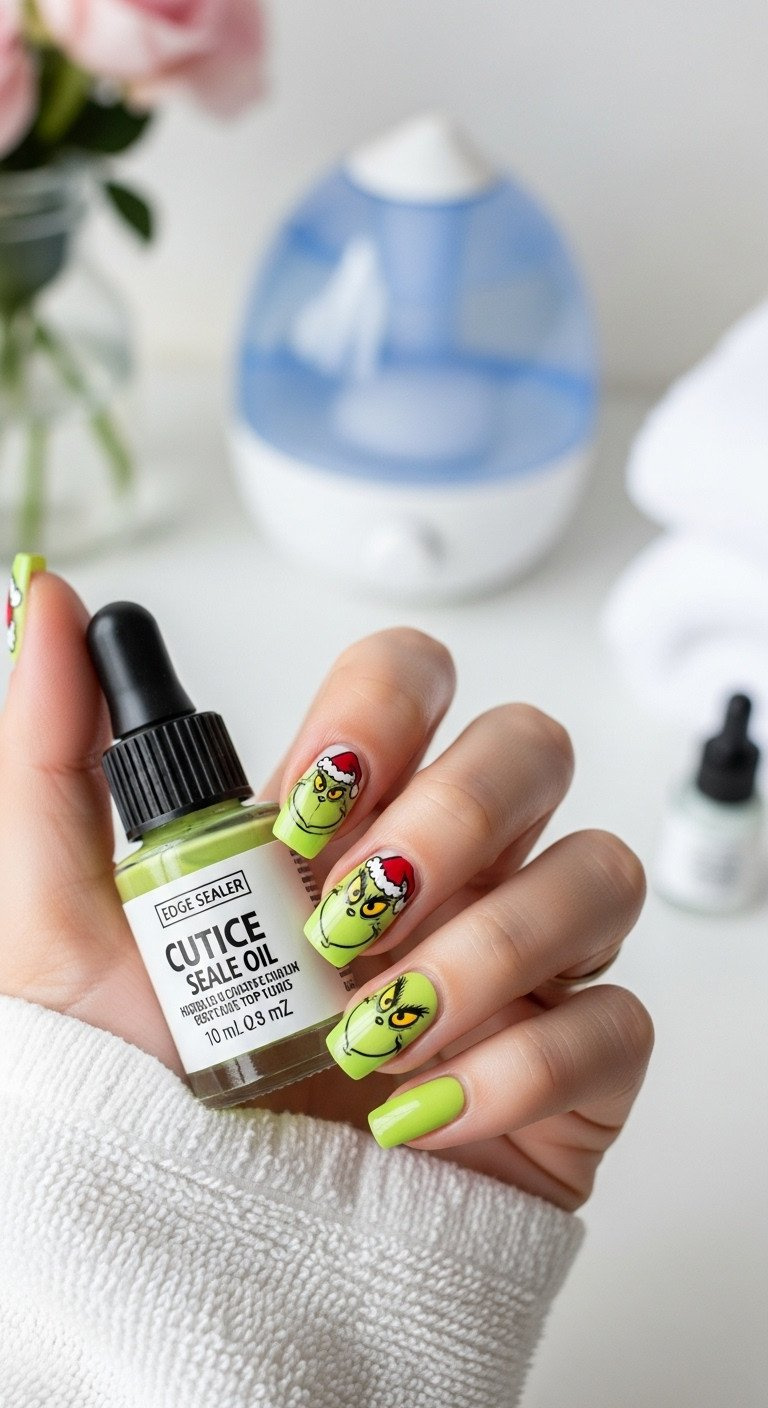
Pin these expert tips to make your holiday nails last!
Materials Needed:
- Nail Dehydrator and Primer: Essential for removing oil before application.
- High-Quality Base Coat: Gel or long-wear base coat compatible with your polish.
- Edge Sealing Top Coat: A final, thick top coat (preferably hard gel) to seal the free edge.
- Cuticle Oil: To hydrate surrounding skin and prevent lifting.
Step-by-Step Directions:
- Prep is Everything: Before applying any product, use the Nail Dehydrator and Primer over the entire nail plate, ensuring it’s free of all oils and debris.
- Cap the Free Edge: During every layer application (base coat, color, and especially the final top coat), swipe the brush horizontally across the very tip of your nail to seal the free edge. This prevents water penetration and chipping.
- Reinforce the Design: If your design is intricate or 3D, apply a thin layer of Edge Sealing Top Coat (or builder gel) over the entire nail to fully encapsulate the art before applying your final matte or glossy top coat.
- Hydrate Daily: Apply Cuticle Oil to the skin around your nail beds twice daily. While it seems counterintuitive, well-hydrated cuticles prevent the skin from pulling the polish away from the nail edge.
- Protect Your Art: Wear gloves when doing dishes, cleaning with chemicals, or gardening, as prolonged exposure to hot water or strong solvents will degrade the top coat and cause peeling.
Pro-Tip: If you notice a tiny chip starting at the tip, immediately file the chipped area smooth and apply a dab of your final top coat, sealing the edge again. Cure/dry completely to stop the chip from traveling.

Key Takeaways: Your Quick Guide to Grinch Nail Mastery
- Color Fidelity: The true Grinch Green is a chartreuse (yellow-lime) shade, not dark emerald. Always apply over an opaque white base coat for maximum visual pop.
- The Fur Effect: Use a matte non-wipe top coat and a dry stippling brush with slightly darker/lighter green paint to simulate the Grinch’s fuzzy fur texture, avoiding a flat, shiny look.
- Line Work Precision: Invest in a 000 detail brush and use highly pigmented gel paint for all black outlines. Stabilize your hand by resting your pinky on the table for ultra-crisp lines.
- Preventing Chips: Cap the free edge with every coat (base and color), and use a dedicated nail dehydrator/primer and a high-quality top coat for maximum durability through the holidays.
- Handling Glitter: When creating the Whoville snow effect, always use a liquid latex cuticle barrier and fully encapsulate the glitter under two thick layers of top coat to ensure a smooth finish and easy maintenance.
- Time-Saving Option: If short on time, consider ordering custom, reusable Grinch press-on nails that offer high-fidelity art without the 3-4 hour application time.
People Also Ask About Grinch Nail Application and Cost
How much should I expect to pay for professional Grinch nail art at a salon?
Professional Grinch nail art pricing is based heavily on the artist’s skill and time, not material cost. For intricate freehand work on one or two accent nails, expect to pay between $10–$25 per nail, in addition to the base manicure price. A full, complex set (all ten nails with different characters/scenes) typically runs $100–$200+ and takes 2.5 to 4 hours to complete.
Can I use acrylic paint instead of nail polish for the detailed Grinch face?
Yes, acrylic paint is often preferred by professional artists for detailed freehand work because it is opaque and dries instantly, allowing for quick layering and easier corrections than standard polish. However, acrylic paint must be applied over a dry layer and fully sealed with a thick, high-quality top coat (like gel top coat) to prevent it from washing or wearing off.
What are the biggest mistakes to avoid when attempting Grinch nail designs?
The two most common mistakes are scale/proportion and using a single flat color. Avoid making the face too large or disproportionate to the nail size, which leads to a crowded look. Secondly, avoid using a single, flat green; character art requires at least three shades of green (base, shadow, highlight) and a matte top coat to achieve dimension and the realistic, fuzzy fur texture.
Final Thoughts
The ultimate Grinch manicure is not just about the color green—it’s about mastering the technical details that translate the Grinch entity onto the nail canvas, from the crispness of his iconic sneer to the texture of his fur. By focusing on quality tools, layering techniques, and proper longevity preparation, you move past the realm of simple festive polish into expert-level character art. Now that you have the ultimate guide to color palettes and freehand techniques, which Grinch design—from the minimalist Max accent to the full 3D heart—will you be pinning and wearing this December 2025?
Last update on 2025-12-03 / Affiliate links / Images from Amazon Product Advertising API