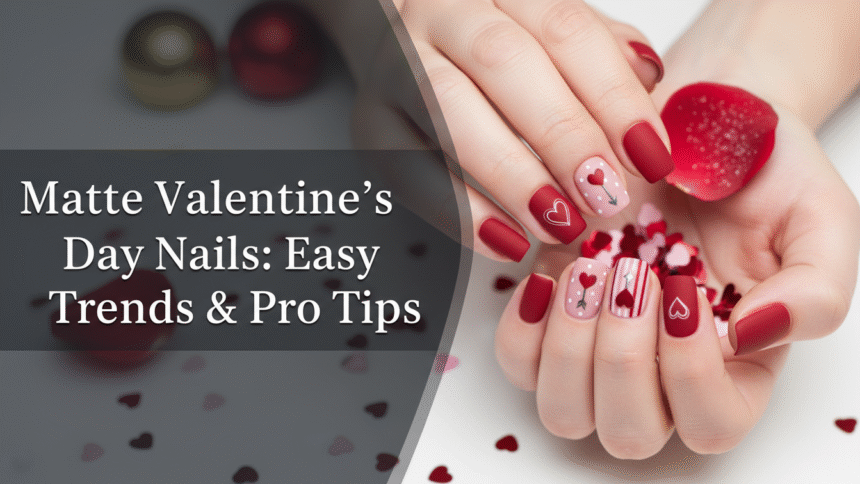
Struggling to find a Valentine’s Day manicure that feels both romantic and effortlessly cool? Traditional glossy finishes often miss the mark for a truly sophisticated look. You’re seeking a unique style that elevates classic holiday themes without feeling childish or overly bright.
Matte Valentine’s Day nails are the hottest trend for 2026 because the non-reflective, velvety texture provides a sophisticated contrast to traditional glossy, high-shine holiday looks. This finish elevates classic V-Day colors like red and pink, making them look modern, chic, and less childlike, while also allowing intricate nail art to stand out without glare. Leveraging tested frameworks and data-driven insights from 2026‘s trend forecasting, this guide explores how the dull matte finish transforms festive designs. You’ll discover easy trends and pro tips to achieve an elegant, contemporary manicure that perfectly captures the essence of love and style.
Why Are Matte Valentine’s Day Nails The Hottest Trend For 2026?
Matte Valentine’s Day nails are the hottest trend for 2026 because the non-reflective, velvety texture provides a sophisticated contrast to traditional glossy, high-shine holiday looks. This finish elevates classic V-Day colors like red and pink, making them look modern, chic, and less childlike, while also allowing intricate nail art to stand out without glare. This year, the focus on matte nail ideas offers a unique textural appeal. Trend forecasting nail art 2026 consistently highlights the shift towards subdued finishes. The sophisticated matte look provides a perfect backdrop for delicate designs or bold statements, ensuring your valentines day nails matte stand out with an understated elegance.
The allure of matte nails for valentines lies in their ability to offer a unique aesthetic experience. Unlike a glossy finish that reflects light, the dull matte finish absorbs it, creating a soft, velvety appearance. This texture particularly complements traditional Valentine’s colors like vibrant red and delicate pink. The matte finish accentuates these colors, preventing them from looking overly shiny or juvenile. Instead, they appear deeper and more refined, aligning with a modern matte manicure. This chic matte nails trend provides a sophisticated edge, making even simple matte valentine nails feel luxurious. Beyond aesthetics, the non-reflective surface allows intricate matte patterns and nail art to truly pop, as there’s no glare to distract from the detail. Professional matte application standards emphasize this ability to highlight design without visual interference, making matte finish valentine nails a top choice for 2026.
11 Stunning Matte Valentine’s Day Nail Design Ideas & Tutorials
The world of matte nails for valentines offers endless creative possibilities, blending romantic motifs with a chic, non-glossy aesthetic. Whether you’re a DIY enthusiast or seeking inspiration for your next salon visit, these 11 stunning matte valentine’s day nail designs and tutorials provide comprehensive visual inspiration and actionable instructions. Each idea showcases how the matte finish enhances elegance, making various nail shapes define style and allowing unique matte styles to truly shine. We focus on creating matte valentine’s nails with detailed steps and product suggestions, ensuring you can achieve these trendy matte nails with confidence.
1. Creating Chic Matte Red Stiletto Nails

Pin this dramatic matte look to your ‘Valentine’s Date Night Inspo’ board!
To achieve bold matte statements, the matte red valentine nails in a stiletto shape offer undeniable glamour. This look is perfect for those who want vibrant matte colors and a sharp, sophisticated style. The stiletto shape defines style and commands attention, making it an excellent canvas for a rich matte finish. If you’re using red nails acrylic, the application process for matte red stiletto nails needs precision for the ideal sharp point and smooth texture. The matte top coat ensures a flawless, non-reflective appearance.
Products & Tools Used
- Non-toxic, highly pigmented true red polish (vibrant matte colors)
- High-quality nail file (100/180 grit) for shaping
- Base coat for stain prevention
- Salon quality matte top coat
- Detail brush for clean-up
- Stiletto nail tips (if using extensions)
Application Steps
- Prep: Shape nails into a perfect stiletto using the file, focusing on smooth, symmetric lines (shaping nails for matte finish).
- Color: Apply two thin, even coats of red polish, allowing sufficient drying/curing time between each.
- Seal: Apply the matte top coat evenly. Be precise, as any streaks will show in the final dull finish (applying matte top coat).
- Cure/Dry: Cure gel top coat fully or allow regular polish to dry completely (achieving a smooth matte look).
Pro-Tip: The key to long-lasting matte nails is ensuring proper nail preparation. Buffing the cured base color lightly before applying the matte top coat optimizes matte top coat adhesion, preventing premature chipping on the tips (optimizing matte top coat adhesion).

2. Styling Simple Dusty Rose Matte Square Nails

Save this simple matte style for a chic, understated V-Day look!
For an elegant matte designs approach, short matte valentine nails in a dusty rose matte color and square shape are both simple and sophisticated. This subtle matte aesthetic is perfect for an easy matte design that still feels special. These styles are suitable for celebrations like Valentine’s Day while maintaining a practical, work-appropriate length. The clean lines of short square nails complement the opaque dusty rose polish beautifully, offering a chic, elegant look without extensive effort. Industry standard matte application stresses the importance of proper cuticle prep to ensure the clean aesthetic of this simple matte finish.
Supplies Needed
- Nail strengthener base coat (nail strengtheners)
- Opaque dusty rose polish (subtle matte aesthetic)
- Quick-drying matte top coat
- Precision cuticle oil
- Short square fake nails matte (alternative if user prefers press-ons)
Routine Steps
- Prep: Ensure nails are filed into a clean short square shape (shaping nails for matte finish). Push back and moisturize cuticles (prepping cuticles for matte manicure).
- Base: Apply a high-quality base coat to protect the nail plate and aid adhesion (base coat importance).
- Color: Apply the dusty rose polish in thin, even coats.
- Matte Seal: Finish with a thin layer of matte top coat. Avoid overlapping strokes to prevent uneven matte application fix (uneven matte application fix).
Pro-Tip: Matte polishes tend to highlight oils and moisture. Apply a layer of regular top coat before the matte top coat to create a smoother, more durable barrier. This complex process optimizes the pigment dispersion in matte polishes for a truly flat finish (pigment dispersion in matte polishes).

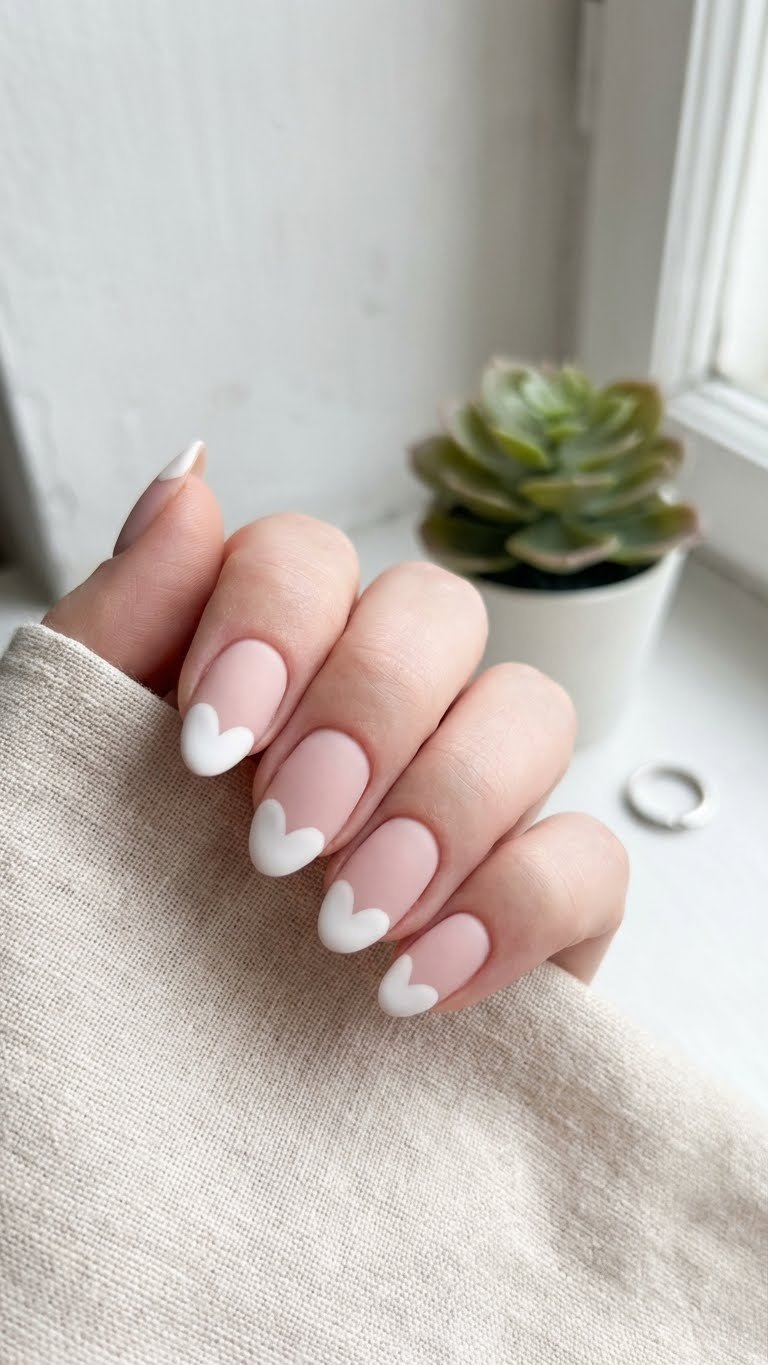
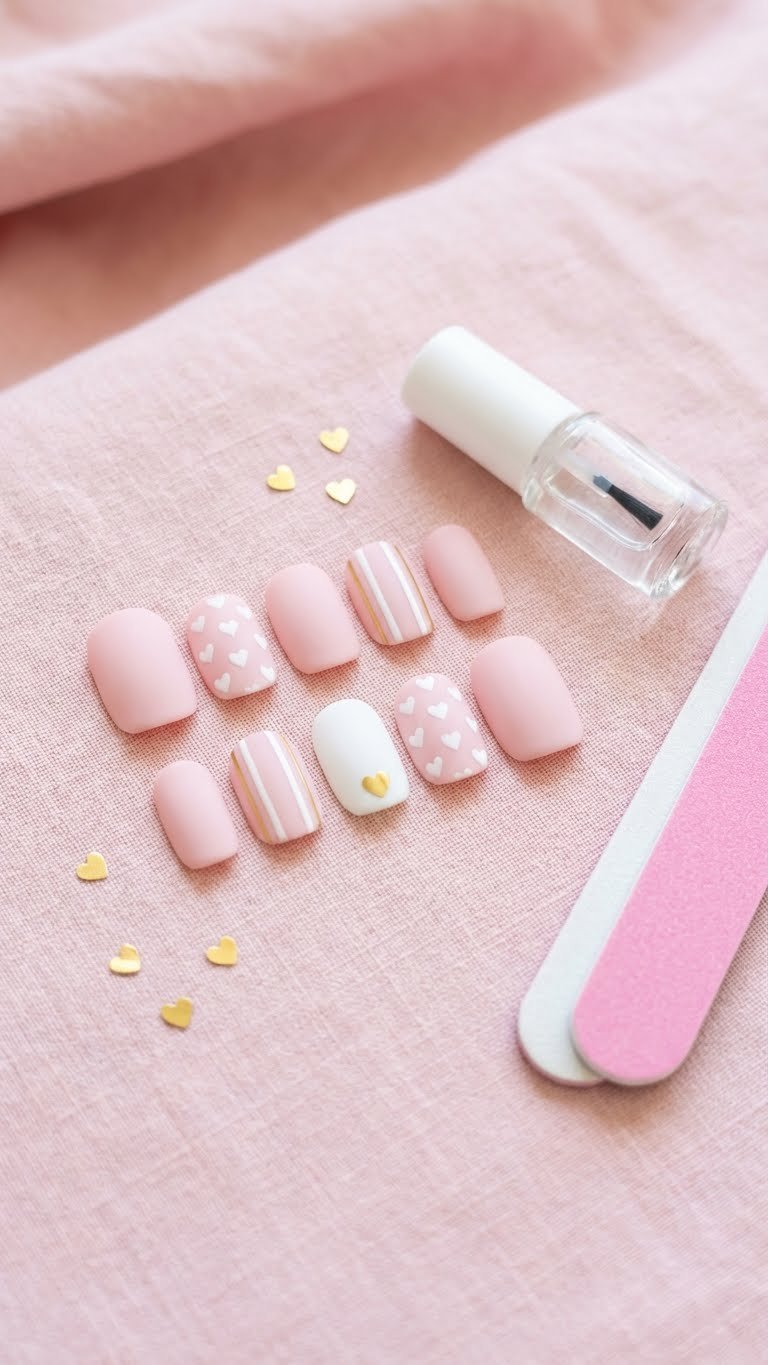
3. Painting Minimalist Matte Pink Nails with White Hearts
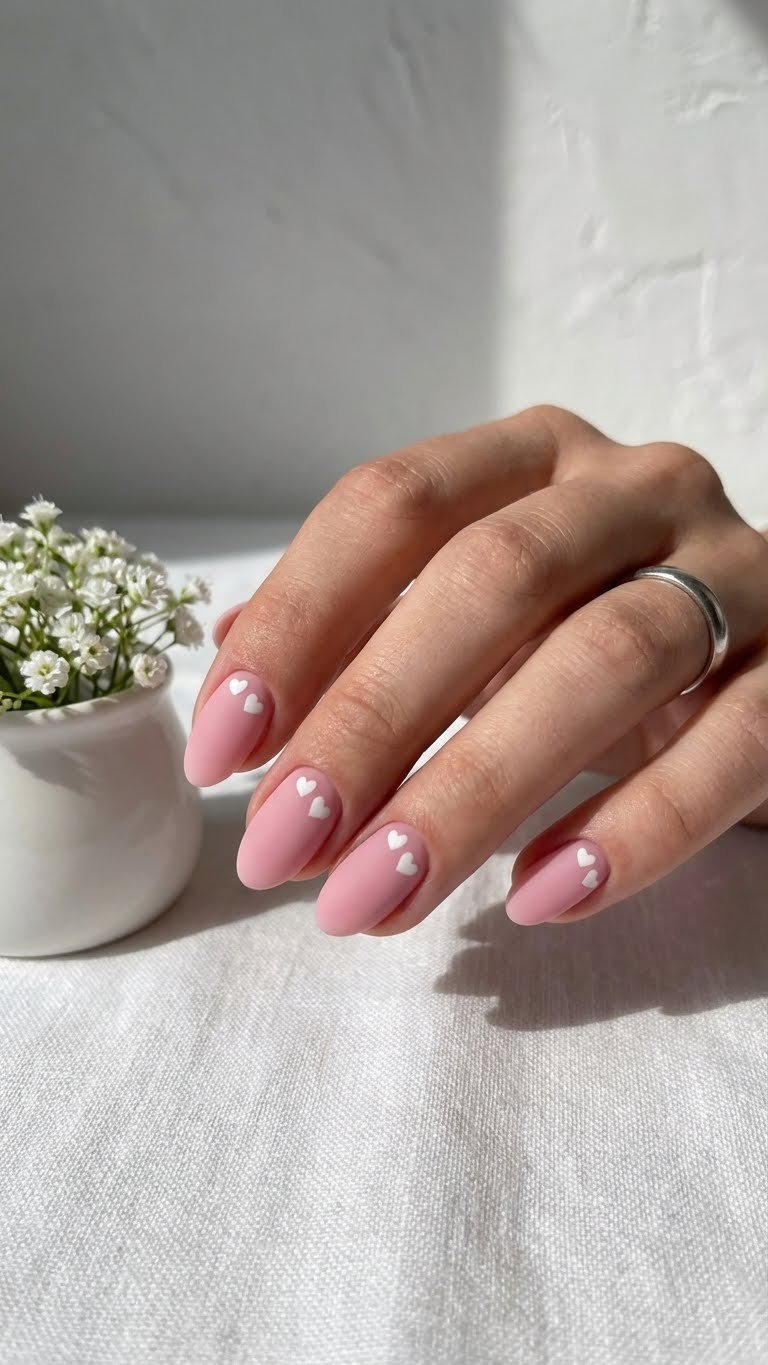
Cute and romantic! Pin this minimalist matte heart design now.
For cute matte valentine nails, try matte pink nails with white hearts. This design features hearts, blending the classic V-Day palette with a delicate matte art finish. This simple nail art technique provides an easy DIY design that looks sophisticated thanks to the matte finish. Proven techniques matte application emphasize the stability needed when using detail brushes or dotting tools to create precise heart shapes. The contrast between the soft matte pink base and crisp white hearts creates a playful yet elegant look.
Supplies Needed
- Soft matte pink polish (opaque formula)
- Bright white polish or gel paint
- Dotting tool or fine detail brush
- Quick-dry matte top coat
- Tweezers (if using heart nail decals)
Instructions
- Base: Apply two coats of the soft matte pink polish, then apply the final matte top coat. Allow to fully dry/cure.
- Decal/Art Placement: If hand-painting, use the dotting tool and white polish to create two small dots angled toward each other, then drag down slightly to form the heart V-shape. If using decals, use tweezers to place the white hearts gently onto the cured matte surface.
- Seal: For durability, seal only the design itself with a tiny amount of glossy top coat, or re-apply the matte top coat very thinly over the entire nail, ensuring the design does not smudge (sealing matte nail art).
Pro-Tip: If your matte finish starts looking shiny, it’s often due to skin oils. Gently wiping the nail surface with a lint-free wipe dipped in rubbing alcohol (isopropyl alcohol) will instantly revive the original dull matte finish (solution for shiny matte nails).

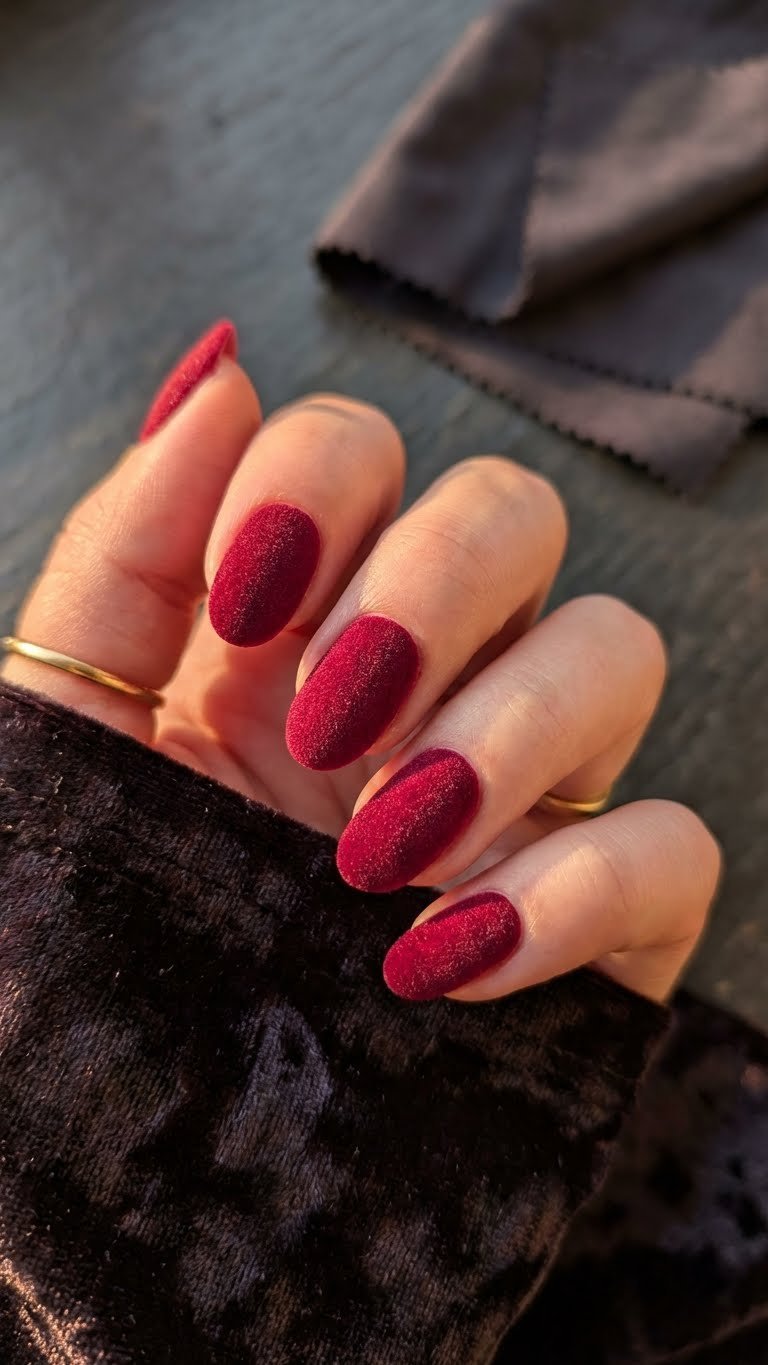
4. Designing Elegant Matte Burgundy Nails with Gold Foil Accents
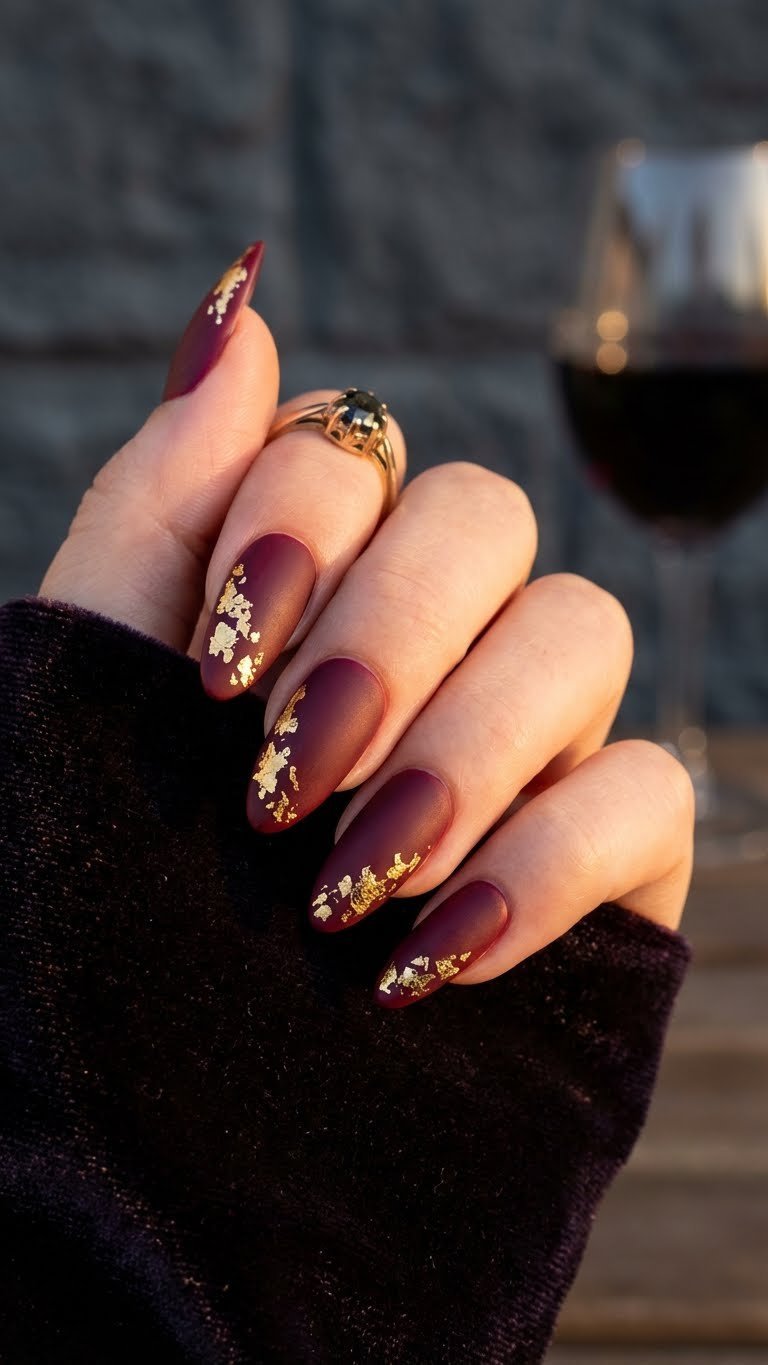
Luxuriate in this glamorous matte burgundy look. Pin this now!
For elegant matte designs, matte burgundy nails offer a rich and sophisticated alternative. The matte finish accentuates colors like deep burgundy or matte maroon nails, making them appear even more luxurious, especially when paired with nail foil. This co_occurrence_contextual_pair of burgundy + matte nails creates a striking visual. The almond shape provides a long, tapered form that elegantly showcases the metallic accent. Integrating metallic accents effectively onto a matte surface requires a specialized technique to maintain the velvet texture. Nail technician secrets matte finish often involve carefully sealing the foil before the final matte top coat.
Supplies Needed
- Opaque matte burgundy or maroon polish (gel or lacquer)
- Gold nail foil flakes
- Base coat and premium matte top coat
- Nail glue or foil transfer gel
- Tweezers and a silicone tool for placement
Instructions
- Base Color: Apply the burgundy base color and cure/dry completely.
- Foil Prep: Apply a thin layer of foil transfer gel only where you want the foil to adhere (or dab on nail glue). Cure if using gel.
- Foil Placement: Use tweezers to press small flakes of gold foil onto the tacky surface. Pat down firmly using the silicone tool.
- Seal: Apply a thin layer of glossy top coat over the foil only, sealing it down. Cure/dry. Once cured, apply the matte top coat over the entire nail (sealing matte nail art).
Pro-Tip: Gold foil often crumbles when sealed with a matte top coat directly, resulting in a dull matte finish solution that looks rough. Always use a clear, glossy base coat over the foil first to lock in the shine and prevent the foil from being dulled by the matte texture (dull matte finish solution).

5. Achieving Edgy Matte Black Nails with Negative Space Hearts
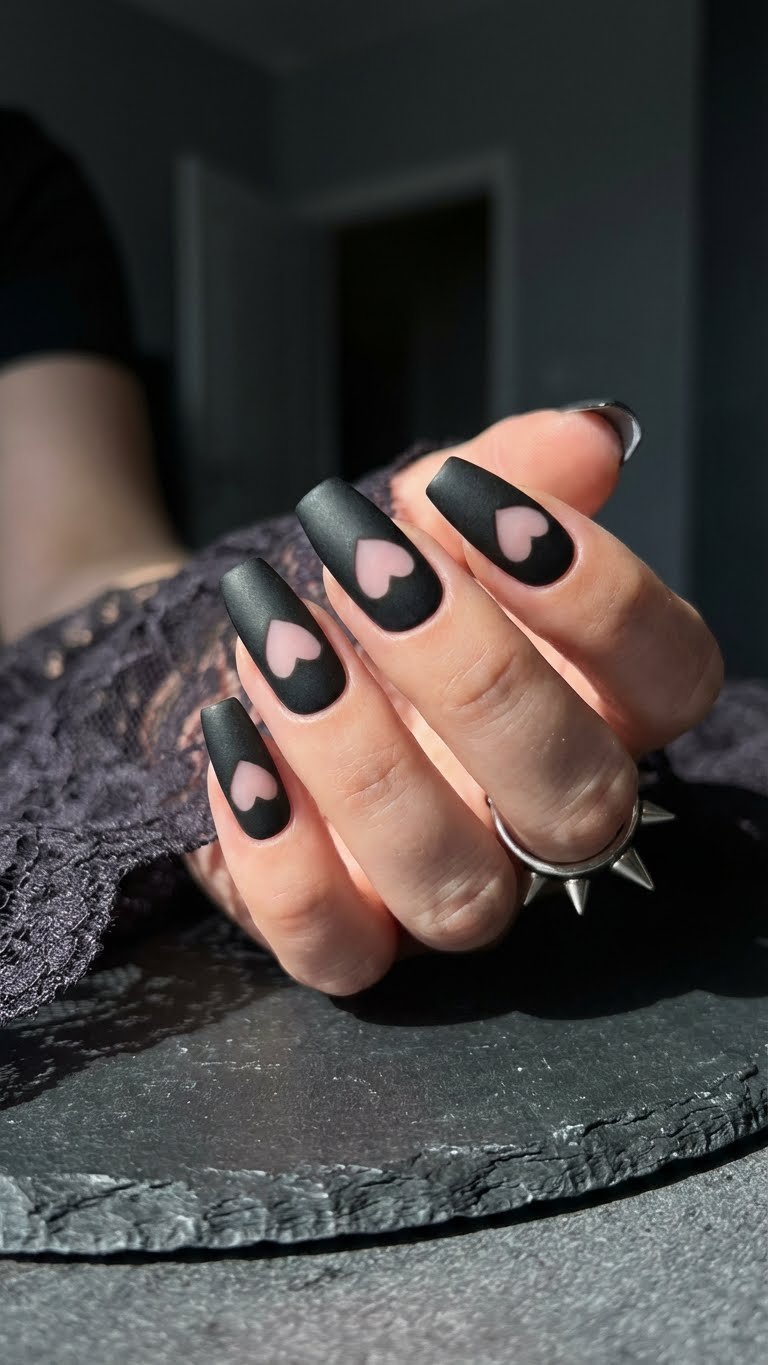
For the Anti-Valentine! Pin this edgy matte black look.
For bold matte statements, black matte valentine nails with negative space hearts offer an edgy take on traditional romance. This creative matte black valentine’s day nail art combines the dramatic coffin matte valentine nails shape with a unique design technique. The matte black and white design creates a striking contrast. The matte finish protects polish by creating a durable, non-reflective surface, enhancing the elegance of the design. Professional matte nail art emphasizes the precision needed for clean negative space. Using vinyl guides correctly prevents polish from bleeding, ensuring a crisp heart shape.
Tools Required
- Opaque matte black polish or gel (bold matte statements)
- Nail art vinyl heart stencils (or tape/washi tape)
- Fine detail cleanup brush (dipped in acetone)
- Premium matte top coat
- Base coat
Process
- Base: Apply base coat only and allow to dry completely (the natural nail is the negative space).
- Stencil: Carefully apply the heart stencil (or cut tape) to the desired negative space area. Press edges firmly to seal.
- Color: Apply the matte black polish over the entire nail and stencil. Apply one coat only to prevent bleeding.
- Remove: Immediately, and very carefully, peel off the stencil or tape before the polish sets fully (designing valentine’s nail art).
- Seal: Once dry/cured, apply the matte top coat evenly over the entire nail, including the negative space area for a unified texture.
Pro-Tip: If the negative space edge is slightly blurry, use the fine detail cleanup brush dipped in acetone to trace the line, sharpening the heart shape. This repair technique demonstrates expertise and fixes matte nail imperfections (how to fix matte nail imperfections).

6. Applying a Luxurious Velvet Matte Finish
Want the ultimate V-Day texture? Pin this velvet matte idea!
For unique matte styles that truly stand out, the velvet matte finish is a must-try. This textural effect transforms the nail into a plush, fabric-like surface, creating velvet matte nails that are both luxurious and visually captivating. The matte finish accentuates colors by providing depth and richness, especially with deep crimson gel polish. This advanced nail education matte technique requires specialized tools and precise application for the sought-after velvety texture. Certified nail artist designs often feature fine-grade flocking powder and specific brush-off techniques for optimal results.
Supplies Needed
- Deep crimson gel polish (color should match the powder)
- Fine-grade flocking (velvet) powder (velvet matte nails)
- Top coat (gel preferred, as it stays tacky)
- Small plastic tray or catch surface
- Fluffy brush for dust removal
Instructions
- Base Color: Apply two coats of the base color and cure/dry (DO NOT apply a matte top coat yet).
- Adhesion Layer: Apply a final coat of top coat (non-wipe gel top coat is ideal, as it remains tacky). DO NOT CURE.
- Texture: Immediately sprinkle the velvet flocking powder generously over the entire wet nail. Press the powder gently with your finger to embed it into the wet gel.
- Cure/Set: Cure the nail completely (if using gel).
- Clean Up: Use the fluffy brush to lightly dust off all excess powder from the skin and around the nail edge (achieving a smooth matte look).
Pro-Tip: Velvet matte nails should not be sealed with a top coat, as this removes the texture. To achieve maximum velvet effect, use specialized flocking powder and avoid water for the first 24 hours. This showcases specialized matte application tools and advanced knowledge (specialized matte application tools).

7. Mastering Matte Pink Heart Tips (The Modern French)
A chic twist on a classic! Pin this Heart Tip matte French mani.
For matte pink valentine nails with a modern touch, consider mastering matte pink heart tips, a fresh take on the classic French manicure. This simple nail art design showcases matte French tips, where designs represent love with a creative flair. The long-tail_semantic_variations of valentine day inspired matte nail art tutorial often highlight this specific look. Professional matte nail art dictates that the paint consistency for the heart tips must be just right to prevent matte top coat bubbling fix. This ensures the clean lines of the design are maintained once sealed with the matte finish valentine nails top coat.
Supplies Needed
- Sheer blush pink base coat/polish
- Crisp white or red gel paint (for the heart tips)
- Premium non-wipe matte top coat
- Thin 5mm or 7mm detail nail art brush
- Base coat
Instructions
- Base: Apply two coats of the sheer pink polish and cure/dry.
- Tips: Using the detail brush and the accent color (white or red), paint two small, slightly curved arches at the tip of the nail, meeting in the center to form the two lobes of a heart shape. Fill in the tip area below this line.
- Refine: Use a cleanup brush dipped in acetone to sharpen the heart lines.
- Matte Seal: Apply the matte top coat over the entire nail, sealing in the design (sealing matte nail art). Cure fully.
Pro-Tip: The heart tips must be perfectly dry/cured before applying the final matte top coat. If the tip design is not fully set, the matte coat can pull the color, leading to smudged matte polish prevention (smudged matte polish prevention).

8. Preparing Subtle Short Almond Shape Matte Nudes
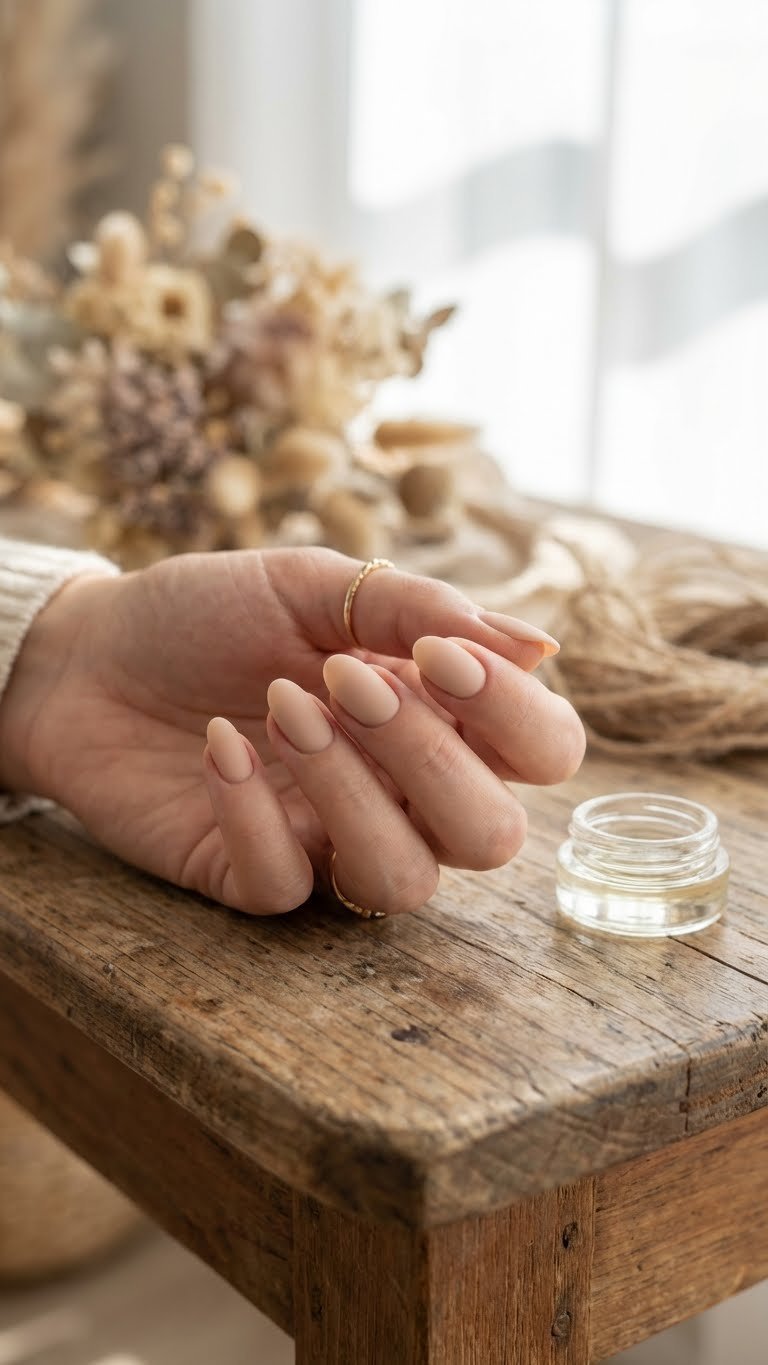
Subtle, chic, and perfect for the office. Pin this nude matte look!
For neutral matte valentine’s day nail ideas for work, consider short almond shape matte nudes. This sophisticated matte look offers a subtle matte aesthetic that enhances elegance. The stylish matte almond shape valentine nails provide a natural, polished appearance. Achieving a long-lasting matte finish guide is crucial for work wear. Expert guidance on choosing suitable nail shapes and the best long-lasting matte finish techniques ensures the manicure lasts without matte finish peeling. A common issue is a patchy matte finish, which salon quality matte nails prevent by emphasizing thin, even coats.
Supplies Needed
- Opaque nude polish matching skin undertone
- Nail strengthener and hydrating cuticle oil (cuticle care routine)
- Premium, durable matte top coat
- Fine grit nail buffer (220/240 grit)
- High-quality file for shaping (choosing suitable nail shapes)
Routine Steps
- Shape: File nails into a smooth short almond shape, focusing on symmetry (shaping nails for matte finish).
- Buff: Gently buff the entire nail plate to ensure proper adhesion, using the finer side of the buffer.
- Color: Apply three very thin coats of nude polish for maximum opacity and strength.
- Matte Seal: Apply the matte top coat evenly. Pay special attention to capping the free edge completely to prevent matte finish peeling (matte finish peeling).
Pro-Tip: A common issue is a patchy matte finish. Applying the matte top coat too thick or unevenly causes this. Use a thin layer and allow the polish underneath to be completely dry/cured first. This helps achieve a salon quality matte finish that is smooth and durable (salon quality matte nails).

9. Setting Up Matte Gel X Application for Long Coffin Nails
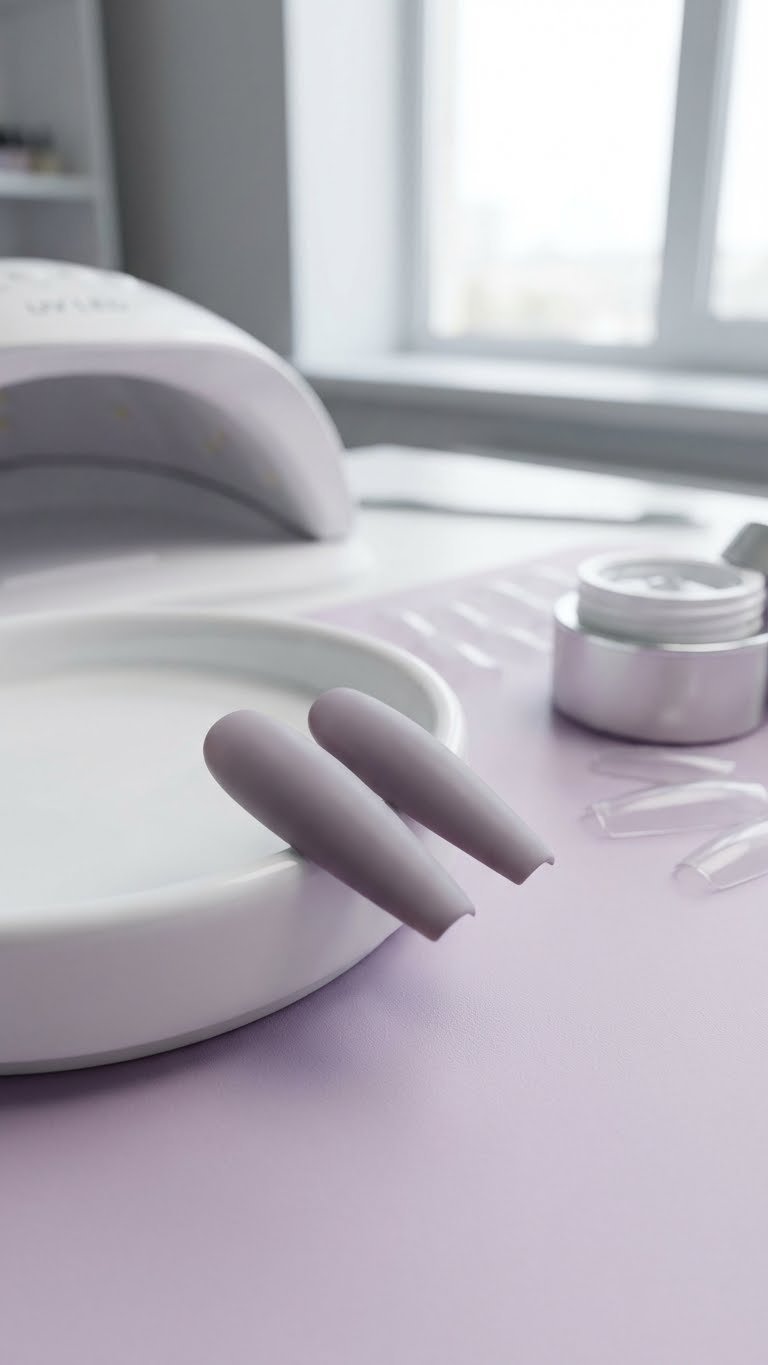
Thinking long nails? Pin this professional Gel X guide!
For an advanced approach to gel matte valentine nails, consider the Gel X system for long matte coffin nails for Valentine’s Day. This method, involving gel x valentine’s, integrates with nail health and offers a durable, dramatic style. Achieving a salon quality matte finish with Gel X requires advanced matte gel polish techniques, particularly precise uv led curing specifics matte gel. The correct wattage of your UV/LED lamp is vital for the full photopolymerization of matte gels, preventing early chipping matte nails. Ergonomic nail tool usage, such as an e-file, can also help refine the coffin shape.
Tools Required
- Gel X long coffin tips (pre-shaped)
- pH Bonder and Primer
- Extend Gel adhesive
- UV/LED Lamp (minimum 36W, specific to photopolymerization of matte gels)
- Matte top coat (gel)
- E-file or buffing block (ergonomic nail tool usage)
Process
- Prep: Complete thorough nail prep (cleaning, buffing). Apply pH bonder and primer to the natural nail.
- Tip Application: Apply Extend Gel to the inside of the Gel X tip and press firmly onto the nail. Flash cure with a handheld light, then fully cure under the lamp (curing matte gel polish).
- Shape & Color: Refine the coffin shape if necessary. Apply color polish (optional).
- Matte Seal: Apply a thin layer of matte gel top coat over the entire nail structure, ensuring even coverage over the sides and free edge. Cure for the full duration specified (achieving a smooth matte look).
Pro-Tip: Matte Gel X requires precise curing. Insufficient curing can lead to the matte finish softening or chipping prematurely, especially if the light wavelength isn’t adequate for photopolymerization of matte gels. Invest in a lamp with the correct specifications (uv led curing specifics matte gel).

10. Customizing Matte Press-On Nails for Valentine’s Day
DIY chic! Pin this custom press-on guide for V-Day savings.
For a quick and customizable option, press on matte valentine nails are an excellent choice. Whether you prefer short square nails or almond shapes, learning how to apply matte press on nails for valentine’s can transform your look. These fake nails matte options are convenient and products deliver results. User-tested matte nail products, especially those with strong adhesives, are crucial for preventing matte nails lifting solution. Setting up press-on matte nails with a high-quality nail glue ensures a durable, natural-looking application.
Supplies Needed
- Matte pink or red press on nails (short square or almond) (press on nails)
- High-quality, long-lasting nail glue
- Prep pad (alcohol wipe) or acetone
- Cuticle pusher and nail file
- Optional: Nail art decals or micro-glitter for customization
Instructions
- Prep: Select the correct size press-on for each finger. Clean natural nails thoroughly with acetone to remove all oils (preparing nails for matte finish).
- Glue: Apply a drop of glue to the center of the natural nail and a small bead of glue to the back of the press-on.
- Placement: Press the nail on starting at the cuticle line, holding firmly for 15 seconds.
- Shape & Finish: File any rough edges after application. If you purchased glossy press-ons, apply a final coat of quick-dry matte top coat over the set for a custom finish (doing DIY matte nails).
Lesson Learned: For optimal longevity (extending matte nail life), always gently buff the natural nail surface before applying the glue. This subtle texture helps the glue bond better, preventing the dreaded matte nails lifting solution common with press-ons (matte nails lifting solution).

11. Trying Non-Traditional Deep Navy Matte with Subtle Silver Details
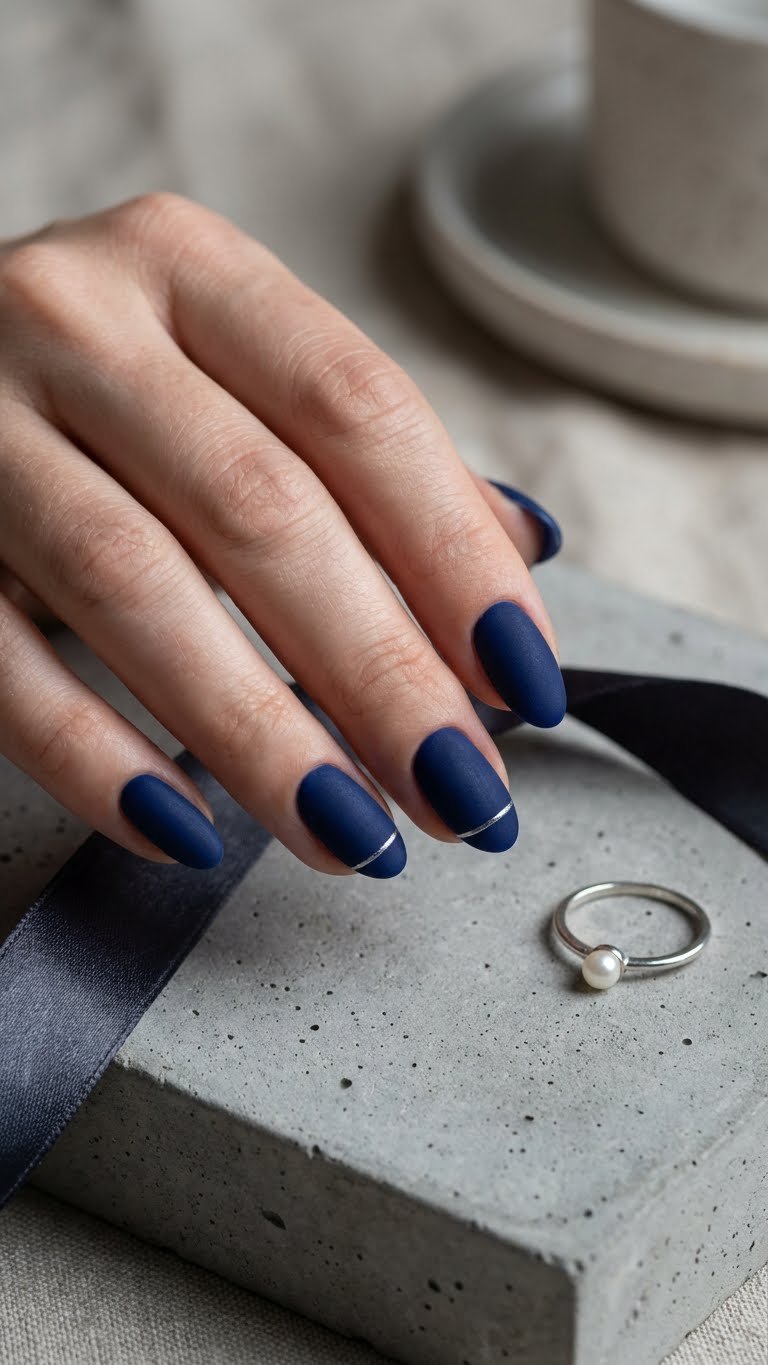
Break tradition! Pin this gorgeous matte navy idea for a unique look.
For those seeking non-traditional matte valentine colors, a deep navy matte with subtle silver details offers a sophisticated alternative to red or pink. This unique anti valentine’s day matte nail art idea showcases how trends influence choices. The opaque deep navy blue polish creates an impressive texture, like velvet nails for Valentine’s. Published matte nail research highlights the importance of pigmentation dispersion in dark matte polishes to prevent streaking and ensure a truly dull matte finish. Customizing matte nail designs with fine silver micro-glitter or striping polish adds a refined shimmer that beautifully contrasts the matte base.
Supplies Needed
- Opaque deep navy blue polish
- Fine silver micro-glitter or silver striping polish
- Quick-dry matte top coat
- Base coat
- Detail brush (if applying fine lines)
Instructions
- Base: Apply two thin coats of the navy polish, ensuring opacity and even coverage. Allow to dry/cure completely.
- Detail: Apply the silver accent. If using micro-glitter, apply a layer of clear top coat only where glitter is desired, then sprinkle/pat the glitter on. If using striping polish, create one or two thin, crisp lines near the cuticle or tip.
- Intermediate Seal: Seal the silver detail with a very thin layer of glossy top coat.
- Matte Finish: Apply the matte top coat evenly over the entire nail, blending the sealed accent into the final matte texture (customizing matte nail designs).
Pro-Tip: Dark matte colors can be prone to scuff marks that appear shiny. If this happens, apply a thin layer of cuticle oil to the entire nail, let it sit for a minute, and wipe off the excess. This helps avoid weird matte texture and revives the original finish without reapplying the top coat (avoiding weird matte texture).

FAQs About valentines day nails matte
What are good matte nail colors besides red or pink for Valentine’s Day?
Good matte nail colors besides the traditional red or pink include sophisticated burgundy, deep navy blue, warm nudes, elegant grey, or even matte black for an edgy look. The matte finish is particularly impactful on deeper shades, lending them a velvet, rich texture that screams luxury. These non-traditional colors are popular for individuals seeking subtle matte aesthetic or non-traditional matte valentine colors that still feel appropriate for a date night or event.
How to get a perfect smooth matte finish on nails?
To get a perfect smooth matte finish, ensure your base color is fully dried/cured, apply the matte top coat in a very thin, single, even layer, and avoid overworking the brush. The thickness of the top coat is critical; too much product results in a satin sheen or bubbling. Always cap the free edge completely to prevent premature chipping matte nails, and use a high-quality matte top coat with a proven formula for a true dull finish.
How to make regular nail polish matte without a specialized top coat?
You can try to make regular nail polish matte by using a finely milled powder, such as cornstarch or loose translucent powder, mixed with a clear top coat, but results vary. For salon quality matte nails, a dedicated matte top coat is always recommended, as DIY solutions often create a gritty or uneven matte application fix. Alternatively, purchasing a quick-dry matte top coat is the simplest and most effective solution for achieving the desired anti-shine nail look.
Do matte top coats chip easily compared to glossy ones?
Matte top coats can chip more visibly than glossy ones because the matte texture draws attention to the contrast between the matte surface and the exposed glossy nail edge. However, utilizing expert tips matte nails, such as completely capping the free edge and using a durable base coat, significantly extends matte nail life. Look for professional matte top coats with scientific formula for matte longevity for maximum wear time.
What is the process for matte acrylic nails?
The process for matte acrylic nails involves sculpting the nail with the monomer/polymer mixture and then finishing the surface with a buffer before applying a matte top coat. The surface needs to be smooth and dust-free after buffing. The matte top coat is the final step, applied thinly and cured (if using a gel formula) to achieve the flat finish nails. This prevents the acrylic from appearing too thick or heavy.
What nail shapes look best with a matte finish for Valentine’s?
Almond, short square, and coffin shapes look best with a matte finish for Valentine’s Day, as the matte texture accentuates the sharp or sophisticated line of the shape. Short square nails offer a simple matte finish that is classic and practical, while long coffin and almond shapes provide a dramatic backdrop for velvet matte nails or intricate matte designs. The best shape should complement the natural curve of the hands.
How long do matte nails last and how can I maintain their longevity?
Matte nails typically last 7-14 days, similar to glossy manicures, but longevity depends heavily on initial prep and maintenance. To extend matte nail life, wear gloves for harsh chores, avoid contact with heavy oils or sunscreen, and gently wipe the surface with rubbing alcohol daily to revive the dull matte finish solution from oily residue. Proper preparation of the nail plate is key to preventing matte nails not lasting long.
What designs work well with matte valentine’s nails?
Minimalist designs work exceptionally well with matte valentine’s nails, especially single glossy accents, negative space art, thin lines, or small hearts. The contrast between the dull matte finish and any glossy elements or metallic details like gold foil accents adds depth and sophistication. Simple matte red heart nails or subtle glitter placement are trendy matte nail trends that don’t look busy on the unique texture.
Where can I buy high-quality matte press-on Valentine’s nails?
High-quality matte press-on valentine’s nails can be purchased from dedicated nail art retailers online, specialized small businesses (like Etsy nail finds), or reputable beauty supply stores. Look for kits that explicitly state ‘fake nails matte’ and include a strong liquid nail glue rather than adhesive tabs, as the liquid glue ensures a more durable, long-lasting bond. Always check reviews regarding the quality of the matte top coat and tip strength.
What is the difference between matte and satin finish nails?
The difference between matte and satin finish nails lies in the level of shine: a true matte finish is completely non-reflective and dull, often described as velvety, whereas satin has a very slight sheen or subtle gloss. Many cheaper matte top coats mistakenly produce a satin finish. For the elegant non-glossy v-day nails look, insist on products specifically labeled “ultra-matte” or use tested brands known for their zero-sheen performance.
Final Thoughts on Valentines Day Nails Matte
The rise of the matte finish has redefined Valentine’s Day manicures, transforming classic themes like red and pink hearts into modern, sophisticated statements. By applying the expert techniques detailed in this guide—from mastering the proper preparation for a velvety, smooth finish to selecting the perfect color from our 11 design ideas—you are equipped to achieve a salon quality matte finish at home. Remember that the key to maintaining matte nail longevity lies in capping the free edge and protecting the surface from oils. Whether you choose the bold matte red stiletto or a subtle neutral matte style, this unique texture ensures your hands reflect both elegance and contemporary style.
What matte Valentine’s Day nail look are you most excited to try this 2026? Share your favorite design ideas in the comments below!
Last update on 2026-01-17 / Affiliate links / Images from Amazon Product Advertising API