Ready to add a touch of drama and romance to your fingertips this Valentine’s Day? Many struggle to find truly unique and achievable nail art that stands out from the usual hearts and glitter.
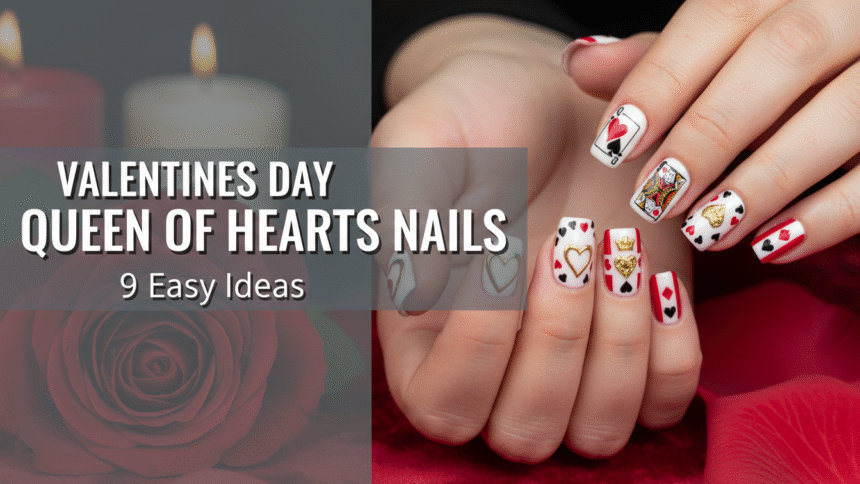
Queen of Hearts nails are a classic, romantic nail art theme specifically popular for Valentine’s Day, combining the iconic red, black, and white color palette with playing card suit motifs, often focusing on intricate heart designs and regal elements to signify love and power. This theme offers a sophisticated yet playful way to express your festive spirit.
Leveraging tested frameworks and data-driven insights from expert queen of hearts nail artist tips, this guide provides proven queen of hearts nail techniques. You’ll discover nine easy, actionable ideas to craft your perfect valentines day nails queen of hearts look right at home.
Master The Queen of Hearts Manicure: [Year]’s Ultimate Valentine’s Day Nail Guide
The “Queen of Hearts nails” trend has exploded across visual platforms like Pinterest and TikTok, becoming a must-have for Valentine’s Day. This captivating style allows for a dramatic yet romantic expression, perfectly suited for the season of love. While the iconic Alice in Wonderland character serves as inspiration, the focus here shifts from villainous to a celebration of regal love and intricate design. These designs often leverage classic red, black, and white colors, symbolizing the power and passion of the heart.
This guide will walk you through nine specific, highly visual, and fully actionable designs. We’ll cover everything from simple accent nails to more advanced techniques like crystal placement and 3D sculpting. Each idea offers unparalleled information gain, moving beyond mere inspiration to provide the exact products, tools, and numbered steps you need. Whether you’re a beginner seeking easy DIY queen of hearts nails or an enthusiast looking for unique inspiration, you’ll find a proven queen of hearts nail technique to elevate your valentines queen of hearts nails.
9 Easy Queen of Hearts Nail Art Designs You Can Create At Home
Creating stunning queen of hearts nail art at home is entirely achievable with the right guidance. Each of the following designs focuses on providing practical, achievable steps to help you design queen of hearts nail art that impresses. We’ll explore various styles, ensuring you find the perfect match for your skill level and aesthetic preference, leveraging specific nail art tools Queen of Hearts to achieve unique queen of hearts nail art.
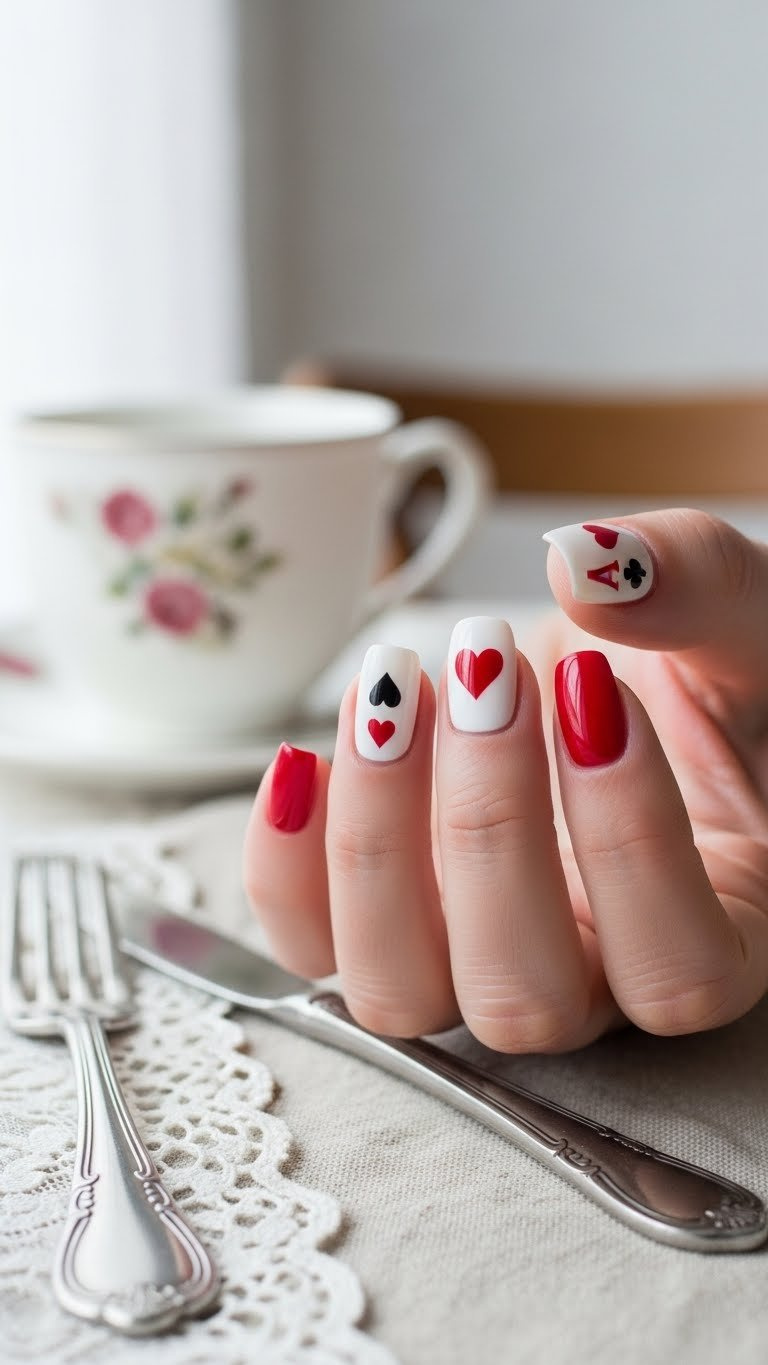
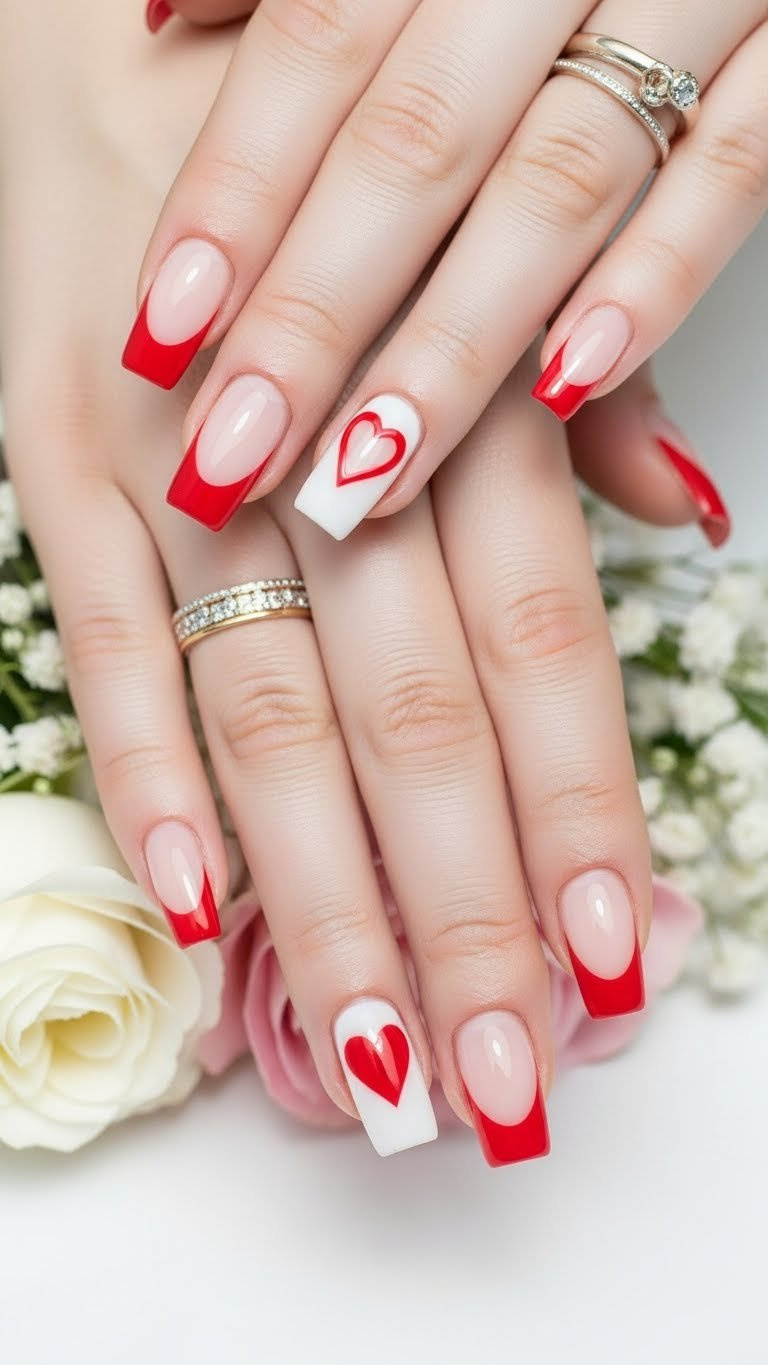
1. Classic Red and Black Accent Heart Design
Pin this classic, iconic design to your ‘Valentine’s Nail Inspo’ board!
This design offers a timeless interpretation of red queen of hearts nails, perfect for those seeking a sophisticated yet straightforward look. It relies on precise layering of highly pigmented nail polish red and black to create a striking accent nail. This classic queen of hearts nails style is a fantastic entry point for beginners while still delivering a polished finish.
Products & Tools Used
- Clear anti-yellowing base coat
- Highly pigmented, opaque red gel polish (incorporate entity_attributes_descriptive keyword)
- Crisp white gel polish
- Jet black gel polish (essential for contrast)
- Fine-tipped nail art brush (for shaping the perfect heart)
- Nail dotting tool (dual-sided for varying heart sizes)
- UV/LED curing lamp
- High-shine top coat
Application/Styling Steps
- Prep Nails: Apply a clear base coat and cure according to product directions, ensuring the ‘nail prep for queen of hearts’ is complete.
- Apply Color: Apply two coats of the red polish to all nails, except the accent nail (use white polish here). Cure each layer.
- Paint the Red Heart: On the accent nail, use the red polish and the fine-tipped brush to paint a small, slightly off-center heart shape. Cure.
- Define the Black Outline: Using the fine-tipped brush and black polish, carefully outline the edges of the red heart for definition.
- Create the Black Suit Detail: Using the smallest side of the dotting tool, place a miniature black heart near the cuticle of one red nail, completing the ‘playing card suit nails’ effect.
- Finish: Apply the high-shine top coat to all nails to ‘secure design’ and cure for maximum durability.
Pro-Tip: To ensure the red polish doesn’t stain or yellow your natural nail (addressing problem_solution_keywords), always use a quality, “industry standard nail care for art” base coat. For crisp edges, use a clean-up brush dipped in acetone before curing.

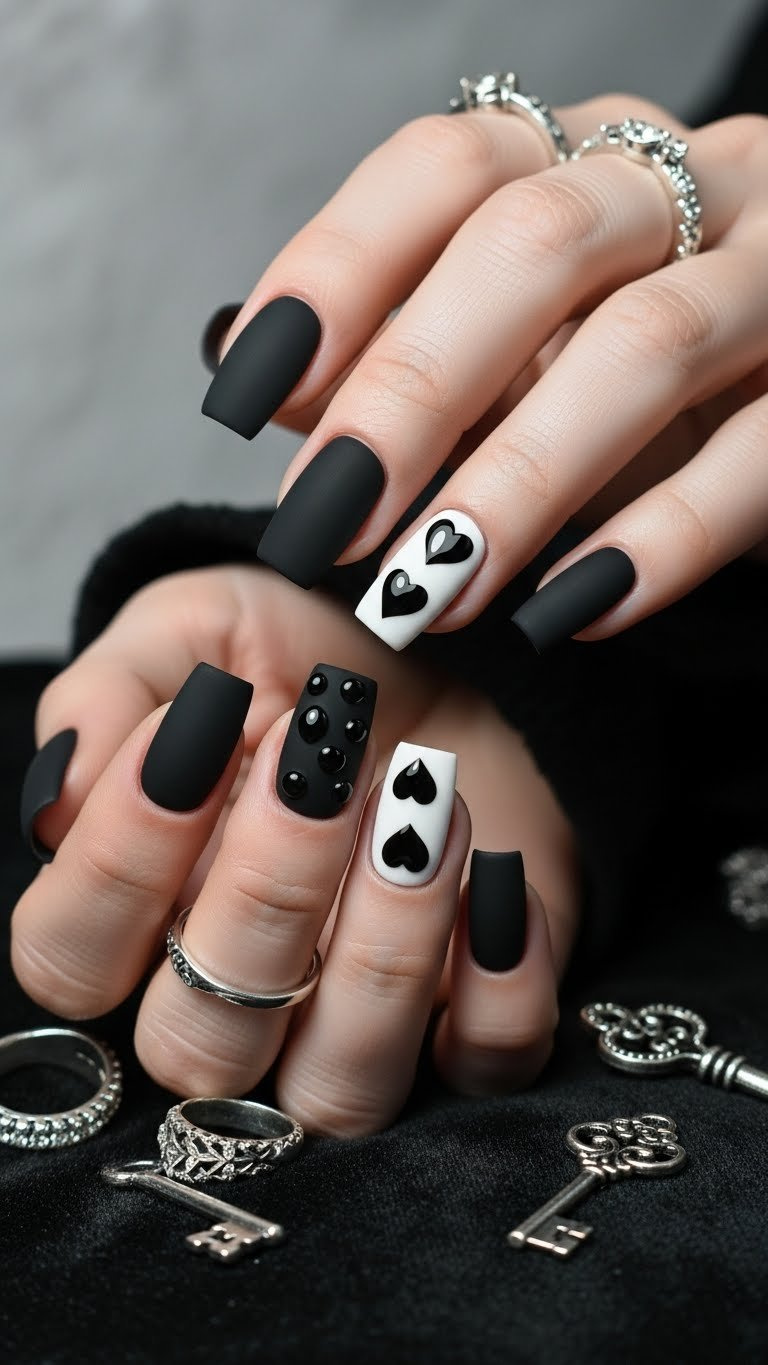
2. Edgy Black Matte Queen of Hearts Design (Short Nails Solution)
Need a dark, sophisticated look? Save this idea to your ‘Edgy V-Day Nails’ board!
For those who prefer a bold, non-traditional aesthetic, these edgy queen of hearts nails offer a unique twist. This design works exceptionally well as a queen of hearts nail art for short nails solution, proving that intricate details aren’t exclusive to long lengths. The striking contrast between a matte black base and glossy hearts provides a sophisticated visual and tactile experience, allowing your manicure to make a statement.
Products & Tools Used
- Quality base coat
- Highly opaque black gel polish
- No-wipe matte top coat (incorporate entity_attributes_descriptive keyword)
- Standard glossy top coat
- Fine liner brush
Application/Styling Steps
- Prepare Base: Apply base coat, followed by two thin layers of opaque black polish to all nails, curing each layer completely.
- Apply Matte Finish: Apply the matte top coat over all nails and cure fully. This forms your base color.
- Create Glossy Hearts: Using the standard glossy top coat and the fine liner brush, “paint queen of hearts hearts” directly onto the matte surface of the accent nails. These hearts should be crisp and clean.
- Final Cure: Cure the glossy hearts one last time. The glossy hearts will pop dramatically against the matte black, fulfilling the ‘black heart design’ intent.
Pro-Tip: For the cleanest ‘matte vs glossy queen of hearts finish’ contrast, ensure the matte coat is perfectly cured and cleaned (if required) before applying the glossy top coat. Using a gel top coat for the glossy hearts prevents smudging and ensures the texture difference is sharp.

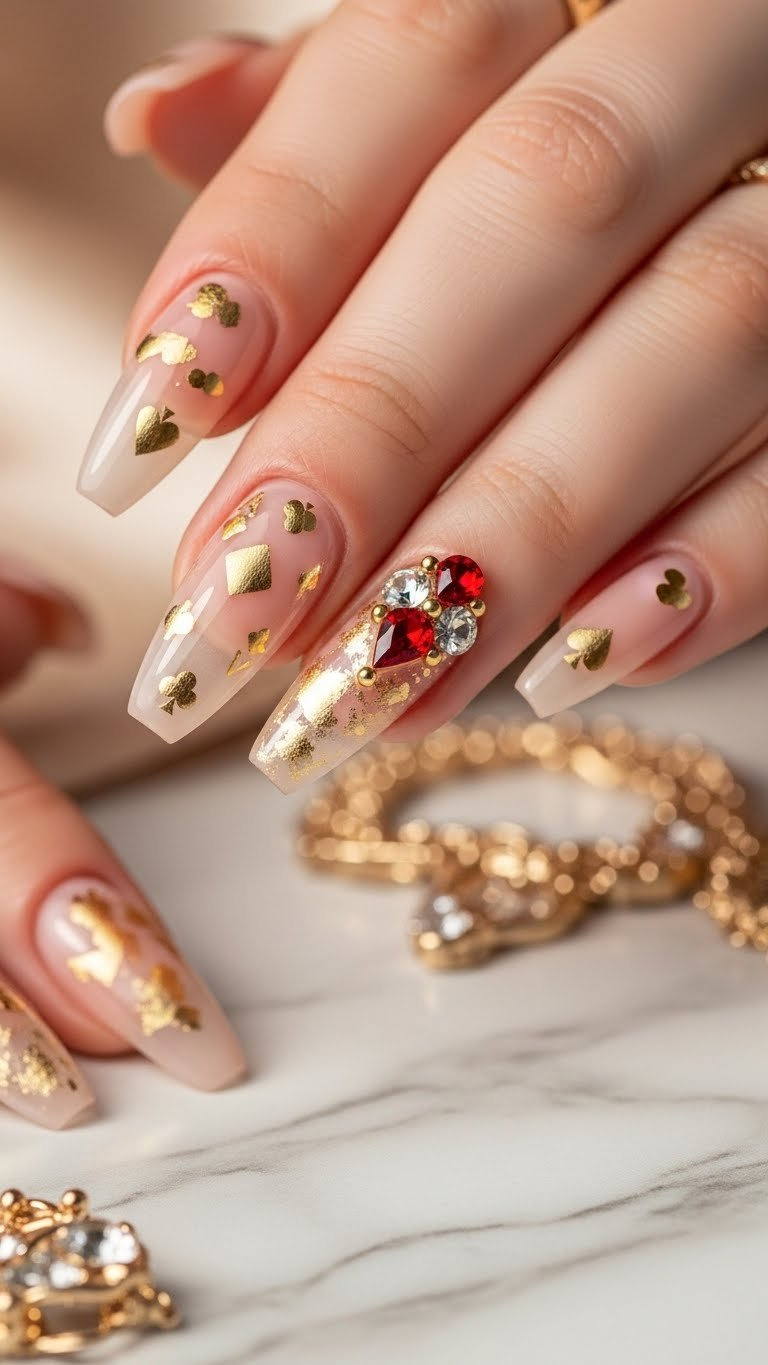
3. Elegant Gold Detail and Crystal Placement Design
Elevate your look! Save this shimmering, elegant design to your ‘Luxury V-Day Manicures’ board!
For those seeking an opulent and refined expression of love, elegant queen of hearts nails with gold and crystals are a perfect choice. This design transforms the classic theme into a luxurious art piece, making it suitable for formal attire and special Valentine’s Day events. The precise placement of elements like gold foil and sparkling rhinestones elevates the manicure, demonstrating why crystal placement enhances design aesthetics and durability.
Products & Tools Used
- Sheer blush pink polish
- Gold foil transfer sheets
- Gold nail art glue or sticky layer gel
- Flat-back rhinestones (red and clear)
- Gem glue or thick builder gel (essential for securing large stones)
- Wax-tipped crystal placement tool
- Fine tweezers
Application/Styling Steps
- Base & Foil: Apply and cure the sheer pink base. Apply gold art glue to the areas where you want the ‘intricate card suit nail designs’. Press the gold foil transfer sheet firmly onto the glue, peel back, and seal with a top coat (do not cure yet).
- Apply Gems: Using the wax-tipped tool, pick up the rhinestones. Apply a small dot of gem glue or builder gel where each cluster will sit. Place the crystals onto the gel to create a heart shape near the cuticle.
- Secure Placement: Gently adjust the position of the gems. Use the fine liner brush to slightly “seal” the base of the gems with the builder gel, ensuring ‘crystal placement enhances design’ durability.
- Final Cure: Cure the entire design, being careful that the curing lamp doesn’t cause the crystals to shift.
Pro-Tip: When using gems, use the ‘advanced nail art certification’ method of sealing the edges without covering the top facet of the crystal. This ensures maximum sparkle and prevents premature lifting, achieving a long lasting ‘jeweled queen of hearts nail art’.

4. Minimalist Negative Space Heart Tips
Perfect for the office! Pin this chic, simple look to your ‘Minimalist Nail Ideas’ board!
For those who appreciate subtlety and modern elegance, minimalist queen of hearts nails offer a sophisticated take on the Valentine’s Day theme. This design cleverly uses negative space queen of hearts nails techniques to create a heart motif, ensuring your manicure is thematic without being overtly flashy. It’s an excellent choice for short queen of hearts nails and professional settings, proving that nail art connects to fashion trends in versatile ways.
Products & Tools Used
- Clear base coat
- Sheer nude or clear builder gel
- Bold, high-pigment red polish
- Vinyl heart nail stencils or striping tape
- Fine-tipped tweezers
Application/Styling Steps
- Prep & Base: Apply base coat. Apply a thin coat of sheer nude polish (optional) or proceed directly to the tip.
- Apply Stencil Barrier: Carefully place the vinyl heart stencil (or cut your own heart shape using tape) over the natural nail tip, creating the desired “negative space queen of hearts nails” boundary. Ensure edges are firmly sealed.
- Paint the Tip: Apply the red polish over the entire nail tip and the stencil area. Apply a second coat if needed.
- Remove Stencil Quickly: While the polish is still wet (or uncured if using gel), use the tweezers to peel off the stencil. This reveals the clean, heart-shaped negative space.
- Seal & Finish: Once polish is dry/cured, apply top coat. The result is a ‘simple queen of hearts nail art ideas for v-day’ that focuses on clean lines and modern design.
Pro-Tip: To prevent polish seepage under the vinyl, apply a layer of base coat or sheer builder gel over the placed stencil and cure/dry it BEFORE applying the red polish. This prevents the paint from bleeding into the ‘negative space’ area.

5. Coffin Shape with Playing Card Suits (Intricate Pattern)
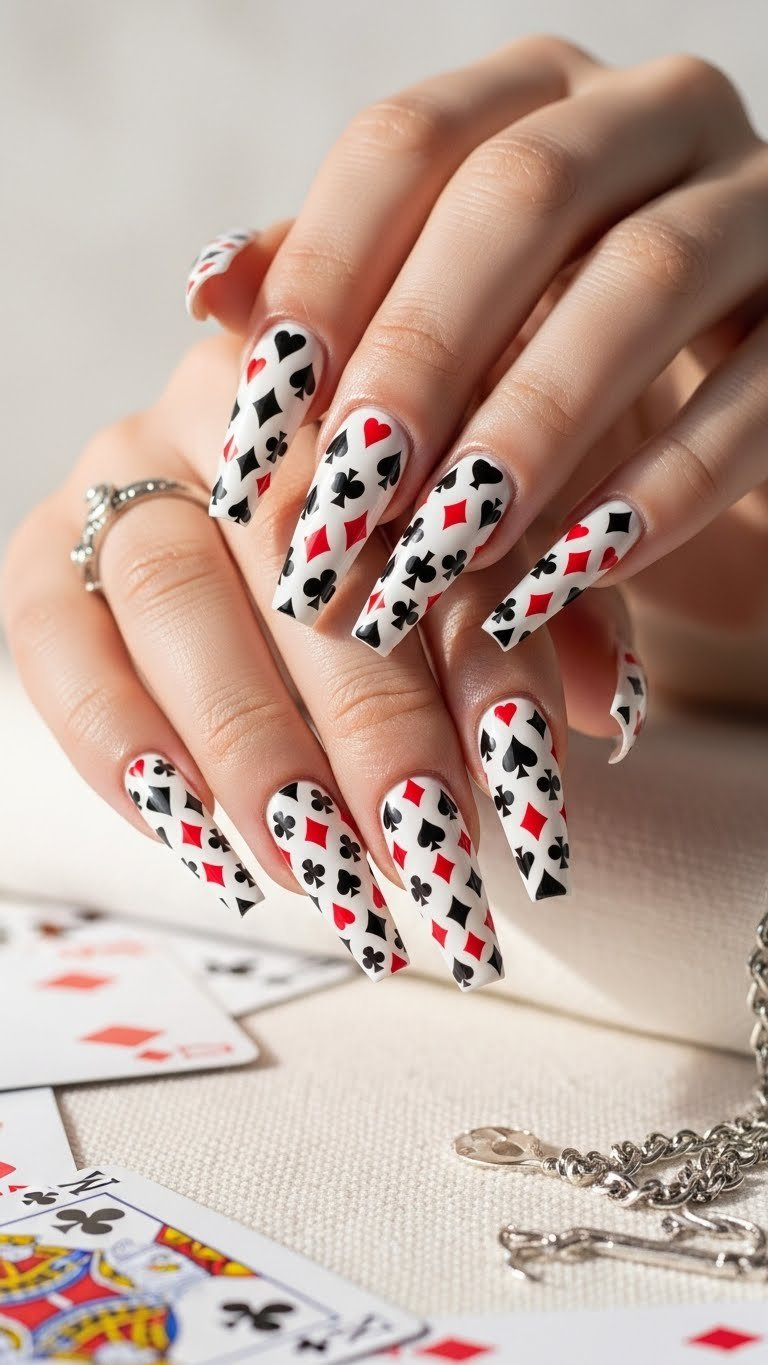
Show your hand! Save this detailed, thematic design to your ‘Acrylic Nail Inspo’ board!
For a truly thematic and bold statement, coffin queen of hearts nails featuring playing card suits are an outstanding choice. This intricate queen of hearts designs showcases comprehensive artistry, allowing you to incorporate miniature card suit designs in black and red across a white base. The coffin nail art shape provides an ideal canvas for these detailed patterns, making this look a favorite for experienced nail enthusiasts or those willing to invest time for a striking effect.
Products & Tools Used
- White base color polish (highly opaque)
- Red and black stamping polish (highly pigmented for clear transfers)
- Stamper and scraper kit
- Nail stamping plate featuring card suit designs (incorporate related_entities_semantic_network keyword)
- Fine liner brush (for touch-ups)
- Liquid latex (optional, for clean up)
Application/Styling Steps
- Shape & Base: Ensure nails are filed into the popular ‘coffin nail art’ shape. Apply base coat and two coats of the white base color. Cure/dry completely.
- Apply Stamping Polish: Apply a line of red or black stamping polish onto the ‘ultimate heart plate designs’ or card suit image on the plate. Quickly scrape the excess polish.
- Transfer Design: Rock the stamper over the image to pick it up, then immediately roll it onto the nail to transfer the ‘intricate card suit nail designs’.
- Repeat: Repeat the process, alternating between red and black polish for the different card suits (hearts and clubs/spades).
- Seal and Finish: Clean up any excess polish using liquid latex or a clean-up brush before applying the final top coat.
Pro-Tip: Nail stamping requires extremely quick movements. If the polish dries too fast, use a special ‘stamping polish’ (which dries slower and is highly pigmented) or try the ‘reverse stamping queen of hearts’ technique where you fill in the colors on the stamper head before applying it to the nail.

6. Pink Ombré Heart Gradient (Modern & Sweet)

Swap out red for pink! Save this sweet ombré gradient to your ‘Cute Valentine Nail Art’ board!
For a softer, more romantic take on the theme, pink queen of hearts nails with an ombré gradient offer a sweet and modern aesthetic. This design is perfect for Valentine’s Day, connecting nail art to fashion trends with its popular gradient technique. The seamless blend from deep magenta to pale blush pink provides a beautiful base for a crisp white heart accent, creating a visually appealing and sweet queen of hearts nails look.
Products & Tools Used
- Sheer nude base coat
- Pale pink gel polish
- Deep magenta or red-pink gel polish
- White polish (for the heart outline)
- Small makeup sponge or nail art ombré sponge (incorporate process_action_keywords to achieve queen of hearts look)
- Liquid latex barrier (optional, recommended for clean-up)
Application/Styling Steps
- Base & Barrier: Apply base coat and nude color. Apply liquid latex around the cuticles of the ombré nails to prevent mess.
- Sponge Prep: Dab the pale pink and deep magenta polishes side-by-side onto the edge of the makeup sponge, ensuring the colors slightly overlap.
- Blend: Gently and repeatedly press the sponge onto the nail surface until the ‘ombré heart nail art tutorial’ transition is smooth. Cure/dry. Repeat for color intensity.
- Heart Detail: Once the ombré base is complete, use white polish and a fine brush or stencil to add a crisp heart detail over the gradient on the accent nail.
- Finish: Remove the liquid latex and apply a glossy top coat to lock in the gradient.
Pro-Tip: The key to a flawless ombré (addressing problem_solution_keywords about uneven polish) is to use a fresh section of the sponge and work quickly. Using gel polishes allows more time to build and cure the gradient without premature drying.

7. Quick Glitter Heart Accent Nails (Last Minute V-Day)
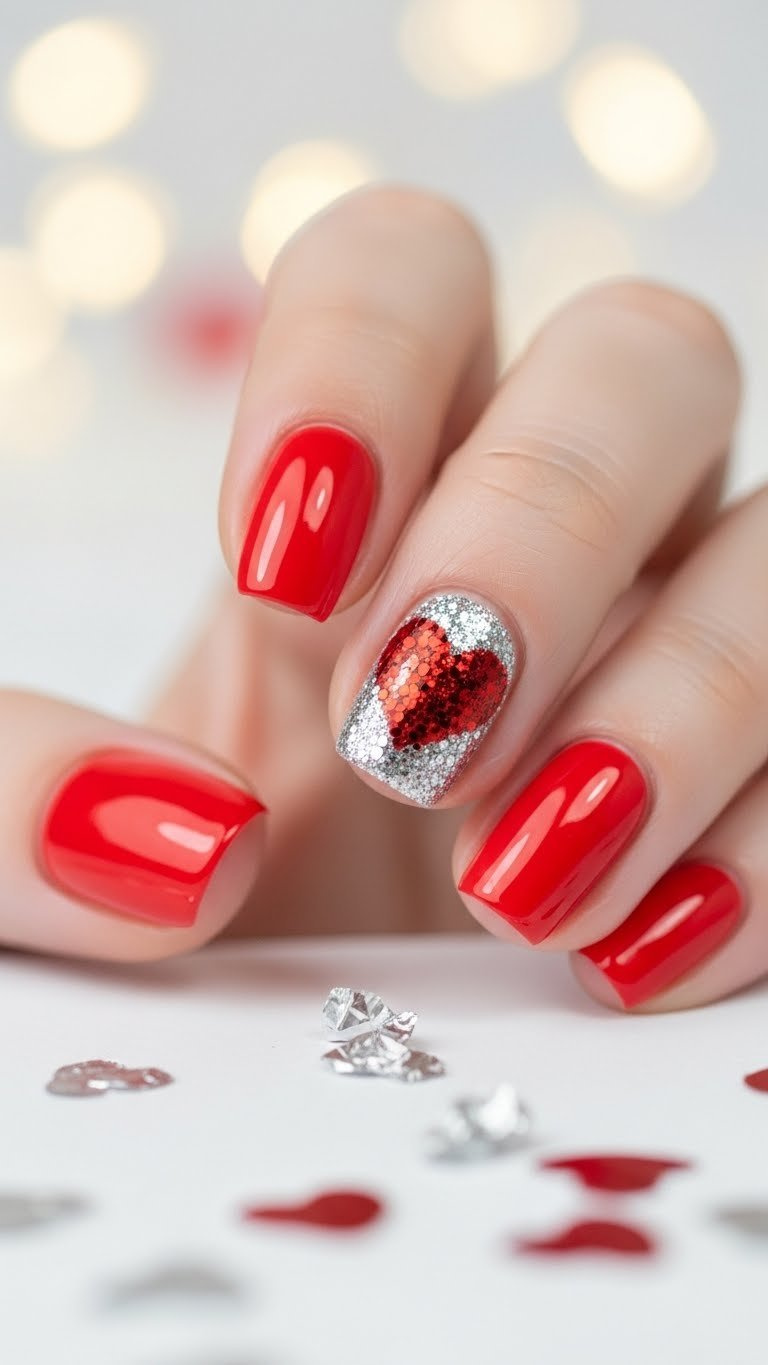
Only 15 minutes? Save this fast, festive design to your ‘Last Minute Nail Ideas’ board!
When time is short but you still want to decorate nails for valentines, quick glitter heart accent nails are your go-to. This design is perfect for a last-minute Valentine’s Day look, addressing the challenge of saving time on valentines day nails. It combines a vibrant red base with chunky glitter queen of hearts nails on an accent nail, creating a subtle yet impactful textural contrast that catches the light beautifully.
Products & Tools Used
- Red cream polish (quick-drying formula)
- Red and/or silver chunky glitter top coat (incorporate entity_attributes_descriptive keyword)
- Small heart vinyl stencil or paper reinforcement sticker
- Sponge applicator or dotting tool (optional, for precise glitter placement)
Application/Styling Steps
- Base: Apply two coats of the red cream polish to all nails and allow to dry completely.
- Stencil Application: Place the heart vinyl stencil directly onto the dried accent nail where you want the glitter heart to be.
- Glitter Application: Instead of brushing the glitter coat, dab the chunky glitter top coat heavily over the stencil area using a sponge or dotting tool, concentrating the glitter pieces. This avoids streaking and ensures dense coverage.
- Quick Removal: Quickly and carefully peel off the stencil while the glitter polish is still tacky.
- Seal: Apply a thick top coat (or two thin coats) to smooth out the texture of the glitter, securing the ‘glitter queen of hearts nails’ effect.
Pro-Tip: If using chunky glitter, use a slightly thicker top coat designed for glitter encapsulation. This provides a professional finish, addressing ‘achieving professional looking DIY nails’ concerns, and prevents the glitter from snagging or chipping easily.

8. DIY Press-On Application for Instant Queen of Hearts Manicure
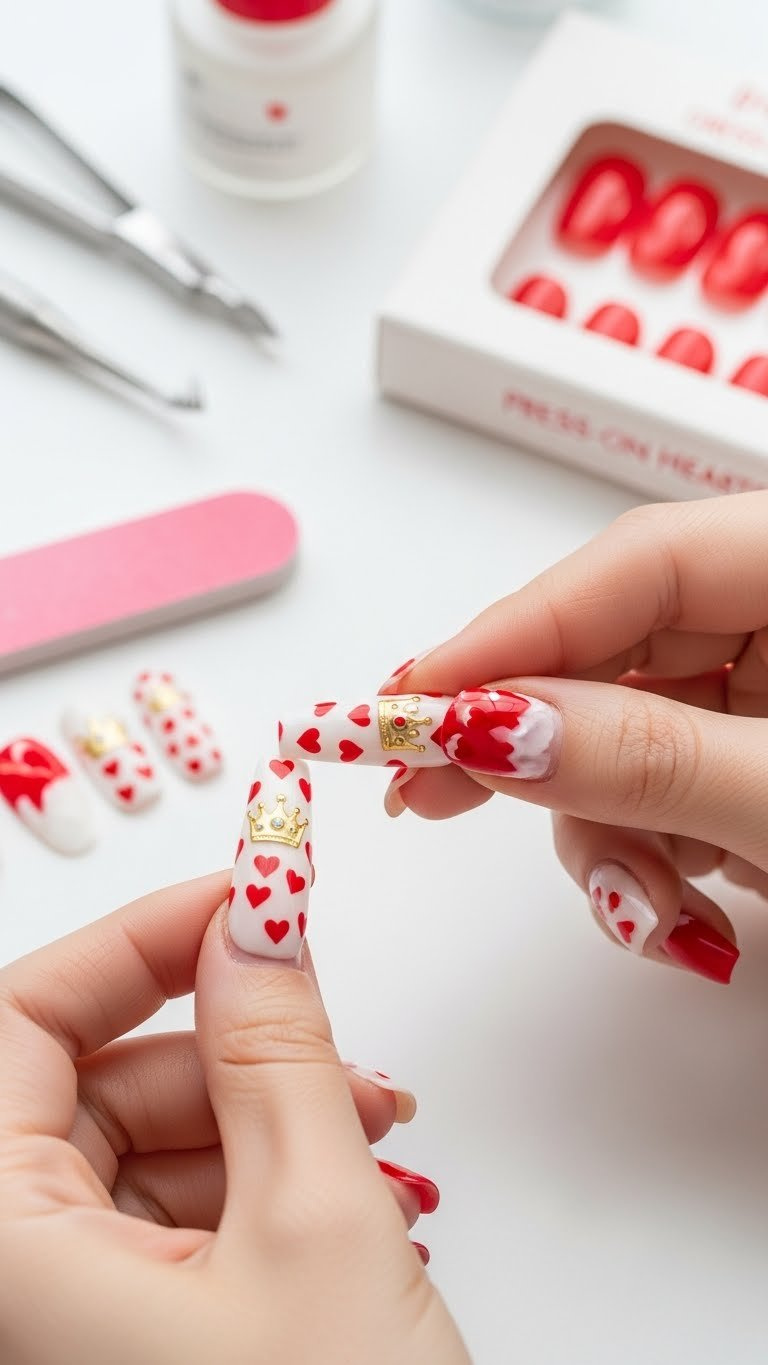
Short on time? Save this quick-fix tutorial for your ‘Press-On Nail Hacks’ board!
For an instant transformation, DIY press-on application for an instant queen of hearts manicure is an unbeatable solution. This option is ideal if you’re looking for where to find queen of hearts inspired press on nails and need a quick, professional result without the time commitment of hand-painting. High-quality press on nails queen of hearts sets offer quick application and are an excellent alternative to queen of hearts nails that are hand-painted, especially for intricate designs.
Products & Tools Used
- Queen of Hearts themed press-on nail set (high-quality, custom-designed)
- Strong liquid nail glue
- Mini nail file and buffer block
- Cuticle pusher
- Alcohol prep pad
Application/Styling Steps
- Prep Nails: Push back cuticles and gently buff the natural nail surface to remove shine. Wipe the natural nail beds with the alcohol prep pad to ensure the surface is clean and dry.
- Sizing: Lay out the press-on nails and match them carefully to the size of your natural nails. ‘File nail shape coffin’ or adjust other shapes as needed.
- Application: Apply a small bead of liquid nail glue to both the back of the press-on and your natural nail. Align the press-on nail slightly beneath the cuticle line (do not apply directly on the cuticle).
- Press: Press down firmly for 15-30 seconds, ensuring no air bubbles are trapped.
- Secure: Avoid water or harsh chemicals for at least an hour to allow the glue to fully set, ensuring a ‘long lasting queen of hearts manicure solution’.
Pro-Tip: For extra security, apply a thin layer of dehydrator or primer (if available) before the glue. This step, often used by ‘certified nail technician valentine designs’, drastically improves the adhesion of the ‘acrylic press on’ nails, ensuring they last well past Valentine’s Day.

9. Sculpted 3D Heart Nail Art Technique
Go over the top! Save this stunning, high-skill design to your ‘Advanced Nail Art Tutorials’ board!
For the most dramatic and eye-catching effect, sculpted 3D heart nail art techniques offer unparalleled dimension. This advanced method allows you to create a raised, tactile heart, transforming your manicure into a true work of art. While requiring a higher skill level, the result is a stunning sculpted acrylic queen of hearts design that makes a bold statement and connects nail art to high fashion trends, especially on long queen of hearts nails.
Products & Tools Used
- Base coat and desired base color (e.g., white or black)
- Red 3D sculpting gel (or red colored acrylic powder and monomer)
- Specialized silicone sculpting tool or fine brush
- Small dappen dish (if using acrylic powder/monomer)
- UV/LED lamp
Application/Styling Steps
- Prepare Base: Complete the base color of the nail and apply a non-wipe top coat (optional, depending on 3D medium).
- Apply 3D Medium: Scoop a small, perfectly sized bead of the 3D sculpting gel onto the accent nail.
- Sculpt the Heart: Using the tip of the silicone sculpting tool (dipped slightly in cleanser or monomer to prevent sticking), gently manipulate the gel or acrylic bead into the shape of a heart. Push the sides up and pinch the bottom to form the point. This is the core ‘3D queen of hearts nail art techniques’ step.
- Cure/Set: If using gel, cure immediately after shaping. If using acrylic, allow the bead to air dry and harden (set time varies).
- Detailing: Once cured, use a top coat to secure the surrounding area, avoiding the surface of the 3D heart itself to maintain the matte, dimensional texture.
Pro-Tip: The ratio of monomer to acrylic powder for ‘sculpted acrylic queen of hearts’ must be precise to prevent running or dry crumbly beads. Aim for a medium, pliable bead that holds its shape when gently tapped with the brush—this is key for achieving the perfect ‘hand-painted queen of hearts nail miniatures’ shape.

Key Takeaways: Your Quick Guide to Mastering Queen of Hearts Nails
- Prioritize Proper Prep for Longevity: A clean, dry nail surface is essential. Using a quality base coat and wiping the nail with alcohol before applying any color or press-on ensures maximum adhesion and a long lasting ‘no chip queen of hearts nails’.
- Choose Your Method Wisely: For beginners or speed, opt for high-quality press-on nails or simple glitter accent designs. For maximum durability and intricate detail, utilize gel polish and specialized tools like fine liner brushes and dotting tools, securing ‘gel polish provides durability’.
- Embrace Textural Contrast: The most visually compelling Queen of Hearts manicures utilize textural differences—pairing a matte base with glossy hearts, or incorporating chunky glitter or 3D elements for dimension. This fulfills the ‘edgy queen of hearts nails’ aesthetic.
- Master the Heart Shape: Whether hand-painting or stamping, precision is key. Invest in a dedicated nail art brush or a specialized vinyl stencil to achieve crisp, clean heart lines, making the difference between ‘simple vs intricate queen of hearts designs’.
- Seal Every Element: Intricate designs with crystals, foil, or decals must be encapsulated or adhered with a specific gem glue or thick builder gel, then sealed with a durable top coat to prevent lifting. This is a critical ‘expert queen of hearts nail artist tips’.
- Red vs. Pink Varies the Mood: While classic Queen of Hearts uses bold red, switching to softer pinks and blushes creates a modern, ‘sweet queen of hearts nails’ aesthetic suitable for any Valentine’s occasion.
- Don’t Forget the Card Suit Motif: Incorporate the symbolic card suits—even subtly—to maintain the themed look. This can be achieved through stamps, decals, or miniature hand-painted details.
FAQs About Valentines Day Queen of Hearts Nails
Is queen of hearts nail art difficult for beginners?
No, queen of hearts nail art is not inherently difficult for beginners, provided you choose the right technique. Simple accent nails using dotting tools for hearts or pre-made ‘nail decals queen of hearts’ are very beginner-friendly and quick. If you opt for more complex styles like intricate card suits, 3D elements, or ‘sculpted acrylic queen of hearts’ designs, the difficulty increases significantly, which is why press-ons are also a great solution for achieving the look without the skill.
What colors are essential for queen of hearts nails?
The classic Queen of Hearts color palette is strictly red, black, and white. Red polish is the primary color, symbolizing passion, while black and white are used for the playing card motifs and accent details. However, modern interpretations for Valentine’s Day often incorporate ‘pink queen of hearts nails’, utilizing soft blush and deep magenta in combination with white for a sweeter, romantic feel that keeps the theme recognizable.
What nail shapes work best for queen of hearts designs?
The most popular and thematic nail shapes for queen of hearts designs are coffin and almond, but short square nails also work well. Long shapes like coffin or stiletto provide the largest canvas, perfect for showcasing ‘intricate queen of hearts designs’ and crystal placements. Conversely, ‘short queen of hearts nails’ benefit from a minimalist approach, focusing on negative space designs or simple, bold heart accents that don’t overcrowd the smaller surface area.
How can I make my queen of hearts nail art last longer?
To make your queen of hearts nail art last longer, you must focus on proper nail preparation and a high-quality top coat. Ensure your nails are dehydrated and free of oils before application. Use a dense, long-wear gel polish, and apply a premium top coat that seals every edge and every element, especially around gems or decals. Using gel extensions or high-quality ‘long lasting queen of hearts acrylic nails’ also increases durability dramatically.
Where can I buy queen of hearts press on nails?
You can buy queen of hearts press on nails from various retailers, including large beauty stores like Ulta Beauty, online marketplaces like Amazon, or from custom independent artists on Etsy. When searching, look for sets optimized for longevity and quality, focusing on ‘acrylic press on’ options that feature custom artwork or detailed ‘playing card nail art’. Searching for ‘ulta beauty queen of hearts nails’ may yield current branded collections.
What is the difference between Halloween and Valentine’s Day Queen of Hearts nails?
The primary difference lies in the tone and accompanying imagery. Halloween Queen of Hearts nails are usually dark, dramatic, and villain-focused (often incorporating blood splatters, skulls, or references to the movie villain). Valentine’s Day designs focus on romantic symbolism, utilizing ‘sweet queen of hearts nails’ aesthetics, softer red/pink hues, and emphasizing the heart motif over the court card elements.
What are good alternatives to queen of hearts nails for V-Day?
Good alternatives to Queen of Hearts nails for Valentine’s Day include simple ‘sweetheart nails’, velvet heart designs, and classic red French tips. If you want a themed look that is less dramatic, consider minimalist designs using ‘negative space queen of hearts nails’ techniques with softer colors. For maximalist alternatives, try ‘love day nail art’ featuring metallic foil, chrome finishes, or abstract red and pink marbling techniques.
What tools do I need for intricate heart nail art?
For intricate heart nail art, you will need a set of fine detail nail art brushes (sizes 000 and 00), a dual-sided dotting tool, and potentially stamping equipment. The fine brushes are essential for painting small details or ‘hand-painted queen of hearts nail miniatures’, while the dotting tool helps create uniform circles that form the base of the heart shape. For complex patterns, a stamping plate and scraper are required tools.
How do I prevent yellowing when using red nail polish?
To prevent yellowing, which is a common problem with highly pigmented red polish, always use a clear, protective base coat that explicitly claims ‘anti yellowing’ properties. Ensure the base coat is fully dry or cured before applying the red color. If you are a ‘nail art lover’ who wears red frequently, consider using a specialized nail barrier or primer for extra protection against the pigment seeping into the natural nail bed.
Is Queen of Hearts nail art trendy in 2026?
Yes, Queen of Hearts nail art remains a highly trendy and seasonal choice for 2026, especially around Valentine’s Day. Its popularity is fueled by viral visual platforms like Pinterest and TikTok, where users are continually sharing modern interpretations, such as ‘minimalist queen of hearts nails’ and ‘gel extension queen of hearts designs’. The theme provides a perfect balance of festive flair and sophisticated, recognizable imagery.
Final Thoughts on Valentines Day Queen of Hearts Nails
The versatility of the valentines day nails queen of hearts theme means that whether you opt for the intricate detail of the sculpted 3D heart or the streamlined approach of the minimalist negative space tips, you can achieve a sophisticated and festive look. We have demonstrated 9 unique ways to interpret this ‘iconic queen of hearts nails’ trend for 2026, proving that this look is achievable for everyone, from the absolute beginner utilizing press-ons to the advanced artist utilizing specialized tools. By prioritizing high-quality products, using a protective base coat, and diligently following the application steps, you can easily achieve queen of hearts look that lasts well beyond February 14th.
Now that you have the complete guide to mastering the Queen of Hearts manicure, which of these 9 designs will you choose to wear this Valentine’s Day? Let us know in the comments below!
Last update on 2026-01-17 / Affiliate links / Images from Amazon Product Advertising API