Are you struggling to find a manicure that perfectly balances romance with style for the upcoming holiday? Many nail enthusiasts feel overwhelmed by the sheer number of options, fearing their DIY attempts will look messy rather than chic, or that salon visits for valentines nails xoxo will break the bank.
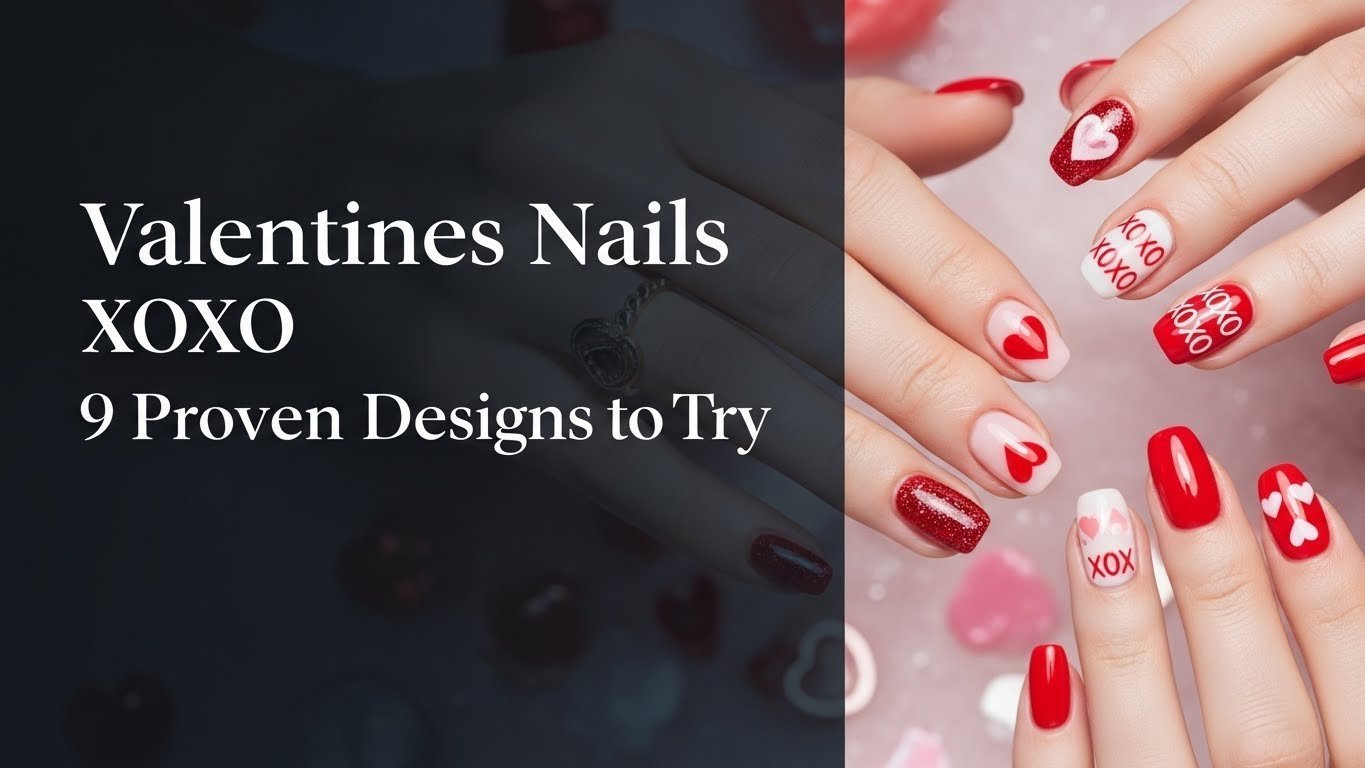
Valentines nails xoxo are festive nail art designs featuring ‘hugs and kisses’ motifs, popular for their cute and romantic appeal during Valentine’s Day. They can range from simple hand-painted Xs and Os to intricate heart patterns and press-on options, perfect for celebrating love in January 2026.
Drawing from comprehensive analysis of current trends and certified nail technician advice, this guide bridges the gap between professional artistry and achievable home manicures. We have curated a collection of styles that range from beginner-friendly decals to advanced negative space techniques, ensuring there is a perfect match for your skill level. Get ready to discover the specific tools, polishes, and steps needed to achieve these 9 proven looks.
Mastering Valentines Nails XOXO: Your Guide to 9 Proven Designs for January 2026
Mastering valentines nails xoxo requires a blend of creativity and the right techniques, whether you are applying press-ons or hand-painting intricate details. This seasonal trend is not just about slapping red polish on your nails; it is about curating a look that expresses affection through style.
As we approach January 2026, the demand for unique and personalized Valentine’s Day nails is at an all-time high. The XOXO nail art motif offers incredible versatility, allowing you to transition from subtle, office-appropriate designs to bold, glittering statements for date night. This section serves as your roadmap, moving beyond generic inspiration to provide actionable, “proven designs” backed by expert application tips. We will explore how different materials—from gel polish to nail stickers—can be utilized to achieve professional results at home, ensuring your manicure is both durable and dazzling.
9 Proven Designs to Transform Your January 2026 Valentines Nails XOXO
The best 9 proven designs for valentines nails xoxo in January 2026 range from simple hand-painted hearts and chic press-ons to elaborate Y2K French tips and coquette bows. These styles cater to every aesthetic, offering solutions for both quick, last-minute applications and detailed, artistic sessions.
To truly transform your look this season, it is essential to select a design that aligns with your lifestyle and skill level. We have categorized these XOXO heart designs to provide a comprehensive solution for everyone, whether you are a DIY novice looking for easy valentines nails xoxo or a seasoned enthusiast ready to tackle negative space XOXO designs. In the following sections, you will find detailed step-by-step tutorials, specific process_action_keywords to guide your application, and curated product recommendations to help you replicate these exact looks. From the durability of gel XOXO nails to the convenience of press on XOXO nails, here is how to execute these top trends flawlessly.
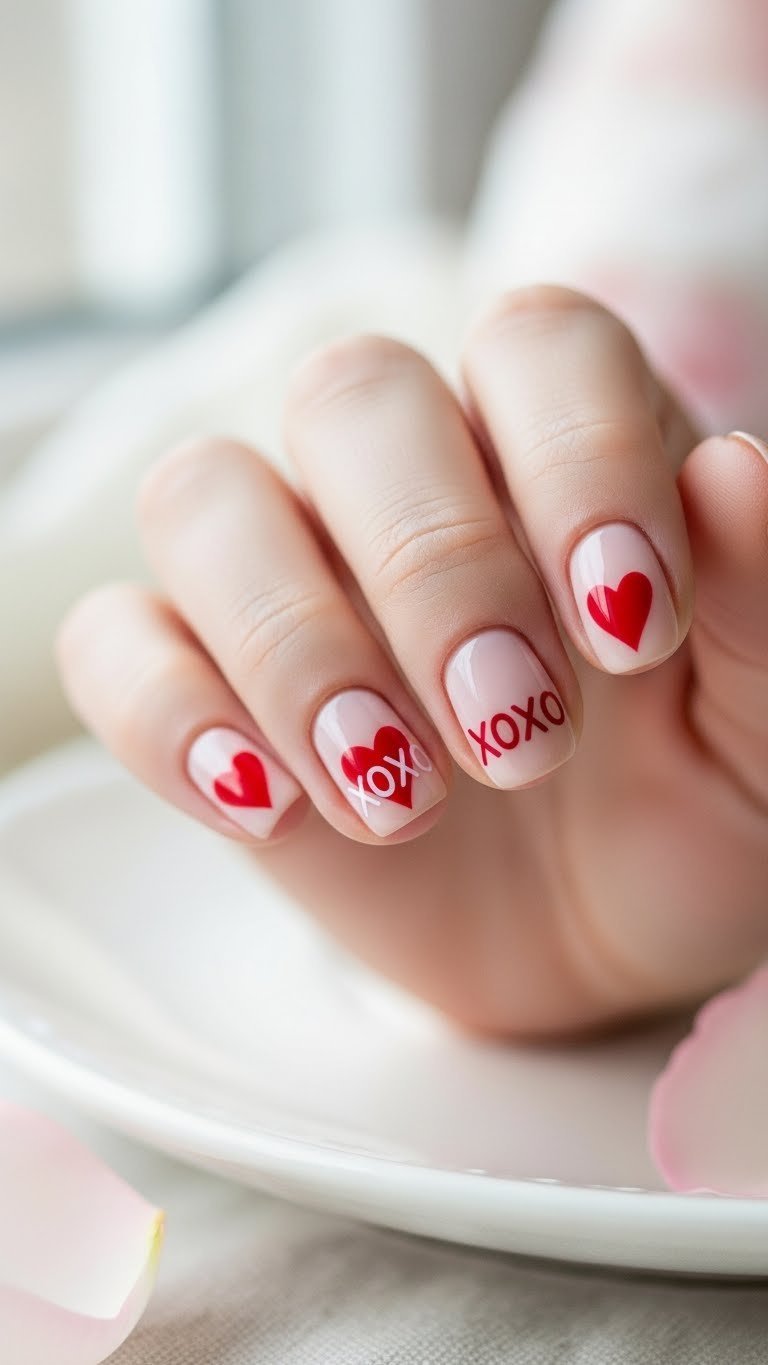
1. Simple Hand-Painted XOXO Hearts
Pin this genius hack to your ‘Valentine’s Day Nail Inspo’ board!
Simple hand-painted XOXO hearts are the perfect entry point for beginners wanting to create charming valentines nails xoxo without needing advanced tools. By using a fine detail brush and a steady hand, you can transform a basic nude manicure into a festive statement.
This design relies on the XOXO symbol rendered as small hearts and letters applied directly with nail polish. It illustrates how a minimalist approach can powerfully symbolize love. According to experienced nail artist tutorials, the secret to crisp lines lies not just in skill, but in using the correct brush tension and loading the bristles with just the right amount of polish.
Products & Tools Used
- Fine Detail Nail Art Brush: A set of extra fine nail art brushes for precision.
- Base Coat: A clear, long-lasting base coat to protect nails.
- Nude or Light Pink Nail Polish: A high-quality, chip-resistant light pink nail polish as the base color.
- Red Nail Polish: A vibrant, opaque classic red nail polish for the hearts and X’s.
- White Nail Polish: A crisp, opaque white nail polish for the O’s or accents.
- Top Coat: A glossy quick-dry top coat for durability and shine.
- Nail Polish Remover & Lint-Free Wipes: For cleanup.
Application/Styling Steps
- Prepare Nails: Start with clean, filed nails. Apply one layer of base coat and let it dry completely.
- Apply Base Color: Apply two thin coats of your light pink nail polish (or nude) to all nails, allowing each coat to dry between applications.
- Paint ‘X’ (First Heart Half): Using the fine detail brush dipped in red nail polish, paint a small diagonal line from the top left to the bottom right of the desired area on your nail.
- Paint Second ‘X’ (Heart Completion): Paint another diagonal line from the top right to the bottom left, crossing the first to form an ‘X’ or the first half of a heart shape.
- Form the ‘O’ (Second Heart Half): Dip the brush in white nail polish and create a small, slightly rounded shape next to the ‘X’, resembling the second half of a heart or an ‘O’ letter.
- Refine & Dry: Allow the design to dry thoroughly. Use a lint-free wipe with a tiny bit of remover to clean up any mistakes around the edges.
- Seal with Top Coat: Once completely dry, apply a generous layer of glossy quick-dry top coat to seal the design and add shine.
Pro-Tip: For perfectly symmetrical hearts, start by painting two small dots for the top curves of the heart, then drag your brush down to meet at a point. Practice on a piece of paper first using nail art practice sheets to get the shape right before applying to your nails.

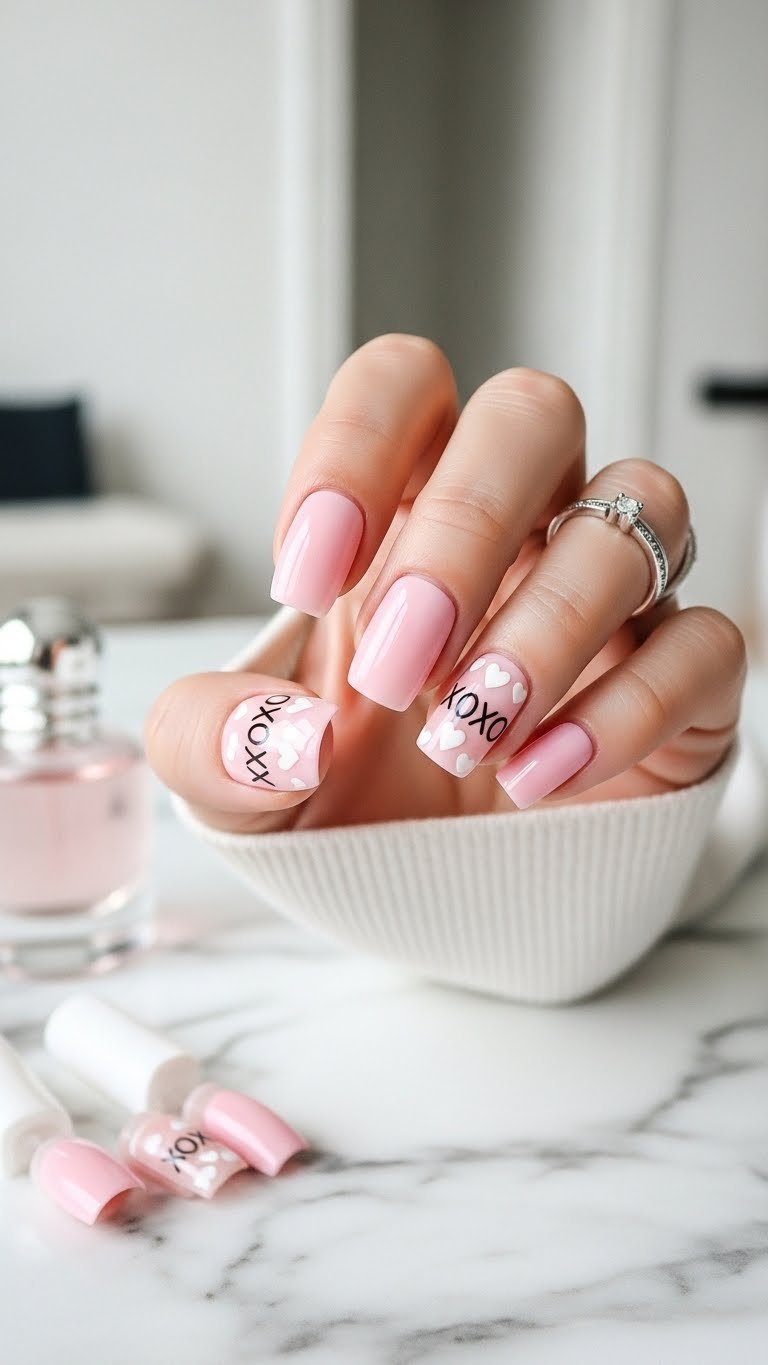
2. Chic Press-On XOXO Nails
Save this effortless style to your ‘Quick Glam Nail Ideas’ board!
Chic press-on XOXO nails are the ultimate solution for busy individuals seeking a flawless, salon-quality manicure in minutes. These pre-designed kits offer durability and style without the drying time of traditional polish.
This method utilizes pre-designed press-on nails as a convenient alternative to salon visits, highlighting attributes like medium square shape, pink color, and intricate XOXO motifs. It perfectly addresses the need for quick valentines nail ideas for busy people, proving that convenience doesn’t require sacrificing aesthetics. Proper nail preparation is critical here; according to professional grade nail supplies guidance, thorough cleansing is the single biggest factor in preventing premature lifting.
Products & Tools Used
- XOXO Press-On Nail Kit: A high-quality set of XOXO themed press-on nails in a medium square shape with pink and white designs.
- Nail Glue: A strong, fast-drying nail glue specifically designed for press-on nails.
- Nail File/Buffer: A fine-grit nail file and buffer block for preparation.
- Cuticle Pusher: A wooden or metal cuticle pusher.
- Alcohol Prep Pads: Isopropyl alcohol wipes for nail cleansing.
Application/Styling Steps
- Nail Preparation: Gently push back your cuticles with a cuticle pusher. Buff the surface of your natural nails lightly with a nail buffer to create a texture for the glue to adhere to.
- Cleanse Nails: Wipe each nail with an alcohol prep pad to remove oils and dust, ensuring a clean surface.
- Size & Select: Match each press-on nail to your natural nail, ensuring a snug fit from sidewall to sidewall. Lay them out in order.
- Apply Glue: Apply a small bead of strong nail glue to your natural nail and a tiny bit to the back of the press-on nail.
- Press On: Align the press-on nail with your cuticle, then press down firmly for 15-20 seconds, ensuring no air bubbles are trapped underneath.
- Repeat & Finish: Repeat for all nails. After application, avoid water for at least an hour.
Pro-Tip: For even longer wear, apply a thin layer of base coat to your natural nails before gluing on the press-ons. This creates an extra barrier for adhesion and can make removal smoother. Look for press-ons made with reusable XOXO nails material if you want to extend their life.

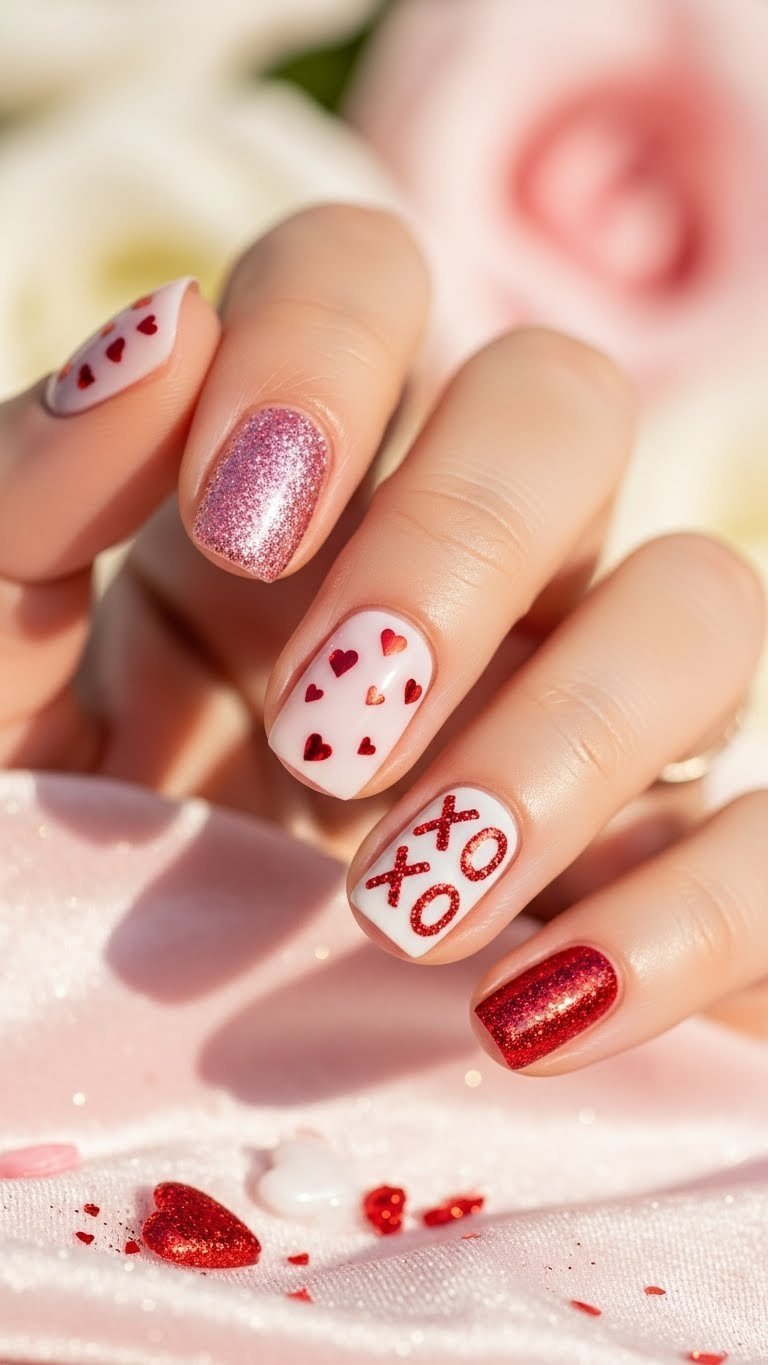
3. Glitter Accent XOXO Nails
Sparkle up your feed! Pin this dazzling design!
Glitter accent XOXO nails add a festive, shimmering element to your manicure, using light-reflecting particles to make your Valentine’s design pop. This look typically features one or two “accent” nails fully coated in sparkle or detailed with glittery letters.
This design leverages glitter polish or loose glitter to enhance the standard XOXO nail art. The relationship between the textural grit of glitter and the smooth finish of regular polish creates a dynamic visual impact. One common issue users face is removing stubborn glitter polish; however, proper application techniques can mitigate this. Drawing on proven long-lasting nail designs expertise, we recommend encapsulation methods to keep the sparkle secure and smooth.
Products & Tools Used
- Base Coat: A standard nail base coat.
- Nail Polish (Base Color): A light pink or white chip-resistant nail polish.
- Glitter Nail Polish: A fine pink or red glitter nail polish for accent nails.
- Loose Nail Art Glitter: (Optional) A pot of extra fine loose glitter in a matching color.
- Fan Brush or Dotting Tool: For applying loose glitter.
- Gel Top Coat: A thick gel top coat to seal the glitter effectively.
- UV/LED Lamp: (If using gel top coat).
Application/Styling Steps
- Prepare & Base Coat: Apply a base coat to clean, prepped nails.
- Base Color Application: Apply two thin coats of your chosen base nail polish. Let dry.
- Glitter Nail (Option 1 – Glitter Polish): On your accent nail(s), apply two coats of glitter nail polish. Allow each coat to dry.
- Glitter Nail (Option 2 – Loose Glitter): While the second coat of base polish is still wet on the accent nail, gently sprinkle loose nail art glitter over the entire nail or specific XOXO designs you’ve painted. Pat gently with a clean finger or fan brush.
- Seal Loose Glitter: Once the loose glitter is set (and base polish is dry), apply a generous layer of gel top coat to encapsulate the glitter. Cure under a UV/LED lamp if using gel.
- Top Coat All Nails: Apply a regular or gel top coat to all remaining nails, sealing any XOXO designs.
Pro-Tip: When using loose glitter, apply a thin layer of regular top coat before sprinkling for better adhesion. To ensure glitter does not snag, always use a thick gel top coat to fully encapsulate it, curing for the recommended time to achieve a smooth, durable finish.

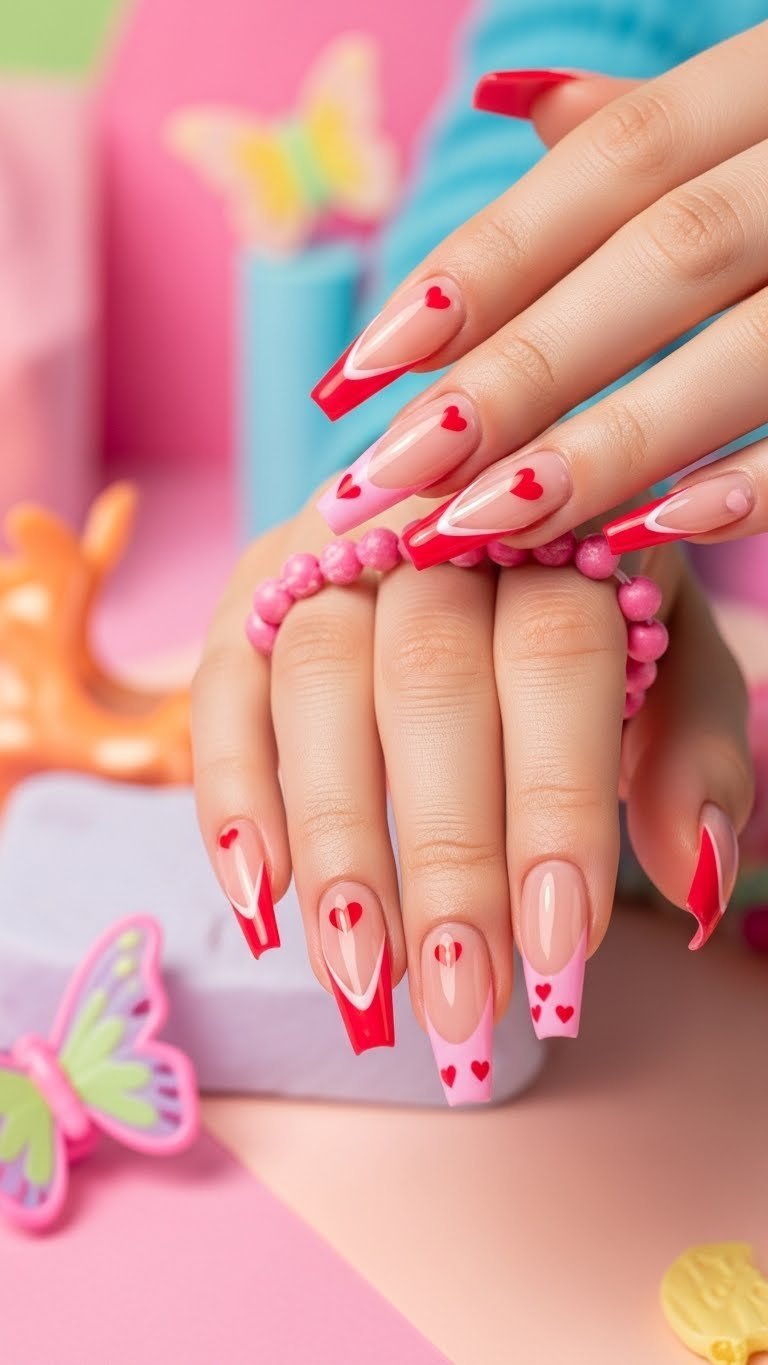
4. Y2K XOXO V-Tip French Manicure
Channel your inner 2000s! Pin this Y2K nail art!
The Y2K XOXO V-Tip French Manicure fuses nostalgic early 2000s aesthetics with modern Valentine’s romance, featuring sharp angular tips instead of the traditional curve. This style is particularly flattering on long valentines nails xoxo, helping to elongate the finger.
This design combines the classic French manicure entity with a Y2K aesthetic and XOXO symbols, demonstrating how nail design trends can be innovatively fused. Achieving the perfect V-shape requires precision; using tools like striping tape is often more effective than freehand painting for beginners. This aligns with techniques often seen in professional valentines nails, ensuring crisp, clean lines that define the look.
Products & Tools Used
- Base Coat: A protective nail base coat.
- Sheer Nude/Pink Polish: A sheer nude or light pink nail polish for the base.
- Red & Pink Nail Polish: Opaque red and bright pink nail polishes for the V-tips.
- Fine Detail Nail Art Brush: For XOXO details.
- Nail Art Striping Tape or V-Tip Guides: For crisp lines.
- Top Coat: A high-shine glossy top coat.
Application/Styling Steps
- Prep & Base: Apply base coat to clean nails and then one coat of sheer nude/pink polish.
- Create V-Tip Outline: Once dry, place nail art striping tape or V-tip guides to create your desired V-shape at the nail tip. Ensure they are pressed down firmly.
- Paint the V-Tips: Apply red nail polish to one side of the V-tip and pink nail polish to the other, or alternate colors on different nails. Paint carefully over the tape.
- Remove Guides: While the polish is still wet, carefully peel off the striping tape or guides to reveal crisp lines.
- Add XOXO Details: Once the V-tips are dry, use a fine detail brush with red or white polish to paint small ‘X’s and ‘O’s near the V-tip or at the cuticle area for a subtle touch.
- Seal & Shine: Finish with a generous layer of glossy top coat to seal the design and add a high-shine finish.
Pro-Tip: To make your V-tips extra sharp and clean, ensure your base coat is completely dry before applying any guides or tape. For a long-lasting finish on such intricate designs, consider a gel top coat and cure with a UV/LED lamp, a method often used in advanced nail art mastery for durability.

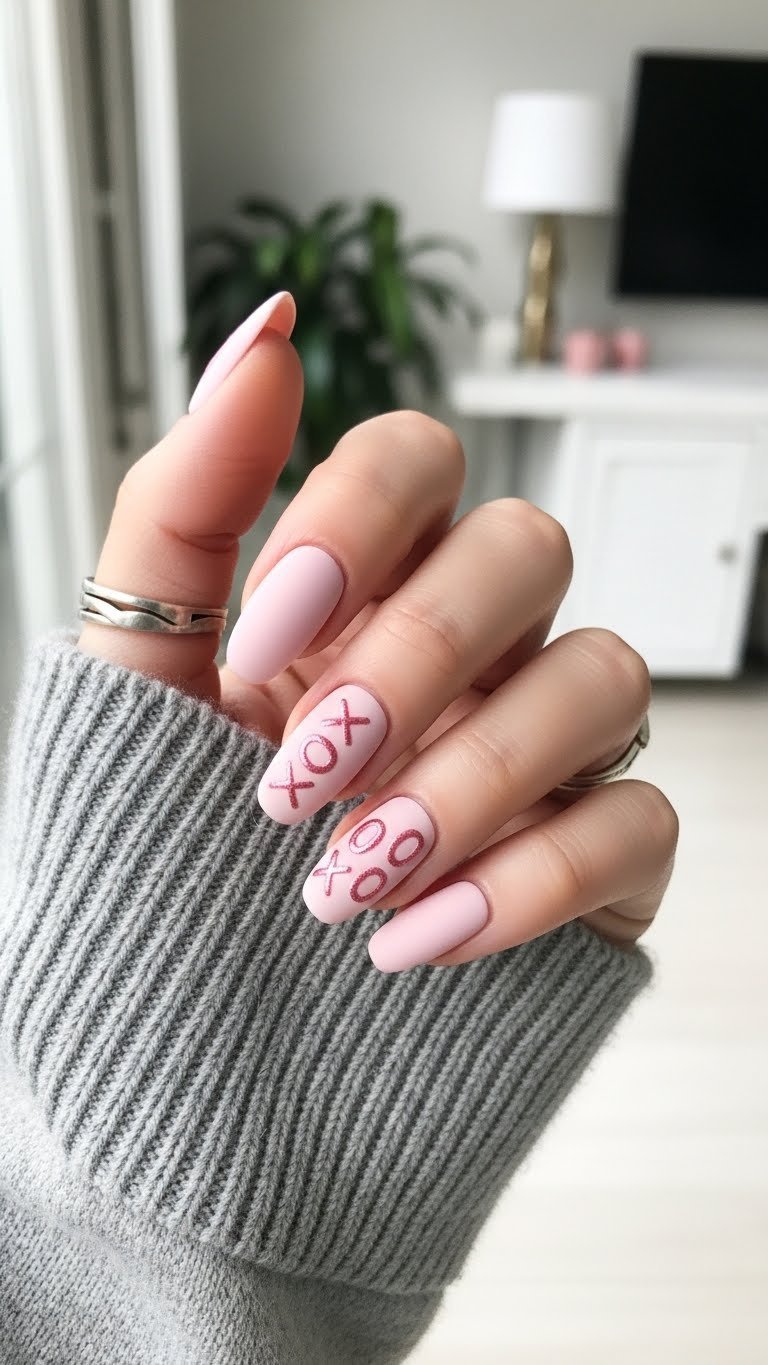
5. Classy Matte Finish XOXO Nails
Elegance at your fingertips! Pin this sophisticated matte look!
Classy matte finish XOXO nails offer a refined alternative to traditional glossy holiday manicures, using texture contrast to create visual interest. By pairing a velvety matte background with glossy lettering, you achieve a subtle yet luxurious look.
This design employs a matte top coat to completely alter the attribute of standard nail polish. The interaction between the flat, non-reflective surface and glossy XOXO designs demonstrates the sophisticated interplay of textures in nail art. A common challenge is a patchy finish; understanding nail product chemistry—specifically that matte top coats dry faster and require fewer strokes—is key to achieve glossy finish details that truly pop against the matte background.
Products & Tools Used
- Base Coat: Standard protective base coat.
- Nail Polish (Color): A dusty rose or soft nude nail polish for the base.
- Matte Top Coat: A high-quality matte top coat for the velvety finish.
- Glossy Top Coat: A clear glossy top coat for the XOXO details.
- Fine Detail Nail Art Brush: For painting small XOXO symbols.
Application/Styling Steps
- Prep & Base Color: Apply base coat and two thin coats of your chosen dusty rose nail polish. Allow to dry completely.
- Apply Matte Top Coat: Apply an even layer of matte top coat over all nails. Ensure even coverage for a consistent matte finish. Let it dry thoroughly.
- Create Glossy XOXO: Using the fine detail brush dipped in glossy top coat, carefully paint small ‘X’s and ‘O’s on your desired accent nails. The glossy finish will stand out against the matte base.
- Allow to Dry: Allow the glossy details to dry completely without smudging. Avoid applying a final top coat over the entire nail, as this would remove the matte effect.
Pro-Tip: When applying the matte top coat, work quickly and avoid over-brushing, as this can lead to streaks. If you desire a different texture, some matte XOXO nails sets come pre-designed with a subtle texture or embossing, providing an alternative to painting.

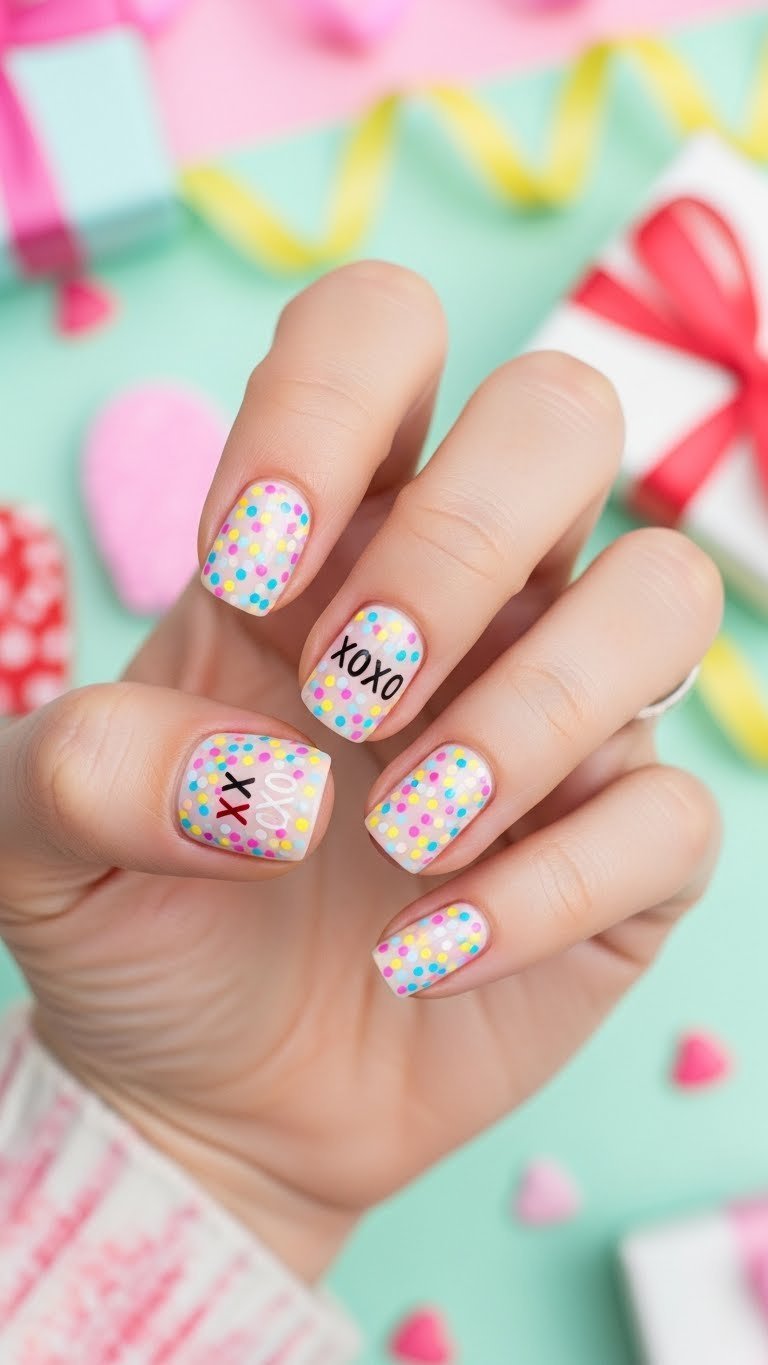
6. Playful Confetti XOXO Designs
Get ready for a party on your nails! Pin this joyful look!
Playful confetti XOXO designs bring a sense of celebration and whimsy to your valentines nails xoxo, using colorful suspended particles to create depth and fun. This style is unique because it combines random organic patterns with structured typography.
This design relies on nail confetti as a key attribute, linking playful textures to the festive theme. The primary challenge here is texture; without proper encapsulation, confetti can snag on clothing or hair. To solve the issue of nail art that won’t snag, we recommend using a thick builder gel or multiple layers of top coat, a technique standard in proven long-lasting nail designs.
Products & Tools Used
- Base Coat: Standard nail base coat.
- Nail Polish (Base Color): A light, opaque white or pale pink nail polish.
- Nail Art Confetti: Small, heart-shaped or circular nail confetti in various Valentine’s colors.
- Wax Pencil or Dotting Tool: For picking up and placing confetti.
- Clear Builder Gel or Thick Top Coat: For encapsulating the confetti.
- UV/LED Lamp: (If using builder gel).
- Fine Detail Nail Art Brush: For optional hand-painted XOXO outlines.
Application/Styling Steps
- Prep & Base: Apply base coat and two thin coats of your chosen white or pale pink nail polish. Let it dry.
- Apply Confetti: While the second coat of base polish is still slightly tacky, use a wax pencil or damp dotting tool to pick up and strategically place nail art confetti onto your nails. Arrange them in a playful, scattered pattern.
- Encapsulate Confetti: Once the confetti is placed and the base polish is dry, apply a generous layer of clear builder gel (and cure under UV/LED lamp) or a very thick top coat to smooth over the confetti and encapsulate it. This prevents snagging.
- Add XOXO (Optional): If desired, use a fine detail brush and a contrasting polish to paint small, clear ‘X’ or ‘O’ outlines over certain areas after the confetti is sealed.
- Final Top Coat: Apply a final layer of top coat for extra shine and protection, ensuring a smooth finish.
Pro-Tip: To ensure the confetti lies flat and doesn’t create bumps, press it gently into the tacky polish before sealing. Using a builder gel for encapsulation, a technique often seen in advanced nail art mastery, provides superior smoothness and durability compared to just a regular top coat.

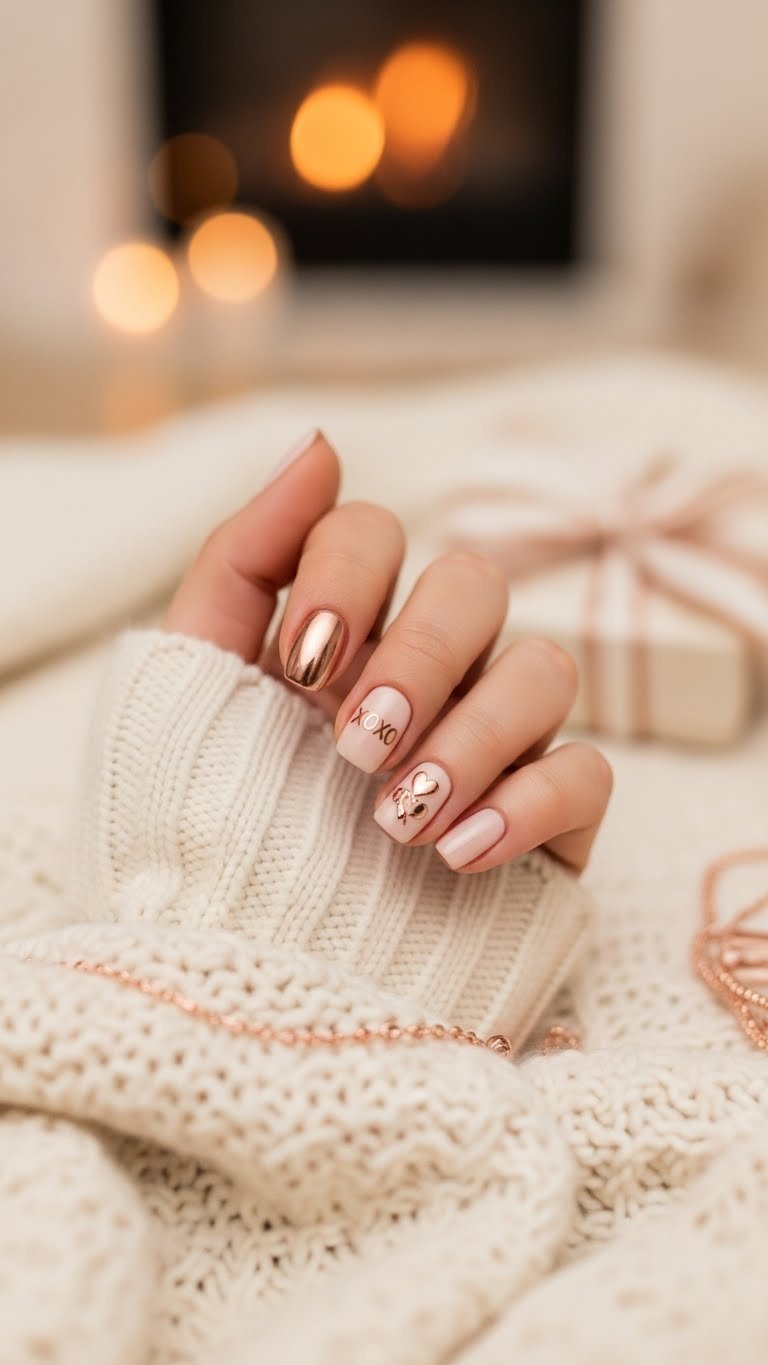
7. Romantic Rose Gold XOXO Accents
Add a touch of luxury to your look! Pin this romantic idea!
Romantic rose gold XOXO accents elevate the typical Valentine’s manicure with warm metallic tones, offering a sophisticated and glamorous aesthetic. This style works beautifully as a subtle nod to the holiday without being overly loud.
This design integrates rose gold polish or charms to add a luxurious attribute to XOXO nails. It specifically links metallic accents to feelings of romance and elegance, showing how specific colors can convey emotion. According to expert nail artist tips, applying metallic polish can be tricky due to brush strokes; using a “floating” technique helps achieve a smooth, mirror-like finish.
Products & Tools Used
- Base Coat: Standard protective nail base coat.
- Nail Polish (Base Color): A soft cream or nude nail polish.
- Rose Gold Nail Polish: A high-quality, opaque rose gold metallic nail polish.
- XOXO Nail Decals/Stickers (Rose Gold): Small, rose gold XOXO nail art decals or stickers.
- Fine Detail Nail Art Brush: For applying metallic accents if freehand.
- Tweezers: For precise placement of decals/charms.
- Top Coat: A glossy, durable top coat.
Application/Styling Steps
- Prep & Base: Apply base coat and two thin coats of your soft cream or nude nail polish. Let dry completely.
- Rose Gold Accent Nail (Option 1 – Full Polish): On one or two accent nails, apply two thin coats of rose gold metallic nail polish.
- Rose Gold Accent (Option 2 – XOXO Decals): Alternatively, on a cream base, apply rose gold XOXO nail decals using tweezers for precise placement. Gently press down.
- Hand-Painted XOXO (Option 3): Using a fine detail brush with rose gold polish, carefully paint small ‘X’s and ‘O’s on a base nail for a delicate touch.
- Seal & Finish: Once all elements are dry, apply a generous layer of glossy top coat over all nails to seal and protect the design, enhancing the shimmer.
Pro-Tip: To make metallic polishes apply smoothly and without streaks, use a floating technique where you apply the polish in one continuous stroke without pressing down too hard. For applying small XOXO nail charms, use a dot of nail glue followed by encapsulating with a builder gel for maximum longevity, a method often recommended by certified nail technicians.

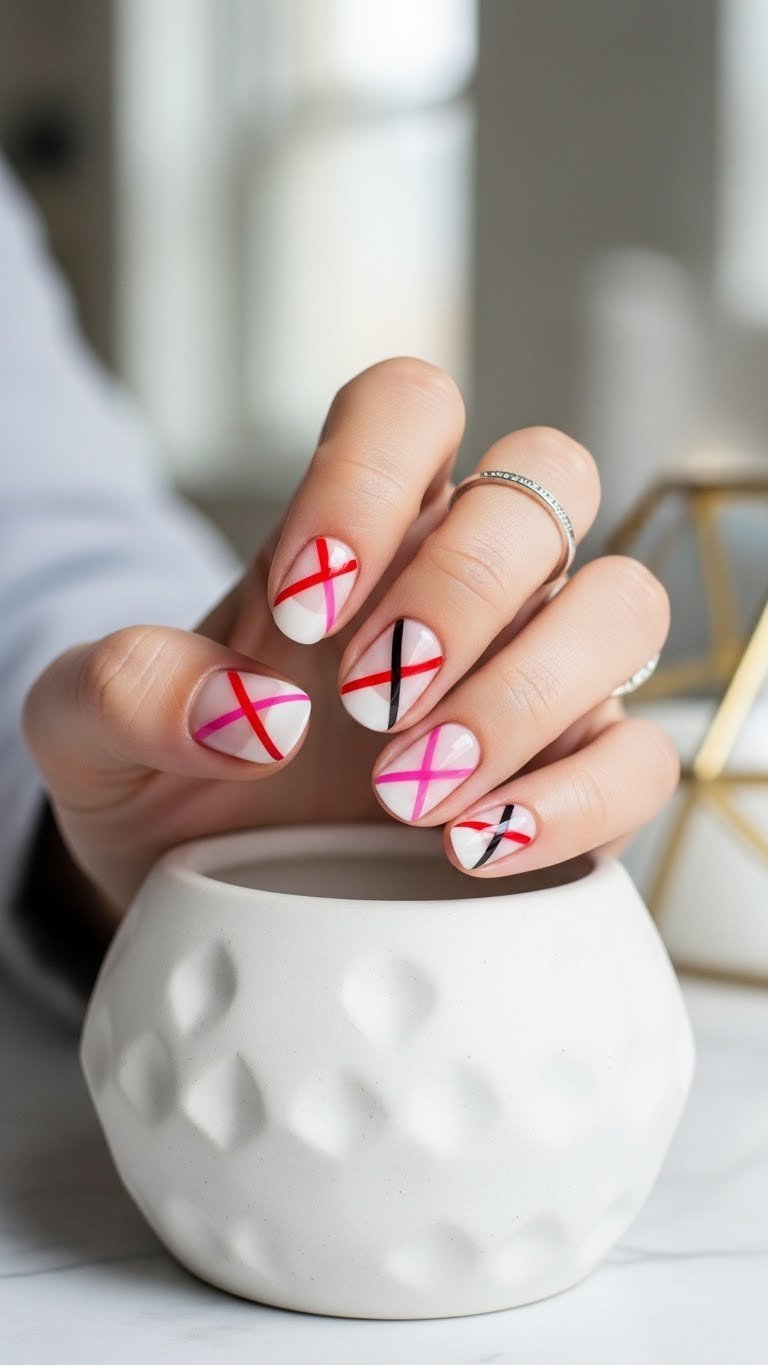
8. Negative Space XOXO Designs
Chic and modern! Pin this minimalist nail art!
Negative space XOXO designs use the natural nail plate as a canvas, creating a modern, breathable look where the ‘X’ and ‘O’ shapes are defined by the absence of color or crisp outlines. This minimalist approach is incredibly chic and grows out gracefully compared to full-coverage polish.
This technique showcases negative space as a core entity, exploring the relationship between unpainted areas and conceptual design. For minimalist XOXO nails, precision is paramount. Using builder gel XOXO designs allows you to create raised lines that define the negative space, a technique borrowed from advanced nail art mastery.
Products & Tools Used
- Base Coat: A good quality, clear base coat.
- Nail Art Striping Tape: Thin nail art striping tape or nail vinyls.
- Nail Polish (Accent Color): Opaque red, black, or pink nail polish for the XOXO lines.
- Fine Detail Nail Art Brush: For intricate details or freehand XOXO.
- Top Coat: A glossy top coat.
Application/Styling Steps
- Prep & Base: Apply clear base coat to clean, prepped nails. Allow to dry completely. The natural nail will serve as your ‘negative space’.
- Create XOXO Outline: For crisp lines, apply nail art striping tape to create the ‘X’ and ‘O’ shapes. Ensure the tape is firmly pressed down, outlining the areas you want to remain clear.
- Paint Around Guides: Apply your chosen accent red nail polish (or black, pink) around the tape, covering the areas that will form the painted part of your XOXO design.
- Remove Tape: While the polish is still wet, carefully peel off the striping tape to reveal the clean negative space XOXO symbols.
- Freehand XOXO (Alternative): If not using tape, use a fine detail nail art brush to freehand paint the outlines of ‘X’s and ‘O’s directly onto the base-coated nail.
- Seal & Protect: Once dry, apply a generous layer of glossy top coat over the entire nail to protect the design and provide shine.
Pro-Tip: For the cleanest negative space lines, ensure your polish is opaque enough to provide good coverage in one or two thin coats. If you’re struggling with freehand, a nail stamping XOXO pattern can provide a perfectly crisp and symmetrical design on your bare nail.

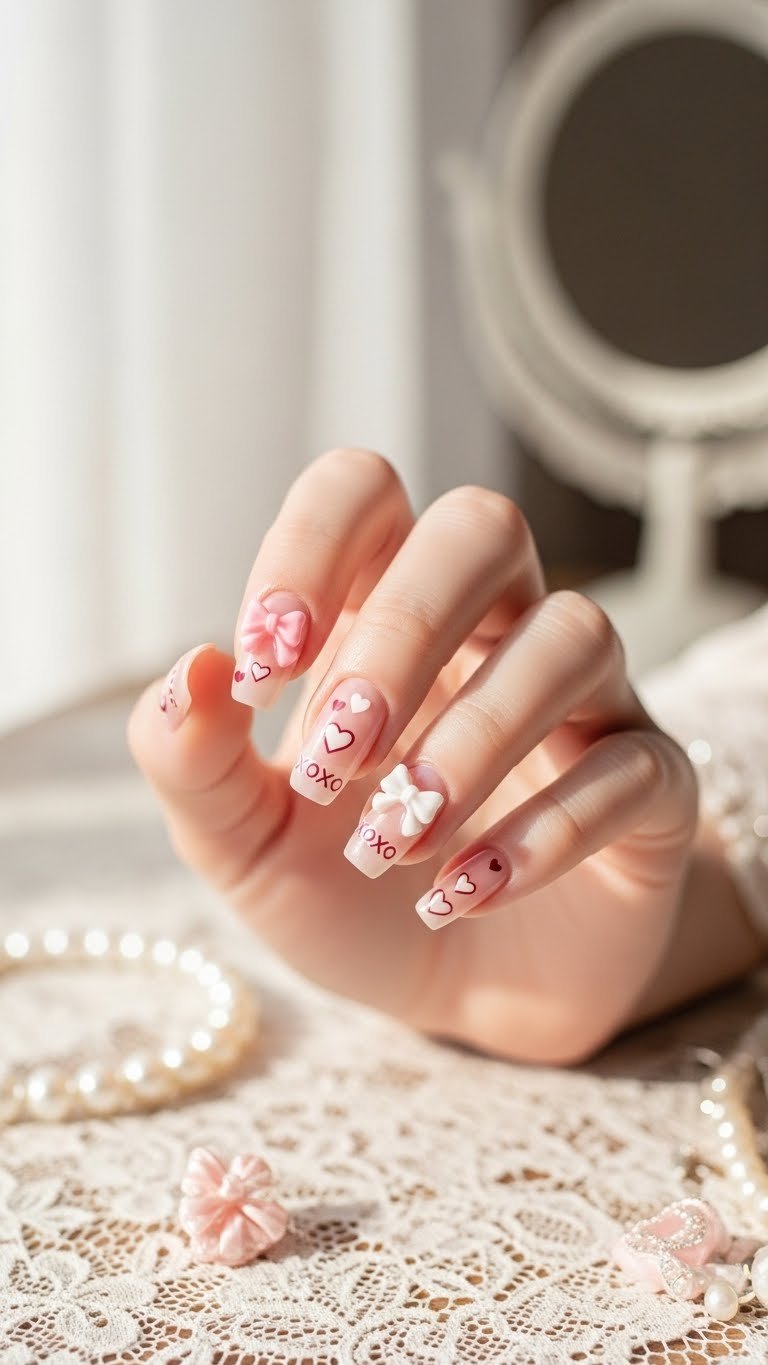
9. Sweet Coquette Bow XOXO Nails
Channel your inner coquette! Pin this charming nail art!
Sweet coquette bow XOXO nails combine the trending ultra-feminine aesthetic with traditional Valentine’s motifs, utilizing 3D charms and delicate pastel shades. This design is all about texture and “girlhood” energy, often featuring ribbons and pearls.
This look integrates 3D bows or bow charms as prominent attributes, linking current fashion trends to nail art. It explores how charms add dimension to an otherwise flat manicure. The main challenge is ensuring these raised elements stay put; professional grade nail supplies application standards suggest using a strong adhesive or builder gel to prevent the charms from popping off during daily activities.
Products & Tools Used
- Base Coat: Standard protective base coat.
- Sheer Pink Nail Polish: A sheer, milky pink nail polish for a soft base.
- Small 3D Bow Nail Charms: Delicate resin or metal bow charms for nail art.
- Fine Detail Nail Art Brush: For painting subtle XOXO details.
- Nail Art Glue or Builder Gel: A strong nail art adhesive or clear builder gel for attaching charms.
- UV/LED Lamp: (If using builder gel).
- Tweezers: For precise placement of charms.
- Top Coat: A glossy top coat.
Application/Styling Steps
- Prep & Base: Apply base coat and two thin coats of your sheer pink nail polish. Let dry.
- Add XOXO Details: Using a fine detail brush and white or a slightly darker pink polish, paint small, delicate ‘X’s and ‘O’s on a few nails.
- Attach Bow Charms: Apply a small bead of nail art glue or a tiny dot of builder gel (cure if using gel) where you want to place the bow. Use tweezers to carefully pick up and place the 3D bow nail charm onto the adhesive. Press down gently.
- Secure Charms: If using builder gel, cure the charm under a UV/LED lamp. Apply a small amount of builder gel around the base of the charm to encapsulate it, ensuring there are no snags, and cure again.
- Seal & Finish: Apply a generous layer of glossy top coat over all nails, carefully working around the charms. Ensure the top coat seals the painted XOXO details but doesn’t obscure the charms.
Pro-Tip: When attaching 3D charms, use a small amount of non-wipe builder gel and cure it fully. This not only secures the charm but also creates a smooth surface around it, preventing the charm from snagging on clothes or hair, a crucial tip for advanced nail prep for longevity.

Key Takeaways: Your Quick Guide to Valentines Nails XOXO
Summarizing the essentials of valentines nails xoxo helps ensure you choose the right method and style for your specific needs, maximizing both beauty and wear time. We have covered a diverse range of techniques, from the simplicity of stickers to the artistry of negative space.
Here are the most critical points to remember when planning your XOXO nail art for January 2026:
- XOXO Nails Offer Diverse Styles for Every Skill Level: From simple hand-painted XOXO designs to elaborate Y2K V-tips or coquette bows, there’s a valentines nails xoxo style for everyone, whether you’re a beginner or an experienced artist.
- Press-Ons Provide Instant Glamour: Chic press-on XOXO nails offer a quick, convenient, and easy to apply XOXO nails solution for a festive Valentine’s Day manicure without the need for intricate DIY.
- Texture and Finish Elevate Your Design: Experiment with matte finish XOXO nails for sophistication or glitter valentines nails xoxo for sparkle, creating dynamic contrast and visual interest.
- Precision Tools are Key for Professional Results: Using fine detail nail art brushes, striping tape, or nail art confetti significantly improves the crispness and quality of your XOXO nail art.
- Secure 3D Elements for Longevity: For designs incorporating small nail charms hearts or 3D bow nail charms, proper adhesion with builder gel is crucial to prevent snagging and ensure your romantic nails xoxo last.
- Negative Space Offers Modern Elegance: Minimalist XOXO nails leveraging negative space provide a contemporary, chic look, emphasizing clean lines and sophisticated style.
- Prioritize Nail Prep and Quality Top Coat: Regardless of the design, thorough nail preparation and a high-quality top coat for XOXO glitter nails (or any design) are essential for durability and a polished finish.
People Also Ask About Valentines Nails XOXO
Understanding common queries about XOXO nails ensures you can troubleshoot issues and make informed decisions about products and techniques. We have compiled the most frequent questions from users to provide clear, actionable answers.
What are XOXO nails for Valentine’s Day?
XOXO nails are a popular Valentine’s Day nail art trend featuring ‘X’ and ‘O’ symbols, representing hugs and kisses, often integrated with hearts or other romantic motifs. These festive designs can range from simple hand-painted details to intricate 3D embellishments, typically in classic Valentine’s colors like red, pink, and white, making them a sweet way to celebrate the holiday.
How to do XOXO nails at home for beginners?
Beginners can easily create XOXO nails at home by using nail art pens or fine detail brushes for simple ‘X’ and ‘O’ letters, or by applying XOXO nail decals and stickers. Starting with a light base color like pink or nude makes any mistakes less noticeable. Always finish with a clear top coat to seal the design and enhance durability.
Where to buy good quality XOXO press on nails?
Good quality XOXO press-on nails can be found online on platforms like Amazon, Etsy, and dedicated beauty retailers, or in stores at major drugstores and beauty supply shops. Look for sets that specify durability, come with a strong adhesive, and offer a variety of sizes and shapes like medium square XOXO nails to ensure a perfect fit for your natural nails.
How long do XOXO press on nails last?
XOXO press-on nails can last anywhere from 5-7 days with proper application and care, though some high-quality sets with strong nail glue can extend to 1-2 weeks. Longevity largely depends on nail preparation, the quality of the adhesive, and how gently you treat your hands during daily activities. Using a reliable strong, fast-drying nail glue is key.
What is the meaning of XOXO on nails?
The meaning of XOXO on nails directly translates to “hugs and kisses,” symbolizing affection, love, and friendship. For Valentine’s Day, this motif is a playful and romantic way to express sentiment, making XOXO nail art a popular choice to complement the holiday’s theme of love and connection.
What are trendy valentines nail designs beyond XOXO?
Beyond classic XOXO, trendy Valentine’s nail designs for 2026 include minimalist heart outlines, gradient pink and red ombré, “coquette” style bows and pearls, chrome or holographic finishes, and abstract swirl patterns. Many trends focus on subtle elegance or playful textures, often incorporating pastels or modern takes on traditional romantic symbols.
What supplies do I need for XOXO nail art?
For basic XOXO nail art, you’ll need a base coat, desired nail polish colors (pink, red, white are popular), a fine detail nail art brush or dotting tool, XOXO nail decals or stickers (optional), and a clear top coat. For more complex designs or 3D elements, nail glue, small charms, or builder gel might also be required to secure embellishments.
Can I do XOXO nails with gel polish?
Yes, you can absolutely do XOXO nails with gel polish, which often offers superior durability and a high-gloss finish. You’ll need gel base and top coats, colored gel polishes, and a UV/LED lamp for curing. Gel polish allows for more intricate designs as it won’t dry until cured, giving you ample time to perfect your gel XOXO designs.
How to remove valentines press on nails without damage?
To remove Valentine’s press-on nails without damage, soak your fingers in warm, soapy water (or a mix of warm water and oil) for 10-15 minutes to loosen the adhesive. Then, gently pry the press-ons from the side using a wooden cuticle pusher. Avoid forcefully pulling them off to prevent damage to your natural nails.
How to make XOXO nail art last longer?
To make XOXO nail art last longer, start with proper nail preparation by cleaning and buffing your natural nails thoroughly. Apply a quality base coat, use thin layers of polish allowing each to dry, and seal your design with a durable, long-lasting top coat. Reapplying top coat every few days can also extend the life of your XOXO manicure.
Final Thoughts on Valentines Nails XOXO
As we wrap up our guide to valentines nails xoxo, it’s clear that these charming designs offer a wonderfully versatile way to express affection and embrace the festive spirit of Valentine’s Day. Whether you opt for the simplicity of hand-painted XOXO hearts, the convenience of chic press-on XOXO nails, or the modern flair of Y2K V-tips, each of these 9 proven designs provides a unique opportunity to elevate your manicure. We’ve explored everything from glittering accents to subtle negative space, demonstrating that XOXO nail art can be as understated or as bold as your heart desires.
Remember, the key to a successful valentines manicure lies in thoughtful preparation, precise application, and the right tools and products. By leveraging the comprehensive steps and product recommendations outlined in this guide, you’re well-equipped to achieve a salon-worthy look right at home. Embracing the romantic nails xoxo trend is not just about aesthetics; it’s a delightful form of self-care and a joyful way to carry the spirit of love on your fingertips throughout January 2026.
Which of these XOXO nail art ideas will you be trying first for Valentine’s Day? Share your favorite designs in the comments below
Last update on 2026-01-17 / Affiliate links / Images from Amazon Product Advertising API