Struggling to create a festive manicure that’s both trendy and elegant? You want salon-quality blue Christmas bow nails, but intricate details and 3D elements seem impossible to perfect at home. This can lead to frustration and designs that don’t last through the holiday season.
Blue Christmas bow nails are a top trend for 2026 because they perfectly merge the icy elegance of cool blue tones with the hyper-feminine ribbon motif from the Coquette aesthetic, creating a sophisticated and modern alternative to traditional holiday colors. This style allows for incredible versatility, from a dainty baby blue look to a dramatic navy and silver statement.
Drawing from professional nail technician methodologies and an analysis of current trends, this guide unlocks the secrets to flawless execution. We will explore seven genius techniques, from mastering 3D bow application to ensuring your manicure lasts for weeks. Get ready to create your most stunning holiday nails yet.
Are Blue Christmas Bow Nails The Ultimate Festive Statement for 2026?
Yes, they absolutely are. The popularity of blue Christmas bow nails in 2026 stems from a perfect fusion of two major cultural currents: the timeless elegance of winter aesthetics and the surging, hyper-feminine Coquette trend. For years, holiday nail art was dominated by reds and greens. However, observing shifts over recent holiday seasons, there’s a clear move towards more sophisticated and unique color palettes. Blue offers a cool, icy alternative that feels both festive and modern.
The design’s power lies in its versatility. A deep navy blue base with a crisp silver bow whispers formal elegance, perfect for a holiday party. Conversely, a sheer baby blue polish with tiny, hand-painted white ribbons channels the playful, dainty Coquette aesthetic that has taken over social media. By combining the symbolic bow—representing gifts and celebration—with shades of blue that evoke winter wonderlands and starry nights, this festive bow nail art becomes more than just a manicure; it’s a personal style statement that’s perfectly on-trend for the season.
Master Blue Christmas Bow Nails With Seven Genius Secrets
Achieving a flawless, long-lasting blue Christmas bow manicure requires more than just a steady hand. It demands specific knowledge of materials, application techniques, and crucial prep work. Curated from professional nail technician methodologies, these seven genius secrets cover everything from color selection and 3D element adhesion to the final touches that guarantee salon-quality results at home. Think of this not just as a tutorial, but as your masterclass in creating the perfect festive bow nail art.
Here are the seven secrets we’ll unlock:
1. The Icy Baby Blue Coquette Look
2. The Elegant Navy Blue and Silver Accent
3. Mastering the 3D Resin Bow Technique
4. Perfecting the Quick Flat Ribbon Decal
5. The Holographic Blue Glitter Base
6. Blue Bow French Tip Precision
7. Longevity Secret: Prep and Capping
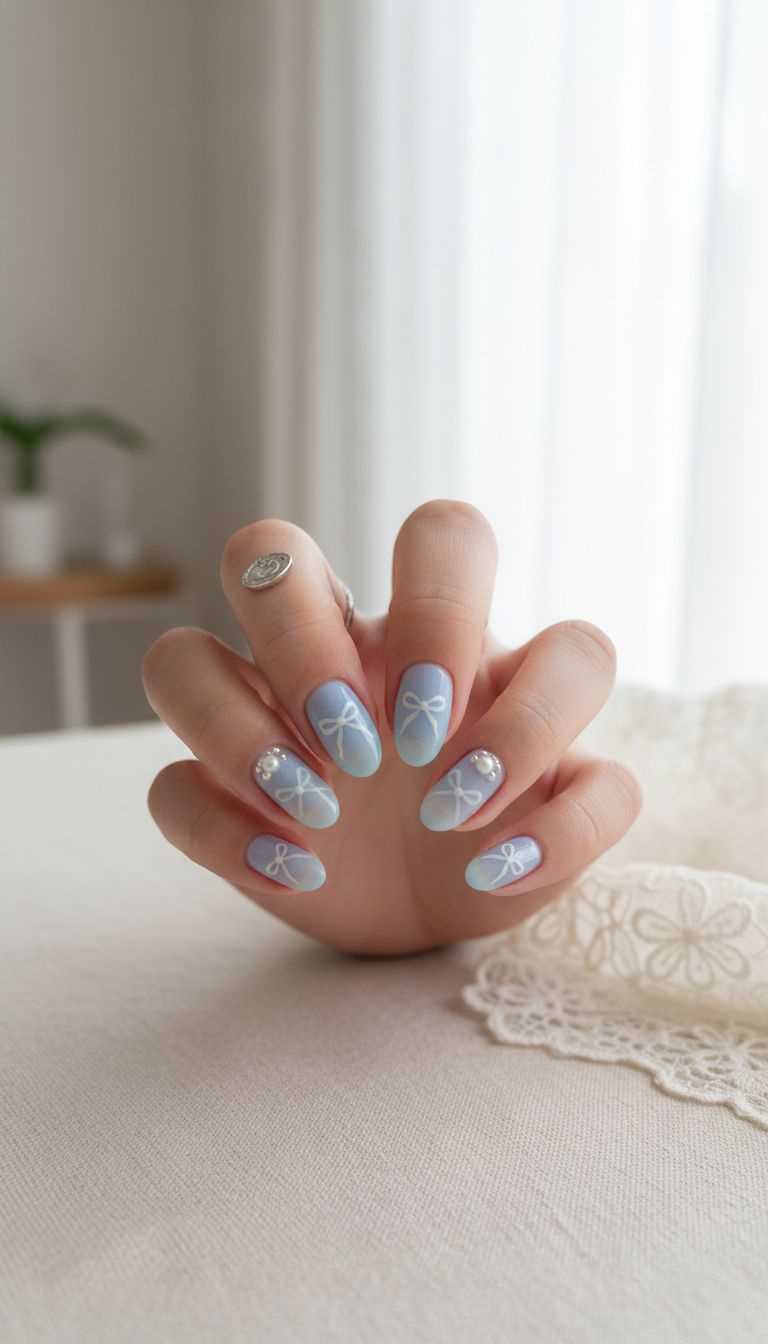
1. The Icy Baby Blue Coquette Look
Pin this genius hack to your ‘Coquette Nail Art’ board!
This look is all about capturing the dainty, hyper-feminine Coquette aesthetic. Using a sheer, icy baby blue base creates a delicate canvas, while the tiny white painted bows and delicate pearl accents add a touch of romance and winter charm.
Products & Tools Used:
- Sheer baby blue gel polish (HEMA-free formula, 1-2 coats opacity)
- Tiny white nail art liner gel
- Fine liner brush (5mm length, size 000 for precision)
- Set of mini iridescent nail pearls (1mm size)
- Non-wipe top coat and UV/LED curing lamp
Application/Styling Steps:
- Prepare the nail surface, apply a base coat, and cure (30s).
- Apply 1-2 thin coats of the sheer baby blue gel polish, curing each layer fully (60s).
- Using the white liner gel and the fine liner brush, paint a tiny, symmetrical bow design near the cuticle or the free edge, ensuring the ribbon lines are crisp. Cure (30s).
- Apply a small bead of non-wipe top coat or specialized rhinestone glue to the center of the bow.
- Carefully place one mini pearl onto the adhesive and flash cure (10s) to secure placement before the final top coat.
- Apply a final non-wipe top coat over the entire nail (avoiding the pearl unless desired) and cure for the full duration (120s).
Pro-Tip: For the daintiest look, use a matte top coat over the base blue polish, leaving the tiny pearl accent glossy for subtle contrast.

2. The Elegant Navy Blue and Silver Accent

Save this clever organization idea!
For a more dramatic and sophisticated holiday look, pair a deep, opaque navy blue with a striking metallic silver bow. This combination is perfect for formal events and looks stunning on longer nail shapes like coffin or almond, where the contrast can truly shine.
Products & Tools Used:
- Highly pigmented opaque navy blue gel polish
- Metallic silver ribbon nail decals or foils
- Fine tip tweezers
- Scissors (for trimming decals)
- Dual-ended silicone tool for pressing foils
Application/Styling Steps:
- Prep nails. Apply base coat and cure. Apply two thin, cured coats of navy blue gel polish to the base nails.
- For the accent nail, apply a sheer nude base (optional) and cure.
- Cut the metallic silver decal or foil into the desired small bow shape, ensuring the size is proportional to the nail.
- Using tweezers, position the decal carefully onto the cured navy or nude nail surface.
- Press the decal/foil firmly onto the nail using the silicone tool, ensuring all edges are flush with the polish.
- Apply a generous layer of non-wipe top coat, ensuring the entire decal is fully encased to prevent lifting or snagging. Cure for 120 seconds.
Lesson Learned: Ensure your navy polish is 100% dry or fully cured before placing the silver decal; residual stickiness can trap the foil unevenly, causing wrinkles.

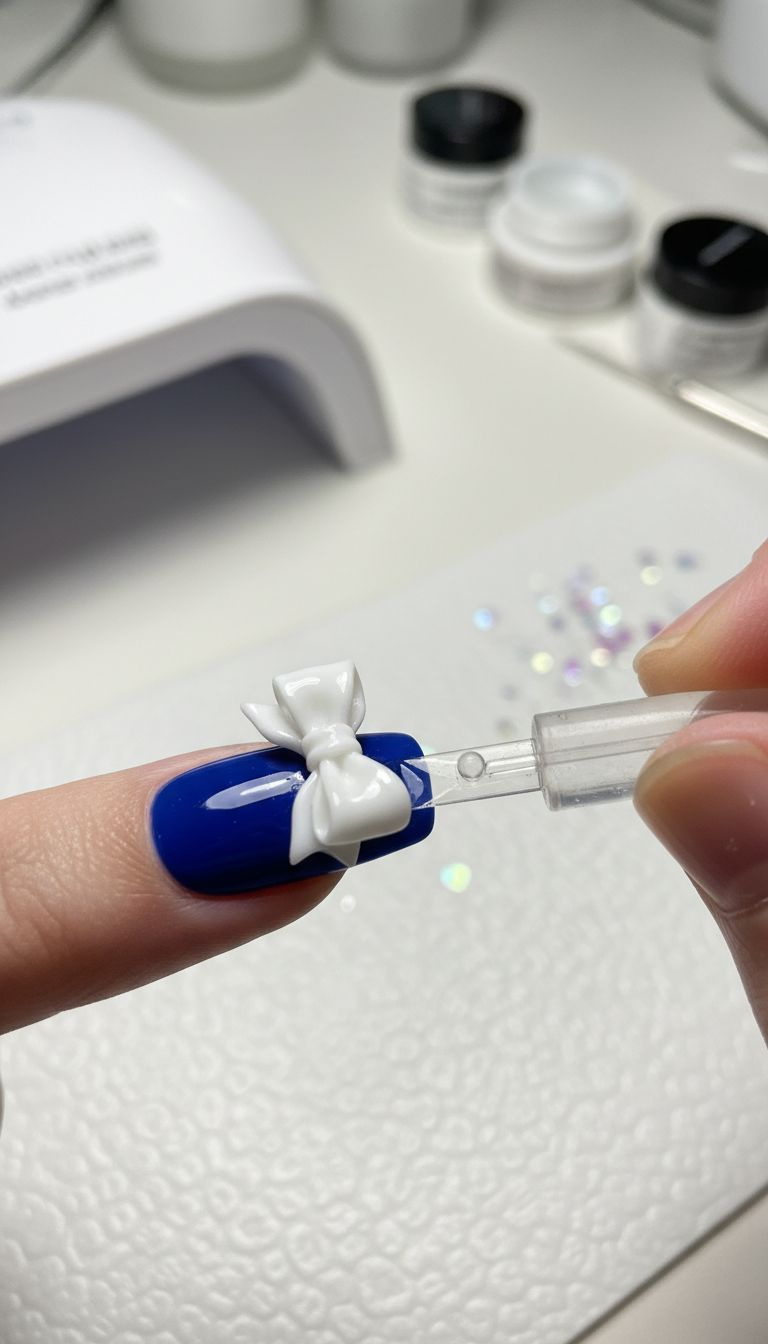
3. Mastering the 3D Resin Bow Technique
Pin this technical tutorial to your ‘Advanced Nail Art’ board!
This is where we address a common gap in most nail art guides: creating durable, professional-grade 3D bows. This advanced technique requires specific materials like sculpting gel and builder gel to create a dimensional, long-lasting element that won’t pop off after a few days.
Products & Tools Used:
- Clear or white 3D sculpting gel (non-flowing consistency)
- Specialized UV/LED curing lamp (minimum 48W)
- Builder gel (used as the adhesive agent)
- Double-ended silicone nail shaper tool
- Dotting tool (for centering the gel bead)
Application/Styling Steps:
- Prepare and polish the nail surface (Base and Blue Color complete and cured). Apply a thin, cured layer of non-wipe top coat—this provides a smooth, less slippery base for attachment.
- Scoop a small bead of 3D sculpting gel and place it onto a silicone pad. Using the shaper tool, divide it into three parts: two loops and one center knot.
- Sculpt the two separate loop shapes and the center knot. Flash cure them separately for 5-10 seconds each to solidify the shape.
- Apply a small bead of builder gel onto the precise placement area on the nail (this is your strong adhesive).
- Carefully place the two loops and the center knot onto the builder gel adhesive and gently press into place.
- Once satisfied with the positioning, fully cure the entire 3D bow system under the UV/LED lamp for a minimum of 120 seconds for full hardening and adhesion.
Warning: Always sculpt 3D elements on a cured surface and ensure the UV lamp is fully functional. Improper curing can lead to allergic reactions or the bow peeling off prematurely. Never let liquid monomer or soft gel touch the skin.

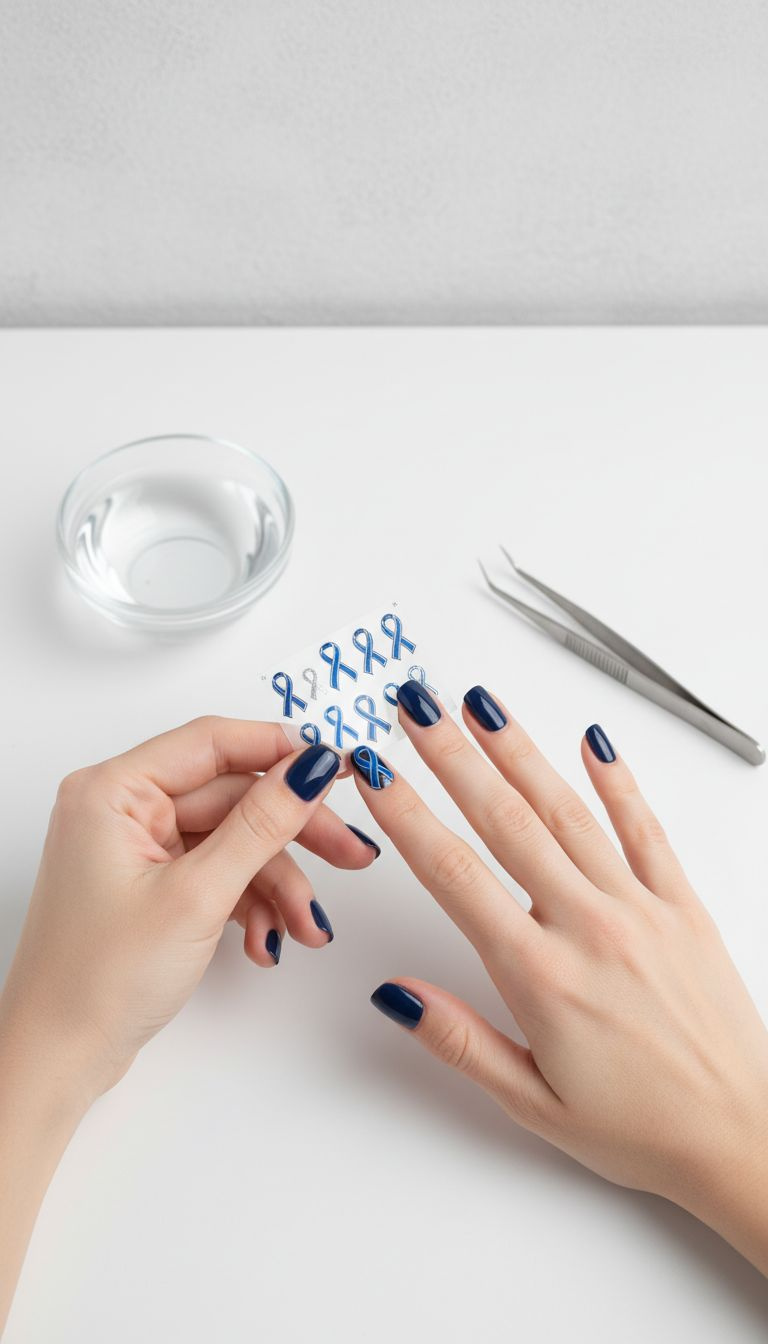
4. Perfecting the Quick Flat Ribbon Decal
Save this quick hack for your ‘Last Minute Christmas Nails’ board!
If 3D sculpting feels too daunting, ribbon decals are your best friend. This beginner-friendly method offers a perfect, flat, and quick way to achieve the blue bow look. Water-slide decals, in particular, provide a crisp, painted-on appearance with minimal effort.
Products & Tools Used:
- Water-slide or sticker blue ribbon nail decals
- Small bowl of lukewarm water (for water-slide)
- Tweezers or silicone pusher tool
- Nail Prep Pad (alcohol wipe)
- Quick-dry top coat or thick sealing gel
Application/Styling Steps:
- Apply and fully dry/cure your base blue polish color (matte or glossy). Do not apply a top coat yet.
- For water-slide decals: Cut out the desired bow design and submerge it in the lukewarm water for 10-20 seconds until the decal easily slides off the paper backing.
- Using tweezers, slide the decal directly onto the nail surface and gently position it.
- Once placed, use a dry tissue or paper towel to gently blot excess water and ensure the decal is flat against the nail.
- Allow the decal to air dry for 1-2 minutes.
- Apply a thick layer of top coat, making sure to fully encapsulate the edges of the decal. Cure or air dry completely.
Pro-Tip: The most common reason for decal failure is inadequate sealing. Apply two layers of a quality, thicker top coat over the decal, waiting 30 seconds between layers for maximum protection.

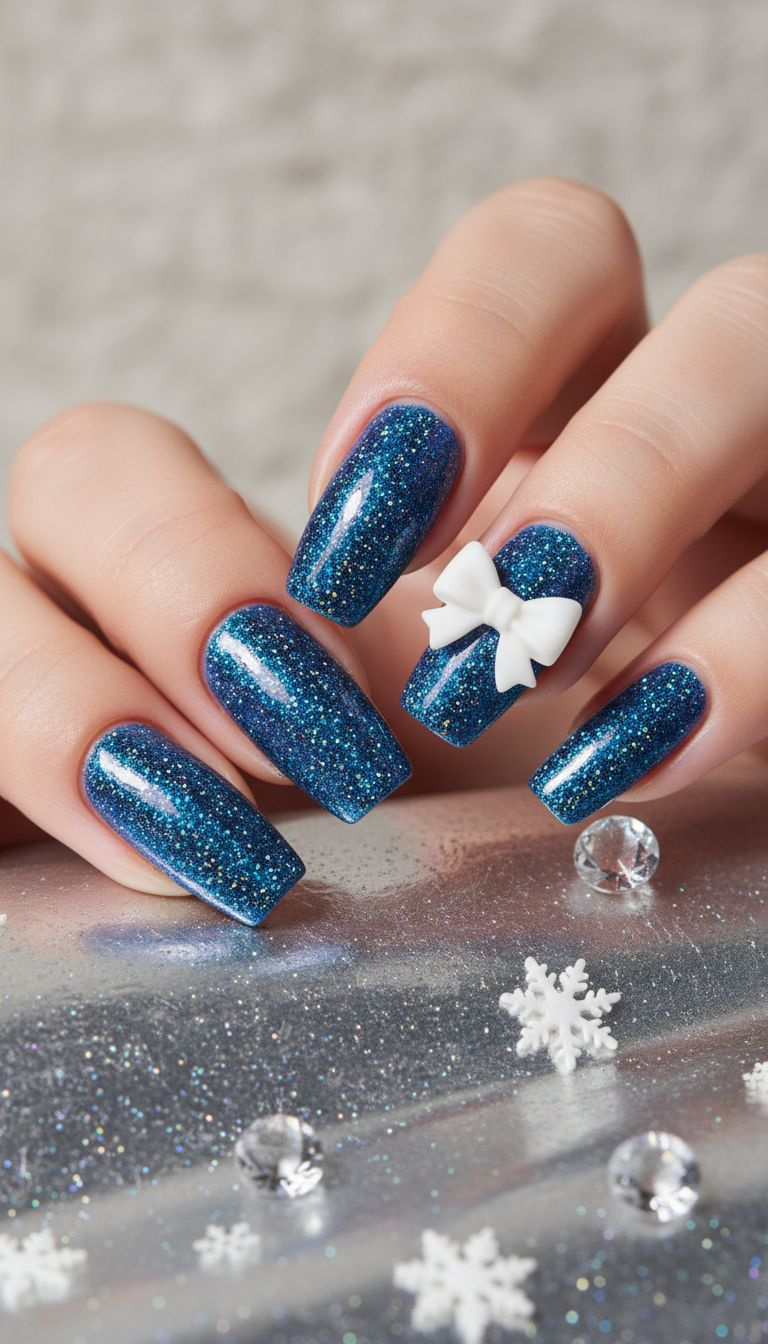
5. The Holographic Blue Glitter Base
Pin this sparkly holiday look now!
To maximize the festive sparkle, a holographic blue glitter base is the perfect choice. This dynamic, shifting backdrop provides a dazzling effect that contrasts beautifully with a simple, clean white bow, preventing the design from looking too busy.
Products & Tools Used:
- Black or very dark opaque base coat (to deepen the holographic effect)
- Holographic blue fine or chunky glitter polish/gel
- Sponge applicator (for dense glitter packing)
- Small white pre-made plastic bow charms
- Nail glue or builder gel adhesive
Application/Styling Steps:
- Apply base coat and cure. Apply one thin, cured layer of the dark opaque base color (this makes the glitter pop).
- Apply a thin layer of the holographic blue glitter polish. Before curing, use a sponge applicator to gently dab and pack the glitter onto the nail until it achieves maximum density/opacity. Cure fully.
- Apply a layer of thick top coat to smooth the surface texture caused by the glitter particles. Cure.
- Apply a dot of builder gel or strong nail glue to the desired bow placement area (usually the ring finger cuticle).
- Affix the white bow charm firmly into the adhesive and flash cure, ensuring the bow sits flush with the surface.
- Apply a final non-wipe top coat around the edges of the bow and over the entire nail, being careful not to coat the bow itself if you want a matte look.
Pro-Tip: If using chunky glitter, use the sponge technique mentioned in step 2. This presses the glitter flat, minimizing the surface bumps and making the smoothing top coat application much easier.

6. Blue Bow French Tip Precision
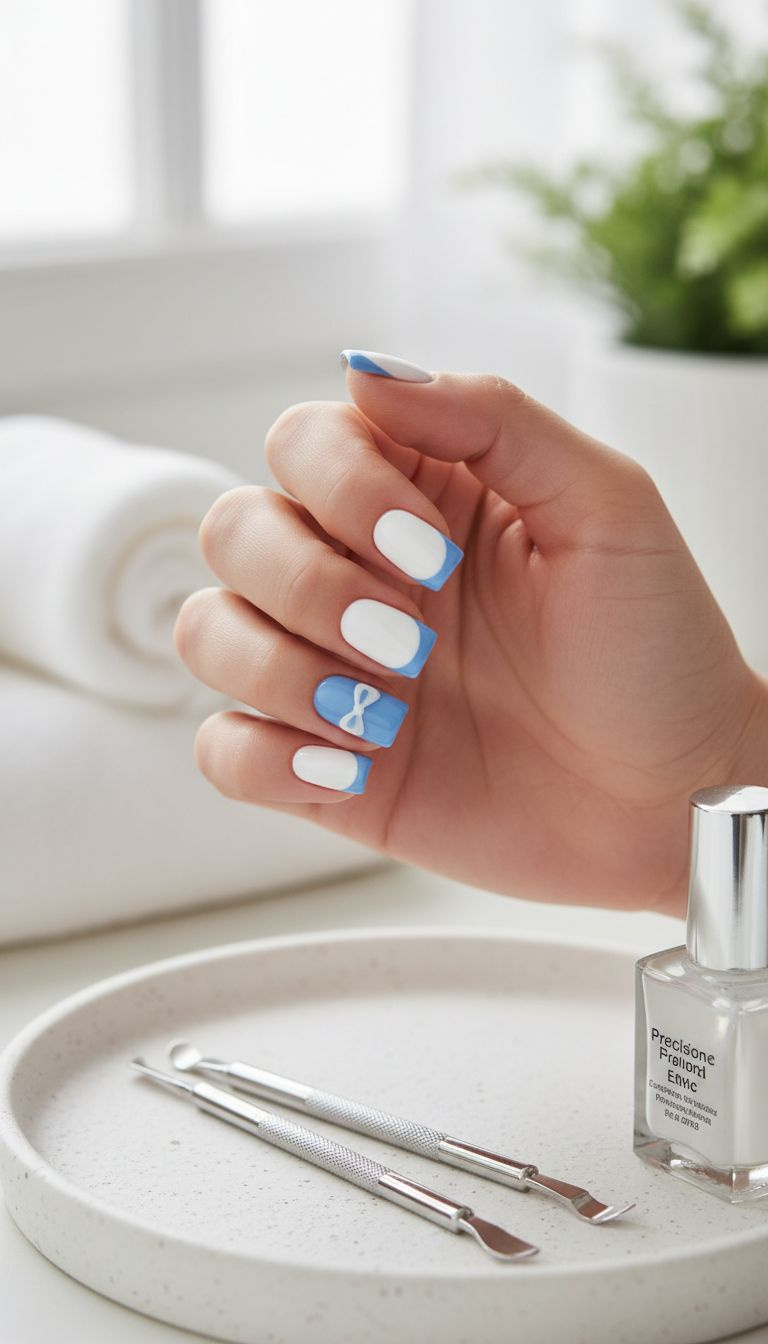
Save this elegant French tip idea!
Combining a classic French manicure with a festive bow detail creates a look that is both timeless and trendy. This technique requires precision, especially in creating a crisp, symmetrical “smile line” for the powder blue tip.
Products & Tools Used:
- Sheer nude or clear builder gel base
- Opaque powder blue gel polish (for the tip)
- White detail liner polish/gel
- Curved French Tip stencils or a specialized striping brush
- Acetone clean-up brush (essential for precision)
Application/Styling Steps:
- Apply and cure the base coat and sheer nude/clear base layer. Remove the inhibition layer (sticky residue) with alcohol.
- Using stencils or a striping brush, carefully paint the powder blue French tip curve onto the free edge of the nail.
- Crucial Step: Use the acetone clean-up brush dipped in polish remover to sharpen the “smile line” (the curve of the French tip) until it is perfectly crisp and symmetrical. Cure the blue tip.
- On the accent nail, use the white detail liner and a 5mm brush to paint a small, highly symmetrical ribbon bow at the center where the nude base meets the blue tip.
- Flash cure the white bow detail (10s).
- Apply a final non-wipe top coat over all nails and cure for 120 seconds.
Lesson Learned: For perfect French tips, use a highly pigmented blue shade. The clean-up brush is your most important tool—it’s easier to clean up the line than to paint it perfectly the first time.

7. Longevity Secret: Prep and Capping for 4-Week Wear
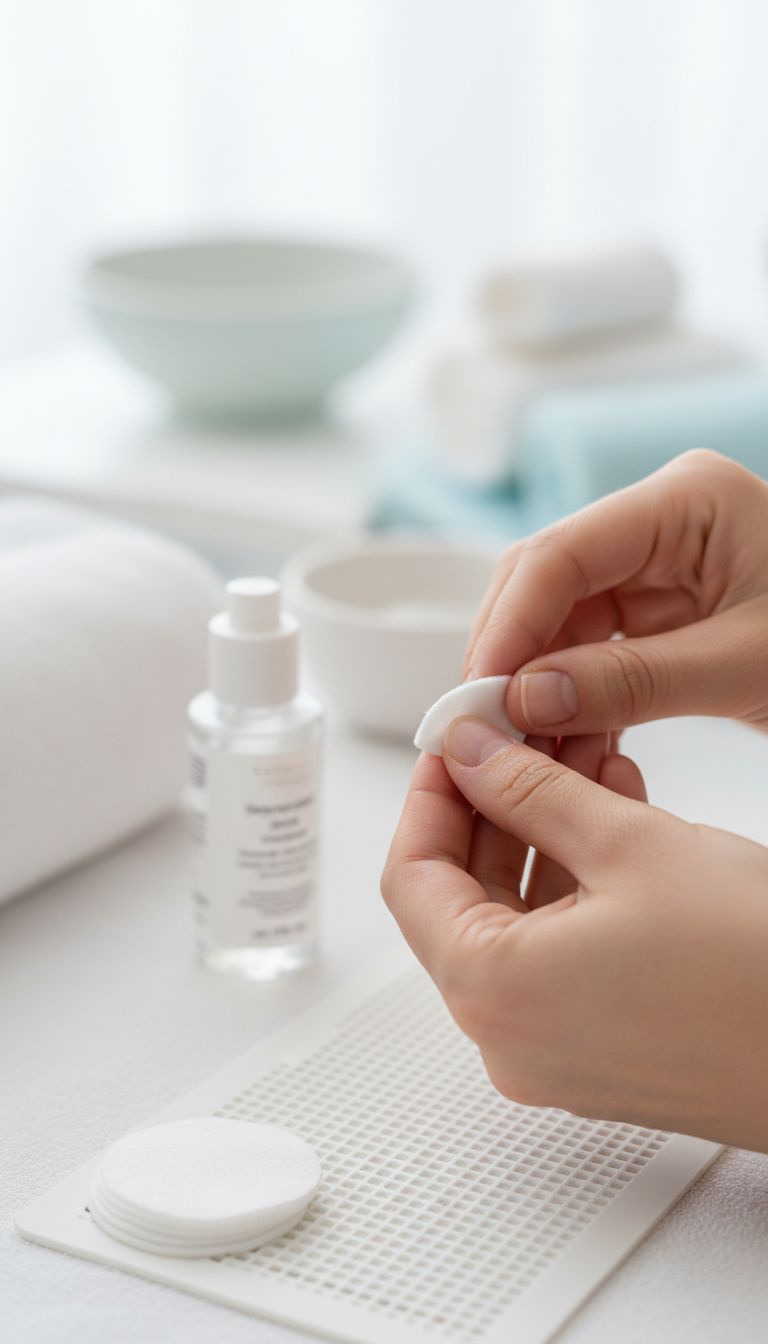
Pin this essential longevity tip!
The most beautiful design is worthless if it chips or lifts in a few days. The secret to a manicure that lasts the entire holiday season lies in meticulous nail prep and a technique called “capping the free edge.” This ensures maximum adhesion and durability.
Products & Tools Used:
- Fine grit buffing block (180/240 grit)
- 99% Isopropyl Alcohol or Nail Dehydrator
- Acid-free primer (optional, for extra adhesion)
- Thin, high-quality base coat gel
- Top Coat Gel (for free edge capping)
Application/Styling Steps:
- Gently Buff: Use the fine grit block to lightly buff the natural nail plate until the surface sheen is removed. This creates micro-channels for the product to adhere to.
- Dehydrate: Generously wipe the entire nail plate with 99% Isopropyl Alcohol or nail dehydrator to remove all oils and moisture. Avoid touching the nail after this step.
- Prime: Apply a single, tiny layer of acid-free primer to the free edge (tip) of the nail only. Let it air dry for 30 seconds.
- Base Coat and Cap: Apply your base coat. Before curing, drag the brush lightly over the very tip of the free edge to “cap” the nail. This seals the edge and prevents early chipping. Cure fully.
- Final Capping: Repeat the capping step with your colored polish and again with your final top coat. Proper capping is critical for long-term wear, especially with 3D elements.
- 3D Longevity: Always use a separate, strong adhesive (like builder gel) for 3D elements, curing the entire system fully (120 seconds minimum).
Expert Tip: Never skip the dehydration step. Most nail art failures (lifting, chipping) occur because of poor prep. Treat the 3D element adhesion like building a tiny foundation; the base must be oil-free and strong.

Your Perfect Blue: Color Theory and Pairing for The Festive Season
Choosing the right shade of blue is crucial for achieving your desired aesthetic. This isn’t just about preference; professional color theory helps determine which blue will be most flattering and appropriate for the occasion. The two primary contenders, navy and baby blue, serve very different purposes.
Navy Blue is best for elegant, formal looks and complements warm or olive skin tones. Baby Blue works best for trendy, coquette aesthetics and complements cool skin tones, matching the icy winter theme perfectly.
Here’s a quick breakdown to guide your choice:
- Navy Blue (Sophisticated & Dramatic): This deep, cool tone exudes elegance. It creates a powerful contrast for white or metallic silver bows, making it ideal for formal holiday parties and evening events. According to color theory, its depth often complements warmer skin undertones by providing a rich, balancing contrast.
- Baby Blue / Icy Blue (Playful & Trendy): A light, powder blue is the heart of the Coquette aesthetic. It feels fresh, youthful, and perfectly captures a snowy, winter vibe. This shade is most flattering on cool skin undertones (those with pink or blueish hues) as it creates a harmonious, monochromatic feel.
- Pairing Metals: As a cool tone, blue almost always pairs best with silver, chrome, or iridescent white accents. These metals enhance the icy, wintery feel of the manicure. Gold can work with warmer-toned blues like teal, but for classic navy or baby blue, silver is the superior choice for a cohesive holiday look.
Key Takeaways: Your Quick Guide to Flawless Blue Bow Nails
To ensure your festive manicure is a stunning success, keep these five essential secrets in mind. This quick summary covers the most critical steps for achieving a durable, professional-looking blue Christmas bow design that will last all season.
- Prep is Primary: Proper nail dehydration and cuticle work prevent 80% of lifting and chipping, guaranteeing long wear.
- Choose Your Blue Wisely: Navy is timeless and elegant; Baby Blue is trendy and delicate (ideal for the Coquette look).
- Use Builder Gel: Don’t rely on simple top coat to secure 3D elements; use a strong builder gel adhesive for maximum longevity.
- Cap the Edges: Sealing the free edge with every layer (base, color, top coat) is the single most effective way to prevent premature tip wear.
- Decals for Beginners: If 3D is too complex, high-quality ribbon decals offer a perfect, flat, and quick solution with stunning results when properly sealed.
People Also Ask About Blue Christmas Bow Manicures
How long do 3D resin bows typically last on nails?
When applied professionally with quality builder gel, fully cured, and properly encapsulated, 3D resin bows can last the full duration of a gel or acrylic manicure, typically three to four weeks. Proper nail preparation, including buffing and dehydration, is essential for maximizing the adhesive bond and preventing premature popping off.
Can I use regular nail polish or only gel for 3D bow designs?
It is strongly advised against using regular nail lacquer for 3D sculpting or adhesion, as it will not dry correctly or provide the necessary structural strength. You must use UV-curable materials, such as specialized 3D sculpting gel, soft gel, or traditional acrylic powder/monomer mix, all requiring a UV or LED lamp for hardening.
What is the easiest way for a beginner to get a perfect bow design?
The easiest method for beginners is to use high-quality vinyl bow decals or water-slide stickers, which require minimal skill. These flat elements only need to be placed on the cured color coat and fully sealed with two thick layers of top coat, providing a clean, symmetrical ribbon look without any sculpting difficulty.
How do I remove complex 3D nail art without damaging my natural nail?
Safe removal requires filing down the bulk of the 3D element and the top coat first (without touching the natural nail), then soaking the remainder in 100% acetone. Never peel, pry, or force the art off, as this can severely damage the nail plate. Follow up with gentle scraping and finish with heavy cuticle oil.
Should I use silver or gold accents with my blue Christmas bow nails?
Silver accents are generally recommended with blue bow nails as they complement the cool undertones of most blue shades (Navy, Baby Blue), enhancing the icy, winter theme. Gold accents are typically reserved for warmer blue shades like teal or richer, traditional colors like red and green.
Final Thoughts
You’ve now mastered the seven genius secrets, from choosing the perfect shade to securing your 3D elements for four weeks of flawless wear. This year, trade in the traditional reds for a sophisticated, icy blue holiday statement that perfectly captures the current Coquette aesthetic. This versatile and elegant design ensures your nails will be a topic of conversation at every festive gathering.
Which of these seven secrets will you try first: the elegant Navy contrast or the dainty Baby Blue French tip? Tell us in the comments below
Last update on 2026-01-17 / Affiliate links / Images from Amazon Product Advertising API