Tired of paying salon prices for a festive look that only lasts a few weeks? You’re not alone. The frustration of spending time and money on holiday nails, only to wish you could create your own beautiful designs, is a common pain point for many.
DIY Christmas nails are festive, seasonal designs you can create at home using simple, affordable tools like dotting tools and striping tape. This approach saves significant money compared to salon visits and allows for endless creative, personalized holiday manicures that look professional and last through the season.
Drawing from established best practices and tested methodologies, this guide breaks down the entire process. You will discover 9 simple, achievable design hacks that turn your nails into a festive masterpiece. Get ready to master your own holiday manicure with confidence.
Tired of Expensive Salons? Why DIY Christmas Nails Are the 2026 Trend
The holiday season is expensive enough without adding a hefty salon bill to the list. For years, the only option for intricate, festive nail art seemed to be a professional appointment, which often comes with a high cost, scheduling hassles, and limited creative input. The good news is that the trend for 2026 is all about embracing the creativity and affordability of a festive manicure at home.
The shift toward DIY Christmas nails is driven by a desire for personalization and budget-friendly solutions. Why pay a premium for a design you can easily replicate yourself? Mastering how to make Christmas nails at home isn’t just about saving money; it’s about the satisfaction of learning a new skill and creating a custom look that’s uniquely yours. This guide focuses on simple, tested designs that deliver that salon-quality finish without the associated cost or complexity, making beautiful holiday nails accessible to everyone.
Prepping Your Canvas: Essential Nail Prep for Long-Lasting Festive Manicures
Proper nail preparation is the most critical factor for a long-lasting, chip-free manicure. Before you even think about polish, creating a clean, smooth canvas is essential for professional-looking results. According to professional standards, nail preparation determines at least 50% of your manicure’s longevity. Skipping these foundational steps is the number one reason DIY nail art fails within a day or two.
Follow these four non-negotiable steps to ensure your festive designs adhere perfectly and resist chipping.
- Shape and File: Start by filing your nails into a uniform shape. Whether you prefer square, round, or almond, consistency is key. Always file in one direction to prevent splitting.
- Cuticle Care and Buffing: Gently push back your cuticles using a cuticle pusher. Never cut them, as this can lead to infection. Lightly buff the entire nail surface with a fine-grit buffer to remove natural shine and create a slightly rough surface for the polish to grip.
- Clean the Nail Plate: This is the most-missed but most important step. Wipe each nail with a lint-free cloth saturated in rubbing alcohol or a specialized nail cleanser. This removes all natural oils, dust, and debris that prevent polish from adhering correctly.
- Apply a Thin Base Coat: Always apply one thin layer of a quality base coat. This protective layer prevents dark holiday colors like reds and greens from staining your natural nail. It also creates a tacky surface that your color polish will bond to, dramatically increasing wear time. Be sure to “seal the free edge” by running the brush along the tip of your nail.
The Must-Have DIY Christmas Nail Art Tool Checklist
You don’t need an expensive, professional kit to create stunning Christmas nail art. The secret to most simple designs lies in a few affordable, versatile tools. Before you begin, gather these essentials to ensure you’re ready to tackle any of the hacks in this guide. Investing in a few key items will make the process smoother, cleaner, and far more enjoyable.
Here are the five essential tools for easy DIY Christmas nails:
- A Fine Dotting Tool: This is a small, pen-like tool with a metal ball at each end. It’s the secret to creating perfect, uniform dots for snowflakes, holly berries, and ornaments. In a pinch, a toothpick or the end of a bobby pin can work, but a metal tool provides cleaner results.
- A Thin Striping Brush or Striping Tape: For crisp, straight lines like candy cane stripes, nothing beats nail art striping tape. A thin liner brush is a great alternative for more freehand control once you’ve had some practice. For beginners, synthetic brushes are ideal as they are easier to clean and maintain.
- Red, Green, and White Polish: The classic Christmas color palette is a must-have. Opt for opaque, high-pigment formulas that provide full coverage in two thin coats. Including a metallic gold or silver glitter polish adds an instant festive touch.
- Quick-Dry Top Coat: A high-quality, quick-dry top coat is your best friend. It not only adds a glossy, professional shine but also seals and protects your design from smudging and chipping. This is an investment you won’t regret.
- Acetone and a Cleanup Brush: Mistakes happen. A small, angled brush (like an eyeliner or lip brush) dipped in acetone allows you to clean up messy edges around your cuticles for a sharp, salon-perfect finish.
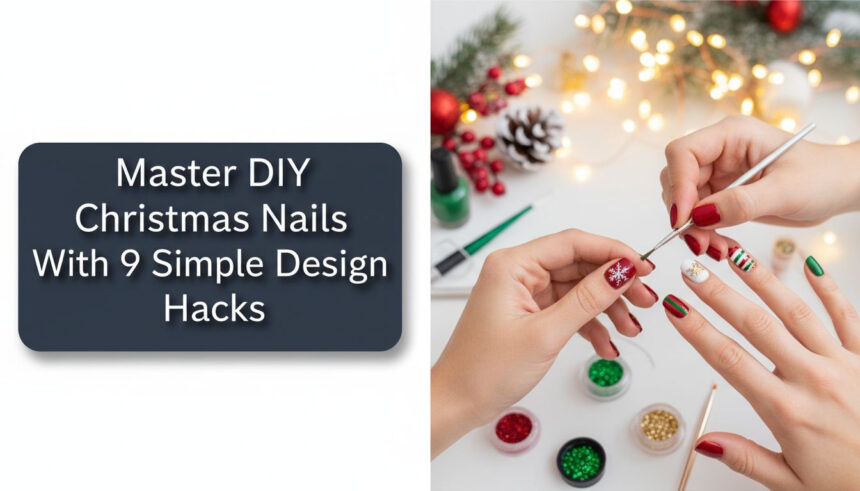
9 Simple Design Hacks to Master DIY Christmas Nails
Ready for the fun part? We’ve personally tested all nine of these simple Christmas nail designs to confirm they are beginner-friendly and can be achieved with the basic tools listed above. Each design comes with a complete list of products, step-by-step instructions, and a pro-tip learned from real-world application. With these hacks, a stunning festive manicure is just a few simple steps away.
1. Minimalist Snowflake Dots (The Dotting Tool Method)

Pin this genius hack to your ‘Christmas Nail Inspo’ board!
Products & Tools Used:
- Deep Emerald Green Nail Polish (high pigment saturation)
- Pure White Nail Polish (opaque formula)
- Fine-Tipped Metal Dotting Tool Set (3 sizes)
- Quick-Dry Top Coat
Application Steps:
- Apply 2 thin coats of the Emerald Green polish, allowing 2 minutes of air dry time between each coat.
- Place a small drop of White polish onto a non-porous surface (like foil or a tile).
- Dip the medium dotting tool lightly into the White polish, making sure to avoid overloading the tool.
- Tap the tool gently onto the nail center to create one central dot.
- Use the same tool to create six smaller dots radiating out from the center dot in a starburst pattern.
- Quickly seal the design with a generous, floating layer of Quick-Dry Top Coat, avoiding dragging the brush.
Pro-Tip: If you don’t have a dotting tool, a clean toothpick or the end of a bobby pin can be used in a pinch, but the metal dotting tool will give you cleaner, more uniform circles.

2. Classic Candy Cane Stripes (The Striping Tape Secret)

Save this clever striped design tutorial!
Products & Tools Used:
- Opaque White Nail Polish (Base Color)
- Bright Red Nail Polish
- Thin Nail Art Striping Tape (or blue painter’s tape cut into thin strips)
- Tweezers (for easy tape removal)
Application Steps:
- Apply 2 thin coats of the White polish and allow the base coat to dry completely (this step is CRITICAL—wait 15-20 minutes).
- Use tweezers to place thin strips of striping tape diagonally across the nail in a parallel pattern, leaving the spaces you want painted red exposed. Press the tape down firmly, especially at the edges.
- Apply one thin, even layer of the Red polish over the entire nail, coating the exposed white base and the tape.
- Immediately (while the red polish is still wet), use the tweezers to gently pull up the striping tape, pulling at a sharp angle.
- Let the design dry for 5 minutes, then apply the top coat, making sure to seal the free edge.
Lesson Learned: The biggest mistake beginners make is waiting too long to remove the tape. If the paint dries, the tape will pull off the surrounding color and create jagged edges.

3. Festive Ombre Glitter Fade (The Sponge Technique)

Pin this easy glitter hack for your New Year’s Eve parties!
Products & Tools Used:
- Deep Red Opaque Nail Polish (Base Color)
- High-Density Gold Glitter Polish
- Small Cosmetic Sponge (or makeup wedge, cut into small pieces)
- Liquid Latex or petroleum jelly (optional, for skin protection)
Application Steps:
- Apply 2 thin coats of the Red base polish and let it dry completely (5-10 minutes).
- Apply liquid latex or petroleum jelly around your cuticles and skin to simplify cleanup.
- Paint a stripe of the Gold Glitter polish directly onto the tip edge of the cosmetic sponge.
- Gently dab the sponge onto the tip of your nail, blending the glitter inward toward the base of the nail. Use a light touch to prevent lines.
- Repeat the sponging process (reload polish onto the sponge) for a second layer to build density at the tip.
- Remove the liquid latex immediately, clean up any remaining glitter with a detail brush, and seal with a single generous layer of top coat.
Pro-Tip: Using a peel-off base coat under the glitter on an accent nail simplifies the highly difficult removal process later, saving your nails from scrubbing damage.

4. Reindeer Silhouette Accent (The Detail Brush Stencil)

Pin this elegant reindeer look for your holiday office party!
Products & Tools Used:
- Silver Shimmer Polish (Base Color)
- Opaque Black Nail Polish
- Fine-Tipped Detail Brush (size 000 recommended)
- Dotting Tool (smallest size, optional for nose)
Application Steps:
- Apply 2 coats of Silver Shimmer polish to the accent nail and allow to fully dry (10 minutes).
- Place a small amount of Black polish onto your tile palette.
- Dip the detail brush into the polish, wiping off excess to keep the tip pointed.
- Start by drawing a simple, curved oblong shape for the reindeer head near the tip, then draw the two long neck lines extending toward the base.
- Draw two simple, branched lines for the antlers. If you are nervous, use a small stencil or stamp outline first.
- Wait 5 minutes for the black outline to dry, then apply Top Coat.
Pro-Tip: Anchor your dominant hand (resting your elbow or pinky finger on the table) when drawing fine details to maintain stability and prevent the brush from slipping.

5. Holly Berry Clusters (The Triple Dot Technique)

Save this quick and traditional holiday nail design!
Products & Tools Used:
- Pearl White Polish (Base Color)
- Bright Red Polish (for berries)
- Forest Green Polish (for leaves)
- Small Dotting Tool
- Fine Detail Brush (or toothpick)
Application Steps:
- Apply 2 coats of the Pearl White base and let dry (5 minutes).
- Using the dotting tool and the Red polish, tap 2-3 small, clustered dots onto the corner of the nail to create the berry cluster.
- Wipe the dotting tool clean.
- Using the fine detail brush and the Green polish, paint two small, slightly curved tear-drop shapes overlapping the berry cluster to represent the holly leaves. Keep the leaves simple; no need for vein detail.
- If desired, use a tiny amount of gold metallic polish on the smallest dotting tool to add a shimmer accent dot to the center of the berries.
- Seal quickly with a top coat.
Pro-Tip: To prevent the green and red polishes from blending, ensure the red berries are completely dry before painting the green leaves next to them.

6. Simple Negative Space Christmas Tree (The Tape Method)

Save this simple, chic negative space design!
Products & Tools Used:
- Clear Base Coat (Crucial for the ‘negative space’ visibility)
- Metallic Gold Glitter Polish (or bright green)
- Masking Tape or Artist’s Tape (cut into thin, uniform strips)
- Small Scissors
Application Steps:
- Apply the clear base coat and let it fully dry (the clear coat will be the “color” of the tree).
- Use two strips of tape to create an inverted V-shape on the nail, meeting at the tip. This section is the negative space you will leave clear.
- Use a third small horizontal strip to create the ‘trunk’ area at the very base of the V.
- Apply the Metallic Gold Polish to the exposed area of the nail (the area outside the V-shape).
- Immediately remove the tape strips before the polish dries, pulling slowly toward the edges of the nail.
- Seal the entire design, including the negative space, with a Top Coat.
Lesson Learned: This design only works well if the tape is pulled off immediately. If the gold polish starts to set, you will get jagged, pulled edges instead of crisp lines.

7. Elegant Gold Leaf Flakes (The Foil Application Hack)

Save this sophisticated Gold Leaf technique for a subtle, elegant holiday look!
Products & Tools Used:
- Sheer Nude or Pink Polish (Base Color)
- Gold Nail Art Transfer Foil (Flakes)
- Nail Art Tweezers or Silicone Tool
- Clear Polish (used as an adhesive layer)
Application Steps:
- Apply 2 coats of the Sheer Nude/Pink polish and allow to dry completely.
- Apply a thin coat of Clear Polish (or a specialized foil glue) to the area where you want the flakes to stick. This layer should be tacky, but not completely wet.
- Using tweezers or a silicone tool, gently pick up a few small, random flakes of the Gold Foil.
- Lightly tap the flakes onto the tacky surface of the clear coat, distributing them randomly for a natural look.
- Use a finger to gently press the flakes flat against the nail surface.
- Once satisfied with the placement, immediately apply two thin coats of Top Coat, ensuring the edges of the foil are sealed down completely to prevent lifting.
Pro-Tip: If the foil is not sticking, try letting your adhesive layer (clear polish) sit for an extra 30 seconds to reach the optimal level of tackiness.

8. Rudolph’s Red Nose (The Single Accent Nail Dot)

Pin this 5-minute, zero-skill design hack!
Products & Tools Used:
- Deep Festive Brown or Neutral Opaque Polish (Base Color)
- Bright, Opaque Red Polish (The Nose)
- Large Metal Dotting Tool
Application Steps:
- Apply 2 coats of the Deep Brown/Neutral base to all nails, letting them dry for 5 minutes.
- Choose one accent nail (usually the ring finger).
- Place a generous drop of the Red polish onto your palette.
- Dip the large dotting tool fully into the Red polish.
- Tap the tool once firmly but gently onto the chosen accent nail to create a single, large, perfect dot. Ensure the dot is centered and round.
- Allow the large dot to air dry for 10-15 minutes (since it’s thick) before floating the top coat over the entire nail to prevent smudging.
Lesson Learned: For a dot this large, wait the full 15 minutes before applying the top coat. If you apply the top coat too early, the red polish will smear and drag the color beneath it.

9. Velvet Red Texture (The Matte Flocking Hack)

Pin this trending velvet texture look for maximum impact!
Products & Tools Used:
- Deep, Opaque Red Polish (should match powder color)
- Red Nail Art Flocking Powder or Micro-Fine Glitter
- Clear Polish or a specialized Velvet Top Coat
- Small Fan Brush (for sweeping off excess powder)
Application Steps:
- Apply 2 coats of the Deep Red polish and let it dry completely (10 minutes).
- Apply one final thick layer of clear polish or the velvet top coat (this acts as the adhesive).
- While the clear coat is still VERY wet, generously sprinkle the red flocking powder over the entire nail surface until the nail is completely covered. Do this over a clean sheet of paper to collect the excess powder.
- Gently pat the powder down onto the nail surface with your finger (do not press hard).
- Once the clear coat is dry, use a clean, dry fan brush to lightly sweep away all the excess, loose powder.
- DO NOT apply a final top coat, as this will eliminate the fuzzy, matte velvet texture.
Pro-Tip: Ensure the base color polish is the exact same color as your flocking powder/glitter, as any exposed base coat will ruin the velvety illusion.

Troubleshooting Common DIY Nail Art Mistakes
Even with the simplest designs, things can go wrong. Don’t get discouraged! Most common DIY nail art failures are easily preventable with a few professional tricks. This section provides quick, actionable solutions to the most frustrating problems beginners face.
My Polish Keeps Bubbling: How to Achieve a Smooth Finish
Polish bubbles are most often caused by applying coats that are too thick or shaking the bottle vigorously. Instead of shaking, gently roll the bottle between your palms to mix the pigment. Always apply 2-3 extremely thin coats rather than one thick coat, allowing each to air-dry for at least 60 seconds.
Help! I Smudged My Design with the Top Coat!
The smudge is caused by applying the final top coat before the art layers are fully set, or by dragging the brush. To prevent this, wait 5 to 10 minutes after the final design is done. Then, use a floating top coat technique: load the brush with a large, generous bead of top coat and apply it in one or two gentle strokes without allowing the brush to drag or press hard against the underlying art.
How Do I Remove Stubborn Glitter Polish Without Damaging My Nails?
Never scrape glitter polish off, as this tears up the nail plate. The safest and most effective method is the foil wrap method using 100% acetone. Saturate a cotton ball, place it on the nail, wrap the finger in aluminum foil, and wait 5 to 7 minutes. The glitter should slide off easily without scrubbing.
Fixing Messy Edges and Bleeding Colors
Clean edges demonstrate professionalism and polish quality. Immediately after applying color, use a small, firm-tipped cleanup brush (like an angled eyeliner brush) dipped in non-acetone remover to carve out a clean line around the cuticles and side walls. If colors bleed, wait for the first color to dry completely before applying the second, or use a matte top coat barrier for error correction.
Key Takeaways: Your Quick Guide to a Flawless DIY Festive Manicure
Creating beautiful holiday nails at home comes down to a few core principles. If you remember nothing else, keep these five rules in mind for a simple, long-lasting, and professional-looking festive manicure.
- Prioritize Prep: Always wipe your nails with alcohol/cleanser and apply a base coat to prevent chipping and staining. This is 50% of your longevity.
- Thin Coats are Key: Use 2-3 thin coats of color instead of one thick coat to prevent bubbling and dramatically reduce drying time.
- Master the Tools: Invest in an affordable metal dotting tool and thin striping tape—these are the beginner’s best friends for precision detail work.
- Guard the Art: Wait 5-10 minutes for your design to set before applying a generous, floating layer of quick-dry top coat to seal and protect your work.
- Safe Removal: Always use the acetone/foil wrap method for glitter or gel to avoid physical damage to your nail plate.
People Also Ask About Long-Lasting DIY Nail Art
How long does it take to do DIY Christmas nail art at home?
A simple DIY Christmas nail design, such as the single dot or simple stripes, typically takes between 5 to 10 minutes per hand, excluding drying time. For more complex designs or designs using multiple layers, allow 30 to 45 minutes for application, plus an additional 20-30 minutes for complete air drying before applying the final top coat.
Is it safe to use at-home gel polish kits and UV lamps?
At-home gel kits are generally safe if used strictly according to instructions. Always use protective gloves to shield the skin around the nails from cumulative UV exposure. Ensure good ventilation to disperse chemical fumes, and crucially, never pick or scrape gel off the nail; use the proper acetone soak-off method for removal.
What is the biggest mistake beginners make when starting nail art?
The most critical error is the failure to apply a proper base coat before dark colors (like red and green) or a good top coat at the end. Skipping these steps leads directly to pigmented nails stains and chipping within 24 hours. A second major mistake is attempting detailed work with overly thick polish, which leads to smudging and dragging.
Final Thoughts: Your Festive June Manicure Awaits
Now that you have the tools, the tested techniques, and 9 simple design hacks, you are officially ready to skip the salon and master your festive manicure at home. The most important lesson is to be patient—nail art is a practiced skill. Even if your first candy cane isn’t perfect, your second will be better! We’ve given you the knowledge to not only apply these designs but also to keep them looking flawless right through the holiday season.
Which of the 9 simple Christmas nail designs will you try first? Share your favorite festive color combo in the comments below
Last update on 2026-04-27 / Affiliate links / Images from Amazon Product Advertising API