Struggling to find a holiday manicure that’s festive but also genuinely sophisticated? You want that perfect deep red color with an elegant bow, but achieving a flawless, long-lasting look at home feels complex and out of reach. You’re not alone in seeking that perfect balance of holiday cheer and high-end style.
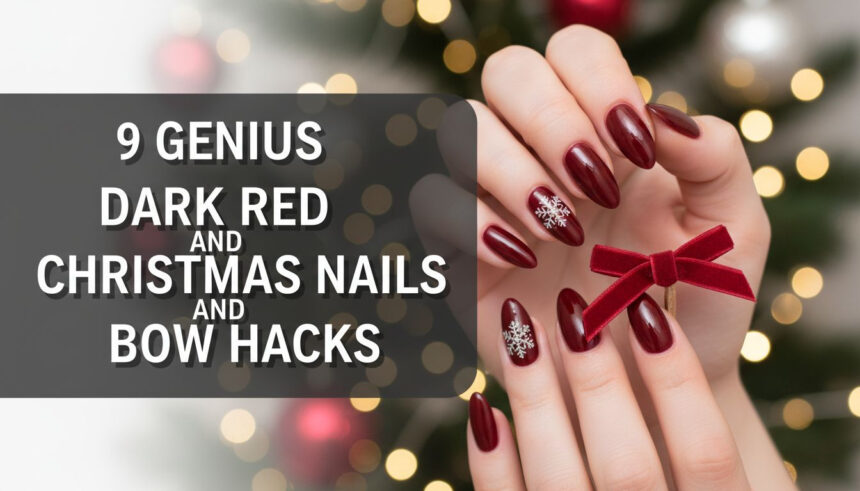
The Dark Red Christmas Bow Nail is the most sought-after manicure of 2026 for its timeless blend of festive color, like deep burgundy and wine, with the sophisticated detail of a classic bow motif. This aesthetic offers a chic, elegant alternative to traditionally bright and glittery holiday designs.
Drawing from proven methodologies and professional nail artist techniques, this guide breaks down the process into simple, actionable steps. You will discover 9 genius hacks to master everything from color selection to flawless bow application. Get ready to create a durable, salon-quality manicure that captures the holiday spirit perfectly.
Are Dark Red Christmas Nails with Bows The Most Elegant Look of 2026?
The search for the perfect holiday nail design often leads down a path of bright reds and glitter. However, for those seeking a more refined and sophisticated aesthetic, the dark red Christmas nail with a bow motif has emerged as the definitive look of 2026. This trend masterfully balances the festive spirit of the holiday season with timeless elegance. The deep, rich tones of burgundy, wine, and oxblood provide a luxurious foundation, moving beyond the expected to offer something more mature and chic.
The bow itself, a classic symbol of gift-giving and celebration, adds a touch of delicate, feminine detail. When combined, the dark red color palette and the bow motif create a Christmas nail design that is both celebratory and incredibly polished. These hacks, curated by professional nail artists and tested for durability, will show you how to achieve this elegant look, whether you’re a DIY enthusiast using gel polish or prefer the convenience of high-quality press-on nails.
9 Genius Dark Red Christmas Nails And Bow Hacks For Flawless Holiday Style
Achieving a salon-quality dark red Christmas manicure at home can feel intimidating. Common frustrations like choosing a flattering shade, applying a bow without it looking clumsy, or having the design chip after just a few days are all too real. But a flawless, long-lasting holiday style is absolutely within your reach.
These nine genius hacks are designed to solve those exact problems. From a simple color theory trick to ensure your chosen red complements your skin tone to professional techniques for securing 3D charms, each step utilizes industry-standard methods. You’ll learn how to master everything from precision decal application to creating stunning texture contrasts, ensuring your elegant red Christmas nails look professionally done and last throughout the entire festive season.
1. Finding Your Flattering Dark Red: The Undertone Hack

Pin this genius hack to your ‘Holiday Nail Inspo’ board!
The secret to a truly high-end dark red manicure lies in the color itself. A shade that clashes with your skin’s undertones can look muddy or harsh, undermining the sophisticated look you’re aiming for. This hack uses simple color theory to help you find the most flattering deep cherry, oxblood, or wine red shade that makes your skin glow.
H4: Products & Tools Used:
- Three Dark Red Polishes: One with blue undertones (Burgundy/Wine), one with brown undertones (Maroon/Brick), and one neutral (Oxblood).
- Base Coat: A clear or slightly pigmented base coat to prevent staining.
- Test Swatch: A clean palette or white paper for swatch comparison.
H4: Application & Styling Steps:
- Assess Your Skin’s Undertone: Look at the veins on your inner wrist—blue/purple indicates cool; green indicates warm; a mix indicates neutral.
- Swatching Test: Apply a thin layer of each polish on your test swatch. Once dry, hold the swatch sheet against your finger, near the cuticle.
- Cool Tone Match: Cool tones (blue veins) will be enhanced by blue-based dark reds (Burgundy, Wine Red). Avoid brown or orange-based reds which can make skin look sallow.
- Warm Tone Match: Warm tones (green veins) look best with brown or orange-based dark reds (Maroon, Deep Cherry). Avoid stark blue-reds which can appear too harsh.
- Apply Barrier: Before applying the final color, use two thin coats of the pigmented base coat to create a barrier and prevent the intense pigment from staining the nail bed.
Pro-Tip: If your dark red polish still looks muddy or uneven after two coats, the pigment load is likely too low. Invest in a professional-grade dark red polish (like Oxblood) known for high opacity.

2. The Easiest Bow: Applying Precision Decals & Stickers

Save this clever organization idea!
For a perfectly symmetrical and crisp bow without any artistic skill required, high-quality nail decals are your best friend. This is the fastest, most beginner-friendly method for adding a bow motif. The key is in the precise application and proper sealing to make the decal look like it was hand-painted.
H4: Products & Tools Used:
- Dark Red Polish: Your chosen high-opacity dark red shade.
- Bow Decals: High-quality vinyl or water-transfer bow decals (preferably white or gold for contrast).
- Top Coat: A high-gloss, quick-drying top coat.
- Detail Tweezers: Necessary for precise placement of small decals.
H4: Application & Styling Steps:
- Prep the Base: Apply your base coat and two thin coats of dark red polish, ensuring the polish is completely dry (or fully cured if using gel).
- Select and Prepare Decal: Gently peel the chosen bow decal using the detail tweezers, or if using a water slide decal, soak it briefly until it separates from the backing paper.
- Precision Placement: Using the tweezers, carefully position the decal onto the nail. Start by gently touching the center point to the nail, then smoothing outwards to ensure no air bubbles are trapped underneath.
- Seal the Decal: Apply a generous layer of the high-gloss top coat over the entire nail, ensuring the edges of the decal are completely saturated and sealed to prevent lifting. Use a second coat if needed for maximum durability.
Pro-Tip: If using gel polish, apply the decal between the color coat and the top coat. For water-slide decals, use a non-wipe top coat before application and then a regular top coat to seal.

3. The Salon Look: Securing a Long-Lasting 3D Bow Charm

Pin this technique to your ‘DIY Gel Manicure’ board!
A 3D bow charm offers incredible visual impact, but the biggest fear is having it snag on clothes or fall off. The professional solution isn’t nail glue; it’s builder gel. This method creates an ultra-strong bond and seamlessly encapsulates the charm’s base, ensuring it stays put throughout all your holiday festivities.
H4: Products & Tools Used:
- 3D Bow Charms: Resin or alloy charms (small to medium size recommended).
- Builder Gel: A medium-viscosity clear builder or sculpting gel (essential for strong adhesion).
- UV/LED Curing Lamp: Required for curing the builder gel.
- Detail Dotting Tool or Wax Pen: For picking up and placing the charm.
H4: Application & Styling Steps:
- Prepare Base: Complete your base coat and dark red color coats (ensure the color is fully cured/dry). Do NOT apply a top coat yet.
- Apply Adhesive: Place a small bead of builder gel exactly where you want the center of the 3D charm to sit. Do not flood the area; only use enough to fill the underside of the charm.
- Place and Cure (Flash Cure): Gently place the charm into the builder gel using the wax pen or tweezers. Do not press too hard. Flash cure under the lamp for 10-15 seconds to set the position.
- Encapsulation/Seal: Using a detail brush, carefully apply a layer of builder gel or top coat around the base of the charm, ensuring the edges are sealed flush with the nail surface without covering the decorative face of the bow. Cure fully for 60 seconds.
Pro-Tip: If you struggle with charms snagging on clothes, this hack is essential. Encapsulation means sealing the edges so there are no sharp parts exposed. Always check the sides of the charm base to make sure the gel is flush.

4. Velvet Sophistication: Mastering the Matte Finish Bow

Save this textured look for your ‘Elegant Holiday Manicure’ board!
To instantly elevate your dark red nails, play with texture. A velvety matte finish makes deep colors like burgundy and oxblood look incredibly rich and luxurious. By keeping the bow detail glossy, you create a stunning visual contrast that looks intentional and high-end.
H4: Products & Tools Used:
- Dark Red Gel Polish: The color coat.
- Matte Top Coat: A high-quality matte finish top coat.
- Glossy Top Coat: A standard high-shine top coat.
- Detail Liner Brush: Size 000 or 00 for painting the glossy bow detail.
H4: Application & Styling Steps:
- Apply Base Layers: Complete your base coat and two coats of dark red color, curing each layer fully.
- Apply Matte Base: Apply the matte top coat evenly over the entire nail surface and cure fully according to the manufacturer’s directions (usually 60 seconds). This creates your velvety base.
- Paint the Glossy Bow: Dip your detail liner brush into the glossy top coat. Carefully freehand paint a small, symmetrical bow shape onto the nail (two small triangles for the loops, one dot for the center knot).
- Final Cure: Cure the glossy bow under the lamp for the final time. The contrast between the velvety matte background and the shiny bow will pop immediately.
Pro-Tip: Matte finishes are prone to showing oil and dirt. To clean them, simply wipe the nail surface with an alcohol-soaked pad, avoiding aggressive scrubbing which can damage the finish.

5. High-Impact Elegance: Deep Red Chrome Powder Effect

Save this trending metallic look to your ‘High-Fashion Nail Art’ inspiration board!
For a modern, high-fashion take on the festive manicure, the chrome powder effect is unbeatable. Applying red chrome powder over a dark red gel base creates a liquid-metal, mirror-like finish that is both festive and incredibly chic. The key to this technique is the precise curing time of your non-wipe top coat.
H4: Products & Tools Used:
- Dark Red Gel Polish: The color base (must be cured gel).
- Non-Wipe Top Coat: Essential for the chrome powder to adhere properly.
- Red Chrome Powder: High-quality, microfine metallic powder.
- Silicone Applicator: A small eyeshadow or silicone tip applicator.
H4: Application & Styling Steps:
- Prep the Base: Apply base coat and dark red color coats, fully curing.
- Apply Non-Wipe Top Coat: Apply a thin, even layer of non-wipe top coat and cure for the exact time recommended by the manufacturer (usually 30-45 seconds) to leave a “tacky” layer. This timing is critical.
- Rub in Chrome: Immediately after curing, use the silicone applicator to rub a tiny amount of the chrome powder onto the nail surface using firm pressure until a mirror finish appears.
- Dust and Seal: Gently dust off excess powder with a clean fan brush. Apply a final, thick layer of the regular non-wipe top coat to encapsulate the chrome and cure fully for 60 seconds. (If the bow is a 3D charm, apply chrome to the base only, then proceed with the sealing in step 3.)
Pro-Tip: The success of the chrome hack depends on curing the non-wipe top coat for the precise time—too long, and the chrome won’t stick; too short, and it will clump. Experiment with cure times (30-45 seconds is often the sweet spot).

6. The Quickest Fix: High-End Press-On Nails with Embedded Bows

Save this clever hack to your ‘Quick Christmas Manicure’ board!
When you need a perfect manicure in minutes, nothing beats a high-quality set of press-on nails. Forget the flimsy, cheap-looking options of the past. Modern luxury press-on nails are thick, sculpted, and come with intricate, pre-applied designs like 3D bows. The secret to making them look like a salon set is all in the preparation and application.
H4: Products & Tools Used:
- Sculpted Press-On Nails: A high-quality kit with dark red color and pre-applied bow charms.
- Liquid Nail Glue: Professional-grade liquid adhesive (avoiding budget glues).
- Prep Kit: Mini nail file, alcohol prep pads, cuticle stick (usually included).
H4: Application & Styling Steps:
- Sizing and Prep: Match each press-on nail to your natural nail size. File your natural nails short and buff the surface lightly. Clean the nail plate thoroughly with the alcohol wipe to remove all natural oils.
- Glue Application: Apply a small, thin line of liquid nail glue down the center of your natural nail and a small drop on the back of the press-on nail itself.
- Adhesion: Starting at the cuticle line, press the press-on nail down at a 45-degree angle. Press firmly for a minimum of 30 seconds to allow the glue to bond. Ensure no air bubbles are trapped.
- Sealing Edges: Once all nails are applied, use a high-gloss top coat to lightly brush over the interface where the press-on meets your cuticle. This blends the edge and increases water resistance.
Pro-Tip: If your chosen press-on set doesn’t fit perfectly, select the next size up and gently file the sides down to custom-fit your nail shape. A perfect fit at the cuticle line is the key to making press-ons look professional.

7. Advanced DIY: Sculpting a Bow with Builder Gel

Pin this advanced technique to your ‘Nail Art Masterclass’ board!
For the dedicated DIY nail artist, sculpting your own 3D bow offers the ultimate customization and durability. Using a thick sculpting gel (or acrylic powder), you can create a high-definition, permanent bow that is perfectly sized and shaped for your nail. This advanced technique requires patience, but the results are stunning.
H4: Products & Tools Used:
- White Sculpting Gel: A thick, non-flowing gel specifically for 3D art (or white acrylic powder and liquid monomer).
- Detail Sculpting Tool: A silicone-tipped shaper or small damp brush (Size #2 or #4).
- Slip Solution: Essential for manipulating the polygel/sculpting gel without sticking.
- UV/LED Curing Lamp: Required for the final cure.
H4: Application & Styling Steps:
- Prepare Gel: Scoop a small, pea-sized bead of white sculpting gel onto a clean palette (or mix a bead of acrylic). Dip your sculpting tool into slip solution to prevent sticking.
- Shape the Loops: Divide the bead into two smaller, equal parts. Gently press and shape the first half into a rounded triangle (the bow loop). Repeat for the second loop, ensuring they are symmetrical.
- Attach and Center: Place the two loops onto the cured dark red base, arranging them to form the bow. Use a small dot of gel in the center to attach them. Flash cure for 10 seconds.
- Knot and Cure: Roll a tiny piece of gel into a small, cylindrical knot and place it over the central joining point. Use the detail tool to push the gel into shape. Cure fully for 60-120 seconds. Finish with a glossy top coat over the rest of the nail, avoiding the sculpted bow itself.
Pro-Tip: Work in very thin layers and cure frequently. Trying to sculpt the entire bow at once with too much gel will result in a messy, uncured final product. Symmetry is key—use guide lines if necessary.

8. Minimalist Festive Accent: The Single Gold Bow Nail

Save this elegant, understated look to your ‘Minimalist Christmas’ board!
Sometimes the most elegant statement is the most subtle. A single, tiny gold foil bow on an accent nail provides a festive touch without overwhelming the sophisticated dark red base. This minimalist approach is perfect for short nails and pairs beautifully with classic gold jewelry for a cohesive holiday look.
H4: Products & Tools Used:
- Dark Red Polish: High-gloss formula.
- Gold Bow Decals/Foil: Very small, minimalist bow decals or gold foil sheets.
- Transfer Adhesive (for foil): Necessary if using gold foil, not decals.
- Detail Tweezers: For precise application.
H4: Application & Styling Steps:
- Base and Color: Apply your base coat and dark red polish (fully dry/cured).
- Transfer Foil/Decal: If using foil, apply the transfer adhesive to the tiny area where the bow will sit, allow it to become tacky, then press the gold foil onto the tacky spot and lift swiftly. If using decals, follow the steps in Hack 2.
- Placement: Place the minimalist gold bow near the cuticle line or centered on the tip, depending on your preferred style. Placing it near the cuticle elongates the nail bed.
- Seal: Use a top coat to thoroughly seal the gold element, ensuring no foil edges are exposed, which prevents chipping and dulling of the gold finish.
Pro-Tip: If using gold foil, look for highly pigmented, thin transfer foil. For a minimalist look, only apply the bow to two accent nails (e.g., ring finger and thumb), leaving the others solid dark red.

9. The Dark Red Jelly Nail: Translucent Depth and Shine

Pin this modern twist on a classic color!
The “jelly nail” trend offers a modern, high-shine twist on the classic dark red manicure. This technique uses a sheer, translucent polish layered to create a glass-like depth and shine. It’s a fantastic way to encapsulate a flat iridescent charm, making the bow appear suspended within the color for a truly unique and trendy holiday look.
H4: Products & Tools Used:
- Jelly Polish: A sheer, translucent dark red or a clear polish mixed with a tiny drop of dark red color.
- Iridescent Charms: Optional, small flat charms or glitter for a suspended look.
- Thick Top Coat: A high-quality, non-yellowing top coat for maximum shine.
H4: Application & Styling Steps:
- Mix the Jelly: If you can’t find a jelly dark red polish, mix a clear top coat or builder gel with 1 drop of highly pigmented dark red polish in a clean palette.
- Layer for Depth: Apply the jelly mixture in two to three thin layers, curing/drying fully between each coat. The layering process builds depth without full opacity.
- Encapsulate Charms (Optional): If using a flat charm (like an iridescent bow), place it after the first or second jelly layer, then apply the final layer over it to create the suspended effect.
- Max Shine Top Coat: Finish with a very generous coat of ultra-glossy top coat to achieve the high-shine, glass-like finish that is characteristic of the jelly trend.
Pro-Tip: For the most successful jelly nail, ensure your natural nails are completely clean and stain-free, as the transparency of the polish will show any imperfections underneath. Use a high-shine oil after the manicure is fully cured to further enhance the glass effect.

Key Takeaways: Your Quick Guide to the Perfect Dark Red Bow Manicure
To achieve a flawless and durable dark red bow manicure, focus on these four critical components. Mastering these steps will ensure your holiday nails look sophisticated and last through every celebration.
| Component | Critical Hack | Why It Matters |
|---|---|---|
| Color Foundation | Use the Undertone Hack to select a dark red shade (Burgundy, Oxblood) that flatters your skin tone, ensuring a sophisticated, high-end look. | Avoid a muddy or dull finish by matching the polish pigment’s blue/brown undertones to your skin’s natural undertone. |
| Bow Application | For 3D charms, Always Use Builder Gel for strong adhesion and longevity, flash curing immediately after placement. | Standard nail glue is often insufficient for heavy 3D elements, leading to snagging and premature loss. |
| Aesthetic Contrast | Utilize Texture Hacking (Hack 4 or 5) by pairing a velvety matte dark red base with a glossy or chrome bow for striking visual dimension. | Contrasting textures elevates the manicure from simple color to advanced, sophisticated nail art. |
| Longevity Secret | Thoroughly Encapsulate the edges of all decals, foil, and 3D charms with a quality top coat or builder gel. | Sealing the edges prevents lifting, snagging, and chipping, making the design last through the entire holiday season. |
People Also Ask About Dark Red Christmas Bow Nails
How long do 3D bow Christmas nails last without chipping or lifting?
A professionally applied 3D bow secured with clear builder gel or specialized nail adhesive should last 10 to 14 days, provided the bow’s edges are fully encapsulated (sealed flush with the top coat) and you avoid long exposure to hot water or harsh chemicals. Proper encapsulation is the key to preventing snagging and lifting.
What is the best shade of dark red polish for a Christmas manicure?
For a sophisticated Christmas look, burgundy and oxblood are the most highly recommended dark red shades due to their deep saturation and elegance. Burgundy (a blue-toned red) looks best on cool skin tones, while maroon (a brown-toned red) complements warmer undertones beautifully.
Can I paint the tiny bow myself if I’m not a professional nail artist?
Yes, you can paint a simple, small bow yourself using a precision detail liner brush (Size 000) and a contrasting color like white or gold. However, for intricate details or perfect symmetry, using high-quality decals or stencils (Hack 2) is a much faster and more reliable option for beginners.
How do I prevent dark red nail polish from staining my natural nails?
The most critical step is applying two coats of a pigmented base coat (like a milky white or sheer pink) before applying the dark red color. This barrier prevents the intense red pigment from leaching into the keratin, eliminating the temporary yellowing associated with deep shades.
Are dark red Christmas press-on nails tacky, or can they look high-end?
High-quality press-on nails, especially those that are thick, sculpted, and custom-sized, can look virtually indistinguishable from a salon gel manicure. To ensure a high-end look, choose kits with matte or chrome finishes and use a reliable liquid nail glue for a seamless fit at the cuticle line.
Final Thoughts
Achieving the perfect dark red Christmas nails with a bow is less about having salon skills and more about applying the right products and techniques for your chosen method—whether that’s mastering the precision of a decal, utilizing the strength of builder gel for 3D charms, or selecting the highest quality press-on set. By utilizing these 9 hacks, you have the expertise to create a sophisticated, long-lasting manicure that perfectly captures the elegance of the 2026 holiday season. Which of these genius dark red bow hacks will you be trying for your next festive gathering?
Last update on 2026-04-27 / Affiliate links / Images from Amazon Product Advertising API