Struggling to find festive nail ideas that don’t require a salon visit? You want beautiful holiday nails, but complex designs feel impossible on short nails. The frustration of smudging intricate art after an hour of effort is all too real.
Easy Christmas nail designs are simple, festive looks you can create at home in under 15 minutes using basic tools like toothpicks, tape, and dotting tools. These methods rely on high-pigment polish and simple patterns like dots or stripes, making them perfect for beginners and especially flattering on short nails.
Drawing from tested frameworks and proven DIY methodologies, this guide reveals the secrets to effortless holiday beauty. We will show you exactly how to achieve nine genius, salon-quality designs without any special skills. Get ready to master simple techniques for a flawless festive manicure.
Tired of Complicated Manicures? Why Simple Christmas Nail Designs Are Your Genius Solution
Finding time for intricate nail art during the busy holiday season can feel impossible. That’s why simple Christmas nail designs are the perfect solution. Easy Christmas nail designs rely on simple tools (like dotting tools or household items) and high-pigment polish. The easiest designs utilize dots, stripes, or glitter accents, taking under 15 minutes per hand to achieve a festive look that is perfect for short nails. This approach avoids the frustration of complicated techniques and delivers a clean, celebratory look without the clutter that complex art can create on a smaller canvas.
As a DIY enthusiast, I’ve curated these specific designs to focus only on methods proven to work fast. Forget time-consuming techniques. We’re focusing on quick, low-effort holiday beauty that leverages simple items you likely already own, like toothpicks and painter’s tape, to get stunning results. It’s all about working smarter, not harder, to make your nails a festive, hassle-free accessory.
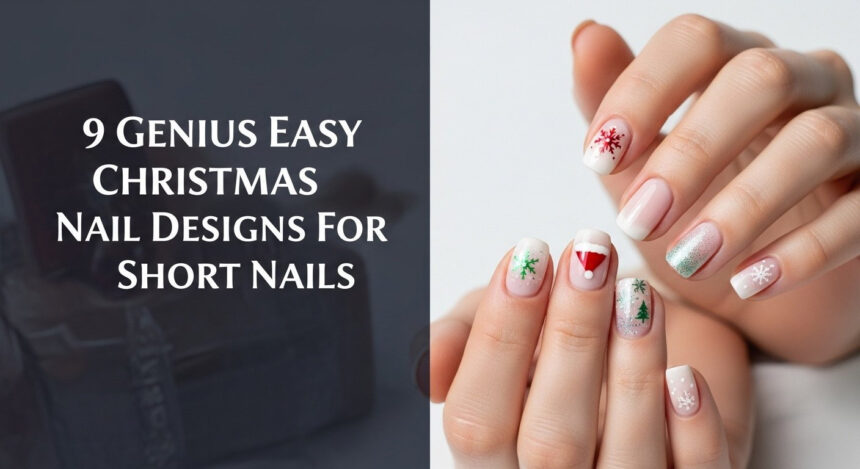
9 Genius Easy Christmas Nail Designs For Short Nails 2026
Ready for some festive fun? We’ve tested and curated these nine genius ideas specifically for beginners with short nails. Each design is based on expert principles for visual balance on small nail plates, ensuring a chic and celebratory look. You won’t need any professional skills—just some classic Christmas colors and a few simple tools. From classic candy cane stripes to subtle glitter gradients, these quick Christmas manicures are designed to impress.
1. Classic Candy Cane Stripes Using Painter’s Tape

Pin this genius hack to your ‘DIY Holiday Beauty’ board!
This method uses low-tack painter’s tape to create perfectly crisp, diagonal candy cane stripes. It’s the best way to achieve a precise, geometric red and white nail art design without any freehand skill.
Products & Tools Used:
- High-pigment red nail polish (creme finish)
- Stark white nail polish (creme finish)
- Quick-dry clear top coat
- Low-tack painter’s tape (or specific nail striping tape)
- Small, sharp cuticle scissors
Application/Styling Steps:
- Apply two thin coats of the red polish base color and let dry completely (use quick-dry drops if needed). Wait at least 30 minutes.
- Cut thin, straight strips of painter’s tape and place them diagonally across the nail plate, ensuring all edges are pressed down firmly.
- Paint the white polish over the entire nail, including the tape strips. Work quickly and apply a single thin, opaque coat.
- Immediately, while the white polish is still wet, carefully peel off the tape strips to reveal the red stripes beneath.
- Allow the design to dry for 5-10 minutes before sealing with a glossy top coat.
Pro-Tip: Before applying the tape to your nail, stick it briefly to your skin (like the back of your hand) once or twice. This reduces the tackiness and prevents the tape from lifting the red base coat when removed.

2. Simple Snowflakes Using the Toothpick Dotting Method

Save this clever organization idea!
Creating a delicate snowflake accent nail is easier than you think. This simple winter nail design uses a common household toothpick to create fine lines and uniform dots, perfect for at-home Christmas nails.
Products & Tools Used:
- Base coat
- Deep blue or navy blue polish (base color)
- Opaque white polish (for design)
- Quick-dry top coat
- Wooden toothpick (or a fine dotting tool)
- Small piece of foil (palette)
Application/Styling Steps:
- Apply base coat and two coats of the navy polish; ensure it is completely dry.
- Place a small puddle of the white polish onto the foil palette.
- Dip the blunt end of the toothpick very lightly into the white polish and stamp a central dot onto the nail (this forms the center of the snowflake).
- Reload the toothpick and create four small dots radiating out from the center dot in a cross pattern.
- Using the very sharp tip of the toothpick, drag tiny, short lines out from each of the four main points to form the classic ‘arms’ of the snowflake.
- Finish with a layer of clear top coat, ensuring you don’t drag the brush across the still-setting design.
Pro-Tip: If you only use a toothpick, use the blunt end for the center dot and the sharp end for the fine lines—it gives you two different tool sizes without buying anything extra!

3. Holly Berry Dotting Accent Nail

Try this classic festive design this June!
This festive dotting art creates the iconic holly motif on an accent nail. Using a bobby pin for the berries and a toothpick for the leaves, this is one of the easiest Christmas nail polish looks with a traditional red and green feel.
Products & Tools Used:
- Nude or sheer white base polish
- Opaque dark red polish
- Opaque dark green polish
- Quick-dry top coat
- Bobby pin (for large dots) or the end of a mechanical pencil (for large dots)
- Toothpick (for small leaf details)
Application/Styling Steps:
- Apply two coats of the sheer base polish to all nails, letting them fully dry.
- On the accent nail (usually the ring finger), place a small puddle of the red polish on a palette.
- Dip the ball end of the bobby pin (or pencil eraser end) into the red polish and place a cluster of 3-4 dots in the corner of the nail to form the berries.
- Clean the bobby pin. Place a small puddle of green polish on the palette.
- Use the sharp end of a toothpick, dipped very lightly in the green polish, to create two simple, tear-drop shapes next to the berries, forming the leaves.
- Once the polish is fully dry, seal the design with two layers of glossy top coat.
Lesson Learned: Use thick, slightly gloopy red polish for the berries. Thicker polish will hold the dot’s perfect circular shape better without spreading out into an amorphous blob.

4. Quick Glitter Gradient Sparkle

Save this five-minute festive hack!
For sparkly Christmas nails with zero fuss, a glitter gradient is your best friend. This tutorial shows you how to use a makeup sponge for quick glitter placement, creating a dense, professional-looking fade effect on your gold accent nails.
Products & Tools Used:
- Clear or sheer nude base coat
- Chunky or densely packed silver/gold glitter polish
- Small wedge makeup sponge (or fine pore kitchen sponge)
- Quick-dry top coat
Application/Styling Steps:
- Apply the clear/sheer nude base coat to all nails and let dry completely.
- Place a small amount of the glitter polish directly onto the corner of the makeup sponge.
- Gently dab the sponge onto the tip of the nail, concentrating the most glitter near the free edge.
- Continue dabbing lightly up the nail, easing the pressure as you go toward the cuticle to create a soft, faded gradient.
- Once satisfied with the density, let the glitter dry for a few minutes.
- Seal the design with a generous coat of top coat (glitter often requires a slightly thicker layer to smooth out the texture).
Pro-Tip: Sponging the glitter on instead of brushing it prevents the base polish from spreading the glitter flakes thinly, ensuring a high-density sparkle payoff.

5. Minimalist Christmas Lights Lines

Pin this easy holiday party look!
This playful Christmas light design uses a simple dark line for the “wire” and multi-colored dots for the “bulbs.” It’s a fantastic example of easy Christmas nail art for kids using household tools and a high-contrast white base.
Products & Tools Used:
- Base coat
- White or neutral base polish
- Black or very dark green polish (for the ‘wire’)
- Small bottles of bright red, green, blue, and yellow polish (for the lights)
- Fine-tipped striping brush (or the sharp tip of a toothpick)
- Very small dotting tool (or a clean, thin needle/pin)
Application/Styling Steps:
- Apply the base color (white) and allow to dry completely.
- Dip the striping brush (or toothpick tip) into the black/dark green polish. Wipe most of the polish off so the line is thin.
- Draw a single, slightly curved, squiggly line across the nail from one side to the other, resembling a string of lights. Let dry for a few minutes.
- Using the very small dotting tool, dip into the different bright polishes (one color per dip) and place small, evenly spaced dots along the dark line.
- Let the dots dry fully. Seal with a top coat.
Lesson Learned: Use the small, round end of a sewing needle dipped in polish if you want the smallest possible light-bulb dots. This works perfectly on short nails where space is limited.

6. Cozy Fair Isle Sweater Print

Cozy up with this sweater nail look!
Replicate a complex-looking Fair Isle design with simple, repeating dots and ‘V’ shapes. This simple sweater knit nail art creates a subtle festive pattern that’s perfect for a minimalist holiday look, especially with a matte top coat for a true cozy sweater feel.
Products & Tools Used:
- Base coat
- Opaque base color (Burgundy, Navy, or Hunter Green)
- Opaque white or cream polish (for the pattern)
- Dotting tool or toothpick
- Optional: Matte top coat (to achieve the ‘sweater’ texture)
Application/Styling Steps:
- Apply two thin coats of the base color and allow to dry fully.
- Using the cream polish and a dotting tool, start at the base of the nail and place a row of three small dots horizontally.
- Below the dots, use a toothpick to draw a row of tiny, unconnected ‘V’ shapes across the nail.
- Repeat steps 2 and 3, alternating the pattern up the nail to create a repeating, simple motif.
- Wait 10 minutes for the pattern to dry completely.
- Seal with a top coat. If you want the true cozy sweater look, use a matte top coat instead of glossy.
Pro-Tip: If using a matte top coat, make sure the pattern underneath is perfectly dry, as matte finishes can sometimes drag wet polish more easily than glossy ones.

7. The Single Accent Christmas Tree

Save this quick Christmas tree hack!
These beginner-friendly freehand Christmas tree steps create a minimalist triangular tree on a single accent nail. By focusing the art on one nail and using simple line work with a gold star accent, the design remains uncluttered and chic.
Products & Tools Used:
- Base coat
- Nude or sheer base polish
- Opaque dark green polish
- Gold metallic polish or gold glitter polish (for star/ornaments)
- Striping brush or the sharp tip of a toothpick
Application/Styling Steps:
- Apply the nude base color to all nails and let dry.
- Dip the striping brush (or toothpick tip) into the dark green polish, making sure to wipe off excess.
- Start at the bottom center of the accent nail and draw a thin vertical line up toward the tip (the trunk).
- Using the same tool, draw a thin ‘V’ on the trunk, starting wide at the bottom and getting narrower toward the tip.
- Repeat the ‘V’ shape 2-3 times, slightly overlapping and decreasing in size, to form the simple triangular tree outline.
- Once the green is dry, use a clean toothpick to place a small gold dot at the top (the star) and 2-3 small dots for ornaments.
Pro-Tip: If your lines aren’t perfect, embrace it! A slightly shaky line just adds to the rustic, “homemade” charm of the tree design.

8. Simple Snowman French Tip Hybrid

Save this adorable snowman idea for your short nails!
Create cute snowman designs with this simple French manicure twist. Using two stacked white dots, this minimalist snowman is confined to the upper third of the nail, making it a perfect simple winter nail design for beginners with short nails.
Products & Tools Used:
- Sheer nude base coat
- Opaque white polish
- Black polish (for eyes/hat)
- Tiny dot of orange or red polish (for scarf/nose)
- Two different sized dotting tools (or the blunt end of a pencil and a toothpick)
Application/Styling Steps:
- Apply the sheer nude polish to all nails and allow to dry completely.
- Using the larger dotting tool and white polish, create a large white dot near the very tip of the nail (the body).
- Using the smaller dotting tool (or a toothpick), place a slightly smaller white dot directly on top of the first (the head). Let these dry fully.
- Using the sharp tip of a toothpick and black polish, create two tiny dots on the head for the eyes. Add a single dot for the nose/mouth.
- Use a tiny red dot for a scarf just below the head dot.
- Finish with a thin black line above the head to create a simple ‘hat’ brim. Seal when dry.
Lesson Learned: By placing the snowman design close to the tip, you utilize the available space on short nails without crowding the cuticle, creating a visual effect similar to a festive French manicure.

9. Subtle Shimmering Micro French Tip

Pin this elegant minimalist holiday look!
This simple French tip Christmas twist is one of the top 2026 Christmas nail trends. A micro French tip uses an ultra-thin line of metallic polish for a simple, chic, and minimalist holiday nail look that is the fastest Christmas nail art you can do.
Products & Tools Used:
- Sheer pink or nude base coat
- Metallic polish in rose gold, silver, or emerald green
- Fine-tipped striping brush (or a piece of tape/stencil for support)
- Quick-dry top coat
Application/Styling Steps:
- Apply two coats of the sheer pink or nude base coat and let dry fully.
- Wipe almost all the polish off your striping brush until only a fine film remains on the tip.
- Carefully paint a very thin, horizontal line of metallic polish across the very tip of the nail (the free edge). Keep the line as thin as possible—this is the ‘micro’ tip.
- Clean up any mistakes instantly with a clean toothpick dipped in remover before the polish dries.
- Repeat the metallic line on the remaining nails.
- Seal the manicure with a glossy top coat.
Pro-Tip: If your hand isn’t steady, place your elbow on a table and use your opposite index finger as a guide, resting the handle of the striping brush against it while painting the line.

The Essential Foundation: How to Make Your Easy Manicure Last
What most guides miss is that even the simplest design needs a solid foundation to look professional and avoid chipping. According to professional standards, proper nail prep and sealing are non-negotiable for achieving longevity. Sealing your nail design correctly is the key to preventing a chipped Christmas nails disaster after just one day. Here’s the essential routine that makes your simple designs look polished and last through the holiday festivities.
The Simple 3-Step Prep Routine
A simple 3-step nail preparation routine is crucial for polish longevity, even for quick designs. First, file the nails gently to shape. Second, lightly buff the surface with a fine buffer block to remove oils and smooth ridges. Third, wipe the nail plate clean with rubbing alcohol or a specialized nail cleanser before applying any polish. This ensures maximum adhesion.
Layering Polish for Maximum Adhesion
Apply all coats of polish (base, color, design) in thin layers. Thicker layers trap solvents, leading to bubbles and a longer drying time, which increases the risk of smudging and rapid chipping. Always cap the free edge of the nail with the base coat, color coat, and final top coat to seal the tip and prevent immediate lifting.
Troubleshooting: The Quick Fixes for Beginner Smudges
If you smudge a wet design, do not wipe it. Instead, wait 30 seconds for the surrounding area to semi-set. Dip a clean, thin detail brush (or toothpick) into polish remover and use it to carefully blot or gently push the smudge back into shape, rather than dragging across the nail. This is a crucial skill for fixing beginner smudging.
People Also Ask About Easy Christmas Nail Designs
Here are some answers to common questions beginners have about creating simple, festive nail art at home. We’ll cover drying times, tool alternatives, and the dreaded glitter removal process.
How long does simple Christmas nail art actually take to dry?
Simple Christmas nail art, using thin coats, should be dry to the touch in under 15 minutes per layer, but fully cured (hardened) in about one hour. To significantly speed up this process, always invest in a dedicated quick-dry top coat or use quick-dry drops or spray, which cuts the final waiting time substantially.
Can I use a bobby pin instead of a dotting tool for Christmas dots?
Yes, a bobby pin is an excellent, free alternative to a small dotting tool. The small, rounded metal tip of a standard bobby pin creates perfect, uniform circles, ideal for snow, holly berries, or small ornaments. Ensure the pin is clean before use and reload the polish frequently for consistency.
What is the easiest way to remove chunky glitter nail art without damaging my nails?
The safest and easiest method for removing chunky glitter is the foil wrap method. Saturate a cotton ball with acetone, place it directly on the nail, wrap the finger tightly in aluminum foil for 5 to 7 minutes, and then gently slide the cotton/foil package off the nail—the glitter will slide off with it.
Final Thoughts
The magic of beautiful nails shouldn’t be complicated or time-consuming. By mastering simple tools like the toothpick and the tape hack, you have everything you need to create these nine genius, short-nail-friendly Christmas designs in under 15 minutes each. This holiday season, let your nails be the easiest and most festive part of your outfit!
What genius household tool do you plan to use for your Christmas manicure this 2026? Share your best nail art secrets in the comments below
Last update on 2026-04-27 / Affiliate links / Images from Amazon Product Advertising API