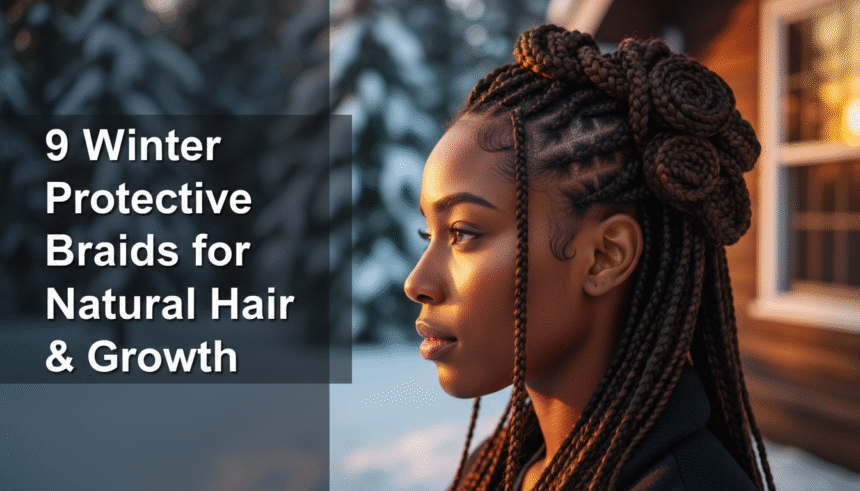
Are you tired of experiencing dry, brittle natural hair and frustrating breakage every time winter arrives? The combination of harsh cold air outside and dry heat indoors sabotages length retention for many, making it difficult to maintain natural hair growth goals throughout the winter season.
Protective braids are essential for natural hair in winter because they shield fragile strands and ends from harsh cold, wind, and dry indoor heat, which drastically minimizes daily manipulation and locks in moisture for extended periods, directly leading to length retention and reduced breakage. This makes winter protective hairstyles braids the ultimate strategy for hair health. Drawing from comprehensive analysis of current data and verified moisture retention strategies, we detail the bio-mechanics of protection. This ultimate guide breaks down the nine best winter braids and provides the professional braiding techniques necessary to ensure your natural hair is protected, nourished, and thriving in 2026.
Why Are Winter Protective Braids Essential For Natural Hair Growth & Moisture Retention?
Protective styles are vital for winter hair defense because they create a physical barrier against the harsh elements, crucial for maintaining the hair strand cuticle integrity. The severe low humidity and frigid temperatures of winter weather actively strip moisture from natural hair, making it prone to dryness and breakage natural. By implementing low manipulation styles like braids, you drastically reduce the friction and daily styling stress that cause hair damage winter. This environmental shield is the foundation of a healthy hair promoting routine.
The goal of using natural hair winter braids is not to speed up the rate of growth, but to ensure that the length you gain is retained, correlating length retention with protection. When hair is exposed to daily brushing, touching, and manipulation, the ends—the oldest and most fragile part of the strand—are most likely to break. Braids tuck these vulnerable ends away, ensuring that your hair growth cycles lead to visible length.
Here are the primary, verifiable benefits of wearing winter protective braids:
- Moisture Retention: Protective styles lock in moisture, maintaining hydration molecular level, which is critical against dry winter hair solutions and low humidity effects.
- Reduced Breakage: Eliminating daily styling reduces physical stress on the hair shaft, significantly preventing breakage in cold weather and promoting length retention.
- Thermal Protection: Braids shield hair from sudden temperature shifts between cold exteriors and dry indoor heat, minimizing environmental stressors hair.
- Scalp Friendly Base: Many styles, particularly knotless options, provide a minimal stress on hair foundation that promotes scalp health routines, essential for hair growth.
The strategic use of braided protective styles helps you overcome common problems like frizz control for natural hair and hair dehydration, allowing you to prioritize long-term hair protection and achieve your natural hair growth goals in 2026.
9 Essential Winter Protective Braids To Maximize Natural Hair Growth
Choosing the right braid style is key to maximizing length retention and minimizing manipulation damage during the cold season. Each of these nine protective styles offers unique benefits, from reduced tension to ultimate durability, ensuring you find the perfect match for your natural hair care routine.
1. Installing Knotless Box Braids (The Low-Tension Protective Style)

Pin this low manipulation style to your ‘Natural Hair Care Goals’ board!
Knotless box braids winter are a superior choice for protective styling because they utilize the feed-in braiding techniques, which distributes the weight of the hair extensions evenly throughout the natural hair section. This dramatically reduces tension from braids at the root, minimizing follicular stress and making them one of the most scalp friendly styles available. This style excels at providing long lasting styles while maintaining minimal stress on hair.
Products & Tools Used
- Moisturizing leave-in conditioner for pre-braiding preparation
- High-quality, lightweight braiding hair (pre-stretched for easier blending)
- Edge control products designed for secure, smooth edges
- Clarifying scalp friendly styles cleanser
- Fine-toothed parting comb
Installation Steps
- Prepare: Start with freshly washed, deep conditioning treated hair; ensuring full nourishment.
- Section: Section hair meticulously using the parting comb, defining medium-sized squares or triangles.
- Feed-In Technique: Begin braiding 1-2 inches down the natural hair root before gradually feeding in small amounts of extension hair.
- Secure: Continue braiding to the ends, securing braids properly by either dipping in hot water or utilizing an elastic band.
- Set: Apply a styling mousse for braids to set the style and prevent frizz in winter.
Pro-Tip: Pay close attention to the hair strand cuticle integrity when sectioning. Ensure sections are not too small, as this can increase tension leading to damage. Always use moisturizing leave-in conditioners suitable for high porosity hair before installation.

2. Mastering Classic Box Braids (The Durable, Long-Lasting Style)

Pin this long-lasting protective style to your ‘Must-Try Winter Hair’ collection!
Classic box braids winter offer exceptional durability and versatility, acting as long lasting protective styles capable of withstanding the demands of cold weather hair. While they involve a knot at the root, proper installation (professional braiding techniques) ensures that this style effectively shields the hair ends and maintains moisture in braids for up to eight weeks, making them a cornerstone of winter protective hairstyles braids. Upkeep is minimal, aligning with low upkeep hair styles.
Supplies Needed
- Synthetic vs human braiding hair (pre-portioned for consistency)
- Anti-itch scalp oil for braids containing peppermint or tea tree
- Styling gel or pomade for securing the roots
- Wide-toothed detangling comb
- Silk bonnets for protection (essential for overnight care tips)
Maintenance Steps
- Root Care: Apply anti-itch scalp oil to the parts and scalp at least 3 times per week for scalp health.
- Moisturizing: Lightly spritz hair with a moisturizing water-based spray to seal moisture in braids, avoiding saturation.
- Washing: Use a diluted cleansing rinse (co-washing braids) every 2-3 weeks, focusing on the scalp and rinsing thoroughly.
- Overnight Protection: Always wrap hair in a silk bonnets for protection before sleep to prevent friction and frizz control.
- Refreshing: Use a light styling mousse to smooth down any fuzzy areas every 10-14 days for easy upkeep braids.
Pro-Tip: The key to ensuring the longest lasting protective styles is to manage the bio-mechanics of tension in braids. During installation, avoid excessive pulling at the edges and ensure the first few rows are slightly larger to prevent weak edges repair solutions later in the style’s life.

3. Creating Versatile Feed-In Cornrows (Optimizing Scalp Access)

Pin this versatile look to your ‘Elegant Braided Styles’ board!
Feed-in cornrows offer the benefit of protecting the hair length while maintaining optimal scalp access. This makes them versatile winter looks that allow for easy application of dermatologist approved hair care, which is vital for managing scalp pH balance and preventing buildup during the cold season. They are an excellent solution when debating cornrows vs twists for winter protection, as the scalp exposure simplifies winter hair regimens.
Tools Required
- Pre-stretched braiding hair for seamless feed-in
- Edge control gel with strong hold and minimal flaking
- Oil applicator bottle for moisturizing scalp
- Wide-toothed detangling brush (for pre-braiding prep)
- Setting spray or styling mousse for braids
Installation Steps
- Map Design: Carefully section the desired pattern (straight back, zig-zag, or updo) using the parting comb.
- Start Braid: Begin with a small section of natural hair, starting the cornrow close to the scalp.
- Feed Hair: Gradually introduce small amounts of the pre-stretched braiding hair as you move along the cornrow line, creating the “feed-in” effect for a natural look.
- Seal: Secure the ends by braiding down completely or wrapping them into an elegant updo, protecting ends with hair ties for updos.
- Nourish: Immediately apply anti-itch oil using the applicator bottle directly to the scalp for winter hair defense.
Pro-Tip: Feed-in cornrows are ideal for maximizing hair growth cycles because they allow for daily application of moisturizing hair oils. Use the oil applicator bottle to apply lightweight oils directly to the scalp to regulate sebum production and avoid product buildup in braids.

4. Styling Voluminous Faux Locs (Achieving Texture and Length)

Pin this luxurious look to your ‘Hair Transformation Ideas’ board!
Faux locs protective styling is a commitment style, often lasting 8–12 weeks, offering maximum long term hair protection. This voluminous style uses kinky hair texture types, often achieved through wrapping or crochet methods, creating a weather resistant hair fortress that shields the entire hair length from damage preventing styles. When properly maintained, faux locs significantly reduce manipulation damage and aid length retention.
Materials Needed
- Preferred braiding hair for wrapping (Kinky hair texture types recommended)
- Crochet needle (if using the crochet method)
- Hair gel or setting lotion for smoothing the natural root
- Anti-frizz mousse or spray
- Hair ties for updos and styling flexibility
Installation Steps (Wrapping Method Focus)
- Pre-Twist: Pre-section and two-strand twist your natural hair sections to serve as the anchor.
- Anchor Hair: Secure the braiding hair around the base of the twisted anchor, ensuring minimal stress on hair.
- Wrap Tightly: Take the wrapping hair and begin tightly wrapping it downward around the entire length of the twisted section until you reach the end.
- Seal Ends: Secure the ends by lightly burning or sealing with a small amount of adhesive, ensuring they are weather resistant hair.
- Refine: Use anti-frizz mousse periodically to manage braid frizz and keep the locs defined.
Pro-Tip: Faux locs can be heavy initially, so understanding the molecular structure of braiding hair is crucial. Choose lightweight fiber options to reduce tension and prevent winter hair loss prevention around the hairline. This style is best for length retention correlates with protection.

5. Achieving Jumbo Senegalese Twists (The Quick Installation Style)

Pin this quick and easy look to your ‘Protective Style Inspo’ board!
Jumbo Senegalese Twists are a fantastic alternative when seeking quick and easy protective braid styles for cold weather, requiring less installation time than smaller box braids or twists + braids. Their large size means fewer anchor points, which often equates to a reduced tension from braids. These twists provide great volume and are one of the most effective low upkeep hair styles, perfect for busy individuals seeking long term hair protection.
Supplies Needed
- Moisturizing cream to seal moisture in braids
- High-hold twist locking gel
- Jumbo braiding hair packs (synthetic or human hair)
- Hair clips for effective sectioning
- Large silk scarf for evening wrap
Installation Process
- Section: Part large, clean sections of hair. Apply moisturizing cream to your natural hair before beginning.
- Two-Strand Twist: Secure the extension hair using the knotless method or a small anchor braid at the root.
- Twist Down: Perform a two-strand twist tightly and evenly down the length of the section, ensuring consistent tension.
- Hot Water Set: Dip the ends of the finished twists into hot water for 30 seconds to seal and prevent unraveling.
- Night Care: Wear a large silk scarf overnight to minimize friction and prevent frizz control for natural hair.
Pro-Tip: The Jumbo Senegalese Twist achieves superior hair growth promoting coiffures because its size drastically reduces the number of parts, limiting the overall stress points on the scalp. Always detangling hair before braids to ensure smooth, clean twists.

6. Executing DIY Mini Twists/Braids (The No-Extension, Low-Manipulation Option)

Pin this affordable DIY option to your ‘Low-Maintenance Hair’ board!
Mini twists are indeed considered winter protective braids, offering a fantastic solution for those seeking winter protective styles without extensions. This option is characterized by minimal stress on hair and superior natural texture preserving results. It’s a popular choice among those seeking low manipulation winter braids for black women, as it allows for easy access to the scalp and continuous application of moisturizing hair oils.
Products Needed
- Creamy leave-in conditioner for maximum hydration
- Natural oil blend (Jojoba, Castor, or Argan) for sealing
- Hair butter or styler (the ‘Cream’ in LOC method)
- Spray bottle with water and a few drops of oil
- Small elastic bands (optional, for securing ends)
Application Steps
- Pre-Treat: Complete a deep conditioning treatment. Apply leave-in conditioner liberally, ensuring hair is slightly damp.
- LOC Application: Apply oil, then cream, to a small section of hair to seal moisture in braids.
- Twist: Tightly two-strand twist the section down to the ends. You can secure the braids properly using small elastic bands or twisting the ends around themselves.
- Stretch: Allow twists to fully air-dry before styling or manipulation to ensure length retention.
- Night Protection: Wear a silk bonnets for protection every night and lightly spritz with water/oil mixture every other day.
Pro-Tip: For 4c hair growth, the elasticity and tensile strength in natural hair is key. Before starting, perform the simple braiding techniques of mini twists on slightly stretched hair to prevent shrinkage and reduce breakage natural during removal. This is critical for protective styling for afro hair.

7. Designing Elegant Goddess Braids (The Sophisticated Updo Option)

Pin this stunning updo to your ‘Formal Hair Inspiration’ board!
Goddess braids are large, raised cornrows achieved by feeding in thick braiding hair, resulting in elegant protective braids that completely secure the hair shaft. As a professional braided styles option, they keep the ends fully tucked away, making them superior hair preservation techniques against the cold. They are simple braided updos for winter hair protection, offering a sophisticated look while minimizing environmental stressors hair.
Supplies Needed
- Large amount of pre-stretched braiding hair (for thickness)
- Strong-hold edge control gel
- Hair pins and hair ties (for securing the updo)
- Braid sealant spray for frizz control
- Satin head scarf for wrapping edges
Installation Steps
- Parting: Create 1-4 large sections for the desired braid design (e.g., two braids on each side leading to a bun).
- Feed-In: Begin a large cornrow or Dutch braid, gradually feeding in large amounts of braiding hair to achieve the thick Goddess effect.
- Styling: Once the braid reaches the nape of the neck or desired updo position, wrap the remaining length into a sleek braided bun or braided ponytail.
- Set: Use braid sealant spray for frizz control braids and to smooth flyaways.
- Edge Care: Apply edge control products and wrap with a scarf for 15 minutes to set the style and protect edges with braids.
Pro-Tip: Because this style involves heavy braiding hair, ensuring minimal stress on hair during installation is vital. For advanced detangling methodologies, use oil to loosen any tangles in the extensions before braiding, rather than attempting to detangle during the process.

8. Preparing Lightweight Marley Twists (Coarser Texture Blend)

Pin this textured protective style to your ‘Twist Style Ideas’ board!
Marley Twists utilize kinky-textured Marley braiding hair types, which offer a natural texture preserving look and excellent volume. This is a lightweight braiding option that blends seamlessly with most natural hair, making it a low manipulation style ideal for winter. The key difference when choosing between Marley Twists vs Senegalese Twists is the coarser, more voluminous finish, providing superb hair protection tips.
Products Required
- Marley braiding hair (kinky texture for blending)
- Spray bottle of water and glycerin
- Lightweight hair oil (such as grapeseed)
- Rat-tail comb for neat parting
- Defining hair gel or cream
Installation Steps
- Stretch Hair: Gently stretch the Marley hair before use to reduce bulk and prevent the style from being too heavy.
- Section & Moisturize: Part clean sections. Apply a liberal amount of moisturizing cream to your own hair, focusing on sealing moisture in braids.
- Twist Start: Anchor the Marley hair using a braid or knot method, ensuring tension leads to damage prevention, not hair loss.
- Two-Strand Twist: Begin twisting tightly to create definition at the root, maintaining a clean two-strand twist down the length.
- Night Care: Use a hair wrap for winter or a satin pillowcase for hair to maintain the style and texture overnight.
Pro-Tip: Marley hair is excellent for texture blending, making it a natural hair friendly choice. However, due to its hygroscopy, it may absorb moisture from your hair in dry conditions. Always saturate your natural hair with moisture (water/leave-in) before starting to avoid hair dehydration.

9. Securing the Halo/Crown Braid (The Minimum Maintenance Updo)

Pin this elegant updo to your ‘Quick Styling Saves’ board!
The Halo or Crown Braid is a simple braided updo for winter hair protection, often achieved using only your natural hair or minimal extensions. Because the hair is braided tightly against the scalp and wrapped around the crown, it acts as a robust protective maneuver, shielding the hair from environmental stressors. This minimal stress on hair style is one of the easiest winter protective braids to maintain daily.
Tools Required
- Moisturizing hair butter or cream
- Firm hold styling gel
- Hair pins or bobby pins (plenty)
- Finishing shine spray (non-aerosol)
- Small hair net (optional, for ultra-sleek finish)
Installation Steps
- Moisturize: Apply hair butter generously, focusing on the ends, which will be tucked away.
- Start Braid: Begin a tight French or Dutch braid near the temple, incorporating small sections of hair as you move around the head circumference.
- Wrap & Secure: Continue braiding until you reach the starting point. Wrap the remaining length around the crown to form the ‘halo’.
- Tuck Ends: Use hair pins to meticulously tuck and secure the end of the braid underneath the starting section.
- Finish: Apply a small amount of lightweight hair oil for moisture over the entire braid for a sleek protective styles finish, ensuring it protects ends.
Pro-Tip: The Halo Braid is one of the best winter protective styles because it minimizes daily styling and completely shields the ends (the oldest part of the hair). Use a small amount of edge control gel to re-do edges every 2-3 days without disrupting the main braid.

Key Takeaways: Your Quick Guide to Winter Protective Braids
Choosing the right winter protective braids is a proactive strategy for achieving natural hair growth by prioritizing hair health benefits and reducing manipulation damage. By following experienced natural hair care advice, you can ensure your chosen style is both long lasting and healthy hair promoting.
- The Winter Environment Demands Low Manipulation: The core benefit of winter protective hairstyles braids is minimizing daily friction and thermal exposure, which directly combats preventing breakage in cold weather.
- Prioritize Moisture Before Installation: Always perform a deep conditioning treatment and use the LOC method before braiding to seal moisture in braids, preparing the hair shaft for several weeks of reduced access.
- Select Styles Based on Tension Tolerance: Knotless box braids and mini twists are preferred options for those seeking minimal stress on hair, reducing the risk of traction alopecia and promoting hair growth.
- Scalp Health is Non-Negotiable: Even with long lasting protective styles, maintaining scalp health routines using diluted cleansers and specialized anti-itch oils is essential for reducing product buildup in braids.
- Nighttime Protection is Critical: Always wear silk bonnets for protection or sleep on a satin pillowcase to manage frizz during sleep and prevent the hair’s hygroscopy from losing moisture to cotton fabrics.
- Extension Hair Requires Pre-Treatment: Whether using Marley, Kinky, or Pre-Stretched braiding hair, pre-stretching and light oil application can improve the longevity and feel of the style.
- Length Retention is the Real Goal: While braids don’t magically speed up growth, they enable length retention correlates with protection by safeguarding the oldest and most fragile parts of the hair (the ends) from damage preventing styles.
FAQs About winter protective hairstyles braids
What is the ideal length of time to keep in winter protective braids?
The industry standard for keeping in winter protective styles ranges from 4 to 8 weeks, depending on the hair’s density and how well you maintain the style. Keeping braids longer than 8 weeks increases the risk of matting, excessive product buildup in braids, and difficulty detangling natural hair upon removal. It’s crucial to follow a consistent cleaning and moisturizing regimen to maximize the healthy hair promoting duration of the style.
How often should you moisturize hair in protective braids during winter?
You should moisturize protective styles every 2 to 3 days using a lightweight water-based leave-in conditioner or a diluted water/oil mix. Follow this with a few drops of moisturizing hair oils applied directly to the scalp and along the length of the braids to seal moisture in braids. Avoid heavy creams, which contribute to product buildup, and instead focus on nourishing hair styles that maintain hair health benefits during cold weather.
Are knotless braids better than box braids for winter protection?
Knotless braids are generally recommended as they exert less tension on the scalp compared to traditional box braids, making them ideal for long lasting styles and preventing weak edges. Both offer excellent hair protection tips by tucking away hair, but the knotless method, utilizing the feed-in technique, reduces manipulation damage and is a better choice for those with sensitive scalp or aiming for maximum length retention.
Can braids actually make your natural hair grow faster in winter?
While braids do not physically speed up your natural hair growth cycle, they significantly aid in length retention by preventing breakage in cold weather and eliminating daily manipulation. Your hair continues to grow at its normal rate (typically ½ inch per month), but the protective braided styles shield the ends, ensuring that the length gained is not lost to friction, damage, or environmental stressors hair.
What are the signs that my winter protective braids need to be removed?
Signs that your protective styles need removal include excessive frizz at the roots, severe product buildup, a foul odor, or persistent scalp itching relief for braids. Significant growth (more than 1 inch) can also cause excessive pulling or matting, indicating that the style has reached its limit. Always remove braids safely and follow up with deep conditioning treatments for post-braid care.
What specific products should I use to care for my scalp with winter braids?
Focus on using light, water-based cleansers and oils rich in anti-inflammatory ingredients like peppermint, tea tree, or witch hazel to manage scalp health. Use an oil applicator bottle for precise application, ensuring you massage the product in to improve blood circulation and regulate sebum production. These products are crucial for combating product buildup in braids and dry winter hair solutions.
What are easy protective braid styles for winter without extensions?
Mini twists and the classic Halo/Crown Braid are among the best easy winter protective braids that do not require extensions. These low manipulation styles utilize only your natural hair, simplifying installation and maintenance while still offering robust hair protection tips against the harsh cold, making them suitable for long lasting winter protective styles for shorter hair.
How do I prepare my natural hair for winter protective braiding?
Preparation involves cleansing, an intensive protein balance treatment, and maximum moisture application using the LOC method. Ensure hair is thoroughly detangled natural hair, deep conditioned, and stretched gently (if desired) before installing protective plaits. This ensures hair health benefits and better resilience against the low humidity effects of winter.
Which braiding hair type is best for locking in moisture during the cold season?
Synthetic hair that closely mimics natural hair texture (like Kinky or Marley hair) tends to blend well, but the key to moisture locking is pre-treating your natural hair. If using synthetic, ensure it is lightweight braiding to avoid tension. Human hair extensions can also be used, offering a natural texture preserving finish and excellent durability.
What are the cons of wearing winter protective braids for too long?
Wearing braids for too long (over 8 weeks) can lead to potential problems like hair loss prevention due to tension fatigue, excessive buildup of dead skin cells and product, and matting/tangling at the roots. This necessitates removing braids safely to allow the scalp and hair follicles to breathe, reducing the risk of permanent damage from continuous tension and addressing thinning hair.
Final Thoughts on Winter Protective Hairstyles Braids
Choosing the right winter protective braids is the single most effective action you can take to shield your natural hair from the harsh cold and dry indoor heat this season. By prioritizing these low manipulation styles—whether you choose the tension-free security of Knotless Box Braids, the quick convenience of Jumbo Twists, or the natural preservation of Mini Twists—you are creating a hair fortress that dramatically reduces damage and actively promotes length retention. Remember that the braid itself is only half the battle; the meticulous moisture regimen and scalp health care detailed in this guide are crucial for seeing optimal hair growth results and achieving the title of healthy winter braids. Implement these proven methods and step into 2026 with the confidence that your natural hair is protected, nourished, and thriving.
We’ve covered 9 essential protective styles; which one will you install first this winter to kickstart your natural hair growth journey? Let us know in the comments!
Last update on 2026-04-20 / Affiliate links / Images from Amazon Product Advertising API