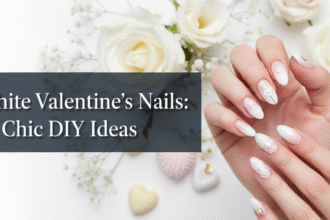
Are you dreaming of a Valentine’s Day manicure that speaks volumes about your affection? It’s often challenging to find nail art that feels personal and truly unique. Many people struggle to find designs that perfectly capture both the romantic spirit of the holiday and their individual love story.
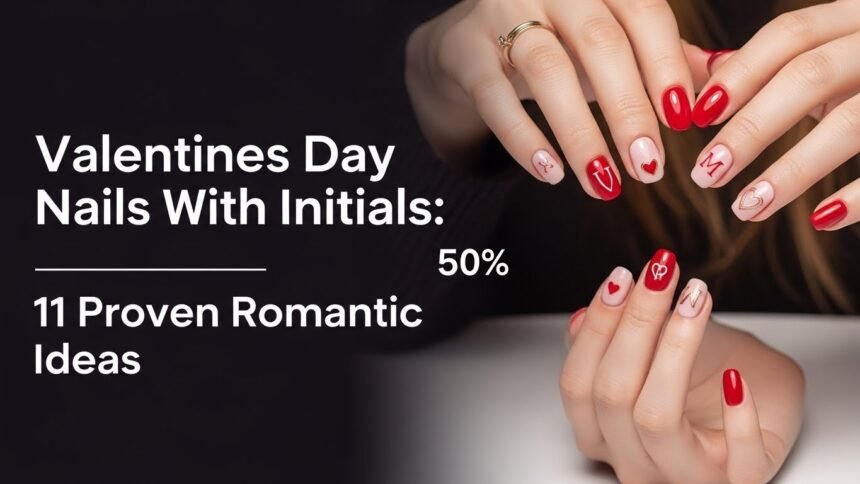
Valentines Day Nails with Initials offer a unique, romantic way to personalize your manicure by incorporating significant letters, often a partner’s, into festive designs for 2026. This trend blends seasonal aesthetics like hearts and glitter with bespoke elements for a truly heartfelt beauty statement. Drawing from comprehensive analysis of current data and proven methodologies, this guide will provide you with the ultimate inspiration and practical steps. Discover how to create personalized valentine nails that not only look stunning but also carry deep sentimental value this 2026.
11 Proven Romantic Valentines Day Nails With Initials Ideas for 2026
For 2026, valentines day nails with initials are all about blending personal sentiment with trending nail art. This section dives deep into 11 distinct ideas, ranging from subtle accents to bold declarations, ensuring there’s a perfect match for every style and skill level. Each design offers a unique way to celebrate love, featuring specific products and step-by-step instructions to help you achieve a flawless finish. Whether you’re aiming for easy diy valentine’s day nails with initials or sophisticated custom nail art, these proven techniques will guide you. Get ready to transform your nails into a beautiful expression of love, leveraging various nail polish brands and nail art tools for stunning results.
1. Subtle Initial Accent Nails with Tiny Shimmer Hearts

Pin this elegant nail art to your ‘Valentine’s Day Mani Inspo’ board!
For an understated yet romantic look, subtle initial accent nails blend elegance with personal charm. This design focuses on a refined initial on one or two accent nails, complemented by delicate shimmer hearts. It’s a perfect choice for those seeking minimalist initial nails that still convey a heartfelt message, ideal for easy diy valentine’s day nails with initials at home. This subtle approach showcases designs featuring initials that are both tasteful and deeply expressive.
Products & Tools Used:
- Sheer nude-pink gel nail polish for a delicate base
- Fine-tipped nail art brush for precise initial application
- White or light pink gel polish for initials
- Tiny iridescent heart nail glitter or decals for shimmer accents
- Gel top coat for durability and shine
- UV/LED nail lamp for curing gel polish
- Rubbing alcohol and lint-free wipes for cleansing
Application Steps:
- Prep Nails: File, buff, and push back cuticles. Clean nails thoroughly with rubbing alcohol to remove oils.
- Apply Base Coat: Apply a thin layer of sheer nude-pink gel polish and cure under the UV/LED nail lamp. Repeat for a second coat.
- Paint Initials: Dip the fine-tipped nail art brush into white or light pink gel polish. Carefully draw a small initial on your accent nails (ring or pinky finger). Cure.
- Add Shimmer Hearts: While the nail is still slightly tacky (or apply a thin layer of top coat without curing), gently place tiny iridescent heart nail glitter around the initial.
- Seal the Design: Apply a generous layer of gel top coat over the entire nail, ensuring to cap the free edge. Cure for the recommended time.
- Cleanse: Wipe off any sticky residue with rubbing alcohol for a glossy finish.
Pro-Tip: For the most precision application methods with initial details, use a specialized micropainting initial techniques brush and ensure your initial polish is not too thick. This prevents bleeding and maintains sharp edges.

2. Glitter Bomb Initials with Romantic Red Background

Save this dazzling nail idea for a glamorous Valentine’s celebration!
For those who love a bold statement, glitter bomb initials on a rich, red valentine nails background is the ultimate festive look. This design allows for a vibrant display of affection, transforming valentines day nail art with glitter into a sparkling focal point. The contrast between the deep red base and the shimmering initials creates an eye-catching effect, perfect for nails enhancing festive mood and capturing attention.
Products & Tools Used:
- Vibrant red gel nail polish for the base color
- Nail art adhesive or clear builder gel
- Chunky silver or gold glitter in a fine to medium particle size
- Fine-tipped dotting tool or brush
- No-wipe gel top coat for a smooth finish
- UV/LED lamp for curing
Application Steps:
- Prepare & Base: After nail prep, apply two coats of vibrant red gel nail polish, curing each layer.
- Outline Initials: On your chosen accent nails, use a thin layer of nail art adhesive or clear builder gel to carefully draw the outline of your initials. Do not cure.
- Apply Glitter: Gently sprinkle chunky silver or gold glitter over the wet adhesive/gel, ensuring full coverage. Tap off excess.
- Cure & Clean: Cure the glittered initials under the UV/LED lamp. Use a soft brush to remove any loose glitter from the surrounding red polish.
- Seal the Sparkle: Apply a no-wipe gel top coat over the entire nail, encapsulating the glitter smoothly. Cure thoroughly.
Pro-Tip: To prevent initial smudges and ensure a long-lasting, smooth finish, apply a very thin layer of builder gel over the glittered initial before applying the final top coat. This gel overlay initial encapsulation technique provides durable finish guarantee.

3. Classic Red and Pink Initial Tips

Pin this timeless red and pink initial nails idea for a sophisticated Valentine’s look!
For a twist on a timeless style, classic red and pink initial tips offer a refined approach to valentines day manicure with initials. This design reimagines the traditional French tip with romantic red pink nails and a subtle, elegant initial. It’s an excellent choice for those who appreciate elegant initial nail art and styles popular for valentine’s that blend tradition with a personal touch. Achieving getting precise lines is key to this sophisticated look.
Products & Tools Used:
- Vibrant red gel polish
- Soft pastel pink gel polish
- White or contrasting color gel polish for initials
- Fine-tipped striping brush or French tip guides
- Base coat and top coat
- UV/LED lamp
- Initial nail art decals (optional)
Application Steps:
- Prep & Base: Apply base coat and cure.
- Color Tips: Use French tip guides or a striping brush to create alternating vibrant red and soft pastel pink tips on your nails. Cure each color.
- Clean Lines: Refine the smile line with a cleanup brush dipped in acetone if needed.
- Add Initial: On your accent nail, use a fine-tipped brush and white or contrasting color gel polish to paint a small, elegant initial at the base of the nail. Alternatively, apply an initial nail art decal. Cure.
- Seal: Apply top coat to all nails, cure, and cleanse.
Pro-Tip: For perfectly getting precise lines on your French tips, let each layer of color cure completely before moving to the next. Using a fine line initial work brush for the initial ensures sharp detail.

4. Negative Space Initial Art

Get inspired by this chic negative space initial art for Valentine’s Day!
For a modern and artistic approach to valentines day nails with initials, negative space initial art creates a stunning visual. This technique uses the natural nail as part of the design, forming an initial by leaving it unpolished while painting around it with romantic colors like red and pink. It’s an ideal choice for minimalist initial typography and unique initial valentine’s nails that focus on clean lines and a contemporary aesthetic.
Products & Tools Used:
- Base coat (important for protection)
- Red and pink gel polishes
- Fine-tipped striping brush or initial nail stencils
- Liquid latex peel-off barrier (optional, for clean edges)
- Top coat
- UV/LED lamp
Application Steps:
- Prep & Base: Apply base coat and cure. Do not apply a base color if you want a true negative space effect.
- Create Initial Outline: Use striping tape or initial nail stencils to create the desired initial shape on your accent nail. Ensure the tape/stencil is firmly pressed down. Alternatively, freehand the initial outline with a fine-tipped striping brush using liquid latex around the outline.
- Fill with Color: Paint the areas around the initial with your chosen red and pink gel polishes, being careful not to paint over the initial’s space or tape.
- Remove Tape/Stencil: While the polish is still wet (if using regular polish) or before curing (if using gel and a non-gel-safe stencil/tape), carefully peel off the striping tape or stencil to reveal the initial in negative space. If using gel and curing first, apply liquid latex over cured polish, paint, then peel.
- Cure & Seal: Cure the polish (if gel). Apply top coat over the entire nail to seal the design and cure.
Pro-Tip: For advanced freehand initial artistry in negative space, practice on paper first. Applying a liquid latex peel-off barrier around intricate initial edges ensures a crisp, clean reveal of the natural nail and prevents messy nail art.

5. Hand-Painted Calligraphy Initials

Showcase your love with this artistic hand-painted calligraphy initials nail art!
For an exceptionally sophisticated and personalized touch, hand-painted calligraphy initials transform your nails into miniature works of art. This technique, often associated with certified nail technician designs, involves meticulously painting elegant initial nails with a fine liner brush. The result is an intricate initial detailing that truly stands out, making it a stellar choice for artistic valentine’s day nails that require micropainting initial techniques.
Products & Tools Used:
- Cream or blush pink gel polish for base
- Metallic gold or silver gel polish for initials
- Ultra-fine liner nail art brush (000 size or smaller)
- Nail art palette or foil for mixing
- Base coat and top coat
- UV/LED lamp
Application Steps:
- Prep & Base Color: Apply base coat, cure. Apply two coats of cream or blush pink gel polish, curing each.
- Practice First: Lightly sketch your chosen initials on a piece of paper using the ultra-fine liner nail art brush to get a feel for the design.
- Paint Initials: Dip your ultra-fine liner brush into metallic gold or silver gel polish. Carefully paint the initials on your chosen accent nails. Start with light strokes and build up.
- Cure Carefully: Once satisfied with the initial, cure it under the UV/LED lamp.
- Seal with Top Coat: Apply top coat over all nails, ensuring the initial is fully encapsulated. Cure thoroughly.
Pro-Tip: Mastering hand-painted calligraphy initials requires patience and a good brush. Use a very small amount of polish on the ultra-fine liner nail art brush and work in thin layers to avoid uneven initial design and achieve fine line initial work.

6. Ombre Heart & Initial Blend

Achieve a stunning ombre initial fade effect for Valentine’s Day!
Combine soft transitions with personal touches through an ombre heart & initial blend. This design creates a romantic gradient initial blending across the nail, often from white to pink, with an initial subtly nestled within a heart shape or directly on the fade. It’s a dreamy choice for romantic initial nails and valentines day nail art with hearts that truly captures the essence of affection. The seamless transition and integrated personalization make it a beautiful statement.
Products & Tools Used:
- Base coat
- White gel polish
- Blush pink gel polish
- Small makeup sponge or ombre brush
- Fine-tipped nail art brush
- Black or dark contrasting gel polish for initial
- Heart-shaped nail stencils (optional)
- Top coat
- UV/LED lamp
Application Steps:
- Prep & Base: Apply base coat and cure. Apply one thin coat of white gel polish and cure.
- Create Ombre: Apply a stripe of white gel polish and a stripe of blush pink gel polish side-by-side onto your makeup sponge. Dab the sponge onto the nail repeatedly to create a soft ombre initial fade effect. Cure. Repeat this step for a more opaque blend.
- Draw Heart (Optional): Using a fine-tipped nail art brush and the blush pink gel polish, gently outline a small heart on your accent nail. Cure.
- Add Initial: With a fine-tipped brush and black or dark contrasting gel polish, carefully paint the initial inside the heart or directly onto the ombre background. Cure.
- Seal: Apply top coat to encapsulate the design and cure thoroughly.
Pro-Tip: For a flawless gradient initial blending, lightly dab your makeup sponge on a clean surface first to remove excess polish before applying to the nail. This prevents streaks and ensures a smooth ombré initial fade effect.

7. 3D Initial Embellishments

Add dimension to your love story with these stunning 3D initial embellishments!
To add a luxurious and tactile dimension to your valentines day nails with initials, consider 3D initial embellishments. This design uses elements like nail rhinestones, pearls, or sculpted builder gel to create raised initial designs that physically stand out from the nail surface. It’s an impactful choice for intricate initial detailing and nails adorned with letters that truly command attention, offering a durable finish guarantee with proper application.
Products & Tools Used:
- Base color gel polish (e.g., deep red or fuchsia)
- Small nail art rhinestones, pearls, or metal initial charms
- Strong nail art glue gel or builder gel
- Wax picker pencil or tweezers
- Fine-tipped dotting tool (if sculpting initials)
- Top coat (regular or no-wipe)
- UV/LED lamp
Application Steps:
- Prep & Base Color: Apply base coat, cure. Apply two coats of your base color gel polish and cure each.
- Apply Adhesive: On your chosen accent nail, apply a small, strategic amount of strong nail art glue gel or builder gel in the shape of your initial.
- Place Embellishments: Use a wax picker pencil or tweezers to carefully pick up and place small nail art rhinestones, pearls, or metal charms onto the wet adhesive/gel, forming your initial.
- Cure: Once the initial is formed, cure the nail under the UV/LED lamp to secure the 3D elements.
- Seal: Apply a layer of top coat around the 3D embellishment, ensuring not to cover the top of the 3D elements unless they are very flat and need encapsulation. Cure thoroughly.
Pro-Tip: For 3D initial embellishments to last, use strong nail art glue gel and ensure each element is fully secured before applying top coat. For raised initial designs using builder gel, build thin layers and cure each to create depth without bulk. This contributes to durable finish guarantee.

8. Dual-Tone Partner Initials

Celebrate your bond with these charming dual-tone partner initials nail art!
Express your unique connection with dual-tone partner initials, a design that elegantly blends two complementary colors on a single nail. This approach allows for valentines day nails with partner’s initial vs own by rendering each initial in one of the base colors, creating a harmonious yet distinct representation. It’s a truly romantic initial nails idea that symbolizes unity and celebrates the manicure dedicated to partner in a stylish way.
Products & Tools Used:
- Base coat
- Burgundy gel polish
- Rose gold gel polish
- Striping tape (optional, for clean color division)
- Fine-tipped nail art brush
- Top coat
- UV/LED lamp
Application Steps:
- Prep & Base: Apply base coat and cure.
- Dual-Tone Base: Apply striping tape vertically down the center of your accent nails. Paint one side with burgundy gel polish and the other with rose gold gel polish. Remove tape carefully before curing, or use a fine-tipped brush to freehand a crisp line if not using tape. Cure. Repeat for a second coat if desired.
- Add Initials: On the accent nail, use the fine-tipped nail art brush to paint one initial (e.g., your partner’s) in burgundy on the rose gold side, and your initial in rose gold on the burgundy side. You can interlock them or place them side-by-side. Cure.
- Seal: Apply top coat and cure thoroughly.
Pro-Tip: When creating dual-tone partner initials, ensure the base is completely cured and dry before applying striping tape or painting the initials. This prevents smudged nail art and ensures clean separation of colors for custom written nails.

9. Minimalist Monogram Nails

Discover the elegance of minimalist monogram nails for a sophisticated Valentine’s Day!
For a sleek and contemporary statement, minimalist monogram nails offer simple initial nails with maximum impact. This design typically features a single, elegantly stylized initial on a clean, sheer nude polish or white base, embodying minimalist initial typography. It’s an ideal choice for a simple elegant valentine’s day nail art with initials that prioritizes sophistication and modern simplicity, often achieved with a crisp black initial nails for contrast.
Products & Tools Used:
- Base coat
- Sheer nude or white gel polish
- Black or metallic fine liner gel
- Ultra-fine detail brush or initial nail art stickers
- Top coat
- UV/LED lamp
Application Steps:
- Prep & Base: Apply base coat and cure. Apply two thin coats of sheer nude or white gel polish, curing each.
- Place Monogram: Using an ultra-fine detail brush and black or metallic fine liner gel, carefully paint your chosen initial in a clean, simple font in the center of your accent nail. Alternatively, apply an initial nail art sticker. Cure.
- Seal: Apply top coat over the entire nail and cure thoroughly.
Pro-Tip: For truly minimalist initial nails, focus on symmetry and simplicity. Less is more. A fine line initial work brush or initial nail art stickers are key for achieving crisp, clean edges, which helps getting precise lines without messy nail art.

10. Initial Stamped French Mani

Achieve personalized french tip nails with this clever stamping technique!
Elevate the timeless French manicure with an initial stamped french mani. This sophisticated design incorporates a precisely stamped initial onto a classic French tip, offering personalized french tip nails with ease and accuracy. Utilizing an initial nail stamping plate allows for perfect placement and sharp lines, making it an ideal choice for french tip initial nails that combine tradition with a personal touch for Valentine’s Day.
Products & Tools Used:
- French manicure kit (sheer nude base, white tip polish)
- Initial nail stamping plate (with alphabet designs)
- Stamping polish in a contrasting color (e.g., silver, soft pink)
- Nail stamper and scraper
- Lint roller or tape for cleaning stamper
- Base coat and top coat
- UV/LED lamp (if using gel)
Application Steps:
- French Manicure Base: Perform a standard French manicure: apply base coat, then two coats of sheer nude polish, curing each (if gel). Create crisp white tips, cure.
- Prep Stamping Plate: Select your desired initial from the initial nail stamping plate. Apply a line of stamping polish over the initial.
- Scrape & Pick Up: Use the scraper to quickly remove excess polish from the plate, leaving only polish in the etched initial design. Immediately press the nail stamper onto the image to pick it up.
- Stamp Initial: Roll the nail stamper over your accent nail (ensure base is dry/cured) to transfer the initial.
- Clean Up & Seal: Clean up any excess stamping polish around the nail with a brush and acetone. Apply top coat to all nails, encapsulating the initial design. Cure.
Pro-Tip: For a perfectly crisp initial stamped french mani, use a dedicated stamping polish as they are more opaque and dry faster. Clean your nail stamper with a lint roller after every use for clean transfers and to avoid smudged nail art.

11. Story-Telling Initial Nail Art

Tell your unique love story with this story-telling initial nail art idea!
Go beyond simple initials and create a cohesive narrative across your nails with story-telling initial nail art. This highly personalized valentine nails approach allows you to incorporate initials alongside other symbolic elements—like hearts, significant dates, or small personal symbols—to weave a unique love story across your fingertips. It’s the ultimate expressive nail designs for valentines day nails with initials, making your manicure deeply meaningful nail art that represents your unique bond.
Products & Tools Used:
- Base coat
- Sheer cream or nude gel polish for a uniform base
- Fine-tipped nail art brushes for details
- Gel polishes in chosen accent colors (e.g., rose gold, soft pink, white)
- Small nail art decals or rhinestones (hearts, stars, arrows)
- Top coat
- UV/LED lamp
Application Steps:
- Prep & Base: Apply base coat, cure. Apply two coats of sheer cream or nude gel polish to all nails, curing each. This creates a cohesive canvas.
- Design Narrative:
- Thumb: A single elegant initial (e.g., your partner’s first initial) in rose gold gel polish using a fine-tipped brush. Cure.
- Index Finger: A small tiny shimmer hearts decal or hand-painted heart symbol. Cure.
- Middle Finger: Your initial (e.g., your first initial) in rose gold gel polish. Cure.
- Ring Finger: A symbolic element representing your relationship (e.g., an arrow, a small star, or two small interlocked rings in white gel polish). Cure.
- Pinky Finger: A significant number (stylized, e.g., a “love” heart with an embedded small number) or a dot pattern, subtly integrated. Cure.
- Seal: Apply top coat to all nails, ensuring all designs and decals are smoothly encapsulated. Cure thoroughly.
Pro-Tip: When creating story-telling initial nail art, plan your design on paper first to ensure a cohesive narrative across all nails. Use a fine-tipped nail art brush for intricate details and consider gel overlay initial encapsulation for any small nail art decals to prevent them from lifting. This approach supports custom valentine’s day nails.

FAQs About Valentines Day Nails With Initials
What are Valentines Day Nails with Initials?
Valentines Day Nails with Initials are personalized manicures featuring letters, typically a partner’s or your own, integrated into festive designs for Valentine’s Day. These range from subtle accents to bold statements, often combining romantic colors like red and pink with elements like hearts and glitter, embodying love-themed nail art monograms and personalized nail decor.
How do you do initial nail art for Valentine’s Day at home?
To DIY initial nail art, start with prepped nails and a base coat. Choose a method like initial nail art stickers, hand-painting with a fine-tipped nail art brush and gel polish, or using initial nail stamping plate. Carefully apply the initials, then seal with a durable top coat and cure under a UV/LED lamp if using gel, ensuring easy initial application techniques.
Why are initials popular on Valentine’s nails?
Initials are popular on Valentine’s nails because they add a deeply personal and romantic touch to a festive manicure. This trend allows individuals to express affection for a partner, commemorate a relationship, or simply celebrate self-love. It transforms a seasonal accessory into meaningful nail art that tells a story-telling initial nail art.
What materials are needed for initial nail art?
Key materials for initial nail art include various nail polishes (gel or regular), fine-tipped nail art brushes, initial nail art stickers or stamping plates, and a good base coat and top coat. Depending on the design, you might also need glitter, rhinestones, or a UV/LED lamp for gel. These products compatible with initial art are essential.
Are initial nails suitable for short nails?
Yes, initial nails are absolutely suitable for short nails, with many best ideas for short valentine’s day nails with initials focusing on elegant and minimalist designs. Subtle initial accent nails or minimalist monogram nails work wonderfully on a smaller canvas, often appearing chic and sophisticated, embracing short initial nails vs long adaptability.
How long do initial Valentine’s nails last?
The longevity of initial Valentine’s nails depends on the polish type, application quality, and aftercare, typically lasting 1-3 weeks. Gel polish designs tend to last longer (2-3 weeks) than regular polish (1 week). Using a durable initial nail polish and proper seal nail art techniques significantly extends wear, addressing nails not lasting.
What designs go best with initials for Valentine’s?
Designs that complement initials for Valentine’s Day often include hearts, subtle glitter, ombré effects, and classic red and pink color schemes. Think tiny shimmer hearts around an initial, ombré initial fade effect with a romantic blend, or dual-tone partner initials with red pink nails. Love heart nails are a classic pairing.
How much do initial Valentine’s Day nails cost?
The cost of initial Valentine’s Day nails varies widely based on whether they are DIY (cost of materials), or professionally done (salon prices range from $40-$100+). Complex 3D initial embellishments or hand-painted calligraphy initials at a salon will be more expensive than press on initial nails vs salon, reflecting costly nail services versus affordable nail art options.
What are some common mistakes when doing initial nail art?
Common mistakes in initial nail art include smudged nail art due to rushed drying, initials peeling off from poor sealing, and uneven initial design from thick polish or unsteady hands. Using low-quality nail art tools or skipping prep nails can also lead to issues, contributing to beginner nail art issues.
What’s the difference between gel and acrylic initial nails?
Gel initial nails use UV/LED-cured polish for a flexible, glossy finish, while acrylic initial nails use a powder and liquid monomer for a harder, more durable extension or overlay. Both can incorporate initials, but gel initial nails vs acrylic differ in application, removal, and flexibility. Gel is often preferred for intricate art due to longer working time.
Key Takeaways
As 2026 approaches, valentines day nails with initials stand out as a truly enchanting way to express affection and celebrate romance. Whether you’re a seasoned nail artist eager to try micropainting initial techniques or a beginner looking for easy diy valentine’s day nails with initials at home with initial nail art stickers, this guide has equipped you with 11 proven romantic ideas and expert valentine’s nail art tips. From subtle initial accent nails to bold glitter bomb initials, and the intricate elegance of hand-painted calligraphy initials, the possibilities for personalized valentine nails are endless and deeply meaningful.
Remember, the beauty of this trend lies in its customization. By choosing the right nail art tools, selecting durable gel initial nails, and adhering to proven initial nail art techniques, you can ensure your valentines day nails with initials last through all your romantic celebrations. Ultimately, these designs are more than just a beauty statement; they’re a heartfelt connection, a miniature love letter worn on your fingertips. Which custom valentine’s day nails idea will you try first to show your special someone how much you care this Valentine’s Day?
Last update on 2026-04-27 / Affiliate links / Images from Amazon Product Advertising API