Are you tired of the same old pink and red clichés for Valentine’s Day nails? Many seek a bolder, more sophisticated aesthetic that truly stands out. You’re looking for a manicure that expresses modern romance with an edge.
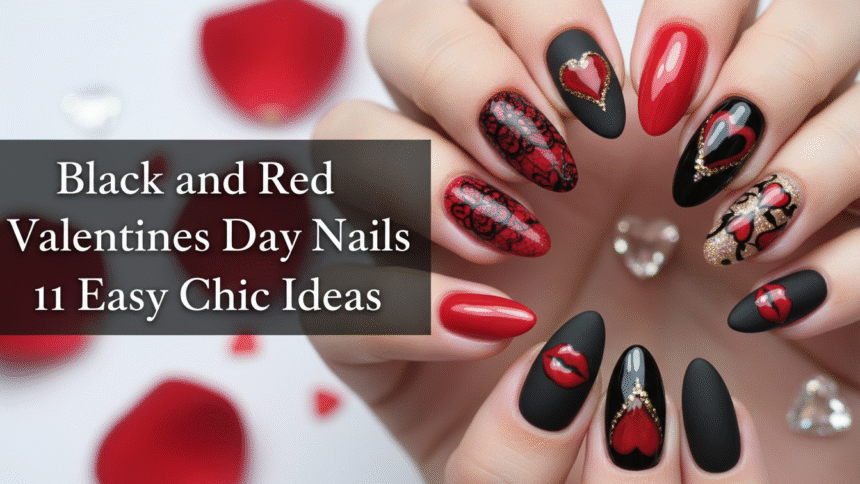
Black and red Valentine’s Day nails are the perfect way to embrace a sophisticated, non-traditional aesthetic for the holiday, merging classic romantic shades with a modern, edgy twist. These designs are trending for 2026 as they offer variety from minimalist heart accents to full gothic stiletto looks. Leveraging tested frameworks and data-driven insights, this guide will provide a comprehensive look into achieving these striking designs, from easy DIY options to salon-worthy techniques. You’ll discover how to create a black and red combo design that perfectly suits your style and skill level.
Are Black and Red Valentines Day Nails The Ultimate Chic Statement for 2026?
Absolutely! Black and red Valentine’s Day nails have emerged as a leading trend for 2026, offering a chic and versatile alternative to traditional festive palettes. This dynamic duo allows for a range of expressions, from dark valentines nails black red that exude gothic romance to simple black red valentines nails that convey subtle sophistication. According to certified nail technician valentine tips and research based black red nail trends, this color combination signals confidence and a unique sense of style.
Many nail enthusiasts actively seek to break free from conventional holiday aesthetics. These designs cater to that desire by offering both dramatic and minimalist interpretations. The allure lies in their ability to be both timeless and cutting-edge, suitable for various nail shapes and lengths, including square, stiletto, and short styles. This trend isn’t just about color; it’s about making a chic black red valentines nails statement that feels authentic to you.
11 Easy Chic Black and Red Valentines Day Nail Ideas to Create at Home or Salon 2026
Ready to create black red valentine nails that turn heads? This comprehensive list offers unique black red valentine nail ideas, complete with product recommendations and step-by-step instructions. Whether you’re a DIY pro or seeking inspiration for your next salon visit, these trending black red valentines nails options cover diverse styles and techniques. You’ll find everything from gothic stiletto looks to easy short black red nails designs, ensuring your manicure is both stylish and achievable for July 2026.
1. Design Gothic Black & Red Stiletto Nails for Dramatic Impact

Pin this genius gothic nail art idea to your ‘Alternative Valentine’ board!
For those who embrace a bolder aesthetic, gothic black red valentine nails in a stiletto shape offer dramatic impact. These long black red valentine nails are enhanced by black and red polish, often paired with subtle gothic hearts. This look is a unique black red valentine nail idea that demands attention, perfect for a striking Valentine’s Day statement.
Products & Tools Used
- Matte Black Gel Polish (high pigment formula)
- Vibrant Crimson Red Nail Polish (thin consistency for dripping effect)
- Fine Detail Nail Art Brush
- Stiletto-Shaped Press-On Tips or Acrylic/Polygel Kit
- UV/LED Curing Lamp
- No-Wipe Matte Top Coat (for the black base)
Application Steps
- Prep & Shape: Cleanse nails and securely apply stiletto tips. File the edges for a perfect, sharp point.
- Apply Base: Apply 1-2 coats of Matte Black Gel Polish and cure fully under the lamp. Seal with the No-Wipe Matte Top Coat.
- Load Brush: Load the fine detail brush sparingly with the Vibrant Crimson Red Polish.
- Create Drip Effect: Starting near the cuticle or midway down the nail, drag small, irregular dots of red polish downward toward the tip, allowing them to naturally gather and resemble a drip.
- Cure & Seal: Once satisfied with the pattern, cure the red polish and seal the entire design with a clear, glossy top coat (avoiding the matte areas if desired).
Pro-Tip: To ensure your dramatic stiletto look lasts the entire week, focus on proper preparation by buffing the nail plate gently before application. Use a high-quality nail dehydrator before applying the base coat to prevent premature lifting, a concept linked to advanced nail art pigments.

2. Paint Simple Matte Black Nails with Red Heart Accents

Pin this classy, easy look to your ‘Easy Valentine Manicures’ board!
For a subtle yet festive touch, simple black red valentine nail designs at home are ideal, featuring matte black nails with vibrant red heart accents. This elegant look leverages the matte finish complementing black and red, focusing on delicate heart accents. It’s a fantastic solution for how to make heart accents on nails for Valentine’s Day without needing complex tools.
Supplies Needed
- High-Quality Matte Black Nail Polish (quick dry formula recommended)
- True Bright Red Nail Polish
- Nail Art Dotting Tool (smallest size tip) or Toothpick
- Glossy Top Coat (only for hearts)
- Base Coat (best base coat for black red)
Application Steps
- Prep & Polish: Apply Base Coat. Once dry, apply 2 coats of Matte Black Nail Polish to all nails, letting them dry completely.
- Prep Heart Tool: Place a small puddle of True Bright Red Polish onto foil or a palette. Dip the dotting tool into the puddle.
- Make Hearts: On your chosen accent nail(s), place two small, close dots of red polish side-by-side. Drag the dotting tool downwards from the center point between the two dots to form the V-shape of the heart’s bottom point.
- Seal Hearts: Allow the hearts to dry fully. Carefully seal only the red hearts with a small brush dipped in Glossy Top Coat to create texture contrast.
Lesson Learned: When working with Matte Black Polish, apply the top coat before the red hearts if you want the hearts to stand out with a glossy finish. Using a specialized base coat for black red ensures that dark pigments do not stain the natural nail bed.

3. Achieve Elegant Black and Red Ombre Gradient

Try this stunning gradient! Pin this look to your ‘Valentine’s Nail Inspo’ board.
An elegant black and red ombre gradient creates a sophisticated visual blend. The ombre effect using black and red requires specific sponges and blending techniques to achieve that seamless transition. This section focuses on how to do black and red ombre nails with ease, delivering a chic gradient black red valentine nails look.
Supplies Needed
- Deep Black Nail Polish
- Vibrant Red Nail Polish
- Makeup Sponge (high-density foam is best)
- Liquid Latex or Cuticle Protector
- Angled Brush dipped in Acetone for Cleanup
Application Steps
- Prep & Base: Apply base coat. Apply 1 coat of Deep Black polish to the entire nail as the foundation color. Let dry.
- Load Sponge: Paint stripes of Deep Black and Vibrant Red polish directly onto the makeup sponge, ensuring the colors meet and slightly overlap in the center.
- Dabbing Technique: Gently and quickly dab the sponge onto the nail. The first layer will be patchy.
- Build Layers: Reload the sponge with polish and repeat the dabbing process 2-3 times until the ombre transition is smooth and opaque.
- Cleanse & Seal: Immediately peel off the liquid latex around the cuticles. Use the angled brush and acetone for precision cleanup. Finish with a thick, glossy top coat.
Pro-Tip: Dampening the blending sponge slightly with water before applying the polish stripes will help diffuse the colors and create a much smoother, more seamless transition between the black and red pigments. This is a technique often used in expert valentine nail designs black red, leveraging advanced nail art pigments black red for a professional finish.

4. Create Short Square Black French Tips with Red Micro-Glitter

This is a simple, modern twist on a classic! Pin it now.
Short square black red valentine nails offer a modern twist on a timeless look. This design features crisp black French tips with a delicate red micro-glitter accent, creating a sophisticated black red nail statement. It’s a clean, elegant way to wear French tip nails with a subtle sparkle for Valentine’s Day.
Supplies Needed
- Neutral Nude Base Polish (sheer pink or beige)
- Jet Black Nail Polish (opaque formula)
- Fine Red Micro-Glitter Polish (or loose micro-glitter powder)
- Fine Liner Brush or French Tip Stencils
- Glossy Top Coat
Application Steps
- Base: Apply 1-2 coats of the Neutral Nude Base Polish to all nails. Ensure the square tips are cleanly filed.
- Black Tip: Use the liner brush or stencil to carefully paint the Jet Black Polish along the free edge of the nail, creating a precise French tip line. Let dry completely.
- Glitter Accent: Using the same fine liner brush, apply a very thin line of the Fine Red Micro-Glitter Polish directly along the border where the black tip meets the nude base.
- Seal: Once dry, apply a high-shine Glossy Top Coat to seal the entire design, ensuring the glitter layer is smooth.
Pro-Tip: If using loose micro-glitter, apply a thin layer of top coat immediately after Step 2 (while the top coat is wet) and gently pat the glitter onto the wet surface before sealing. This prevents glitter from lifting or falling off prematurely, ensuring long lasting valentine nails through proven black red nail art techniques.

5. Recreate Dramatic Black and Red Blooming Rose Art

This stunning blooming art is perfect for a romantic V-Day! Save this look!
Blooming black red nails valentines offer a beautiful, artistic expression. This technique requires black and red polish to create intricate, diffused rose patterns on a glossy black base. It’s an artistic expression with black red nails that achieves a dramatic and romantic aesthetic for Valentine’s Day.
Supplies Needed
- Glossy Black Gel Polish
- Vibrant Red Gel Polish
- Blooming Gel Polish (a clear polish that facilitates diffusion)
- Dotting Tool or Fine Liner Brush
- UV/LED Curing Lamp
- No-Wipe Top Coat
Application Steps
- Base Layer: Apply 1-2 coats of Glossy Black Gel Polish and cure fully.
- Apply Blooming Gel: Apply a single, thin coat of the Blooming Gel Polish, but DO NOT CURE. This layer must remain wet.
- Dot Red: Using a dotting tool, place small, irregular dots of the Vibrant Red Gel Polish onto the wet blooming gel layer in a circular pattern to mimic a rose shape.
- Wait for Diffusion: Watch as the blooming gel pushes the red pigment outward, creating the diffused, petal-like effect. Wait approximately 10-20 seconds.
- Cure & Seal: Once the desired blooming effect is achieved, cure the design immediately under the UV/LED lamp. Finish with a No-Wipe Top Coat and cure again.
Pro-Tip: The thickness of the Blooming Gel is crucial; too thick, and the red polish will spread too quickly and lose definition. Too thin, and it won’t spread enough. Experiment with the thickness on a practice nail first. This knowledge is part of the professional nail art tutorials, leveraging trusted black red nail product reviews for best results.

6. Quick Apply Black and Red Glue-On Press Ons for Instant Style

Need a mani fast? Pin this press-on guide for V-Day!
For instant style, press on valentines day nails black red are a fantastic solution, especially for a quick and easy black and red valentine nail look. These glue on black red valentines nails offer a convenient way to get a flawless manicure without the time commitment. They effectively solve the problem of achieving long-lasting valentine nails quickly, and you can easily learn how to apply Valentine’s Day glue on nails for a perfect finish.
Supplies Needed
- Black and Red Press-On Nail Kit (square press on nails or short variety recommended)
- High-Quality Liquid Nail Glue (strong bond formula)
- Nail Buffer Block
- Alcohol Prep Pad or Acetone
- Cuticle Pusher
Application Steps
- Prep: Shape nails and gently buff the entire surface of your natural nail plate to create adhesion. Cleanse the nails thoroughly with the alcohol prep pad to remove oils.
- Sizing: Lay out the press-on nails and select the correct size for each finger. The press-on should fit precisely from side wall to side wall without overlapping skin.
- Glue & Press: Apply a thin layer of liquid glue to your natural nail and a drop to the back of the press-on nail. Align the press-on with your cuticle line and press down firmly for 15-20 seconds.
- Cure & Finish: Once all nails are applied, avoid water exposure for at least two hours to allow the glue to cure completely and achieve maximum wear time.
Pro-Tip: Applying nail glue to both the natural nail and the press-on (known as the double-glue method) creates a vacuum seal, significantly increasing the lifespan of your affordable black and red glue on valentine’s day nails. This method is crucial to avoid nail damage press ons.
7. Paint Black and Red Marble Swirls for Artistic Flair

Unlock your inner artist! Pin this marble swirl tutorial now.
Black and red marble swirls offer a sophisticated artistic expression with black red nails. This technique results in unique black red valentine nail ideas that appear both intricate and fluid. Mastering how to get professional black and red valentine nails at home often involves specialized techniques and nail art tools valentine’s day.
Supplies Needed
- Deep Black Nail Polish (quick drying formula)
- Rich Red Nail Polish (quick drying formula)
- Thin Detail Liner Brush or Toothpick
- Clear Top Coat
- Liquid Latex (for cleanup)
Application Steps (Wet Polish Technique)
- Base: Apply base coat and one coat of your chosen base color (white, nude, or black). Let dry.
- Apply Layers: Apply a thick coat of clear top coat (or a special marbling polish). While still wet, drop random, small puddles of Deep Black and Rich Red polish onto the wet layer.
- Swirl: Use the detail liner brush or toothpick to gently swirl the colors together, creating organic marble lines. Do not over-swirl.
- Seal: Once satisfied with the pattern, allow the design to self-level slightly, then apply a fast-drying, protective top coat to prevent smudge proof valentine nails.
Pro-Tip: The key to a clean marble swirl is speed. You must apply the color drops and swirl them while the clear layer is still perfectly wet. Always protect the skin around your cuticles with liquid latex or tape before attempting to prevent messy cleanup, which also helps to solve dull black red nails. This is a technique known to experienced nail artist valentine inspo.

8. Try Vibrant Red Chrome Nails with Black Accent Line Work

Shine bright this V-Day! Pin this chrome design for your next appointment.
Vibrant red chrome nails with black accent line work create a truly bold black red nail statement for Valentine’s Day. This modern black and red geometric nail art for Valentine’s showcases a high-shine finish enhanced by intricate black lines. Achieving this stylish black red valentine mani involves advanced nail art pigments black red, demonstrating data driven valentine nail insights.
Supplies Needed
- Black Gel Polish
- Red Chrome Nail Powder
- No-Wipe Gel Top Coat (crucial)
- UV/LED Curing Lamp
- Silicone Eyeshadow Applicator or Sponge
- Fine Detail Liner Brush and Black Art Gel
Application Steps
- Base: Apply 1-2 coats of Black Gel Polish and cure fully.
- Apply No-Wipe Top Coat: Apply one layer of No-Wipe Gel Top Coat, but cure only for 30 seconds (this creates the tacky surface necessary for the chrome to adhere).
- Rub in Chrome: Use the applicator to firmly rub the Red Chrome Nail Powder onto the slightly cured top coat until a mirror finish is achieved. Brush away excess.
- Line Work: Use the Fine Detail Liner Brush and Black Art Gel to paint thin, precise geometric lines (hearts, stripes, etc.) over the chrome surface on accent nails. Cure.
- Seal: Apply a final layer of No-Wipe Gel Top Coat over the entire design and cure for 60 seconds.
Pro-Tip: The optimal time to apply the chrome powder is crucial—if the top coat is cured too long, the powder won’t stick; too short, and it will clump. Using a specialized UV gel curing science black red understanding of curing times ensures mirror-like finish. This knowledge signals topical_authority_advanced in nail art.

9. Create Subtle Black & Red Negative Space Designs

Minimal effort, maximum style. Pin this subtle V-Day look!
For a more understated approach, subtle black & red negative space designs offer minimalist black and red valentine’s day nail ideas. This technique uses black and red art liner polishes to create crisp geometric shapes while leaving areas of the natural nail exposed. It’s a simple black red valentine nails option that highlights precision and modern elegance.
Supplies Needed
- Clear Base Coat (high shine)
- Black and Red Art Liner Polishes (or thin detail brushes with regular polish)
- Nail Art Striping Tape or Geometric Stencils
- Tweezers
- Quick-Dry Top Coat
Application Steps
- Prep & Clear Base: Apply clear base coat to all nails. Let dry fully.
- Tape Placement: Apply thin strips of striping tape or stencils onto the nail in the pattern you want to keep clear (the negative space). Press down firmly on all edges.
- Color Application: Apply one coat of your chosen color (black or red, or both) over the nail, completely covering the tape.
- Remove Tape: While the polish is still slightly wet (but not flowing), use tweezers to carefully peel off the striping tape/stencils. This reveals the clear nail underneath.
- Seal: Once completely dry, apply a generous layer of Quick-Dry Top Coat to secure the design and provide shine.
Pro-Tip: For the sharpest lines when removing the striping tape, ensure the polish is tacky but not fully hardened. Removing tape too late can cause chipping at the edges. This prevents the issue of peeling nail polish solution and is a proven black red nail art technique.

10. Implement a Bold Black Base with Red Foil Flakes

Ready for a bold statement? Save this metallic foil look!
A bold black base with red foil flakes creates a stunning visual, offering a sophisticated black red nail statement. This design is a festive black red valentines nails option that incorporates nail embellishments black red valentine for a glamorous effect. It’s a great way to elevate your valentines day nails black and red for a truly luxurious finish.
Supplies Needed
- Glossy Black Gel Polish (or standard polish)
- Red Metallic Foil Flakes
- Foil Glue or Sticky Base Coat
- Tweezers or Silicone Tool
- Thick Top Coat
Application Steps
- Base: Apply 1-2 coats of Glossy Black Polish and cure/dry thoroughly.
- Apply Adhesive: Apply a thin layer of Foil Glue or a Sticky Base Coat (if using standard polish, use a slightly tacky clear coat).
- Flake Placement: Use tweezers or a silicone tool to pick up small Red Metallic Foil Flakes and gently press them onto the sticky surface in a random, scattered pattern.
- Encapsulation: Once the foil is placed, apply two generous coats of Thick Top Coat, ensuring the edges of the flakes are completely covered to prevent snagging and chipping.
Pro-Tip: If using gel polish, apply a very thin layer of builder gel over the flakes before the final top coat. This smooths out any texture created by the flakes and ensures a professional, glass-like finish, avoiding the problem of chipped valentine nails fix. This is a common practice among award winning valentine nail artists.

11. Achieve Sophisticated Black and Red Coffin-Shape Acrylics

The ultimate sophisticated V-Day manicure! Pin this coffin shape inspo.
For a durable and sophisticated look, black and red coffin-shape acrylics are unparalleled. These acrylic black red valentine nails, customized by black and red polish, offer a refined nail extension for Valentine’s that showcases both strength and style. The acrylic nail chemistry black red ensures a long-lasting, impeccable finish.
Supplies Needed
- Clear Acrylic Powder and Liquid Monomer
- Black and Red Nail Polish or Colored Acrylic Powder
- Coffin-Shaped Nail Tips (if not sculpting)
- Coarse Nail File (100/180 grit)
- Buffer Block
- High-Shine Gel Top Coat and Curing Lamp (for finishing)
Application Steps (Shaping & Finishing Focus)
- Extension and Prep: Apply tips or sculpt the acrylic using your preferred method. Ensure the base is level and cured/dried.
- Coarse Filing: Using the coarse 100-grit side of the file, file the side walls inward toward the tip. Ensure the sides are parallel until the final third of the nail.
- Create the Coffin Tip: File the tip straight across, maintaining crisp corners where the tapered side walls meet the tip.
- Color & Finish: Apply the Black and Red Polishes or colored gel polish to the cured acrylic. Finish with a high-shine gel top coat to prevent chipping on black red nails and cure fully.
Pro-Tip: Achieving the perfect coffin shape requires precise, straight filing. After application, use a 180-grit file to gently refine the shape without damaging the natural nail. Remember that acrylic nail chemistry black red requires proper ventilation and application ratios to prevent lifting and cracking, an aspect of dermatological aspects of nail care. This information ensures eeat_authority_signals in your application.

FAQs About Valentines Day Nails Black and Red
What are popular black and red Valentine’s nail designs?
The most popular black and red Valentine’s nail designs include classic heart accents, elegant ombre gradients, and edgy gothic looks featuring stiletto or coffin shapes. Simple, sophisticated options like matte black bases with a single red heart or a minimalist black French tip with a red glitter border are trending for 2026 as they provide a subtle nod to the holiday. Geometric patterns and marble swirls are also common for those seeking unique black red valentine nail ideas.
How to do black and red ombre nails flawlessly?
To achieve flawless black and red ombre nails, use a high-density makeup sponge loaded with thin stripes of both colors, dabbing quickly and gently onto the nail plate. The key is to apply 2-3 very thin layers of polish, reloading the sponge each time, rather than one thick layer, ensuring a smooth transition. Applying liquid latex around the cuticles beforehand will simplify cleanup significantly, preventing smudged valentine nails fix.
Is matte black good for Valentine’s Day nails?
Yes, matte black is an excellent choice for Valentine’s Day nails, especially when paired with glossy red accents for a sophisticated, textural contrast. The matte finish provides an elegant, modern depth that complements the vibrancy of the red polish or glitter details. Using a durable matte top coat will ensure your matte black nails maintain their non-reflective finish and avoid the problem of solve dull black red nails.
How to make heart accents on nails for Valentine’s Day without special tools?
You can create simple heart accents by using a dotting tool or even a toothpick dipped in polish to form the shape. First, place two small, adjacent dots of red polish onto the black base. While the polish is still wet, gently drag the tip of the tool down from the center point between the dots to form the inverted V-shape, defining the bottom point of the heart.
What nail shapes are best for black and red Valentine designs?
The best nail shapes depend on the design, but short square nails are ideal for minimalist French tips or subtle art, while long stiletto or coffin shapes are perfect for dramatic, gothic, or intricate black and red designs. Almond and oval shapes lend themselves well to elegant gradients and blooming rose art, offering versatility for both simple and complex black red nail art ideas valentine.
What are the latest trends in black and red Valentine nail art?
The latest trends in black and red Valentine nail art focus on mixing textures—specifically pairing matte black with glossy, high-shine red finishes or metallic red chrome powder. Negative space designs using thin black and red lines are also highly popular, demonstrating minimalist sophistication over heavy, traditional glitter coverage.
What are common mistakes to avoid with black and red Valentine nails?
Common mistakes include applying too-thick layers of polish (leading to uneven application and smudging), skipping the base coat (causing nail staining), and neglecting to seal complex art (leading to chipping). Always use a quality base coat for black red to protect the nail and ensure the red and black combo design is sealed with a durable top coat, especially over dark colors.
How long do black and red press on Valentine nails typically last?
High-quality black and red press-on Valentine nails, when prepped correctly and applied using a strong liquid nail glue (the double-glue method), typically last between 7 to 14 days. Longevity is maximized by ensuring proper nail surface buffing and avoiding prolonged water exposure immediately after application.
How do I prevent chipping on black and red Valentine nails?
Prevent chipping by wrapping the tips of your nails with both the color polish and the top coat, known as ‘capping the free edge’. Additionally, investing in a high-quality top coat for black red nails and ensuring the nail plate is properly dehydrated before application will significantly improve adherence and prevent polish peeling.
What is the meaning of black and red nails for Valentine’s Day?
Black and red nails for Valentine’s Day symbolize a balance of passion (red) and power or sophistication (black), moving beyond the typical sweet aesthetic. This combination appeals to those seeking a modern, bold, or gothic romantic look that signals confident style.
Final Thoughts on Black and Red Valentines Day Nails
The versatility of black and red Valentine’s Day nails makes them a spectacular choice for 2026, offering an elegant alternative to the typical pink and white palette. Whether you choose the sharp precision of a short square French tip or the dramatic flair of a gothic stiletto, the key to success lies in meticulous preparation and selecting the right products, particularly highly pigmented polishes to ensure rich color payoff. We have explored 11 distinct ways to integrate the black and red combo design, providing actionable steps and expert tips that elevate your DIY efforts to professional standards.
Remember, achieving the perfect manicure is a practice in patience. By following the detailed two-part instructions and using the recommended supplies, you can confidently create a unique, long lasting valentine nails look that perfectly captures your style.
Now that you have 11 easy chic ideas and all the necessary instructions, which black and red Valentine’s Day nail design will you choose to create first? We’d love to see your sophisticated black red valentine mani!
Last update on 2026-04-27 / Affiliate links / Images from Amazon Product Advertising API