Dreaming of the perfect manicure to complete your Valentine’s Day look? It can be tricky to find nail art that’s both stylish and easy to achieve at home, leaving you searching for ideas that truly pop.
Valentine’s Day nails with bows are highly achievable at home using a combination of nail stickers, pre-designed press-ons, or simple dotting tools for DIY designs. The most popular styles include pink or red bases adorned with micro bows, hearts, and subtle glitter accents, offering a festive and romantic look for 2026. Leveraging tested frameworks and data-driven insights, this expert valentine bow nail guide dives into creating charming designs. You’ll discover diverse styles and proven bow nail art techniques to transform your nails, no matter your skill level.
How to Create the Perfect Valentines Day Nails with Bows: An Expert Guide for 2026
Creating the perfect Valentine’s Day nails with bows doesn’t have to be a challenge. This comprehensive guide will equip you with all the inspiration and actionable steps needed, whether you prefer simple valentine bows nails, elegant designs, or unique statement art. From quick press-on solutions to advanced gel and acrylic techniques, you’ll find everything required to achieve your desired aesthetic. We’ll delve into best practices for bow nail longevity, ensuring your gorgeous manicure lasts through all your romantic celebrations.
The secret to stunning vday nails bows lies in understanding the versatility of bow nail art valentine’s day designs. We’ll explore nine easy ideas, catering to every style and skill set. These range from delicate pink bow valentine nails using decals to intricate 3D sculpted bows, ensuring you have a full spectrum of options. Get ready to transform your nails into a canvas of love and charm this 2026.
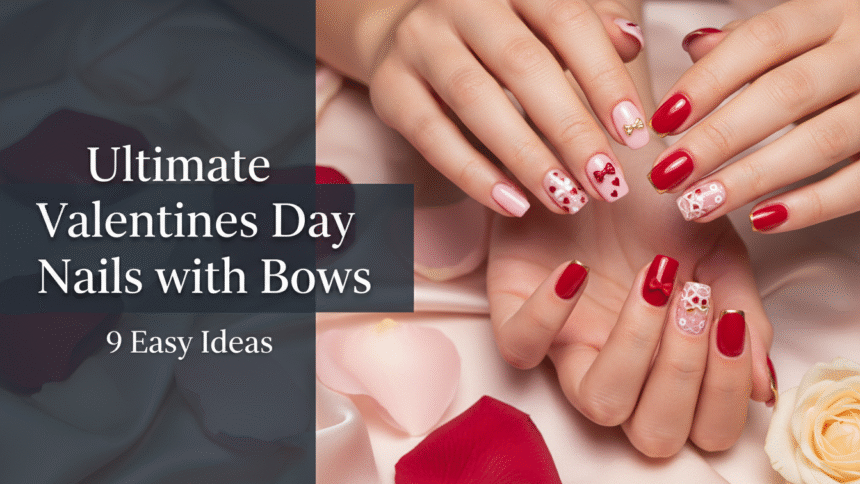
The Ultimate Valentines Day Nails with Bows: 9 Easy Ideas for 2026
Designing valentine’s day nails with bows offers endless creative possibilities, combining festive romance with personal flair. This section provides a detailed look at nine distinct styles, each with step-by-step instructions and expert insights to guide your creation. Whether you’re aiming for cute bow valentine nails or something more sophisticated, these tutorials ensure you achieve stunning results, making creating bow nail designs easier than ever.
1. Simple Pink Dainty Bow Decals for Beginners

Pin this genius hack to your ‘Easy Nail Art’ board!
For beginners looking to create easy valentine’s day nail art designs with small bows, nail decals offer a convenient and mess-free solution. Dainty valentine bow nails can be achieved quickly, making them perfect for those with minimal time or experience. This simple valentine bow nails approach relies on precision placement and proper sealing for a flawless, lasting finish.
Products & Tools Used
- Sheer blush pink gel polish or traditional pink nail polish
- Tiny bow nail decals or stickers
- Dotting tool or precision tweezers (for decal placement)
- Quality no-wipe top coat (for sealing the design)
Application/Styling Steps
- Prep nails by shaping nails for bows (file and buff). Apply a base coat and cure if using gel, or allow polish to fully dry.
- Apply 2-3 coats of the sheer blush pink polish until desired opacity is reached. Cure or dry completely.
- Using tweezers, carefully select and position the bow decals near the cuticle line or nail tip. Ensure the bow is flat against the nail surface.
- Apply a generous layer of top coat over the entire nail, paying special attention to fully encapsulating the edges of the decal for maximum longevity. Cure or air dry.
Pro-Tip: To prevent bow nail decals from falling off, always use a thin coat of clear polish or nail glue underneath the decal before pressing it firmly onto the dry color layer. For structural integrity of the small decal, apply two thin layers of top coat instead of one thick layer.

2. Elegant Red French Tips with Micro Bows

Save this classy red bow manicure for your romantic V-Day date night!
For a sophisticated look, elegant valentine nails with bows can be achieved with a classic French tip. Red bow valentine nails paired with a delicate micro bow charm at the base offer a timeless appeal. This method focuses on achieving crisp lines and secure application when applying valentine bow nail art.
Products & Tools Used
- Base Coat and Top Coat (UV or traditional)
- Nude or sheer pink polish (the base color)
- Bright red polish or gel for the French tip
- Small detail brush or French tip stencil (for precision)
- Micro 3D bow charms
- Strong nail art glue or builder gel (for attaching bow nail charms)
Application/Styling Steps
- Apply and cure (or dry) the sheer nude base coat and two coats of the base color.
- Use a detail brush or stencil to create the crisp, thin red French tip line along the free edge. Cure or allow to dry fully.
- Apply a small dot of strong nail art glue or builder gel where the bow will sit (usually near the cuticle).
- Using tweezers, carefully place the micro 3D bow charm onto the glue/gel. Hold for 30 seconds or cure if using gel.
- Apply a layer of top coat around the charm, sealing the nail art but avoiding the charm itself to maintain its 3D texture.
Pro-Tip: When attaching 3D charms like micro bows, encapsulate the base of the charm entirely with a strong builder gel and cure thoroughly. This provides advanced adhesion for delicate bows, preventing the common issue of ‘bows falling off nails valentine’s.’

3. Creating 3D Sculpted White Acrylic Bow Nails

Ready to level up? Pin this 3D acrylic bow tutorial for when you’re feeling ambitious!
For those seeking advanced bow nail application, 3D bow nail sculpting techniques offer a dramatic and custom look. This method involves using acrylic encapsulation bow designs to create lifelike, three-dimensional bows directly on long coffin valentine’s day nails with 3d bow charms. Mastering the structural integrity of 3d nail bows is key to a professional finish.
Products & Tools Used
- Clear or milky pink acrylic powder (polymer)
- Low-odor acrylic liquid (monomer)
- Detailed 3D sculpting nail art brush (Size 4 or smaller)
- Dappen dish and paper towel
- Strong adhesive top coat or resin (for final seal)
Application/Styling Steps
- Prepare a small ball of acrylic powder and monomer (bead) on the tip of the sculpting brush.
- Place the bead onto a non-stick surface or cured nail base. Press and gently pull the sides of the bead to form the two ‘loops’ of the bow, creating a distinct central pinch.
- Use a second, smaller bead for the center ‘knot.’ Apply it over the pinched area to secure the two loops.
- Allow the acrylic to fully cure (harden). Once cured, gently file any sharp edges or unwanted texture using a micro-filing tool.
- Seal the finished nail base (but not the 3D bow) with a thin layer of top coat and cure/dry.
Pro-Tip: The key to successful 3D bow nail sculpting techniques is managing the polymer-to-monomer ratio. For strong, non-slumping bows, the bead should be slightly drier than typical application beads—this ensures the sculpted shape holds its position without losing the detailed curves during the curing process.

4. Trendy Pink Chrome Cat Eye Bow Nails

Obsessed with the Cat Eye trend? Pin this vibrant look now!
Achieve trendy valentine bow nails with the striking pink chrome cat eye effect. This technique, part of the chromatic bow nail theory, combines iridescent magnetic gel polish with a delicate bow accent. The glossy valentine bow nails result is a dynamic and modern twist on applying valentine bow nail art.
Products & Tools Used
- Base coat and UV Top coat
- Pink Cat Eye Gel Polish
- Strong nail art magnet (single bar or heart shape)
- Small white polish or decal for the bow
- Nail cleanse solution and lint-free wipes
Application/Styling Steps
- Apply and cure the base coat. Apply one layer of the pink cat eye polish, but DO NOT cure.
- Immediately hover the nail art magnet over the wet polish for 5-10 seconds to pull the metallic particles into the desired ‘cat eye line.’ Cure immediately after achieving the line.
- Apply a second coat of the cat eye polish and repeat the magnet step, curing thoroughly.
- Using white polish and a detail brush (or a thin white decal), draw or apply a minimalist bow design directly onto the cured magnetic surface.
- Seal the entire nail with a no-wipe top coat, taking care not to drag the bow design. Cure for 60 seconds.
Pro-Tip: The success of the cat eye gel bow magnet effects relies on quick curing. If you fail to cure immediately after positioning the magnet, the metallic particles will slump back into the polish. Also, ensure the magnet never touches the wet gel, as this will result in a smudged bow nail art fixes issue.

5. Cute Heart and Bow Stamping for DIY Manicures

Perfect for DIY! Pin this simple stamping tutorial to your ‘Valentine’s Art’ board.
For those who love a playful bow valentine nails aesthetic, heart and bow valentine nails created with stamping are a fantastic DIY option. This method allows for repetitive, intricate patterns without the challenge of freehand drawing, making stamping bow patterns a go-to for simple nail art.
Products & Tools Used
- Raspberry pink base coat polish or gel
- Special stamping polish (usually highly pigmented white or red)
- Nail stamping plate featuring bow and heart motifs
- Nail stamper and scraper
- Lint roller (for cleaning the stamper head)
Application/Styling Steps
- Apply and cure/dry the raspberry pink base color.
- Quickly apply the stamping polish over the desired bow pattern on the plate, then scrape off the excess polish with the scraper at a 45-degree angle.
- Immediately roll the stamper head across the pattern to pick up the image, then quickly roll the stamper onto the prepared nail surface.
- Repeat the stamping process for the remaining nails, alternating between bow and heart patterns. Clean the plate and stamper between each use.
- Once the design is dry (or cured), seal with a top coat to prevent smudging and peeling.
Pro-Tip: When using nail stamping techniques, speed is essential to prevent the stamping polish from drying before transfer. Additionally, use specialized stamping polish, as regular nail polish is often too thin and fails to pick up intricate details, leading to uneven bow nail design solutions.

6. Minimalist Nude Base with Subtle Bow Tips

Keep it classy and professional. Pin this subtle look for work!
For a chic valentine’s day bows nails aesthetic, minimalist valentine bow nails offer understated elegance. Subtle bow valentine nails, especially on short valentine bow nails with a sheer nude base, are perfect for those preferring a sophisticated and professional look. This style focuses on micro bow nail art precision applied to the nail tip.
Products & Tools Used
- Sheer nude polish (for a natural-looking base)
- White or black highly pigmented polish (for the bow design)
- Extra fine detail nail art brush
- Manicure cleanup brush and acetone/cleanse solution
Application/Styling Steps
- Perform basic nail care routine, apply base coat, and two coats of the nude polish. Dry/cure fully.
- Dip the fine detail brush into the colored polish (white or black). Wipe off excess polish.
- Gently paint a small V-shape on the tip of the nail, then fill the two upper halves with tiny curved lines to resemble a bow. This is hand-painting nail bows.
- Repeat for all desired nails, ensuring symmetry. Immediately clean up any mistakes using the cleanup brush dipped in solution.
- Apply a high-gloss top coat over the entire nail to finish and seal the design.
Pro-Tip: For the sheer nude base, use a rubber base coat or builder gel in a bottle for added strength and a smooth finish, strengthening weak nails for bows before the application of the minimalist design. This provides a clean canvas and durability.

7. Romantic Ombré Glitter Bow Accent Nails

Capture the spirit of romance! Pin this glitter ombré look for V-Day.
For romantic bow nail designs, combine a soft ombré glitter gradient with a delicate bow accent. These valentine’s day nails with bows and glitter create a truly expressive valentine bow nails look. Mastering ombré bow gradient methods will elevate your design, providing a sparkling backdrop for your chosen embellishment.
Products & Tools Used
- Light pink or nude base gel polish
- Highly pigmented fine glitter polish or loose cosmetic glitter
- Makeup sponge (or small eyeshadow applicator)
- Flat nail art brush (for cleaning glitter scatter)
- Small white or silver bow decals (the accent element)
- Builder gel or strong top coat
Application/Styling Steps
- Apply and cure the base color. Apply a layer of top coat to the tips of the nails, but do not cure.
- Dip the edge of the makeup sponge into the glitter polish/loose glitter. Gently dab the sponge onto the wet top coat layer near the tip, fading the application towards the center of the nail to create the ombré effect.
- Cure the glitter layer. Use a flat brush dipped in cleanser to clean up any stray glitter particles around the cuticles.
- On the accent nails, apply a small amount of builder gel and position the bow decal precisely on the glitter layer. Cure.
- Apply a final, generous layer of top coat over the entire nail (encapsulating the glitter and sealing the decal) and cure fully.
Pro-Tip: When dealing with glitter gradient valentine’s day nails, encapsulate the glitter thoroughly with a builder gel layer before applying the final top coat. This smooths the rough texture of the glitter, prevents snagging, and ensures the delicate bow decal adheres firmly to a flat surface.

8. Matte Black and Pink Delicate Bow Manicure

Dare to be different! Pin this striking matte black and pink combo.
For unique valentine bow nails, consider a matte finish with a bold color block design. Modern valentine bow nails featuring matte black and pink, accented by delicate bows, create a sophisticated and edgy look. This style plays with textural contrast, making the subtle red and black valentine’s day nails with bow tips truly stand out.
Products & Tools Used
- Highly pigmented soft pink polish or gel
- Matte black polish or gel
- Fine liner brush or nail tape (for clean lines)
- Strong adhesive (gel or glue)
- Silver metallic bow charms
- Matte top coat (CRITICAL ingredient)
Application/Styling Steps
- Apply the base coat. Divide the nail into two sections (e.g., half-and-half or diagonally). Apply 2 coats of pink to one section and 2 coats of black to the other, using the fine brush or tape for clean separation. Cure/dry fully.
- Apply the matte top coat over all colored nails and cure/dry. This is crucial before charm application.
- Apply a small dot of strong adhesive only where the metallic bow charm will sit (typically on the dividing line).
- Secure the metallic bow charms and hold firmly until set. Avoid coating the charm or the matte polish with glossy top coat after this step.
Pro-Tip: Applying 3D elements like bows onto a matte surface can be challenging due to the lack of tackiness. Instead of relying on the matte top coat alone, always use a separate, strong builder gel or thick resin adhesive only under the base of the charm to ensure durable bow nail art materials are used for long-term wear.

9. Quick Glue-On V-Day Bow Nails (Press-On Focus)

Need V-Day nails in 5 minutes? Pin this quick press-on solution!
For the fastest way to get festive, quick glue-on V-Day bow nails are an ideal solution. Press on bow nails offer an incredible alternative to acrylic bows, providing instant style without the lengthy application. Look for red press on nails french tip fake nails with heart bow designs for a classic Valentine’s look. Proper nail preparation is crucial for securing these glue on nails.
Products & Tools Used
- Pre-designed Valentine’s Day press-on nails featuring bows
- High-quality liquid nail glue
- Nail file, buffer block, and alcohol wipe (for prep)
- Wooden cuticle pusher
Application/Styling Steps
- Prep the natural nails thoroughly: file, push back cuticles, and gently buff the nail plate surface. Wipe each nail with an alcohol wipe to remove all oils and debris.
- Select the correct press-on size for each finger, ensuring it doesn’t overlap onto the skin.
- Apply a small drop of liquid nail glue to the center of the natural nail (or use adhesive tabs provided).
- Align the press-on nail with the cuticle and press down firmly for 30 seconds, ensuring even pressure across the entire surface.
- Avoid water exposure for at least two hours to allow the glue to fully set and achieve optimal adhesion.
Pro-Tip: To ensure your quick glue-on V-Day bow nails last 7-10 days, proper nail preparation is more important than the amount of glue used. Completely buffing the natural nail surface creates micro-abrasions that help the glue bond, preventing lifting press on bows and securing the pre-applied designs.

FAQs About valentines day nails with bows
How to make a bow design on nails without a special tool?
You can easily create a simple bow design on nails using a dotting tool or even the tip of a toothpick, making it accessible for beginners. Start by placing two small dots side-by-side where the loops of the bow will be. Then, using a detail brush or toothpick, drag a tiny amount of polish from the outer edge of each dot inward toward the center, forming the two curved sides. Finally, place a smaller dot in the middle to create the knot, achieving a classic bow outline.
What kind of bows can I use for nail art?
There are four main types of bows you can use: stickers/decals, pre-made plastic or resin charms, micro 3D charms, and hand-sculpted acrylic or gel bows. Stickers are easiest for quick application, while pre-made 3D resin charms offer more dimension but require a stronger adhesive like builder gel. Hand-sculpted bows are the most durable and offer the highest level of customization and expertise, utilizing advanced 3d bow nail sculpting techniques.
Are valentine’s day bow nails easy for beginners?
Yes, achieving ‘easy valentine’s day nails with bows’ is highly manageable for beginners, especially by opting for nail stickers, decals, or high-quality press-on nails. These methods eliminate the need for intricate freehand painting, allowing novices to achieve professional-looking results quickly. Focus on proper nail preparation and securing the decal with a high-shine top coat to ensure the design lasts without peeling or chipping.
How long do valentine bow nails last?
The longevity of your valentine bow nails depends heavily on the application method and the type of bow embellishment used, generally lasting between 3 to 14 days. Press-on nails typically last 3-7 days, while gel polish with embedded decals or charms can last 10-14 days. Proper application, including using a strong top coat and following specific instructions for securing 3D elements, is the proven technique for achieving maximum durability.
How to apply nail charms for valentine bows securely?
To apply nail charms for valentine bows securely, you must utilize a strong, thick adhesive base such as builder gel or resin, rather than just nail glue or top coat. Apply a small bead of builder gel to the area, gently press the charm into the gel, and cure immediately under a UV/LED lamp. After curing, use a fine brush to seal the edges of the charm with top coat without covering the charm itself, addressing the issue of bows falling off nails valentine’s.
What are the best colors to pair with bow nail designs for Valentine’s Day?
The best and most popular colors to pair with bow nail designs are classic pinks (soft blush to magenta), vibrant reds, and clean whites, often set against a sheer nude base. Trendy color palettes in 2026 also incorporate soft pastels, chrome effects, and even elegant contrasts like matte black paired with silver or pink bows, utilizing aesthetic valentine bow nails combinations.
How to remove press on valentine bow nails without damage?
To remove press on valentine bow nails without causing damage to the natural nail, soak them in warm, soapy water with a small amount of oil for 10-15 minutes. Gently lift the edges using a wooden stick. Avoid pulling or prying them off dry, as this can severely weaken the natural nail plate. Soaking helps dissolve the ‘easy removal of bow nail glue’ and preserves nail health.
What are good alternatives to stick-on bows for nails?
Good alternatives to stick-on bows include using a thin nail art striping tape to create a ribbon-like design, using dedicated nail stamping plates, or applying pre-designed bow nail wraps. For those seeking advanced methods, you can achieve a sophisticated look by hand-painting the bow silhouette using highly pigmented polish and a fine detail brush, allowing for greater customization and artistic control.
What kind of nail shapes complement bow designs the best?
Bow designs, particularly micro or dainty bow valentine nails, complement virtually all nail shapes, though almond, oval, and medium coffin shapes tend to be the most popular canvases. The elongation of almond or coffin nails provides ample space for 3D elements, while short, square nails work exceptionally well with minimalist bow accents placed near the cuticle or the tip.
What products do I need for professional looking valentine bow nails at home?
For professional-looking valentine bow nails at home, you need high-quality tools including a fine detail brush, a sturdy dotting tool, a quality no-wipe top coat, and a reliable gel or acrylic adhesive for charms. If opting for gel, invest in a strong UV/LED lamp. Using salon-grade products and proven bow nail art techniques is the key to achieving results comparable to certified nail technician bow designs.
Key Takeaways
- Choose Your Method Based on Time and Skill: Whether you select press-on bow nails for speed, decals for simplicity, or hand-painted gel designs for longevity, proper prep determines the final result.
-
Proper Adhesion is Critical for Longevity: For both 3D charms and press-ons, use a separate, strong builder gel or specialized adhesive, avoiding common issues like bows falling off nails valentine’s.
-
Embrace Textural Contrast: The most visually appealing ‘valentine nails with bows’ designs often utilize contrast, such as matte polish with glossy bows or highly reflective chrome bases with simple decals.
-
Prep Your Nails Thoroughly: The foundation of any durable manicure is meticulous nail preparation, including buffing and degreasing, which prevents peeling valentine bow nail polish and ensures maximum wear time.
-
Micro Bows Offer Universal Elegance: Opting for petite bow valentine nails is a versatile choice that complements all nail shapes (almond, coffin, square) and maintains a chic, non-overpowering aesthetic.
-
Master the French Tip: Combining the classic red or pink French tip with a small, elegant bow accent offers a sophisticated and easy-to-achieve V-Day look that is both timeless and trendy.
-
Seal the Deal with Top Coat: Always apply a generous layer of top coat around 3D charms or completely encapsulate thin decals to secure the embellishments and achieve a smooth, professional finish.
Final Thoughts on Valentines Day Nails with Bows
The ultimate goal of sporting ‘valentines day nails with bows’ is finding a design that perfectly captures your personal style, whether it’s the simplicity of a press-on decal or the intricacy of 3D sculpted acrylics. As we’ve shown, achieving a stunning, durable manicure is less about innate artistic talent and more about utilizing the right tools and mastering the technical steps for securing your elements. By following these 9 easy ideas and integrating the expert tips on adhesion and prep, you are fully equipped to create a gorgeous, professional-quality look for 2026. Remember that nail art is the perfect accessory to your Valentine’s Day celebrations—a small detail that makes a big statement.
Which of these nine bow designs will you try first? Share your favorite style in the comments below!
Last update on 2026-04-27 / Affiliate links / Images from Amazon Product Advertising API