Dreaming of perfect Valentine’s Day nails that scream romance and sophistication but dread the complex salon techniques? Achieving stunning, gradient nail art at home often feels overwhelming, leaving you with less-than-perfect results when aiming for those trending valentines day nails ombre.
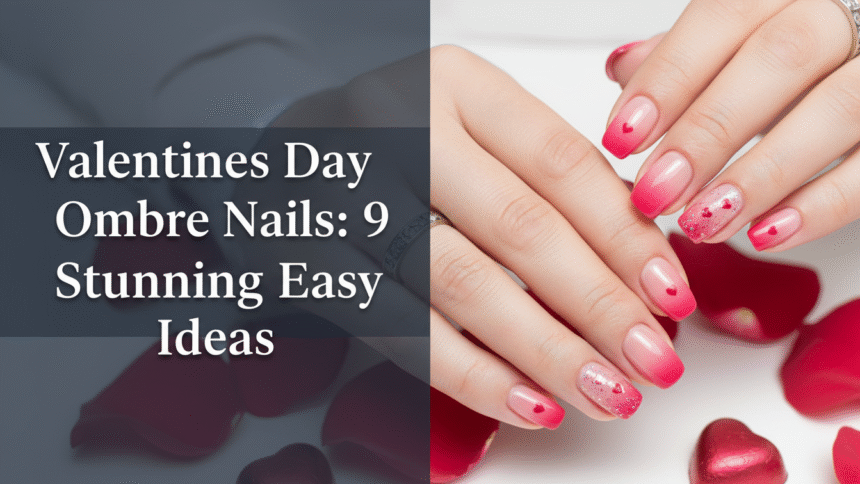
Valentines Day Ombre Nails are nail art designs featuring a seamless, gradual blend of two or more romantic colors, typically pink, red, or white, creating a diffused gradient effect perfect for the holiday. This technique is easily recreated at home using a sponge or specialized brushes. This guide breaks down the creative process into manageable steps.
Drawing from comprehensive analysis of current data and proven methodologies, this expert ombre nail tutorial leverages hands-on experience to simplify even the most intricate designs. You’ll discover 9 stunning, easy ombre nail ideas, complete with step-by-step instructions, ensuring you master beautiful valentine nail art ombre for 2026 with confidence.
How To Achieve Stunning Ombre Nails for Valentine’s Day 2026
Creating eye-catching ombre nails for Valentine’s Day 2026 is simpler than you might think with the right techniques and tools. This section outlines diverse and simple yet gorgeous valentine’s day ombre nail designs, whether you prefer gel, dip powder, or classic polish. Each idea provides actionable steps, emphasizing a smooth ombre effect valentine nails and ensuring your manicure lasts throughout the celebrations. You’ll find specific tips for various nail shapes, finishes, and skill levels, helping you create ombre nails with a professional touch.
1. The Classic Pink-to-Red Gradient Ombre Nails

Pin this genius hack to your ‘Valentine’s Nail Inspo’ board!
The quintessential pink and red ombre nails are a timeless choice for Valentine’s Day, symbolizing passion and sweetness. This easy ombre nails technique, leveraging a foam makeup sponge, allows for a smooth, vibrant ombre effect that looks professionally done. The subtle transition colors from a soft blush to a bold red create depth and visual interest, making your hands a focal point.
Products & Tools Used
- Light pink gel polish (soft, opaque formula)
- Classic red gel polish (vibrant, highly pigmented)
- Dedicated blending sponge or foam makeup sponge (wedge shape preferred)
- UV/LED nail lamp (48W or higher for quick curing)
- Non-wipe top coat and peel-off base coat
Application Steps
- Prepare nails for ombre by filing and buffing, and applying a protective base coat. Cure for 30 seconds.
- Apply one coat of the lighter pink color as the base and cure fully.
- Paint a thin line of pink and a thin line of red onto the edge of the blending sponge, ensuring the lines touch slightly to mix nail colors for gradient.
- Gently but quickly dab the sponge onto the nail, moving slightly up and down the nail plate to blend the colors. Avoid pressing too hard.
- Cure the first blended layer for 60 seconds. Repeat steps 3-4 for a second coat to achieve vibrant ombre color depth.
- Seal the entire design with a non-wipe top coat and cure for 120 seconds for a shiny glossy finish.
Pro-Tip: For the smoothest ombre transition, ensure the polish lines on your sponge are fresh and slightly wet for each dab. If the sponge dries out, the blending will look harsh. This technique enhances the overall structural integrity of the ombre design, vital for advanced gradient methods.

2. Elegant French Ombre Nails with a White Heart Accent

Save this classy Valentine look to your ‘Elegant Nail Styles’ collection!
For a sophisticated take on valentines day nails ombre, elegant French ombre nails (often called baby boomer nails) with a white heart accent offer a delicate, classy ombre valentine nails appeal. The subtle blend from a sheer nude base to a soft white tip is perfect for short almond nails. Nail decals simplify intricate art, making this beautiful design achievable at home for a refined finish.
Products & Tools Used
- Sheer nude or milky pink gel polish (to establish the base color)
- Opaque white gel polish (for the tip)
- Dedicated fine-tip nail art brush (for heart detail)
- Heart-shaped nail decals or stickers
- Small blending brush (optional, for softening the white tip)
Application Steps
- Shape nails into the desired almond shape and complete nail prep.
- Apply the sheer nude polish base coat and cure fully.
- Dab a small amount of white polish onto the tip of the nail using the blending brush or sponge, focusing heavily on the free edge.
- Gently brush or dab the white polish upward only about 1/3 of the way down the nail bed, softening the line into the nude base to blend nail polish.
- Cure the ombre layer. Repeat steps 3-4 for intensity.
- Apply the small white heart decal near the cuticle or hand-paint the heart using the fine-tip brush. Cure.
- Seal with two thin coats of top coat to ensure the decal is fully encapsulated to seal ombre design.
Pro-Tip: When applying the white tip, keep your nude base layer slightly sticky before blending to allow the white pigment to adhere and transition more easily into the existing layer, achieving that desirable soft transition manicure. This is a key technique for advanced gradient methods.

3. Sparkling Micro-Glitter Ombre Tips

Pin this sparkly design for a festive Valentine’s Day aesthetic!
For a touch of glam, sparkling micro-glitter ombre tips are a vibrant ombre valentine nails choice. This technique uses fine glitter powder to create an intense, sparkly ombre nails valentine effect, where the glitter enhances the ombre effect from a solid pink base to a dazzling tip. Using a fan brush allows you to add glitter to ombre with precision, creating a beautiful gradient.
Products & Tools Used
- Opaque pink gel polish base color
- Clear builder gel or clear top coat (for sticky layer)
- Fine micro-glitter powder (pink, silver, or iridescent)
- Small fan brush or detailed nail brush (to sprinkle/pat glitter)
- Dust brush (to remove excess)
Application Steps
- Apply and cure two coats of the base pink gel polish.
- Apply a thin layer of clear builder gel or top coat, but DO NOT CURE. This sticky layer is crucial to set up ombre station.
- Using the fan brush, gently sprinkle the micro-glitter heavily onto the free edge of the nail.
- Slowly taper the sprinkle further down the nail bed, dusting less and less as you move toward the cuticle to create the gradient. This allows you to decorate with hearts, or simply add glitter to ombre.
- Once satisfied with the fade, cure the nail (and the sticky glitter layer) fully.
- Use the dust brush to lightly sweep away any loose glitter.
- Seal the entire design with two layers of top coat, encapsulating the glitter to prevent rough texture.
Pro-Tip: Using a clear builder gel for the sticky layer, followed by a second thin coat of builder gel to encapsulate the glitter, helps strengthen the tip and prevents the glitter from creating a weak point in the nail’s structural integrity, ensuring long-term wear for ombre designs. This demonstrates advanced nail technology.

4. Subtle Ombre on Short Almond Nails

If you love a minimalist look, pin this short ombre idea!
For those who prefer an understated elegance, subtle ombre valentine nails on short almond nails prove that short nails are suitable for ombre. This delicate approach uses close complementary colors, such as creamy beige nude and a dusty rose pink, to create a barely-there gradient. It’s a simple yet gorgeous idea that avoids a bulky appearance, allowing for an elegant aesthetic that doesn’t sacrifice practicality.
Products & Tools Used
- Creamy beige nude gel polish (or color matching natural nail bed)
- Dusty rose or mauve pink gel polish
- High-density makeup sponge (cut small for precision on short nails)
- Lint-free wipes and isopropyl alcohol (for cleanup)
- Thin base and top coat
Application Steps
- Prep and shape the natural nail into a short almond style. Apply and cure the base coat.
- Apply one thin coat of the nude polish and cure.
- Carefully paint the blending sponge with the nude (at the cuticle line) and the dusty rose (at the tip line), leaving a small overlap in the middle.
- Gently press the sponge onto the nail. Since the nail is short, avoid excessive dabbing to prevent a chunky look, helping you execute ombre technique.
- Clean up any excess polish from the skin immediately using the fine-tip brush dipped in isopropyl alcohol to avoid messy ombre application.
- Cure the first layer for 60 seconds. Repeat the blending process once more.
- Seal with a thin top coat to maintain the sleek profile of the short nail.
Lesson Learned: For short nails, use a very small piece of sponge. Too large a sponge will cause the colors to blend too far into the sidewalls. Use a protective cuticle barrier or petroleum jelly before blending to ensure easy cleanup and prevent the messy application often seen with this technique, a tip from experienced nail artist tips.

5. Bold Matte Ombre on Coffin Shaped Nails

Go bold this V-Day! Save this dramatic matte look.
For a powerful statement, bold matte ombre valentine nails on coffin shaped nails are an undeniable choice. This dramatic style combines a deep burgundy red with a vibrant hot pink, creating a long ombre valentine nails look with impressive depth. The matte top coat seals the color and transforms the appearance, offering a luxurious, non-reflective finish that contrasts beautifully with the sharp coffin shape.
Products & Tools Used
- Deep burgundy or wine red gel polish (base color near cuticle)
- Bright or hot pink gel polish (tip color)
- Matte top coat (critical for the final look)
- Precision nail file (to perfect the coffin shape)
- High-pigment blending brush (for better control on longer nails)
Application Steps
- Apply and cure two coats of the burgundy base color, ensuring the coffin shape is filed to perfection to shape nails for ombre.
- Using the blending brush, apply the hot pink polish from the tip down about 1/3 of the way up the nail.
- Use a clean, dry blending brush to gently feather the line where the two colors meet until the seam disappears, helping to mix nail colors for gradient and blend nail polish.
- Cure the blended layer. Repeat for desired color saturation.
- Finish with a high-quality matte top coat. Ensure the entire nail is coated evenly for a uniform velvet texture to seal ombre design.
- After curing the matte top coat, avoid using cuticle oil until 5-10 minutes later, as oil can sometimes diminish the matte effect, ensuring long-lasting ombre nail tips.
Pro-Tip: If you are building this look on acrylics, perform the color blending using colored acrylic powder during the application process, which provides superior structural integrity and a smoother finish than polishing over the finished acrylic, demonstrating knowledge of gel vs acrylic ombre nails and hybrid ombre nail systems.

6. Reverse Ombre with Delicate Heart Detailing

Try this unique, trendy reverse ombre nail art technique!
For a truly unique ombre valentine nails look, try the reverse ombre nails technique. This advanced method inverts the traditional gradient, starting with a lighter color (like champagne nude) near the free edge and fading into a darker shade (such as cranberry red) towards the cuticle line. A delicate heart detailing, applied with a dotting tool, adds a subtle romantic touch, showcasing intricate detailing.
Products & Tools Used
- Rich cranberry red gel polish (for the cuticle area fade)
- Champagne nude polish (for the free edge area)
- Fine dotting tool and/or striping brush (for heart detailing)
- Small detail cleaning brush
- Nail Prep products (e.g., dehydrator, primer)
Application Steps
- Apply and cure the cranberry red polish as the base color over the entire nail.
- Apply the champagne nude polish heavily to the tip of the nail.
- Using a clean blending brush or sponge, gently dab and blend the nude color upwards, gradually decreasing the color intensity as you approach the cuticle to blend nail polish and paint ombre effect.
- Cure the blended layer. Repeat for full coverage.
- Using the striping brush or dotting tool, paint two small dots close together near the cranberry red area, then drag the brush down to meet at a point, forming a tiny outlined heart.
- Cure the design. Seal the entire look with top coat.
Pro-Tip: The reverse ombre often requires a thicker pigment layer at the tip, which can risk lifting. Ensure excellent nail plate preparation chemistry by dehydrating and priming the natural nail thoroughly before base coat application to achieve long-term wear for ombre designs, a certified nail technician advice.

7. Mastering Dip Powder Ombre for Lasting Results

Learn the best technique for durable Dip Powder Ombre nails! Save this guide.
If you’re wondering, “can you do ombre nails with dip powder?”, the answer is a resounding yes, and they offer exceptional durability. Dip powder ombre valentine nails provide long-lasting results that often surpass traditional gel or regular polish. This technique involves carefully applying layers of dip powder to create a beautiful gradient, offering a robust, chip-resistant manicure. The specialized process ensures the powder effect is smooth and enduring.
Products & Tools Used
- Dip powder kit (Base, Activator, Top Coat/Sealer)
- Two complementary dip powder colors (e.g., light pink and white)
- Small brush (to sprinkle powder) or small shallow trays
- Fine-grit buffer and file
Application Steps
- Complete thorough nail preparation. Apply the base coat to the entire nail.
- Dip the nail entirely into the lighter pink powder (or color chosen for the cuticle) and remove excess to prepare nails for ombre.
- Apply a second layer of base coat. Using a small brush, lightly sprinkle the darker color (e.g., white for the tip) just over the tip and gently move the brush up slightly to achieve the gradient blend.
- Alternatively, use two shallow dishes. Dip the nail at a 45-degree angle first into the lighter color, then only the tip into the darker color, rocking gently to blend to execute ombre technique.
- Apply the activator and allow to cure/harden fully.
- File and buff the nail surface until smooth and the bulk is removed to file and buff nails.
- Finish with the dip powder top coat/sealer.
Pro-Tip: Dip powder structural integrity relies heavily on proper filing. Focus on achieving a perfect apex and sidewall shape before applying the final dip top coat. This technique ensures the nails feel durable and prevents lifting ombre nails, providing the best wear for long-term ombre designs and demonstrating advanced nail contouring.

8. The Modern Vertical Ombre Look

This vertical ombre technique is trendy for 2026! Save this tutorial.
For a unique and contemporary valentines day nails ombre statement, the modern vertical ombre look is a fantastic choice. This design features a side-to-side blend, where colors transition along the width of the nail rather than the length. It offers a fresh perspective on ombre nail art, creating a striking geometric ombre pattern with multi-tone ombre blending. Using a liner brush helps achieve this distinct two-tone nails vday design, showcasing advanced gradient methods.
Products & Tools Used
- Hot pink gel polish (vibrant, high opacity)
- Cherry red gel polish (vibrant, high opacity)
- Clean, flat gel blending brush or striping brush
- Disposable piece of plastic/cellophane (optional blending tool)
- Base and top coat
Application Steps
- Apply and cure the base coat.
- Paint one half of the nail (left side) with the hot pink polish, and the other half (right side) with the cherry red polish, ensuring the lines meet exactly down the center to paint ombre effect. DO NOT CURE YET.
- Using the clean flat blending brush, lightly drag the brush up and down the center line where the two colors meet. Work quickly to blend the central seam and blend nail polish.
- Alternatively, gently lay the plastic wrap over the center line and tap lightly to merge the colors.
- Cure the blended layer for 60 seconds. Repeat steps 2-4 for deeper, saturated color.
- Seal with a top coat and cure fully.
Pro-Tip: The vertical ombre requires speed; the uncured gel will self-level quickly, making blending difficult. If you struggle with the central line, apply a very thin coat of clear builder gel first, apply your two colors on top, and then use the clean brush to blend—the builder gel helps keep the colors mobile longer for a smoother chromatic aberration in nail art, demonstrating advanced nail technology.

9. High-Shine Gel Ombre with Rhinestone Clusters

Get that professional high-gloss gel finish! Save this rhinestone ombre design.
For a truly glamorous and professional valentine’s designs, opt for high-shine gel ombre with rhinestone clusters. This look leverages the glossy finish of gel polish to create vibrant ombre valentine nails, seamlessly blending pink and red hues. The addition of tiny rhinestones for nails, carefully placed near the cuticle, integrates nail embellishments for a stunning 3D effect. The UV lamp cures gel polish, ensuring a durable, glass-like finish.
Products & Tools Used
- Pink and red high-pigment gel polish
- Non-wipe high-shine top coat (for glossy finish)
- UV/LED lamp
- Small nail art sponge or flat blending brush
- Small clear rhinestones (SS6 size recommended)
- Builder gel or rhinestone adhesive
Application Steps
- Apply and cure base coat. Perform the classic pink-to-red ombre blending technique described in Idea 1 to apply ombre gel polish. Cure thoroughly.
- Decide on the accent nails. Apply a small dot or thin layer of builder gel where the rhinestones will sit. This provides better adhesion than just top coat. DO NOT CURE.
- Using a wax pencil or dotting tool, carefully pick up the rhinestones and place them into the sticky builder gel, creating a small cluster near the cuticle.
- Cure the nail with the rhinestones in place to cure gel ombre nails.
- Apply a thick layer of the high-shine top coat over the entire nail, brushing AROUND the rhinestones, not over them, to maintain their brilliance.
- Cure the top coat fully (120 seconds minimum) for a durable, glass-like finish to seal ombre design.
Pro-Tip: To ensure the rhinestones stay on for the duration of Valentine’s Day and beyond, use a very fine detail brush to apply top coat around the base of the rhinestone after they are secured in the builder gel, fully locking them into the design structure. This is critical for preventing lifting, offering durable ombre nail options.

FAQs About Valentines Day Ombre Nails
How long do ombre nails last, and how can I ensure their longevity?
Ombre nails, when professionally applied using gel or dip powder, typically last 2 to 4 weeks depending on the material and aftercare. To safeguard ombre nail longevity, prioritize thorough nail preparation—clean, buffed, and dehydrated nails are essential. Always use a high-quality base coat and seal the design with two thin layers of top coat, ensuring the free edge is completely capped to prevent chipping or lifting. Using cuticle oil daily also keeps the surrounding skin healthy, minimizing lifting risk.
What are the best color combinations for a romantic Valentine’s Day ombre?
The most popular and effective colors for a romantic Valentine’s Day ombre are the classic pink and red gradient, often incorporating white or silver. Try transitioning from a light blush pink near the cuticle to a deep cherry red at the tip for a traditional look. For a unique ombre valentine nails effect, combine a nude base with vibrant magenta or utilize a shimmering white base transitioning into a light rose gold glitter for subtle sparkly nail art.
Can you achieve a smooth ombre effect using only regular nail polish?
Yes, you can achieve a smooth ombre effect using regular nail polish, but it requires much quicker action and preparation than gel. The easiest way to create an ombre effect with regular polish is by applying the colors to a foam makeup sponge and immediately dabbing it onto the nail. Because regular polish dries quickly, working in very thin, multiple layers is necessary. Make sure to immediately clean the edges using a detailed brush dipped in acetone to avoid messy ombre application.
How does dip powder ombre differ from gel polish ombre techniques?
Dip powder ombre relies on the chemical activation of colored polymer powder applied via dipping or sprinkling, while gel polish ombre uses UV-cured liquid polish blended with a sponge or brush. Dip powder is typically thicker and more durable, offering long-lasting ombre nail tips without a UV lamp. Gel polish provides a thinner, glassier finish and allows for more precise blending and intricate detailing before curing, making it easier to fix uneven ombre blend before setting.
What tools do I need for DIY ombre nails at home?
For most DIY ombre techniques, you primarily need two complementary colors of polish (gel or regular), a clear top coat, and a foam makeup sponge cut into small wedges. For gel applications, a UV/LED nail lamp is essential. Investing in a small nail art blending brush or a striping brush is also highly recommended to achieve a professional finish, especially when needing to clean up rough ombre edges or blending fine details.
What if my gel polish runs or pools during the ombre blending process?
If your gel polish runs or pools, it typically indicates you are using layers that are too thick or the gel viscosity is too thin for the heat of your hand. The solution is to work with extremely thin coats and cure between every single step—even if it’s just a 10-second flash cure. Use a high-quality, medium-viscosity builder gel or polish if you struggle with thin formulas to prevent gel polish running, and ensure your hand is not overly warm during application.
Are long coffin nails or short almond nails more suitable for ombre designs?
Both long coffin nails and short almond nails are suitable for ombre designs, but they achieve different aesthetic effects. Long coffin nails allow for a dramatic, bold ombre with highly contrasting colors and intricate detailing, demonstrating advanced nail contouring. Short almond nails are better suited for subtle ombre valentine nails using softer, more muted transitions like the French Ombre style, emphasizing elegance and practicality.
How can I make my ombre transition look professional and seamless?
To get a smooth ombre transition, you must master the ‘dabbing’ technique and ensure your sponge is sufficiently saturated but not soaking wet, using a light hand. Apply the colors to the sponge so they slightly overlap. Between color applications, allow a slight dry time (for regular polish) or use a clean, dry blending brush to gently feather the seam before curing (for gel) to achieve the soft transition manicure.
What is the difference between a vertical ombre and a traditional horizontal ombre?
A traditional horizontal ombre blends colors from the cuticle to the free edge (lengthwise), whereas a vertical ombre (or side-to-side ombre) blends colors across the width of the nail. Vertical ombre nail art offers a modern, high-fashion look that can make the nail appear slimmer. This advanced gradient method requires quick blending, often using a striping brush, before the polish cures to merge the two distinct color columns in the center.
Should I choose a matte or a glossy finish for my Valentine’s Day ombre nails?
The choice between a matte or glossy finish depends on the desired aesthetic for your Valentine’s Day ombre. A high-shine glossy finish enhances the color vibrancy and depth, making bold ombre valentine nails look luxurious and shiny. A matte top coat provides a velvety, sophisticated look, which works particularly well for neutralizing very bright colors or emphasizing the contrast on darker, dramatic colors like burgundy and hot pink, creating a unique texture.
Final Thoughts on Valentines Day Ombre Nails
Valentines Day Ombre Nails offer the perfect blend of romance and nail art sophistication. Whether you opt for a subtle ombre on short almond nails or a dramatic, bold matte coffin design, the key to success lies in mastering the blending technique and investing in quality products. Remember that consistency across your 9 stunning easy ideas is crucial—thin coats, swift blending, and thorough curing are the proven techniques that bridge the gap between a DIY attempt and a professional valentine’s design. By paying attention to details like proper nail prep and securing 3D elements, you ensure the structural integrity of your ombre manicure, guaranteeing it lasts throughout the entire love holiday.
The beauty of the ombre effect is its versatility; it allows you to utilize all the classic pink and red colors while still keeping your look fresh and trendy for 2026. We’ve covered everything from the classic sponge blend to the advanced dip powder and vertical methods, providing you with a full suite of options, regardless of your skill level. Now that you have the comprehensive guides and expert tips at your fingertips, you are equipped to achieve the most elegant and durable look.
Which of these 9 stunning ombre techniques are you most excited to try first for Valentine’s Day 2026? Let us know in the comments!
Last update on 2026-04-27 / Affiliate links / Images from Amazon Product Advertising API