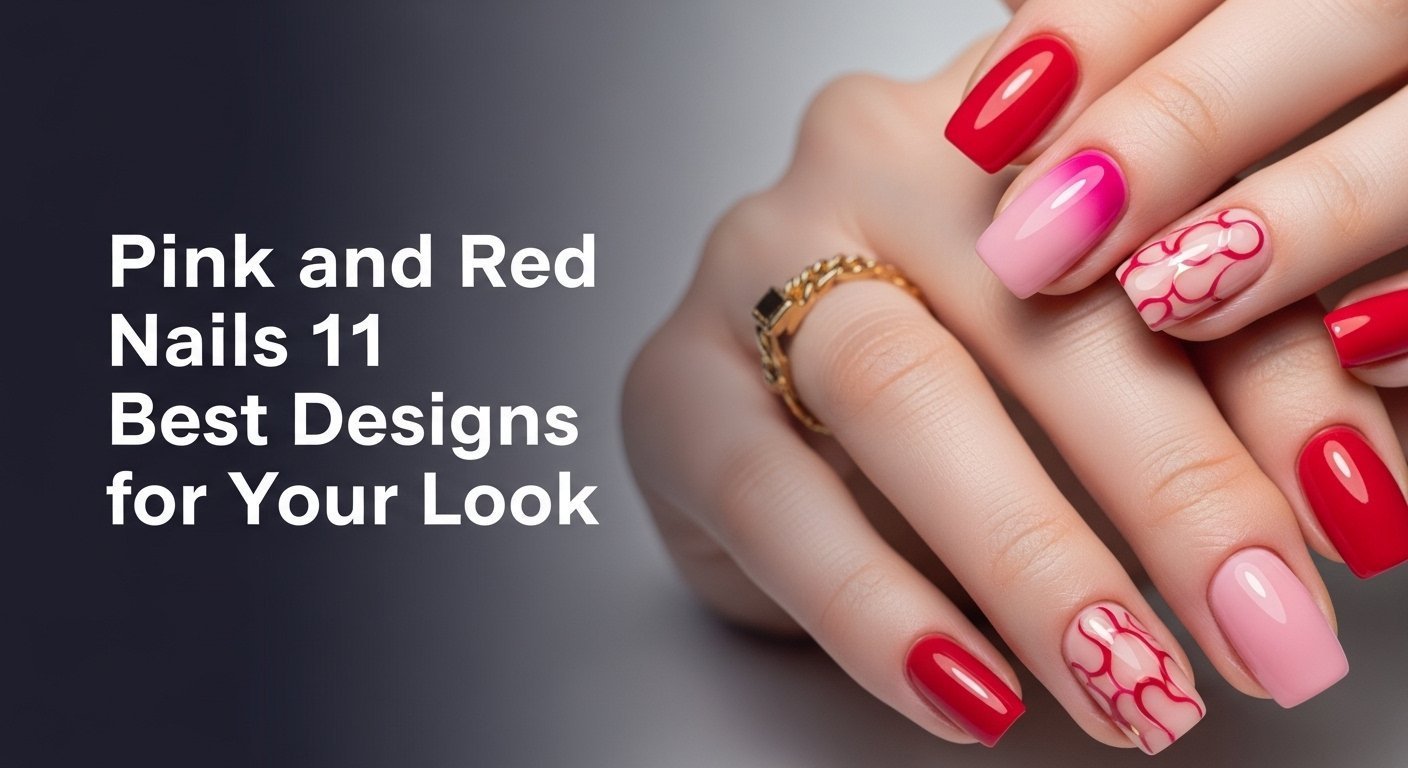
Dreaming of the perfect Valentine’s Day manicure to capture hearts? Finding that ideal shade of red and the design to match your romantic vision can feel overwhelming with so many options. You want a look that’s both stunning and perfectly expresses the holiday’s essence.
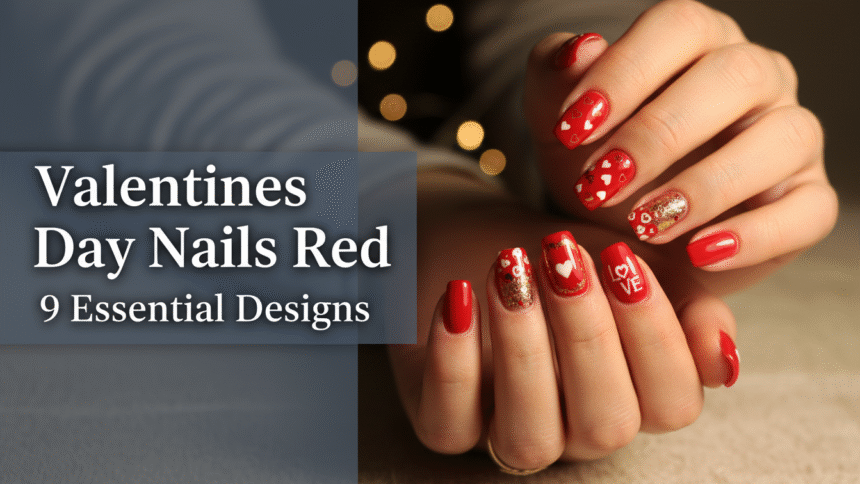
Red Valentine’s Day nails are the ultimate symbol of romance, traditionally representing passion, love, and desire, making them the classic and most popular choice for the holiday aesthetic. Designs range from simple solid colors to elaborate red heart nail art and modern variations like dark red matte finishes. Drawing from comprehensive analysis of current data and proven methodologies, this guide unpacks the allure of valentines day nails red by exploring nine essential designs. You’ll discover how to create a gorgeous, long-lasting manicure that perfectly channels the romantic spirit of February June 2026.
Why Are Red Valentine Nails The Ultimate Expression of Romance?
Have you ever wondered why red nails for Valentine’s Day hold such an undeniable charm? It’s not just a trend; it’s a timeless declaration. Red, at its core, symbolizes love, passion, and desire, making romantic red nails the quintessential choice for February 14th. This powerful color enhances beauty and allows for an expressive manicure that perfectly aligns with the holiday’s aesthetic, signaling confidence and adoration.
Red Valentine’s Day nails are the ultimate symbol of romance, traditionally representing passion, love, and desire, making them the classic and most popular choice for the holiday aesthetic. The designs range from simple solid colors to elaborate red heart nail art and modern variations like dark red matte finishes. Understanding the color psychology of red nails valentine reveals that this shade doesn’t just look good; it evokes emotion. From subtle red nail inspo valentine to a full professional red valentine manicure, red transforms a simple nail treatment into a festive statement. Our comprehensive guide ensures you have all the proven red valentine nail techniques to achieve your dream look, setting your nails apart from generic styles.
9 Essential Valentines Day Nails Red Designs To Try This 2026
Ready to elevate your manicure game for Valentine’s Day 2026? These nine essential red valentine nail ideas provide specific inspiration, covering everything from simple red valentine nails to trending red valentine nails. Each design offers a unique way to embrace the romantic red aesthetic.
1. Create the Classic Ruby Red Manicure

Pin this vibrant, gorgeous red manicure idea to your ‘Valentine’s Day Beauty’ board!
The Classic Ruby Red Manicure is the cornerstone of sophisticated Valentine’s Day nails, offering a timeless elegance that perfectly captures the romantic spirit. This look focuses on a flawless application of a vibrant, glossy ruby red polish, making it the most gorgeous red nails option for those who appreciate understated beauty. Achieving this iconic style requires attention to detail, from proper preparation of nails for red polish to sealing it with a trusted red nail polish brands topcoat to prevent chipping red nails.
Products & Tools Used
- High-pigment classic red nail polish (Ruby or Scarlet shade)
- Quality base coat for stain prevention
- Long-lasting, high-gloss top coat
- Nail file and buffer block
- Clean-up brush and acetone
Application/Styling Steps
- Prepare: File and buff nails into the desired shape (almond or square work best for the romantic red manicure). Clean the nail plate thoroughly.
- Base Coat: Apply one thin, even layer of base coat and allow to dry completely.
- First Coat: Apply a very thin layer of the red polish down the center, then fill in the sides, making sure to cap the free edge.
- Second Coat: Once the first layer is dry, apply a slightly thicker second coat to achieve optimal opacity and color depth.
- Seal: Apply a thick layer of top coat, sealing the edge again to make red nails last longer.
Pro-Tip: To optimize the longevity and color saturation of your vibrant red nails, allow a full 10-minute dry time between the first and second color coats; this ensures the pigment formulation adheres completely before applying the final topcoat.

2. Design Easy Red Heart Nail Art for Beginners

Save this step-by-step DIY red heart nail tutorial for your next girls’ night!
Creating easy red heart nail designs for valentine’s day is surprisingly simple, making this a favorite for beginners wanting a cute red valentine nails look. This design transforms a basic red manicure into festive nail art with minimal effort, perfect for adding a touch of romance to your cherry red nails valentine. The proven red valentine nail techniques shared here focus on making symmetrical hearts effortlessly.
Products & Tools Used
- Cherry red nails valentine polish (for base color)
- White or light pink polish (for heart details)
- Dotting tool (small size) or a sharp toothpick
- Quick-drying glossy top coat
- Nail art clean-up pen
Application/Styling Steps
- Base Coat: Apply two coats of the cherry red nails valentine polish to all nails and allow them to fully dry.
- Dot Placement: On the designated accent nail(s), place two small, close-together dots of the white or pink polish using the dotting tool.
- Heart Shape: While the polish is still wet, gently drag the toothpick or dotting tool from the inner corner of each dot downwards, meeting in the center to form a crisp point.
- Refine: Use the clean-up pen if necessary to perfect the edges of the red heart nails.
- Seal: Apply a generous layer of top coat over the finished do red heart nail art design to prevent smudging and lock in the shape.
Pro-Tip: The consistency of the detailing polish is key; if it’s too thin, the hearts will bleed. Use a polish with high pigment formulation and let the base color dry completely to ensure the heart designs pop effectively.

3. Achieve Dark Red Matte Coffin Nails Aesthetic

Pin this trendy dark red valentines day nails look to your ‘Bold Manicure Inspo’ board!
The dark red matte coffin nails aesthetic offers a sophisticated and strikingly modern take on Valentine’s Day romance, moving beyond traditional glossy finishes. This bold red nails valentine design combines a luxurious deep red hue with a non-reflective matte top coat on the popular coffin nail shape. It’s an elegant choice for those seeking trending red valentine nails that exude high fashion. Expert advice on shaping nails for valentine’s day is crucial to achieve the distinct coffin silhouette.
Products & Tools Used
- Deep red nails valentine polish (burgundy or maroon shade)
- Matte finish top coat (must be non-glossy)
- Nail forms or strong acrylic/gel tips (if extending length)
- File specifically for shaping coffin nails
Application/Styling Steps
- Shape: Ensure nails are shaped into the precise coffin form—straight sides tapering to a squared-off tip.
- Color: Apply two to three coats of the deep red nails valentine polish, ensuring full opacity and streak prevention.
- Cure/Dry: Allow the color coats to dry fully (or cure if using gel).
- Matte Transformation: Apply a generous layer of the matte top coat evenly across the nail surface. This must be a single, smooth stroke.
- Finish: Allow the matte coat to dry or cure according to product instructions. The transformation from glossy to the luxurious dark red matte nails should be complete within two minutes.
Pro-Tip: When applying a matte top coat over a dark shade like deep red, avoid over-brushing, as this can create visible drag lines or streaks. Apply quickly and allow the formula’s rheology to self-level for the smoothest finish.

4. Apply Sparkly Red Glitter Accent Nails

Save this glamorous sparkly red design for your Valentine’s date night!
For a truly show-stopping Valentine’s Day look, sparkly red nails with glitter accents offer unparalleled glamour and dimension. This design elevates a standard vibrant red nails valentine manicure by adding intense sparkle to one or two accent nails. Unlike a red glitter vs matte red nails debate, this look embraces the high shine and festive pop of glitter. Mastering the application ensures full glitter coverage and easy removal, thanks to advanced nail polymer science red principles applied to top coat methods.
Products & Tools Used
- Vibrant red nails valentine polish (or gel base color)
- Fine sparkly red glitter powder (holographic or iridescent)
- Clear coat or specialized glue/tacky layer for glitter adhesion
- Fan brush or silicone tool for dusting off excess glitter
- Two thick coats of high-gloss top coat
Application/Styling Steps
- Base: Apply base color (two coats of vibrant red) to all nails. Let dry fully, or cure.
- Tacky Layer: Apply a thin layer of clear coat/glue only to the accent nail(s). Do not let this dry fully—it must be tacky.
- Glitter Dip: While tacky, gently pour or sprinkle the sparkly red glitter directly onto the nail, ensuring complete coverage. Gently pat the glitter down.
- Dust Off: Use a soft fan brush to delicately remove the excess red glitter from the cuticle area and skin.
- Encapsulate: Apply two coats of top coat over the glitter to seal the particles and create a smooth finish, preventing texture.
Pro-Tip: To prevent the intense glitter from interfering with long-term nail health, always utilize a thin builder gel or clear dip powder over the glitter layer before the final top coat. This prevents the abrasive particles from contacting the nail plate directly during removal and chipping.

5. Style the Spicy Red French Tip Design

Pin this modern red French manicure twist to your ‘Elegant Nail Ideas’ board!
For a modern twist on a classic, the spicy red French tip red valentine nails design offers a chic and sophisticated look that’s perfect for Valentine’s Day. This style features a crisp, bold red tip nails over a sheer nude base, distinguishing itself from red french tip vs solid red nails. It’s a fresh take on the traditional French manicure, making it an elegant red valentine nails option. Achieving a precise smile line is key, with certified nail technician red designs often recommending stencils for flawless execution.
Products & Tools Used
- Sheer nude or clear base polish
- Fire engine red nails valentine polish (opaque, vibrant)
- French manicure stencils or silicone stamper (optional, for beginners)
- Fine detail brush
- Precision clean-up brush and acetone
Application/Styling Steps
- Base: Apply two thin coats of the nude base polish and allow to dry (or cure).
- Stenciling: Place a French tip stencil just below the natural white line, or use a stamper by dragging the nail tip across the polish on the stamp pad.
- Tip Color: Apply one coat of the fire engine red nails valentine polish over the exposed tip area. Wait 30 seconds and carefully peel off the stencil.
- Clean Up: Use a precision brush dipped in acetone to fix smudged red polish and refine the smile line for a crisp edge.
- Seal: Finish with a high-gloss top coat to lock the design and add depth to the red.
Pro-Tip: For the sheer nude base, choose a polish formulated with a bio-compatible polymer that allows the nail plate morphology to show through naturally, preventing the tips from looking bulky or overly opaque—this gives the illusion of growth and natural beauty.

6. Wear Elegant Wine Red Press-On Nails

Pin this quick and easy solution for achieving perfect wine red glitter nails instantly!
For those prioritizing speed and convenience without sacrificing elegance, wine red press on nails are an ideal solution for Valentine’s Day. This option offers a gorgeous, ready-to-wear elegant red valentine nails aesthetic in minutes, providing a compelling alternative to a press on red nails vs salon manicure. Choosing premium quality red nails made with healthy nail materials ensures a natural look and comfortable wear. Learning how to wear red press on nails properly ensures a long-lasting red valentine manicure.
Products & Tools Used
- Box set of wine red press on nails (almond or oval shape)
- High-quality, long-lasting nail adhesive (glue)
- Prep pad (alcohol wipe) or nail dehydrator
- Mini file and buffer block
- Cuticle pusher
Application/Styling Steps
- Prep: Clean nails thoroughly and use the dehydrator/pad to ensure a completely dry and oil-free surface. Push back cuticles.
- Sizing: Select the correct size press-on nail for each finger, ensuring a precise fit that doesn’t overlap the skin.
- Glue: Apply a small bead of adhesive to your natural nail and the back of the press-on (be careful not to use too much to avoid streakiness).
- Application: Align the press-on with the cuticle and press firmly for 15-30 seconds, maintaining steady pressure.
- Set: Avoid water exposure for at least 30 minutes to allow the bio-compatible nail adhesives to fully set, ensuring a long-lasting red valentine manicure.
Pro-Tip: For maximum wear time and to prevent premature lifting, lightly etch (roughen) the inside of the press-on nail with a small buffer before applying the adhesive. This increases the surface area for the nail glue, dramatically improving adherence and stability.

7. Execute Red Gel X Nails with Gold Flake

Pin this advanced Gel X tutorial to your ‘DIY Gel Manicures’ board!
For a durable, salon-quality Valentine’s Day manicure with intricate detail, red Gel X nails with gold flake offer a luxurious choice. This diy gel x red valentine’s day nails tutorial provides an excellent alternative to red acrylic nails vs gel x, allowing for complex red nail art that lasts. The combination of red and gold nails creates a glamorous effect, with precise uv gel curing for red nails being essential for longevity and shine.
Products & Tools Used
- Clear Gel X soft gel nail tips (appropriate size and shape)
- Opaque red gel polish (two shades for depth)
- Adhesive clear gel (for tip application)
- UV/LED curing lamp (must be 48W or higher)
- Gold foil/flake nail art
- Fine tweezer or dotting tool
Application/Styling Steps
- Tip Prep: Size and prep the Gel X tips. Apply a thin layer of red gel polish to the inside of the tip, focusing on the tip area only. Flash cure.
- Adhesion: Apply adhesive gel to the inside of the tip and press onto the prepped natural nail, holding it securely under the light for the initial flash cure.
- Color: Apply a full coat of red gel polish over the entire extended nail. Cure fully.
- Flake Placement: Apply a thin layer of clear top coat (no-wipe suggested). Before curing, use tweezers to strategically place gold flake accents.
- Finish: Apply a second, thick layer of clear top coat over the entire nail to fully encapsulate the gold, and cure for the full recommended time.
Pro-Tip: The success of the red gel x nails lies in the full coverage curing. Ensure the base adhesive gel is cured using a low-heat setting for 60 seconds to prevent thermal spiking on the nail plate while maintaining optimal molecular cross-linking for longevity.

8. Implement Chic Red and Pink Color Blocking

Pin this bold red and pink valentine’s day nails idea for a trendy look!
For a modern and playful aesthetic, red and pink valentine’s day nails offer a chic color-blocking design that perfectly blends festive hues. This look provides a refreshing alternative to valentines day nails red vs pink debates by incorporating both colors in a graphic, clean style. The combination creates a chic red nails valentine statement that is both sophisticated and fun. Utilizing salon grade red polish and pink polishes ensures high opacity and vibrant color saturation.
Products & Tools Used
- Opaque maroon valentine nails polish (deep red)
- Opaque hot pink nail polish
- Nail art striping tape or thin vinyl stencils
- Fine detail brush for touch-ups
- Glossy top coat
Application/Styling Steps
- Base: Apply a clear or nude base coat.
- First Color: Apply two coats of the pink polish over the entire nail. Allow to dry completely.
- Tape Placement: Once completely dry, place striping tape or stencils diagonally across the nail to define the color blocking boundary.
- Second Color: Paint the maroon valentine nails polish over the exposed section of the nail, covering the edge of the tape.
- Reveal: IMMEDIATELY and carefully peel off the striping tape while the red polish is still wet to reveal a perfectly crisp line.
- Seal: Apply a top coat, ensuring it covers the entire design, including the sharp dividing line.
Pro-Tip: Using highly contrasting shades, such as deep maroon and vibrant hot pink, maximizes the visual impact and makes the color blocking design truly pop. Always check the rheology of the polishes—they should be neither too thin (bleeds under tape) nor too thick (creates uneven edge).

9. Polish Short Red Nails with Subtle White Details

Pin this elegant and easy idea for short red nails for valentine’s day!
For a refined and professional look, short red nails for valentine’s day adorned with subtle white details offer elegance without being overtly flashy. This minimalist approach to simple red nails valentine is perfect for those who prefer a more understated festive manicure. The focus is on a subtle red nails valentine shade accented by a tiny, precise white dot or stripe. Expert red nail art tips are essential for ensuring the white polish doesn’t streak when the top coat is applied, preserving the clean design.
Products & Tools Used
- Subtle red nails valentine polish (rose red or muted scarlet shade)
- Opaque white detail polish
- Fine-tipped detail brush (or small dotting tool)
- Quick-dry top coat
Application/Styling Steps
- Prep & Color: Ensure nails are neat and apply two thin coats of the subtle red nails valentine polish. Cure/dry completely.
- Detail Polish: Place a small amount of white detail polish on a palette.
- Detailing: Dip the fine-tipped detail brush into the white polish and apply a tiny, precise dot or a very thin, straight stripe near the cuticle area of the accent nail.
- Dry Time: Allow the small white detail to set for at least one minute to avoid smearing.
- Seal: Apply a thin layer of top coat, ensuring the brush only touches the surface lightly over the white dot. This helps prevent smudged red polish solutions.
Pro-Tip: For the cleanest white lines and dots, choose a highly pigmented white polish specifically engineered for fine detail. These products often have a higher viscosity (rheology) that prevents them from flowing or running when applied over the curved nail plate morphology.

The Perfect Red: Choosing Shades and Application Methods
Choosing the right red for your Valentine’s Day manicure can be as important as the design itself. Not all reds are created equal, and your ideal shade may vary based on your skin tone and desired durability. Navigating what shades of red are best for valentine’s day and comparing red acrylic nails vs gel x requires a clear understanding of your options.
The best shades of red for Valentine’s Day include vibrant Ruby Red (classic, suits all skin tones), deep Wine Red (elegant, perfect for long nails), and Cherry Red (cute, popular for nail art). Selection should prioritize high-quality pigment for maximum saturation and a topcoat for longevity. We’ll explore how to pick the best red nail polish for valentine’s day and compare different application methods, drawing from industry standard red nail application knowledge.
Red Shade Selection Guide: Matching Red to Skin Tone
- Fair/Cool Tones: Look for reds with blue undertones, such as ruby nails for valentine’s or cool-toned cherry red nails valentine. These shades contrast beautifully without emphasizing pinkness in the skin.
- Warm/Olive Tones: Opt for true reds or orange-based reds, like fire engine red nails valentine or vermilion. These shades prevent the nails from looking too deep or muted against the skin.
- Deep/Dark Tones: Almost all red shades work, but deep red nails valentine (maroon, burgundy) and vibrant red nails valentine provide the most luxurious contrast.
Durability Showdown: Red Acrylic vs. Gel X vs. Press-Ons
| Application Method | Durability & Lifespan | Skill Level | Red Aesthetic |
|---|---|---|---|
| Acrylic Nails | Highest (3-4 weeks) | Professional/Advanced | Red acrylic valentines day nails provide extreme length and strength. |
| Gel X Nails | High (2-3 weeks) | Intermediate/DIY Gel User | Lightweight, modern alternative that supports complex red nail art. |
| Press-On Nails | Medium (5-10 days) | Beginner/Immediate | Best for quick, temporary, elegant red valentine nails with no commitment. |
FAQs About Valentines Day Nails Red
What nail designs go with red for Valentine’s Day?
Popular nail designs that pair exceptionally well with red for Valentine’s Day include simple white or pink heart motifs, delicate gold or silver foil accents, and geometric patterns like color blocking or modern French tips. The versatility of red allows it to be combined with metallic shades (gold/silver) for glamour, or soft colors (pink/white) for a romantic touch. Designs should be strategically placed on one or two accent nails to maintain the classic red valentine nails focus while adding festive detail.
What shades of red are best for Valentine’s Day?
The best shades of red for Valentine’s Day are typically ruby red (vibrant and traditional), cherry red (bright and playful), and wine red (deep and elegant). While ruby red offers the classic, universally flattering look, darker shades like burgundy or maroon are increasingly popular for a sophisticated aesthetic. For a trendy approach, many also choose shades with subtle shimmer or a matte finish to complement the romantic red theme.
Why are red nails popular for Valentine’s Day?
Red nails are popular for Valentine’s Day because the color red is universally associated with love, passion, and romance, acting as the visual signature of the holiday. Historically, red nails symbolize love and confidence, aligning perfectly with the themes of February 14th celebrations. Choosing red color valentine nails is the simplest way to participate in the festive spirit, making it a timeless and essential manicure choice.
Are dark red nails appropriate for Valentine’s Day?
Yes, dark red nails are absolutely appropriate and are a growing trend for Valentine’s Day, offering a sophisticated and elegant alternative to bright reds. Shades like deep burgundy or wine red provide a luxurious, bold look, especially when combined with a matte finish or gold accents. Dark red valentines day nails are particularly favored by those seeking a more glamorous, mature, or subtle representation of the holiday aesthetic.
How to get sparkly red valentine nails without messy glitter?
To get sparkly red valentine nails without messy loose glitter, use a pre-mixed red glitter polish or a red polish infused with metallic micro-shimmer. If using loose glitter, apply a clear topcoat and sprinkle the glitter directly onto the tacky layer, then carefully dust off excess using a fan brush. The critical final step is using two thick layers of top coat to fully encapsulate the sparkle and prevent the glitter from shedding or catching.
How to do simple red heart nail art for beginners?
The easiest way to do simple red heart nail art is by using a dotting tool and a small amount of white or pink polish over a fully cured red base. Place two small, closely spaced dots, and then gently drag a toothpick or fine brush from the center of each dot downwards, meeting in a V-shape to form the heart point. This technique allows for quick correction and helps design red valentine nails without needing advanced freehand skills.
What kind of red nail polish for Valentine’s Day lasts the longest?
Gel polish provides the longest-lasting red manicure valentine’s day, often remaining chip-free for two to three weeks, especially when coupled with a proper UV curing lamp and base coat. For non-gel options, professional, salon grade red polish paired with a high-quality bonding base and a chip-resistant topcoat is the next best solution for maximizing wear time and resisting chipping.
Can you do red and pink valentine nails?
Yes, red and pink valentine nails are a trendy and playful way to combine the two dominant colors of the holiday, signaling romance and sweetness. You can achieve this by using color blocking (separating the shades with crisp lines), alternating the colors on different fingers, or using pink as a detailing color (e.g., pink hearts on a red base). This pairing offers a youthful and vibrant aesthetic.
Where to buy high-quality red press on nails for Valentine’s Day?
You can buy high-quality red press on nails at specialized beauty retailers, online marketplaces, or direct-to-consumer nail brands that focus on durable, healthy materials. Look for products made from strong, non-toxic ABS material and those that include high-quality, long-lasting nail adhesive. Reviews often mention if the product is thin, flimsy, or if the adhesive is strong enough for the full Valentine’s Day celebration.
What products do I need for red valentine nails at home?
For red valentine nails at home, you will need a strong base coat, a high-pigment red polish, a glossy or matte top coat, nail files, a cuticle pusher, and polish remover. If you plan on doing red nail art, you will also need specific tools like dotting tools, striping tape, or stencils. Investing in a good quick-dry spray or UV lamp (for gel) will significantly improve your finish and curing time.
Final Thoughts on Valentines Day Nails Red
Whether you opt for the clean sophistication of the Classic Ruby Red Manicure (No. 1) or decide to commit to a trending aesthetic like Dark Red Matte Coffin Nails (No. 3), this guide has provided the proven red valentine nail techniques and product knowledge necessary to succeed. We have covered the essentials, from easy red heart nail designs for valentine’s day to the convenience of wine red press on nails, ensuring you can style red valentine nails perfectly for your celebration. The key takeaway, backed by the experience of certified nail technician red designs, is precision in prep and patience in the final sealing step to ensure your long-lasting red valentine manicure.
Don’t let the pressure of the holiday lead to chipped polish; apply the expert red nail art tips shared here, select your most gorgeous red nails inspiration, and remember that confidence is the ultimate accessory. Your romantic red nails are a crucial element of your overall look.
Which of these 9 essential designs are you planning to try first for Valentine’s Day 2026? Let us know in the comments below!
Last update on 2026-04-27 / Affiliate links / Images from Amazon Product Advertising API