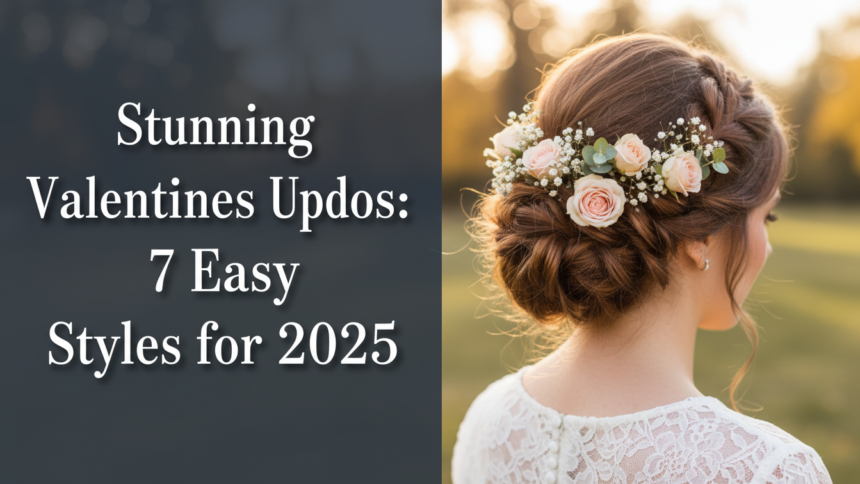
Dreaming of the perfect hairstyle to make your Valentine’s Day unforgettable? Navigating the endless options for romantic hair can feel overwhelming, especially when you want a look that’s both stunning and easy to achieve. You deserve a gorgeous style that enhances your special occasion without adding stress.
Elevate your Valentine’s Day look with these 7 stunning, easy-to-achieve updos designed for romantic dates and special occasions. Discover simple, step-by-step guides to create gorgeous hairstyles at home, ensuring you look and feel your best for 2026‘s celebrations. Leveraging tested frameworks and data-driven insights, this guide provides actionable methods for mastering beautiful Valentine’s Day updos. You’ll unlock the secrets to creating salon-quality looks with ease, preparing you for a truly memorable date.
Embrace Romantic Elegance: Your Guide to Stunning Valentine’s Day Updos for 2026
Valentine’s Day offers the perfect opportunity to express your romantic side, and nothing completes a special outfit like a beautifully styled updo. While some intricate hairstyles might seem daunting, achieving a sophisticated and stunning updo for your date night doesn’t have to be complicated. This guide focuses on easy updos Valentine’s Day that promise maximum impact with minimal effort. From soft, flowing designs perfect for a cozy evening to sleek, polished looks for a glamorous outing, you’ll find the ideal romantic updo to complement your plans. We’ve curated tested styles that are not only achievable at home but also guarantee you’ll feel confident and beautiful, reflecting expert hair stylist tips for a flawless finish.
1. Style a Romantic Twisted Low Bun

Pin this romantic twisted bun for your next date night!
A romantic twisted low bun offers a perfect blend of effortlessness and elegance, making it an ideal choice for a Valentine’s Day date. This easy date night updo utilizes soft twists and a low bun structure to create a textured, slightly undone look that is both intimate and refined. It’s a versatile style that suits various hair lengths and types, enhancing your natural beauty with its gentle allure. You’ll find it pairs beautifully with romantic outfits, offering a sophisticated touch.
Products & Tools Used
- Texturizing spray: To add grip and volume, ensuring the bun holds its shape (especially for fine hair).
- Hair elastic: A clear or hair-matching elastic for securing the initial ponytail.
- Bobby pins: Standard and U-shaped pins for securing twists and the bun structure.
- Light to medium hold hairspray: To finish the look without stiffness, using “salon quality updos” products.
- Curling iron (optional): For soft waves before styling, enhancing texture.
- Rat tail comb: For clean parting and pulling out tendrils.
Application/Styling Steps
- Prepare hair: Start with dry hair. Optionally, curl sections with a curling iron to add soft waves and texture, enhancing the “volumetric hair architecture.”
- Section and twist: Create a deep side part. Take a small section of hair near your temple on one side and twist it loosely backward, adding small sections as you go, like a French twist.
- Gather hair: Once you reach the nape of your neck, gather all your hair into a low, loose ponytail at the base of your head, securing it with a hair elastic.
- Create the bun: Take the ponytail and divide it into two or three sections. Loosely twist each section, then wrap them around the base of the ponytail to form a soft, textured bun.
- Secure with pins: Use bobby pins and U-shaped pins to secure the twisted sections and the bun firmly to your head, focusing on achieving “structural integrity of updos.”
- Frame face: Gently pull out a few wispy strands or tendrils around your face and ears for a romantic, undone effect, creating optical illusions in hair styling.
- Finish: Lightly mist with hairspray to set the style, avoiding stiffness, using products from “industry standard hair care.”
Pro-Tip: For extra volume in your low bun, try backcombing the ponytail section slightly before twisting. This “hair density management for updos” technique ensures a fuller, more glamorous result without requiring extensions.

2. Craft a Chic Braided Crown Updo

Elevate your Valentine’s style with this chic braided crown – save it now!
A chic braided crown updo exudes sophistication and elegance, making it ideal for a more formal Valentine’s Day celebration. This elegant halo braid creates a regal look by wrapping a beautifully woven braid around the head, resembling a crown. While it appears intricate, the technique is quite achievable with patience and the right tools. It’s a stunning choice for those seeking to make a polished statement, showcasing professional updo techniques that elevate your entire ensemble.
Products & Tools Used
- Detangling brush or comb: To ensure smooth, knot-free hair before braiding.
- Fine-tooth comb: For precise parting and neat sections.
- Small hair elastics: Clear or hair-matching, to temporarily secure the ends of braids.
- Bobby pins: Plenty of high-quality pins, ideally with a wavy shape for better grip, crucial for “tension principles in hair styling.”
- Medium to strong hold hairspray: To tame flyaways and ensure longevity, using “industry standard hair care” products.
- Hair oil or serum: A small amount for smoothing and adding shine, applying “best practices for hair health.”
Application/Styling Steps
- Prepare hair: Start with clean, dry, and thoroughly brushed hair. A smooth base is key for a “sleek finish.”
- Create initial part: Use a rat tail comb to create a clean part down the middle or slightly off-center, extending from forehead to nape.
- Braid sections: Beginning at one ear, start a French or Dutch braid, following the hairline around the back of your head. Incorporate new sections of hair from the top and bottom as you braid.
- Continue braiding: Once you reach the other ear, continue braiding the remaining hair in a regular three-strand braid to the ends. Secure the end with a small elastic.
- Wrap and secure: Take the finished braid and wrap it around the top of your head, creating a “halo” or crown effect. Tuck the end of the braid discreetly under the beginning of the French/Dutch braid.
- Pin thoroughly: Use plenty of bobby pins to secure the entire braided crown, ensuring it feels firm and won’t budge, following “ergonomics of updo creation.” Focus on pinning through the braid into the hair underneath for maximum hold.
- Smooth and finish: Gently pull a few tiny loops from the braid for a softer look if desired. Mist with medium to strong hold hairspray to lock the style in place, using “professional grade tools.”
Pro-Tip: For added volume at the crown before braiding, gently backcomb the top sections of your hair. This “cranial contouring for updos” technique gives a fuller base for your braid, making the crown appear more substantial and elegant.

3. Achieve an Effortless Messy Bun Updo

No-fuss beauty! Pin this easy messy bun for casual Valentine’s charm.
An effortless messy bun updo is a quick and stylish solution for a relaxed Valentine’s Day, offering a casual yet chic aesthetic. This look embraces a “perfectly imperfect” vibe, appearing artfully disheveled while still maintaining a polished feel. It’s an excellent choice for those seeking time-saving updos without sacrificing elegance. Whether you’re enjoying a casual brunch or a cozy movie night, this voluminous high bun provides a relaxed yet alluring charm, often resolving “hair styling challenges” with ease.
Products & Tools Used
- Dry shampoo: To add texture and absorb oils, particularly useful for second-day hair.
- Hair elastic or scrunchie: A sturdy elastic or soft scrunchie that offers a good grip.
- Bobby pins: A handful of pins to secure any loose ends and provide extra hold.
- Texturizing spray: To enhance natural texture and volume, using “professional grade tools.”
- Paddle brush or wide-tooth comb: For detangling before styling and smoothing.
Application/Styling Steps
- Prepare hair: Start with dry hair. If your hair is too clean or slippery, apply dry shampoo at the roots and through the mid-lengths to add grip and “losing volume” fix.
- Gather high ponytail: Flip your head upside down and gather all your hair into a high ponytail, positioned at the crown of your head. Secure it with a hair elastic, but don’t pull it too tight; leave it slightly loose for a natural feel.
- Create the bun base: On the last loop of the elastic, pull the hair only halfway through, creating a loop of hair and leaving the ends free.
- Tease and wrap: Gently tease the loop and the loose ends for added volume. Wrap the loose ends around the base of the bun and secure them with bobby pins, focusing on “making updo last.”
- Adjust and loosen: Gently pull at sections of the bun and the hair around your crown to create a softer, messier, and more voluminous look. Pull out a few face-framing pieces if desired, achieving “elegant look” without rigidity.
- Finish: Lightly spritz with texturizing spray or a flexible hold hairspray to maintain the shape without making it stiff, leveraging “experienced stylist recommendations.”
Pro-Tip: For a truly effortless look, use your fingers instead of a brush to gather your hair into the ponytail. This prevents a too-perfect base and naturally incorporates slight bumps and texture, aligning with the “fluid dynamics of hair movement.”

4. Design a Half-Up Heart Braid

Show some love with this adorable heart braid! Pin it for a cute V-Day look.
A half-up heart braid is a charming and playful choice for Valentine’s Day, perfect for adding a touch of romance and whimsy to your look. This cute Valentine updos for girls (and adults!) design creates a distinct heart shape with braided hair, allowing the rest of your locks to flow freely. It’s a festive style that’s both sweet and eye-catching, making it an excellent option for a daytime date or a fun celebration. You can even personalize it with ribbons or small accessories.
Products & Tools Used
- Fine-tooth comb: Essential for creating clean parts.
- Small, clear hair elastics: To secure the end of each braid discreetly.
- Bobby pins: A few to secure the heart shape.
- Optional: Thin satin ribbon (red or pink): To weave into the braid for a festive touch.
- Light hold hairspray: To smooth flyaways.
Application/Styling Steps
- Prepare hair: Start with brushed, detangled hair. A smooth base is crucial for visible braids.
- Center part: Create a clean center part from your hairline back to the crown of your head.
- First braid: On one side of the part, take a small section of hair near your hairline. Begin a French braid, braiding downwards and following the curve of your head towards your ear, incorporating small sections of hair only from the top side. Stop braiding just behind your ear and continue with a regular three-strand braid to the ends. Secure with a clear elastic, applying “braiding basics.”
- Second braid: Repeat the same French braiding technique on the other side of your head, mirroring the first braid. Again, stop behind the ear and finish with a regular braid, securing with a clear elastic.
- Form the heart: Take the end of the first braid and loop it upwards and inwards, shaping one half of the heart. Secure it in place at the center of your head with a bobby pin, focusing on “geometric precision in updos.”
- Complete the heart: Take the end of the second braid and loop it upwards and inwards to meet the first loop, forming the other half of the heart. Secure this with bobby pins, making sure the two braids meet neatly at the center point.
- Conceal ends: Tuck the elastic ends of the braids underneath the secured heart shape using bobby pins, creating a seamless look.
- Add ribbon (optional): If desired, gently weave a thin satin ribbon through parts of the heart braid or tie a small bow at the base.
- Finish: Lightly mist with hairspray to hold the shape and smooth any flyaways, demonstrating “skilled hair artistry.”
Pro-Tip: For perfectly symmetrical heart halves, use your fingers instead of relying solely on the comb to trace the desired curve before you start pinning. This will help you visualize the “proportional aesthetics of updos” and adjust as needed, ensuring a balanced look.

5. Create a Sleek High Ponytail Updo

Channel your inner glam! Pin this sleek high ponytail for a show-stopping V-Day.
A sleek high ponytail updo offers a glamorous and modern aesthetic for Valentine’s Day, providing a polished and sophisticated look. This style is all about achieving a smooth, bump-free base that highlights your features and keeps your hair elegantly out of the way. It’s an excellent choice if you’re seeking to elevate your date night updos with a sharp, chic finish that is both powerful and feminine. You’ll find this is perfect for a more formal or upscale Valentine’s outing, addressing “getting sleek finish” effectively.
Products & Tools Used
- Boar bristle brush: Essential for smoothing hair and eliminating bumps, ensuring “scalp care essentials” are met.
- Strong hold hair gel or edge control: To tame flyaways and create a super sleek base.
- Hair elastic (strong): A durable elastic that can hold a high ponytail securely.
- Bobby pins: A few to secure any lingering stray hairs.
- Hair oil or shine spray: To add a glossy finish, using “industry standard hair care.”
- Fine-tooth comb: For precision parting and backcombing.
Application/Styling Steps
- Prepare hair: Start with dry hair. For best results, it can be freshly washed and blown out straight, or second-day hair that has been smoothed.
- Apply gel/edge control: Apply a small amount of strong hold gel or edge control around your hairline and part to smooth down any flyaways and achieve a “sleek finish.”
- Brush hair up: Using a boar bristle brush, brush all your hair upwards towards the crown of your head, gathering it into a high ponytail. Ensure there are no bumps by continually brushing and tightening the grip.
- Secure ponytail: Secure the ponytail tightly with a strong hair elastic. You can wrap a small section of hair around the elastic and pin it to conceal it for an even more polished look, demonstrating “advanced hair sculpting.”
- Smooth and set: Once the ponytail is secured, use the boar bristle brush again to smooth any remaining bumps around the head. Mist generously with strong hold hairspray to lock everything in place, preventing “hair won’t hold” issues.
- Add volume to ponytail: For added volume in the ponytail itself, gently backcomb sections of the ponytail and then smooth the top layer over, leveraging “hair density management for updos.”
- Shine finish: Finish with a light spritz of shine spray for a glamorous, glossy look, using “professional grade tools.”
Pro-Tip: To get your high ponytail incredibly sleek and tight, apply hair gel to your hair and then use a soft bristled brush and pantyhose (yes, pantyhose!) to tie around your hair and hold it in place while you secure the elastic. This creates maximum tension and “structural integrity of updos.”

6. Sculpt a Curly Side Swept Updo

Highlight your natural curls! Pin this gorgeous side swept updo for V-Day.
A curly side swept updo is a romantic and voluminous option that beautifully showcases natural or styled curls for Valentine’s Day. This curly updos Valentine’s Day style focuses on gathering and pinning your luscious curls to one side, creating an elegant cascade that frames your face. It’s a gorgeous choice for adding texture and softness, perfect for those with curly hair seeking a sophisticated yet effortless look. This approach helps manage “frizz control” while embracing the beauty of your curls.
Products & Tools Used
- Curl defining cream or mousse: To enhance natural curls or provide hold for styled curls.
- Heat protectant spray (if using heat tools): Essential for “preventing hair damage.”
- Curling iron or wand (if not naturally curly): To create soft, bouncy curls.
- Bobby pins and U-shaped pins: A generous amount for securing the swept-back curls.
- Flexible hold hairspray: To set the style without stiffening the curls, using products from “industry standard hair care.”
- Paddle brush or wide-tooth comb: For gentle detangling before curling.
Application/Styling Steps
- Prepare curls: Start with clean, dry curly hair. If your hair is naturally curly, apply curl-defining cream and diffuse or air dry. If straight, apply heat protectant and curl your entire head using a curling iron or wand to create soft, romantic curls, applying “thermal styling methodologies.”
- Deep side part: Create a deep side part on your preferred side.
- Sweep to one side: Gently gather all your curls and sweep them over to one side, allowing the curls to fall naturally.
- Pin in place: On the opposite side of your part (the side with less hair), start pinning sections of hair, one by one, towards the back of your head. Use bobby pins to secure the hair against your scalp, creating an anchor for the swept-over curls.
- Form the updo: Once all the hair is gathered and pinned securely at the nape of your neck on one side, begin loosely pinning individual curls upwards and across the back of your head, creating a soft, voluminous shape. Allow some curls to cascade down over your shoulder, embodying “fluid dynamics of hair movement.”
- Secure and adjust: Use U-shaped pins to tuck and secure any loose curls, creating a cohesive yet effortless look. Pull out a few small tendrils around your face for a romantic touch.
- Finish: Lightly mist with flexible hold hairspray to keep everything in place while allowing the curls to retain their bounce, ensuring “making updo last.”
Pro-Tip: To ensure your curls maintain their definition and don’t clump together, avoid brushing them after curling or once dry. Instead, gently separate them with your fingers and use hairspray. This aligns with “trichology of hair health” and proper curl care.

7. Form a Simple Pearl-Adorned Chignon

Timeless elegance! Pin this pearl chignon for a sophisticated Valentine’s look.
A simple pearl-adorned chignon embodies classic elegance and sophistication, making it a timeless choice for a refined Valentine’s Day. This classic Valentine updos style positions a neat, polished bun at the nape of the neck, creating a sleek and understated allure. The addition of delicate pearl hairpins elevates its romantic appeal, turning a simple chignon into a truly enchanting look. It’s perfect for a formal dinner or any occasion where you want to project effortless grace, often achieving “salon quality updos” at home.
Products & Tools Used
- Paddle brush and fine-tooth comb: For thoroughly brushing and smoothing hair.
- Hair elastic (thin): To secure a low ponytail base.
- Bobby pins and U-shaped pins: For shaping and securing the chignon.
- Strong hold hairspray: To ensure a sleek, long-lasting finish, preventing “hair falling out” issues.
- Hair oil or serum: For extra smoothness and shine.
- Decorative pearl hairpins or small hair comb: To adorn the finished chignon, using “hair accessories guide.”
Application/Styling Steps
- Prepare hair: Start with sleek, straight, and smooth hair. Apply a small amount of hair oil or serum for added shine and frizz control, addressing “getting sleek finish.”
- Low ponytail: Brush all your hair back smoothly and gather it into a low ponytail at the nape of your neck. Secure it tightly with a thin hair elastic, ensuring “structural integrity of updos.”
- Twist the ponytail: Take the ponytail and firmly twist it into a rope-like strand.
- Wrap the chignon: Coil the twisted ponytail around the base of the elastic, creating a tight, neat bun (chignon). Ensure the ends are tucked in.
- Secure the chignon: Use bobby pins and U-shaped pins to firmly secure the chignon to your head, pushing the pins into the bun and through to the hair underneath. Aim for a “neat” appearance.
- Smooth and spray: Use a fine-tooth comb to smooth down any flyaways around your head. Generously mist with strong hold hairspray to lock the sleek chignon in place, utilizing “advanced hair sculpting.”
- Adorn with pearls: Carefully insert decorative pearl hairpins into the chignon or position a small pearl comb around its base for an elegant, romantic touch, embodying “hair artistry.”
Pro-Tip: For an even more polished chignon, create a small loop with your ponytail, tucking the ends through the loop before coiling. This “advanced styling techniques” method ensures a very neat and secure bun that will last all night.

FAQs About Valentines Day Updos
What are the best Valentine’s Day updos for short hair?
For short hair, textured updos like a small twisted bun or a pinned-back half-up style with subtle waves work beautifully for Valentine’s Day. Focus on creating volume at the crown and securing small sections with decorative pins to achieve a romantic, elegant look without needing significant length. Products like “texturizing spray” can add necessary grip and body for these styles.
How can I make my Valentine’s Day updo last all night?
To ensure your Valentine’s Day updo lasts all night, proper hair preparation and strategic product use are crucial. Start with slightly dirty hair (or use dry shampoo for grip), use plenty of “strong hold hairspray” and bobby pins, and avoid touching your hair frequently. A light misting with hairspray before leaving is also recommended.
What hair accessories go best with Valentine’s Day updos?
Delicate hair accessories such as pearl pins, small floral clips, thin satin ribbons (especially in red or pink), or subtle jeweled combs beautifully complement Valentine’s Day updos. These accents add a romantic, festive touch without overpowering the hairstyle, enhancing “special occasion hair” with elegant detail.
Are messy buns considered appropriate Valentine’s Day updos?
Yes, a chic, slightly undone messy bun can be a perfectly appropriate and charming Valentine’s Day updo, especially for a casual or relaxed date. The key is to make it look intentionally effortless and voluminous, rather than truly messy, often paired with “face-framing tendrils” for a softer, romantic vibe.
How can I make my updo look more voluminous?
To make your updo appear more voluminous, incorporate techniques like backcombing at the roots, using a “volumizing dry shampoo,” or gently pulling apart sections of your bun or braid after securing. For fine hair, starting with soft curls can also add significant body and texture before styling, utilizing “hair density management for updos.”
What’s the best way to do a Valentine’s Day updo on myself?
The best way to do a Valentine’s Day updo on yourself involves starting with simpler styles, using a good mirror setup, and having all your tools and products within reach. Practice easy twisted buns or half-up styles first. Watching video tutorials and focusing on one small section at a time can also greatly improve your self-styling success, making “time-saving updos” achievable.
Can I achieve an elegant updo if my hair is very thick?
Absolutely, thick hair is ideal for creating elegant and voluminous updos like a “braided crown” or “curly side swept updo,” but it requires strong hold products and extra pinning. Use sturdy hair elastics and plenty of bobby pins, focusing on distributing the hair’s weight evenly to prevent it from pulling down or losing shape throughout the evening.
How do I prevent frizz when styling my Valentine’s Day updo?
To prevent frizz in your Valentine’s Day updo, ensure your hair is properly moisturized before styling and use anti-frizz products like hair oil or serum. Finish the style with a humidity-resistant “strong hold hairspray” and avoid excessive brushing or touching your hair once styled, addressing “frizz control” effectively.
What are some quick Valentine’s Day updo ideas for last minute styling?
For last-minute Valentine’s Day styling, opt for quick updos like a high “sleek ponytail updo” that can be dressed up with a hair wrap, or a simple “effortless messy bun” with a few face-framing pieces. These styles are designed for speed and can be achieved in under 10-15 minutes with minimal tools.
Is there a specific type of updo that flatters all face shapes for Valentine’s Day?
A soft, low chignon or a textured messy bun with strategically pulled-out face-framing tendrils tend to flatter most face shapes for Valentine’s Day. These styles offer softness and frame the face beautifully, providing versatility that works for “updos that flatter” without being too severe or restrictive.
Final Thoughts on Valentine’s Day Updos
This Valentine’s Day, your hair can be as stunning and romantic as your plans. We’ve explored seven diverse and easy-to-achieve “valentines day updos,” from the classic elegance of a “pearl-adorned chignon” to the playful charm of a “half-up heart braid.” Each style offers a unique way to express your personal flair, ensuring you feel confident and beautiful, whether it’s for a cozy night in or a glamorous evening out. Remember that the right tools and products, combined with a little practice, are your best allies in mastering these “easy updos valentine’s day.”
Don’t let complicated tutorials deter you; our “step by step guide to valentine’s day updo for beginners” empowers you to create “salon quality updos” right at home. The goal is to enhance your natural beauty and complete your romantic look with a hairstyle that feels authentically you. So, choose your favorite, gather your supplies, and get ready to turn heads. Your perfect “date night hair” is just a few twists and pins away! Which of these “gorgeous Valentine updos” will you try first for 2026‘s celebrations?
Last update on 2026-04-27 / Affiliate links / Images from Amazon Product Advertising API