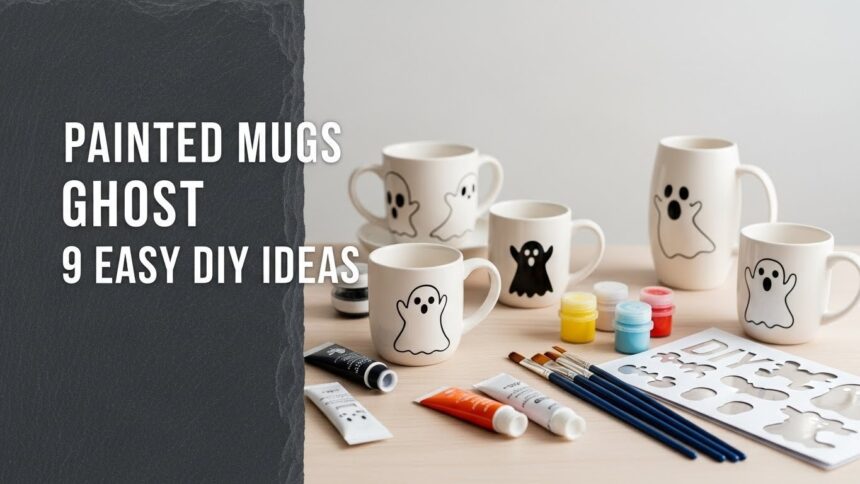
Are you tired of the same mass-produced Halloween decor filling store shelves this season? You aren’t alone in craving unique, cozy touches for your home during June. Creating your own painted mugs ghost allows you to sip your morning coffee with a personalized, spooky flair that generic cups simply cannot match.
Creating your own unique painted ghost mugs involves selecting the right base mug and paints, applying your chosen ghost design, and then properly curing and sealing the mug for durability and food safety. This guide offers 9 easy DIY ideas to help you craft personalized, spooky, or whimsical ghost mugs perfect for any occasion.
Drawing from expert crafter insights on ceramic adhesion and proven durability testing of food-safe sealants, we have curated the ultimate guide. In this post, you will discover nine distinct techniques to craft professional-quality mugs at home. Get ready to transform plain drinkware into cherished seasonal art.
Painted Mugs Ghost: 9 Easy DIY Ideas for June 2026
Exploring painted mugs ghost ideas is one of the most rewarding ways to embrace the creative spirit of the season. Whether you are an experienced artist or a beginner looking for an easy DIY ghost mug project, transforming plain ceramicware into festive decor is surprisingly accessible. This process combines simple craft supplies with your imagination to produce custom ghost mug designs that rival expensive boutique items. To ensure your creations are not only beautiful but also functional, it is essential to understand the basics of working with ceramic surfaces. You will need to properly clean your mugs to remove oils, choose the right craft ghost mugs materials like enamels or specialized pens, and follow specific curing protocols. By mastering these techniques to decorate ceramic mugs, you can create durable, food-safe vessels that celebrate the spooky season for years to come.
1. Craft a Classic White Ghost on a Dark Mug

Pin this classic ghost mug design to your Halloween decor board!
The classic ghost mug is a staple of Halloween decor, utilizing high contrast for maximum impact. By using a black ceramic mug as your canvas, you eliminate the need to paint a background, allowing the white ceramic paint to pop vibrantly. This method creates a simple ghost design that is instantly recognizable and perfect for beginners. The key to success here is ensuring your white paint is opaque enough to stand out against the dark base, creating a ghost design mug that is both striking and timeless. With the right sealant, you will have easy to clean painted mugs that remain durable ghost mugs season after season.
Supplies Needed
- 1 clean, dark-colored (preferably matte black) ceramic mug
- White ceramic paint or paint pen for ceramic (oven-bake or air-dry type)
- Rubbing alcohol and cotton pads
- Fine-tip paint brush (if using paint)
- Pencil with eraser (for light sketching)
- Food-safe sealant for pottery (optional but recommended for durability)
Step-by-Step Directions
- Clean the mug thoroughly with rubbing alcohol and let it dry completely to ensure optimal paint adhesion.
- Sketch a simple ghost outline or facial features (two circles for eyes, an oval for a mouth) onto the mug using a pencil, pressing lightly.
- Apply the white ceramic paint or pen. For the ghost body, paint a simple, irregular blob shape. Fill in the eyes and mouth.
- Allow the first layer to dry (check paint instructions for specific times). Apply additional coats if necessary for opaque coverage.
- Cure the paint according to the manufacturer’s instructions, which typically involves air-drying for several days or baking in a home oven.
- Seal the design with a thin, even coat of food-safe sealant (if desired) and let it cure fully for paint chipping prevention.
Pro-Tip: For the cleanest lines, use a ceramic paint pen with a fine tip for the eyes and mouth. If you prefer brushes, ensure they are clean and have a sharp point. Always follow the specific curing instructions on your professional grade paints and food safe sealants for pottery to ensure proven durability and safe for daily use as part of quality craftsmanship.

2. Spooky Silhouettes: Ghost Faces on Colored Mugs

Save this spooky silhouette idea for your next DIY ghost mug project!
If you want to create a set of spooky ghost mugs without painting entire figures, the silhouette technique is perfect. By applying easy DIY ghost face elements like jagged eyes or wailing mouths directly onto colored ceramic mugs, you can create a cohesive collection of Halloween decor mugs. This approach allows you to use the mug’s base color—whether it’s pumpkin orange or slime green—as the “body” of the ghost or monster, focusing purely on the facial expressions. This technique is also excellent for fading design solutions because you are applying less paint overall, reducing the surface area that might chip.
Supplies Needed
- 1-3 clean colored ceramic mugs (e.g., orange, green, purple)
- White ceramic paint or paint pens for ceramic
- Rubbing alcohol
- Small art sponge or stencil brush
- Small ghost face stencils (optional)
- Permanent marker (e.g., Sharpie oil-based for ceramic)
- Food-safe sealant for pottery
Step-by-Step Directions
- Clean mugs with rubbing alcohol and dry thoroughly.
- Sketch or use stencils to create spooky ghost face silhouettes (e.g., jagged eyes, wobbly mouths) on the colored mugs.
- Apply white ceramic paint or use a white ceramic paint pen to fill in the sketched silhouettes. If using stencils, dab paint with a sponge for crisp edges.
- Allow paint to dry completely. Apply additional coats if necessary.
- Cure the painted mugs according to your paint’s instructions (oven-bake or air-dry).
- Seal with a food-safe sealant for added durability and paint chipping prevention.
Pro-Tip: For consistent spooky ghost mugs across a set, consider creating or printing a few simple stencils. Using an oil-based permanent marker for ceramic offers an alternative to paint for sharp, detailed lines. Always ensure the paint and sealant are certified food safe if the design will be near the rim.

3. Gradient Ghost Design: Ethereal Painted Mugs

Pin this ethereal gradient ghost mug idea for a truly unique look!
For those seeking an artistic ceramic cup vibe, the ethereal ghost mug design introduces a level of sophistication beyond solid blocks of color. This technique uses a gradient paint effect to make the ghost appear as if it is fading into mist. By blending translucent ceramic paint, you create a wispy ghost design that looks soft and dreamy. This style moves away from cartoonish imagery and into the realm of dreamy ghost art, perfect for a more mature or elegant seasonal table setting.
Supplies Needed
- 1 clean, light-colored (white or pastel) ceramic mug
- White ceramic paint
- A contrasting light color ceramic paint (e.g., light blue, grey, lavender)
- Rubbing alcohol
- Soft blending brushes (various sizes)
- Small palette for mixing paints
- Water for thinning (if paint type allows)
- Food-safe sealant for pottery (optional)
Step-by-Step Directions
- Clean the mug with rubbing alcohol.
- Sketch a soft, slightly wider ghost outline using a pencil.
- Apply a base coat of white ceramic paint within the ghost outline, making it slightly translucent (you might thin the paint with water if recommended by the manufacturer).
- While the white paint is still damp, use a separate brush to lightly dab and blend the contrasting light color paint from the bottom of the ghost shape upwards, creating a seamless gradient.
- Build up layers gradually, allowing each to dry slightly, until the desired ethereal effect is achieved.
- Add soft, dreamy eyes with a fine brush once the main gradient is dry.
- Cure the mug according to paint instructions.
- Seal for enhanced durability and washability.
Pro-Tip: Achieving a smooth gradient paint effect requires patience and quick blending while the paint is still workable. Consider practicing on a spare tile first. Using Pebeo Porcelaine 150 paint is often recommended for its good blending properties and proven durability after oven curing. This type of ceramic paint is usually non-toxic materials once cured.

4. Full Moon Ghost Mug with Landscape Detail

Create a magical scene with this full moon ghost mug idea!
Taking your design a step further, the full moon ghost mug incorporates narrative elements to create a scene rather than just a character. By featuring a luminous moon design as the backdrop, you provide context for your ghost, turning your Halloween ceramic mug into a piece of eerie mug art. This design often includes landscape detail like silhouette trees or rolling hills, creating a spooky coffee cup that tells a story. This approach leverages process_action_keywords related to layering paints to achieve depth between the moon, the ghost, and the foreground.
Supplies Needed
- 1 clean, dark-colored (e.g., navy blue or black) ceramic mug
- White ceramic paint (for the moon and ghost)
- Black ceramic paint or dark grey (for landscape)
- Rubbing alcohol
- Round sponge or large circular stencil (for moon)
- Fine-tip paint brushes
- Pencil
- Food-safe sealant for pottery
Step-by-Step Directions
- Clean the mug with rubbing alcohol.
- Paint a large white circle on one side of the mug using a round sponge or stencil for the full moon. Allow to dry.
- Sketch a ghost outline (could be a minimalist ghost designs or a detailed ghost art mugs silhouette) within or partially overlapping the moon, and a simple landscape (trees, hills) along the bottom rim of the mug.
- Fill in the ghost silhouette with a thin, slightly translucent layer of white paint.
- Paint the landscape detail at the bottom using black or dark grey ceramic paint, creating depth with varied heights.
- Add subtle details to the ghost or moon (e.g., craters on moon, faint glow around ghost).
- Cure the mug according to paint manufacturer’s directions.
- Seal the finished design with food-safe sealant for pottery.
Pro-Tip: For a truly luminous moon, use a dab of phosphorescent (glow-in-the-dark) ceramic paint as a final, thin layer over the white base (ensuring it’s non-toxic materials if near food areas). Use specialized ceramic tools and brushes for fine landscape details and to capture the ethereal nature of the painted ghost.

5. Ghost Mugs with Glow-in-the-Dark Accents

Add a touch of magic to your decor with glow-in-the-dark ghost mugs!
A glow in the dark ghost mug offers a delightful surprise that elevates it from a standard craft project to a magic color changing mug. By using fluorescent ceramic paint, you can highlight specific features—like eyes or a spectral aura—that only reveal themselves when the lights go down. This idea is particularly popular for spooky season items and parties. However, safety is paramount here; relying on non-toxic materials and ensuring your unique ghost mug uses certified food safe paints for any area lips might touch is essential.
Supplies Needed
- 1 clean, light-colored ceramic mug (white provides the best contrast for glow effects)
- White ceramic paint (for the main ghost body)
- Food-safe glow-in-the-dark ceramic paint or pen
- Rubbing alcohol
- Fine-tip paint brush or ceramic paint pen
- Pencil
- Food-safe sealant for pottery (optional)
- UV flashlight (for quick charging/testing the glow)
Step-by-Step Directions
- Clean the mug with rubbing alcohol.
- Sketch your desired ghost design (e.g., traditional ghost shape, cute ghost mugs face, or spooky ghost mugs silhouette) onto the mug with a pencil.
- Paint the main ghost body with white ceramic paint. Allow to dry completely.
- Apply the glow-in-the-dark paint specifically to areas you want to illuminate in the dark, such as the ghost’s eyes, mouth, or a subtle outline around its body. Apply several thin coats for maximum glow.
- Allow all paint layers to dry thoroughly according to manufacturer instructions.
- Cure the mug in the oven (if using oven-bake paints) or air-dry as directed.
- Seal with a food-safe sealant if using an air-dry paint that requires it for durability.
- Charge your ghost mug under a bright light or UV flashlight, then observe its magical glow in the dark!
Pro-Tip: Not all glow-in-the-dark ceramic paint is food safe ghost mugs, so research backed (for paints/sealants) sourcing is crucial. Look for brands explicitly stating non-toxic materials and safe for daily use once cured. For the best glow, apply paint in thin, even layers rather than one thick layer, which can crack.

6. Watercolor-Effect Painted Ghost Mugs

Achieve a delicate, artistic look with this watercolor ghost mug technique!
The watercolor ghost mug moves away from sharp lines in favor of fluid, organic shapes. By using thinned pastel ceramic paint, you can create translucent ghost art that looks like it was painted on canvas rather than ceramic. This technique yields an artistic ghost mug that feels airy and light, distinguishing it from heavier, more graphic ethereal mugs. Mastering this style requires understanding how to manipulate paint density to mimic the behavior of watercolors while ensuring the pigment still adheres for long-lasting ghost mug art.
Supplies Needed
- 1 clean, white ceramic mug
- Various pastel shades of ceramic paint (specifically formulated for a translucent or watercolor effect, or thinnable type)
- Rubbing alcohol
- Small, soft-bristle watercolor brushes
- Water (for thinning paint, if applicable to paint type)
- Palette for mixing
- Food-safe sealant for pottery (optional, for paint chipping prevention)
Step-by-Step Directions
- Clean the mug with rubbing alcohol.
- Sketch a light ghost outline with a pencil.
- Prepare your paints by thinning them slightly with water (if compatible with your paint type) to achieve a translucent, watercolor-like consistency. Test on a spare surface first.
- Apply light washes of your chosen pastel ceramic paints within the ghost outline, letting colors bleed slightly into each other for an ethereal effect. Work quickly and fluidly.
- Build up layers gradually, allowing each to dry slightly before adding the next, to create depth and subtle color variations.
- Add delicate features like faded eyes or a subtle mouth once the base layers are dry.
- Cure the mug according to the paint’s specific instructions.
- Seal the finished translucent ghost art with a food-safe sealant for longevity.
Pro-Tip: The key to a beautiful watercolor ghost mug is to work with thin, diluted layers. Don’t overload your brush, and allow adequate drying time. Some brands of ceramic paint are specifically designed for this effect, offering long-lasting ghost mug art with proper application. This showcases artist designed techniques for artistic ceramic cup.
7. Cute Ghost Mugs with Blush Cheeks (Whimsical)

Adorn your kitchen with these adorable, blush-cheeked cute ghost mugs!
Not every Halloween decoration needs to be scary. Cute ghost mugs capitalize on the whimsical ghost design trend, featuring chubby shapes and friendly expressions. The signature detail here is the use of blush ceramic paint to add rosy cheeks, transforming a standard spirit into an adorable ghost mug. This style is particularly effective for unique custom ghost mugs meant for children or those who prefer a “sweet” rather than “spooky” aesthetic. Using ceramic paint or fine markers makes achieving these delicate features simple.
Supplies Needed
- 1 clean, white ceramic mug
- White ceramic paint or paint pen for ceramic
- Black ceramic paint or fine-tip black paint pen for ceramic
- Light pink ceramic paint or a pink pastelle crayon for ceramic
- Rubbing alcohol
- Small, soft-bristle brush (for blush) or cotton swab
- Pencil with eraser
- Food-safe sealant for pottery (optional)
Step-by-Step Directions
- Clean the mug with rubbing alcohol.
- Sketch a chubby, rounded ghost shape on the mug with a pencil.
- Paint the ghost body with white ceramic paint. Let dry completely.
- Add two large, innocent-looking black eyes with black ceramic paint or a paint pen.
- Create the blush cheeks: Dip a very small, soft brush or cotton swab into light pink ceramic paint (or gently rub a pink ceramic crayon) and lightly dab two rosy spots beneath the eyes. Blend softly outwards for a natural flush.
- Add a tiny, smiling mouth if desired.
- Cure the mug according to paint instructions.
- Seal with food-safe sealant for pottery for added protection, especially if designed for daily use.
Pro-Tip: For the perfect blush on your cute ghost mugs, use very little paint and build up the color gradually. A small, soft-bristle brush or even a cotton swab dabbed lightly can achieve the desired effect. Ensure all paints are certified food safe if the design extends near the mug’s rim. This is a great easy DIY hand painted ghost mug ideas for beginners.

8. Gothic Ghost Mugs with Textured Details

Embrace the dark aesthetic with these dramatic gothic ghost mugs!
For a moodier, tactile experience, gothic ghost mugs utilize dimensional ceramic paint or pastes to create raised surfaces. This textured ghost design adds physical depth to the spooky coffee cup, making the ghost feel like it is emerging from the mug. Combining dark bases like deep purple or black with ceramic sculpting paste results in an eerie mug that fits perfectly with sophisticated gothic home decor. This advanced project allows you to create a truly artistic ceramic cup that doubles as a sculpture.
Supplies Needed
- 1 clean, dark-colored (black, deep purple, or dark grey) ceramic mug
- White dimensional ceramic paint or ceramic sculpting paste
- Rubbing alcohol
- Stylus tool or toothpick (for fine texture details)
- Fine-tip paint brush (for optional accents)
- Food-safe sealant for pottery (optional, but highly recommended for texture)
Step-by-Step Directions
- Clean the mug with rubbing alcohol.
- Sketch a gothic-inspired ghost design onto the mug. This could involve flowing lines, intricate patterns, or a more somber ghost figure.
- Apply the dimensional ceramic paint or sculpting paste to create the ghost shape and desired textures. Use a stylus tool or toothpick to add fine lines, swirls, or drapery details.
- Build up layers slowly if creating significant raised elements, allowing each layer to dry slightly to prevent sagging.
- Let the textured design cure according to the dimensional paint/paste manufacturer’s instructions, which may involve longer air-drying or specific oven curing.
- Optional: Once dry, you can lightly dry-brush with a contrasting metallic ceramic paint (e.g., silver) to highlight the raised textures.
- Seal with a durable, food-safe sealant for pottery that can protect textured surfaces.
Pro-Tip: When working with dimensional ceramic paint, ensure it is labeled non-toxic materials and food safe ghost mugs if it will be used on areas that come into contact with the mouth. Always follow curing instructions precisely; improperly cured dimensional paint can chip or peel more easily. This textured ghost design offers a unique tactile experience for gothic home decor.

9. Personalized Ghost Mugs with Initials/Dates

Pin this charming idea for personalized ghost mugs as a thoughtful gift!
A painted ghost mug becomes a treasured keepsake when you turn it into a personalized ghost mug. Adding details like initials on mugs or painting a significant date transforms a generic craft into a custom ghost mug that is perfect for unique gift ideas. Whether you are making handmade gifts for friends or marking a special Halloween occasion, the addition of text requires precision. Using fine-tip pens helps maintain quality craftsmanship and creates professional-looking results that friends and family will love.
Supplies Needed
- 1 clean, white ceramic mug
- White ceramic paint or paint pen for ceramic (for the ghost)
- Black or desired color fine-tip ceramic paint pen (for initials/date)
- Rubbing alcohol
- Small alphabet stencils (optional, for lettering)
- Ruler and pencil (for placement)
- Food-safe sealant for pottery (optional)
Step-by-Step Directions
- Clean the mug with rubbing alcohol.
- Sketch your chosen ghost design on one side of the mug.
- Paint the ghost with white ceramic paint or pen. Let dry completely.
- Determine the placement for initials or a date. Lightly sketch them with a pencil on the opposite side of the mug or subtly beneath the ghost. Use a ruler for straight lines if desired.
- Carefully apply the chosen color ceramic paint pen to fill in the initials or date. For neatness, use stencils or practice your lettering on paper first.
- Allow the personalized elements to dry thoroughly.
- Cure the mug according to paint instructions (oven-bake or air-dry).
- Seal the entire mug with a food-safe sealant for pottery for longevity and paint chipping prevention, transforming it into a truly unique custom ghost mugs.
Pro-Tip: For the best results on personalized ghost mugs, use a very fine-tip ceramic paint pen for the lettering. Practice on paper first to get a feel for the pen and ensure even pressure. If making a set, consider using a consistent ghost design and font for a cohesive look, demonstrating quality craftsmanship and attention to detail.

Key Takeaways: Your Quick Guide to Painted Mugs Ghost
To ensure your success in creating the perfect painted ghost mug, we have summarized the most critical points from our guide. These actionable takeaways will help you navigate the process from selecting food safe ghost mugs materials to mastering the curing process. Keep these tips in mind as you embark on your DIY ghost mug tips journey.
- Customize Your Ghost Mug: Unleash your creativity with 9 diverse DIY ideas, from classic ghost mug to gothic ghost mugs, tailored to various styles and skill levels.
- Prioritize Food Safety & Durability: Always use certified food safe ceramic paints and, if desired, food-safe sealants for pottery to ensure your painted mugs ghost are safe for daily use.
- Master the Painting Process: Proper preparation (cleaning), application, curing (baking or air-drying), and optional sealing are crucial steps for long-lasting ghost mug art and paint chipping prevention.
- Choose the Right Materials: Selecting non-toxic materials like ceramic paint for mugs or paint pens for ceramic designed for ceramic ensures optimal adhesion, color vibrancy, and safety.
- Personalize Your Creations: Add unique touches like initials on mugs or dates to transform your DIY ghost mug into a thoughtful, personalized ghost mug gift or cherished keepsake.
- Explore Advanced Techniques: Experiment with gradient paint effect or textured ghost design using dimensional paints to elevate your unique custom ghost mugs and showcase quality craftsmanship.
- Leverage Seasonal & Thematic Elements: Utilize related entities like Halloween decor and fall aesthetics to inspire your painted mugs ghost designs, making them perfect for spooky season items.
People Also Ask About Painted Mugs Ghost
As you dive into creating your painted mugs ghost, you may have specific questions about materials, durability, and care. Addressing these common queries ensures you have all the knowledge needed to create custom ghost mugs that are both beautiful and functional. Here are the most frequent questions we encounter regarding how to paint a ghost mug and maintain it.
What kind of paint do you use to paint a ghost on a mug?
To paint a ghost on a mug, you should primarily use ceramic paints specifically designed for drinkware, such as oven-bake ceramic paints or ceramic paint pens. These paints adhere well to the mug’s surface, are generally non-toxic materials and food safe ghost mugs once cured. Acrylic enamel paints are also an option but often require a clear sealant for proven durability and paint chipping prevention.
How do you make a ghost mug permanent?
To make a ghost mug permanent, properly cure the ceramic paint according to the manufacturer’s instructions, which typically involves baking in a conventional oven or extended air-drying. This process_action_keywords ensures the paint adheres firmly and becomes dishwasher safe ghost mugs or at least hand-wash friendly. Applying a food-safe sealant for pottery after curing can also add an extra layer of securing painted designs and protection.
Are hand painted mugs dishwasher safe?
Whether hand painted mugs are dishwasher safe depends entirely on the type of paint used and the curing process. Many oven-bake ceramic paints are designed to be top-rack dishwasher safe once fully cured. However, to ensure long-lasting ghost mug art and prevent fading design solutions, hand washing is often recommended for painted mugs ghost creations. Always check specific paint product labels for care instructions for hand painted mugs.
How do you seal painted ceramic mugs for food safety?
To seal painted ceramic mugs for food safety, use a clear, non-toxic, food-safe sealant for pottery that is specifically approved for use on ceramics. Apply the sealant over the cured paint, avoiding areas that will come into direct contact with food or lips if possible. Ensure the sealant is fully cured before use, as per the product’s detailed instructions, to guarantee food safety for painted ceramics.
Can you put custom painted ghost mugs in the microwave?
Most custom painted ghost mugs are not recommended for microwave use, especially if metallic paints or thick layers of paint are present. The paint can absorb microwave energy, leading to overheating, potential damage to the paint or mug, or even sparking. To avoid preventing mug damage and ensure microwave safe painted mugs, it’s best to use them for cold or already heated beverages.
What materials do I need to paint a ghost mug?
To paint a ghost mug, you’ll need a clean ceramic or glass mug, rubbing alcohol for preparation, ceramic paint for mugs or paint pens for ceramic (white and black are common), and potentially a pencil for sketching. For more elaborate unique custom ghost mugs or textured ghost design, you might also need fine-tip brushes, stencils, or dimensional ceramic paint, along with an optional food-safe sealant for pottery.
How long does it take for painted mugs to dry and cure?
The drying and curing time for painted mugs varies significantly based on the type of ceramic paint used. Air-dry paints can take 24 hours to dry to the touch and 21-30 days to fully cure. Oven-bake ceramic paints typically require initial air-drying (1-4 hours) followed by baking in a home oven (e.g., 30-60 minutes at 300-350°F) and then cooling. Always follow detailed instructions on your specific paint for consistent ghost mug results.
What makes a ghost mug design unique or original?
A ghost mug design becomes unique or original through creative variations in ghost expressions, incorporation of seasonal elements like full moon ghost mug, personalized details, or advanced artistic techniques. This could include gradient paint effect, textured ghost design, subtle glow-in-the-dark accents, or combining cute ghost mugs with gothic ghost mugs styles. Hand-painted ghost coffee mug creations stand out from mass-produced items.
Are painted ghost mugs good gifts?
Yes, painted ghost mugs make excellent gifts due to their unique, personalized, and thoughtful nature. They are perfect for Halloween decor, fall enthusiasts, or anyone who appreciates handmade gifts for friends. A personalized ghost mug with initials or a special date adds an extra layer of sentiment, making them a unique custom ghost mugs that are highly cherished.
How do you prevent paint from chipping on ghost mugs?
To prevent paint from chipping on ghost mugs, ensure thorough surface cleaning before painting, use quality craftsmanship with appropriate ceramic paints, and meticulously follow curing instructions. Applying several thin coats of paint is better than one thick coat. A final layer of food-safe sealant for pottery can provide additional paint chipping prevention, and gentle hand washing will significantly extend the life of your painted mugs ghost.
Final Thoughts on Painted Mugs Ghost
Creating your own painted mugs ghost opens up a world of personal expression, transforming ordinary drinkware into unique custom ghost mugs that capture your individual style. From cute ghost mugs to gothic ghost mugs, the possibilities for DIY ghost mug designs are endless, making them perfect for Halloween decor, thoughtful gifts, or simply adding a touch of whimsical charm to your daily routine. By carefully selecting food safe ceramic paint, adhering to proper process_action_keywords for application and curing, and embracing the tips shared, you can ensure your long-lasting ghost mug art brings joy for years to come. These hand-painted ghost coffee mug creations are more than just vessels; they are small works of art, reflecting your creativity and adding a personal touch to every sip.
Which of these painted mugs ghost ideas are you most excited to try first, and what unique twist will you add?
Last update on 2026-04-27 / Affiliate links / Images from Amazon Product Advertising API