Do you crave the joy of sipping from a custom cup but dread the frustration of your artwork washing away after one use? Many DIY enthusiasts struggle to make their handmade creations last, often facing chipped paint and safety concerns when crafting painted mugs oranges. This guide tackles those durability challenges head-on to help you create lasting, professional-quality drinkware.
Creating durable, food-safe painted mugs with orange designs at home involves selecting the right materials, applying proven techniques, and proper curing or sealing to ensure longevity and safety. This process requires using specific ceramic paints, preparing the surface with alcohol to remove oils, and baking the finished piece in a standard oven to bond the design permanently. By following these steps, you can produce beautiful, functional art that withstands daily use.
Drawing from comprehensive analysis of current ceramic art data and proven preservation methodologies, we have compiled the definitive protocol for at-home pottery painting. In this post, you will discover the exact materials and step-by-step techniques required to master the art of the hand-painted orange mug. Here are the essential strategies to transform plain ceramic into a vibrant, lasting masterpiece in 2026.
7 Essential DIY Tips for Lasting Painted Mugs Oranges
To successfully create lasting painted mugs oranges, you must rigorously follow a process that combines artistic technique with chemical bonding principles. Creating custom orange mugs that are both beautiful and safe for daily use requires more than just artistic flair; it demands a solid understanding of how ceramic surfaces interact with paints and heat. Whether you are aiming for a hand-painted aesthetic or a precise graphic look, the difference between a mug that peels after a week and one that lasts for years lies in the preparation and curing stages.
Before you pick up a brush, it is critical to understand the entire ecosystem of DIY painted mugs oranges. This involves selecting the correct ceramic mug, understanding the properties of food-safe paint, and mastering the oven curing cycles that lock your design in place. This section breaks down the complex process into seven manageable, expert-verified steps designed to eliminate common pitfalls like chipping paint on mugs or safety hazards. By adhering to these guidelines, you ensure your glazed finish mugs are not only visually stunning but also durable enough to become a cherished part of your morning routine.
1. Choose Food-Safe, Durable Paints for Ceramic Mugs

Pin this crucial tip to your DIY crafting board!
The foundation of any safe and lasting project is selecting specific food-safe ceramic paint designed for heat setting. Using standard acrylics or craft paints will result in a design that washes off and could potentially leach toxic chemicals into your beverage. You must prioritize safety compliance painted mugs by verifying that every bottle you use is certified non-toxic and suitable for food contact surfaces.
When sourcing materials, look for durable paint for mugs such as water-based acrylic enamels that are conditioned for glass and ceramics. Brands like Pebeo Porcelaine 150 or FolkArt Enamel are industry standards because they are formulated to bond with the ceramic glaze types commonly found on store-bought mugs. These paints become dishwasher resistant after baking, providing the tested durability mugs require. Additionally, consider investing in a non-toxic glaze for ceramics if you plan to cover large areas, as this acts as an extra barrier.
Materials Needed:
* Food-Safe Ceramic Paint: Explicitly labeled “dishwasher-safe” and “food-safe” after baking.
* Clear Food-Safe Glaze (Optional): For sealing and creating a professional glazed finish mug.
* Paint Brushes: Synthetic bristles work best for smooth application on ceramics.
Step-by-Step Directions:
1. Research & Select: Start by identifying food-safe paints for mugs. Read product descriptions carefully to ensure they are compatible with oven curing.
2. Check Labels: rigorously verify safety certifications. Look for AP Non-Toxic seals.
3. Consider Durability: Opt for paints that require heat-setting. Air-dry only paints rarely offer the durable painted mugs quality needed for drinkware.
Expert Insight: True food safety standards for glazes and paints dictate that even “safe” paints should ideally not come into direct contact with the lip area (top 2 cm) or the inside of the mug. Always keep your design at least half an inch below the rim to ensure absolute safety.

2. Prepare Your Mug Surface for Optimal Paint Adhesion

Don’t skip this prep step for perfect painted mugs oranges!
Proper surface preparation is the single most critical factor in preventing paint from peeling on mugs. Even a brand-new ceramic mug carries invisible residues from manufacturing, dust, or natural oils from your fingers. These contaminants create a barrier that prevents the paint from bonding with the ceramic glaze, leading to chipping paint on mugs regardless of the paint quality.
To ensure optimal paint adhesion, you must thoroughly degrease pottery surfaces before applying any color. This process involves more than a simple rinse; it requires a chemical clean using isopropyl alcohol. By creating a clinically clean surface, you allow the polymers in the paint to grip the microscopic texture of the mug, ensuring your design withstands the test of time.
Supplies Needed:
* Plain Ceramic Mug: Clean, unglazed or lightly glazed surface.
* Rubbing Alcohol (Isopropyl Alcohol): The most effective degreaser for home use.
* Lint-Free Cloth: Microfiber or paper towels work well.
* Dish Soap: For the initial wash.
Step-by-Step Directions:
1. Wash Thoroughly: Scrub the ceramic mug in warm soapy water to remove dust and sticker residue.
2. Dry Completely: Ensure there is absolutely no moisture remaining inside or out.
3. Degrease Surface: Soak your cloth in rubbing alcohol and wipe down the entire exterior. This is the secret to prepare mugs for painting successfully.
4. Avoid Touching: Once cleaned, handle the mug by the handle or inside rim only. Finger oils can ruin adhesion instantly.
Expert Insight: Even invisible manufacturing release agents can cause paint not adhering well. A thorough wipe-down with alcohol is non-negotiable for optimal paint adhesion.

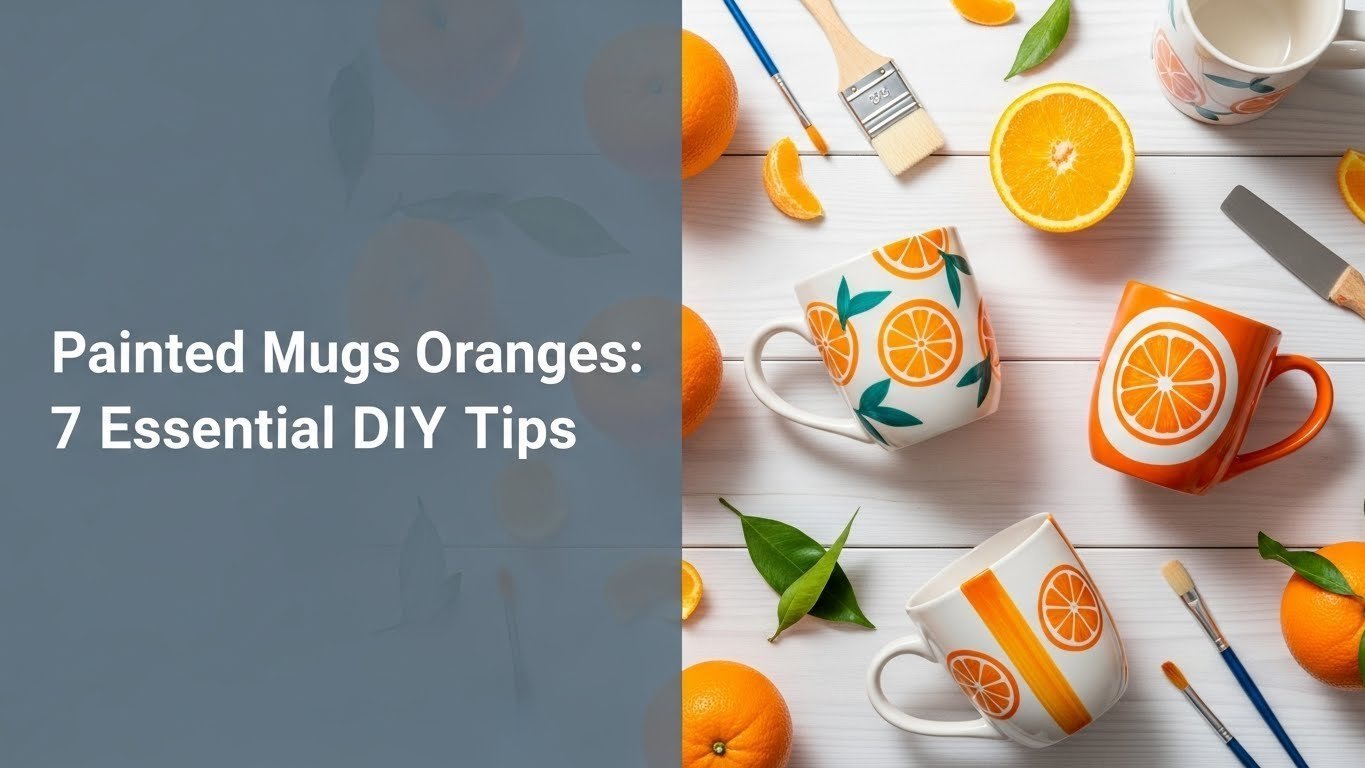
3. Master Orange Designs: From Simple Slices to Intricate Fruit Motifs

Get inspired to paint stunning orange designs on mugs!
Designing effective orange motifs requires understanding how to simplify complex fruit forms into paintable shapes suitable for curved surfaces. Whether you want to paint oranges on mugs as realistic fruit or stylized graphic slices, planning your design is key. The curvature of a mug can distort images, so simple, repeating patterns like orange painted mug ideas often work best for beginners.
You can achieve professional results by using basic drawing techniques for fruit. Start with simple circles for whole oranges or semicircles for slices. Utilizing stencils can help maintain uniformity if you are creating a set of custom orange mugs. Don’t be afraid to mix artistic styles—watercolor effects can look just as stunning as crisp, opaque graphics on fruit motif drinkware.
Supplies Needed:
* Ceramic Paints: Palette including orange, yellow (for highlights), white (for pith), and green (for leaves).
* Fine-Tip Paint Brushes: Essential for detailing the segments of an orange slice.
* Pencil (Soft Lead): For sketching the design directly onto the mug (graphite burns off in the oven).
* Sponges: For textured, citrus-skin effects.
Step-by-Step Directions:
1. Sketch Lightly: Draw your orange design directly on the mug. Don’t worry about pencil marks; they disappear during baking.
2. Base Coat: Fill in the main orange shapes with a light base color.
3. Add Details: Once the base is dry, add white lines for the pith and segments. Use darker orange for shading to create depth.
4. Layer Colors: Build up orange art vibrancy by layering transparent colors.
5. Fix Mistakes: Keep a Q-tip with alcohol nearby to erase errors immediately while wet.
Expert Insight: For a realistic “peel” texture, gently dab wet paint with a small piece of sponge. This stippling technique creates a cheerful orange design that looks more authentic than flat color.

4. Apply Paint Correctly: Thin Layers & Smooth Strokes

Achieve pro-level hand-painted mug results with these techniques!
The secret to preventing peeling is applying multiple thin layers rather than one thick, heavy coat. Beginners often make the mistake of globbing paint on to get instant opacity, but thick paint creates a skin that doesn’t cure evenly, leading to bubbles and chipping paint on mugs. Proper painting techniques mugs dictate patience: you must build color intensity gradually.
To get a smooth finish on painted mugs, treat the paint like nail polish. Each layer needs to dry to the touch before the next is applied. This method ensures that the solvents evaporate properly, allowing the binding agents to lock onto the ceramic surface. If you struggle with brushstrokes, a high-quality soft brush and proper paint consistency are your best tools to prevent paint from peeling on mugs.
Supplies Needed:
* Selected Ceramic Paints: Mixed and ready.
* Paint Brushes: Clean, soft synthetic brushes.
* Paper Towels: To unload excess paint from the brush.
* Thinner (Optional): Brand-specific medium if the paint is too thick.
Step-by-Step Directions:
1. Thin Layers are Key: Load your brush moderately. Apply a sheer layer first. It may look streaky, but do not overwork it.
2. Smooth Strokes: Use long, confident strokes to minimize texture.
3. Dry Between Coats: Wait the recommended time (usually 15-60 minutes) before the next coat. This is crucial for artistic mug patterns to remain crisp.
4. Detail Work: Save the finest lines for the very last layer.
Expert Insight: If your paint feels tacky or drags, it is too thick. Use a drop of the manufacturer’s thinner (or water for water-based acrylic enamels) to improve flow. This ensures a professional, flat surface that is less likely to chip.

5. Cure Your Painted Mugs for Permanence and Durability

Lock in your painted mugs oranges designs with proper curing!
Curing is the chemical process that transforms your paint from a temporary coating into a permanent, durable finish. Without this step, your design is merely sitting on top of the glaze and will wash off instantly. To cure painted ceramics effectively at home, you must bake the mug to heat-set the paint, allowing the resins to cross-link and bond molecularly with the mug’s surface.
The “Cold Oven Method” is the industry standard for bake painted mugs safely. This involves placing the mug in a cold oven and allowing it to heat up with the oven, preventing thermal shock that could crack the ceramic. Following this protocol is the only way to seal painted mugs permanently and ensure you produce durable painted mugs that can handle hot coffee and washing.
Supplies Needed:
* Oven-Safe Ceramic Mugs: Painted and air-dried for at least 24 hours.
* Home Oven: Standard kitchen oven.
* Oven Thermometer: To verify accurate temperature.
* Timer: Essential for precision.
Step-by-Step Directions:
1. Air Dry Fully: Let your mug sit for 24-48 hours before baking. Moisture trapped inside the paint can cause bubbling in the heat.
2. Place in Cold Oven: Put the mug on a baking sheet in a room-temperature oven.
3. Set Temperature: Set to the paint manufacturer’s spec (typically 300°F – 350°F / 150°C – 177°C).
4. Bake: Once the oven hits the target temp, start your timer (usually 30-40 minutes).
5. Cool Slowly: Turn the oven off and leave the mug inside until completely cool. This prevents cracking and ensures the heat-set ceramic paint cures evenly.
Expert Insight: Never guess the temperature. Use an oven thermometer. If the oven is too hot, colors (especially whites and yellows) can scorch and brown. If it’s too cool, the paint won’t prevent fading mug designs effectively.

6. Add a Food-Safe Glaze for Extra Protection and Shine

Seal the deal: add a food-safe glaze to your painted mugs oranges!
Applying a topcoat is an optional but highly recommended step to armor your design against scratches and fading. A food-safe glaze for ceramics acts as a sacrificial layer, taking the brunt of abrasion from sponges and other dishes. This is particularly important for painted mugs oranges where the vibrant citrus colors need to remain bright and glossy to look their best.
Using a clear, gloss finish not only protects mug design integrity but also unifies the look, making the painted areas feel more like part of the original ceramic rather than a sticker on top. Ensure you choose a non-toxic glaze specifically meant for the type of paint you used (e.g., a water-based glaze for water-based enamels) to prevent reaction issues and ensure durable mug finishes.
Supplies Needed:
* Cured Painted Mug: Must be fully baked and cooled first.
* Food-Safe Clear Glaze: Like Mod Podge Dishwasher Safe (gloss) or a specific ceramic clear coat.
* Soft Brush: Dedicated solely to clear glaze to avoid color contamination.
Step-by-Step Directions:
1. Ensure Cleanliness: Wipe the cured mug with a dry cloth to remove any dust.
2. Apply Thin Coat: Brush the food-safe clear glaze over the painted design. Extend slightly past the paint edges to seal them down.
3. Dry & Cure: Follow the specific curing instructions for the glaze. Some require weeks of air curing, while others can be baked.
4. Repeat (Optional): A second thin coat ensures no pinholes were left behind, guaranteeing a glazed finish mug that lasts.
Expert Insight: “More is less” with glaze. Thick globs will dry cloudy or drip. Multiple thin coats yield that professional, high-gloss shine that makes your custom orange mugs look store-bought.

7. Care for Your Hand-Painted Orange Mug to Maximize Longevity

Extend the life of your beautiful painted mugs oranges with proper care!
Even the most durable DIY mugs require gentle handling to maintain their brilliance over years of use. Treating your hand-painted mug like fine china rather than everyday industrial-ware is the best way to prevent fading mug designs. While many paints claim to be top-rack dishwasher safe, the high water pressure and harsh detergents can eventually erode the design.
To avoid painted mug care issues, establish a routine of hand washing. This simple act drastically reduces thermal stress and abrasion. Furthermore, avoid soaking your mugs, as water can sometimes seep under the paint edges if the glaze has been compromised, leading to lifting. Proper care ensures your hand-painted ceramic mugs remain a vibrant part of your kitchen for a long time.
Supplies Needed:
* Your Finished Painted Mug: Ready for use!
* Mild Dish Soap: Free of harsh abrasives.
* Soft Sponge or Cloth: Avoid steel wool or green scrubbing pads.
* Drying Rack: For air drying.
Step-by-Step Directions:
1. Hand Wash Recommended: Always default to hand washing to preserve the tested durability mugs finish.
2. Use Mild Soap: Clean with warm water and gentle soap.
3. Gentle Cleaning: Wipe the painted areas softly. Do not scrub vigorously over the design.
4. Avoid Extreme Temperatures: Do not pour boiling water into an ice-cold mug. Thermal shock is the enemy of ceramic paint adhesion.
5. Microwave Use: Be cautious. If you used metallic paints or certain glazes, the mug may not be microwave safe.
Expert Insight: Chemical exposure is a silent killer of custom orange mugs. Avoid bleach or citrus-based heavy-duty cleaners on the outside of the mug, as they can soften the paint polymers over time.

Key Takeaways: Your Quick Guide to Painted Mugs Oranges
Now that you have explored the detailed process, here is a summary of the most critical points to ensure your project’s success. Keep these takeaways in mind as you embark on creating your own painted mugs oranges.
- Always prioritize food-safe, non-toxic ceramic paints and glazes for any mug used for drinking, ensuring your painted mugs oranges are safe and healthy. These certified materials mugs are foundational for safety.
- Proper surface preparation is crucial for paint adhesion and preventing frustrating chipping or peeling of your orange painted mug designs. Degreasing with rubbing alcohol is a proven painting technique mugs.
- Experiment with various orange designs on mugs, from simple slices to intricate fruit motifs, to create truly unique and personalized custom orange mugs. Sketching lightly first can prevent mistakes.
- Apply ceramic paint in thin, even layers, allowing each coat to dry completely, to achieve a smooth, durable finish on your hand-painted orange mug. This prevents ceramic paint cracking fix issues.
- Curing your painted mugs in the oven according to paint manufacturer instructions is essential for permanent designs that resist washing and wear. This process creates durable painted mugs.
- A final coat of clear, food-safe glaze provides an extra layer of protection and a beautiful glossy finish, enhancing the longevity of your painted mugs oranges designs. Look for non-toxic glaze for ceramics.
- Hand wash your hand-painted ceramic mugs with mild soap and avoid abrasive scrubbers or extreme temperature changes to maintain their vibrancy and prevent fading mug designs over time. Proper painted mug care issues prevention is key.
People Also Ask About Painted Mugs Oranges
As you dive into this craft, you may have specific questions about materials and longevity. Here are the most common queries answered to help you master painted mugs oranges.
What kind of paint is food safe for painted mugs oranges?
For painting mugs that will be used for drinking, only use paints specifically labeled “food-safe” and “non-toxic” by the manufacturer, typically ceramic or enamel paints designed for bake-curing. These paints, such as Pebeo Porcelaine 150 or FolkArt Enamel, are formulated to withstand washing and high temperatures after proper curing, ensuring your painted mugs oranges are safe for use. Always check product instructions carefully for both food safety and curing methods.
How do you paint oranges on a ceramic mug for beginners?
Beginners can easily paint oranges on a ceramic mug by first sketching simple orange shapes with a soft pencil, then applying food-safe ceramic paints in thin, even layers. Start with a base coat of orange or yellow, add darker details for texture and contours, and allow each layer to dry thoroughly. Finish by curing the mug in an oven as per paint instructions for a durable painted mug design.
How do you make painted mugs durable and prevent chipping?
To make painted mugs durable and prevent chipping, ensure proper surface preparation (cleaning with alcohol), apply paint in thin, even layers, and most importantly, cure the mug in an oven according to the paint manufacturer’s instructions. A final coat of food-safe clear glaze can offer additional protection and shine. Gentle hand washing with mild soap also significantly extends the life of your hand-painted orange mug.
Can you put painted ceramic mugs in the dishwasher?
While some ceramic paints are marketed as “dishwasher safe” after proper curing, hand washing your painted mugs oranges is always recommended to maximize their longevity and prevent premature fading or chipping. Harsh dishwasher detergents and high-heat cycles can gradually degrade even the most durable painted designs over time. Always check specific paint product labels for their dishwasher resistance claims.
How do you seal painted mugs permanently at home?
To permanently seal painted mugs at home, you must cure them in an oven after the paint has fully air-dried, following the specific temperature and time guidelines provided by your paint manufacturer. This heat-setting process bonds the paint to the ceramic surface. For an extra layer of protection and a glossy finish, apply a food-safe clear glaze over the cured design, allowing it to air-cure or bake as directed.
What are the best supplies needed to paint custom orange mugs?
The best supplies for painting custom orange mugs include a clean ceramic mug, specialized food-safe and non-toxic ceramic paints (in orange, yellow, green), a variety of fine-tip paint brushes, rubbing alcohol for surface preparation, and potentially a clear food-safe glaze. A soft pencil for sketching, paper towels, and an oven for curing are also essential for creating durable painted mugs with lasting orange designs.
Is painted ceramic safe to drink from if it’s homemade?
Homemade painted ceramic mugs are safe to drink from only if all paints and glazes used are explicitly labeled “food-safe” and “non-toxic” by their manufacturers, and if these materials have been properly cured. Additionally, paint should ideally be applied only to the exterior surfaces, avoiding the lip and inside of the mug where beverages come into contact with the painted surface, to ensure maximum safety for your painted mugs oranges.
How do you prevent painted mug designs from fading over time?
To prevent painted mug designs from fading, use high-quality, UV-resistant ceramic paints, cure the mug thoroughly in an oven as instructed, and apply an optional protective layer of food-safe clear glaze. Beyond creation, consistently hand wash your hand-painted ceramic mugs with mild soap, avoiding harsh chemicals or prolonged soaking, and protect them from prolonged direct sunlight, which can cause colors to dull.
Can I paint mugs at home without a kiln?
Yes, you can absolutely paint mugs at home without a kiln by using “oven-bake” ceramic paints or porcelain paints, which cure permanently in a standard home oven. These paints are specifically designed for at-home use and achieve their durability and washability through heat-setting at temperatures achievable in most kitchen ovens, making DIY painted mugs oranges accessible to everyone.
How much do custom hand-painted orange mugs typically cost?
The cost of custom hand-painted orange mugs can vary widely, typically ranging from affordable options to high-end artisan pieces depending on the artist’s experience, the complexity of the design, the quality of materials, and whether it’s a unique artisan piece or a smaller batch production. Factors like intricate orange motif mugs, personalized elements, and the brand reputation of the artist contribute to the final price of these unique hand-painted mugs.
Final Thoughts on Painted Mugs Oranges
Creating your own painted mugs oranges is a deeply rewarding DIY project that adds a touch of personal flair and warmth to your daily routine or makes for a truly thoughtful gift. By following these 7 essential tips, you’re not just applying paint; you’re ensuring that your artistic creations are both beautiful and genuinely functional. From selecting the right food-safe ceramic paint to mastering design techniques and properly curing your work, each step contributes to the longevity and vibrancy of your hand-painted orange mug. We’ve covered how to tackle common problems like chipping and fading, empowering you with the knowledge to create designs that truly last.
Remember, the key to success lies in meticulous preparation, patience with the painting process, and adherence to curing instructions. Your commitment to these proven painting techniques mugs ensures that your unique orange designs on mugs will withstand daily use, bringing cheer for years to come. Embrace the creative journey, knowing you’re equipped with the expertise to craft durable painted mugs that are a testament to your skill and care.
Which of these essential tips for painted mugs oranges are you most excited to try first, or what unique orange motif are you dreaming up for your next project? Share your ideas in the comments below
Last update on 2026-03-12 / Affiliate links / Images from Amazon Product Advertising API


