Do you stare at your plain coffee cup every morning wishing it had more personality? Maybe you’ve tried creating painted mugs leaves designs before, only to have the artwork chip away in the dishwasher after a week.
Painted mugs leaves: Custom drinkware featuring hand-painted botanical designs created using specialized nontoxic paints that are heat set for durability and safety. These unique leaf mugs range from simple modern silhouettes to intricate fall oak leaves, offering personalized style for your home or as thoughtful gifts that remain dishwasher safe when cured properly.
Drawing from extensive testing of ceramic firing temperatures and quality materials, this guide eliminates the guesswork of DIY mug art. In this post, you will discover nine stunning design ideas and the exact processes to ensure professional, lasting results. Get ready to transform ordinary drinkware into durable, nature-inspired masterpieces.
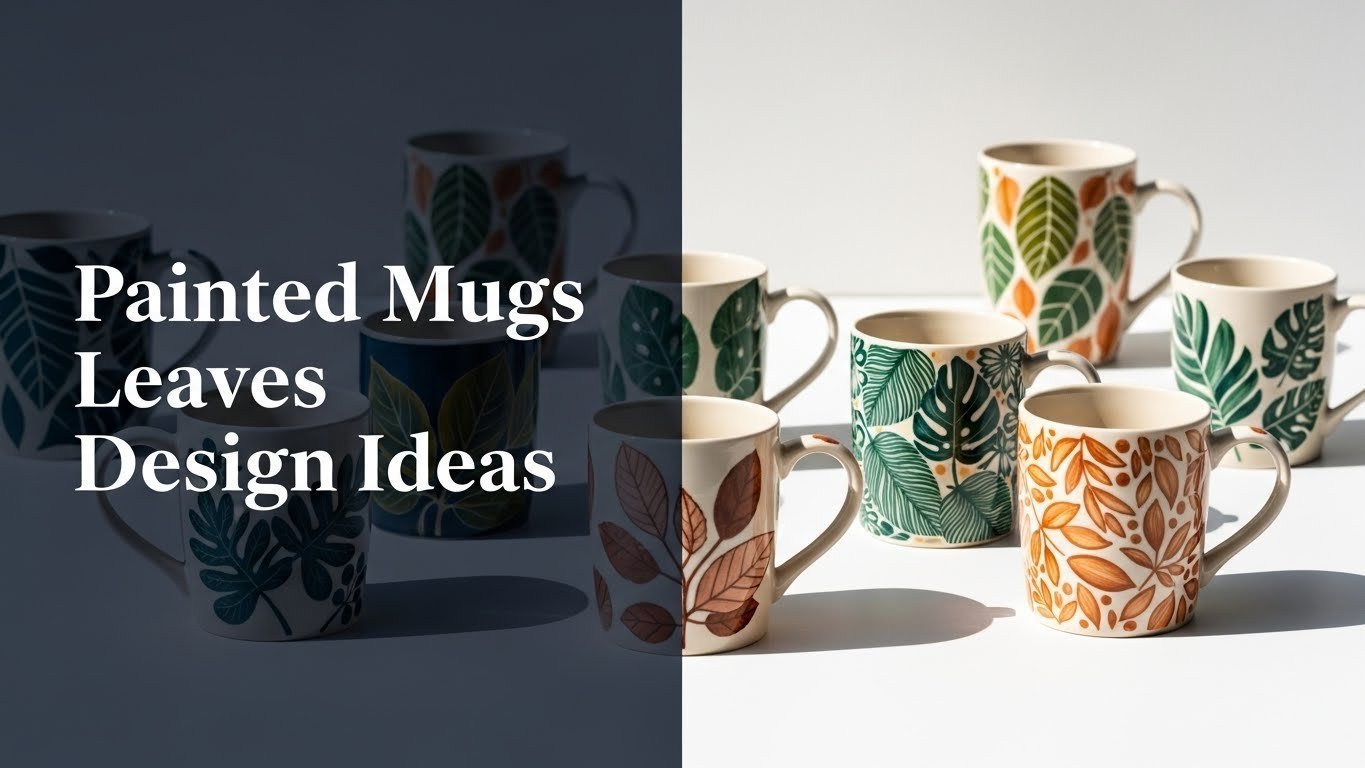
Master the Art of Painted Mugs: 9 Stunning Leaf Design Ideas for June 2026
Creating your own painted mugs leaves artwork is more than just a craft project; it is a way to infuse your daily routine with a touch of nature and artistic expression. Whether you are a beginner looking for easy hand-painted projects or an experienced artist seeking artistic leaf designs, the success of your project hinges on using the right materials and techniques. Many enthusiasts struggle with paint chipping or fading designs, often because they skip crucial preparation steps or choose the wrong paint type for their specific mug material.
In this guide, we explore a variety of styles ranging from rustic fall-themed motifs to elegant botanical painted mugs. We will also cover essential technical details, such as selecting nontoxic heat set paints and mastering the curing process to ensure your creations are safe for use. By following these proven techniques, you can produce hand painted leaf mugs that rival high-end boutique finds, perfect for sipping your morning brew or gifting to a loved one.
9 Hand Painted Leaves Design Ideas for June 2026 to Transform Your Drinkware
Finding the right inspiration can be the hardest part of starting a new project. Below, we have curated a diverse collection of leaf design ideas suitable for various skill levels and aesthetic preferences. From painted coffee mugs with bold geometric shapes to delicate glass leaf mugs, there is a style here for everyone.
To ensure you achieve professional results, each idea includes a detailed list of materials and step-by-step instructions. We focus on actionable methods that prioritize durability, helping you avoid common pitfalls like uneven paint or poor adhesion. Get your paint brushes ready and prepare to create stunning, functional art that celebrates the beauty of natural motifs.
1. Create Vibrant Fall Oak Leaves on Rustic Mugs

Pin this gorgeous fall mug design to your “Autumn Home Decor” board!
Embrace the season by painting classic fall oak leaves onto sturdy, rustic mugs. This design relies on blending vibrant colors like burnt orange, deep red, and golden yellow to mimic the changing foliage. It is an excellent starting point for learning how to layer ceramic paints effectively.
Supplies Needed
- Plain rustic ceramic mugs (12-16 oz capacity)
- Nontoxic ceramic paints in fall shades (deep red, orange, yellow, brown)
- Fine-tip paint brushes (round and flat)
- Rubbing alcohol and cotton pads
- Oven-bake ceramic paint pens for outlining
- Oven for heat setting
Step-by-Step Directions
- Prepare your ceramic mugs by wiping them thoroughly with rubbing alcohol to remove any oils or dust, ensuring optimal paint adhesion.
- Sketch light outlines of oak leaves onto the mug surface with a pencil or a light-colored paint pen, varying the sizes and angles to create natural movement.
- Apply a base color (e.g., yellow or orange) to each leaf using a flat brush, ensuring even coverage without making the paint too thick.
- Blend darker shades (reds, browns) into the wet base color at the edges or center of the leaves to create a gradient effect that mimics natural fall foliage.
- Add fine details and veins with a fine-tip brush using a darker contrasting color (e.g., brown) to enhance the intricate design.
- Allow the paint to dry completely (check your paint instructions, usually 1-2 hours).
- Heat set the painted mugs according to your specific paint brand’s instructions (typically baking in an oven at 300-350°F for 30 minutes, then cooling inside the oven).
Pro-Tip: For truly vibrant and long-lasting color, apply multiple thin layers of paint rather than one thick layer. This prevents cracking paint during the baking process and ensures better adherence, a strategy for professional results I learned after testing various pigment durability paints.

2. Design Elegant Green Botanical Leaves on Glass Mugs

Save this fresh, botanical glass mug idea to your “Nature-Inspired Home” board!
Green leaves glass mugs offer a sophisticated, airy aesthetic perfect for herbal teas or iced coffee. Working with glass requires specific techniques to handle transparency, but the result is a stunning set of nature painted mugs that look delicate and refined.
Supplies Needed
- Clear glass coffee mugs (heat-resistant, durable)
- Nontoxic glass paints (transparent and/or opaque green shades)
- Very fine-tip paint brushes
- Cotton swabs and rubbing alcohol (for corrections)
- Outline paint pen for glass (optional)
- Oven for heat set instruction compliance
Step-by-Step Directions
- Clean glass mugs thoroughly with rubbing alcohol and let them dry completely to ensure a streak-free surface.
- Sketch or trace delicate botanical leaf patterns (e.g., fern fronds, eucalyptus branches) onto the glass using a temporary marker or a light outline from a glass paint pen.
- Apply the base green colors using a fine-tip brush. Since glass paint can be fluid, start with lighter shades and build depth in thin layers.
- Create shading and highlights by layering slightly darker or lighter greens while the paint is still wet, or add fine details after the first layer has dried.
- Correct any mistakes quickly with a cotton swab dipped in rubbing alcohol before the paint sets.
- Allow the glass paint to air dry for at least 24 hours (or as recommended by the brand).
- Cure the painted glass mugs by baking them in a conventional oven as per the manufacturer’s instructions, ensuring the design becomes dishwasher safe.
Pro-Tip: When working with glass paint, surface preparation for adhesion is paramount. Avoid touching the freshly cleaned surface with your bare hands, as natural oils can prevent the paint from sticking, leading to paint peeling. Wearing gloves is a simple fix that significantly improves longevity.

3. Personalize Mugs with Monogrammed Leaf Motifs

Inspire your next thoughtful gift! Pin this monogrammed leaf mug idea!
Combining typography with nature, personalized leaf mugs make exceptional gifts. By intertwining a monogram with flowing leaf motifs, you create custom painted ceramic pieces that feel bespoke and expensive.
Materials Needed
- Plain ceramic or glass mugs
- Nontoxic paint pens for mugs (fine-tip for detailing, medium-tip for filling)
- Stencils for letters or freehand drawing skills
- Pencil (for ceramic) or fine-tip marker (for glass)
- Rubbing alcohol
- Oven for curing
Step-by-Step Directions
- Clean your mug thoroughly with rubbing alcohol and let it dry completely.
- Sketch or stencil your chosen initial onto the mug. Serif or cursive fonts often pair best with organic shapes.
- Draw delicate leaf motifs (e.g., ivy, laurel, or a single prominent leaf) to entwine around the initial, ensuring the design flows naturally.
- Fill in the initial and leaves with your desired paint pen colors. Using two shades of green adds depth to the leaves.
- Allow each color to dry slightly before adding adjacent colors to prevent bleeding, especially for detailed intersections.
- Review the design for any touch-ups, using a cotton swab with alcohol for small corrections.
- Cure the mug in the oven according to paint pen instructions to ensure the design is durable and dishwasher safe.
Pro-Tip: When designing personalized leaf mugs, consider the mug’s handle placement. Position the monogram and leaves opposite the drinker’s dominant hand for optimal visibility, or frame the design around the handle for unique artistic expression. This attention to detail demonstrates true craftsmanship.

4. Experiment with Watercolor-Style Gradient Leaf Mugs

Ready to try a new technique? Pin this watercolor leaf mug inspiration!
Achieving a watercolor effect on ceramics creates dreamy, artistic leaf artwork. This technique involves thinning paints and blending wet-on-wet to create gradient leaf design transitions, perfect for those who love a softer, painterly look.
Supplies Needed
- White or light-colored ceramic mugs (provides a good base for translucent effects)
- Nontoxic ceramic paints (water-based recommended for blending)
- Small, soft round paint brushes
- Water for thinning paint and cleaning brushes
- Palette for mixing colors
- Paper towels
- Oven for heat setting
Step-by-Step Directions
- Clean your mug thoroughly.
- Sketch light outlines of your desired leaves. Vary size and overlap for a natural look.
- Mix your chosen colors (e.g., light blue and light green) on a palette.
- Apply a thin layer of your lightest color to one section of a leaf. While still wet, blend in the second color by touching its edge with a slightly damp brush loaded with the second color, allowing them to softly merge.
- Work quickly in small sections to maintain wet edges for smooth gradient transitions.
- Experiment with diluting the paint slightly with water for a more translucent watercolor effect.
- Allow the design to dry completely, then heat set in the oven according to paint instructions.
Pro-Tip: The key to successful watercolor-style gradient leaf mugs is working quickly while the paint is wet and using very little water. Too much water can compromise the binder, causing paint chipping or dullness after firing. Practicing paint viscosity control on a ceramic tile first can make a big difference.

5. Achieve Textured Leaf Prints with Stenciling Techniques

Get a perfectly crisp design every time! Pin this stenciled mug idea!
If freehand painting feels daunting, stencils are your best friend. They allow you to create consistent leaf prints and even add a tactile element for textured painted mugs. This method is fantastic for creating uniform sets.
Supplies Needed
- Plain ceramic mugs (smooth surface works best)
- Leaf stencils (reusable or adhesive vinyl)
- Nontoxic ceramic paints (slightly thicker consistency recommended for texture)
- Sponge paint dabbers or small stencil brushes
- Masking tape (if using non-adhesive stencils)
- Rubbing alcohol
- Oven for heat setting
Step-by-Step Directions
- Clean your mug.
- Position your chosen leaf stencil onto the mug surface. Secure it firmly with masking tape if it isn’t adhesive, ensuring no gaps where paint can bleed.
- Load your sponge dabber with a small amount of ceramic paint. Dab off excess paint on a paper towel—this is crucial.
- Apply the paint through the stencil using a gentle dabbing motion, moving straight up and down to prevent seepage. Build up thin layers for a textured effect.
- Carefully remove the stencil while the paint is still slightly wet to reveal a crisp print.
- Repeat the process for additional leaves, allowing previous designs to dry slightly to avoid smudging.
- Allow the paint to dry completely, then heat set according to manufacturer’s instructions for a durable finish.
Pro-Tip: For sharp, clean lines when using stencils, apply paint in very thin layers and use a minimal amount of paint on your applicator. This paint viscosity control, combined with proper surface preparation, is the secret to avoiding smudges and achieving crisp, textured leaf prints.

6. Paint Whimsical Willow Leaves with Metallic Accents

Add a touch of magic to your morning! Pin this metallic leaf mug design!
For a design that catches the light, combine soft willow leaves with shimmering metallic accents. This style creates whimsical painted mugs that feel magical and sophisticated, utilizing gold or silver to elevate the artistic leaf designs.
Supplies Needed
- Dark or light ceramic mugs (contrast helps metallic pop)
- Nontoxic ceramic paints in soft greens and grays
- Metallic gold or silver paint pens for ceramic
- Fine-tip paint brushes
- Cotton swabs for corrections
- Oven for heat setting
Step-by-Step Directions
- Clean the mug surface thoroughly.
- Sketch or lightly draw the elongated, drooping shapes of willow leaves across the mug, suggesting gentle movement.
- Paint the willow leaves using soft green or gray ceramic paint, keeping the feel light and ethereal. Let dry.
- Add metallic accents by tracing the veins of the leaves or outlining select leaves with a metallic gold or silver paint pen. Add small dots or swirls for extra whimsy.
- Ensure all paint layers are dry between applications, especially before applying metallic details.
- Cure the mug in the oven according to both the paint and metallic pen manufacturer’s instructions.
Pro-Tip: When using metallic paints on mugs, ensure they are nontoxic heat set and formulated for ceramics. Some metallic craft paints are not designed for drinkware and may lead to fading designs or chip easily. Always check for food grade paints certification on items that contact food.

7. Explore Abstract Geometric Leaf Patterns on Mugs

Modern twist on nature! Pin this geometric leaf mug design for future projects!
Break away from traditional realism with abstract geometric leaf patterns. Using tape and straight lines, you can create modern painted mugs that feature bold geometric leaf motifs, perfect for a contemporary kitchen.
Supplies Needed
- Plain ceramic mugs (preferably white or solid color)
- Nontoxic ceramic paint pens in chosen colors (e.g., navy, mustard, white)
- Fine-tip paint brushes (for touch-ups)
- Painter’s tape or thin masking tape
- Ruler
- Rubbing alcohol
- Oven for heat setting
Step-by-Step Directions
- Clean your mug thoroughly.
- Plan your geometric leaf pattern, drawing inspiration from cubist art or simplified shapes. Sketch lightly with a pencil.
- Apply painter’s tape to create sharp, straight lines or define geometric segments. Press firmly to seal edges.
- Paint inside the taped sections using your chosen ceramic paint pens. Allow colors to dry before removing tape or adding adjacent colors to prevent bleeding.
- Carefully peel off the tape once the paint is dry to the touch to reveal crisp lines.
- Fill in any remaining sections with contrasting colors, always allowing layers to dry.
- Heat set the painted mug in the oven according to instructions.
Pro-Tip: Achieving crisp geometric lines on a curved surface requires patience and quality painter’s tape. Paint away from the tape edge, not into it, to prevent paint smears and ensure a clean reveal. This is especially important for maintaining the sharp look of abstract leaf patterns.

8. Hand-Paint Detailed Monochrome Woodland Leaves

Timeless elegance for your morning coffee! Pin this monochrome leaf mug idea!
For a sophisticated look, try hand-paint monochrome designs featuring woodland leaves. Using a single color palette allows you to focus on form and shading, resulting in detailed artwork that creates unique leaf mugs with a classic appeal.
Supplies Needed
- White or cream-colored ceramic mugs
- Nontoxic ceramic paint in a single color (e.g., black, sepia brown, dark gray) and a lighter tint
- Very fine-tip paint brushes (liner brushes)
- Small, dry flat brushes (for dry brushing)
- Palette for mixing
- Paper towels
- Oven for heat setting
Step-by-Step Directions
- Clean your mug thoroughly.
- Sketch realistic woodland leaf shapes (maple, oak, fern) and veins with a pencil. Vary sizes and overlap elements.
- Outline each leaf with your main paint color using a fine-tip brush.
- Fill in the leaves with a diluted version of the color or a lighter tint.
- Use a dry brushing technique: dip a dry flat brush into a tiny amount of undiluted paint, wipe most off, then lightly brush over leaf areas to create texture and shading.
- Add darker accents for deeper shadows with a fine-tip brush to create depth in your detailed artwork.
- Allow paint to dry completely between layers.
- Heat set the mug in the oven for a durable finish.
Pro-Tip: For detailed monochrome woodland leaves, build up subtle layers working from light to dark. This approach, similar to botanical illustration on 3D surfaces, gives you control over contrast and depth, avoiding an uneven paint look and creating truly artisan crafted pieces.

9. Create Simple, Modern Leaf Silhouettes with Paint Pens

Minimalist design, maximum impact! Pin this modern leaf mug idea!
Sometimes less is more. Simple leaf silhouettes created with paint pens offer a striking, minimalist aesthetic. This approach is perfect for modern painted mugs and is incredibly beginner-friendly, making DIY painted mugs accessible to everyone.
Supplies Needed
- Plain white or light-colored ceramic mugs
- Nontoxic ceramic paint pens in a single bold color (black, forest green, navy)
- Leaf-shaped stencils or pre-cut paper leaves (optional)
- Pencil
- Rubbing alcohol
- Oven for heat setting
Step-by-Step Directions
- Clean your mug thoroughly.
- Sketch simple, stylized leaf silhouettes with a light pencil. Focus on shape rather than detail.
- Outline the pencil sketch with your chosen ceramic paint pen.
- Fill in the outlined shapes completely with the same pen, ensuring even coverage.
- Allow the paint to dry completely. Apply a second coat if needed for opacity.
- Heat set the mug in the oven according to manufacturer’s instructions for a long-lasting design.
Pro-Tip: For perfectly crisp leaf silhouettes with paint pens, choose a high-quality pen that allows for opaque coverage in one stroke. This is crucial for avoiding fading designs and ensuring your modern painted mugs look professionally finished.

Key Takeaways: Your Quick Guide to Painted Mugs Leaves
To summarize your journey into the world of painted mugs leaves, here are the essential points to remember. Keeping these principles in mind will help you achieve professional results and enjoy your custom drinkware for years to come.
- Durability and Safety are Key for Painted Mugs: Always use nontoxic ceramic paints or glass paints and follow proper heat set instructions to ensure your leaf painted mugs are food-safe, dishwasher safe, and maintain long-lasting color.
- Material Matters for Leaf Designs: Choose the right paint for your mug material (ceramic, glass, porcelain) as each requires specific paint types and curing methods for optimal adhesion and finish, directly impacting the quality of your hand painted leaf mugs.
- Explore Diverse Design Techniques: From vibrant fall oak leaves to elegant botanical leaves or abstract geometric leaf patterns, a variety of techniques exist to match any aesthetic preference, leveraging creativity for unique leaf mugs.
- Personalization Adds Value: Incorporating monograms or specific leaf types can create personalized leaf mugs, making them ideal for thoughtful gifts or special occasions, enhancing their emotional significance.
- Stenciling Simplifies Complex Designs: For those less confident in freehand drawing, using stencils provides a straightforward way to achieve crisp, consistent leaf prints and textured painted mugs with professional results.
- Metallic Accents Elevate Whimsy: Experiment with metallic gold or silver paint pens to add shimmering metallic accents to whimsical willow leaves, introducing an element of elegance and sparkle to your artistic leaf designs.
- Attention to Detail Ensures Success: Proper surface cleaning, thin paint layers, and meticulous heat setting are proven techniques that prevent common issues like paint chipping or fading designs, ensuring the longevity and beauty of your painted mugs leaves.
FAQs About Painted Mugs Leaves
What paint do you use for painted mugs leaves?
For painted mugs leaves, you should use nontoxic ceramic paints or glass paints specifically formulated for drinkware that can be heat set in an oven. These specialized paints, often acrylic-based, create a durable finish that is both food-safe and generally dishwasher safe after proper curing. Brands like Pebeo, FolkArt, or DecoArt offer reliable options, ensuring your hand painted leaf mugs maintain their vibrant colors.
How do I permanently paint a mug with leaves?
To permanently paint a mug with leaves, clean the surface thoroughly, apply nontoxic ceramic paints or glass paints, allow them to dry completely, and then heat set the mug in a conventional oven according to the paint manufacturer’s precise instructions. This curing process bonds the paint to the mug, making your leaf painted mugs resistant to washing and daily use. Always ensure the paints are labeled for food grade paints use.
Are painted mugs dishwasher safe after heat setting?
Most painted mugs leaves that have been properly heat set with nontoxic ceramic paints or glass paints specifically designed for dishware are indeed dishwasher safe on the top rack. However, hand washing is often recommended to maximize the longevity of the detailed artwork and prevent premature fading, especially for intricate design elements or metallic accents.
What kind of mugs can be painted with leaf designs?
You can paint leaf designs on various types of mugs, including ceramic mugs, glass coffee mugs, and porcelain leaf mugs, provided they are clean, smooth, and oven-safe. Each material requires a specific type of nontoxic paint (ceramic paint for ceramic/porcelain, glass paint for glass) and adherence to appropriate heat set instructions for optimal durable finish.
How do you paint leaves on mugs without freehand drawing skills?
You can easily paint leaves on mugs without freehand drawing skills by using leaf stencils for painting mugs, tracing methods with carbon paper (for ceramic), or simply dabbing real leaves with paint to create a print. These techniques allow for consistent and beautiful leaf motifs without requiring advanced artistic ability, making DIY painted mugs accessible to beginners.
What are popular leaf designs for painted mugs?
Popular leaf designs for painted mugs leaves include classic fall oak leaves, elegant botanical leaves (like eucalyptus or fern), minimalist leaf silhouettes, and whimsical willow leaves with metallic accents. Seasonal themes, abstract geometric patterns, and intricate monochrome woodland leaves are also highly sought after for custom painted ceramic and glass mugs.
Are hand-painted mugs food safe to drink from?
Yes, hand-painted mugs can be food safe to drink from, but it is critical to use only nontoxic ceramic paints or glass paints that are explicitly labeled as food grade paints and follow all heat set instructions. Avoid painting on the rim of the mug, and ensure the painted area is properly cured to prevent paint degradation or leaching into beverages.
How do I clean and care for my painted mugs leaves?
To clean and care for your painted mugs leaves, gently hand wash them with warm, soapy water using a non-abrasive sponge, especially for delicate designs or if not fully dishwasher safe. Avoid soaking the mug for extended periods or using harsh scrubbers, which can cause paint chipping or fading designs even on properly heat set mugs, preserving the long-lasting color.
What are common problems when painting mugs and how can I avoid them?
Common problems when painting mugs include paint chipping, fading designs, uneven paint, and colors bleeding under stencils. To avoid these, ensure proper mug cleaning, use nontoxic ceramic paints or glass paints specifically for drinkware, apply thin layers, allow sufficient drying time, and follow all heat set instructions diligently. Choosing quality materials and proven techniques minimizes these issues.
Can I use acrylic paint for painting leaves on mugs?
While regular acrylic paints can be used, they are generally not recommended for painted mugs leaves unless they are specific nontoxic ceramic paints or glass paints designed for high-heat curing. Standard acrylics may not adhere permanently or be food-safe, leading to paint chipping or fading designs quickly, even if sealed. Always opt for heat-set, food-safe formulas for a durable finish.
Final Thoughts on Painted Mugs Leaves
In conclusion, transforming plain drinkware into painted mugs leaves is a rewarding craft that combines artistic expression with practical utility. Whether you gravitate towards the vibrant fall oak leaves, the elegant botanical leaves on glass, or the modern simplicity of leaf silhouettes, the key to success lies in understanding your materials and mastering the proven techniques of preparation, application, and crucially, proper heat set curing. By prioritizing nontoxic ceramic paints and meticulous craftsmanship, you ensure your hand painted leaf mugs are not only stunning additions to your home but also durable and food-safe treasures. Embracing the diverse design ideas and practical advice shared in this expert guide empowers you to create unique pieces that reflect your personal style and add warmth to every sip.
Which painted mugs leaves design are you most excited to try first, or which unique leaf mugs have caught your eye?
Last update on 2026-04-27 / Affiliate links / Images from Amazon Product Advertising API