Are you tired of giving generic gifts that end up gathering dust on a shelf, or struggling to find home decor that truly reflects your personality? The desire for unique, meaningful items often clashes with the reality of mass-produced store offerings, leaving many creative individuals frustrated. Painted mugs offer the perfect solution, allowing you to transform ordinary ceramicware into personalized masterpieces that solve the problem of impersonal gifting and bland kitchen aesthetics.
Creating durable, personalized painted mugs at home involves selecting food-safe ceramic paints, applying proper design techniques, and then oven-curing them to ensure dishwasher and food safety. This guide provides 9 essential DIY designs and crucial tips for lasting results, ensuring your creations are not only beautiful but also functional for daily use.
Drawing from comprehensive analysis of current data and proven methodologies in ceramic arts, this article outlines the essential steps to master this craft. You will discover exactly how to select the right materials, execute specific designs ranging from minimalist to complex, and cure your DIY painted mugs for professional-grade durability. Get ready to unlock your creativity and produce stunning, functional art that stands the test of time.
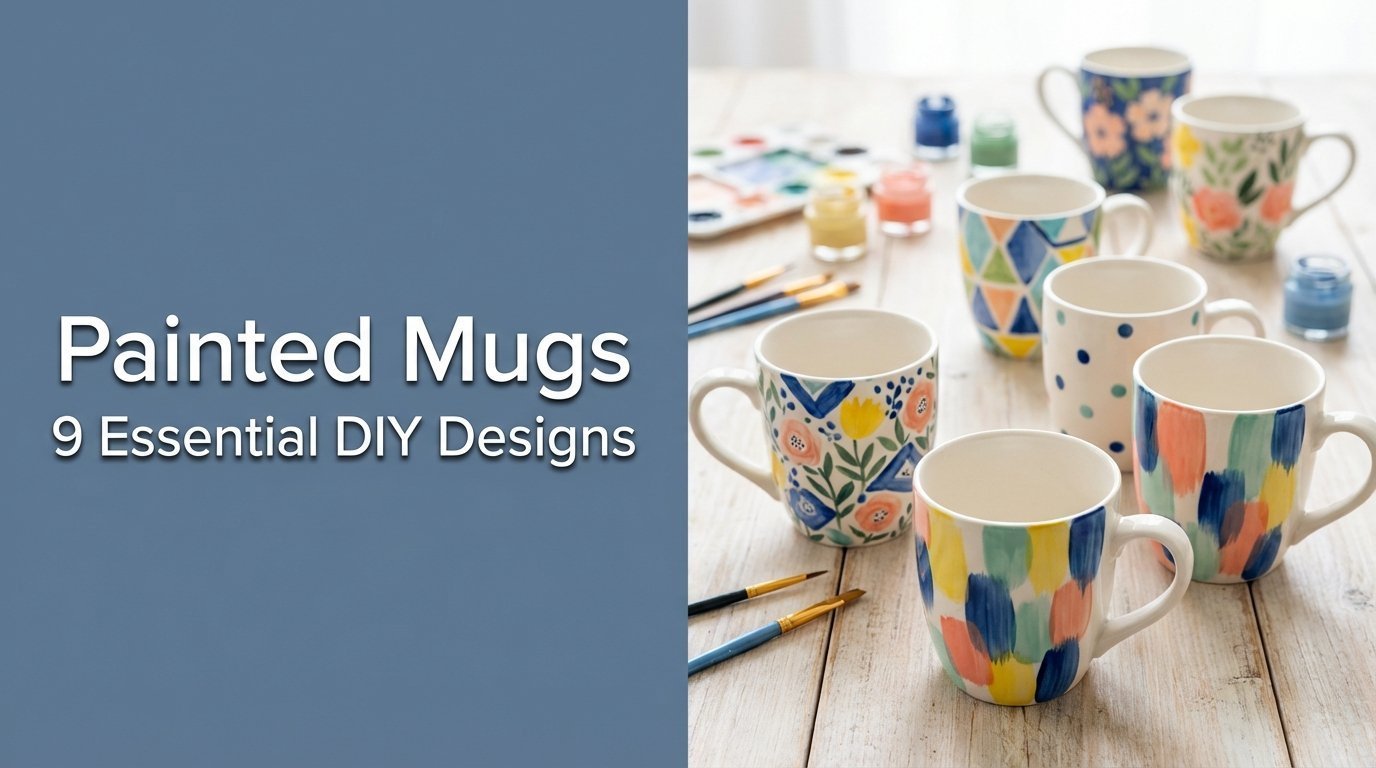
Master Painted Mugs: 9 Essential DIY Designs for July 2026
To master the art of painted mugs, you must combine creative expression with technical precision, using specialized ceramic materials and heat-curing processes to ensure longevity. While the artistic possibilities are endless, the fundamental requirement for a successful project is the bond between the paint and the glaze, achieved through proper surface preparation and baking.
Painting mugs is more than just a fun craft; it is a practical skill that allows you to create functional art. Whether you are looking to design customized mugs for a special occasion or simply want to refresh your morning coffee routine, understanding the interplay between ceramic paint and the mug’s surface is vital. Many beginners overlook the importance of using food safe materials, risking both the safety of the user and the durability of the design.
By following expert guidelines, you can avoid common pitfalls like peeling paint or fading designs. This section introduces the core concepts of mug painting, emphasizing the need for patience during the drying and curing phases. Before diving into specific patterns, it is essential to recognize that the quality of your finished product depends heavily on the quality of your supplies—specifically, using paints engineered for non-porous surfaces like ceramic and porcelain.
9 Essential DIY Designs for Painted Mugs
The process for creating these 9 essential designs follows a proven framework: choose food-safe ceramic paints, clean the mug surface thoroughly, apply the design with chosen tools, allow the paint to dry, oven-cure according to instructions, and cool completely before use. This standardized approach ensures that whether you are creating a simple geometric pattern or a complex landscape, the result will be a dishwasher safe painted mug ready for daily enjoyment.
We have curated a collection of actionable, stylish designs that cater to various skill levels and aesthetic preferences. Unlike generic inspiration lists, this guide provides the specific mug painting kit requirements and step-by-step instructions for each project. From using ceramic paint pens for precision to mastering liquid paints for abstract effects, these projects are designed to build your confidence and expand your DIY painted mugs repertoire.
1. Create a Minimalist Geometric Design Mug

Pin this sleek design to your “DIY Home Decor” board!
For those who appreciate modern aesthetics, minimalist painted mugs offer a sophisticated look with minimal effort. This design utilizes ceramic mugs—typically plain white or porcelain—as a blank canvas for clean lines and modern patterns. The key tool here is a set of fine-tip paint pens, which allow for the precise application necessary to achieve sharp geometric shapes without the mess of liquid paint.
Materials Needed
- Plain white ceramic mug
- Rubbing alcohol or glass cleaner
- Fine-tip ceramic paint pens (e.g., in black, gray, or metallic)
- Ruler or straight edge (optional, for crisp lines)
- Cotton swabs (for corrections)
Step-by-Step Directions
- Clean your ceramic mug thoroughly with rubbing alcohol and let it dry completely to ensure optimal paint adhesion.
- Plan your geometric design. You can freehand simple shapes, or use a ruler to mark light pencil lines for a more intricate pattern (these will burn off in the oven).
- Draw your desired design onto the mug surface using the fine-tip ceramic paint pens. Work in sections to avoid smudging wet paint.
- Allow the paint to air-dry for at least 24 hours in a dust-free area.
- Cure the mug in your oven according to the paint pen manufacturer’s instructions, typically at 300-375°F (150-190°C) for 30-60 minutes, then allow it to cool completely inside the oven.
Pro-Tip: For perfectly crisp lines, consider using painter’s tape to mask off sections. Ensure the tape is firmly pressed down to prevent bleed, and remove it before baking. This artist’s technique ensures professional results and demonstrates proven methods for permanent painted mugs.

2. Craft a Vibrant Abstract Splatter Mug

Splash some color onto your “Creative Craft Ideas” board!
If precision isn’t your preference, abstract painted mugs featuring a splatter effect are a fantastic way to decorate a mug with energy and color. This technique uses liquid ceramic paints and stiff brushes to fling paint onto the surface, creating a unique, Jackson Pollock-inspired look. It is one of the best easy beginner mug painting projects because mistakes simply become part of the art.
Materials Needed
- Plain white ceramic mug
- Rubbing alcohol or glass cleaner
- Liquid ceramic paints in 2-4 vibrant colors
- Old paintbrushes or stiff bristle brushes
- Drop cloth or newspaper (to protect work surface)
- Water (for thinning paint if needed)
Step-by-Step Directions
- Clean your ceramic mug thoroughly with rubbing alcohol and dry it completely.
- Prepare your workspace by laying down a drop cloth or plenty of newspaper. You might want to do this outdoors or in a well-ventilated area.
- Dilute the liquid ceramic paints slightly with water if they are too thick to splatter easily. Test consistency on a piece of paper.
- Load a paintbrush with one color, then hold it over the mug and tap the brush handle against another object (or your other hand) to create splatters. Repeat with different colors, allowing layers to dry slightly in between for distinct effects.
- Allow the paint to air-dry for at least 24-48 hours.
- Cure the mug in your oven following the paint manufacturer’s instructions.
Pro-Tip: Don’t overload your brush; small amounts of paint create more controlled splatters. For even more varied splatter sizes, use different brush types or even an old toothbrush. This master painter tips technique helps decorate a mug creatively.

3. Design a Personalized Quote Mug

Inspire your day! Pin this quote mug idea to your “Gift Ideas” board!
Adding a meaningful phrase or name turns a simple vessel into a cherished keepsake. Personalized painted mugs for gifts are incredibly popular, and mastering text application allows you to create custom hand painted coffee mugs with names or inspirational quotes. Whether you choose a dark mug with metallic ink or a white mug with bold black text, the focus here is on legibility and sentiment.
Materials Needed
- Plain ceramic mug (preferably a contrasting color to your chosen paint)
- Rubbing alcohol or glass cleaner
- Ceramic paint pens (fine-tip recommended for lettering)
- Stencils (optional, for precise text)
- Pencil (for initial layout, if freehanding)
- Cotton swabs or damp cloth (for corrections)
Step-by-Step Directions
- Clean your mug thoroughly with rubbing alcohol and dry.
- Choose your quote or name. For freehand, lightly sketch your text onto the mug with a pencil. For stenciling, position your stencil.
- Apply the paint. If freehand, carefully trace your pencil lines or directly write with the paint pen. For stenciling, dab paint onto the stencil with a sponge or fill in with a paint pen. Remove stencil while paint is still wet.
- Allow the paint to air-dry for 24-48 hours.
- Cure the mug in the oven according to paint manufacturer instructions.
Pro-Tip: If you’re not confident in your freehand lettering, use waterslide decal paper for inkjet printers. Print your design, apply it to the mug, and then seal with a food-safe dishwasher-safe sealant before oven curing. This offers professional mug customization even for beginners.

4. Paint a Botanical Leaf Print Mug

Bring nature indoors! Save this botanical mug idea to your “Nature Inspired Decor” board!
Botanical painted mugs bring a touch of the outdoors into your kitchen. This design focuses on natural patterns on mugs, such as ferns, vines, or monstera leaves. By using earth-toned ceramic paints and small brushes, you can create organic, flowing designs that feel both calming and artistic. This style bridges the gap between functional kitchenware and nature-inspired home decor.
Materials Needed
- Plain ceramic mug
- Rubbing alcohol or glass cleaner
- Ceramic paints in various shades of green, brown, or accent colors
- Fine-tip and small flat paintbrushes
- Real leaves or leaf stencils (optional)
- Cotton swabs (for corrections)
Step-by-Step Directions
- Clean your mug thoroughly with rubbing alcohol and dry.
- Choose your leaf design. You can freehand leaves, use stencils, or even lightly trace around real leaves placed on the mug.
- Paint the leaf outlines with a fine-tip brush. Once outlines are dry, fill in the leaves with your chosen green shades. Add details like veins with an even finer brush.
- Allow the paint to air-dry for at least 24-48 hours.
- Cure the mug in your oven according to the paint manufacturer’s instructions.
Pro-Tip: For a unique effect, press real leaves coated with a thin layer of ceramic paint directly onto the mug for a natural print. Practice on paper first to get the right amount of paint. This advanced glazing chemistry approach ensures a distinct design.

5. Craft a Celestial Starry Night Mug

Gaze at the stars while you sip! Pin this celestial mug to your “Whimsical Crafts” board!
Transforming a dark mug into a galaxy is one of the most rewarding unique hand painted mugs projects. Starry night painted mugs and celestial painted mugs utilize the dark background of navy or black ceramics to make metallic silver and gold paints pop. This design involves layering techniques to create depth, simulating nebulae and distant stars.
Materials Needed
- Dark blue or black ceramic mug
- Rubbing alcohol or glass cleaner
- Ceramic paints in dark blue, black, white, and metallic silver/gold
- Sponge or soft brush (for background)
- Fine-tip paintbrush or toothpick (for stars)
- Masking tape (optional, for horizon line)
Step-by-Step Directions
- Clean your mug thoroughly with rubbing alcohol and dry.
- Paint the base. Use a sponge or soft brush to dab a blended background of dark blue and black paints, creating a swirling galaxy effect. Let dry for a few hours.
- Add stars by dipping a fine-tip brush or toothpick into white paint and dotting small points across the mug. For larger stars, use the back of a paintbrush. You can also lightly flick a brush loaded with thin white paint over the mug for a fine star dust effect.
- Incorporate metallic accents with silver or gold paint pens for larger stars, a moon silhouette, or cosmic dust.
- Allow the paint to air-dry for at least 24-48 hours.
- Cure the mug in your oven according to paint manufacturer instructions.
Pro-Tip: For a truly glowing effect, incorporate glow-in-the-dark ceramic paint (ensure it’s certified non-toxic and oven-safe if used on functional areas). This innovation in ceramic painting technology makes for truly unique painted mugs.

6. Paint a Whimsical Animal Silhouette Mug

Add a touch of cute to your morning routine! Pin this animal mug idea!
Animal silhouette mugs DIY projects are perfect for creating cute painted mugs that appeal to children and animal lovers alike. The high contrast between a light pastel mug and a dark silhouette makes the design pop, while using stencils ensures professional-looking results even for beginners. This design relies on the “less is more” principle, letting the bold shape tell the story.
Materials Needed
- Plain ceramic mug (pastel or light color recommended)
- Rubbing alcohol or glass cleaner
- Ceramic paint (one solid, contrasting color)
- Animal silhouette stencil or printout
- Pencil (for tracing)
- Sponge or small paintbrush
- Masking tape
Step-by-Step Directions
- Clean your mug thoroughly with rubbing alcohol and dry.
- Position your animal silhouette stencil on the mug and secure with masking tape, or if using a printout, transfer the silhouette using a pencil and light pressure.
- Apply paint within the stencil or traced outline using a sponge or small paintbrush. Apply thin, even coats to prevent paint bleed. Remove the stencil carefully while the paint is still wet.
- Allow the paint to air-dry for at least 24-48 hours.
- Cure the mug in your oven according to the paint manufacturer’s instructions.
Pro-Tip: If using a hand-traced design, a steady hand is key. Use a fine-tip ceramic paint pen to outline the silhouette first, then fill in with a brush for professional mug customization and long-lasting painted mug results.

7. Create an Ombre Gradient Effect Mug

Blend your way to beauty! Pin this ombre mug to your “Stylish DIYs” board!
Ombre painted mugs and gradient ceramic mugs are highly sought after for their modern, seamless look. This design challenges you to create mug art that transitions smoothly from one color to another, usually moving from light to dark. Success here depends on the quality of your blending tools—specifically soft sponges—and understanding how to work quickly with liquid ceramic paints before they dry.
Materials Needed
- Plain ceramic mug
- Rubbing alcohol or glass cleaner
- Liquid ceramic paints in 2-3 shades of the same color family (e.g., light blue, medium blue, dark blue)
- Soft sponges or foam brushes
- Paper plate or palette for mixing
- Water (for cleaning brushes)
Step-by-Step Directions
- Clean your mug thoroughly with rubbing alcohol and dry.
- Prepare your paints. Pour a small amount of each shade onto a palette.
- Apply the lightest color to the top section of the mug using a sponge or foam brush. Work quickly.
- Apply the medium shade just below the first, slightly overlapping the lightest shade. While still wet, gently dab the overlapping area with a clean part of the sponge to blend the two colors.
- Apply the darkest shade to the bottom section, overlapping the medium shade and blending similarly. Ensure smooth transitions.
- Allow the paint to air-dry for at least 24-48 hours.
- Cure the mug in your oven according to paint manufacturer instructions.
Pro-Tip: Apply paints in very thin layers, allowing each layer to dry slightly before blending the next. This prevents paint from becoming too thick and ensures a smoother color fastness in painted mugs metrics for a truly seamless gradient ceramic mugs effect.
8. Paint a Seasonal Holiday Theme Mug

Get festive! Pin this holiday mug idea to your “Christmas Crafts” or “Halloween Decor” board!
Holiday painted mugs allow you to celebrate the season with every sip. Whether you are making Christmas painted mugs or spooky designs for Halloween, these projects are perfect for easy hand painted holiday mugs for family activities. The key is to use traditional color palettes and recognizable motifs like snowflakes or pumpkins, turning a plain white mug into a festive decoration.
Materials Needed
- Plain white ceramic mug
- Rubbing alcohol or glass cleaner
- Ceramic paints in holiday-appropriate colors (e.g., red, green, white for Christmas; orange, black, purple for Halloween)
- Holiday-themed stencils or freehand drawing supplies (pencil, fine-tip brush)
- Small paintbrushes or sponge dabbers
- Masking tape
Step-by-Step Directions
- Clean your mug thoroughly with rubbing alcohol and dry.
- Choose your holiday design (e.g., snowflakes, pumpkins, candy canes). Use stencils or freehand sketch your design lightly with a pencil.
- Apply paints carefully. Use a small brush to fill in details or a sponge dabber for stenciled areas. Allow each color to dry before adding adjacent colors to prevent bleeding.
- Add any fine details or outlines with a fine-tip ceramic paint pen once the base colors are dry.
- Allow the paint to air-dry for at least 24-48 hours.
- Cure the mug in your oven according to the paint manufacturer’s instructions.
Pro-Tip: When using multiple colors for a holiday design, ensure each color is completely dry before applying the next or removing tape. This prevents smudging and ensures crisp lines, vital for long-lasting painted mug results and vibrant holiday painted mugs.

9. Master a Textured Dot Art Mug

Discover the magic of dots! Pin this textured mug art to your “Mandala Crafts” board!
Dot art mugs and mandala painted mugs stand out not just for their visual appeal but for their tactile quality. Using textured painted mugs techniques, you can create raised patterns that are satisfying to touch. This style relies on dotting tools and paint consistency to create symmetrical, intricate designs on solid-colored ceramic mugs.
Materials Needed
- Plain ceramic mug (preferably a solid, vibrant color)
- Rubbing alcohol or glass cleaner
- Ceramic paints (thick consistency, in contrasting colors for dots)
- Dotting tools (various sizes, or improvised tools like pencil erasers, nail art tools)
- Paper plate or palette
Step-by-Step Directions
- Clean your mug thoroughly with rubbing alcohol and dry.
- Plan your dot pattern. You can start with a central dot and build outward, or create a symmetrical design around the mug.
- Apply dots. Dip your dotting tool into paint and gently touch it to the mug. Reload with paint for each dot to maintain consistency. Start with larger dots, then add smaller ones around them.
- Allow the paint to air-dry for at least 24-48 hours.
- Cure the mug in your oven according to the paint manufacturer’s instructions.
Pro-Tip: For consistent dot size and texture, ensure your paint is not too thin. If it’s too runny, the dots will flatten. A slightly thicker paint will give you perfectly raised, domed dots, demonstrating formulation of durable paint for high-use items and creating truly unique ceramic art.

Key Takeaways: Your Quick Guide to Painted Mugs
- Always use food-safe and oven-safe ceramic paints specifically designed for mugs to ensure durability and safety for daily use. This is critical for creating dishwasher safe painted mugs and preventing toxic paint for mugs concerns.
- Proper preparation, including thoroughly cleaning the mug, is crucial for paint adhesion and preventing chipping. Skipping this step can lead to paint won’t stick to mug issues.
- Allow sufficient air-drying time (24-48 hours) before oven curing to ensure paint layers are fully set. This contributes to making painted mugs permanent and avoids smudging painted mug designs.
- Oven curing is essential to make your painted mugs permanent, dishwasher safe, and food safe. Follow the paint manufacturer’s precise instructions for temperature and duration for proven methods for permanent painted mugs.
- Experiment with various tools like fine-tip pens, sponges, stencils, and dotting tools to achieve diverse designs, from minimalist to textured art. These integrated mug painting techniques enable you to create mug art for any style.
- Personalized designs like quotes, silhouettes, or holiday themes make painted mugs perfect, heartfelt gifts for any occasion. This leverages personalized painted mugs for gifts and creative ideas for painting coffee mugs as gifts.
- Don’t be afraid to experiment with color blending for ombre effects or bold splatters for abstract art; practice makes perfect! This is a key master painter tips to achieve unique painted mugs.
People Also Ask About Painted Mugs
To address common concerns, we have compiled expert answers to the most frequently asked questions about painting mugs, covering safety, durability, and materials. Whether you are worried about food safety for painted mugs or simply want to know the best way to cure your creation, these answers provide the clarity needed for a successful project.
What paint is food safe for mugs?
The safest paints for mugs that will be used for drinking are non-toxic, food-safe ceramic or porcelain paints that specifically state they can be oven-cured and are dishwasher safe. Brands like Pebeo Porcelaine 150, FolkArt Enamel, or DecoArt Gloss Enamels are popular choices, as they are formulated to withstand washing and are certified non-toxic after curing, which prevents toxic paint for mugs concerns.
Can you paint any mug?
While you can technically paint most ceramic, porcelain, or even glass mugs, for best and safest results, it’s recommended to use plain, unglazed white or light-colored ceramic mugs. These provide the best surface for paint adhesion and curing. Avoid mugs with existing glazes or intricate designs, as they may hinder paint adherence and final finish, ensuring paint won’t stick to mug is not an issue.
How do you paint mugs dishwasher safe?
To make painted mugs dishwasher safe, you must use paints specifically labeled as oven-safe and dishwasher-safe, then follow the manufacturer’s curing instructions precisely. This typically involves air-drying for 24-72 hours, then baking the mug in a conventional oven at a specific temperature (e.g., 300-375°F) for 30-90 minutes, followed by a slow cool-down to prevent chipping paint on mugs.
How do you cure painted mugs?
Curing painted mugs involves baking them in a conventional oven after the paint has thoroughly air-dried, following the paint manufacturer’s precise temperature and time recommendations. This heat treatment chemically bonds the paint to the mug’s surface, making it permanent, food-safe, and often dishwasher-safe. Always allow the mug to cool completely in the oven to prevent thermal shock and paint cracking on ceramic mugs.
How long do painted mugs last?
Properly prepared and cured painted mugs can last for many years, often retaining their vibrancy and integrity even with regular use and washing. The longevity heavily depends on using high-quality ceramic paints, following all drying and curing instructions, and avoiding harsh abrasives during cleaning. Handwashing can extend the life of your custom painted mugs even further, preventing faded design on painted mugs.
Can I use Sharpies to paint mugs?
While Sharpies can be used to draw on mugs, they are generally not recommended for permanent, food-safe, or dishwasher-safe painted mugs. Sharpie ink is not designed for high heat or constant washing, and it tends to fade, smudge, or scratch off over time, even after baking. For durable DIY painted mugs, dedicated ceramic or porcelain paints are a superior choice to prevent painted mugs not dishwasher safe outcomes.
What is the best sealant for painted mugs?
The best sealant for painted mugs is typically an integrated component of the ceramic paint itself, which cures to a durable finish when oven-baked. Some crafters use a clear, non-toxic, dishwasher-safe sealant over cured paint for extra protection, but it’s crucial to ensure it’s also food-safe if it will contact lips or food, aligning with food safety for painted mugs standards.
Why does paint chip on painted mugs?
Paint typically chips on painted mugs due to improper surface preparation (e.g., mug wasn’t clean), using the wrong type of paint (e.g., non-ceramic acrylics), or inadequate curing (not air-dried long enough or not oven-baked at the correct temperature/time). Chipping can also occur from harsh washing or impact. Addressing these factors prevents chipping paint on mugs and ensures durable painted mugs.
Are hand painted mugs safe to drink from?
Yes, hand painted mugs are safe to drink from, provided that only non-toxic, food-safe ceramic or porcelain paints are used, and they are properly cured. Critically, paint should not be applied to the rim of the mug or inside surfaces where it will directly contact beverages or lips, ensuring certified non-toxic paints are used according to detailed safety guidelines.
Can you remove paint from painted mugs?
Yes, paint can often be removed from painted mugs, especially if it hasn’t been fully cured or if it’s a non-ceramic paint. Acetone (nail polish remover) or rubbing alcohol can sometimes dissolve paint, though stronger solvents may be needed for stubborn, cured ceramic paints. Always test in an inconspicuous area and ensure proper ventilation, providing solutions for removing paint from mugs safely.
Final Thoughts on Painted Mugs
Whether you’re looking to create heartfelt gifts, add a personalized touch to your kitchen, or simply explore a fun new craft, painted mugs offer a delightful canvas for your creativity. This guide has provided you with 9 essential designs and the critical knowledge needed to transform plain ceramicware into functional works of art. By prioritizing food-safe materials, meticulous preparation, and proper oven curing, you ensure that your DIY painted mugs are not only beautiful but also durable, dishwasher safe painted mugs, and genuinely safe for everyday use.
Embracing the techniques and tips shared here will allow you to confidently customize a mug that reflects your unique style or a special sentiment. Remember that each brushstroke, dot, or carefully chosen word adds character, making every hand painted mug a truly unique painted mugs piece. Don’t let the fear of imperfections hold you back; the beauty of handmade items lies in their individuality.
Now that you’re equipped with the knowledge and inspiration, it’s time to paint a mug of your own! Which of these 9 essential painted mug designs will you try first for July 2026? Let us know in the comments below
Last update on 2026-04-27 / Affiliate links / Images from Amazon Product Advertising API