Are you tired of the same flat, opaque manicures that lack depth and dimension for your romantic celebrations? Many beauty enthusiasts struggle to find unique, trend-setting designs that truly capture the whimsical essence of romance while maintaining a sophisticated edge. If you are looking to elevate your nail game this Valentines nails jelly season, you need a style that offers more than just color—you need texture and light.
Valentines nails jelly: A trending nail aesthetic characterized by a translucent, glossy finish achieved using sheer gel polish that mimics the look of clear, colored fruit jelly. This technique creates a see-through, glass-like effect perfect for layering romantic elements like encapsulated hearts, glitter, or floating floral designs, offering a dimensional elegance that standard opaque polishes cannot replicate.
Drawing from comprehensive analysis of current nail artistry data and professional nail artist methodologies, this guide breaks down the science and art of the translucent manicure. You will discover exactly how to replicate high-end salon looks using industry best practices, ensuring your nails are not only beautiful but durable. Get ready to master the sheer, glass-like finish that is dominating social media feeds in 2026.
Unlock the Magic of Translucent: Your Guide to Valentines Nails Jelly
What sets the valentines jelly nails trend apart? It is the mastery of light diffusion and depth. Unlike traditional manicures where the color sits flat on the nail plate, jelly nail art valentine’s designs utilize the translucent valentine nails technique to create a “squishy,” candy-like appearance. This aesthetic relies heavily on the quality of the gel nail designs and the precision of application.
The core appeal of valentines nails jelly lies in its versatility. The jelly finish acts as a window, allowing you to embed art within the polish rather than just painting on top of it. This requires specific materials—namely, translucent or “sheer” gel nail polish—and a proper UV lamp for curing. By understanding the interplay between translucent layers, you can achieve dimensional jelly nails that look professionally sculpted, even if you are a DIY enthusiast.
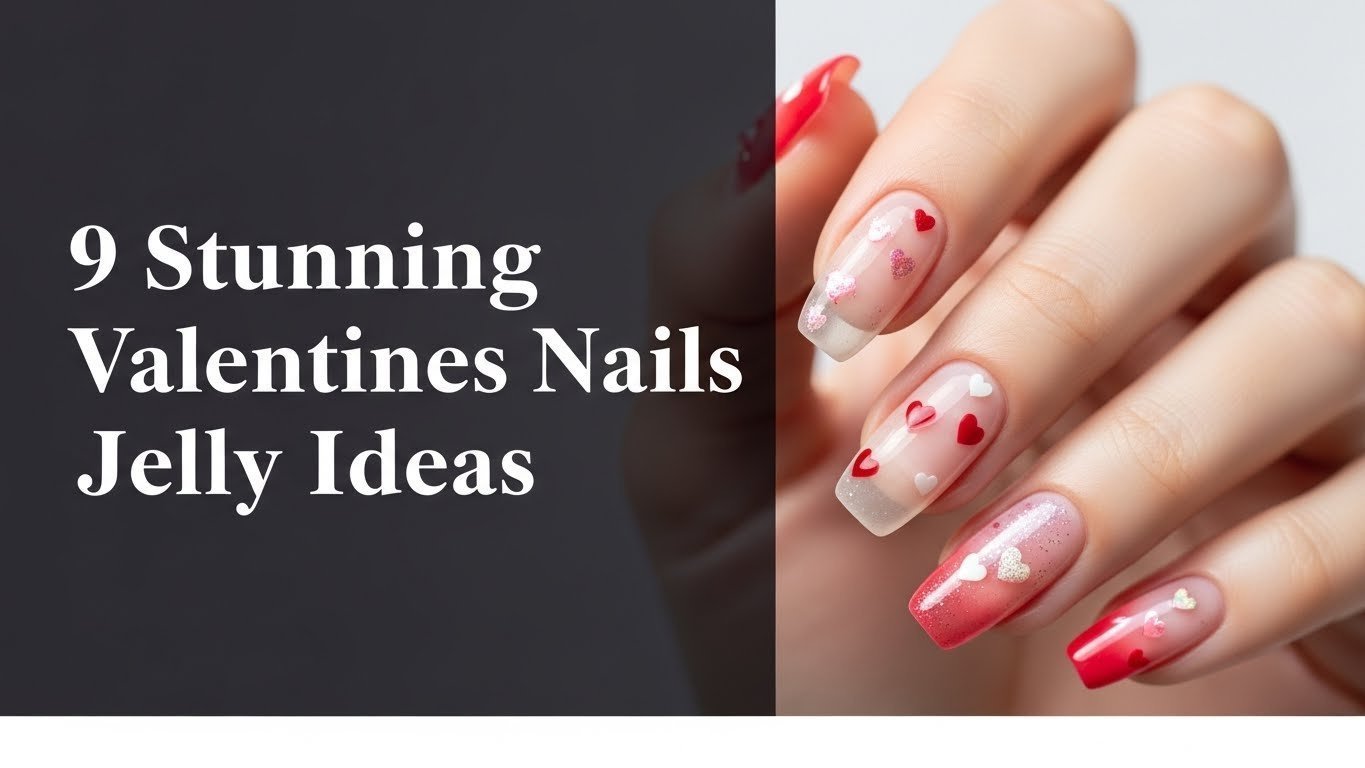
9 Stunning Valentines Nails Jelly Ideas for 2026
Ready to transform your nails into translucent masterpieces? We have curated a collection of trending jelly valentine nails that range from simple elegance to intricate artistry. Each design focuses on specific techniques, from basic layering to advanced encapsulation, ensuring there is a style for every skill level.
Below, you will find detailed tutorials for easy jelly valentine nails and more complex jelly nail art, complete with the exact supplies you need to recreate these 2024 nail trends.
1. Translucent Heart Accents for Jelly Valentines Nails

Pin this stunning jelly heart nail design to your Valentine’s board!
This design epitomizes the “sweetheart” aesthetic. By using translucent heart nails techniques, you create hearts that appear to be floating inside the nail plate. This jelly nail art design often utilizes pink jelly gel as a base, providing a soft, romantic canvas for the bolder heart accents.
Supplies Needed
- Sheer pink or clear jelly gel polish
- Red or pink opaque gel polish (for hearts)
- Blooming gel (optional, for soft edges)
- Fine detail nail art brush
- Top coat gel
- UV/LED nail lamp
- Nail file and buffer
- Alcohol wipes
Step-by-Step Directions
- Prepare nails: File and buff nails, push back cuticles, and wipe with an alcohol pad to ensure a clean surface.
- Apply base coat: Apply a thin layer of base coat and cure under UV/LED lamp.
- First jelly layer: Apply one thin layer of sheer pink or clear jelly gel polish and cure.
- Create hearts: Dip your fine detail brush into the red/pink opaque gel. Gently dot and drag to form small heart shapes on the nail. For a softer, blurred look, apply a thin layer of blooming gel before the heart and let it spread slightly before curing.
- Cure hearts: Cure the hearts under the lamp.
- Second jelly layer: Apply another thin layer of the sheer jelly gel polish over the hearts and cure to encapsulate them, creating a dimensional effect.
- Seal with topcoat: Finish with a no-wipe top coat and cure one final time for maximum shine and protection.
Pro-Tip: For truly crisp heart shapes on jelly nails, ensure your fine detail brush is clean and not overloaded with polish. If using blooming gel, a very thin, even layer is key to control the spread of the heart’s edges. This demonstrates advanced nail techniques for a perfect translucent effect.

2. Gradient Ombre Pink Jelly Nails

Save this romantic pink jelly ombre look for your next date night!
Nothing says romance quite like a soft fade. Pink jelly nails executed with an ombre jelly nails technique offer a sophisticated twist on the classic gradient. Unlike opaque ombre which can look stark, gradient jelly nails blend seamlessly, looking almost like watercolor paintings on long jelly nails.
Supplies Needed
- Light pink jelly gel polish
- Medium pink jelly gel polish
- Small makeup sponge or ombre brush
- Base coat gel
- Top coat gel
- UV/LED nail lamp
- Nail cleanser solution
- Lint-free wipes
Step-by-Step Directions
- Prep nails: Clean, buff, and apply base coat, then cure.
- First jelly layer: Apply one thin coat of the lighter pink jelly gel polish to the entire nail and cure.
- Apply to sponge: Dab both the light and medium pink jelly gel polishes onto the edge of your makeup sponge, creating a small gradient strip.
- Sponge onto nail: Lightly dab the sponge onto the nail, starting from the middle and working towards the tip, ensuring a smooth transition. Do not cure.
- Blend and cure: Use an ombre brush or clean sponge to gently feather the colors if needed, then cure.
- Repeat for intensity: Apply another layer of the sponge application if more color intensity is desired, then cure.
- Seal with topcoat: Apply a high-shine top coat and cure for a durable finish.
Pro-Tip: When creating an ombre jelly nails look, work quickly to blend before the gel starts to self-level too much. Using a dedicated ombre brush can provide a smoother transition than a sponge, especially for delicate sheer nails. This reflects an expert nail care advice approach to advanced nail sculpture.

3. Red Glitter Jelly Nails with Sparkle

Sparkle up your Valentine’s with these dazzling red glitter jelly nails!
For those who want to make a bold statement, red jelly nails infused with sparkle are unmatched. The glitter jelly nails aesthetic takes advantage of the sheer base to allow light to hit the glitter particles from all angles, creating a depth that opaque polish hides. This is one of the most popular festive jelly valentine nails styles.
Supplies Needed
- Sheer red jelly gel polish
- Fine holographic nail glitter
- Clear builder gel (optional, for extra dimension)
- Base coat gel
- Top coat gel
- UV/LED nail lamp
- Fan brush or silicone tool (for glitter application)
Step-by-Step Directions
- Prep and base coat: Prepare nails and apply a base coat, then cure.
- First jelly layer: Apply one thin layer of sheer red jelly gel polish and cure.
- Glitter application: Apply another thin layer of jelly gel polish (do not cure). Sprinkle fine holographic glitter over the wet gel using a fan brush or silicone tool, concentrating it evenly.
- Encapsulate glitter: Gently pat down glitter if needed, then cure. Apply a thin layer of clear builder gel over the glitter if desired for more depth and smoothness, then cure.
- Second jelly layer (optional): For deeper color and encapsulation, apply another thin layer of sheer red jelly gel polish and cure.
- Seal with topcoat: Finish with a durable, high-gloss top coat and cure.
Pro-Tip: To prevent the glitter jelly nails from feeling bulky, ensure each layer is thin. For maximum sparkle without sacrificing the jelly-like texture nails, consider mixing fine glitter directly into a clear jelly gel polish before application. This leverages understanding of pigment suspension and gel overlay techniques.

4. Subtle Nude Jelly Nails with Minimalist Design

For understated elegance, try these subtle nude jelly nails!
Not every Valentine’s look needs to be bright red. Subtle jelly nails offer a “your nails but better” aesthetic that is perfect for professional settings. By combining delicate jelly nail art on short jelly nails, you create elegant jelly valentine nails that feel modern and clean, often utilizing minimalist nail art principles.
Supplies Needed
- Sheer nude or milky pink jelly gel polish
- White or light pink gel liner
- Fine detail nail art brush (00 or 000 size)
- Base coat gel
- Top coat gel
- UV/LED nail lamp
- Nail wipes
Step-by-Step Directions
- Nail preparation: Clean, file, buff, and apply base coat, then cure.
- Jelly layers: Apply two thin coats of the sheer nude jelly gel polish, curing after each layer.
- Minimalist design: Using the fine detail brush and white/light pink liner gel, create a single thin line, a tiny dot, or a small, abstract shape on one or two accent nails. Cure immediately after each design element to prevent spreading.
- Seal with topcoat: Apply a no-wipe top coat and cure for a smooth, glossy finish.
Pro-Tip: For subtle jelly nails that look professionally done, use very minimal product on your detail brush for the minimalist design. Less is more to keep the lines crisp and prevent bleeding. This falls under expert nail care advice and ensures the delicate nail art is perfect.

5. Encapsulated Floral Jelly Nails for a Romantic Touch

Preserve beauty on your nails with these enchanting encapsulated floral jelly designs!
The technique of encapsulation is where jelly finish valentine nails truly shine. Encapsulated jelly nails involve embedding real dried flowers between layers of gel. The result is floral jelly nails that look like tiny paperweights, offering deep, dimensional jelly nails that are undeniably romantic.
Supplies Needed
- Clear or very pale pink jelly gel polish
- Tiny dried flowers for nail art or floral nail decals
- Fine-tip tweezers
- Base coat gel
- Builder gel (optional, for smooth encapsulation)
- Top coat gel
- UV/LED nail lamp
- Buffing block
Step-by-Step Directions
- Prep and base coat: Prepare nails and apply base coat, then cure.
- First jelly layer: Apply a thin layer of clear or pale pink jelly gel polish (do not cure).
- Place flowers: Carefully pick up a tiny dried flower or decal with tweezers and gently place it onto the wet gel. Adjust its position as desired.
- Cure lightly: Flash cure for 10-15 seconds to hold the flower in place.
- Encapsulate: Apply a slightly thicker layer of jelly gel polish or clear builder gel over the flower to fully encapsulate it. Ensure no edges are sticking up. Cure completely.
- Smooth surface: If the surface feels uneven, gently buff with a fine-grit buffing block to smooth it out. Wipe away dust.
- Final jelly layer: Apply another thin layer of clear or pale pink jelly gel polish and cure for optimal transparency and shine.
- Seal with topcoat: Finish with a high-gloss top coat and cure.
Pro-Tip: When doing encapsulated jelly nails, always ensure your flowers or decals are as flat and thin as possible to avoid bulk. If using real dried flowers, a small amount of clear builder gel can help create a smooth dome over them before your final jelly polish layers, preventing uneven jelly application and promoting long-lasting jelly nails.

6. Sweetheart French Jelly Nails for a Modern Twist

Give your French manicure a romantic upgrade with these sweetheart French jelly nails!
Reinvent the classic French tip with sweetheart nails. This design replaces the standard white line with a curved, heart-like “V” shape at the tip. By using a sheer base, these French jelly nails look incredibly natural and modern. It is one of the most elegant jelly valentine nails options for those who prefer sheer nails over opaque colors.
Supplies Needed
- Sheer natural pink or clear jelly gel polish (for base)
- Sheer white or soft pink jelly gel polish (for tips)
- Fine liner nail art brush or French tip guides
- Base coat gel
- Top coat gel
- UV/LED nail lamp
- Alcohol wipes
Step-by-Step Directions
- Prep and base coat: Prepare nails and apply base coat, then cure.
- Jelly base: Apply two thin coats of the sheer natural pink or clear jelly gel polish, curing after each.
- Create sweetheart tip: Using the fine liner brush (or a French tip guide placed in a curved shape), apply the sheer white or soft pink jelly gel polish to create a curved ‘sweetheart’ shape along the free edge of the nail. Ensure the line is smooth and even. Cure.
- Refine tip (optional): If needed, apply a second thin layer to the tip for more opacity or to refine the shape, then cure.
- Seal with topcoat: Apply a high-gloss top coat over the entire nail and cure for protection and shine.
Pro-Tip: The key to perfect sweetheart French jelly nails is a steady hand and building the tip color in thin, even layers. If you struggle with freehand, use an inverse French tip sticker as a guide to create the perfect curve. This helps prevent uneven jelly application and ensures professional jelly nails.

7. Marble Effect Valentines Nails Jelly

Achieve artistic elegance with these mesmerizing marble effect jelly nails!
Merging artistic jelly nails with the timeless look of stone, marble effect jelly nails use translucency to create a smoke-like or watercolor nails appearance. This sheer effect manicure works beautifully with soft pinks and whites, making it a perfect, non-literal Valentine’s design.
Supplies Needed
- Clear or pale pink jelly gel polish (for base)
- Sheer white or slightly darker pink jelly gel polish (for marble lines)
- Blooming gel (optional, for softer marble effect)
- Fine detail nail art brush or dotting tool
- Base coat gel
- Top coat gel
- UV/LED nail lamp
- Alcohol wipes
Step-by-Step Directions
- Prep and base coat: Prepare nails and apply base coat, then cure.
- Jelly base: Apply one thin coat of clear or pale pink jelly gel polish and cure.
- Blooming gel layer (for soft marble): Apply a thin, even layer of blooming gel over the cured jelly base (do not cure).
- Draw marble lines: Using a fine detail brush or dotting tool, apply small dots or thin lines of the sheer white/pink gel polish onto the wet blooming gel.
- Swirl for effect: Gently swirl the colors together with the detail brush or dotting tool to create a marble pattern. Let the blooming gel do its magic for a few seconds as the colors spread, then cure.
- Direct marble (without blooming gel): Alternatively, apply a thin layer of the clear/pale jelly, then immediately draw lines with the white/pink jelly and gently swirl directly on the wet jelly before curing.
- Seal with topcoat: Apply a high-gloss top coat and cure to complete the marble effect jelly nails.
Pro-Tip: When creating marble effect jelly nails, working quickly is key, especially if you’re not using blooming gel. For a subtle, translucent elegance, use sheer shades for your marbling lines. Experiment with how quickly you swirl for different rheology of gels and effects.

8. Galaxy Jelly Nails for a Cosmic Romance

Explore the cosmos with these enchanting galaxy jelly nails!
Love is universal, and so is this design. Galaxy jelly nails utilize dark, translucent blues and purples to create depth that opaque black polish simply cannot. By layering sheer colors with fine glitter, you create dimensional jelly nails that look like a deep-space nebula, achieving incredibly artistic jelly nails.
Supplies Needed
- Sheer blue, purple, and pink jelly gel polishes
- Fine holographic or iridescent glitter/flakes
- White or black gel polish (for tiny stars)
- Dotting tool or fine detail brush
- Base coat gel
- Top coat gel
- UV/LED nail lamp
- Lint-free wipes
Step-by-Step Directions
- Prep and base coat: Prepare nails and apply base coat, then cure.
- First jelly layers: Apply thin, uneven patches of sheer blue and purple jelly gel polishes to the nail. Gently blend the edges with a clean brush for a cloudy effect. Cure.
- Add dimension: Apply a tiny amount of sheer pink jelly to create nebulae-like swirls. Before curing, sprinkle fine glitter/flakes sparsely over the wet areas. Cure.
- Create stars: Dip a small dotting tool or fine detail brush into white or black gel polish and create tiny dots for stars. Cure.
- Build depth: Apply another thin layer of clear or very sheer blue jelly gel polish over the entire nail to deepen the galaxy effect and encapsulate the glitter/stars. Cure.
- Seal with topcoat: Finish with a high-gloss top coat and cure.
Pro-Tip: For truly captivating galaxy jelly nails, build up your colors and glitter in very sheer, thin layers. This preserves the translucent nails effect and creates optical depth. A thixotropic gel for the base can help prevent colors from blending too much before curing.

9. Rose Quartz Jelly Nails for Healing Love

Embrace tranquility with these beautiful rose quartz jelly nails!
This design channels the energy of the love stone. Rose quartz jelly nails mimic the mineral’s milky, fractured appearance using sheer pink jelly nails as a base. It creates glass-like nails that are luminous and ethereal, perfect for a high-vibe Valentine’s.
Supplies Needed
- Sheer milky pink jelly gel polish
- White gel nail polish
- Fine detail nail art brush
- Base coat gel
- Builder gel (optional, for smooth surface)
- Top coat gel
- UV/LED nail lamp
- Alcohol wipes
Step-by-Step Directions
- Prep and base coat: Prepare nails and apply base coat, then cure.
- Jelly base: Apply one thin coat of the sheer milky pink jelly gel polish and cure.
- Create veins: Apply another thin layer of the sheer milky pink jelly gel polish (do not cure). Dip your fine detail brush into a tiny amount of white gel polish, remove excess, and gently drag wispy, irregular lines across the wet pink jelly. Do not over-blend.
- Cure veins: Once satisfied with the pattern, cure the nail.
- Build depth: Apply a thin layer of clear builder gel or more sheer milky pink jelly gel polish over the design to encapsulate the veins and add depth, then cure.
- Smooth surface: If needed, gently buff the surface smooth and wipe with alcohol.
- Seal with topcoat: Apply a high-gloss top coat for a polished glass-like nails finish and cure.
Pro-Tip: To make your rose quartz jelly nails truly convincing, ensure the white veins are subtle and irregular, not stark lines. Building up the translucent pink base in thin layers before adding the white helps achieve the depth and softness of natural stone, leveraging understanding of layered jelly nails.

Key Takeaways: Your Quick Guide to Valentines Nails Jelly
To ensure your manicure lasts through March, remember these critical pillars of the jelly application process. Success with valentines jelly nails relies as much on preparation as it does on artistry.
- Mastering the translucent effect is key to stunning jelly nails. Achieving the desired sheer, glossy look for valentines nails jelly relies on thin, even layers of specialized jelly gel polish rather than thick coats.
- HEMA-free gel polish enhances safety and comfort. Opting for HEMA free gel is crucial for preventing potential allergic reactions and ensuring safe nail application, especially for DIY enthusiasts working at home.
- Layering creates unique depth and dimension. From encapsulated hearts to ombre gradients, building color and design in sheer layers is how dimensional jelly nails achieve their signature look.
- Proper nail preparation is foundational for durability. Thorough cleaning, buffing, and a quality base coat prevent common issues like chipping jelly nails and ensure a long-lasting jelly nail finish.
- Experiment with glitter and minimalist designs. Whether you prefer glitter jelly nails or subtle jelly nails with delicate accents, the translucent base provides a versatile canvas for various Valentine’s aesthetics.
- UV/LED lamps are essential for curing gel polish. A reliable UV lamp for nails or LED lamp for nails is non-negotiable for properly curing jelly gel polish, ensuring durability and a professional finish.
- Practice makes perfect for intricate designs. Techniques like marbling and encapsulated art require patience and precision, but the rewarding artistic jelly nails results are well worth the effort.
People Also Ask About Valentines Nails Jelly
What are jelly nails?
Jelly nails are characterized by their translucent, glossy appearance, achieved using sheer gel polish that mimics the look of clear, colored jelly. This effect allows the natural nail or encapsulated designs to show through, creating a unique depth and glass-like finish, making them perfect for playful yet sophisticated valentines nails jelly designs.
How do I achieve a translucent jelly nail effect for Valentine’s?
To achieve a translucent jelly effect, mix a small amount of colored gel polish with a clear builder gel or a dedicated clear jelly gel. Apply thin, even layers, curing each layer. For Valentine’s, use pinks, reds, or nudes and consider layering for depth or adding subtle encapsulated elements like glitter or hearts.
What gel polish makes jelly nails?
Specialized jelly gel polishes or a mix of clear builder gel with a touch of colored gel are used to create jelly nails. Brands often offer pre-mixed jelly shades, but you can customize translucency by diluting opaque colors with clear gel, ensuring they are compatible for proper curing and durability.
Can I do jelly nails at home without special equipment?
While possible, achieving professional-looking jelly nails at home typically requires a UV/LED nail lamp for curing gel polish. You’ll also need a base coat, top coat, gel colors, and nail prep tools. The lamp is crucial for the gel to harden and achieve its long-lasting, glossy finish.
Is jelly nail polish good for short nails?
Yes, jelly nail polish is excellent for short nails as its translucent nature can make nails appear longer and more elegant. The sheer finish is subtle and sophisticated, and intricate designs or minimalist accents can be particularly striking on shorter nail beds, enhancing the natural look.
What colors are best for Valentine’s jelly nails?
Traditional Valentine’s colors like sheer pink, translucent red, and milky nude are ideal for jelly nails. You can also experiment with subtle purples, soft whites, or even clear bases with glitter. The key is maintaining translucency to achieve the signature jelly-like appearance.
How long do jelly nails typically last?
Jelly nails, when applied correctly with quality gel polish and proper curing, typically last 2-3 weeks, similar to other gel manicures. Longevity depends on proper nail preparation, application technique, and aftercare, including using a durable top coat and avoiding excessive nail trauma.
What is HEMA free gel polish and why is it important for jelly nails?
HEMA free gel polish is formulated without Hydroxyethyl Methacrylate, a common allergen in some nail products. It’s important for jelly nails, especially for DIY users or those with sensitivities, as it reduces the risk of allergic reactions while still providing professional-grade performance and durability.
How can I make my jelly nails look even more dimensional?
To make your jelly nails more dimensional, experiment with layering various sheer colors, encapsulating fine glitter or small decals, or using blooming gel for marble effects. Building depth with multiple thin translucent layers creates an optical illusion that enhances the glass-like, three-dimensional look characteristic of jelly nails.
What are the latest trends in Valentine’s nail art for 2026?
For 2026, trending Valentine’s nail art includes minimalist designs on sheer bases, encapsulated elements like tiny hearts or flowers, and subtle ombre effects with translucent colors. Expect to see refined interpretations of classic Valentine’s themes, often incorporating glitter, chrome accents, or delicate French tips on jelly nails.
Final Thoughts on Valentines Nails Jelly
Valentines nails jelly offer a captivating blend of elegance and playfulness, making them the perfect choice to celebrate love and self-expression this 2026. We’ve explored a range of stunning designs, from the delicate charm of translucent heart accents and rose quartz effects to the vibrant sparkle of glitter and the modern twist of sweetheart French tips. Each idea leverages the unique, dimensional beauty of a sheer gel finish, providing a refreshing alternative to traditional opaque manicures.
Whether you’re a seasoned nail artist or a DIY enthusiast, the comprehensive guides for each look empower you to create jelly nails that truly reflect your style. By prioritizing proper application techniques, selecting quality jelly gel polish, and understanding the nuances of layering, you can achieve a durable, salon-worthy finish at home. Remember the importance of HEMA free gel for safety and always cure thoroughly for optimal results.
Now that you’re equipped with inspiration and actionable steps, which jelly nail art valentine’s design will you try first? Share your favorite look in the comments below
Last update on 2026-03-11 / Affiliate links / Images from Amazon Product Advertising API


