Ever feel like every Valentine’s Day manicure looks exactly the same, leaving you scrolling endlessly for something that feels truly personal? You aren’t alone in wanting a design that speaks directly to your relationship rather than just copying a generic heart pattern. Valentines nails with initials are the perfect solution to this dilemma, blending romantic tradition with a deeply personal touch that celebrates your unique bond.
Valentines nails with initials: A trending personalization technique where a partner’s or loved one’s first letter is artistically integrated into a manicure using fine-tip painting, decals, or negative space designs. This style transforms standard red and pink nail art into a sentimental statement piece, offering a customized way to express affection that ranges from subtle ring-finger accents to bold, decorative focal points suited for any nail length or shape.
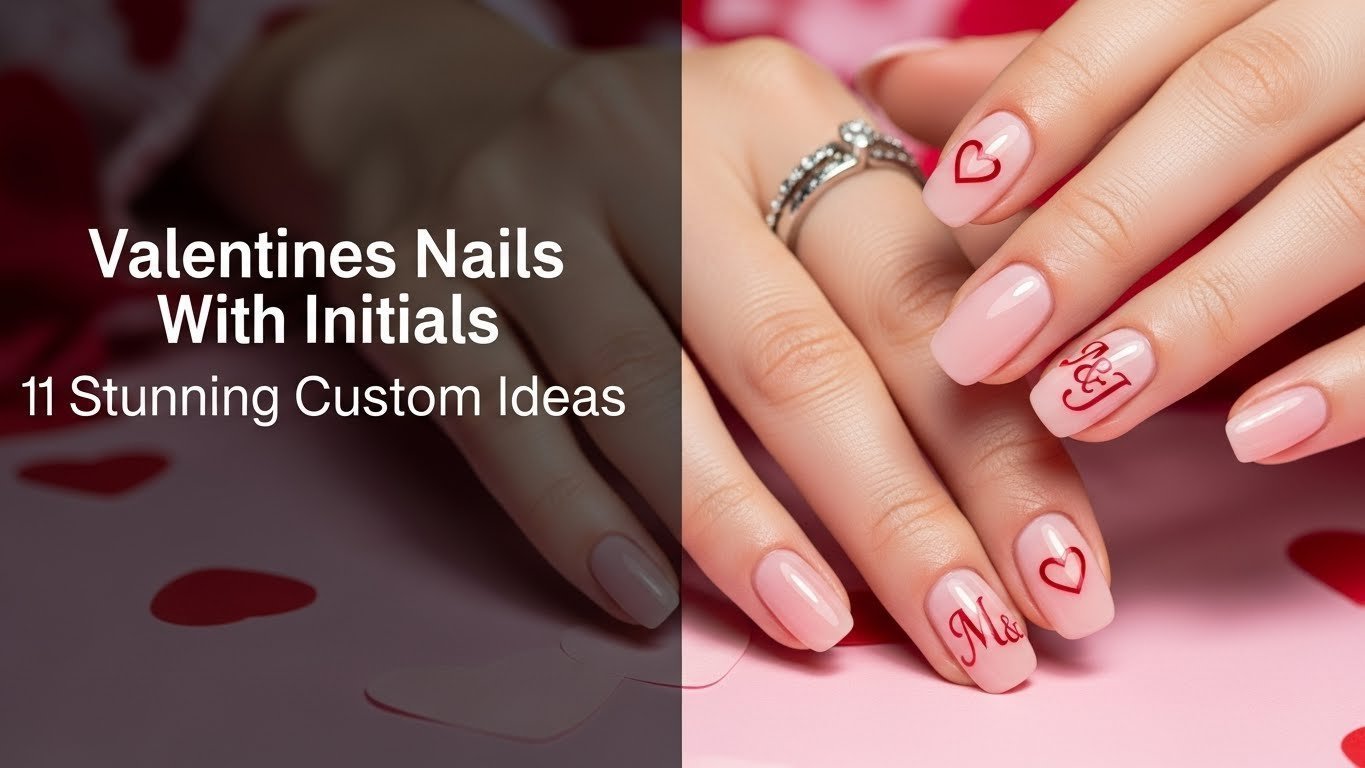
Drawing from comprehensive analysis of current personalized nail art trends and proven application methods, this guide cuts through the noise of generic designs. We have curated 11 distinct styles—from elegant French tips to edgy matte finishes—that cater to every skill level and aesthetic preference. Get ready to discover the perfect initial nail design that turns your fingertips into a romantic declaration this 2026.
11 Stunning Custom Valentines Nails With Initials To Celebrate Love 2026
Personalized initial nails have evolved far beyond simple sticker placements, becoming a sophisticated art form that allows you to wear your heart on your fingertips quite literally. In 2026, the trend focuses on integrating meaningful letters into broader design concepts, merging technical precision with romantic storytelling. Whether you are looking for a discreet nod to your partner or a bold declaration of love, custom valentines nails offer a versatility that standard seasonal manicures simply cannot match.
Before diving into the tutorials, it is important to note that the success of designing initial nails lies in the preparation and the tools you choose. From selecting the right base coat to mastering the stability required for painting initials on nails, each design below is structured to help you achieve salon-quality results at home. We will explore a variety of techniques, ensuring there is something for everyone—whether you have short natural nails, love the length of acrylics, or prefer the convenience of press-ons. Here are the top ideas to inspire your romantic look this February.
1. Classic Red & White Initial Accent Nail

Pin this elegant initial accent nail design to your Valentine’s board!
If you want a timeless look that screams romance without being overly complicated, the classic initial nail is your go-to. This design utilizes a vibrant red backdrop to make a crisp white letter pop, serving as a sophisticated focal point on an accent initial nail. It is perfect for beginners because it focuses on a single nail per hand, reducing the pressure to paint ten perfect letters.
Supplies Needed:
* Vibrant red gel nail polish or regular lacquer
* White fine-tip nail art pen or thin nail art brush
* Clear base coat
* High-gloss top coat
* Nail polish remover and cotton swabs for cleanup
* Optional: Small initial nail decals or stickers for ease of application
Step-by-Step Directions:
1. Prepare Nails: Apply a thin layer of clear base coat to clean, buffed nails, letting it dry completely.
2. Apply Red Base: Paint all nails (or just the chosen accent nail) with two coats of the vibrant red gel nail polish, ensuring even coverage. Cure under a UV/LED lamp if using gel, or allow to air dry.
3. Draw Initial: Using the white fine-tip nail art pen, carefully draw your desired initial (e.g., your boyfriend’s initial) on the accent nail. For a crisp look, practice on paper first.
4. Add Optional Heart: If desired, add a tiny white heart next to the initial with the same fine-tip pen.
5. Seal Design: Once dry (or cured), apply a generous layer of high-gloss top coat to all nails to protect the design and add shine.
Pro-Tip: For perfectly crisp lines when painting tiny initials, use a detail brush with a very small amount of white polish and “drag” the brush rather than pressing. This professional initial nail technique prevents bleeding and ensures a sharp finish.

2. Sparkling Glitter Heart & Initial Duo

Save this dazzling glitter initial nail art idea for your next romantic occasion!
For those who believe a little sparkle is essential for Valentine’s Day, glitter initial nails offer the perfect balance of glamour and sentimentality. This design pairs shimmer heart nails with personalized lettering, using fine glitter to create texture and light-catching dimension. It is a fantastic way to elevate a soft pink manicure into something event-ready.
Supplies Needed:
* Soft pink gel nail polish or regular lacquer
* Fine silver or rose gold nail glitter
* Nail art adhesive or clear gel polish (if using loose glitter)
* Thin nail art brush
* Heart-shaped nail stencils (optional)
* Clear base coat and glossy top coat
* Tweezers (for precise glitter placement)
Step-by-Step Directions:
1. Prep Nails: Apply base coat and two coats of soft pink gel nail polish to all nails. Cure gel or air dry lacquer.
2. Create Glitter Heart: On your chosen accent nail, apply a thin layer of nail art adhesive in the shape of a heart (or use a stencil). Carefully sprinkle fine glitter over the adhesive, pressing gently. Tap off excess.
3. Apply Initial Glitter: On an adjacent nail, apply nail art adhesive in the shape of your initial (e.g., partner’s initial). Carefully apply glitter in the same way.
4. Seal Glitter: Once the glitter is secure, apply a thin layer of clear gel or a dedicated glitter top coat to encapsulate the glitter. Cure if using gel.
5. Final Top Coat: Finish all nails with a durable glossy top coat to ensure long-lasting shine and prevent glitter shedding.
Pro-Tip: To prevent glitter from feeling bumpy, apply two thin layers of glossy top coat over the glitter designs, allowing each to fully dry or cure. This creates a smooth, encapsulated finish using professional initial nail techniques.

3. Minimalist French Tip with Subtle Initial

Pin this chic French tip initial design for a sophisticated Valentine’s Day look!
If your style leans towards the understated, minimalist initial french tip nails provide a whisper of romance rather than a shout. This design updates the traditional French manicure by tucking a subtle initial near the cuticle or sidewall. It’s elegant, office-appropriate, and secretly sentimental—a perfect choice for someone who wants elegant initial nails that match any outfit.
Supplies Needed:
* French manicure kit (includes sheer nude/pink base, white tip polish)
* Fine-tip nail art pen in black, gray, or metallic silver
* Clear base coat and glossy top coat
* French tip guides (stickers) for crisp lines (optional)
* Small initial nail decals or stickers (alternative to painting)
Step-by-Step Directions:
1. Base & Tip: Apply base coat. Follow your French manicure kit instructions to apply the sheer nude/pink base and then the crisp white tips. Allow to dry completely.
2. Initial Placement: On your chosen accent nail (e.g., ring finger), carefully apply a small initial decal or paint a tiny initial letter using the fine-tip pen. Position it subtly, perhaps near the cuticle or along the side of the nail.
3. Seal It In: Finish with a generous layer of glossy top coat to protect the entire design and enhance shine.
Pro-Tip: For the most elegant initial nails with a French tip, ensure the initial is perfectly proportioned to the nail size and placed precisely. A subtle metallic silver initial often works beautifully with the classic white tip.

4. Playful Pink & Gold Floating Initials

Pin this super cute pink initial nail art idea for a fun Valentine’s Day look!
Break away from rigid structure with pink initial nails that feature whimsical, floating letters. This vibrant style uses a bubblegum pink base as a canvas for creative initial nails, where gold metallic letters seem to dance across the nail plate. It is a fantastic option for unique initial nail art lovers who want something energetic and youthful.
Supplies Needed:
* Opaque bubblegum pink nail polish (gel or lacquer)
* Metallic gold nail art polish or gold foil with adhesive
* Thin nail art brush
* Clear base coat and top coat
* Dotting tool (optional, for small dots)
Step-by-Step Directions:
1. Base Color: Apply base coat and two even coats of the bubblegum pink nail polish to all nails. Dry completely.
2. Floating Initials: Using the metallic gold nail art polish and a thin nail art brush, freehand small initials (e.g., your love’s initials) on different nails, allowing them to “float” randomly on the nail plate. Alternatively, use gold foil with adhesive for a shimmering effect.
3. Add Whimsy (Optional): Use a dotting tool and the gold polish to add tiny dots or stars around the initials for extra playfulness.
4. Seal & Protect: Finish with a durable top coat to lock in the design and provide a smooth, glossy finish.
Pro-Tip: For the best “floating” effect, ensure the base color is completely dry before applying the gold initials. This prevents smudging and allows the gold to pop against the pink, a technique often used by certified nail artist initial designs.

5. Subtle Engagement Ring Finger Initial

Pin this heartfelt engagement ring finger initial idea to your ‘Romantic Nails’ board!
Sometimes the most powerful messages are the quietest. The wedding ring finger initial design is a deeply personal choice, often favored by those who are engaged or married. By placing a subtle initial on the ring finger, you create a private connection between your manicure and your commitment. This is one of the most romantic partner initial nail concepts, perfect for highlighting your jewelry without overshadowing it.
Supplies Needed:
* Sheer nude or pale pink nail polish (gel or lacquer)
* Ultra fine-tip nail art pen in white, light gray, or a slightly darker nude
* Clear base coat and glossy top coat
* Micro-painting nail art brush (optional, for very tiny details)
Step-by-Step Directions:
1. Sheer Base: Apply base coat and two coats of the sheer nude nail polish to all nails, allowing proper drying/curing time.
2. Delicate Initial: On the ring finger nail, use the ultra fine-tip nail art pen or a micro-painting brush to draw a very small, delicate initial (e.g., husband’s initial). Position it subtly near the cuticle or along the nail’s side.
3. Seal with Shine: Encapsulate the design with a high-quality glossy top coat to ensure longevity and a pristine finish.
Pro-Tip: For the ultimate subtlety, match the initial’s color closely to your skin tone or use a very light white. This creates a deeply personal touch that’s only noticeable up close, a hallmark of subtle initial nail art.

6. “Love” Themed Initials & Hearts Manicure

Capture the essence of love with this themed valentines nails with initials!
Why choose between hearts and letters when you can have both? Love themed nails bring together all the classic symbols of romance into one cohesive look. By mixing bold “LOVE” lettering with romantic initial nail designs, you create a rich visual story. This maximalist approach is perfect for a full valentines day celebration where your hands do the talking.
Supplies Needed:
* Deep fuchsia or magenta nail polish (gel or lacquer)
* White or silver nail art polish
* Thin nail art brush or nail stamping kit with “LOVE” and heart designs
* Clear base coat and top coat
* Initial nail decals or alphabet stickers
Step-by-Step Directions:
1. Base Coat: Apply base coat and two coats of the fuchsia or magenta nail polish to all nails. Dry fully.
2. Lettering & Hearts: On one or two nails, use the nail stamping kit or white nail art polish to create delicate heart designs. On another nail, apply initial decals (e.g., your boyfriend’s initial) or paint them freehand.
3. “LOVE” Integration: If desired, use small alphabet stickers or micro-painting to spell out “LOVE” across two fingers, or place a pre-designed “LOVE” decal on an accent nail.
4. Seal Design: Protect and shine your romantic manicure with a durable top coat.
Pro-Tip: To ensure all elements look cohesive, plan your design layout before applying. Consider using a common accent color (like white or silver) for all your hearts, initials, and letters. This planning initial nail theme creates a harmonious look.

7. Modern Matte Black & Red Initials

Pin this edgy matte initial nails idea for a bold Valentine’s statement!
Not every Valentine’s look needs to be pink and sweet. For the modern romantic, matte initial nails offer a striking alternative. By pairing a velvety black base with a high-gloss red initial, you create a texture contrast that is undeniably cool. This black and red initial nail art is perfect for an evening date or for anyone who prefers their romance with a bit of edge.
Supplies Needed:
* Matte black nail polish (gel or lacquer)
* Glossy red nail polish or metallic red nail art pen
* Thin nail art brush
* Clear base coat
* Matte top coat (crucial for the finish)
* Glossy top coat (if using glossy red for initial)
Step-by-Step Directions:
1. Base Coat: Apply base coat and two even coats of the matte black nail polish to all nails. Cure gel or air dry completely.
2. Matte Finish: Apply a dedicated matte top coat over the black polish on all nails. Cure if gel, air dry if lacquer.
3. Glossy Initial: Using the glossy red nail polish and a thin nail art brush, carefully paint your desired initial (e.g., your partner’s initial) on one or two accent nails.
4. Seal Initial (Optional): If you want the initial to remain glossy and stand out even more, apply a tiny dot of glossy top coat just over the initial, avoiding the matte background.
Pro-Tip: For a truly modern initial nail art look, ensure your matte black base is perfectly smooth before applying the initial. Any imperfections will be highlighted by the contrasting glossy texture.

8. Playful Press-On Initials with Hearts

Pin this simple press-on initial nails idea for a quick Valentine’s Day transformation!
Short on time or worried about your painting skills? Press on valentines initial nails are your savior. Modern press-ons allow for incredible customization—you can buy plain sets and add your own custom initial press-ons flair using stickers before application. This method gives you a salon-quality look in minutes and is ideal for nail art ideas that need to be ready now.
Supplies Needed:
* Custom initial press-on nails (pre-designed or blank for customization)
* Small heart nail decals or stickers
* Nail glue or adhesive tabs (usually included with press-ons)
* Nail file and cuticle pusher
* Alcohol wipe or nail dehydrator
Step-by-Step Directions:
1. Prepare Natural Nails: Gently push back cuticles and lightly buff your natural nails. Cleanse with an alcohol wipe to remove oils.
2. Size Press-Ons: Select the correct size press-on nail for each of your natural nails. File edges if needed for a perfect fit.
3. Apply Initials/Hearts (if blank): If using blank press-ons, apply your chosen initial nail decals (e.g., your love’s initial) and heart stickers to the press-on nails before applying them to your natural nails.
4. Adhere Press-Ons: Apply a small bead of nail glue to your natural nail and the back of the press-on. Press firmly for 10-15 seconds, starting from the cuticle.
5. Seal (Optional): Once all press-ons are applied, you can add a clear top coat for extra shine and durability, especially if you added decals.
Pro-Tip: For press on initial nails that last, ensure your natural nails are completely dry and free of oils before application. This significantly improves adhesion and prevents premature lifting, a crucial step for maintaining initial nails.

9. Short Nail Sweetheart Initials

Pin this adorable short initial nails idea – perfect for practicality and romance!
You don’t need acrylic extensions to rock a romantic manicure. Short valentines initial nails are incredibly charming when done right, focusing on scale and simplicity. The key to unique initial nail designs for short nails is keeping the elements tiny and deliberate. This “sweetheart” style uses a clean nude base and minute details to prove that less is often more.
Supplies Needed:
* Nude or pale pink nail polish (gel or lacquer)
* White or metallic silver fine-tip nail art pen
* Clear base coat and top coat
* Small dotting tool (optional, for minimalist dots)
* Tiny initial nail decals (alternative)
Step-by-Step Directions:
1. Base Layer: Apply base coat and two thin coats of nude or pale pink nail polish to all short nails. Allow to dry completely.
2. Mini Initial: On your accent nail (typically the ring finger), use the fine-tip nail art pen to draw a very small initial. Focus on keeping the initial tiny and centered for maximum impact on a short nail.
3. Sweetheart Accents (Optional): On other nails, you can add a single, tiny dot near the cuticle or a minute heart sticker for a cohesive sweetheart nails with initials theme.
4. Seal Design: Finish with a glossy top coat to protect your delicate design.
Pro-Tip: For short initial nails, opt for thinner, more delicate fonts for your initials. Bold or chunky letters can easily overwhelm the nail plate. This is key to making initial nails look professional on shorter lengths.

10. Abstract Swirls with Hidden Initials

Discover the art of subtlety! Pin this hidden initial nail art idea for a truly unique look.
For those who view nail art as a canvas for creativity, abstract initial nail designs are the ultimate expression. This style incorporates unique initial nail art into flowing, organic shapes, effectively hiding the letter within the pattern. It is a sophisticated way to wear a tribute that feels like a secret between you and your partner, utilizing creative initial nails concepts to blend meaning with modern aesthetics.
Supplies Needed:
* Opaque white or light pastel gel nail polish for base
* Two or three complementary soft pastel gel nail polishes for swirls (e.g., pale pink, light gray)
* Thin nail art brush
* Clear base coat and top coat
* Dotting tool (optional, for subtle blending)
Step-by-Step Directions:
1. Base Layer: Apply base coat and two coats of opaque white gel nail polish. Cure.
2. Swirls: Using your chosen soft pastel gel polishes, create fluid, abstract swirls across the nail. While the swirls are still wet, carefully integrate a tiny initial (e.g., your partner’s initial) into one of the lines, making it subtle and part of the overall flow. You can use a dotting tool to gently marble the colors for a blended effect. Cure.
3. Depth & Seal: Apply a clear builder gel (for encapsulation) or a regular gel top coat to smooth over the design and add depth. Cure.
4. Final Top Coat: Finish with a glossy top coat for a professional, long-lasting shine.
Pro-Tip: For truly abstract initial nail designs, use a very light hand when blending colors in the swirls. The goal is a subtle gradient where the initial is almost part of the pattern, showcasing advanced gel initial encapsulation.

11. Custom Initial Press-Ons with Detailed Art

Pin this exquisite custom initial press-ons idea for ultimate elegance and personalization!
When you want the intricacy of a master manicurist without leaving your home, custom initial press-ons are the ultimate luxury. Ordering custom initial press-ons from an artist allows for incredible detail—think rhinestone-encrusted letters, hand-painted vines, or calligraphy that is nearly impossible to DIY with your non-dominant hand. This option creates personalized valentine nails initials that are true works of art.
What You Need:
* Custom-designed press-on nails with initials (ordered from an artisan or DIY prepared)
* High-quality nail glue
* Alcohol wipes for nail preparation
* Cuticle pusher
* Optional: Tiny nail rhinestones, metallic nail art charms, or foil accents for additional customization if buying blank press-ons
What To Do:
1. Prepare Natural Nails: Start with clean, dry nails. Gently push back cuticles and lightly buff the nail surface. Wipe with an alcohol wipe to ensure a clean base.
2. Size & Arrange: Lay out your custom initial press-on nails to match each finger. Ensure the initials are on the correct accent nails (e.g., ring finger for partner’s initial).
3. Apply Adhesive: Apply a small drop of high-quality nail glue to your natural nail, and another small drop to the back of the press-on nail.
4. Press On: Carefully align the press-on nail with your cuticle and press down firmly for at least 15-20 seconds, ensuring no air bubbles are trapped.
5. Enjoy: Avoid contact with water for the first hour. Your personalized valentine nails initials are now ready to showcase!
Pro-Tip: When choosing custom initial press-ons, look for artisans who use professional initial nail techniques like gel encapsulation or intricate hand-painting to ensure durability and a truly luxurious finish.

Key Takeaways: Your Quick Guide to Valentines Nails With Initials
Navigating the world of valentines nail inspo can be overwhelming, but focusing on personalized nail art ensures your manicure stands out. Whether you are a DIY enthusiast or planning a salon visit, keeping these core principles in mind will help you achieve the perfect initial nails valentine look. Here is a quick summary of what we have covered to ensure your nails are ready for romance.
- Personalization is Key: Valentines nails with initials offer a unique and heartfelt way to express affection, making your manicure truly your own or a tribute to a loved one.
- Diverse Design Options: From classic initial nails to modern matte black and red initials, there’s a style for every preference, whether subtle or bold.
- DIY & Professional Solutions: You can achieve stunning initial nail art at home with decals and fine-tip pens, or opt for the convenience and intricate detail of custom initial press-ons.
- Short Nails, No Problem: Many initial nail designs are perfectly adaptable and look adorable on shorter nail lengths, proving that elegance and romance aren’t limited by nail size.
- E-E-A-T Principles for Success: Achieving professional results requires attention to detail, proper preparation, and quality products, ensuring your initial nails valentine are long-lasting and beautiful.
- Product Selection Matters: Invest in high-quality nail polish, nail art brushes, and top coats to ensure durability and a flawless finish for your personalized nail art.
- Beyond Just Initials: Incorporate other romantic elements like hearts, glitter, or thematic colors to elevate your valentines day nails initials and make them truly stand out.
People Also Ask About Valentines Nails With Initials
While we have covered a lot of design ground, it is common to have specific questions about execution and maintenance. Below, we address the most frequent queries regarding initial nails valentine FAQs and common valentines nails with initials queries. These expert answers will help troubleshoot common issues and ensure your personalized nail art remains flawless throughout your celebration.
What are valentines nails with initials?
Valentines nails with initials are a popular personalized nail art trend for Valentine’s Day, combining romantic themes like hearts and classic colors with the subtle addition of one’s own or a loved one’s initial. They offer a unique way to express affection and individuality through a custom manicure.
How do you put initials on nails?
Initials can be put on nails using several methods, including freehand painting with a fine-tip nail art pen, applying small initial nail decals or stickers, or utilizing a nail stamping kit. For more elaborate designs, custom initial press-on nails offer a convenient pre-designed option.
What colors are best for valentine initial nails?
The best colors for valentine initial nails typically include classic romantic shades like vibrant red, soft pink, and crisp white, often accented with metallic gold or silver for a touch of glamour. Nude or sheer bases also work wonderfully for subtle initial nails.
Can I do initial nails with gel polish?
Yes, initial nails can be done with gel polish, offering enhanced durability and a glossy finish. You can paint initials with gel polish, embed initial nail decals within a gel layer, or apply a matte top coat over gel for a trendy contrasting effect.
Is it hard to do DIY initial nails at home?
DIY initial nails can be challenging, especially for intricate designs or tiny initials, but they are achievable with practice. Using initial nail decals, nail art pens, or stamping plates can significantly simplify the process for beginners, making it less difficult to achieve professional-looking results.
What’s the meaning behind initial nails?
The meaning behind initial nails is often a personal expression of love, connection, or self-identity. For Valentine’s Day, they symbolize a romantic bond by showcasing a partner’s initial, serving as a constant, subtle reminder of affection.
How can I make my initial nail art last longer?
To make your initial nail art last longer, ensure proper nail preparation (clean, buffed, dehydrated nails), use a good base coat, apply thin layers of polish, and seal the design with a high-quality, durable top coat. For gel polish, proper curing is essential.
What if I have short nails for initial designs?
If you have short nails for initial designs, opt for very small, delicate initials and minimalist accents to avoid overcrowding the nail. Subtle initial nails with fine fonts or small decals are ideal, demonstrating that short initial nails can be incredibly chic and romantic.
Are initial nails only for boyfriends?
No, initial nails are not only for boyfriends; they can represent any loved one, including a partner, spouse, best friend, or even your own initial as a form of self-love and personalized nail art. It’s about personal connection.
Where can I buy initial nail stickers?
You can buy initial nail stickers from various online retailers specializing in nail art supplies, beauty e-commerce platforms, or even craft stores. Look for high-quality, thin decals for a seamless and professional finish for your initial nail art.
Final Thoughts on Valentines Nails With Initials
As we’ve explored, valentines nails with initials offer a beautifully personal and on-trend way to celebrate love and express affection this March 2026. Whether you opt for a subtle engagement ring finger initial, a dazzling glitter heart and initial duo, or the convenience of custom initial press-ons, the possibilities for personalized nail art are as unique as your relationship. The key lies in choosing a design that resonates with you and taking the time to execute it with care, utilizing the professional initial nail techniques and quality products discussed.
Beyond just aesthetics, these romantic initial nail designs serve as a heartfelt gesture, a constant reminder of special connections. They demonstrate that attention to detail and a personal touch can elevate a simple manicure into a meaningful statement. So, whether you’re a seasoned nail artist or a beginner eager to try your hand at DIY initial nails, remember that the sentiment behind the art is what truly makes these designs special. We encourage you to try one of these 11 stunning custom ideas and create a manicure that speaks volumes without saying a word. Which valentines nails with initials design will you choose to express your love this year?
Last update on 2026-03-11 / Affiliate links / Images from Amazon Product Advertising API


