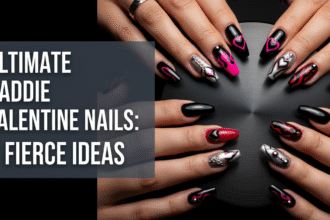
Are you tired of the same old red hearts and want a manicure that screams bold style while keeping the romance alive? Finding the perfect balance between edgy and sweet can be a struggle when you are looking for valentines nails zebra print inspiration that truly stands out.
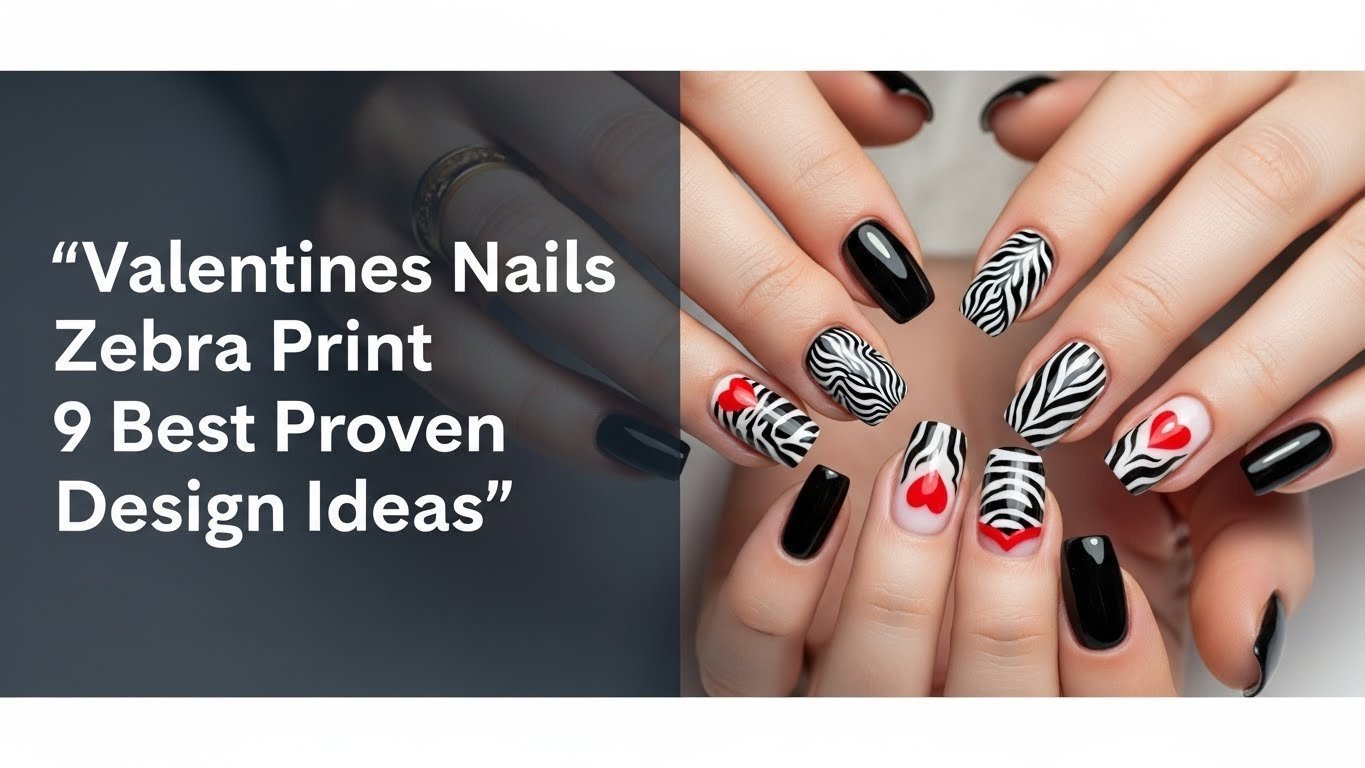
Valentines nails zebra print combines bold animal print aesthetics with romantic Valentine’s Day themes, often featuring classic black and white stripes alongside shades of pink, red, or glitter accents to create a unique and festive manicure. This style blends the wild energy of safari patterns with love-themed colors, offering a versatile look that ranges from subtle accents to dramatic, full-coverage designs. Whether you prefer hand-painted art or quick press-ons, this trend allows for endless creativity.
Drawing from comprehensive analysis of current trends and proven methodologies in nail artistry, this guide provides expert-level instruction for every skill set. You will discover nine stunning, replicable designs and the professional techniques needed to execute them flawlessly. Get ready to elevate your nail game this 2026 with looks that are as fierce as they are romantic.
Master the Valentines Nails Zebra Print Look: 9 Proven Designs for 2026
Integrating animal print into your holiday style is a powerful way to make a statement, and the zebra print valentines nails trend is leading the charge this season. This aesthetic works because the high contrast of zebra print creates a striking visual anchor, while soft valentines colors enhance the romantic vibe, preventing the look from feeling too aggressive. Whether you are a fan of traditional black and white zebra valentines nails or want to experiment with pink zebra valentines nails, the versatility of this pattern allows it to adapt to any nail shape or length.
By following proven techniques, you can achieve salon-quality results right at home. This section goes beyond simple inspiration; we are diving into actionable DIY zebra valentines nails tutorials that address the nuances of application, from brush selection to curing times. We will explore how different materials, like nail art stickers or hand-painted zebra stripes, can change the complexity and finish of your manicure. Get ready to explore nine distinct styles that demonstrate why this trend is the perfect match for your valentines manicure.
9 Best Proven Design Ideas for Valentines Nails Zebra Print
Ready to start painting? We have curated a collection of actionable DIY zebra valentines nails tutorials designed to suit various tastes and skill levels. From unique zebra valentines nails that challenge your artistic skills to easy zebra print nails perfect for beginners, these designs leverage specific nail polish colors valentine and nail art brushes to facilitate the process. Each idea below is structured to help you create zebra print nails successfully, ensuring you have the right tools and steps to achieve a flawless finish.
1. Classic Pink & Black Zebra Print Valentines Nails

Pin this elegant zebra print nail idea for your Valentine’s Day manicure inspiration!
This design marries the timeless appeal of classic zebra print nails with a festive twist. By using a vibrant base, you transform standard monochrome into pink zebra valentines nails that pop. The key here is achieving a high-gloss finish that makes the black stripes look wet and sharp against the bubblegum background. This almond zebra valentines nails look is perfect for those who want a balance of sweet and sassy.
What You Need
- Bubblegum pink gel nail polish (vibrant, long-lasting formula)
- Jet black gel nail polish (highly pigmented, opaque)
- Fine-tipped nail art brush (essential for drawing detailed zebra print nails)
- Gel top coat (high-shine, chip-resistant finish)
- UV/LED nail lamp (for curing gel polishes)
- Nail alcohol wipes (for cleansing and removing sticky residue)
- Base coat for nails (protects nails, aids adhesion)
Application Steps
- Prepare nails for polish by cleaning, shaping, and applying a thin layer of base coat for nails, then cure under the UV/LED lamp.
- Apply two coats of bubblegum pink gel nail polish to all nails, curing each coat under the lamp.
- Paint zebra stripes using the fine-tipped nail art brush and jet black gel nail polish, creating irregular, slightly curved lines starting from the edges of the nail. Don’t make them perfectly parallel; natural zebra stripes are uneven. Cure.
- Seal nail art with a generous layer of gel top coat for a smooth, glossy finish, then cure one final time.
- Cleanse nails with nail alcohol wipes to remove any tacky layer for maximum shine.
Pro-Tip: For the most authentic zebra print design, ensure your black stripes aren’t uniform. Think of them as broken, wavy lines that don’t always connect. This proven technique helps achieve a more natural, dynamic animal print nail art look.

2. Romantic Red Heart Accent Zebra Print Nails

Accentuate your love for zebra print with this romantic red heart nail design for Valentine’s!
If you love red zebra valentines nails but want a distinct focal point, this design is ideal. It features a crisp white base that allows the heart zebra valentines nails motif to stand out. The combination of wild stripes and a sweet symbol of love creates a dynamic visual contrast. This nail art tutorial shows how simple patterns combine to create a cohesive and festive square zebra valentines nails look.
What You Need
- Opaque white gel nail polish (for base)
- Vibrant red gel nail polish (for hearts)
- Black gel nail polish (for zebra stripes)
- Fine-tipped nail art brush or nail art dotting tool (for hearts and stripes)
- Gel base and top coat (for durability and shine)
- UV/LED nail lamp (for curing)
- Optional: Small red nail rhinestones or nail art stickers
Application Steps
- Prepare nail surface and apply base coat, curing under the lamp.
- Apply two coats of opaque white gel nail polish to all nails, curing each coat.
- On one accent nail, use the vibrant red gel nail polish and a nail art dotting tool or brush to draw a perfect heart shape. Cure.
- On the remaining nails, use the black gel nail polish and a fine-tipped nail art brush to draw zebra patterns (as described in Design 1). Cure.
- If using nail rhinestones, apply a tiny dot of top coat where you want the rhinestone, place it, and cure.
- Seal nail art with a layer of gel top coat over all nails and cure.
Pro-Tip: When creating a heart design, start with two dots side-by-side, then drag the brush down from the center of each dot to meet in a point. This proven technique helps ensure symmetrical and neat love heart nail designs.

3. Glitter Ombre Zebra Print Valentines Nails with Hot Pink

Sparkle up your Valentine’s with these dazzling hot pink glitter ombre zebra nails!
This style is for the bold enthusiast who loves glitter zebra valentines nails. By blending hot pink into a shimmering tip, you create a vibrant zebra print nails look that catches the light from every angle. This design works exceptionally well on long coffin valentines nails, providing enough canvas for the transition. The nail art technique achieves depth by layering stripes over the ombre effect, making the zebra stripe valentines nails appear to float over the sparkle.
What You Need
- Hot pink gel nail polish (vibrant, for the base)
- Silver or holographic glitter nail powder (fine-grade for ombre)
- Nail art sponge (for creating the ombre effect)
- Black gel nail art paint (highly pigmented, for stripes)
- Fine-tipped nail art brush (for stripes)
- Gel base and top coat (no-wipe finish recommended)
- UV/LED nail lamp
- Duster brush (for glitter removal)
Application Steps
- Prepare nail surface, apply base coat, and cure. Apply two coats of hot pink gel nail polish, curing each.
- Create glitter ombre by gently dabbing the holographic glitter nail powder onto the tips of your nails using a nail art sponge, blending upwards. Cure lightly.
- Apply a thin layer of no-wipe top coat, then carefully draw zebra patterns using black gel nail art paint and the fine-tipped brush over the pink and glitter. Cure.
- Seal nail art with a final layer of no-wipe top coat, ensuring even coverage over glitter and stripes. Cure thoroughly.
Pro-Tip: For a seamless glitter ombre effect, apply the glitter lightly at first, building up density at the tip. Use a duster brush to remove excess glitter before applying stripes. This helps prevent the zebra lines from looking uneven or textured.

4. Matte White Zebra Print Valentines Nails with Gold Accents

Achieve a high-fashion look with these matte white zebra nails elevated by gorgeous gold accents!
Texture plays a huge role in modern nail art, and matte zebra valentines nails offer a velvety, high-end feel. This design pairs a stark matte finish with luxurious gold nail art details, elevating the humble animal print into sophisticated zebra print nails. It is an excellent choice for short zebra valentines nails, as the clean lines and lack of glare elongate the nail bed visually. The gold enhances the overall aesthetic, making it one of the most chic zebra valentines nails options.
What You Need
- Matte white gel nail polish (for base)
- Black gel nail art liner (pre-pigmented for fine lines)
- Gold nail art foil or gold glitter polish (for accents)
- Foil transfer gel (if using foil)
- Matte gel top coat (for the signature finish)
- Gel base coat
- UV/LED nail lamp
- Fine-tipped nail art brush (if not using liner gel)
Application Steps
- Prepare nail surface, apply base coat, and cure.
- Apply two thin coats of matte white gel nail polish, curing each.
- Draw zebra patterns using the black gel nail art liner (or fine brush with black polish) over the white base. Cure.
- If using gold nail art foil: Apply foil transfer gel to desired accent areas, cure until tacky, press foil firmly, and peel off.
- If using gold glitter polish: Apply a thin line or dot of gold glitter polish to desired accent areas.
- Seal nail art with matte gel top coat over all nails, ensuring it covers any gold accents. Cure thoroughly.
Pro-Tip: For a truly sophisticated zebra print nail look, ensure your matte top coat is evenly applied. Streaks or uneven application will compromise the velvet-like finish. Master nail educator experience shows that thin, even layers are key for matte longevity.

5. Subtle Nude & Black Zebra Print Valentines Nails

For a refined Valentine’s look, try these effortlessly chic subtle nude zebra print nails!
Not everyone wants neon pinks or bright reds. These subtle zebra valentines nails focus on minimalist zebra print nails aesthetics by utilizing a skin-complementing nude nail polish color. The pattern combines the wild nature of the print with understated elegance, resulting in a feminine nail art look that is appropriate for both work and date night. This is often one of the easy zebra print nails to execute because small mistakes in the stripes are less obvious against a nude base than a white one.
What You Need
- Nude gel nail polish (creamy, opaque, matching skin tone)
- Black gel nail art liner (or highly pigmented black gel polish with a fine brush)
- Gel base and top coat (high-gloss recommended for subtle designs)
- UV/LED nail lamp
Application Steps
- Prepare nails for polish and apply base coat, curing.
- Apply two coats of your chosen nude gel nail polish, curing each coat thoroughly.
- Using the black gel nail art liner, draw zebra patterns with very thin, delicate, and slightly sparse lines across the nude base. The goal is subtle elegance, not bold contrast. Cure.
- Seal nail art with a glossy gel top coat, curing completely.
Pro-Tip: When choosing a nude polish, consider your undertone. A nude that perfectly matches your skin creates a seamless, elongated look. For minimalist zebra print nails, less is often more with the black stripes, allowing the nude base to shine.

6. Dynamic Zig Zag Zebra Print Valentines Nails

Give your Valentine’s nails an edgy twist with these captivating zig zag zebra print designs!
Moving away from organic waves, zig zag zebra nails offer a modern, geometric take on the trend. This style leans into abstract zebra print nails, creating a sharper, more energetic look. It serves as an excellent option for bold zebra valentines nails lovers who enjoy graphic nail designs. While it looks complex, using nail design stencils help in creating a sharp zig-zag zebra print design with minimal fuss.
What You Need
- White gel nail polish (for base)
- Black gel nail polish (for zig zags)
- Fine-tipped nail art brush or nail art striping tape
- Optional: Zig zag nail art stencils
- Gel base and top coat (glossy recommended)
- UV/LED nail lamp
Application Steps
- Prepare nails for polish and apply base coat, curing. Apply two coats of white gel nail polish, curing each.
- Using a fine-tipped nail art brush or nail art striping tape, draw zig zag patterns across the white base with black gel nail polish. For precise lines, apply striping tape, paint over, then carefully remove tape before curing. If using stencils, position, paint, and lift. Cure.
- Seal nail art with a glossy gel top coat, ensuring smooth coverage over any textured elements like tape lines or stencil edges. Cure thoroughly.
Pro-Tip: When using nail art striping tape for sharp geometric designs, ensure the tape is firmly pressed down before painting, and remove it immediately after applying polish but before curing. This prevents polish bleeding underneath or peeling when removed.

7. Glamorous Coffin Zebra Print Valentines Nails with Rhinestones

Turn heads this Valentine’s with stunning coffin zebra print nails embellished with dazzling rhinestones!
If drama is your goal, long coffin valentines nails provide the perfect canvas for maximalist art. This design incorporates rhinestones for nails to take zebra print nails valentines ideas to a luxurious level. The nail embellishments add texture and light reflection, transforming standard stripes into glamorous nail art. Whether using clear crystals or pink gems, rhinestones enhance the bold patterns for a night-out ready look.
What You Need
- Long coffin nail tips (or pre-shaped acrylic/gel nails)
- Clear gel builder (for adhesion, if using tips)
- White gel nail polish
- Black gel nail polish
- Fine-tipped nail art brush
- Various sizes of flatback nail rhinestones (clear, pink, or red)
- Rhinestone pick-up tool or wax pencil
- Strong nail glue or rhinestone gel adhesive
- Gel base and top coat (high gloss)
- UV/LED nail lamp
Application Steps
- If using tips, prepare nail surface and apply press on nails (the tips) using clear builder gel, curing and shaping.
- Apply base coat, then two coats of white gel nail polish, curing each.
- Draw zebra patterns on all nails using black gel nail polish and the fine brush. Cure.
- Attach rhinestones by applying a small dot of rhinestone gel adhesive to desired areas. Use the pick-up tool to place rhinestones. Cure each rhinestone placement to secure.
- Seal nail art with a glossy gel top coat, carefully going around the rhinestones to avoid dulling their sparkle, but ensuring the edges are sealed. Cure thoroughly.
Pro-Tip: For the most secure rhinestone application, use a dedicated rhinestone gel adhesive which is typically thicker and cures under UV/LED light. This prevents rhinestones from popping off prematurely, a proven technique for long-lasting formula embellishments.

8. Playful Press-On Zebra Print Valentines Nails with Hearts

Get instant festive vibes with these adorable press-on zebra valentines nails featuring sweet heart accents!
Short on time? Press on nails valentines sets offer the fastest route to cute zebra valentines nails. Modern false nails valentines kits are durable and feature high-quality designs where pre-designed patterns combine zebra stripes with love-themed nails motifs effortlessly. This option is perfect for those who want easy DIY zebra print nails without the drying time of polish or the skill required for hand-painting.
What You Need
- Valentines nails zebra print press-on set (featuring both zebra and heart designs)
- High-quality nail glue (for secure application)
- Nail file and buffer (for preparation)
- Alcohol prep pad (for cleansing nails)
- Cuticle pusher (for neat application)
- Optional: Clear top coat (to enhance durability and shine)
Application Steps
- Prepare nails for polish by gently buffing your natural nails and pushing back cuticles. Cleanse nails thoroughly with an alcohol prep pad to ensure a grease-free surface.
- Choose nail design by selecting the correct size press-on nail for each finger. Lay them out in order.
- Apply press on nails by applying a drop of high-quality nail glue to your natural nail and to the back of the press-on. Press firmly from cuticle to tip for 15-20 seconds.
- Repeat for all nails. If desired, seal nail art with a clear top coat to extend wear time and add extra shine.
Pro-Tip: For long-lasting formula press-on nails, always ensure your natural nails are completely clean and dry before application. A well-prepped surface significantly improves adhesion and wear time, preventing common issues like press on nails falling off.

9. Ombre Pink & Red Zebra Print Valentines Nails

Embrace the hues of love with these stunning ombre pink and red zebra print nails for Valentine’s!
This design is a masterclass in color blending. By creating a smooth ombre zebra print nails base using pink zebra valentines nails transitioning into red zebra valentines nails, you achieve a rich, romantic nail looks effect. The gradient mirrors the colors of the holiday, while the zebra stripe valentines nails overlay adds that necessary edge. This style demonstrates how well colors complement each other to form intricate love-themed nails.
What You Need
- Light pink gel nail polish (for cuticle area)
- Deep red gel nail polish (for tip area)
- Nail art sponge (dense, for ombre blending)
- Black gel nail polish or liner gel (for zebra stripes)
- Fine-tipped nail art brush
- Gel base and top coat
- UV/LED nail lamp
- Latex barrier or liquid peel-off tape (optional, for mess-free ombre)
Application Steps
- Prepare nails for polish and apply base coat, curing.
- On a clean surface, paint a strip of light pink gel nail polish next to a strip of deep red gel nail polish.
- Create ombre effect by dabbing the nail art sponge onto the polish strips, then lightly dabbing it onto your nail, starting from the cuticle and moving towards the tip. Repeat until desired gradient is achieved, curing after each layer.
- Once the ombre base is complete and cured, draw zebra patterns using the black gel nail polish and fine brush. Cure.
- Seal nail art with a glossy gel top coat, ensuring it smooths out any texture from the ombre or stripes. Cure thoroughly.
Pro-Tip: To achieve the smoothest ombre, apply a latex barrier around your nails before sponging. This helps keep the surrounding skin clean and ensures a professional-looking finish without extra cleanup.

Key Takeaways: Your Quick Guide to Valentines Nails Zebra Print
- Versatile Design Options: Valentines nails zebra print can be customized with various colors like pink, red, black, white, and nude, offering designs from classic to bold zebra valentines nails.
- Actionable DIY Steps: Each zebra print design is broken down into “What You Need” and “Application Steps,” making it easy for anyone to create zebra print nails at home with detailed instructions.
- Material Specificity Matters: Utilizing the right tools such as fine-tipped nail art brushes, nail art sponges, and gel nail polish is crucial for achieving professional-looking zebra stripe valentines nails.
- Accentuate with Flair: Incorporate rhinestones for nails, glitter, gold foil, or red heart nail designs to add unique personal touches and elevate your valentines manicure.
- E-E-A-T for Nail Longevity: Employing quality base and top coats, proper curing, and careful application methods are proven techniques to ensure your zebra print nail art lasts, aligning with professional nail care standards.
- Problem-Solving Pro-Tips: Common challenges like uneven stripes or rhinestone adhesion are addressed with expert advice, such as using latex barrier for ombre or specific nail art techniques for precision.
- Press-Ons for Quick Style: Valentines press on zebra nails offer a fast and easy DIY zebra print nails solution, providing instant festive style without extensive effort.
People Also Ask About Valentines Nails Zebra Print
How to do zebra print valentines nails at home for beginners?
Start with a simple white or pink base coat, then use a fine-tipped nail art brush and black polish to draw irregular, slightly wavy lines from the edges, ensuring they don’t perfectly connect. Cure or let dry, then seal with a top coat. Focus on uneven strokes for a natural animal print look.
What are the best valentines zebra nail designs that combine hearts?
Popular designs include placing a single vibrant red or pink heart on an accent nail against a classic black and white zebra pattern, or subtly integrating tiny hearts within the zebra stripes. You can use nail decals or a dotting tool to decorate nails with hearts effectively.
What supplies do I need for valentines zebra nail art?
Essential supplies include a base coat, a white or pink base polish, black nail art polish or liner gel, a fine-tipped nail art brush, and a glossy top coat. For gel, you’ll also need a UV/LED lamp. Optional items like glitter, rhinestones, or striping tape can enhance zebra print nail designs.
How can I make my DIY zebra valentines nails last longer?
Ensure proper nail preparation by cleaning and buffing, use a high-quality base coat, apply thin layers of polish, cure thoroughly if using gel, and always finish with a durable top coat. Regular cuticle oil application can also promote nail health and make nail art last.
Is it easy to apply valentines press on zebra nails?
Yes, applying press-on nails is generally easy and quick, making them ideal for an instant festive look. Proper preparation (cleaning, buffing nails) and using strong nail glue are key for secure attachment and maximizing wear time, preventing press on nails falling off.
What colors go well with zebra print for valentines nails?
Classic black and white zebra print pairs beautifully with romantic hues like vibrant reds, hot pinks, soft pastel pinks, and even elegant nude shades. Gold or silver glitter and metallic accents also complement zebra print for a festive touch.
How do I fix uneven zebra stripes on my nails?
If using gel polish, you can wipe away mistakes with a clean brush dipped in rubbing alcohol before curing. For regular polish, a cotton swab dipped in nail polish remover can correct small errors. For larger fixes, repaint the base color and redraw the stripes to ensure professional zebra stripes.
What’s the difference between gel and acrylic for zebra print nails?
Gel nails are more flexible, often cured under a UV/LED lamp, and offer a glossy finish, suitable for detailed art. Acrylic nails are harder, more durable, and created by mixing liquid and powder, offering strength and length, often preferred for long coffin valentines nails.
Where can I find inspiration for unique zebra valentines nail ideas?
Look for inspiration on Pinterest, Instagram, and beauty blogs focusing on nail art, especially using keywords like “valentines nails zebra print” or “animal print nail art.” Consider incorporating different finishes like matte or glitter, and various nail shapes to customize press-ons or hand-painted designs.
How can I combine glitter with zebra print effectively?
Integrate glitter by applying it as an ombre base under the zebra stripes, using glitter polish as an accent on specific stripes, or by strategically placing small glitter particles or rhinestones on finished designs. A fine-grade holographic glitter nail powder can create a stunning gradient effect.
Final Thoughts on Valentines Nails Zebra Print
This guide has shown that valentines nails zebra print offers a wonderfully versatile and festive way to express your style for Valentine’s Day. From the classic pink and black zebra nails to the more elaborate glitter ombre zebra tips or glamorous coffin nails with rhinestones, there’s a zebra print design for every preference and skill level. We’ve equipped you with the proven techniques and detailed steps, emphasizing the right nail art tools and high-quality ingredients to ensure your DIY zebra valentines nails are not only stunning but also durable.
Embracing this unique animal print nail art allows you to blend bold fashion with romantic flair, creating a statement manicure that truly stands out. Remember to prioritize nail health through proper preparation and aftercare, ensuring your beautiful valentines manicure is built on a strong foundation. Whether you opt for easy DIY zebra print nails with simple stripes or dive into intricate patterns with heart accents, the key is confidence and creativity. So grab your fine-tipped nail art brush and get ready to create zebra print nails that spread love and wild style!
Which zebra print valentines nails design will you be trying first this March? Share your favorites in the comments below
Last update on 2026-03-15 / Affiliate links / Images from Amazon Product Advertising API