Tired of the same old red nails for Valentine’s? You want a look that’s flirty and fun for the season but still feels modern and sophisticated. It can be a challenge to find designs that hit that perfect sweet spot.
The best pink Valentine’s nails for a modern look combine classic romantic elements with contemporary nail art techniques. These often include minimalist heart details, subtle glitter accents, elegant pink French tips, and soft ombre gradients, offering a sophisticated alternative to traditional red designs. This approach gives you a fresh, chic, and personal way to celebrate.
Drawing from established best practices and current beauty nail trends, this guide breaks down the most stunning ideas. You’ll discover 11 actionable designs, complete with the exact steps and tools needed to achieve them. Get ready to find your perfect valentines nails pink manicure for June 2026.
What Are The Best Pink Valentine’s Day Nails for a Modern Look?
When you’re searching for the perfect pink valentine’s day nails, it’s about finding a style that feels both festive and personally expressive. The beauty of pink is its incredible range. You can go for subtle blush pink nails that whisper romance or make a bold statement with vibrant hot pink valentine nails. The best modern looks often incorporate a creative twist on classic ideas, proving that pink is anything but predictable. This guide moves beyond simple inspiration, providing actionable expert pink valentines nail tips for each design. We’ll explore how to use different shades, textures, and techniques—from ombre to French tips—to create a variety of stunning, romantic nail designs that feel fresh for 2026.
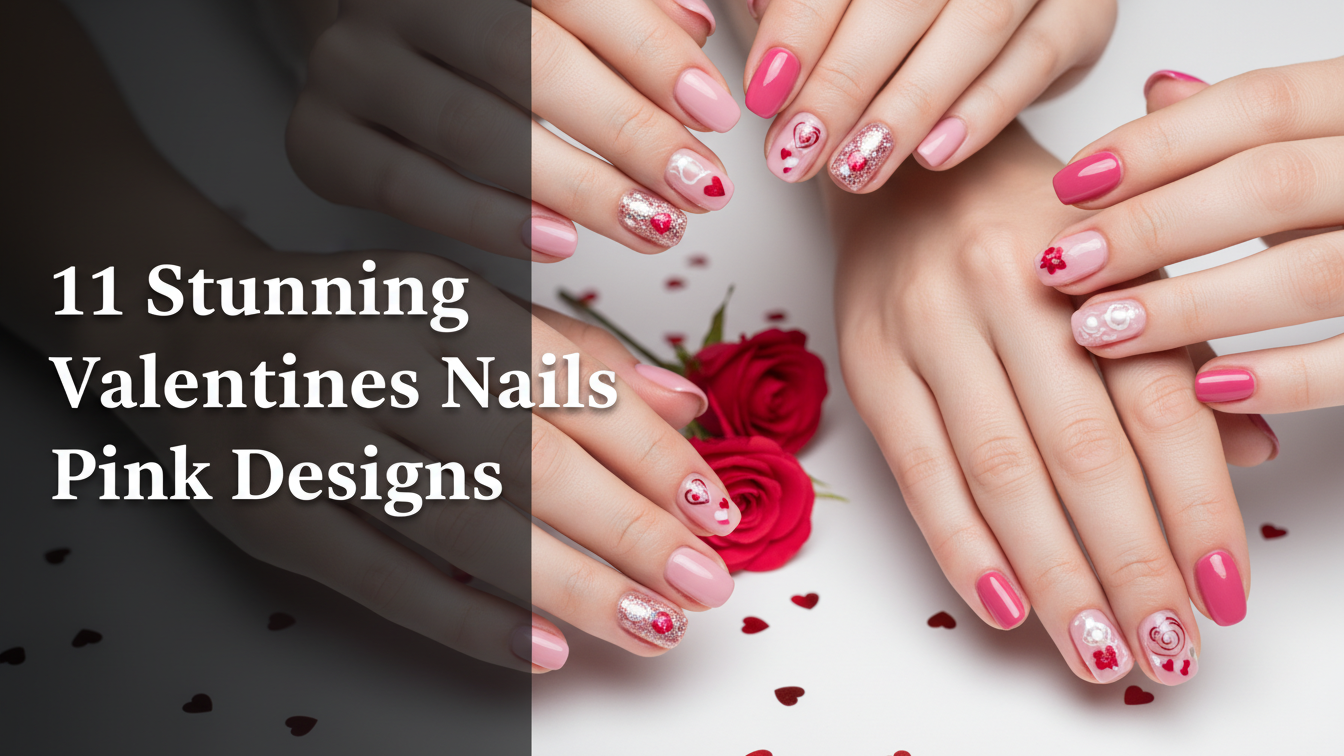
11 Stunning Valentines Nails Pink Designs for a Romantic Look
Here is a curated list of 11 beautiful and achievable pink valentine nail art ideas. Each design includes a clear list of what you’ll need and step-by-step instructions to help you get the look, whether you’re doing it yourself or showing it to your nail technician. From simple pink valentine nails to more intricate styles, there’s an idea here for every skill level and taste.
1. Create a Classic Light Pink Manicure with a Tiny Heart Accent

Pin this simple pink valentine nails idea for a touch of minimalist romance!
Products & Tools Used
- Sheer or opaque light pink nail polish (e.g., a ballet slipper or bubblegum pink shade)
- Opaque white nail polish for the accent
- High-gloss, quick-dry top coat
- Nail art dotting tool with a very fine tip, or a toothpick
- Base coat for nail plate adhesion science
Application Steps
- Prepare your nails by filing, shaping, and applying a quality base coat to protect the nail.
- Apply two thin coats of your chosen light pink nail polish to all nails, allowing each coat to dry completely.
- On your ring finger, use the dotting tool to place two small, equal-sized dots of white polish next to each other.
- From the bottom of each dot, drag the polish down and inwards to meet at a point, forming a tiny heart shape.
- Let the heart design dry for 2-3 minutes, then seal the entire manicure with a high-gloss top coat for shine and longevity.
Pro-Tip: In my experience, for the most delicate heart, use less polish on your dotting tool than you think you need. You can always add more, but it’s hard to take away. This prevents a “blobby” look and keeps the design classy pink valentine nails chic.

2. Design a Subtle Pink Ombre with a Touch of Glitter

Save this dreamy ombre pink valentine nails idea to your ‘Nail Inspo’ board!
Products & Tools Used
- A sheer nude or milky white polish for the base
- A medium pastel pink valentine nails polish
- A loose, ultra-fine holographic or rose gold glitter
- A latex-free makeup sponge
- A glossy top coat
- Liquid latex or tape for easy cleanup around the cuticle
Application Steps
- Prep your nails and apply a base coat. Once dry, apply one coat of the milky white/nude polish to all nails.
- Apply a stripe of the white/nude polish and a stripe of the pink polish directly onto the makeup sponge, slightly overlapping them.
- Gently dab the sponge onto your nail, moving it slightly up and down to blend the colors. Repeat until you achieve the desired opacity for your ombre pink valentine nails.
- While the last ombre coat is still tacky, lightly sprinkle the fine glitter over the top half of the nail, concentrating it at the tip.
- Clean up the edges with a brush dipped in acetone, then apply a generous layer of top coat to smooth out the texture and seal the design.
Pro-Tip: For a seamless blend, re-apply the polish to your sponge for each nail. After applying the top coat, add a second layer of top coat 5 minutes later. This creates a “gel-like” thickness that completely smooths over the glitter and sponge texture.

3. Style Modern Pink French Tips with a Heart Twist

Pin this chic french tip pink valentine nails look for a modern Valentine’s statement!
Products & Tools Used
- A sheer, natural pink base polish
- An opaque, hot pink nail polish
- A fine-liner nail art brush or striping tape
- A high-shine top coat
- A base coat
Application Steps
- After your base coat, apply one to two coats of the sheer pink polish to establish the nail bed color. Let dry completely.
- For the standard nails, use the fine-liner brush to paint a deep ‘V’ shape at the tip with the hot pink polish. Or, use two pieces of striping tape to create the ‘V’ shape, paint inside, and remove the tape while the polish is wet.
- For the heart nails accent nail, use the liner brush to draw two connected curves at the tip, forming the top of a heart. Fill it in.
- Correct any mistakes with a cleanup brush dipped in acetone to ensure a crisp “smile line.”
- Once the tips are fully dry, apply a glossy top coat to all nails.
Pro-Tip: To get a perfectly symmetrical heart tip, place a single dot in the center of your nail tip as a guide. Then, draw one curve from the left edge to the center dot, and mirror it on the right side. This technique, used by certified nail technicians, ensures balance.

4. Achieve an Elegant Negative Space Heart Design

Love this minimalist look? Pin this classy pink valentine nails idea!
Products & Tools Used
- A sophisticated, dusty rose or mauve pink polish
- A high-quality, non-yellowing top coat
- A heart-shaped nail vinyl/nail stickers (recommended) OR a very fine liner brush
- A strengthening base coat
Application Steps
- Prep nails thoroughly. For the negative space nail, it is critical to have a perfectly clean and buffed nail bed. Apply a clear base coat to all nails.
- On all nails except the accent nail, paint two coats of the dusty rose polish.
- On the accent nail, place the heart-shaped nail vinyl firmly in the center of the bare nail.
- Paint one or two coats of the dusty rose polish over the entire nail, including the sticker.
- While the last coat is still wet, carefully peel off the heart sticker using tweezers to reveal the crisp, negative space heart.
- Wait for all nails to dry completely, then seal with a glossy top coat.
Pro-Tip: If attempting this freehand, use your liner brush to draw the heart outline first, then fill in the area around the heart. This gives you more control than trying to paint the negative space perfectly. It’s a reverse-painting technique that ensures a cleaner result.

5. Try a Chic Matte Pink with a Glossy French Tip

Pin this sophisticated matte pink idea for a touch of unexpected texture!
Products & Tools Used
- A rich, dark pink valentine nails polish of your choice (e.g., magenta, deep rose)
- A high-quality matte top coat
- A standard glossy top coat
- A fine-liner nail art brush
- Base coat
Application Steps
- Prep nails and apply your base coat.
- Paint two to three coats of your chosen dark pink polish until it’s fully opaque. Let it dry completely.
- Apply one even coat of the matte top coat over all your nails. Wait for it to dry completely to its full matte effect (it will look dull and non-reflective).
- Pour a small drop of your glossy top coat onto a piece of foil.
- Dip your fine-liner brush into the glossy top coat and carefully paint a thin French tip on each nail. The contrast between the matte base and glossy tip will appear instantly.
Pro-Tip: The key to this look is a high-quality matte top coat. Cheaper versions can look streaky. For an even more subtle look, you can do a “half-moon” glossy accent at the cuticle instead of a French tip. This is an advanced technique seen in professional pink valentines nail art.

6. Apply Dazzling Pink and Gold Foil Flakes

For a touch of glam, pin this stunning pink and gold nail idea!
Products & Tools Used
- A sheer milky white or soft pink valentine nails polish
- Rose gold or gold foil flakes
- A wax-tipped pencil or tweezers for placing flakes
- A thick, gel-like glossy top coat
Application Steps
- After prepping and applying a base coat, paint two coats of your sheer pink/white polish.
- While the second coat is still slightly tacky, use your wax pencil or tweezers to pick up individual gold foil flakes.
- Gently press the flakes onto the nail in a scattered, abstract pattern. Focus more flakes near the cuticle for a cascading effect.
- Lightly tap down any edges of the foil that are sticking up to ensure a smooth surface.
- Apply a generous first layer of top coat to seal the flakes. Once dry, apply a second layer to create a perfectly smooth, glass-like finish.
Pro-Tip: The secret to a professional foil application is encapsulation. Using two layers of a thick top coat fully encases the foil, preventing it from snagging or peeling and providing a luxurious, deep shine. This is a core principle in advanced nail sculpting techniques.

7. Recreate the “Strawberry Milk” Jelly Nail Trend

Pin this trendy and cute pink valentine nails look, perfect for a subtle style!
Products & Tools Used
- A sheer, milky or jelly pink nail polish
- (DIY Method) A clear top coat and an opaque pink polish
- A high-shine, plump-effect top coat
- A good quality base coat
Application Steps
- Start with immaculately prepped nails. This look relies on the appearance of healthy natural nails. Apply your base coat.
- DIY Method: On a piece of foil, mix 5-6 drops of clear top coat with 1 drop of your opaque pink polish. Mix well to create a sheer, translucent color.
- Apply one thin coat of your jelly polish (store-bought or DIY) to the nail. The first coat will be very sheer. Let it dry.
- Build the color with a second or even a third thin coat until you reach your desired “strawberry milk” opacity. You should still be able to see the whites of your nail tips faintly through the polish.
- Finish with an extra-shiny, “plumping” top coat to get that signature juicy, gel-like finish.
Pro-Tip: The key to the jelly look is “visible nail line” (VNL). Don’t try to make it fully opaque. The beauty is in the translucency. This look is also incredibly forgiving for chips and grow-out, making it a great low-maintenance option.

8. Craft a Playful Pink Cow Print Accent Nail

Feeling fun? Pin this playful pink valentine nails idea for a unique twist!
Products & Tools Used
- A bright, bubblegum pink polish
- An opaque white polish
- A dotting tool or the rounded end of a bobby pin
- A glossy top coat and base coat
Application Steps
- After your base coat, paint all nails except the accent nail with two coats of the bubblegum pink polish.
- On the accent nail, paint two coats of the opaque white polish. Let it dry completely.
- Pour a small amount of the pink polish onto a piece of foil.
- Dip your dotting tool into the pink polish and create several irregular, “cow-like” splotches on the white nail. Vary the size and shape. Don’t aim for perfect circles; organic blobs look best.
- Once the print is dry, seal all nails with a glossy top coat.
Pro-Tip: For a more authentic look, don’t just make dots. Create some elongated, slightly curved shapes. Overlap a few of the splotches with the edge of the nail to make it look like a continuous pattern.

9. Design Edgy Pink Nails with a Black Heart

Show your edgy side! Pin this bold pink valentine nails idea.
Products & Tools Used
- A vibrant, hot pink nail polish
- A highly pigmented, opaque black nail polish
- A fine-liner nail art brush or a heart nail sticker
- A high-shine top coat and base coat
Application Steps
- After a base coat, apply two to three coats of the hot pink polish until it is fully opaque and even. Let it dry completely.
- Using a fine-liner brush and the black polish, carefully draw the outline of a heart in the center of your chosen accent nail.
- Fill in the heart outline with the black polish. Apply a second coat if needed to ensure it is completely opaque against the bright pink.
- Use a cleanup brush with acetone to perfect the shape of the heart.
- Finish all nails with a super glossy top coat to enhance the dramatic shine.
Pro-Tip: To ensure your black heart is super crisp, apply a quick-dry top coat over the pink before you paint the heart. This creates a smooth, sealed canvas and prevents the black polish from bleeding into the pink.

10. Master the Pink “Velvet” Magnetic Nail Effect

Get this mesmerizing glow! Pin this pink velvet nails tutorial.
Products & Tools Used
- A pink magnetic (cat eye) gel nail polish
- A strong nail art magnet wand
- A gel base coat and a no-wipe gel top coat
- An LED/UV lamp for curing
Application Steps
- Prep nails and apply a gel base coat. Cure under the lamp according to the manufacturer’s instructions.
- Apply a thin coat of the pink magnetic polish, but DO NOT CURE IT YET.
- To get the “velvet” effect, hold the magnet wand flat over the nail (not on the side) for 10-15 seconds. Then, hold it on each side of the nail for 10-15 seconds. This pushes the magnetic particles away from the center, creating an all-over glow rather than a sharp line.
- Once you are happy with the effect, cure the nail immediately under the lamp to lock the design in place.
- Repeat with a second coat for a deeper effect, manipulating with the magnet again before curing. Finish with a no-wipe gel top coat and a final cure.
Pro-Tip: For an extra-dimensional look, paint a coat of black gel polish as your base color before applying the pink magnetic polish. This makes the magnetic effect pop even more. Tested pink nail art methods show this provides the best contrast.

11. Create Sweet Pink and White Marble Nails

Pin this beautiful rose quartz nail art for an elegant Valentine’s look.
Products & Tools Used
- An opaque white or milky pink gel polish for the base
- A sheer pink gel polish
- (Optional) A rose gold glitter liner gel polish
- Blooming gel
- A fine-liner nail art brush
- Gel base/top coat and a UV/LED lamp
Application Steps
- After prepping and applying/curing a gel base coat, paint one to two coats of your white/milky pink base color, curing each coat.
- Apply a generous coat of blooming gel over the base color, but DO NOT CURE.
- Using your liner brush, draw a few random, squiggly lines of the sheer pink polish onto the wet blooming gel.
- Wait and watch for 15-30 seconds as the blooming gel causes the pink lines to expand and soften, creating a natural marble effect.
- (Optional) Add a few tiny lines of the rose gold glitter polish for a touch of shimmer. Once you’re happy with the marbled look, cure under the lamp. Finish with a top coat and a final cure.
Pro-Tip: The key to a natural marble look is randomness. Don’t make your lines straight or parallel. Criss-cross them and vary the thickness. Less is often more with this technique.

Key Takeaways: Your Quick Guide to Valentines Nails Pink
- Pink Offers Versatility: Valentines nails pink designs range from simple and cute heart accents to bold and edgy looks with black details, offering more variety than traditional red.
- Technique Matters Most: You can create stunning effects like ombre pink valentine nails and marble using simple tools like a makeup sponge or special products like blooming gel.
- Texture is a Modern Twist: Don’t forget to play with finishes. A matte pink nail with a glossy tip creates a sophisticated, high-fashion look without adding more colors.
- Accent Nails are Your Friend: For a quick and impactful design, focus on an accent nail. A negative space heart or a playful cow print on one finger can elevate a simple pink manicure.
- A Good Top Coat is Essential: Whether you need a high-gloss, plumping, or matte finish, the right top coat is crucial to seal your design, add longevity, and achieve a professional look.
- Embrace Trendy Finishes: Experiment with viral trends like semi-translucent jelly nails or shimmering velvet nails (using magnetic polish) to give your Valentine’s look a current, aesthetic feel.
FAQs About Valentines Nails Pink
Is pink a good color for Valentine’s nails?
Absolutely, pink is an excellent and increasingly popular choice for Valentine’s nails. While red is traditional, pink offers a wider range of tones, from soft and romantic blush pink to fun and flirty hot pink. It allows for more modern and versatile designs that can feel personal, sophisticated, or playful, making it a perfect color to celebrate the occasion.
What are the most popular pink Valentine’s nail trends for 2026?
The top trends for this year focus on texture and minimalist details. This includes “velvet” nails using magnetic polish, semi-translucent “jelly” or “lip gloss” nails, and modern French tips using shades of pink. Subtle accents like tiny hearts, delicate glitter, and negative space designs are also extremely popular for a chic, understated look.
How can I make my pink Valentine’s manicure last longer?
Proper prep and sealing are key to a long-lasting pink valentines nails manicure. Always start by cleaning the nail plate with alcohol to remove oils. Use a quality base coat for adhesion and finish with a durable, chip-resistant top coat. For extra protection, re-apply the top coat every 2-3 days to maintain shine and prevent chips.
What’s better for Valentine’s: pink or red nails?
The choice between pink and red nails is purely personal, but they evoke different feelings. Red is classic, bold, and passionate. Pink is often seen as more romantic, modern, and versatile. If you want a timeless, dramatic look, choose red. If you want something softer, trendier, or more playful, valentines nails pink offers a fantastic range of options.
What are some simple pink Valentine’s nail ideas for beginners?
Beginners should focus on simple designs that have a big impact. A classic light pink valentine nails manicure with a single, tiny heart accent on one finger is very easy to do with a dotting tool. Another great option is a glitter top coat over a solid pink base, or applying simple heart-shaped nail stickers for a flawless look with no freehand drawing required.
How do I choose the right shade of pink for my skin tone?
Look at your undertones for the most flattering pink. If you have cool undertones (veins look blue), pinks with blue or purple hints like magenta or fuchsia look great. If you have warm undertones (veins look green), peachy-pinks and corals are stunning. For neutral undertones, you can wear almost any shade, from dusty rose to bubblegum pink.
Can I do pink ombre nails at home?
Yes, you can definitely create beautiful pink ombre nails at home with a makeup sponge. Apply stripes of your chosen pink and a lighter color (like white or a paler pink) onto a sponge and dab it onto your nail. It creates a soft gradient effect. Protect the skin around your nail with liquid latex for easy cleanup.
What are pink press-on nails for Valentine’s like?
Valentine’s themed press-on nails are a fantastic and quick option. They come in countless pink valentine nail art designs, from simple glitter to intricate heart patterns. Modern press on nails are durable, easy to apply with adhesive tabs or glue, and can look just as good as a salon manicure, making them perfect for a special event.
What designs go well with hot pink Valentine’s nails?
Hot pink is a bold base that pairs well with high-contrast accents. A single black heart, a crisp white French tip, or a sparkly silver glitter accent nail all create a stunning, modern look. Because hot pink valentine nails are so vibrant, a simple, clean design on an accent nail often works best to keep it looking chic and not overwhelming.
How do I fix a chipped pink nail polish?
You can easily fix a small chip without redoing the entire nail. Gently buff the edge of the chip to smooth it out. Apply a very thin layer of your pink polish just over the chipped area, dabbing lightly to blend. Let it dry, then apply a full, thin coat over the entire nail, followed by a top coat to seal and even out the finish.
Final Thoughts on Your Perfect Pink Valentine’s Nails
This Valentine’s Day, moving beyond the traditional red and embracing the world of valentines nails pink opens up a universe of stylish possibilities. As we’ve explored through these 11 stunning designs, pink is not just one color; it’s a versatile palette for expressing every mood, from the subtle blush pink of a first crush to the bold hot pink of a confident romance.
Whether you’re a beginner trying a simple pink valentine nails design with a tiny heart or an enthusiast mastering the mesmerizing glow of velvet nails, the power to create pink valentine nails that are uniquely you is at your fingertips. By using the right tools and the step-by-step techniques in this guide, you can achieve a professional, chic pink valentine nails look at home. We hope you feel inspired to experiment and find the perfect design that makes you feel beautiful and celebrated.
What pink valentine nail art design are you most excited to try for June 2026? Share your favorite idea in the comments below
Last update on 2026-04-27 / Affiliate links / Images from Amazon Product Advertising API