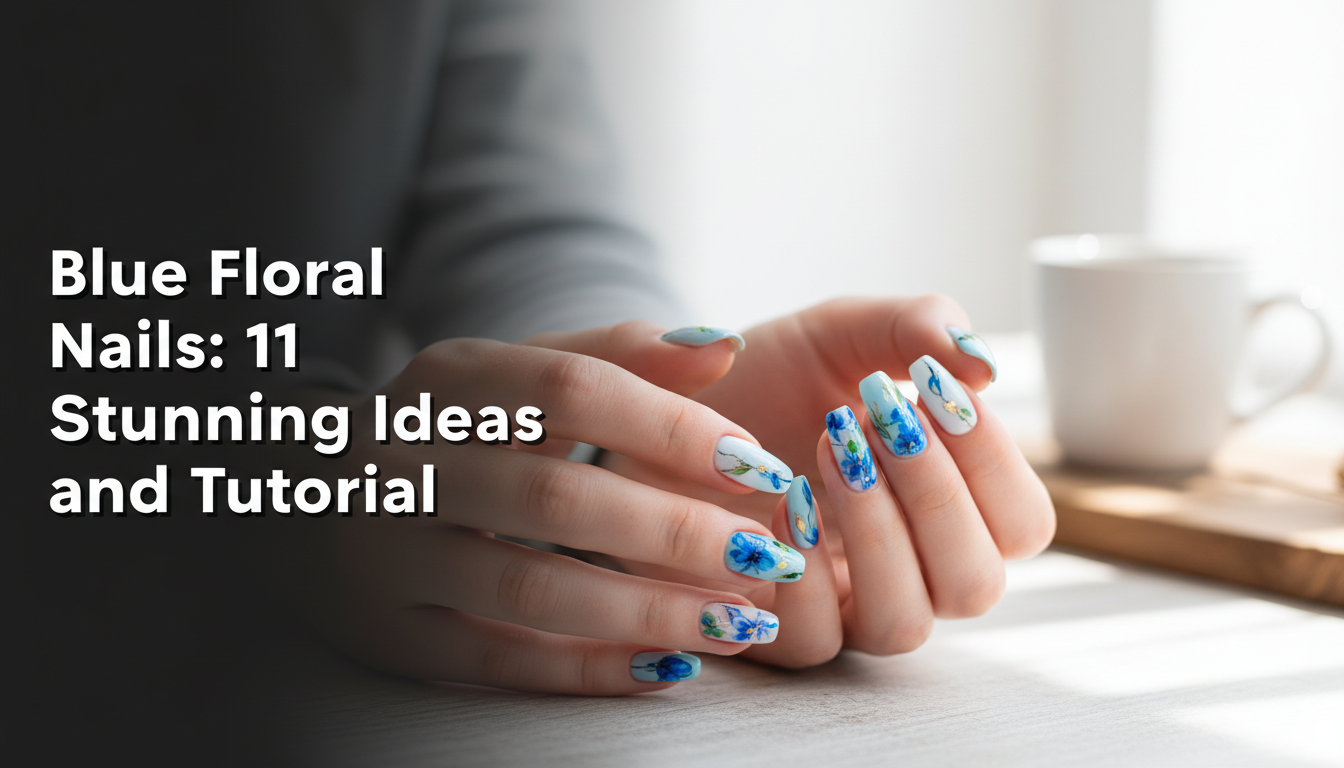
Tired of the same old polish and dreaming of those perfect summer nail designs you see all over Pinterest? You want trendy, eye-catching nails for your vacation, but complex tutorials feel completely out of reach for a beginner. It’s frustrating when you want to achieve those hot girl summer nails but feel stuck with a single, boring color.
The best summer nail designs for beginners in 2026 include minimalist styles like neon French tips, simple floral accents, and colorful pastel ombre effects. These looks use basic, easy-to-learn techniques like dotting and simple brush strokes, making them incredibly achievable at home with a starter gel polish kit while still looking professionally done.
Drawing from an analysis of current trend data and proven application methods, this guide breaks down the most popular looks into simple, foolproof steps. We’ll show you how to master 11 stunning, beginner-friendly designs that are perfect for any summer occasion. Get ready to create salon-quality art right at your fingertips.
What Are the Best Summer Nail Designs for Beginners in 2026?
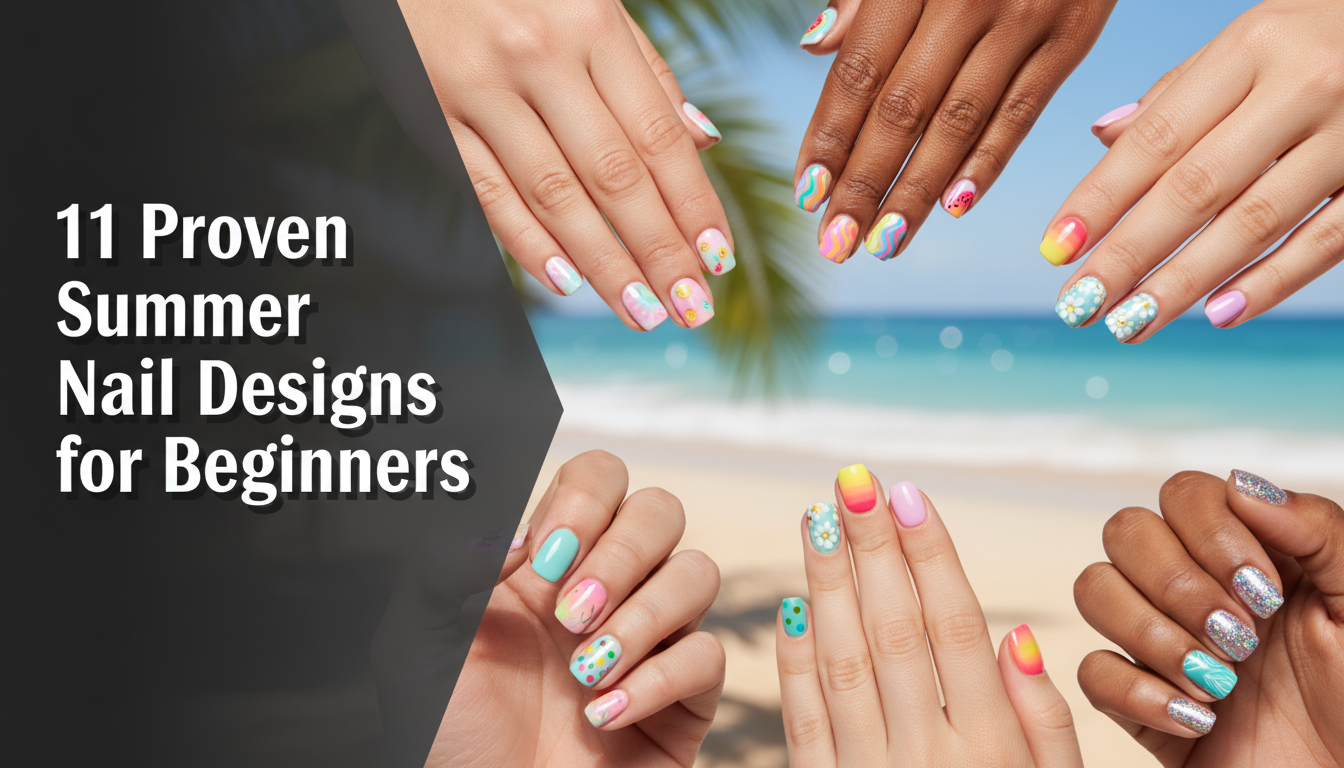
The best summer nail designs for anyone new to DIY nail art are those that deliver a big visual impact with minimal complexity. For 2026, the trends are leaning into both vibrant fun and minimalist chic, which is great news for beginners because it offers a wide range of achievable styles. The key is focusing on designs that utilize simple tools and techniques. Think less about intricate, hand-painted masterpieces and more about clever uses of color, texture, and basic patterns. Styles like the modern neon French tip, which only requires a steady hand and a thin brush, or pastel dot patterns made with a simple dotting tool, are perfect examples. These designs look current and stylish but don’t require years of practice. You can create stunning cute summer nail designs using bright summer colors on any nail shape, though many of these styles are particularly popular on short almond nails, proving you don’t need extreme length to have fun with your manicure. All you truly need to get started is a basic gel polish kit with a UV LED lamp and a few key colors.
11 Proven Summer Nail Designs for Beginners to Master in 2026
Now that you know what’s trending, let’s dive into the “how.” This isn’t just a gallery of pretty pictures; it’s your personal, step by step playbook for creating the best summer nails 2026. Each of the 11 designs below is broken down into a simple, actionable guide perfect for DIY nail art beginners. We’ve focused on techniques that provide a longer lasting manicure and use basic manicure tools you can easily find. From your next vacation to a simple weekend brunch, these are the proven designs that will elevate your look. We’ll cover everything from simple floral accents to the viral glazed donut look, ensuring you have the perfect design for any summer vibe.
1. Create a Modern Neon French Tip Manicure

Pin this chic neon look to your ‘Summer Nails’ board!
This modern twist on a classic is one of the most popular french tip variations and embodies a chic, minimalist aesthetic. It’s perfect for beginners because it’s clean, simple, and incredibly stylish, especially on short almond nails. Using a vibrant neon + yellow or pink against a sheer nude base makes a bold statement without overwhelming the nail.
Products & Tools Used
- Sheer Nude or Pink Builder Gel (e.g., a BIAB overlay summer-style product for strength)
- Neon nail finish Gel Polish (neon + yellow or hot pink)
- Ultra-thin Nail Art Liner Brush (often called a “striper brush”)
- No-Wipe Glossy Top Coat
- UV LED Lamp
- Isopropyl Alcohol and Lint-Free Wipes
Application Steps
- Prep Natural Nail: Push back cuticles, lightly buff nail surface, and cleanse with an alcohol wipe to dehydrate the nail bed.
- Apply a thin layer of your sheer nude builder gel as a base. Cure under lamp for 60 seconds. Apply a second coat if needed for a more opaque coverage and cure again.
- Pour a small amount of the neon polish onto a palette. Dip your liner brush in and carefully paint thin layers to create the French tip. Don’t worry about perfecting it in one go.
- Cure the neon tip for 30-60 seconds. Apply a second thin coat of neon for a vibrant pigment and cure again.
- Seal with top coat: Apply a generous layer over the entire nail, making sure to cap the free edge. Cure for 60-90 seconds for a rock-hard, smudge-proof application.
- Finish by applying cuticle oil to rehydrate the skin around the nail.
Pro-Tip: In my experience, the key to a sharp line is to rest your painting hand on a stable surface. Use short, steady strokes and pull the brush towards you. A hema-free gel polish can also reduce the risk of skin irritation for beginners.

2. Achieve Easy Tropical Hibiscus Accents

Save this simple floral tutorial for your next beach trip!
Nothing says summer vibes quite like a hibiscus + tropical flower. This beach nail art looks intricate, but it’s shockingly easy to create with a basic dotting tool technique. It’s the perfect accent nail for your vacation nail designs and a great way to practice your diy nail art skills.
Products & Tools Used
- Opaque Base Color (e.g., a vibrant coral, turquoise, or ocean breeze blue)
- Opaque White Gel Polish
- Yellow Gel Polish
- A Nail Art Dotting Tool (with multiple ball sizes)
- Base Coat and Glossy Top Coat
- UV LED Lamp
Application Steps
- Prep and Base: Apply base coat, cure, then apply two thin coats of your chosen base color, curing for 60 seconds after each coat.
- Create the Petals: Place a drop of white polish on a palette. Dip the larger end of your dotting tool into the white. Create five dots in a circle on your nail – these are your petals.
- Shape the Flower: Before curing, use the smaller end of the dotting tool (or a clean, thin brush) to gently drag each dot from its outer edge towards the center of the circle. This will create the petal shape. Once happy, cure under lamp for 60 seconds.
- Add the Center: Use the smallest dotting tool to place a single dot of yellow polish in the center of the flower. Cure for 30 seconds.
- Seal and Shine: Seal with top coat, ensuring the design is fully covered. Cure for 60 seconds for a durable, pool party ready finish.
Pro-Tip: For a more dynamic look, don’t place the flower dead center on every nail. Position it near the cuticle on one nail and off to the side on another. This use of negative space is a hallmark of modern nail art.

3. Master the Stunning Sunset Ombre Effect

Pin this gorgeous sunset look for your next vacation!
The sunset ombre effect is a quintessential look for summer holiday nails. The beautiful color gradient of pink + orange and yellow enhances nail length and looks incredibly professional. The secret for beginners is a simple makeup sponge, which does all the blending for you and ensures the vibrant pigments transition smoothly.
Products & Tools Used
- A light base color (white or sheer nude)
- Two to three ombre colors (e.g., deep orange, bright pink, yellow)
- A disposable wedge makeup sponge
- Liquid Latex or Peel-Off Nail Barrier
- Base Coat and Glossy Top Coat
- UV LED Lamp
Application Steps
- Prep and Base: After your standard nail prep, apply a thin coat of your light base color and cure. This makes the ombre colors pop.
- Protect Your Skin: Paint the liquid latex on the skin all around your nail. Let it dry completely. This will make cleanup a breeze.
- Load the Sponge: Paint stripes of your sunset colors directly onto the makeup sponge in the order you want them on your nail.
- Apply the Gradient: Gently dab the sponge onto your nail, moving it slightly up and down to blend the colors. The first layer will look faint; this is normal. Cure for 30 seconds.
- Build the Color: Repeat step 4, reloading the sponge and dabbing onto the nail. Two to three layers should create a fully opaque coverage with a smooth blend. Cure under lamp for a full 60 seconds after the final layer.
- Clean and Seal: Peel off the liquid latex. Use a small brush with alcohol to clean up any remaining polish on your skin. Seal with top coat and cure for a final 60 seconds.
Pro-Tip: To avoid a chunky or bubbly texture, dab the sponge on a piece of paper once after loading it with polish. This removes the excess and ensures a smoother application. This technique prevents the dreaded bubble-free polish problem.

4. Create Cute & Minimalist Pastel Dots

Love minimalism? Pin this easy pastel dot design!
This is one of the most cute simple summer nail designs for short nails. It perfectly captures the clean girl aesthetic and is almost impossible to mess up. Using a dotting tool technique with a few pastel summer tones against a nude base creates a chic, minimalist look that’s both playful and sophisticated. You can even try a matte + pastel finish for a more modern vibe.
Products & Tools Used
- A Nude or Sheer Pink Base Polish
- 3-4 Pastel Summer Tones (e.g., lilac, mint, baby blue, peach)
- A fine-tipped Dotting Tool (or the end of a bobby pin)
- Base Coat and Glossy or Matte Top Coat
- UV LED Lamp
Application Steps
- Prep and Base: Perform your standard nail prep. Apply base coat and cure. Apply two coats of your nude base color, curing after each.
- Prepare Your Palette: Place one drop of each pastel color onto a palette.
- Apply the Dots: Dip the smallest end of your dotting tool into your first pastel color. Gently press it onto the nail, concentrating the dots near the cuticle area for a “floating” effect.
- Vary the Colors: Clean the tool and repeat the process with the other pastel colors, scattering them randomly amongst the first set. Don’t aim for perfect symmetry.
- Cure the Design: Once you’re happy with your dot pattern, cure under lamp for 60 seconds.
- Choose Your Finish: Seal with top coat—either glossy for a classic look or a matte top coat for a more contemporary, clean girl aesthetic. Cure for a final 60 seconds.
Pro-Tip: For a perfect dot, hold the tool perpendicular to the nail and press down gently without wiggling. The amount of pressure you use will determine the size of the dot. This is a foundational dotting tool technique.

5. Get the “Glazed Donut” Chrome Look

Pin this guide to achieving the viral glazed donut nail trend!
The “glazed donut” nail is the ultimate clean girl aesthetic trend, and it’s surprisingly simple to do at home. The key is using a sheer, milky base of sheer jelly nails and a special chrome powder finish. This almond + chrome look creates a pearlescent sheen with a subtle holographic sparkle that looks incredibly high-end.
Products & Tools Used
- A Sheer, Milky White or Light Pink Gel Polish (sheer jelly nails)
- White or Pearl Chrome Powder Finish
- A No-Wipe Glossy Top Coat (This is essential!)
- A soft eyeshadow applicator or silicone tool
- Base Coat and a separate, regular Glossy Top Coat
- UV LED Lamp
Application Steps
- Prep and Base: After prepping, apply a base coat and cure. Apply one to two coats of your sheer milky polish, curing after each.
- The Critical Step: Apply a thin layer of No-Wipe Top Coat. Cure under lamp for ONLY 20-30 seconds. The top coat should be hard but still slightly warm and receptive to the powder.
- Apply the Chrome Powder: Dip your eyeshadow applicator into the chrome powder, picking up a small amount. Gently but firmly rub the powder onto the surface of the nail until it turns into a mirror-like, pearlescent finish.
- Dust Off Excess: Use a soft, fluffy brush to gently dust away any loose powder from the nail and surrounding skin.
- Seal It Twice: Seal with top coat (the no-wipe one again) and cure for a full 60 seconds. For proven durability, add a second layer of a regular (tack-type) glossy top coat and cure again. This protects the chrome from chipping.
Pro-Tip: The “glazed” effect comes from using a sheer base color. If you apply chrome powder over an opaque white, you will get a much more intense, metallic mirror finish rather than the subtle, holographic sparkle of the glazed donut look.
6. Design Fun & Easy Watermelon Nail Art

Add this juicy watermelon design to your summer fun board!
Among all the tropical fruit motifs, the watermelon + red (or pink) design is a timeless summer classic. These cute summer nail designs are instantly recognizable and symbolize fun, pool party ready days. It’s a simple three-part design that looks much more complicated than it actually is.
Products & Tools Used
- A vibrant pink or red gel polish
- A bright green gel polish
- A black gel polish
- A thin liner brush and a very small dotting tool
- Base Coat and Glossy Top Coat
- UV LED Lamp
Application Steps
- Prep and Base: After your standard nail prep, apply base coat and cure. Paint two coats of your pink/red polish, curing for 60 seconds after each.
- Paint the Rind: Using your liner brush and the green polish, paint a French tip on the end of your nail. It doesn’t have to be perfect; a slightly wavy line looks more natural. Cure under lamp for 60 seconds.
- Add the Seeds: Pour a tiny drop of black polish onto your palette. Use your smallest dotting tool or the tip of a toothpick to place 3-5 tiny, scattered dots on the pink part of your nail.
- Cure the Seeds: Cure the black dots for 60 seconds.
- Make it Glossy: Seal with top coat. A thick, glossy top coat will make the watermelon design look extra juicy and delicious. Cure for a final 60-90 seconds.
Pro-Tip: For a fun variation, create a “slice” accent nail. Paint the entire nail pink, then add a green arc along the cuticle line instead of the tip. This shows versatility and creativity.
7. Paint Simple & Serene Ocean Wave Nails

Get those beach vibes! Pin this easy ocean wave tutorial.
This serene beach nail art is perfect for your summer holiday nails and symbolizes the ultimate summer vacation. The design uses a clever “drag-through” technique with blue + white polish to create a realistic, foamy wave effect. It looks like it was done by a pro, but it’s a simple trick with uncured polish.
Products & Tools Used
- Two shades of blue gel polish (light and dark)
- Opaque white gel polish
- A very thin liner brush
- Base Coat and Glossy Top Coat
- UV LED Lamp
Application Steps
- Prep and Base: Prep natural nail, apply base coat, and cure.
- Create the Ocean Base: Paint random patches of your light and dark blue polishes onto the nail. Don’t cure them yet!
- Blend the Water: Use a clean brush to gently swirl the colors together where they meet, creating a mottled ocean look. Now, cure under lamp for 60 seconds.
- Draw the Wave Lines: Using your liner brush and the white polish, draw a few thin, squiggly horizontal lines across the nail. These are your waves. Do not cure.
- Create the Foam: Before curing, use the very tip of your liner brush to gently drag downwards from the white lines in a few spots. This will create the “sea foam” effect. Once you are happy, cure for 60 seconds.
- Seal Your Scene: Seal with top coat to smooth everything out and make the ocean sparkle. Cure for a final 60 seconds.
Pro-Tip: For extra sparkle, mix a tiny amount of fine silver glitter into your top coat before sealing the design. This will mimic the sun glistening on the water and create truly eye-catching beach nail art.

8. Try the “Clean Girl” Sheer BIAB Manicure

Pin this guide to the perfect, healthy-looking summer manicure.
The ultimate in minimalist summer nail ideas, the sheer BIAB overlay summer look is all about enhancing your natural beauty. “BIAB” stands for “Builder in a Bottle,” a type of gel that promotes nail health and protects the natural plate. It creates a strong, plump, and incredibly glossy sheer finish that embodies the clean girl aesthetic.
Products & Tools Used
- Builder in a Bottle (BIAB) or a similar soak-off builder gel in a sheer pink or nude
- pH Bonder / Dehydrator
- Gel Base Coat
- High-Shine Glossy Top Coat
- UV LED Lamp
- Cuticle Oil
Application Steps
- Meticulous Prep: This look is all about perfection. Push back cuticles, shape with file into a neat shape, and gently buff. Clean with alcohol thoroughly. Apply the pH bonder.
- Apply Base Coat: Paint a thin layer of your gel base coat and cure under lamp for 60 seconds.
- The Builder Layer: Apply a thin “slip layer” of the builder gel over the whole nail (do not cure). Then, take a larger bead of builder gel and place it in the center of your nail. Gently “float” the brush over the bead to guide it into a smooth, even layer that provides structure.
- Perfect the Apex: Turn your finger upside down for 10-15 seconds. Gravity will help pull the gel into a perfect, subtle curve (the apex), which gives the nail its strength. Cure for 60-90 seconds.
- Final Shine: You can leave it as is or add a layer of color. For the true clean girl aesthetic, simply seal with top coat for extreme shine. Cure for 60 seconds.
- Nourish: Finish with a generous application of high-quality cuticle oil. This is a key part of the look.
Pro-Tip: The key to a smooth builder gel application is to use minimal pressure. Let the gel self-level. If you have lumps, use a fine liner brush to gently guide the gel into place before curing. This prevents having to do a lot of filing.

9. Rock a Bold, Color-Block Design

For the bold and daring: pin this graphic color-block tutorial!
For those who love bold color palettes and geometric shapes, color-blocking is a perfect choice. This design, which really stands out in photos, is made incredibly simple by using nail art tape as a stencil. It allows you to create sharp, clean lines for your geometric shapes, and finishing with a matte summer nails top coat gives it a modern, graphic edge. This look is especially striking on a long coffin shape.
Products & Tools Used
- A neutral base color (like white or nude)
- 2-3 bold color palettes of your choice (e.g., blue, red, yellow)
- Thin nail art striping tape
- Black liner gel (optional, for outlines)
- Base Coat and Matte Top Coat
- UV LED Lamp, tweezers
Application Steps
- Prep and Base: After standard prep, apply your base coat and two coats of your neutral base color, curing after each. Ensure it is completely dry and cured.
- Tape Your Design: Use the striping tape to mask off sections of your nail, creating geometric shapes. Press the edges down firmly to prevent bleeding.
- Paint Your First Color: Paint your first bold color into one of the taped-off sections. Don’t worry about being neat on the tape. Apply a second coat if needed for opaque coverage.
- Cure and Remove: Cure under lamp for 60 seconds. Immediately after curing, use tweezers to gently peel off the tape.
- Repeat: Repeat steps 2-4 for your other colors in the remaining sections.
- Outline and Seal: (Optional) Use a black liner gel to trace the lines where the colors meet for a graphic look and cure. Finish by applying a matte summer nails top coat over the entire nail and cure for a final 60 seconds.
Pro-Tip: When applying the tape, leave a small “tab” hanging off the edge of your nail. This makes it much easier to grab with tweezers for a quick, clean removal after curing.

10. Play with Aura & Blush Nail Art

Get the vibe! Pin this easy tutorial for the trendy aura nails look.
Aura nails are one of the biggest aesthetic summer nail designs right now. They feature a soft, airbrushed-looking gradient that symbolizes a trendy aesthetic. While it looks like it requires an airbrush, the secret is a magic product called blooming gel. It allows a dot of color, like a pink + orange combination, to effortlessly spread into a perfect, soft-focus circle.
Products & Tools Used
- A sheer nude or pink base color
- One or two “aura” colors (e.g., hot pink, orange, lavender)
- Blooming Gel (This is the key product!)
- A dotting tool or small brush
- Base Coat and Glossy Top Coat
- UV LED Lamp
Application Steps
- Prep and Base: After your nail prep, apply your base coat and two coats of your sheer nude base color, curing after each layer.
- Apply Blooming Gel: Paint a generous layer of blooming gel over the entire nail. DO NOT CURE.
- Add the Aura: Place a small dot of your chosen aura color in the center of the uncured blooming gel.
- Watch the Magic: Wait and watch for 15-30 seconds. The blooming gel will cause the color dot to spread out and disperse, creating a soft, airbrushed effect. The longer you wait, the more it will spread.
- Cure the Aura: Once the aura has spread to the size you like, cure under lamp immediately for 60 seconds to stop it from spreading further.
- Seal and Shine: Seal with top coat to give it a super glossy, liquid look. Cure for a final 60 seconds.
Pro-Tip: For a two-tone aura, place a small dot of your second color inside the first dot before it has finished spreading. The two colors will bloom together for a beautiful gradient effect, similar to a sunset ombre effect but in a circle.

11. Add Delicate 3D Chrome Accents

Elevate your look with this 3D chrome accent tutorial!
The trend for 3D nail textures brings a touch of maximalist nail art to your fingertips. This trendy 3D chrome summer nail art 2026 looks incredibly complex but is achievable by using a thick builder gel to create a raised pattern before adding the chrome powder finish. It’s a high-fashion look that adds literal and visual dimension to your manicure.
Products & Tools Used
- A base color of your choice (works best on nudes or darks)
- A thick builder gel or a specific “3D Art Gel”
- A thin liner brush
- Silver or Gold Chrome Powder Finish
- A No-Wipe Top Coat
- An eyeshadow applicator
- UV LED Lamp
Application Steps
- Prep and Base: Complete your nail prep and apply your chosen base color, curing fully. Apply a layer of glossy or matte top coat and cure. Your base nail should be completely finished.
- Draw the 3D Design: Using your liner brush and the thick builder gel, draw your raised design (e.g., swirls, lines, dots) on top of the finished nail. Build up the height as desired.
- Cure the 3D Element: Cure under lamp for 60-90 seconds until the builder gel is completely hard.
- Apply No-Wipe Coat: Carefully paint a thin layer of No-Wipe Top Coat ONLY over the raised 3D design you just created. Try not to get it on the base nail. Cure for just 20-30 seconds.
- Add the Chrome: Use your eyeshadow applicator to firmly rub the chrome powder over the semi-cured no-wipe top coat on your 3D design. The chrome will only stick to the raised part.
- Final Seal (Optional): Dust off any excess powder. The chrome on the no-wipe top coat is quite durable, but for extra protection, you can carefully paint another thin layer of no-wipe top coat just over the chrome lines and cure for 60 seconds.
Pro-Tip: This technique is a game-changer because you’re applying it over a fully finished manicure. This means if you mess up the 3D part, you can often just wipe it off with alcohol before curing and try again without ruining your base color.

Key Takeaways: Your Quick Guide to Summer Nail Designs
- Beginner Tools are Key: You don’t need to be a pro. A simple dotting tool, makeup sponge, and thin liner brush are the foundation for most of these cute summer nail designs.
- Preparation is Everything: The secret to a longer lasting manicure is in the prep. Always buff nail surface, cleanse with alcohol, and use a quality base coat.
- Specialty Gels Simplify Trends: Achieving viral looks like aura nails or the clean girl aesthetic is easy with the right products. “Blooming Gel” creates the aura effect, while a “Builder in a Bottle” (BIAB overlay summer) gives strength and a plump look.
- The No-Wipe Top Coat is a Must-Have: For any chrome powder finish, including the “Glazed Donut” look, a no-wipe top coat is non-negotiable. It’s the key to making the powder stick correctly.
- Thin Layers are Better Than Thick: When painting with vibrant pigments or creating designs, always paint thin layers and cure between each. This ensures proper curing, prevents smudging, and provides proven durability.
FAQs About summer nail designs
What are the nail trends for summer 2026?
The top nail trends for summer 2026 are the ‘clean girl’ aesthetic featuring **sheer jelly nails, vibrant neon nail finish colors, pearlescent chrome powder finish (like ‘glazed donut’ nails), and minimalist designs on short almond nails. We’re also seeing lots of 3D nail textures and playful fruit motifs like watermelon and citrus.**
Can you do summer nail designs on short nails?
Absolutely! Most **summer nail designs look fantastic on short nails. Styles like minimalist pastel dots, modern neon French tips, and the ‘clean girl’ sheer manicure are particularly flattering. These designs embrace the natural nail shape and are celebrated as part of the short nails trending this summer movement.**
How do I make my summer nails last longer on vacation?
To make your manicure last, proper prep is key. Additionally, **seal with top coat every three to four days to add a fresh layer of protection against chipping. When at the beach or pool, rinse your hands after swimming to remove salt or chlorine, and always apply a high-quality cuticle oil daily to keep your nails flexible and less prone to breaking.**
Should I get gel or acrylic for summer vacation?
For most people, a **gel manicure is better for a typical summer vacation. It’s more flexible than acrylic, making it less likely to break or lift during activities like swimming. Gel also has a glossier finish that resists dulling from sun and sand. Acrylics are more durable for extreme length but require more upkeep.**
What is the easiest summer nail art for a total beginner?
The easiest designs are those using a dotting tool. Creating a simple pattern of **minimalist pastel dots or a five-dot hibiscus flower requires almost no artistic skill. Another incredibly easy option is the aura nails look using blooming gel, where the product does all the blending work for you.**
Final Thoughts on Your Summer Manicure
As you can see, creating beautiful and trendy summer nail designs is completely within your reach. You don’t need to be a professional manicurist or have a massive collection of tools to achieve a look that you’re proud of. The key is to start with a simple design you love, focus on good preparation for a longer lasting manicure, and embrace the beginner-friendly products and techniques that make achieving salon-grade looks at home easier than ever. From the minimalist clean girl aesthetic to bold and bright tropical fruit motifs, the perfect design to express your summer style is waiting. Which one will you try first?
Last update on 2026-04-27 / Affiliate links / Images from Amazon Product Advertising API