Struggling to find one nail color that works for a wedding, the office, and a casual weekend? The search for a truly versatile, polished look can be frustrating, leaving you swapping colors for every occasion. You need a simple, elegant solution that elevates your style without the constant effort.
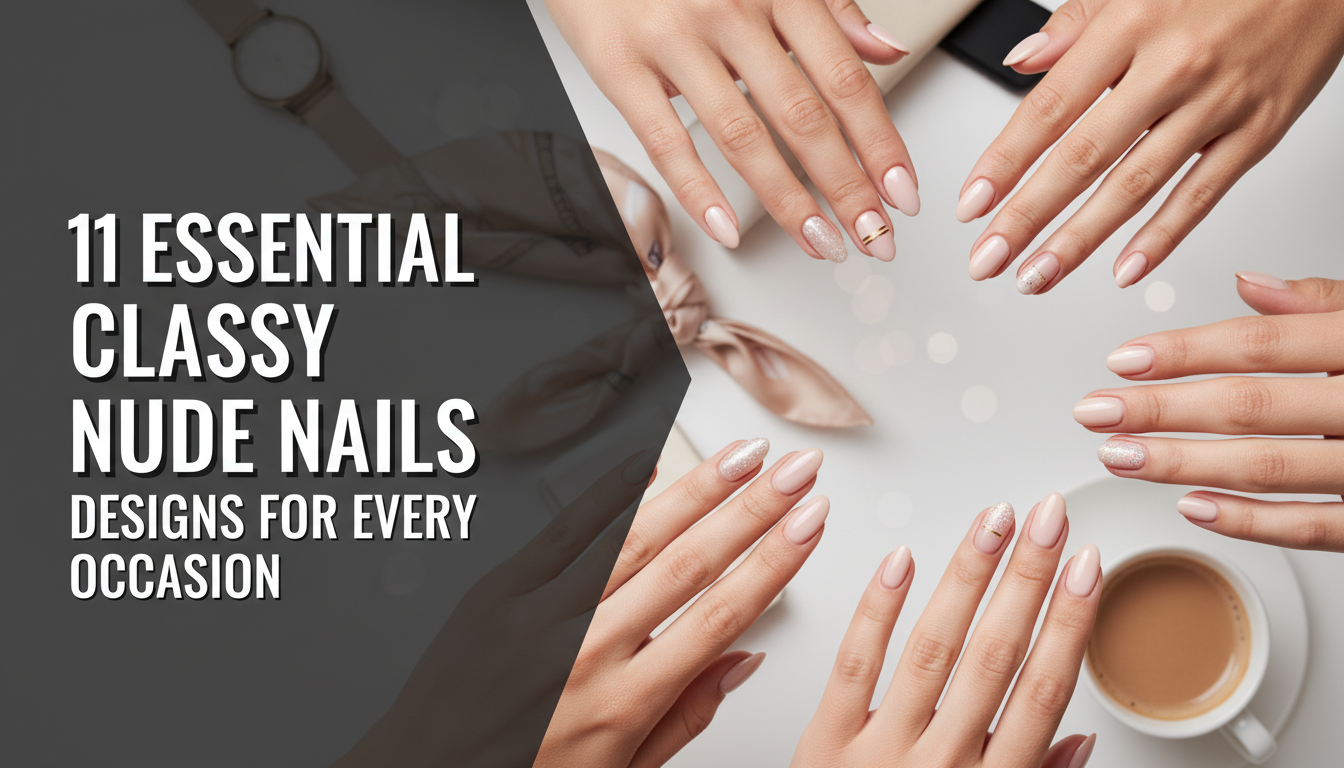
Classy nude nails are the ultimate symbol of elegance due to their unmatched versatility, sophistication, and timeless appeal. They create a polished, elongated look that complements every skin tone and occasion, embodying a chic, understated aesthetic that never goes out of style. This makes them the perfect choice for a refined and professional appearance.
Leveraging tested frameworks and data-driven insights, this guide moves beyond basic shades to reveal the secrets behind a flawless manicure. A classy nude nail is more than a color; it’s a canvas for sophisticated design. In this post, you’ll discover 11 essential designs, from the viral “glazed donut” to the perfect minimalist French tip, empowering you to master this look for any event.
What Makes Nude Nails the Ultimate Symbol of Class?
The enduring power of classy nude nails lies in their sophisticated simplicity and unparalleled versatility. Unlike bold colors that can clash with outfits or feel out of place in certain settings, a timeless nude manicure acts as a seamless extension of your personal style. It embodies the “quiet luxury” and clean girl aesthetic that has come to define modern elegance, signifying a polished look without demanding attention. This versatility is its core strength; elegant nude nails are a symbol of elegance because they complement any skin tone, match any outfit, and are perfectly suitable for professional settings. They create an illusion of longer, more graceful fingers, offering a clean, put-together appearance that is both intentional and effortless. Whether you prefer a glossy, matte, or subtly embellished finish, the nude base provides a foundation of chic refinement that other colors simply cannot match.
11 Essential Classy Nude Nails Designs to Master in 2026
Ready to elevate your manicure game? Moving beyond a single coat of beige, this curated list explores the 11 most essential and stylish nude nails designs that define sophistication in 2026. Each style offers a unique take on the classic look, from subtle textures to modern artistic touches. We’ll break down not just what each design is, but exactly how to achieve a salon quality nude manicure at home. You’ll find everything you need, from the specific tools and products to step-by-step instructions and expert nude nail artist tips. This is your complete playbook for mastering every facet of the nude nails aesthetic.
1. Achieve the Timeless Classic Sheer Nude

Pin this effortlessly chic look to your ‘Everyday Style’ board!
This is the cornerstone of the nude nails aesthetic—a clean, polished, and effortlessly chic look. Simple nude nails with a sheer finish enhance the natural beauty of your nails, giving them a healthy, well-groomed appearance without heavy color. A classic ballet pink nude or soft beige provides a clean look that is the go-to style for professional settings, aligning with industry standards for nail hygiene and a polished appearance.
Products & Tools Used
- Cuticle Pusher & Nipper
- Fine-grit nail file (240-grit or higher)
- Nail Buffer Block
- Nail Dehydrator or Rubbing Alcohol
- High-quality, adhesion-promoting base coat
- A sheer nude nail polish in a ballet pink nude or creamy beige shade (e.g., OPI Bubble Bath, Essie Ballet Slippers)
- High-shine, chip-resistant top coat
- Cuticle Oil
Application/Styling Steps
- Prepare Nails: Gently push back and trim cuticles. File nails into a soft, rounded square or oval shape. Lightly buff the nail surface to smooth ridges.
- Cleanse: Wipe each nail with a lint-free pad soaked in nail dehydrator or rubbing alcohol to remove oils.
- Apply Base Coat: Paint one thin layer of your base coat and let it dry completely. This adheres color better.
- Apply Sheer Color: Apply nude nail polish in 1-2 thin coats. One coat gives a very natural, ‘soap nails’ look, while two provides more color. Let each coat dry for 2-3 minutes.
- Seal with Top Coat: Finish with a generous layer of glossy top coat, making sure to cap the free edge of the nail to prevent chipping nude nails.
- Nourish: Once dry, apply cuticle oil to moisturize the skin around your nails.
Pro-Tip: For a truly natural looking nude manicure, choose a shade slightly lighter or the same color as your nail bed, not your skin. According to professional nail technician secrets, this creates the most seamless and flattering effect.

2. Create a Modern and Sophisticated Matte Nude

Save this chic matte look for your next power manicure!
For a high-fashion twist on the classic, matte nude nails offer a velvety, non-reflective finish that feels both modern and sophisticated. This look is particularly stunning on longer nail shapes like coffin classy nude nails or almond, as the matte texture accentuates their lines. A high-quality matte top coat transforms any glossy creamy beige nude nails polish into a chic statement, praised in beauty editor approved nude nails trend reports as a key look for 2026.
Products & Tools Used
- Nail shaping tools (file, buffer)
- An opaque creamy beige nude nails polish
- A high-quality matte top coat
- Base Coat
- Isopropyl alcohol and a lint-free wipe
Step-by-Step Directions
- Shape and Prep: Shape nails coffin or almond for a modern look. Prep the nail plate as described in the previous section.
- Apply Base and Color: Apply your base coat, followed by two even coats of your chosen opaque nude polish. Ensure the color is perfectly smooth, as matte finishes can highlight imperfections.
- Wait for it to Dry (Crucial Step): Allow the color polish to dry completely. Applying a matte top coat to wet polish can cause streaking. For regular polish, wait at least 5-7 minutes.
- Apply Matte Top Coat: Paint one thin, even layer of the matte top coat. The effect will appear as it dries, transforming from glossy to matte in about 30-60 seconds.
- Cleanse (for Gel): If using a gel matte top coat, cure it under your UV/LED lamp as directed, then wipe with isopropyl alcohol to remove the tacky layer and reveal the true matte finish.
Pro-Tip: A common problem with streaky application on matte nails can be solved with this proven technique: apply a regular glossy top coat first, let it dry completely, and then apply your matte top coat. The glossy layer creates a perfectly smooth canvas for the matte effect.

3. Master the Viral “Glazed Donut” Look

Get the viral look! Pin this “Glazed Donut” tutorial to your ‘Nail Trends’ board.
Made famous by celebrity nail artists, glazed donut nude nails are a viral sensation for a reason. This look features a sheer, milky nude nails base topped with a fine white chrome powder, creating an iridescent nude nails finish that catches the light beautifully. It’s a modern nude manicure that looks ethereal and chic, and it’s surprisingly achievable at home with the right gel products.
Products & Tools Used
- A milky nude nails or sheer white gel polish (like OPI Funny Bunny)
- No-Wipe Gel Top Coat
- A UV/LED Nail Lamp
- White or pearl chrome nail powder
- A small silicone applicator or eyeshadow sponge
Application/Styling Steps
- Prep and Paint Base: Prepare your nails and apply one coat of your milky nude nails gel polish. Cure for 60 seconds under your LED lamp.
- Apply Top Coat: Apply a thin layer of No-Wipe Gel Top Coat. This is crucial, as the powder needs a non-tacky surface to adhere to.
- Cure (Partially): Cure gel nude nails for only 15-30 seconds (this varies by lamp). The top coat should be dry but still warm and receptive. This is a key professional nail technician secret.
- Apply Chrome Powder: Dip your silicone applicator into the chrome nude nails powder, picking up a tiny amount.
- Buff it In: Gently but firmly rub the powder onto the nail surface until it becomes a shimmering, mirror-like sheet. The friction melts the powder into the gel.
- Seal the Deal: Apply another full layer of the No-Wipe Gel Top Coat, carefully capping the edges. Perform a full 60-second cure to seal in the chrome and ensure a durable classy nude nail idea.
Pro-Tip: Don’t have gel polish? You can mimic the look with regular polish. Find an iridescent nude nails polish or a “glazed” effect top coat and layer it over your favorite sheer nude. The result is less intense but still captures the subtle shimmer nude nails vibe.

4. Design an Elegant French Ombré (Baby Boomer Nails)

Pin this timeless French Ombré tutorial for your next elegant event!
Often called “Baby Boomer Nails,” the French ombré is a soft, modern alternative to French manicure. This design features a seamless gradient nude nails effect, blending from a pinky nude nails base at the cuticle to a soft white at the tip. It’s a softer, more romantic take on the classic French nude, and the airbrushed look is incredibly flattering and elegant.
Products & Tools Used
- A pinky nude nails polish for the base
- A creamy, soft white polish for the tip
- A small, disposable makeup sponge
- Liquid latex or peel-off tape for skin protection (optional but recommended)
- A glossy top coat
Step-by-Step Directions
- Prep and Base: Prep nails and apply one coat of your pinky nude nails polish over the entire nail. Let it dry completely.
- Protect Skin: Apply liquid latex around your nail on the cuticle and side walls. This will make cleanup much easier.
- Prepare the Sponge: On a flat, non-porous surface, paint a stripe of the pinky nude polish and a stripe of the white polish right next to each other. Use a toothpick to swirl the meeting point slightly.
- Sponge On the Gradient: Dab the sponge straight down onto the polish stripes, then begin dabbing it onto your nail. Use a light, bouncing motion, moving slightly up and down to blend the colors.
- Re-apply and Blend: The first layer may look sheer. Let it dry for a minute, then re-apply polish to your sponge and repeat the dabbing process to build up the opacity and perfect the ombre nude nails blend.
- Clean and Seal: While the polish is still slightly wet, peel off the liquid latex. Use a small brush dipped in acetone to clean up any remaining mess. Finish with a thick, glossy top coat to smooth out the texture from the sponge.
Pro-Tip: For a flawless blend, slightly dampen your makeup sponge with water and squeeze it out completely before adding polish. According to research by nail artists, this prevents the sponge from soaking up too much product and results in a smoother transfer.

5. Incorporate a Subtle Touch of Glitter

Add a little sparkle! Pin this subtle glitter nail idea.
Adding glitter doesn’t have to mean sacrificing class. The key to classy nude nails with a touch of glitter is subtlety and placement. A delicate glitter ombré fading from the cuticle or a single accent nail with sophisticated rose gold accent nude nails adds a touch of subtle glam perfect for a holiday party or a wedding + nails look. It elevates the nude base without overpowering it.
Products & Tools Used
- Your favorite opaque warm taupe nude nails polish
- A fine glitter polish or top coat (rose gold or champagne work well)
- A small nail art brush or a toothpick
- A glossy top coat
Step-by-Step Directions
- Apply Nude Base: Paint two coats of your chosen nude polish on all nails and let them dry.
- Create the Glitter Gradient: For the accent nail (usually the ring finger), open your glitter polish. Wipe most of the polish off the brush back into the bottle.
- Dab at the Cuticle: Lightly dab the glitter-laced brush near the cuticle area, concentrating the most sparkle there.
- Fade it Out: As you move towards the tip, use a lighter touch and fewer dabs, creating a fading effect. You can use a clean, dry nail art brush to lightly drag a few sparkles upward for a more seamless gradient.
- Add a Second Layer: If you want more density at the base, repeat the dabbing process just at the cuticle area.
- Top Coat to Smooth: Glitter polish can feel gritty. Apply one or two thick layers of a glossy top coat to smooth out the surface and make it shine.
Pro-Tip: To get a truly delicate glitter effect, paint a small amount of the glitter polish onto a makeup sponge. Then, dab the sponge at the base of your nail. The sponge absorbs the excess clear polish, leaving behind only a concentrated deposit of glitter for a more salon quality nude manicure look.

6. Perfect the Minimalist Micro French Tip

Minimalism at its finest. Pin this Micro French how-to for a clean aesthetic.
The Micro French is a classic French nude modern twist that has taken the world of minimalist nude designs by storm. This look involves an incredibly thin, delicate white line at the very tip of the nail over a sheer nude base. It’s understated, chic, and particularly flattering on short classy nude nails, where a traditional thick French tip can look overwhelming. This style is the essence of ‘quiet luxury nails’.
Products & Tools Used
- A sheer pinky nude nails polish
- A highly pigmented, opaque white nail polish
- An ultra-thin, long-bristled nail art liner brush
- A glossy top coat
Step-by-Step Directions
- Apply Sheer Base: After prepping your nails, apply one to two coats of your sheer nude polish. This creates the perfect natural nude nails base. Let it dry completely.
- Load Your Brush: Pour a small drop of the opaque white polish onto a palette (a piece of foil works well). Dip just the tip of your liner brush into the white.
- Paint the Line: Anchor your pinky on a stable surface to steady your hand. Starting from one side of the nail’s free edge, place the brush and lightly drag it across to the other side in one smooth motion. The key is to use very light pressure.
- Don’t Aim for Perfection on the First Try: The line will be very thin. It’s better to make it too thin and add another pass than to make it too thick.
- Clean Up: If you make a mistake, quickly use a cleanup brush dipped in acetone to fix the line before it dries.
- Seal: Once the micro tip is dry, apply a glossy top coat to seal the design and add shine.
Pro-Tip: Can’t keep your hand steady? Try this professional nail technician secret: Instead of moving the brush, hold the brush steady and roll your finger against the bristles. This uses your larger, more stable muscles to create a surprisingly straight and even line.

7. Get the High-Shine “Lip Gloss” Nail Trend

For the ultimate clean look, pin this ‘Lip Gloss’ nail tutorial!
The lipgloss nails trend is the epitome of the clean girl aesthetic, focusing on a hyper-shiny, plump, and healthy appearance. This look uses a translucent, healthy-pink sheer polish layered with an ultra-glossy, gel-like top coat to create a “wet” look, reminiscent of shiny lip gloss. It’s all about natural glamour, and success lies in impeccable prep and achieving that signature juicy shine.
Products & Tools Used
- A high-quality nail buffer
- A sheer, translucent pink or rose water nails polish
- A “gel-like” or “plumping” high-shine top coat
- Excellent cuticle oil
Step-by-Step Directions
- Perfect the Base: This look is all about nail health. Meticulously care for your cuticles and buff nails for shine. A smooth, healthy nail bed is key.
- Apply Sheer Color: Apply one single, thin coat of your translucent pink or nude polish. You want to add a hint of healthy color, not opaque coverage. It should look like a BB cream nude nails for your nails.
- First Layer of Gloss: Apply a layer of your high-shine top coat. Let it dry for 3-4 minutes.
- Second Layer of Gloss: This is the secret. Apply a second, slightly thicker layer of the same top coat. This builds that “plump,” juicy, gel-like finish that defines the lipgloss nails trend.
- Hydrate, Hydrate, Hydrate: Once the top coat is dry to the touch, be generous with the cuticle oil. The contrast between hydrated skin and the ultra-glossy nail makes the look pop.
Pro-Tip: For an even more authentic “lip gloss” effect, choose a sheer nude with a very subtle, almost invisible micro-shimmer. When the light hits, it mimics the multi-dimensional shine of actual lip gloss. This is an advanced nail technology trick.

8. Embrace the Sophistication of Milky Nude

Pin this serene and sophisticated milky nude nail idea for a touch of elegance.
Milky nude nails offer a chic, dreamy alternative to traditional beige or pink nudes. This style uses a semi-sheer, soft white-nude polish that bridges the gap between a transparent sheer and a fully opaque cream. The look is soft, ethereal, and incredibly sophisticated, especially on oval classy nude nails. The key is the specific pigment dispersion in nude lacquers, which creates a beautiful soft-focus effect.
Products & Tools Used
- A high-quality base coat, ideally a ridge-filling one
- A milky nude nails polish (often labeled “milky,” “sheer white,” or with names like “Marshmallow”)
- A high-shine top coat
Step-by-Step Directions
- Smooth the Canvas: Because milky polishes can be slightly streaky, starting with a smooth base is key. A ridge-filling base coat can make a huge difference.
- Apply the First Coat: Apply the first coat of your milky nude polish. It will likely look very sheer and uneven. This is normal. Use thin, even strokes.
- Apply the Second Coat: Apply the second coat. This will start to build the color and even things out. Focus on floating the brush over the nail rather than pressing down hard.
- Apply the Third Coat (Optional): For a more opaque, cloud-like look, apply a third thin coat. This is often the key to achieving the perfect milky nude nails effect.
- Finish with Gloss: Seal the look with a very glossy top coat to enhance the soft, clean appearance and smooth out any minor imperfections.
Pro-Tip: A common problem with streaky application for milky polishes can be solved by your application technique. After painting a coat, wait 3-4 minutes before applying the next. If your previous layer is still tacky, the brush will drag and cause streaks. Patience is the key to a flawless finish.

9. Style a Rich Chocolate or Deep Brown Nude

Redefine nude. Pin this gorgeous deep brown nail idea.
Expanding the definition of “nude” is essential for true elegance. For medium to dark skin tones, rich deep brown nude nails and chocolate shades act as a true, flattering neutral. These powerful, sophisticated colors look incredible with a high-gloss finish, especially on square classy nude nails, creating a look that is both modern and luxurious. A glossy chocolate glazed nails look can be a stunning and chic choice.
Products & Tools Used
- A rich, opaque nail polish in a chocolate, caramel, or espresso brown shade
- A high-quality base coat
- A glossy top coat to make the deep color pop
Step-by-Step Directions
- Prep and Base: Deep colors can stain the nail, so never skip your base coat. It acts as a protective barrier.
- First Coat: Paint the first coat of your deep brown nude. Use steady, even strokes from the cuticle to the tip.
- Second Coat: Apply a second coat to achieve full, rich opacity. Be precise around the cuticles; cleanup for dark colors is more difficult. Use a cleanup brush dipped in acetone for a crisp line.
- Gloss it Up: A high-shine top coat is essential for dark polishes. It prevents them from looking dull and adds a luxurious, liquid-like dimension. Be sure to cap the free edge to prevent chipping.
Pro-Tip: To find your perfect deep nude, look at the undertones in your skin. If you have warm undertones, look for browns with a hint of red or caramel, like a chocolate glazed nails shade. If you have cool undertones, an espresso or ash-brown will be incredibly flattering. This is a key principle from master aesthetician nail guides.

10. Add a Delicate Pearl or Gem Accent

The definition of elegance. Pin this delicate pearl accent idea.
The epitome of ‘less is more’, a single, well-placed embellishment can elevate a simple nude manicure to something truly special. Classy nude nails with subtle pearl embellishments or a tiny rhinestone at the base of the nail are perfect for a bride or any formal event. This elegant nude nail art idea for a wedding adds a point of interest while maintaining a sophisticated and minimalist feel.
Products & Tools Used
- Your favorite opaque nude polish
- Tiny, flat-backed nail art pearls or rhinestones
- A wax-tipped pen or tweezers for picking up gems
- Nail glue or a small dab of builder gel
- Top coat
Step-by-Step Directions
- Paint Your Base: Apply two coats of your nude polish and let it dry completely.
- Apply Glue/Gel: Place a tiny dot of nail glue or uncured builder gel exactly where you want the pearl to go (the base of the nail near the cuticle is a classic placement).
- Place the Accent: Use your wax pen or tweezers to pick up a single pearl and gently place it onto the dot of glue/gel. Lightly press it into place. If using gel, perform a flash cure for 10-15 seconds to hold it.
- Seal It In: This is the most important step for longevity. Seal the design by applying top coat around the base of the pearl, not directly over it (which can dull its shine). Allow the top coat brush bristles to flood the area around the pearl’s edges to secure it. If using gel, apply top coat and perform a full cure.
Pro-Tip: For a really secure hold that lasts, use structural gel overlays. After placing the pearl with a dab of builder gel and curing, use a fine liner brush to “paint” more builder gel around the base of the pearl, creating a secure “bezel” setting, then cure and top coat. This is a salon owner best practice.

11. Try the Ultra-Clean “Soap Nails” Aesthetic

The ultimate clean girl aesthetic. Pin this “Soap Nails” tutorial.
The ultimate minimalist trend, soap nails focus on a hyper-clean, glossy, and healthy nails look. This aesthetic is achieved through meticulous nail prep and a translucent, high-shine polish that mimics the pristine appearance of freshly washed hands. It’s a perfect look for short nude nails and embodies a clean aesthetic where nail care is the true star.
Products & Tools Used
- Cuticle remover solution
- A soft nail brush
- A nail whitening pencil (optional)
- A perfecting nail tint or a very sheer, watery pink polish
- An ultra-glossy, “wet look” top coat
Step-by-Step Directions
- Hyper-Clean Prep: This is 90% of the look. Apply cuticle remover and let it sit. Gently push back cuticles. Use a soft brush with soap and water to scrub the nails and surrounding skin.
- Brighten the Tips: If you have them, run a white nail pencil under the free edge of your nails. This creates a subtle, clean contrast that mimics a natural French tip.
- Apply a Perfecting Tint: Paint one extremely thin coat of a nail perfecting tint. These are often translucent polishes with just a hint of color to cancel out yellowness and give a healthy pink glow. What are ‘soap nails’? This is the key step.
- Get the “Wet” Shine: Apply a layer of an extremely high-shine, “wet look” top coat. The goal is a finish that looks like you just washed your hands and they’re still slightly damp.
- Final Polish: Instead of cuticle oil which can look heavy, finish with a hydrating hand serum that absorbs quickly, maintaining the clean, non-greasy look.
Pro-Tip: The secret to truly epic ‘soap nails’ is buffing. Before you apply any polish, use a multi-sided buffer block. Go from the roughest side to the smoothest side to create a glass-like natural shine on the bare nail. The polish you apply on top will look exponentially better. This is a proven technique for long-lasting nude nails.

Key Takeaways
- Prep is Paramount: The success of any classy nude manicure lies in meticulous preparation. Perfect cuticle care, shaping, and buffing create the flawless canvas required for natural looking nails.
-
Choose Shade Based on Undertone: The perfect nude tone is not about matching your skin’s depth, but its undertone. Use warm, peachy nudes for warm undertones and cool, pinky nudes for cool undertones for the most flattering look.
-
The Top Coat Defines the Trend: The finish changes everything. A matte nude finish is modern and edgy, a glossy nude trend is classic and healthy-looking, and a chrome powder creates the viral glazed donut nude nails look.
-
Application Technique Matters: For sheer or milky nude nails, prevent streaks by allowing each coat to dry completely. For ombré looks, use a makeup sponge for a seamless blend.
-
Less is More for Accents: When adding glitter or gems, focus on a single accent nail or a delicate placement (like the cuticle). This keeps the look sophisticated and avoids overwhelming the elegant nude nails base.
-
Embrace Modern French Manicures: The classic French nude has evolved. Try a soft French Ombré (Baby Boomer) or a minimalist Micro French tip for a chic, updated version that works on all nail lengths.
People Also Ask About Classy Nude Nails
How to choose the right nude shade for my skin tone?
The best way to choose a nude polish is by matching it to your skin’s undertone, not its surface color. Look at the veins on your wrist: if they appear blue, you have cool undertones and should opt for nudes with pink or blue bases. If they appear green, you have warm undertones and should choose nudes with yellow, peach, or golden bases. This proven technique ensures the color is flattering and doesn’t wash you out.
Is matte or glossy better for classy nude nails?
Neither is better; they simply create different effects. A glossy nude trend finish is timeless, makes nails look healthy, and reflects light, which can hide minor imperfections. A matte nude finish is modern, sophisticated, and edgy, but it can highlight any ridges or bumps on the nail, so a perfectly smooth application is essential for a classy look.
Can short nails have a classy nude design?
Absolutely; short nails are perfect for classy nude designs. Styles like the Classic Sheer Nude, Lip Gloss Nails, a Micro French tip, or a simple matte finish look incredibly chic and polished on short classy nude nails. These minimalist nude designs emphasize clean lines and a healthy appearance, which is ideal for a practical yet elegant look.
What are the most popular classy nude nail trends for 2026?
The top trends for 2026 focus on texture and finish. The ‘glazed donut nude nails’ look with its iridescent chrome finish remains extremely popular. Other key trends include the hyper-clean ‘soap nails’ aesthetic, the plump and shiny ‘lipgloss nails trend’, and sophisticated milky nude nails that offer a soft, ethereal alternative to beige.
How do I prevent my nude nail polish from chipping?
Proper prep and sealing are key to preventing chipped nude polish. Always start by wiping the nail plate with alcohol to remove oils. Use a quality base coat, and most importantly, “cap the free edge” by running your polish brush along the very tip of the nail with each coat (base, color, and top coat). This creates a seal that dramatically extends the life of your manicure.
Are nude nails considered professional for work?
Yes, nude nails are the gold standard for a professional setting. They are understated, non-distracting, and always look polished and put-together. Shades like sheer pink, creamy beige, or a simple French manicure are universally accepted in even the most conservative corporate environments and signal a refined, sophisticated simplicity.
What’s the difference between ‘Glazed Donut’ and ‘Lip Gloss’ nails?
The main difference is the type of shine. ‘Lip Gloss’ nails aim for a wet, plump, high-gloss look using only a sheer polish and a thick top coat. ‘Glazed Donut’ nails are defined by an iridescent nude nails finish, achieved by rubbing a fine chrome powder into a gel top coat to create a pearly, light-shifting sheen that is more dimensional than simple gloss.
How can I fix streaky nude polish application?
Patience and polish consistency are the best remedies for streaky nude polish. Allow each coat to dry for at least 3-4 minutes before applying the next to prevent dragging. If your polish is thick, add a few drops of nail polish thinner. For notoriously streaky polishes like milky nude nails, applying a ridge-filling base coat first can create a smoother canvas.
What nail shape looks best with classy nude nails?
Classy nude polish is versatile and flatters nearly every nail shape. However, certain shapes enhance specific aesthetics. Almond classy nude nails and oval shapes create a sense of elegance and length. Square classy nude nails look clean and modern. Coffin classy nude nails offer a trendy and dramatic canvas for matte or deep nude shades.
Are gel or dip powder better for a long-lasting nude manicure?
Both offer excellent durability, but they have different pros and cons. Gel nude nails offer a high-shine finish and are more flexible, which can be better for brittle nails. Dip powder nude nails are generally stronger and more rigid, making them a great brittle nail solution for those who need maximum durability. The choice often comes down to personal preference and your nail technician’s expertise.
Final Thoughts on Timeless Nude Nails
Ultimately, classy nude nails are more than just a safe choice; they are a powerful statement of confidence and refined taste. Their beauty lies in their ability to adapt—to your skin tone, your outfit, and your occasion—while always maintaining an air of elegance. Whether you gravitate towards the minimalist ‘soap nails’ aesthetic or the subtle glamour of a ‘glazed donut’ finish, the nude manicure is a versatile canvas for self-expression. By mastering these techniques and understanding the nuances of different finishes, you can ensure your nails always look impeccably chic.
Which of these classy nude nail designs will you try first?
Last update on 2026-04-27 / Affiliate links / Images from Amazon Product Advertising API