Struggling to find a nail design that’s both chic and timeless? It can be hard to choose a look that feels fresh and modern but also has lasting elegance. You want something sophisticated that works for any occasion, from the office to a wedding.
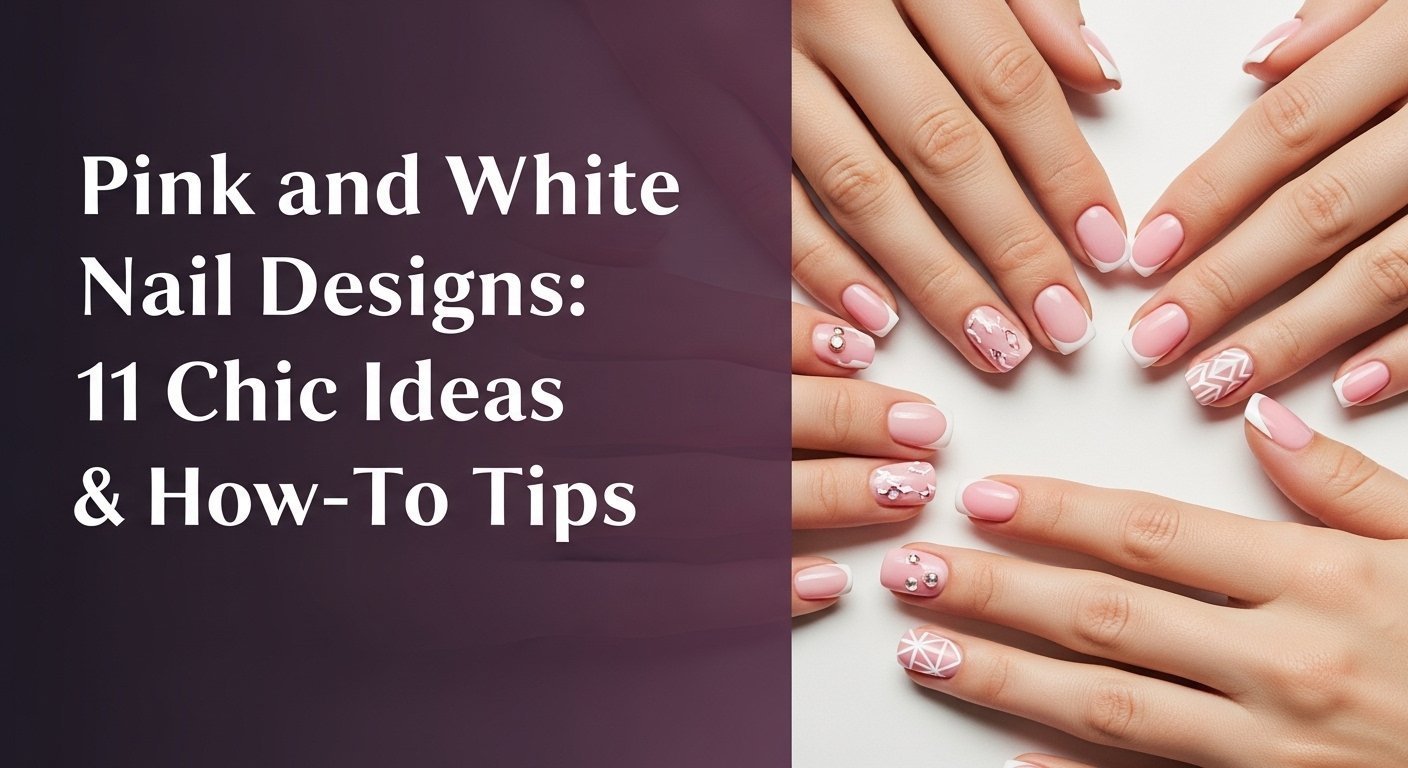
Pink and white nail designs are a timeless manicure choice celebrated for their versatility and classic elegance. This combination offers a clean, sophisticated look that is suitable for everything from professional settings to formal events like weddings. It can be adapted into countless styles, making it a consistently fashionable and popular option.
Drawing from established best practices and current trends, this guide provides the ultimate inspiration. We will explore 11 stunning pink and white nail designs you can recreate this year. You’ll discover step-by-step instructions and pro tips to achieve a flawless, salon-quality look at home.
What Makes Pink and White Nail Designs a Timeless Choice?
The enduring appeal of pink and white nail designs lies in their inherent elegance and unmatched versatility. This classic color combination strikes a perfect balance between soft, feminine pink and clean, crisp white, creating a look that is both polished and sophisticated. According to nail experts, this duo is consistently recommended because it complements every skin tone and is appropriate for virtually any setting, from a professional office environment to a glamorous wedding. Whether it’s the iconic classic pink and white nails of a French manicure or the modern blend of an ombre “Baby Boomer” style, this combination allows for endless creative expression. Its ability to be both understated and bold ensures that chic pink and white nails remain a go-to choice, never going out of style.
11 Chic Pink and White Nail Designs to Recreate in 2026
Now that we understand why this color combination is a perennial favorite, let’s dive into the creative possibilities. This section will be your ultimate visual gallery and practical guide, delivering on the promise of 11 distinct and stylish pink and white nails. Each idea is more than just a picture; it’s a mini-tutorial complete with the tools you’ll need and the exact steps to follow. Whether you’re a DIY enthusiast looking for easy pink and white nail designs for beginners or seeking inspiration to bring to your nail technician, you’ll find a look to fall in love with. We’ll cover everything from timeless classics to the latest pink and white designs trending in 2026.
1. Create the Ultimate Classic Pink and White French Tip

Pin this timeless look to your ‘Nail Goals’ board!
The French tip pink and white nails design is the epitome of elegance. This iconic style features a sheer, natural pink and white nails base that mimics the look of a healthy nail bed, topped with a crisp, opaque white tip that follows the nail’s natural “smile line.” Its beauty lies in its simplicity and its ability to elongate the fingers, making it a perfect choice for professional settings and formal events. It is the foundation of the classic pink and white look.
Products & Tools Used
- Sheer pink gel polish (e.g., OPI Bubble Bath)
- Opaque white polish for tips (e.g., Essie Blanc)
- French tip guide strips for clean lines
- Base coat for nail protection and adhesion
- High-gloss top coat for a long-lasting manicure
- Thin nail art brush for manual application (optional)
Application/Styling Steps
- Prepare nails by filing to your desired shape, pushing back cuticles, and cleansing the nail plate with alcohol.
- Apply one thin layer of base coat and cure under a UV lamp for gel nails if using gel.
- Paint one to two coats of the sheer pink polish over the entire nail. Cure each layer.
- Place the french tip guide strips just below the free edge of your nail. Carefully paint the tip with the opaque white polish. Remove the strip while the polish is still wet for a crisp line.
- Alternatively, use a thin nail art brush to design the white tip by hand.
- Finish with a layer of high-gloss top coat and cure for a durable pink and white finish.
Pro-Tip: For a more natural look, use an off-white or milky white for the tip instead of a stark, bright white. In my experience, this softens the contrast for a more sophisticated, salon-approved result.

2. Master the Soft Pink and White Ombre (Baby Boomer Nails)
Save this dreamy ombre look for your next manicure appointment!
Also known as Baby Boomer Nails, the pink and white ombre is a modern, softer take on the classic French. This style features a seamless pink and white gradient, melting from a soft pink at the cuticle into a clean white at the tip with no harsh lines. It’s a hugely trendy pink and white nail look, popular for its blended, natural appearance. This technique is especially stunning with SNS dipping powder but can also be achieved with regular or gel polish and a simple tool.
Products & Tools Used
- A soft pink polish and a classic white polish
- A latex-free makeup sponge, cut into a small wedge
- Liquid latex or peel-off tape for skin protection
- Base coat and top coat
- A small piece of foil or a palette for polish
Application/Styling Steps
- Prepare your nails and apply a base coat. Once dry, apply two coats of the soft pink polish as your base color.
- Protect the skin around your nail with liquid latex or tape.
- On your foil palette, paint a stripe of the pink polish and a stripe of the white polish right next to each other, slightly overlapping.
- Dab the makeup sponge directly onto the polish stripes a few times to blend the colors.
- Gently dab or stipple the sponge onto your nail. Build the color gradually in 2-3 thin layers, reapplying polish to the sponge for each nail and each layer.
- Once you’re happy with the gradient, immediately remove the liquid latex.
- Finish with a generous layer of quick-dry top coat to smooth the texture and blend the colors further.
Pro-Tip: To get a smoother blend and prevent bubbles, slightly dampen the makeup sponge with water and squeeze it out completely before dabbing it in the polish. This is a proven nail art technique that helps the polish transfer more evenly.

3. Design Elegant Pink Nails with a White Marble Accent
Add a touch of luxury! Pin this marble nail art idea.
For a touch of luxury, creating marble pink and white nails on an accent finger is a stunning choice. This elegant pink and white nails design pairs solid pink nails with a single nail featuring realistic stone-like veining. It’s a form of creative nail art that looks incredibly intricate but can be achieved with a simple “blooming” technique. This method uses a special blooming gel or even just wet polish to allow the colors to spread naturally, creating a sophisticated marble effect that enhances any manicure.
Products & Tools Used
- An opaque soft pink polish
- A white polish
- A light grey or another shade of pink polish for veining
- A very fine-tipped nail art brush
- “Blooming” gel polish (optional, for an easier effect)
- A glossy top coat
Application/Styling Steps
- Paint all nails, except your chosen accent nail (e.g., the ring finger), with two coats of the soft pink polish.
- On the accent nail, apply a base of white polish. Do NOT cure it if using regular polish. If using gel, apply the white base, cure it, and then apply a layer of blooming gel (do not cure the blooming gel).
- Using the fine-tipped brush, draw thin, squiggly lines of the pink and grey polish across the wet white/blooming gel layer.
- Watch as the colors gently spread and “bloom” to create a natural marble effect. You can gently swirl the colors with your brush if needed.
- Once you like the design, cure the nail under your UV lamp.
- Apply a glossy top coat to all nails to seal in the design and add shine.
Pro-Tip: For hyper-realistic veins, dip your fine-tipped brush in a tiny bit of acetone before picking up the polish color. This thins the polish and creates more delicate, transparent-looking lines, a technique used by master technicians.

4. Apply Chic Pink and White Coffin Nails with Glitter
Perfect for a celebration! Pin this glittery coffin pink and white nails idea.
The coffin nail shape, with its long, tapered silhouette and flat tip, is perfect for making a statement. Pairing it with pink and white nails with glitter creates a look that is both glamorous and chic. This style is often achieved using acrylic pink and white nails or full-coverage press-on nail kits to get the perfect length and shape. A full-coverage glitter accent nail provides a dazzling contrast to the soft pink, making this design ideal for parties, holidays, or any time you want your hands to sparkle.
Products & Tools Used
- Coffin shaped press-on nails kit or acrylic pink and white nails supplies
- A solid pastel pink polish
- A high-density, loose cosmetic glitter (holographic or silver)
- A clear gel polish or a glitter-specific adhesive
- A small, flat brush for glitter application
Application/Styling Steps
- Shape your natural nails or apply your coffin shaped press-on nails or acrylic nails.
- Paint the nails you want to be solid pink with two coats of your chosen color.
- For the accent nail, apply a thin layer of clear gel or glitter adhesive. Do not cure.
- Using the flat brush, gently press the loose glitter onto the nail, tapping it to ensure full, even coverage.
- Brush away any excess glitter from the skin and nail. Cure the nail to set the glitter in place.
- Apply two layers of a thick, glossy top coat over the glitter nail, curing after each. This will create a smooth, glass-like surface.
Pro-Tip: To get a perfectly smooth finish over chunky glitter, use a “gel smoothing” technique. Apply the first top coat, cure, wipe with alcohol, gently buff the surface with a fine-grit buffer to knock down high points, cleanse, then apply the final top coat. This is a professional nail results at home secret!

5. Style Modern Abstract Swirls in Pink and White
Unleash your inner artist! Pin this abstract swirl design.
For a contemporary and artistic take, try modern pink and white nails with abstract swirls. This creative pink and white nails style is perfect for expressing your personality and looks fantastic on short pink and white nails. The beauty of abstract nail art is that it doesn’t require perfection; free-flowing lines and organic shapes are part of the charm. All you need is a sheer pink base, a couple of accent colors, and a fine liner brush to create your own unique masterpiece.
Products & Tools Used
- A sheer nude-pink base color
- An opaque white polish
- A vibrant or hot pink and white polish
- A long, thin liner nail art brush
- Glossy top coat
Application/Styling Steps
- Apply your sheer nude-pink base color to all nails and let it dry or cure completely.
- Pour a small drop of the white polish and the hot pink polish onto your palette.
- Dip your long liner brush into the white polish. Starting from one side of the nail, design a single, wavy, fluid line across the nail. Don’t aim for perfection.
- Clean your brush and repeat the process with the hot pink color, either overlapping or running parallel to the white line.
- You can add swirls to one, two, or all of your nails for different effects.
- Let the design dry completely before sealing with a glossy top coat.
Pro-Tip: The key to smooth, non-shaky lines is to load the brush with enough polish and pull the brush in one continuous motion rather than “drawing” or “sketching” the line. Let the long bristles of the liner brush do the work for you.

6. Add Delicate Pink and White Floral Details
So sweet and subtle! Pin this floral pink and white idea.
Floral pink and white nails are a delicate and romantic option, perfect for spring, weddings, or anyone who loves a touch of sweetness. These cute pink and white nail designs don’t have to be complicated. In fact, a simple five-petal flower on an accent nail can be created by anyone, even if you’re not an artist. By using a nail art dotting tool, you can easily create perfect petals for a beautiful and easy nail design on either long or short pink and white nails.
Products & Tools Used
- A milky or pastel pink base polish
- An opaque white polish
- A yellow or gold polish for the center
- A nail art dotting tool with a small tip
- A glossy top coat
Application/Styling Steps
- Apply two coats of your pink base polish and let it dry completely.
- Pour a small drop of white polish onto your palette.
- Dip the small end of your dotting tool into the white polish.
- Create the flower by placing five dots in a small circle on your nail. This will form the petals.
- Clean the dotting tool. Dip it into the yellow or gold polish.
- Place one single dot in the very center of your five white dots. You’ve just created a simple flower!
- Finish with a glossy top coat to protect your delicate design.
Pro-Tip: For a cherry blossom branch effect, use a fine liner brush to draw a thin, brown, slightly curved line first. Then, use the dotting tool method to place 3-5 pink and white “flowers” along the branch. This adds another layer of sophistication.

7. Try Edgy Pink and White with Chrome Accents
Bold and futuristic! Pin this chrome pink and white look.
Combine sweet and edgy with chrome pink and white nails. This modern nail art look pairs a bold hot pink and white with a futuristic, mirror-like chrome accent nail. The chrome effect is achieved using a special powder that is rubbed onto a specific type of gel top coat. This design is perfect for those who want their long pink and white nails to have a high-impact, reflective finish that truly stands out from the crowd.
Products & Tools Used
- A hot pink gel polish
- A black or white gel polish (as a base for the chrome)
- A no-wipe gel top coat (CRITICAL for this look)
- White or silver chrome powder
- A small, soft eyeshadow applicator or silicone tool
- A UV/LED lamp
Application/Styling Steps
- Apply your hot pink gel polish to the nails you want to be solid pink, curing each layer.
- On your accent nail, apply one coat of black (for a silver chrome) or white (for a pearl chrome) gel polish and cure.
- Apply a thin layer of no-wipe gel top coat over the accent nail and cure for the exact recommended time (usually 30-60 seconds). Do NOT over-cure.
- Immediately, while the nail is still warm, take a tiny amount of chrome powder on your applicator.
- Vigorously rub the powder onto the surface of the nail until it becomes a perfect, reflective mirror.
- Gently dust off any excess powder and seal the chrome nail with two more layers of top coat to prevent chipping.
Pro-Tip: The key to a flawless chrome finish is the top coat cure time. If you under-cure, it will be sticky and patchy. If you over-cure, the powder won’t stick at all. Test your lamp’s timing on a swatch stick first! This is a master technician nail tip.
8. Craft Simple Pink and White Heart Designs
So lovely! Pin this simple heart pink and white nails idea.
Nothing says sweet and romantic quite like heart pink and white nails. These cute pink and white nail designs are perfect for Valentine nails, anniversaries, or just to add a touch of love to your look. While drawing a perfect heart can seem daunting, there’s a simple hack using a dotting tool that makes it incredibly easy. This technique turns a tricky shape into one of the most simple pink and white nail designs you can do.
Products & Tools Used
- A sheer or natural pink base polish
- An opaque white polish
- A nail art dotting tool
- A fine-tipped liner brush (optional but helpful)
- Glossy top coat
Application/Styling Steps
- Apply your pink base color and let it dry completely.
- Using your dotting tool, place two white dots right next to each other on your nail. These will be the top curves of the heart.
- With your liner brush (or the very tip of your regular polish brush), drag each dot downwards to meet at a single point, forming the “V” shape of the heart.
- Fill in the shape if needed. You have a perfect heart!
- For an even easier option, use a single heart nail decal.
- Let the design dry and then apply a glossy top coat.
Pro-Tip: If you’re doing this with gel polish, flash cure for 10 seconds after creating the heart shape to lock it in place before it has a chance to move or spread. Then, do a full cure before applying the top coat.

9. Get Creative with Pink and White Cow Print
Fun and trendy! Pin this pink cow print nail idea.
Animal prints are always in style, and a pink and white cow print offers a fun, playful twist. These trendy pink and white nails are surprisingly easy to create because the pattern is supposed to be imperfect. The irregular, organic splotches look best on almond pink and white nails but work on any shape. It’s a unique pink and white nails look that shows off your fun side.
Products & Tools Used
- An opaque white polish for the base
- A pastel or light pink and white polish for the spots
- A dotting tool or the polish brush itself
- A glossy top coat
Application/Styling Steps
- Apply two coats of the opaque white polish to your nails and let them dry completely.
- Using the brush from your pink polish bottle, wipe off most of the polish on the rim.
- Use the tip of the brush to create irregular, splotchy shapes on the white base. Don’t try to make them round or uniform. Think of the shapes on a real cow.
- Vary the size and placement of the spots on each nail for a more organic look.
- You can use a dotting tool for smaller spots to add more variety.
- Let the pink spots dry completely, then seal the entire design with a glossy top coat.
Pro-Tip: For a modern twist, try a matte top coat over the cow print design. This gives it a soft, velvety texture that’s very on-trend and different from the usual glossy finish.

10. Rock a Minimalist Half-and-Half Design
Clean and modern. Pin this minimalist two-tone look.
For lovers of minimalism and graphic looks, a half-and-half or color block nails design is a perfect choice. This is one of the most striking yet simple pink and white nail designs. It involves splitting the nail down the middle with a perfectly straight line, painting one side pink and the other white. This modern pink and white nails style looks particularly sharp on square pink and white nails and relies on a key tool for its precision: nail art striping tape.
Products & Tools Used
- A pastel pink polish
- An opaque white polish
- Thin nail art striping tape
- Base coat and top coat
Application/Styling Steps
- Apply your base coat. Then, paint your entire nail with the lighter of the two colors (e.g., the pastel pink). Apply two coats and let it dry completely. This is very important.
- Once the base is bone dry, place a piece of striping tape vertically down the exact center of your nail. Press it down firmly.
- Carefully paint the other color (the white) on the non-taped half of the nail.
- Immediately and carefully, while the white polish is still wet, peel off the striping tape to reveal a crisp, clean line.
- Let the design dry, then apply a glossy top coat to even everything out.
Pro-Tip: Pull the tape off in the direction away from the wet polish. For example, if you painted the right side, pull the tape off towards the left. This helps prevent any smudging of your clean line.

11. Implement Easy Pink and White Press-On Nails
The easiest way to chic nails! Pin these press-on nail options.
If you’re looking for the ultimate shortcut to a perfect manicure, look no further than press-on pink and white nails. These are the most easy pink and white nail designs to achieve because the art is already done for you! Modern press-ons offer salon quality nails in a huge variety of styles—from ombre to French tips—and can be applied in minutes. The secret to making them last is all in the nail prep, ensuring a durable pink and white manicure that can last for weeks.
Products & Tools Used
- A kit of high-quality pink and white press-on nails in your desired style
- The included nail glue or adhesive tabs
- An alcohol prep pad
- A nail file and buffer
- A cuticle pusher
Application/Styling Steps
- Prepare your natural nails. This is the most important step for a long-lasting manicure. File your nails short, push back your cuticles, and gently buff the surface of your natural nail to remove shine.
- Cleanse each nail thoroughly with the alcohol prep pad to remove any dust and oils.
- Size the press-on nails to fit each of your natural nails perfectly.
- Apply a drop of nail glue to both your natural nail and the back of the press-on nail.
- Press the nail on, starting at the cuticle and applying firm pressure for 30 seconds.
- Avoid contact with water for at least one hour to allow the glue to fully bond.
Pro-Tip: For maximum wear time, use both adhesive tabs and nail glue. Apply the tab to your natural nail first, then put a drop of glue on the tab before pressing the nail on. This dual-adhesion method is a game-changer for durability.

Key Takeaways
- Versatility is Key: Pink and white nail designs range from the classic pink and white french tip to trendy baby boomer nails (ombre), making them suitable for any style or occasion.
- Tools Make it Easy: Achieving salon quality nails at home is possible with the right tools. A nail art dotting tool creates perfect flowers and hearts, while a makeup sponge is the secret to a smooth pink and white ombre.
- Prep is Non-Negotiable: For any design, especially press-on nails or gel, proper nail preparation (buffing, cleansing, cuticle care) is the most critical step for a durable, long-lasting pink and white manicure.
- Technique Over Talent: You don’t need to be an artist. Simple techniques like the “two dots” for a heart or using striping tape for clean lines can help you create intricate pink and white nails with ease.
- The “No-Wipe” Rule for Chrome: To achieve a true mirror-like chrome pink and white finish, you MUST use a no-wipe gel top coat as the base for the chrome powder.
- Don’t Fear Imperfection: For designs like marble pink and white nails or cow print, irregular and organic shapes look more authentic. Perfection is not the goal.
FAQs About pink and white nail designs
What are baby boomer nails?
Baby Boomer nails are a specific type of pink and white ombre nail design. They feature a seamless gradient that blends a natural pink or nude color at the cuticle into a soft white at the tip. Unlike a classic French manicure with its sharp line, this style has no demarcation, creating a very soft, natural, and modern look.
How long do pink and white nails last?
The longevity of your pink and white nails depends entirely on the material used. A manicure with traditional polish might last 3-7 days. Gel polish can last 2-3 weeks without chipping. SNS dipping powder and acrylic pink and white nails are the most durable options, typically lasting 3-4 weeks before they require a fill.
What is the difference between pink and white acrylic vs gel nails?
The main difference is the chemical composition and application process. Acrylic nails are created by mixing a liquid and a powder to form a substance that is sculpted onto the nail and air-dries. Gel nails use a gel that is brushed on in layers and must be cured under a UV or LED lamp.
Are pink and white nails still popular in 2026?
Yes, pink and white nails are a timeless classic and remain extremely popular in 2026. While the classic French tip is always in style, modern variations like pink and white ombre (Baby Boomers), minimalist abstract lines, and chrome accents keep the color combination feeling fresh and on-trend.
Why are pink and white nails sometimes more expensive?
Pink and white sets, especially acrylics, can be more expensive due to the skill and time required. Creating a perfectly sculpted French tip or a seamless ombre blend with two colors is a more advanced technique than a single-color application, so salons charge accordingly for this specialized service from a certified nail technician.
Can you get pink and white designs on short nails?
Absolutely! Many pink and white nail designs look incredibly chic on short nails. Styles like a thin-line French manicure, minimalist abstract swirls, subtle floral details, or a simple glitter accent nail are perfect for shorter lengths and can even create the illusion of a longer nail bed.
How do you remove pink and white acrylic nails safely?
To remove acrylics safely, you must soak them in 100% acetone. First, file off the top coat to break the seal. Then, soak cotton balls in acetone, place them on your nails, and wrap each finger in foil for 20-30 minutes. The acrylic will soften, allowing you to gently scrape it off.
What pink shades work best with white nail art?
The best pink depends on the desired look and your skin tone. For a classic, natural look, a sheer, milky pink or a soft nude-pink is ideal. For a more modern or bold style, a vibrant pastel pink, a dusty rose, or even a hot pink and white combination can be stunning.
Is pink and white nail art suitable for professional settings?
Yes, pink and white nail art is one of the most suitable choices for professional settings. Classic styles like a French manicure or a subtle Baby Boomer gradient are clean, elegant, and understated, making them a salon-approved go-to for corporate environments.
What products are needed for pink and white dip nails (SNS)?
For pink and white SNS or dip powder nails, you need a specific set of liquids and powders. The essential kit includes a bonder, a base coat, the sheer pink and bright white dipping powders, an activator to harden the powder, and a top coat for shine.
Final Thoughts on Your Perfect Pink and White Manicure
From the timeless elegance of a French tip to the playful nature of a cow print, it’s clear that pink and white nail designs offer a world of creative possibilities. This classic combination serves as the perfect canvas for any style, whether you’re aiming for understated sophistication or a bold, modern trend. We’ve armed you with the techniques, pro tips, and inspiration to achieve a beautiful, durable pink and white manicure. You have everything you need to either confidently tackle a DIY project or know exactly what to ask for at your next salon visit.
Which pink and white nail design will you try first?
Last update on 2026-04-27 / Affiliate links / Images from Amazon Product Advertising API