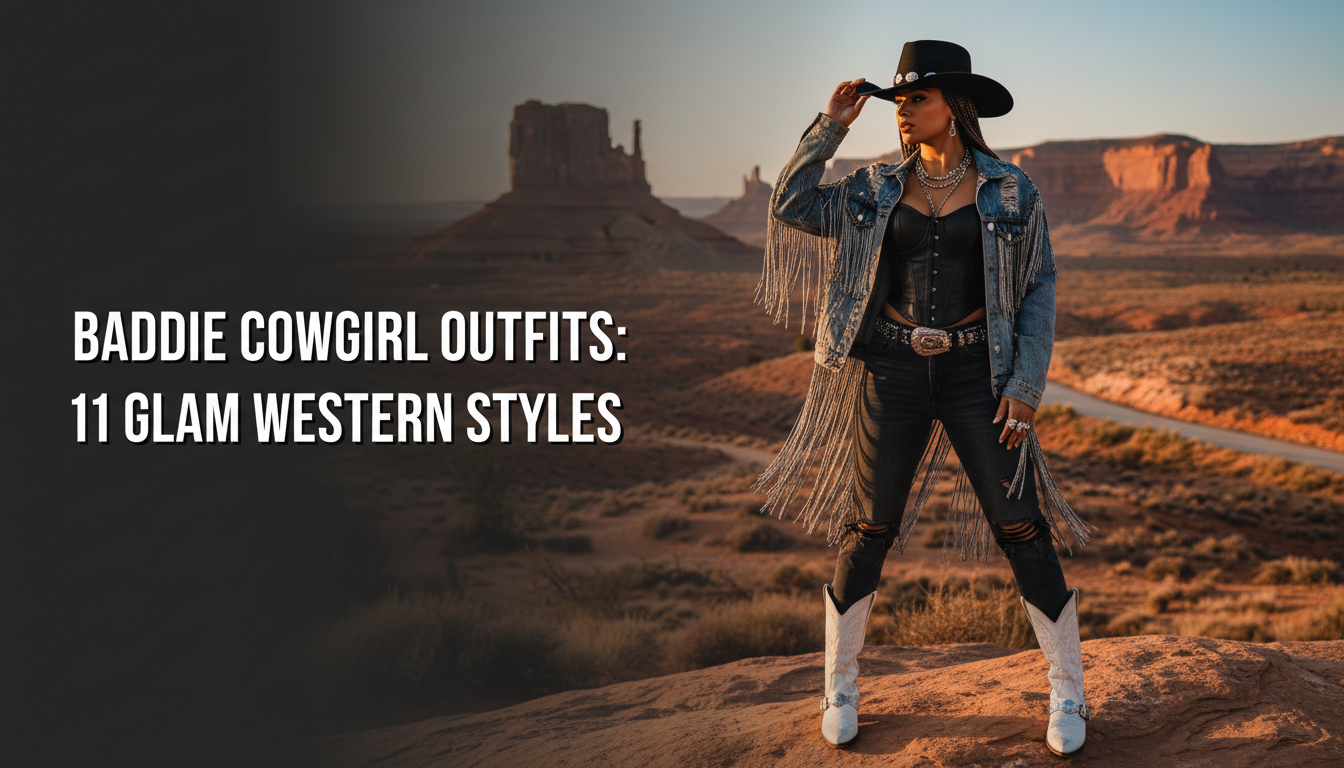
Struggling to find autumn nail ideas that look chic on shorter lengths? It’s easy to feel like all the best, most intricate designs are reserved for long, dramatic nails, leaving you with limited, uninspired options for your practical, fall short nail designs.
The best fall short nail designs for 2026 blend timeless autumn colors like deep plum and olive green with modern techniques such as minimalist micro-french tips, matte finishes, and subtle tortoiseshell accents. These styles are popular because they offer a chic, sophisticated look that is both practical and stylish for everyday wear.
Drawing from an analysis of professional nail artist trends and proven application methods, this guide is your ultimate resource. We’ll explore 11 classy, achievable ideas specifically curated for short nails. Get ready to discover how to transform your manicure into a sophisticated statement this season.
What Are the Best Fall Short Nail Designs for a Classy Look in 2026?
The search for the perfect classy short fall nail designs ends here. In 2026, the trends are moving away from overly complex patterns and toward sophisticated simplicity, which is fantastic news for those who prefer shorter nails. The focus is on rich, moody colors, interesting textures, and modern takes on classic designs. This shift celebrates the practicality of short nails, proving they are a chic canvas for high-fashion looks. From the velvety depth of a matte finish to the subtle elegance of a tortoiseshell pattern, the best designs enhance your nails without overwhelming them. We’ve curated the top trends that are easy to request at a salon or even try at home.
This section will showcase 11 distinct and elegant ideas that define the autumn short nail designs trend for 2026. Each one includes a breakdown of the tools you’ll need, step-by-step instructions, and an expert tip to ensure a professional-quality result.
11 Classy Fall Short Nail Designs to Try This Season
Get ready to find your new favorite manicure. This curated list features everything from subtle, minimalist looks to glamorous accents perfect for the autumn season. Each design is specifically chosen to complement shorter nail lengths, focusing on techniques and colors that create a chic and elongated appearance. Whether you’re a DIY enthusiast or looking for inspiration to bring to your nail technician, you’ll find an achievable and stylish option here.
1. Create a Sophisticated Tortoiseshell Accent Nail

Pin this chic tortoiseshell look to your ‘Fall Nail Inspo’ board!
Products & Tools Used
- Sheer amber or burnt orange gradient jelly nail polish
- Opaque espresso brown short nails polish for other fingers
- Dark brown or black nail polish
- A fine-point nail art brush or a dotting tool
- Glossy top coat
Application Steps
- Apply a base coat to all nails and let it dry completely. Paint the non-accent nails with two coats of the espresso brown polish.
- On your accent nail, apply one coat of the sheer amber jelly polish. Do not cure if using gel.
- While the jelly polish is wet, use your fine-point brush to randomly place small, irregular dots of the dark brown/black polish.
- Gently use the brush to slightly soften and blend the edges of the dots, creating the signature layered tortoise look. Let the colors bloom and settle for a moment.
- Apply a second coat of the sheer amber jelly polish over the pattern to create depth.
- Finish all nails with a high-gloss top coat to seal the design and add shine.
Pro-Tip: In my experience, the key to a realistic tortoiseshell pattern is layering. Don’t be afraid to add a third sheer coat on top if you want more depth. This dimensional technique makes short nails look incredibly luxe.

2. Achieve an Elegant Deep Plum Matte Manicure

Save this moody matte look for your next fall manicure!
Products & Tools Used
- A high-quality deep plum nail shades polish
- A reliable matte top coat (gel or air-dry)
- Base coat
- Isopropyl alcohol and a lint-free wipe (optional, for gel)
Application Steps
- Begin with clean, prepped nails. Apply a thin layer of base coat and let it dry.
- Paint two thin, even coats of the deep plum polish, allowing each coat to dry thoroughly to prevent bubbling.
- Once the color is completely dry, apply one even layer of the matte top coat. Be sure to cover the entire nail surface from edge to edge.
- If using a no-wipe gel matte top coat, cure under a UV/LED lamp as directed.
- If using an air-dry matte top coat, let it dry completely for 5-10 minutes. Do not touch the surface as it dries.
- For gel polishes with a tacky layer, gently wipe the cured nail with isopropyl alcohol on a lint-free pad to reveal the true matte finish.
Pro-Tip: The secret to a perfect matte finish is a smooth canvas. After your color coats are dry, if you see any bumps, gently buff the surface before applying the matte top coat. This industry standard practice ensures a velvety, flawless look.

3. Style Modern Olive Green Micro-French Tips

Pin this minimalist micro-french idea for a subtle touch of fall color!
Products & Tools Used
- A sheer, milky pink or nude base polish
- A creamy olive green short nails polish
- A very thin nail art liner brush OR a clear silicone nail stamper
- Glossy top coat
Application Steps
- Apply your sheer pink or nude base coat and let it dry completely. This creates the perfect natural-looking canvas.
- Brush Method: Pour a small amount of olive green polish onto a palette. Dip your thin liner brush in and carefully trace a delicate line along the free edge of your nail.
- Stamper Method (Easy Hack): Paint a small amount of the olive green polish directly onto the head of the clear silicone stamper.
- Gently press the tip of your nail into the polish on the stamper at a 45-degree angle. Press down just enough to create a thin, crisp line.
- Use a clean-up brush dipped in acetone to perfect the line if needed.
- Finish with a glossy top coat to protect the design.
Pro-Tip: For the stamper method, don’t press your nail in too deep. A lighter touch is all you need for the perfect micro-french tips fall colors. This is one of the best designs that make short nails look longer without adding actual length.

4. Paint Moody Espresso Brown Abstract Swirls

Love this coffee-inspired art? Pin it to your ‘Cozy Nails’ board!
Products & Tools Used
- A neutral beige or cream base polish
- An espresso brown short nails polish
- A white or light cream polish for contrast
- A long, thin nail art liner brush
Application Steps
- Apply two coats of your neutral base color and let it dry completely.
- Pour small drops of the espresso brown and white polishes onto a palette.
- Dip your long liner brush into the brown polish. Starting near your cuticle, drag the brush in a single, fluid ‘S’ shape across the nail. Don’t worry about perfection.
- Clean the brush, then dip it into the white polish. Trace a second, thinner swirl right alongside the brown line to create contrast and dimension.
- Repeat on 2-3 nails per hand for an intentionally mismatched, artistic look.
- Seal the design with a glossy top coat.
Pro-Tip: The key to a fluid swirl is to load your brush with enough polish and use a light, confident hand. According to professional nail artist autumn trends, pairing a dark swirl with a whisper-thin light one creates the most dimensional technique on a small canvas.

5. Design Elegant Minimalist Negative Space

Pin this ultra-chic negative space idea for a modern fall look!
Products & Tools Used
- A clear base/top coat
- An opaque burgundy short fall nails polish
- Thin nail art striping tape
- Tweezers
Application Steps
- Apply a clear base coat to your natural nail and let it dry completely. This is your “negative space” canvas.
- Using tweezers, place the striping tape on your nail to mask off the area you want to remain bare. For a diagonal look, place one piece of tape from the top left to the bottom right.
- Press the tape down firmly to ensure no polish will bleed underneath.
- Paint the exposed part of the nail with the burgundy polish. Apply a second coat if needed for full opacity.
- CRITICAL STEP: While the polish is still wet, use tweezers to carefully and slowly peel off the tape. This creates the crispest line.
- Wait for the design to dry completely, then apply a glossy top coat over the entire nail.
Pro-Tip: Don’t wait for the polish to dry before removing the tape. Removing it while wet prevents the dried polish from cracking and lifting. This is a proven short fall nail technique for flawless geometric art.

6. Add a Touch of Glam with Burnt Orange and Gold Leaf

Ready for pumpkin spice season? Pin this glam gold leaf look!
Products & Tools Used
- A rich burnt orange nail polish
- A pot of nail art gold leaf flakes
- A pair of tweezers or a wax-tipped pen
- A clear gel or thick top coat
Application Steps
- Apply two coats of your burnt orange polish and let them dry completely.
- On your chosen accent nails, apply a thin layer of a clear gel or a slightly wet top coat. This will act as an adhesive for the flakes.
- Use tweezers to pick up a small piece of gold leaf. Gently place it onto the nail.
- Use the tweezers or a silicone tool to gently press and break the flake into smaller, more delicate pieces, arranging them near the cuticle.
- Add a few more tiny flakes, creating a scattered, fading effect as you move up the nail.
- Encapsulate the design by applying one or two thick layers of a glossy top coat, ensuring all the edges of the gold leaf are sealed flat.
Pro-Tip: For a more integrated look, apply the gold leaf after the first coat of orange polish, then apply the second coat over it. This topical_authority_advanced technique makes the gold look like it’s suspended within the color.

7. Try a Navy Blue and Cream Plaid Pattern

Get cozy with this plaid nail art! Pin it for your next fall style.
Products & Tools Used
- A creamy white or off-white base polish
- A deep navy blue polish
- A silver or gold glitter liner polish (optional)
- A very thin nail art striping brush
Application Steps
- On your accent nail, apply two coats of the cream polish. Let it dry completely. Paint the other nails with the navy blue polish.
- Dip your striping brush into the navy polish. Paint two vertical lines on one side of the accent nail.
- Clean the brush, then paint two horizontal lines across the bottom half of the nail, crossing over the vertical lines.
- Clean the brush again. Use the silver glitter liner to trace one of the vertical lines and one of the horizontal lines to add a pop of sparkle.
- Let the design dry for at least 15 minutes before sealing with a glossy top coat.
Pro-Tip: The trick to clean lines is to have very little polish on your brush and to pull it in one steady, continuous motion. Don’t try to “sketch” the line. This is a core professional application tips short nails skill.

8. Create a Simple Mustard Yellow Polka Dot Design

Pin this happy and easy polka dot idea for a playful fall look!
Products & Tools Used
- A sheer nude or cream base polish
- An opaque mustard yellow polish
- A nail art dotting tool (or the tip of a bobby pin/toothpick)
Application Steps
- Apply two coats of your sheer nude base color and allow it to dry fully.
- Pour a small drop of the mustard yellow polish onto a piece of foil or a palette.
- Dip the very tip of your dotting tool into the polish.
- Gently press the tool onto your nail to create a perfect dot. Start with a few randomly spaced dots.
- Vary the placement on each nail for a more organic, playful look. Use smaller dots to fill in gaps.
- Wait for the dots to be completely dry to the touch before applying a glossy top coat to avoid smearing.
Pro-Tip: For a more uniform look, re-dip your dotting tool in the polish after every 2-3 dots. For a varied look with different dot sizes, don’t re-dip as often. This simple adjustment gives you complete control over the final design.

9. Master the “Milk Chocolate” Solid Color Manicure

Simple, chic, and delicious. Pin this perfect chocolate brown color!
Products & Tools Used
- A rich, creamy milk chocolate brown polish
- A high-quality base coat
- A high-shine, quick-dry top coat
- A small clean-up brush and acetone
Application Steps
- After your base coat is dry, apply the first coat of polish using the three-stroke method: one stroke down the center, then one on each side.
- Leave a tiny gap between the polish and your cuticle to avoid flooding the area.
- Let the first coat dry for at least two minutes.
- Apply a second coat for full, opaque coverage.
- Dip a clean-up brush in acetone to wipe away any polish on the skin for a crisp, professional line.
- Finish with a generous layer of a glossy, quick-dry top coat to get that liquid-shine effect and protect your manicure.
Pro-Tip: To make your manicure last, “wrap the tip” of your nail. After painting the top surface, run the brush lightly along the free edge of your nail. This industry standard practice helps prevent chipping short fall nails.

10. Rock a Subtle “Glazed Cherry” Chrome Look

Get the viral glazed look! Pin this trendy “glazed cherry” idea.
Products & Tools Used
- A sheer cherry red or deep burgundy gel polish
- A no-wipe gel top coat
- White or pearl chrome powder
- A small eyeshadow applicator or silicone tool
- UV/LED nail lamp
Application Steps
- Apply one to two coats of your sheer red gel polish, curing after each coat.
- Apply a thin layer of the no-wipe gel top coat and cure for the recommended time (usually 30-60 seconds). Do NOT wipe off any tacky layer.
- Using your eyeshadow applicator, pick up a tiny amount of chrome powder.
- Gently but firmly rub the powder onto the surface of the nail until it develops a mirrored, pearlescent sheen. A little powder goes a long way.
- Dust off any excess powder with a soft, fluffy brush.
- Apply another layer of the no-wipe top coat to seal in the chrome powder and cure one final time.
Pro-Tip: The key to the glazed—not glittery—effect is to apply the chrome powder when the no-wipe top coat is freshly cured and still warm. This allows the powder to melt into the surface for that signature smooth finish.

11. Style a Double French Tip with Earthy Tones

Double the style! Pin this modern double French tip design.
Products & Tools Used
- A nude base polish
- An espresso brown polish
- An off-white or cream polish
- An ultra-fine nail art liner brush
Application Steps
- After applying your nude base coat, pour a small drop of espresso brown polish onto a palette.
- Dip your liner brush in the brown polish and carefully paint a thin micro-french line right at the free edge of your nail. Let it dry.
- Clean your brush thoroughly, then dip it into the off-white polish.
- Paint a second, equally thin line directly underneath the brown line, leaving a tiny sliver of nude base showing between them.
- Take your time and use a steady hand. Clean up any mistakes with a clean-up brush dipped in acetone.
- Finish with a glossy top coat to smooth and seal the design.
Pro-Tip: To keep the lines from looking bulky on a short nail, use the very tip of your liner brush and apply minimal pressure. This design is all about precision and delicacy. It’s a favorite among leading beauty publication fall nails for its graphic impact.
Key Takeaways
- Embrace Deep, Earthy Tones: The top fall nail colors for short nails in 2026 are rich, sophisticated shades like espresso brown, deep plum, olive green, and navy blue. These colors provide impact without needing a large canvas.
- Texture is Everything: A matte finish nails look or a high-shine “glazed” effect using chrome powder can elevate a simple solid color into a trendy, classy short fall nail design.
- Modern French Tips Dominate: The micro-french tips and double french tip are the perfect designs that make short nails look longer. They are minimalist, elegant, and highly fashionable.
- Sophisticated Accents are Key: Instead of covering every nail, focus on high-impact accents. A single tortoiseshell accent nail or a touch of gold leaf provides a luxurious feel while maintaining a practical short fall nails look.
- Technique Over Complexity: Simple designs like abstract swirls or negative space look professional when executed with the right tools (liner brushes, striping tape). Precision is more important than intricate patterns on short nails.
People Also Ask About Fall Short Nail Designs
What are the best fall nail colors for short nails?
The best fall nail colors for short nails are rich, deep, and opaque shades that provide a sophisticated look. Top choices include espresso brown, burgundy, olive green, navy blue, and deep plum. These moody hues make a statement without needing a long nail, and they beautifully complement the autumn color palette.
How can I make my short nails look longer with fall designs?
To make short nails look longer, use designs that create vertical lines or draw the eye upward. Minimalist french tips (especially micro-french), negative space designs with vertical elements, and delicate gradient effects are excellent choices. Sticking to oval or short almond fall nails shapes also helps create an illusion of length.
Are short nails in style for autumn 2026?
Yes, short nails are very much in style and are considered chic and practical for autumn 2026. Many celebrity-inspired short fall looks and runway trends feature shorter, well-manicured nails. They are low-maintenance and provide the perfect canvas for modern, minimalist designs like solid matte colors and subtle nail art.
What nail shapes are best for short fall nails?
The best shapes are soft square (squoval), round, and almond, as they are durable and elegant. A short square fall nail design offers a modern look, while a round shape is classic and practical. A short almond shape can help elongate the look of your fingers, making it a very popular choice for classy designs.
Can you do intricate designs on short nails?
Absolutely, but the key is simplification and scale. For intricate patterns like tortoiseshell or plaid, it’s best to use them on a single accent nail to avoid a cluttered look. For other designs, like abstract swirls or florals, using a finer brush and smaller motifs ensures the art works well on short nails.
How do I prevent my fall manicure from chipping on short nails?
Proper prep and sealing are crucial for preventing chipping. Always start with a quality base coat, apply thin coats of polish, and most importantly, “wrap the tips” of your nails by running the polish brush along the free edge. Finish with a durable top coat for maximum protection.
What’s the difference between gel and acrylic for short fall nails?
Gel polish is a polish that is cured under a UV light, while acrylics are extensions built on top of your natural nail. For short nails, gel polish is often preferred as it adds strength and long-lasting color without adding bulk or artificial length, making it perfect for achieving fall gel nail designs for short square nails.
What are some easy DIY fall nail designs for beginners with short nails?
The easiest DIY designs are polka dots, simple abstract swirls, and solid matte colors. Polka dots can be made with a toothpick, and abstract swirls don’t require any precision. A good matte top coat can instantly transform any solid color into a trendy, easy short fall nail art look.
Is matte or glossy better for short fall nails?
Both matte and glossy finishes are stylish, so it’s a matter of personal preference. Matte vs glossy short fall nails comes down to the vibe you want. A matte finish gives a soft, cozy, and modern look, while a glossy finish is classic, high-impact, and can make colors appear richer.
How do I avoid a “stubby” look with dark fall colors on short nails?
To avoid a “stubby” look, proper shaping and clean application are key. Shape your nails into a soft oval or almond to create length. When painting, leave a tiny, clean gap around your cuticles. This small detail makes the nail bed appear longer and the overall manicure more refined and elegant.
Final Thoughts on Your 2026 Fall Manicure
As we’ve seen, having short nails doesn’t mean sacrificing style, especially during the rich and creative autumn season. The key to elegant fall short nail designs lies in embracing sophistication through rich colors, modern textures, and minimalist art. Whether you opt for a moody matte plum, a chic micro-french tip, or a single, stunning tortoiseshell accent nail, you have endless options to express your seasonal style. This 2026, it’s all about proving that practicality and high fashion can go hand-in-hand. Which design will you try first to celebrate the cozy season?
Last update on 2026-04-27 / Affiliate links / Images from Amazon Product Advertising API