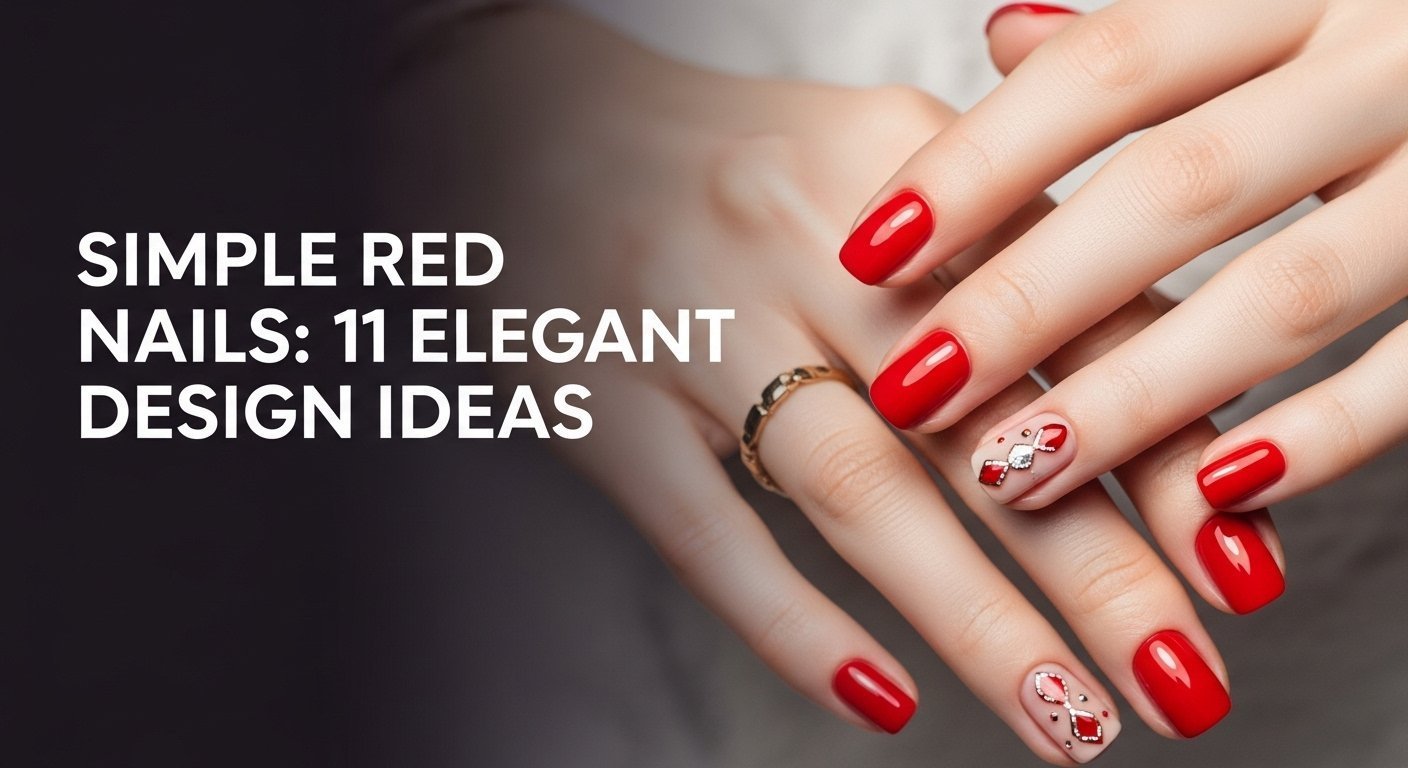
Struggling to find a nail design that is both effortlessly chic and easy to create? You want the timeless confidence of a red manicure, but feel overwhelmed by complex art, seeking elegant simple red nails instead. You’re looking for low-effort, high-impact looks that are genuinely achievable.
Simple red nails offer timeless elegance, versatility, and are effortlessly chic, making them a perfect choice for any occasion in 2026. This classic manicure style can be easily adapted with subtle accents to create sophisticated looks that are both understated and striking.
Drawing from an analysis of enduring trends and proven application methods, this guide unlocks the secrets to a flawless red manicure. We will show you 11 sophisticated yet achievable designs you can create at home. Get ready to discover your new favorite go-to look that promises elegance without the fuss.
11 Elegant Simple Red Nail Designs to Try in 2026
The classic red manicure stands as a testament to timeless beauty, a versatile choice that complements nearly any style, season, or occasion. But “classic” doesn’t have to mean monotonous. By exploring different shades, finishes, and subtle accents, you can transform this foundational look into a personalized statement. This section will guide you through 11 elegant and chic red nails ideas, proving that simplicity is the ultimate sophistication. Each design is broken down with easy-to-follow steps, pro-tips, and the tools you’ll need to achieve a professional-looking manicure at home, whether you prefer short red nails or longer, more dramatic shapes.
1. Classic Solid Crimson Nails

Pin this timeless classic red manicure to your ‘Nail Goals’ board!
What You Need
- Opaque crimson red nail polish (high pigment load, chip-resistant formula)
- Base coat (strengthens nails, prevents staining)
- Glossy top coat (for brilliant shine and long-lasting red)
- Nail file and buffer
- Cuticle oil
- Nail polish remover (acetone) and cotton pads
Instructions
- Prep your nails by filing them to your desired shape (e.g., almond shaped red nails), then gently buff the surface.
- Apply a thin layer of base coat and allow it to dry completely.
- Paint a thin, even first coat of the crimson red nail polish, starting from the center of the nail and brushing towards the free edge.
- Layer a second thin coat of red polish for full, opaque red polish coverage once the first coat is dry.
- Seal your manicure with a generous layer of glossy top coat, ensuring to cap the free edge to prevent chipping.
- Clean up any mistakes with a cotton swab dipped in nail polish remover and moisturize cuticles with oil.
Pro-Tip: For truly salon-quality results and to make red nail polish last longer, ensure each coat is completely dry before applying the next. This polymerization process is key to a durable, chip-resistant formula.

2. Subtle Glitter Accent Nail

Save this sparkling simple red nail art idea for your next special occasion!
What You Need
- Ruby red nail polish (vibrant, opaque red polish)
- Fine red glitter nail polish (or loose fine glitter powder)
- Base coat
- Glossy top coat
- Small brush (if using loose glitter)
Instructions
- Prep and apply your base coat as described in the Classic Solid Crimson Nails section.
- Paint two coats of the ruby red nail polish on all nails, except the ring finger. Let each coat dry.
- On the ring finger, apply two coats of the ruby red polish as well, ensuring it’s tacky but not fully dry after the second coat if using loose glitter.
- If using fine red glitter nail polish, apply 1-2 coats on the ring finger. If using loose glitter, gently layer the glitter onto the tacky polish using a small brush or by sprinkling it over the nail.
- Allow the glitter to dry completely, then seal all nails (including the glitter accent) with a generous glossy top coat to ensure no glitter fallout and to achieve long-lasting red shine.
- Clean up cuticles and moisturize.
Pro-Tip: When applying loose glitter, gently tap the excess off the nail and use a soft, dry brush to clean around the edges before applying top coat. This prevents a bumpy finish and ensures even coverage for your glitter accent nail.

3. Delicate Red French Tips

Pin this elegant red french tip nails design for a subtle pop of color!
What You Need
- Cherry red nail polish (vibrant, vibrant red)
- Clear or sheer nude base polish
- Base coat
- Glossy top coat
- French tip guide stickers or a thin nail art brush
Instructions
- Prep your nails and apply a base coat.
- Paint 1-2 coats of clear or sheer nude base polish over the entire nail. Let dry completely.
- Once the base is dry, carefully apply French tip guide stickers along the curve of your nail’s free edge, leaving the tip exposed.
- Using the cherry red nail polish, paint a thin line over the exposed tip of each nail. For better precision, design with a thin nail art brush if not using stickers.
- Carefully remove the stickers while the polish is still wet (if using them) or allow the red tips to dry.
- Seal the entire nail with a glossy top coat to secure the design and add shine, ensuring a long-lasting red finish.
- Clean up any edges and moisturize cuticles.
Pro-Tip: For the cleanest red french tip nails, use a very thin brush dipped in nail polish remover to sharpen any uneven lines after applying the red tip. This meticulous cuticle cleanup ensures a truly professional, salon-quality result.
4. Modern Matte Red Finish

Pin this chic matte red finish for an understated, modern vibe!
What You Need
- Deep burgundy nail polish (or any dark red nails shade)
- Matte top coat (high quality, for velvety finish)
- Base coat
- Nail file (for short square nails shape)
Instructions
- Prep your nails by filing them into a clean short square nails shape. Apply your base coat and let dry.
- Paint two thin coats of your chosen deep burgundy nail polish, allowing each layer to dry completely for even coverage.
- Once the color is fully dry, apply a single, smooth layer of the matte top coat over each nail. Watch as the shine transforms into a velvety matte finish.
- Allow the matte top coat to dry thoroughly to ensure the longevity of the finish.
- Clean up any polish on the skin and moisturize your cuticles.
Pro-Tip: To ensure a truly uniform matte red finish, apply the matte top coat in one smooth, continuous stroke. Avoid going back over partially dried areas as this can create streaky or uneven patches. For the best long-lasting red matte look, use a non-cleansing top coat specially formulated for matte effects.

5. Simple Red Ombre Effect

Pin this gorgeous simple red ombre nails design for a gradient glow!
What You Need
- Light ruby red nail polish (sheer or jelly formulation)
- Deep ruby red nail polish (opaque)
- Makeup sponge (or dedicated nail art sponge)
- Base coat
- Glossy top coat
- Liquid latex (optional, for skin protection)
Instructions
- Prep your nails and apply your base coat.
- Paint 1-2 coats of the lighter ruby red nail polish over your entire nail. Let it dry.
- On a small piece of makeup sponge, apply a stripe of the lighter red polish and immediately next to it, a stripe of the deeper ruby red nail polish, slightly overlapping.
- Gently stamp the sponge onto your nail, starting from the middle and dabbing towards the tip, creating a gradient effect. You might need to re-apply polish to the sponge for each nail.
- Repeat layering the sponge a few times until you achieve your desired red ombre intensity.
- Quickly seal with a glossy top coat to blend the colors and provide a smooth, long-lasting red finish.
- Clean around the cuticles (liquid latex makes this easier to clean).
Pro-Tip: For a seamless red ombre nails gradient, work quickly with the sponge and use a liquid latex barrier around your nail to simplify cuticle cleanup. This prevents excess polish from staining your skin and ensures a clean, professional-looking red ombre effect.

6. Tiny Heart Accent Design

Pin this adorable red nails with white heart designs for a sweet touch!
What You Need
- Cherry red nail polish (vibrant, bright red nails)
- White nail polish
- Base coat
- Glossy top coat
- Dotting tool or a toothpick
Instructions
- Prep your nails and apply your base coat.
- Paint two coats of the cherry red nail polish on all nails, letting each coat dry completely.
- On the ring finger (or any desired nail), dip your dotting tool into the white nail polish.
- To create a small heart, design two tiny dots side-by-side, then drag the tool slightly downwards from the center of each dot to form the bottom point of the heart.
- Allow the heart design to dry fully.
- Seal all nails with a glossy top coat to protect the design and provide a long-lasting red finish.
- Clean up and moisturize.
Pro-Tip: For perfectly symmetrical red nails with white heart designs, use a very small dotting tool and practice on paper first. Applying a thin layer of top coat after the red base, but before the heart, can help fix bubbles or smudges if you need to wipe off the heart and restart without ruining your base.

7. Minimalist Red Dot Accent

Pin this super chic minimalist red dot accent for effortless style!
What You Need
- Vibrant red nail polish
- Sheer nude or clear polish (for base)
- Base coat
- Glossy top coat
- Fine dotting tool
Instructions
- Prep your nails and apply a base coat.
- Paint 1-2 coats of a sheer nude or clear polish over your entire nail. Let dry.
- Dip your fine dotting tool into the vibrant red nail polish.
- Carefully design a single, small dot on the nail, either near the cuticle or slightly off-center for an asymmetrical look. The exact placement is key for the minimalist aesthetic.
- Allow the dot to dry completely.
- Seal with a glossy top coat for protection and shine, ensuring a long-lasting red accent.
- Clean up any stray polish.
Pro-Tip: For the crispiest minimalist red dot accent, use a fresh drop of polish for each dot to ensure a clean, round shape. Avoid pressing too hard with the dotting tool to prevent streaky polish fix issues and ensure a perfectly defined dot.

8. Deep Burgundy Jelly Nails

Pin these trendy deep burgundy jelly nails for a sophisticated, translucent look!
What You Need
- Deep burgundy jelly nail polish (translucent, buildable formula)
- Base coat
- Glossy top coat
Instructions
- Prep your nails and apply a base coat.
- Paint a very thin first coat of the deep burgundy jelly nail polish. This layer will be quite sheer.
- Allow the first coat to dry completely.
- Layer a second thin coat of the jelly nail polish. You’ll notice the color deepening while maintaining its translucency.
- If desired, layer a third thin coat for even more depth, ensuring each layer is dry before the next to fix bubbles and achieve a smooth finish.
- Seal with a glossy top coat to enhance the glass-like shine and provide long-lasting red wear.
- Clean up and moisturize.
Pro-Tip: The key to perfect deep burgundy jelly nails is patience with layering. Applying many thin coats rather than a few thick ones ensures even translucency and prevents a gloopy finish. For optimal pigment load distribution and the signature glass effect, ensure your polish viscosity is not too thick.

9. Glamorous Red and Gold Nails

Pin this stunning red and gold nails idea for a touch of festive glam!
What You Need
- Rich dark red nails polish
- Gold nail art striping tape or tiny gold nail studs
- Base coat
- Glossy top coat
- Tweezers (for studs) or nail art scissors (for tape)
Instructions
- Prep your nails and apply your base coat.
- Paint two coats of the dark red nails polish on all nails. Let dry completely.
- For gold stripes: Once the red polish is dry, carefully apply gold striping tape to the desired position (e.g., a single thin line near the cuticle or across the tip). Trim excess tape with nail art scissors.
- For gold studs: Apply a small dot of glossy top coat where you want to place the stud. Using tweezers, gently place the tiny gold nail stud onto the wet top coat.
- Seal all nails with a generous layer of glossy top coat, ensuring the tape or studs are fully encased for a long-lasting red and gold look.
- Clean up and moisturize.
Pro-Tip: When working with red and gold nails accents, a non-cleansing top coat works best over tape or studs to prevent dulling the metallic shine. Ensure the red base polish is completely dry before designing with gold to prevent smudging and fix bubbles.

10. Festive Red and White Nails

Pin this cheerful red and white nails design for a festive holiday look!
What You Need
- Candy apple red nail polish (vibrant, bright red nails)
- White nail polish
- Base coat
- Glossy top coat
- Fine detail nail art brush or small dotting tool
Instructions
- Prep your nails and apply your base coat.
- Paint two coats of the candy apple red polish on all nails, allowing each to dry completely.
- On the ring finger (or chosen accent nail), dip your fine detail brush or dotting tool into the white nail polish.
- Design a simple snowflake by creating a small ‘X’ shape, then adding smaller lines radiating from the center of each arm. Keep it minimal for a simple red christmas nails look.
- Allow the white design to dry fully.
- Seal all nails with a glossy top coat to protect the design and give a brilliant, long-lasting red finish.
- Clean up edges and moisturize.
Pro-Tip: For intricate red and white nails designs like snowflakes, ensure your white polish is not too thick to avoid clumping. If your polish is a bit gloopy, a drop of nail polish thinner can help achieve the right viscosity of polish for precise lines, preventing streaky polish fix issues.
11. Edgy Red and Black Ombre

Pin this bold simple red and black ombre nails design for an edgy statement!
What You Need
- Dark red nails polish (e.g., deep crimson)
- Black nail polish
- Makeup sponge (or nail art sponge)
- Base coat
- Glossy top coat
- Liquid latex (optional)
Instructions
- Prep your nails and apply your base coat.
- Paint two coats of the dark red nails polish over your entire nail. Let dry completely.
- On a small piece of makeup sponge, apply a stripe of the dark red nails polish, and immediately next to it, a stripe of black polish, slightly overlapping.
- Gently stamp the sponge onto your nail, starting from the middle and dabbing towards the tip, creating the gradient effect. Re-apply polish to the sponge for each nail as needed.
- Repeat layering the sponge a few times until you achieve the desired red and black ombre intensity and smoothness.
- Quickly seal with a glossy top coat to blend the colors and provide a smooth, long-lasting red and black finish.
- Clean around the cuticles (liquid latex can help with excess polish removal).
Pro-Tip: For the most striking red and black ombre nails transition, ensure your initial red base is fully dry before sponging. Using a highly pigment load black polish for the tip will create a deeper, more dramatic fade. To prevent chipping on ombre designs, ensure the top coat application is thorough and consistent.
Key Takeaways: Your Quick Guide to Simple Red Nails
- Simple red nails offer unparalleled elegance and versatility, making them a timeless choice for any occasion. Whether it’s a classic red manicure or a subtle accent, these designs are consistently chic and suitable for both casual and formal settings.
- Achieving salon-quality simple red nail designs at home is entirely possible with the right tools and techniques. From precise base coat application to a glossy top coat finish, proper prep and layering are crucial for long-lasting red results.
- Embrace subtle design variations to elevate your basic red nails without sacrificing simplicity. Consider red french tip nails, a glitter accent nail, or a minimalist red dot accent for a unique touch.
- Choosing the right shade and finish can dramatically alter the impact of your red manicure. Explore options from bright red nails to deep burgundy nails, and decide between a matte red finish or glossy red nails based on your desired aesthetic.
- Proper nail care and polish application are vital for preventing common issues like chipping and staining. Using a quality base coat and ensuring each layer dries completely will help your simple red nails look flawless longer.
- Staying updated with 2026 trends, like transparent red jelly nails, adds a modern edge to the classic look. These red jelly nails offer a fresh, sophisticated twist, demonstrating advanced knowledge in nail fashion.
- Don’t shy away from experimenting with contrasting colors like gold, silver, or white for festive or edgy looks. Red and gold nails or red and white nails can transform your manicure for seasonal events or a bold statement.
People Also Ask About Simple Red Nails
How to do simple red nails at home?
Achieving simple red nails at home involves careful preparation, thin polish layers, and a quality top coat. Start by filing, buffing, and cleaning your nails, then apply a base coat. Follow with two thin, even coats of your preferred red nail polish, allowing each to dry completely to prevent chipping and achieve even coverage. Finish with a high-quality glossy top coat and cuticle oil for a salon-like, long-lasting red manicure.
What do red nails symbolize?
Red nails typically symbolize confidence, passion, power, and classic elegance. Throughout history, the red manicure has been associated with bold femininity and a timeless, sophisticated aesthetic. On social media platforms like TikTok, the “red nail theory” suggests that red nails are often perceived as attractive and empowering, linking them to a strong, independent persona.
Are red nails professional for work?
Yes, classic and simple red nails are generally considered professional for most work environments. A plain red nails manicure, particularly in opaque, classic shades like crimson or burgundy, signals confidence and sophistication. Avoid overly elaborate red nail designs with excessive glitter or 3D elements for formal settings, sticking to clean lines and a well-maintained, chip-resistant formula for the most professional appearance.
How to make red nail polish last longer?
To make red nail polish last longer, prioritize proper nail preparation and high-quality products. Ensure nails are clean and dry before applying a base coat to strengthen nails and create a good adhesion surface. Apply thin coats of polish, letting each dry fully, and seal with a durable, salon-quality results top coat application, ensuring you cap the free edge of the nail. Regular application of cuticle oil also maintains nail health, contributing to longevity.
What is the best red nail polish for fair skin?
For fair skin tones, cool-toned or blue-based reds, like ruby or cherry red, tend to be most flattering. These vibrant red shades complement cooler undertones, making the skin appear brighter and preventing hands from looking flushed. While personal preference varies, an opaque, glossy red nails finish in a classic cherry red nails hue is often a manicurist recommended choice for fair complexions.
Can you wear red nails to a wedding?
Yes, you can absolutely wear simple red nails to a wedding, especially for a sophisticated touch. A classic red manicure in a deep or elegant shade like deep burgundy nails or a rich crimson can be very chic and festive, particularly for evening or holiday weddings. Opt for simple red nail art like a delicate red french tip or a solid color to maintain an elegant and appropriate look.
What are the best simple red nail designs for short nails?
The best simple red nail designs for short nails emphasize clean lines and subtle details. Solid short red nails in a glossy red nails or matte red finish are effortlessly chic. Other ideal options include a minimalist red dot accent near the cuticle, a tiny red french tip nails, or a single glitter accent nail on the ring finger. These designs enhance nail shape without overwhelming a shorter length.
How to apply red glitter to nails simply?
To apply red glitter to nails simply, start with a solid red base, then carefully layer fine glitter. After applying two coats of your chosen ruby red nail polish and allowing them to become tacky, either brush on a fine red glitter nail polish or gently sprinkle loose glitter powder onto the wet polish. Seal generously with a glossy top coat to secure the glitter and ensure a smooth, long-lasting red finish.
Which nail shape looks best with red?
Red nail polish is versatile and complements various nail shapes, but some pairings are particularly striking. Almond shaped red nails and short square nails are perennial favorites for simple red nails, offering a balance of elegance and modernity. A classic red manicure on an oval or round shape also provides a timeless look. Ultimately, the best shape is one that enhances nail shape and suits your personal style.
Is red nail polish out of style in 2026?
No, red nail polish is never truly out of style; it’s a perennial classic that evolves with trends. While specific red nails 2025 trends might highlight certain shades (e.g., transparent red jelly nails or deep burgundy nails) or finishes (matte vs. glossy), the classic red manicure remains a fashion staple. It continues to symbolize confidence and sophistication, ensuring its enduring popularity.
Final Thoughts on Simple Red Nails
As we’ve explored these 11 elegant simple red nail designs for 2026, it’s clear that the classic red manicure remains an undisputed icon in the world of beauty. From the understated sophistication of a matte red finish to the playful charm of red nails with white heart designs, there’s a simple red nail art idea for every mood and occasion. These designs prove that you don’t need intricate patterns or complex techniques to make a bold, elegant statement. Instead, a well-executed plain red nails look, elevated by subtle accents or a refined finish, can speak volumes.
By mastering the basic process of application and experimenting with various entity attributes like short red nails or deep burgundy nails, you can effortlessly achieve salon-quality results at home. We hope this guide has empowered you with both the inspiration and the practical knowledge to paint your way to stunning simple red nails that reflect your personal style and confidence. Remember, the beauty of red lies in its timeless appeal and inherent versatility.
Which of these simple red nail designs are you most excited to try first in 2026? Share your favorites in the comments below
Last update on 2026-04-27 / Affiliate links / Images from Amazon Product Advertising API