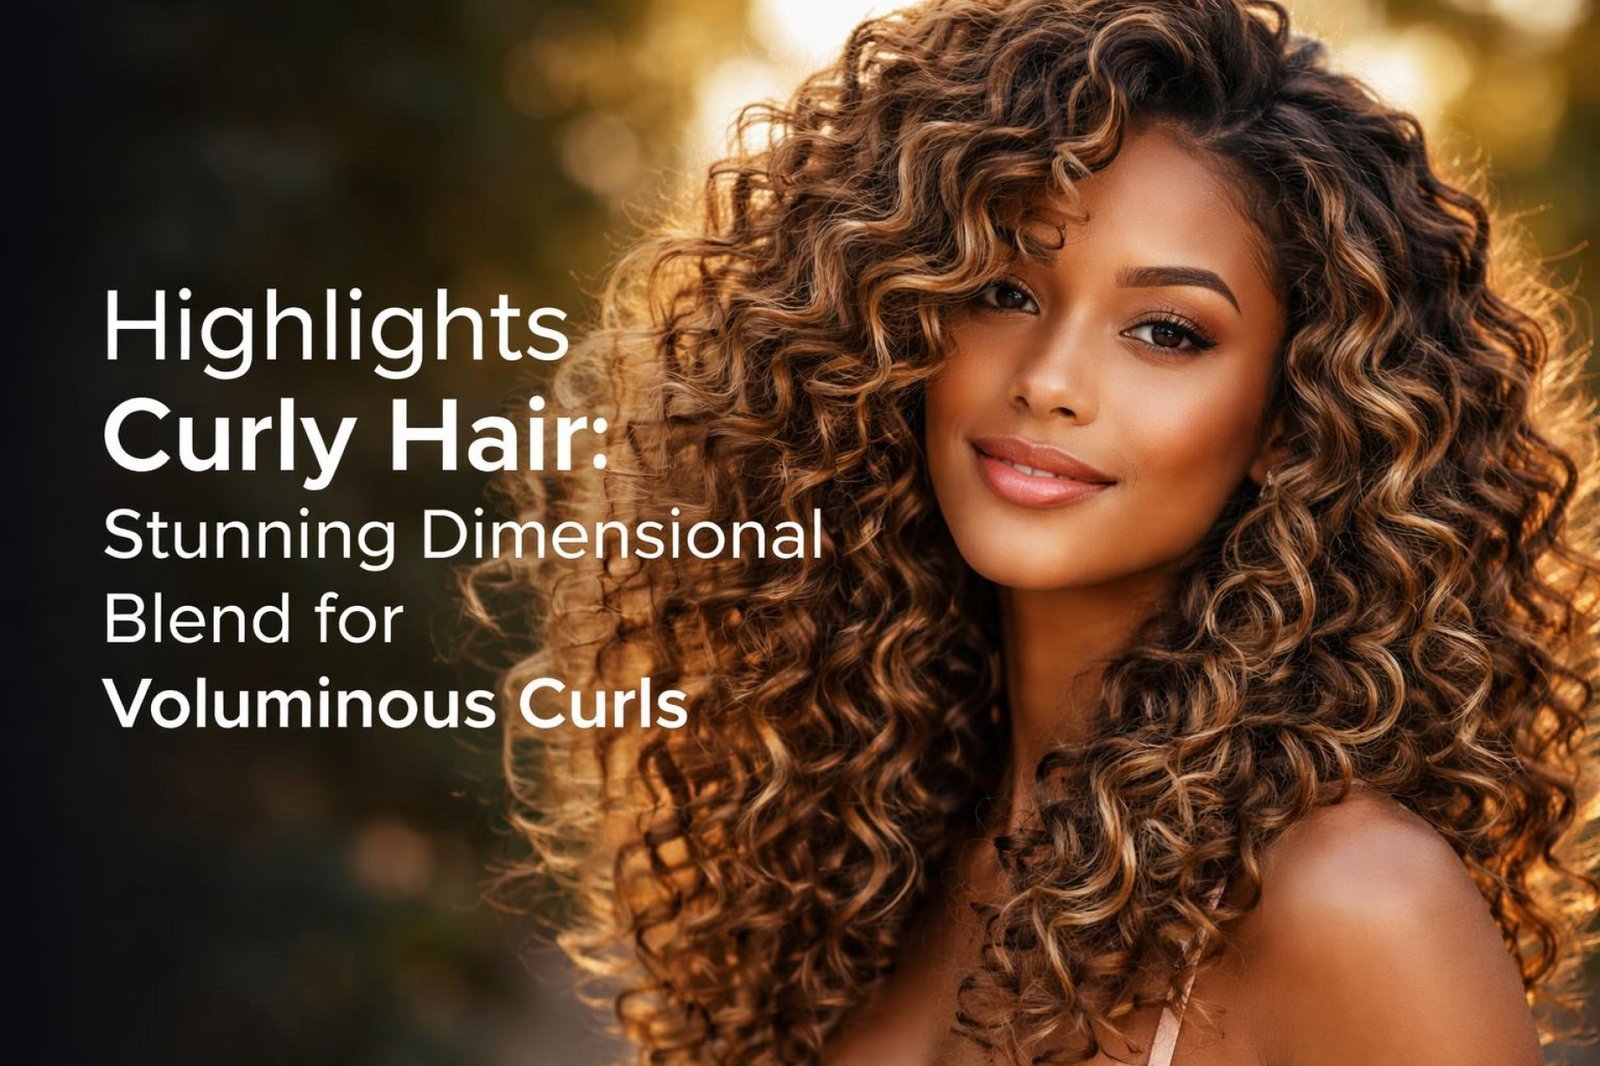
Dreaming of vibrant, dimensional curls that pop with life, but worried about damaging your precious curl pattern? Many curly-haired individuals struggle to achieve stunning highlights curly hair without sacrificing moisture, inviting frizz, or ending up with uneven color that looks anything but natural. The fear of chemical damage often overshadows the desire for a fresh, luminous look, leaving curls dull and uninspired.
Highlights for curly hair add dimension and volume without compromising curl pattern by utilizing specialized techniques like Pintura or Balayage, which strategically paint color onto individual curls to enhance their natural shape and movement. These methods ensure a natural-looking blend and vibrant tones while minimizing damage. Leveraging tested frameworks and data-driven insights, this guide unpacks the secrets to achieving and maintaining beautifully highlighted curls.
Drawing from comprehensive analysis of current data and proven methodologies, we’ll explore expert-approved techniques that honor the unique needs of textured hair. Discover how to transform your curls with a stunning dimensional blend, ensuring both vibrant color and lasting curl health. Get ready to embrace luminous locks that truly reflect your style.
9 Stunning Dimensional Blends for Voluminous Curls
Achieving beautiful highlights curly hair requires understanding how color interacts with the unique structure of curls. This section explores various techniques and color blends specifically designed to enhance natural volume and definition, moving beyond generic applications to embrace methods that celebrate your unique texture. From hand-painted precision to sun-kissed sweeps, discover the perfect dimensional blend that offers both vibrant aesthetics and long-term curl health. We’ll delve into stylist-approved practices that ensure stunning results while protecting the integrity of your curls.
1. Understanding Pintura Highlights: The Ultimate Technique for Highlights Curly Hair

Pin this genius hack to your ‘Hair Goals’ board!
Pintura highlights are a superior technique for curly hair because they involve hand-painting color directly onto individual curls, respecting and enhancing the natural curl pattern rather than disrupting it. This method allows for precise placement, ensuring the color saturates each curl where light would naturally hit, resulting in a truly dimensional color that enhances volume. Unlike traditional foiling, Pintura minimizes damage and helps maintain curl pattern preservation, which is crucial for healthy, vibrant curly hair highlights. Certified colorists often recommend this stylist approved method for its ability to protect hair cuticle health and deliver stunning, long-lasting results.
Tools Required for Pintura Highlights:
- Hair lightener (often ammonia-free, gentle formula for curls)
- Developer volume (20 vol. or lower for minimal damage to hair porosity)
- Pintura brush (fine-tipped for precision painting on individual curls)
- Mixing bowl and applicator
- Gloves
- Clips (non-damaging to section curly hair)
- Deep conditioning treatment (bond builder or protein treatment)
Step-by-Step Pintura Application:
- Prep Curls: Start with dry, detangled curly hair. Avoid washing for 24-48 hours prior to allow natural oils to protect the scalp.
- Sectioning Hair: Divide hair into 4-6 large, manageable sections using non-damaging clips, starting from the nape.
- Mix Lightener: Carefully mix your lightener and developer according to product instructions in a non-metallic bowl, ensuring a creamy, consistent viscosity of lightener.
- Hand-Paint Curls: Take small, individual curls from each section. Using the Pintura brush, hand-paint the lightener onto the mid-shaft to ends of each curl, focusing on the natural fall and movement. Avoid roots to create a natural, blended look.
- Process Lightener: Allow the lightener to process based on the manufacturer’s instructions and your desired lift, checking frequently to prevent over-lightening or damage.
- Rinse Thoroughly: Once desired lightness is achieved, rinse the hair with cool water until all lightener is removed.
- Deep Condition & Tone: Apply a deep conditioner or bond builder to replenish moisture and strengthen structural integrity. Follow with a hair toner if needed to neutralize brassiness and achieve the desired final hue.
Pro-Tip: True Pintura involves painting on dry curls, allowing stylists to see the natural curl pattern and create truly dimensional color that perfectly accentuates curls. This approach minimizes uneven color and maximizes curl definition.

2. Achieving Dark Blonde & Honey Brown Balayage on Curls

Save this look to your ‘Curly Hair Color Inspiration’ board!
Balayage on curly hair offers a beautiful, low-maintenance solution for adding warm, sun-kissed dimension, especially when using shades like dark blonde and honey brown. This technique involves painting the lightener freehand onto the hair’s surface, creating a soft, natural gradient that blends roots seamlessly. The result is a dimensional color that grows out gracefully, minimizing harsh lines and making it a popular choice for those seeking a natural-looking enhancement to their curly hair highlights. By focusing on color selection and proper application, you can achieve a glossy finish while avoiding unwanted brassiness.
What You Need for Dark Blonde & Honey Brown Balayage:
- Hair color kit (professional-grade, suitable for balayage on dark hair)
- Lightener (creamy consistency, specifically for freehand painting)
- Developer (20 volume for gradual, controlled lift)
- Honey brown hair dye (permanent or demi-permanent for base or lowlights)
- Dark blonde hair dye (to achieve the target light shade)
- Applicator brush (wide for sweeping motions)
- Mixing bowls, gloves, clips
- Purple shampoo (to combat yellow tones)
- Deep conditioner (with bond repair properties)
Step-by-Step Balayage Application:
- Consult & Plan: Assess your starting hair color and desired dimensional blend. Decide on highlight placement for a natural-looking finish.
- Prepare Hair: Start with dry, unwashed hair. Detangle and part curly hair into manageable sections.
- Mix & Apply Lightener: Mix lightener and developer. Using a wide applicator brush, paint sweeping strokes of lightener onto small sections of curly hair, focusing mid-shaft to ends. Ensure blending for a seamless transition.
- Process & Rinse: Let the lightener process until the desired lifting stages are reached. Rinse thoroughly with cool water.
- Apply Color & Tone: Apply the honey brown or dark blonde hair dye as planned, creating a multi-tonal effect. Follow with a hair toner if needed to refine the shade and neutralize brassiness.
- Deep Condition: Apply a hydrating deep conditioner to replenish moisture and enhance curl definition.
Pro-Tip: For a truly dimensional color that enhances volume and blends roots seamlessly, choose honey brown and dark blonde shades that are no more than 2-3 levels lighter than your natural base. This creates a soft, sun-kissed effect.

3. Ash Blonde Highlights for Cool-Toned Curly Hair

Pin this elegant look for your next salon visit!
Ash blonde highlights offer a sophisticated, cool-toned contrast for curly hair, effectively neutralizing unwanted warmth and creating a luminous dimensional blend. Achieving this look on curly hair requires precise toning and careful attention to the lifting stages to avoid orange hair or a brassy fix. The unique structure of curls means that ash blonde can truly pop, enhancing definition and creating depth. Incorporating purple shampoo into your routine is essential for maintaining these cool tones and preventing color fading, ensuring a consistent and salon quality finish.
Products & Tools for Ash Blonde Highlights:
- Lightening kit (with bond builder if coloring at home)
- Ash blonde hair dye or toner (specifically formulated for cool tones)
- Developer (low volume for subtle lift, higher for significant change)
- Purple shampoo and conditioner (sulfate-free and curl-friendly)
- Deep conditioning mask (for post-color hydration)
- Applicator brush, mixing bowls, gloves, clips
Steps to Achieve & Maintain Ash Blonde:
- Lighten Strategically: Apply lightener to chosen sections, ensuring the hair lifts to a pale yellow stage. This is crucial for ash blonde tones to develop correctly without looking green.
- Rinse & Dry: Thoroughly rinse out the lightener and gently towel dry.
- Apply Ash Toner/Dye: Apply the ash blonde toner or dye evenly to the lightened sections. Follow product instructions precisely for processing time to achieve the desired cool tones and avoid over-toning.
- Rinse & Condition: Rinse thoroughly and apply a nourishing deep conditioner to restore moisture and seal the cuticle.
- Weekly Purple Shampoo: Use a purple shampoo 1-2 times a week to neutralize any brassy or yellow undertones that may emerge, maintaining the ashy look.
- Regular Deep Conditioning: Continue with weekly deep conditioning treatments to keep curly hair hydrated and prevent dryness relief and color fading.
Pro-Tip: The key to true ash blonde highlights on curly hair is reaching the correct underlying pigment (pale yellow) during the lifting stages and then using a high-quality toner to neutralize warm undertones. Always use sulfate-free products designed for color-treated hair to prolong the vibrancy and prevent color fading.

4. DIY Face-Framing Money Piece Highlights at Home

Try this easy ‘Money Piece’ look and show off your curls!
A DIY money piece is an excellent way to add a vibrant, face-framing effect to your curly hair at home, offering a low-commitment option for those wanting to brighten their look. This technique focuses on highlighting a small section of hair directly around your face, which can significantly brightens face and accentuates curls. While attempting highlights for curly hair at home, it’s crucial to use a gentle approach, perhaps with no bleach highlights alternatives or a low-volume lightener, to prevent damage and ensure a seamless, natural-looking blend that still pops.
Supplies Needed for DIY Money Piece Highlights:
- Highlighting kit (gentle, low-volume lightener or no bleach highlights alternative)
- Foil or plastic wrap (small pieces for isolation)
- Applicator brush (small, precise for painting)
- Mixing bowl, gloves, clips
- Mirror (to check placement)
- Deep conditioning treatment
Steps for DIY Money Piece Application:
- Gather Supplies & Prep: Ensure you have all products & tools used. Perform a strand test and patch test. Protect clothing and surfaces.
- Section Front Curls: Isolate a small section of curly hair at your hairline on either side of your face (the “money piece”). These are typically 1-2 inches wide.
- Mix & Apply Lightener: Mix your chosen lightener. Carefully paint the lightener onto the selected curls, focusing on mid-shaft to ends for a natural, face framing look.
- Isolate & Process: Wrap each lightened section in foil or plastic wrap to separate it from the rest of your hair. Allow to process for the recommended time, checking every 5-10 minutes.
- Rinse Thoroughly: Once desired lightness is achieved, rinsing the lightener completely from the highlighted sections.
- Condition & Style: Follow with a deep conditioning treatment. Style your curly hair as usual, noticing the brightens face effect.
Pro-Tip: When doing DIY money piece highlights on curly hair, always use the lowest effective developer strength and monitor the processing time closely. If unsure, opt for a temporary highlights for curly hair option or a no bleach highlights spray to minimize potential damage.

5. Subtle Sun-Kissed Highlights for Natural Looking Curls

Discover your perfect natural glow – pin for later!
Subtle sun-kissed highlights for curly hair are designed to mimic the natural brightening effects of the sun, adding delicate dimension and enhancing the hair’s texture without a dramatic color change. This natural looking highlights approach is ideal for those seeking a low maintenance way to add warmth and light to their curls. By strategically applying a gentle lightener with a low developer strength, you can achieve a soft, luminous effect that respects the structural integrity of your curls while delivering beautiful dimensional color. The focus is on enhancing your natural beauty with fine, shimmering streaks.
What You Need for Subtle Sun-Kissed Highlights:
- Gentle hair lightener (or ammonia-free option)
- Low volume developer (e.g., 10 or 15 volume)
- Balayage paddle or foil strips
- Applicator brush (small, precise)
- Mixing bowl, gloves, clips
- Hair oil or bond builder (for pre-treatment or mixing with lightener)
Steps for Sun-Kissed Application:
- Minimal Prep: Start with dry, detangled hair. Do not wash for 24 hours. Apply a thin layer of hair oil to protect strands if desired.
- Strategic Sectioning: Section curly hair into manageable parts. Identify specific curls or small strands that would naturally catch the sun (e.g., around the face, crown, ends).
- Mix & Gentle Application: Mix lightener and low volume developer. Using a small brush, lightly paint the mixture onto very fine strands, focusing on the mid-shaft to ends. Apply sparingly for a truly subtle effect.
- Process with Care: Allow the lightener to process for a shorter duration, checking frequently until a slight lift (e.g., 1-2 shades lighter) is achieved.
- Rinse Thoroughly: Rinse completely with cool water.
- Deep Condition: Finish with a deep conditioning treatment to ensure moisture retention and curl definition.
Pro-Tip: The secret to truly natural looking highlights curly hair is embracing a lower developer strength and opting for a technique that blends roots seamlessly, allowing for longer periods between touch-ups. Focus on the outermost layer of curls for the most realistic sun-kissed effect.
6. Caramel Highlights for Dark Brown Curly Hair

Craving warmth? Pin this caramel dream!
Caramel highlights for dark brown curly hair offer a rich, warm, and inviting dimensional blend that beautifully complements deeper base tones, adding vibrancy without harsh contrast. These highlights on dark hair are designed to enhance volume and create a natural-looking effect that complements skin tone. The key is selecting the right caramel hair dye or toner and ensuring sufficient lift to achieve true warm tones without unwanted red or orange undertones. This approach provides low maintenance caramel highlights for curls, as the blend grows out gracefully.
What You Need for Caramel Highlights:
- Hair lightener (formulated for dark hair lift)
- Developer (e.g., 20 or 30 volume, depending on desired lift)
- Caramel hair dye or toner (to achieve the specific warm shade)
- Applicator brush (for precise painting)
- Foil or balayage film (for cleaner sections)
- Mixing bowls, gloves, clips
- Color-safe deep conditioner
Steps to Achieve Caramel Highlights:
- Assess & Plan: Determine the placement of your caramel highlights, often concentrating on mid-lengths and ends, and around the face.
- Prepare Hair: Start with dry, detangled dark brown curly hair. Section into manageable parts.
- Mix & Apply Lightener: Mix lightener with the appropriate developer volume. Carefully paint the mixture onto fine to medium sections of hair where you want the caramel tones. Use foil or film to keep sections separate.
- Process & Monitor: Allow the lightener to process, checking every 10-15 minutes. For dark brown hair, this stage is critical to lift past red/orange to a yellow/gold level.
- Rinse & Towel Dry: Once lifted to the desired level, rinsing thoroughly and gently towel dry.
- Apply Caramel Shade: Apply your chosen caramel hair dye or toner to the lightened sections. Follow instructions for processing time.
- Final Rinse & Condition: Rinse thoroughly and apply a generous amount of color-safe deep conditioner to lock in moisture and shine.
Pro-Tip: For truly rich caramel highlights on dark brown curly hair, ensure the hair lifts to a warm gold color before applying the final toner or dye. This prevents muddy or dull results and ensures vibrant tones that perfectly complement skin tone.
7. Voluminous Chunky Highlights: A Modern Curly Hair Trend

Make a statement with chunky highlights – pin it!
Chunky highlights are making a bold return, offering a dynamic and voluminous statement for curly hair by creating distinct, wider ribbons of contrasting color. This style of highlights curly hair is known for its dramatic highlights that visually enhance volume and add significant depth to the hair. Achieving chunky highlights on curls requires meticulous sectioning and thorough saturating of the lightener to ensure even lift and prevent uneven color. When done correctly, this modern trend can provide striking visual impact, complementing the natural movement and texture of curls.
Products & Tools for Chunky Highlights:
- Hair lightener (stronger lift formula may be needed)
- Developer (e.g., 20 or 30 volume for significant contrast)
- Foil sheets (pre-cut or roll, for precise isolation)
- Highlighting comb (for weaving sections)
- Applicator brush (for painting and saturating)
- Mixing bowls, gloves, clips
- Bond repair treatment (essential for strong lift)
Steps to Achieve Chunky Highlights:
- Consult & Design: Plan the placement of your chunky highlights – where do you want the boldest contrast? Consider your curly hair part and overall style.
- Prepare Hair: Start with dry, detangled hair. Section curly hair meticulously into 4-6 parts, securing with clips.
- Weave & Isolate: Using the tail of a highlighting comb, weave out thicker sections of hair for each highlight. Place a foil sheet underneath, close to the root.
- Mix & Saturate: Mix your lightener and developer. Apply the mixture generously, saturating the woven section completely from root to tip.
- Fold Foil & Process: Carefully fold the foil to encapsulate the hair, ensuring no lightener bleeds onto other sections. Allow to process, checking frequently for desired lift.
- Rinse & Tone: Once lifted, rinse thoroughly. Apply a hair toner if needed to refine the highlight shade (e.g., to an icy blonde or creamy blonde).
- Deep Condition: Finish with an intensive bond repair treatment or deep conditioner to counteract any potential damage.
Pro-Tip: For a successful chunky highlights look on curly hair, precise sectioning and thorough saturating of the lightener are key. Ensure the lightened sections are fully encapsulated in foil to prevent uneven processing and achieve distinct, voluminous contrast.
8. Essential Prep Steps Before Highlights Curly Hair

Prep your curls like a pro – pin this guide!
Proper preparation is the most critical step to prevent damage and ensure vibrant, long-lasting results when getting highlights on curly hair. Curly hair requires moisture and strength to withstand the lightening process. Neglecting pre-highlighting care can lead to breakage prevention, dryness relief, and compromised curl definition. By focusing on intense hydration and protein treatments, you fortify the structural integrity of your curls, ensuring they remain healthy and resilient throughout the coloring process and beyond.
What You Need for Pre-Highlight Prep:
- Deep conditioning mask (intensely hydrating for dryness relief)
- Protein treatment (to strengthen weak strands and prevent breakage)
- Leave-in conditioner (for daily moisture)
- Sulfated-free shampoo and conditioner (gentle cleansing)
- Microfiber towel (for gentle drying)
- Wide-tooth comb (for tangle-free hair)
Essential Pre-Highlighting Steps:
- Deep Condition Weekly: For 2-3 weeks prior, use a rich deep conditioning mask weekly to boost moisture retention and improve curl definition.
- Protein Treatment: A week before, apply a targeted protein treatment to reinforce structural integrity and prevent breakage, especially if your hair feels weak.
- Avoid Harsh Treatments: Refrain from heat styling, chemical treatments, or excessive clarifying for at least a week to avoid stressing the hair.
- No Wash Day-Of: Do not wash your hair on the day of your appointment. Natural oils provide a protective barrier against the lightener.
- Arrive with Detangled Hair: Ensure your curly hair is fully detangled and dry for your stylist, allowing for easier sectioning and application.
- Communicate: Discuss your hair’s history, current condition, and desired outcome with your stylist.
Pro-Tip: Healthy curly hair takes color better and is less prone to damage. Prioritizing moisture retention and protein balance in the weeks leading up to your highlights is the single most effective way to ensure a successful, vibrant, and long-lasting result.

9. Post-Highlight Curly Hair Maintenance & Color Protection

Keep your highlights vibrant – pin these daily tips!
Post-highlight curly hair maintenance is essential for preserving the vibrancy of your color, preventing frizz, and maintaining the integrity of your curl pattern. After the chemical process of highlighting, curly hair requires moisture more than ever to combat potential dryness relief and damage. A consistent routine using sulfate-free shampoo and regular deep conditioning treatments is crucial for color protection and ensuring your highlighted curly hair remains healthy, defined, and shiny. Protecting your hair from external aggressors like UV rays and friction is also key to preventing color fading and breakage prevention.
What You Need for Post-Highlight Maintenance:
- Sulfate-free shampoo and conditioner (color-safe, gentle for curls)
- Deep conditioning treatment (weekly, for moisture retention)
- Leave-in conditioner or curl cream (for daily hydration and curl definition)
- Purple shampoo (if you have blonde or ash tones, for brassiness fix)
- Microfiber towel or cotton t-shirt (to prevent frizz control)
- Silk pillowcase (to reduce friction and breakage prevention)
- UV protection spray (to prevent color fading)
Your Post-Highlight Care Routine:
- Gentle Washing: Use a sulfate-free shampoo and conditioner specifically designed for color-treated curly hair. Wash less frequently to preserve natural oils and prevent color fading.
- Deep Condition Weekly: Apply a rich deep conditioning treatment once a week to replenish moisture lost during the highlighting process and improve curl definition.
- Combat Brassiness: If you have blonde or ash highlights, incorporate a purple shampoo 1-2 times a week to neutralize brassiness and maintain cool tones.
- Air Dry or Diffuse: Avoid high heat styling. Air dry or use a diffuser on a low-heat setting to style your curly hair gently, minimizing frizz.
- Protect from UV: Use a UV protection spray when exposed to the sun to shield your highlights from fading.
- Nighttime Protection: Sleep on a silk pillowcase or use a silk bonnet to reduce friction, frizz, and breakage prevention while preserving your curl pattern.
- Regular Trims: Schedule regular trims every 8-12 weeks to remove split ends and keep your curly hair looking healthy and vibrant.
Pro-Tip: Highlighted curly hair thrives on moisture. Consistent deep conditioning and using sulfate-free products are non-negotiable for color protection and maintaining curl definition. Think of it as a constant quest for moisture retention to prevent dryness relief and keep your new color looking fresh.

FAQs About Highlights Curly Hair
What highlights are best for curly hair?
Pintura highlights are widely considered the best for curly hair, as they involve hand-painting color directly onto individual curls to enhance their natural pattern and dimension without causing damage. Balayage is another excellent option, offering a softer, sun-kissed look with natural grow-out. Both techniques allow for precise placement that accentuates the unique texture of curls, preventing a striped or uneven appearance often seen with traditional foils.
Do highlights damage curly hair?
Highlights can damage curly hair if not done correctly, particularly due to the chemical process of lightening which can strip moisture and disrupt the curl pattern. However, with proper preparation, professional application (especially techniques like Pintura), and a dedicated post-highlight maintenance routine focused on deep conditioning and moisture, damage can be significantly minimized. Always prioritize curl-friendly, sulfate-free products.
How to highlight curly hair at home?
Highlighting curly hair at home typically involves using a balayage or money piece technique with a gentle lightening kit, focusing on painting fine strands or face-framing pieces to minimize overall damage and complexity. It’s crucial to perform strand and patch tests, use a low-volume developer, and strictly follow instructions. For intricate or full-head highlights, professional salon service is highly recommended to ensure even results and hair health.
Pintura vs balayage: which is better?
For curly hair specifically, Pintura is often considered superior to traditional balayage because it directly addresses the unique structure of curls, painting each one individually for maximum definition and dimension. While balayage creates a sweeping, sun-kissed blend, Pintura allows for more controlled saturation that works with the curl’s natural movement, leading to less damage and more vibrant results that truly enhance the curl pattern.
How much do curly hair highlights cost?
The cost of curly hair highlights varies widely, typically ranging from $150 to $400+ depending on the technique (Pintura often being more specialized), the salon’s location and prestige, the stylist’s experience, and the length and density of your hair. This investment reflects the specialized skill and time required to achieve beautiful, damage-free highlights on textured hair.
Can you get highlights on 4C hair?
Yes, you can absolutely get highlights on 4C hair, and they can add stunning dimension and depth to tight coils. The key is working with a certified colorist experienced with 4C textures, who will use specific, gentle techniques like Pintura or foilayage and prioritize bond-building treatments and deep conditioning to protect the hair’s delicate structure and moisture retention.
How to prevent frizz after highlights?
To prevent frizz after highlights, focus on an intense moisture-retention routine: use sulfate-free, hydrating shampoos and conditioners, apply a weekly deep conditioning mask, and always use a leave-in conditioner or curl cream. Gently blot dry with a microfiber towel, avoid excessive heat styling, and protect hair at night with a silk pillowcase or bonnet to minimize friction and maintain curl definition.
Will highlights ruin my curl pattern?
Highlights can potentially alter or loosen your curl pattern if the lightening process is too aggressive or prolonged, leading to damage and loss of elasticity. However, when done by an experienced professional using curl-specific techniques and gentle formulas, and followed by a robust moisturizing routine, your curl pattern can be preserved and even enhanced by the added dimension.
What are the best highlights for curly hair men?
For men with curly hair, the best highlights often involve subtle, natural-looking sun-kissed pieces or a face-framing money piece to add texture and brightness without being overly dramatic. Caramel, honey, or light brown shades tend to blend well with darker bases, creating a modern, effortless look that enhances the natural volume and movement of men’s curls.
How to maintain blonde highlights on curls?
Maintaining blonde highlights on curls requires consistent use of purple shampoo (1-2 times weekly) to neutralize brassiness, paired with an intensive hydrating routine to combat dryness. Regular deep conditioning, leave-in treatments, UV protection, and gentle styling methods are essential to keep blonde highlights vibrant, prevent color fading, and maintain healthy curl definition.
Final Thoughts on Highlights Curly Hair
Achieving stunning highlights curly hair is an art that blends aesthetic desire with scientific understanding of curl integrity. From mastering the precision of Pintura highlights to selecting the perfect dimensional blend of dark blonde, honey brown, or ash blonde balayage, the journey to vibrant, voluminous curls requires thoughtful planning and diligent care. Remember, the goal isn’t just to change your hair color, but to enhance your natural texture, adding depth and light that moves with every bounce of your curls. By prioritizing damage prevention through meticulous preparation and a dedicated post-highlight curly hair maintenance routine, you can enjoy long-lasting highlights that truly shine.
Whether you opt for a professional salon experience or a careful DIY money piece, the principles remain the same: hydrate, protect, and choose techniques that respect your unique curl pattern. With the right knowledge and products, your highlighted curly hair can be a testament to both bold personal style and impeccable hair health. What’s your favorite tip for maintaining vibrant highlights curly hair? Share your thoughts in the comments below!
Last update on 2026-04-27 / Affiliate links / Images from Amazon Product Advertising API