Struggling to find stylish looks for your shoulder-length curls? It often feels like you’re stuck between the awkward grow-out phase and the length needed for more intricate styles, leading to endless ponytails and frustration with frizz. Finding the right curly hair hairstyles medium length can feel like an impossible challenge.
Styling medium-length curly hair involves using the right products to enhance your natural texture and choosing hairstyles that minimize frizz while adding volume. Key styles include layered cuts to avoid “triangle hair,” effortless half-up styles for elegance, and using a diffuser for defined, bouncy curls that make daily styling quick and easy.
Drawing from established best practices and stylist-approved techniques, this guide provides the ultimate visual and practical inspiration. We will explore 11 effortless ideas, detailing not just the look but the exact steps and products you need to achieve it. You will discover how to master your medium length curls for any occasion.
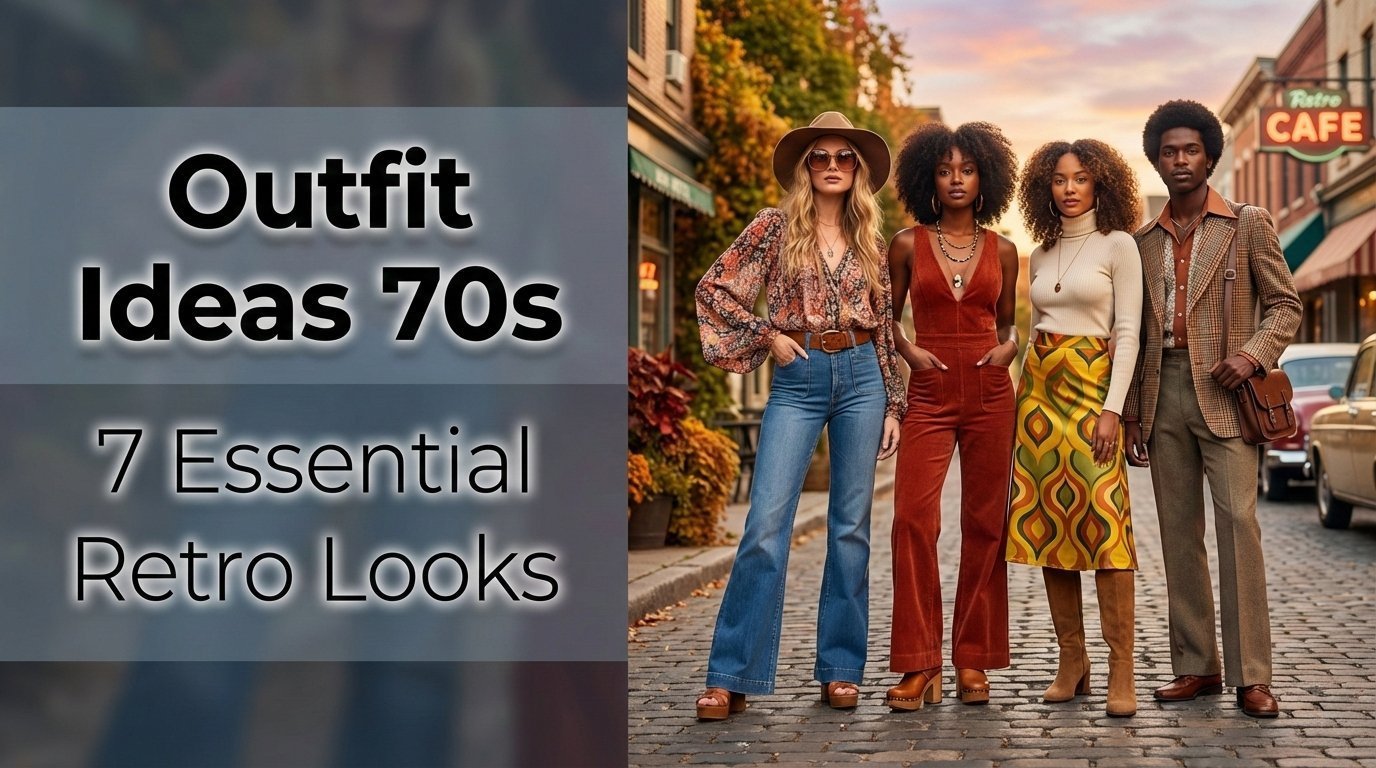
11 Effortless Curly Hair Hairstyles for Medium Length in 2026
Finding the perfect hairstyle when you have shoulder length curls can transform your entire look and simplify your daily routine. The key is to find styles that embrace your natural texture rather than fighting against it. From quick 5-minute updos to professionally inspired cuts, there’s a world of options that can help you manage frizzy hair and achieve beautiful curl definition. This curated list provides not just inspiration, but the actionable steps you need to recreate these looks at home, proving that effortless and chic go hand-in-hand.
1. The Classic Curly Lob Style

Pin this chic curly lob to your “Hair Goals” board!
The curly lob style, or long bob, is a timeless and versatile shoulder length bob that works beautifully with natural curls. It’s modern, chic, and surprisingly low maintenance, offering enough length for styling flexibility while being short enough to feel light and bouncy. This cut is perfect for showcasing healthy, defined curls and can be adapted for any occasion, from a professional setting to a casual weekend.
Products & Tools Used
- Leave-in conditioner with good slip for detangling
- A high-definition curl cream that enhances natural ringlets
- A lightweight hair oil to seal moisture and add shine
- Microfiber towel or cotton t-shirt for plopping
Application/Styling Steps
- Start with freshly washed and conditioned hair. While it’s still soaking wet, apply a generous amount of leave-in conditioner.
- Use a wide tooth comb to gently detangle and ensure even product distribution.
- Section your hair and apply the curl cream using the “praying hands” method to smooth it down the hair shaft.
- Gently scrunch your hair upwards towards the scalp to encourage curl formation.
- Plop your hair in a microfiber towel for 15-20 minutes to absorb excess water without causing frizz.
- Air dry or use a diffuser on low speed and low heat to dry your hair the rest of the way. Once fully dry, scrunch out any crunch with a drop of hair oil.
Pro-Tip: As a stylist, I always recommend asking for subtle, long layers within the lob cut. This is the secret to getting beautiful shape and volume while preventing the bottom-heavy “triangle hair” look that many people with medium length curly hair fear.

2. The Effortless Half Up Half Down

Save this easy half up half down style for your next brunch date!
The half up half down curly hairstyles are the epitome of effortless chic. This quick style is perfect for second or third-day curls, getting hair out of your face while still showing off its length and texture. It’s incredibly versatile, easily transitioning from a casual day look to an elegant evening style with the simple change of an accessory. It’s a go-to for a reason and one of the best cute easy hairstyles for school with curly hair.
Products & Tools Used
- A refreshing spray or water to revive day 2 curls
- A stylish hair accessory like a scrunchie, claw clip, or bobby pins
- A light-hold hairspray (optional)
Application/Styling Steps
- If working with second-day hair, lightly mist your tresses with water or a curl refreshing spray to bring back some bounce.
- Gather the top section of your hair, from your temples to the crown of your head.
- Secure the gathered section with your chosen accessory. For a messy look, don’t pull the ponytail all the way through the elastic on the last loop.
- Gently pull out a few face framing layers or tendrils around your face to soften the look.
- Fluff the bottom section of your hair with your fingers to add volume.
Pro-Tip: For a more elegant version perfect for a wedding guest or date night, create two small twists on either side of your part and pin them at the back of your head. This transforms the simple style instantly. This works especially well for those with hairstyles for medium length curly hair over 50.

3. Rock a Voluminous Deep Side Part

Need instant volume? Pin this deep side part trick!
One of the simplest yet most effective ways to instantly get more volume in curly hair is by creating a deep side part curly style. This technique is a lifesaver for those who struggle with flat roots, as flipping the hair against its natural growth pattern creates immediate lift and drama. It’s a powerful look for thick hair that adds a touch of glamour and asymmetry, drawing attention to your eyes and cheekbones.
Products & Tools Used
- A volumizing mousse or root lift spray
- A wide tooth comb or rattail comb for parting
- Long metal clips (duckbill clips) for setting the roots
- A diffuser attachment for your blow dryer
Application/Styling Steps
- On damp hair, apply volumizing mousse, focusing on the root area.
- Using the end of a comb, create a deep side part, much further over than you normally would.
- To set the part and create extra lift, place the long metal clips at the roots along the part line, lifting the hair up and away from the scalp.
- Diffuse your hair, paying special attention to drying the roots first with your head flipped upside down for maximum volume.
- Once your hair is 100% dry, remove the clips. Gently use your fingers or a hair pick to fluff the roots.
Pro-Tip: For long-lasting volume, try styling your hair with a middle part and then, once it’s completely dry, flip it over to a deep side part. This ‘tricks’ the roots into standing up, giving you that professional salon blowout look without the heat damage. This is a key technique to avoid that flat on top look.

4. Embrace the Modern Curly Shag

Pin this edgy curly shag for your next salon visit!
The shaggy medium hair cut has made a huge comeback, and it’s particularly stunning on layered curly hair. This cut is all about creating a messy, textured look with tons of movement and volume. Often paired with curtain bangs curly styles, the shag is designed to enhance your hair’s natural wave and curl pattern, making it a fantastic low maintenance option that looks intentionally cool and edgy.
Products & Tools Used
- A lightweight curl-enhancing mousse
- A texturizing spray or sea salt spray
- A diffuser
Application/Styling Steps
- The shag is all about the cut, so the styling is minimal. Start by applying a light mousse to damp hair to encourage your natural texture.
- Scrunch generously to form curl clumps.
- Diffuse with your head flipped upside down to enhance the layers and create natural volume.
- Once dry, spray a texturizing or sea salt spray throughout the mid-lengths and ends.
- Use your fingers to shake out the roots and separate the curtain bangs, encouraging a messy, lived-in look.
Pro-Tip: The key to an amazing curly shag is the protein-moisture balance. Because it’s so textured, it can be prone to dryness. Make sure you are using a deep conditioner regularly and listen to your hair—if it feels mushy, you need protein; if it feels brittle, you need moisture.

5. Add Stylish Curtain Bangs & Face Framing Layers

Thinking about bangs? Save this curtain bangs inspo for later!
For those wondering, can you have bangs with curly hair?, the answer is a resounding yes! Medium length curly hair with curtain bangs is one of the most popular and flattering trends. These soft, long bangs sweep to the side, beautifully blending with face framing layers to highlight your cheekbones and eyes. They offer the stylish look of bangs without the high-maintenance commitment of a blunt fringe, making them the perfect entry point for adding a new dimension to your layered curly hair.
Products & Tools Used
- Denman brush or a similar styling brush for control
- A small amount of curl cream or gel
- A mini flat iron (optional, for specific touch-ups)
- Clips to separate your bangs
Application/Styling Steps
- When your hair is damp, separate your bangs from the rest of your hair.
- Apply a small amount of product to your bangs.
- Take your styling brush and, holding it vertically, wrap small sections of your bangs around it, pulling forward and away from your face to create a C-shape. This is a form of finger coiling with a brush.
- You can either let them air dry or gently diffuse them.
- For any unruly tendrils, you can use a mini flat iron on a low heat setting to quickly smooth them into place.
Pro-Tip: The biggest mistake is treating your bangs like one solid unit. To get that soft, sweeping look, you must style them as individual curl clumps. I use a Denman brush technique on my clients, styling each curl in the direction I want it to lay.

6. The Quick & Protective Pineapple Updo

Protect your curls while you sleep! Pin this pineapple technique.
Learning how to sleep with medium curly hair is a non-negotiable part of any curly hair routine. The pineappling technique is a game-changer. This protective updo involves loosely gathering your curls at the very top of your head, which prevents tangling and friction while you sleep. The result? You wake up with preserved curl definition, reduced frizz, and incredible volume, making it much easier to refresh day 2 curls.
Products & Tools Used
- A loose fabric scrunchie, PuffCuff, or spiral hair tie
- A silk or satin scarf or bonnet (optional, for extra protection)
- A silk pillowcase
Application/Styling Steps
- Flip your head upside down.
- Gently gather all of your hair into a very high, loose ponytail at the top of your head, close to your forehead.
- Secure it loosely with a scrunchie or other gentle hair tie. Only wrap it once or twice—it should be loose enough to not leave a dent.
- Your curls should be spilling forward over your head.
- Sleep on a silk pillowcase to minimize friction. For extra protection, you can also wrap your hair in a satin scarf or pop on a bonnet over the pineapple.
- In the morning, simply take out the scrunchie and gently shake your hair out.
Pro-Tip: For medium length hair, some pieces at the nape of your neck might fall out. That’s perfectly normal. You can either sleep with them out or use a few small clips to secure them. The main goal of pineappling is to protect the bulk of your hair.

7. Style an Elegant Braided Crown

The perfect wedding guest hairstyle! Pin this braided crown tutorial.
For a special occasion, combining braids + curls creates a beautifully romantic and elegant look. A braided crown is one of the best wedding guest hairstyles for shoulder length curly hair because it keeps hair controlled and out of your face while still showcasing your gorgeous curly texture. It might look intricate, but it’s surprisingly easy to create and looks stunning with a few loose tendrils left out to frame the face.
Products & Tools Used
- A few clear elastic bands
- Bobby pins that match your hair color
- A medium-hold hairspray
Application/Styling Steps
- Create a part where you’d like your braid to start.
- Take a 2-3 inch section of hair at the front and begin a simple three-strand braid or a dutch braid (if you’re more advanced) along your hairline towards your ear.
- Secure the end of the braid with a clear elastic.
- Gently pull on the edges of the braid to fatten it up and make it look fuller (this is called “pancaking”).
- Drape the braid across your forehead or hairline like a headband and secure the end behind the opposite ear using bobby pins.
- Repeat on the other side if you want a full crown, or leave it as a side accent. Mist with hairspray to finish.
Pro-Tip: Don’t worry about it being perfect! A slightly messy, deconstructed braid looks more modern and romantic with curly hair. The texture of your curls will help hide any imperfections and hold the bobby pins in place.

8. The Polished High Puff for Natural Curls

Show off your beautiful coils! Pin this high puff tutorial.
The high puff is a classic, powerful, and professional style that beautifully showcases the texture of natural coils. It’s an excellent option for those learning how to style 4c hair medium length, as it creates impressive volume and keeps hair protected. This style celebrates the beauty of a natural hair journey, offering a chic and polished look that is perfect for work, events, or any day you want to feel confident.
Products & Tools Used
- A strong-hold edge control
- A soft boar bristle brush or edge brush
- A large, stretchy hair tie or shoelace
- A hair oil or moisturizing cream
- An afro pick
Application/Styling Steps
- Start on moisturized, stretched hair for best results (e.g., from an old twist-out).
- Apply edge control around your entire hairline. Use a soft brush to smooth your edges back.
- Flip your head forward and gather your hair into a high ponytail. Use a shoelace or a very stretchy band for more control without snagging.
- Secure the puff at the crown of your head. Don’t pull the hair all the way through; create a puff.
- Use an afro pick to gently fluff and shape your puff to your desired volume and shape.
- Tie a satin scarf around your edges for 10-15 minutes to set them.
Pro-Tip: To combat shrinkage and get a fuller-looking puff on medium length hair, use the banding method. After washing, place several hair ties down the length of a few sections of your hair. Let it dry completely. This will stretch your coils without heat, giving you more length to work with for your puff.

9. The Low Maintenance Wash and Go

Master the perfect wash and go! Pin these essential steps.
The wash and go is the foundation of any great curly hair routine. While the name implies simplicity, achieving a perfectly defined, frizz-free result requires mastering a specific technique. When done correctly, it’s the ultimate low maintenance style that allows your natural curl pattern to shine. Learning how to define curls on medium hair using this method will result in consistently healthy, glossy, and beautiful hair.
Products & Tools Used
- A moisturizing sulfate-free shampoo and conditioner
- A leave-in conditioner
- A strong-hold botanical hair gel or mousse
- A microfiber towel or t-shirt
Application/Styling Steps
- Start in the shower. After shampooing, apply a large amount of conditioner and detangle with your fingers or a wide tooth comb.
- With your hair still full of conditioner, cup water in your hands and scrunch it upwards into your hair. This is the squish to condish method, which helps form curl clumps. Rinse lightly.
- While your hair is still soaking wet (do not towel dry!), apply your leave-in conditioner for a base layer of moisture.
- Immediately follow with your hair gel. Rake it through gently, then glaze it over the curl clumps. Scrunch again to encourage definition.
- Plop your hair in a microfiber towel for 20 minutes.
- Air dry or diffuse the rest of the way. Do not touch your hair while it’s drying!
Pro-Tip: The secret to a successful wash and go is applying products to soaking wet hair. If your hair starts to dry, keep a spray bottle of water on hand to re-wet it. This ensures the product coats the curls evenly and locks in hydration, which is the ultimate key to frizz control.

10. Accessorize with a Stylish Headband

The easiest way to look chic! Pin this headband styling idea.
Headbands are the ultimate accessory for a quick easy hairstyles solution. Whether you’re dealing with a bad hair day, trying to keep hair out of your face, or simply want to add a pop of color to your outfit, a headband is a perfect choice. This versatile accessory instantly makes you look put-together and can create amazing volume at the crown, making it a stylish and professional choice for any day of the week.
Products & Tools Used
- A stylish headband (knotted, padded, or a simple elastic one)
- A hair pick for volume
Application/Styling Steps
- This is the easiest style of all! Start with your hair down, in whatever state it’s in (day 1 or day 4!).
- Place the headband on your head, about an inch back from your hairline.
- Gently push the headband back, allowing it to gather the front section of your hair.
- Once the headband is in a comfortable position, use a hair pick or your fingers to lift the hair at the crown, just behind the headband, to create some volume.
- Pull out a few curly tendrils in front of the headband if you like a softer look.
Pro-Tip: Look for headbands lined with satin or silk. This is expert recommended because they are much gentler on curly hair and won’t snag or cause the friction that leads to frizz and breakage, especially when worn frequently. This is also a great professional hairstyle for men with medium curly hair.

11. Create a Messy Top Knot Bun

The perfect messy bun for curls! Save this easy tutorial.
Learning how to do a messy bun with curly hair is a rite of passage. This quick 5 minute hairstyles staple is perfect for the gym hairstyles, running errands, or a casual night in. The natural volume and texture of curly hair make it uniquely suited for creating a full, effortless-looking bun that straight hair can only dream of. The key is to embrace the imperfections and let your curly texture do the work.
Products & Tools Used
- A strong but gentle hair tie (like a spiral tie or fabric scrunchie)
- Several U-shaped bobby pins
- Dry shampoo (optional, for grip and volume)
Application/Styling Steps
- If your hair is too soft or clean, give it some grit by spritzing dry shampoo at the roots.
- Flip your hair upside down and gather it into a high ponytail, but don’t pull it tight.
- On the last loop of the hair tie, only pull the hair halfway through to create a looped bun, leaving the ends out.
- Now, work with the texture you have. Take the ends of the hair and wrap them around the base of the bun in one direction.
- Use the U-shaped bobby pins to tuck and secure the ends, and also to shape the bun itself. Pin any parts that feel too loose.
- Gently tug on the bun to increase its size and messy look. Pull out a few face-framing pieces.
Pro-Tip: The secret to a sturdy but comfortable messy bun is using U-shaped pins instead of standard bobby pins. They hold more hair and don’t create the tension points that can lead to headaches. Wiggle them into the base of the bun to anchor it to the hair on your scalp.

Key Takeaways: Your Quick Guide to Medium Length Curly Hairstyles
- Hydration is Everything: The foundation of all great curly hair hairstyles medium length is moisture. Always apply styling products like curl cream and gel to soaking wet hair to lock in hydration and prevent frizz.
- The Right Cut is a Game-Changer: A cut with medium length layers, like a shag or lob, is the best way to create shape, add volume, and prevent the dreaded “triangle hair” shape.
- Protect Your Curls at Night: Use the pineappling technique and sleep on a silk pillowcase to preserve your style, reduce tangles, and make your morning routine infinitely easier.
- Embrace Your Natural Texture: The best styles, like a messy bun or a wash and go, work with your hair’s natural coils and waves, not against them. Don’t aim for perfection; aim for healthy and defined.
- Master a Few Key Techniques: Learning simple methods like how to scrunch, plop with a microfiber towel, and use a diffuser correctly will dramatically improve your curly hair routine.
- Accessories are Your Best Friend: On lazy days, a stylish headband or a well-placed clip can instantly transform your look from messy to chic and professional.
People Also Ask About Medium Length Curly Hair
Is shoulder length good for curly hair?
Yes, shoulder length is one of the best lengths for curly hair. It’s long enough to show off your curl pattern and allow for versatile styling like updos, but short enough that it doesn’t get weighed down. This length often provides the perfect balance for achieving maximum volume and bounce without excessive maintenance.
How do you avoid the “triangle shape” in medium curly hair?
The key to avoiding “triangle hair” is getting a proper cut with strategic layers. A stylist who specializes in curly hair will cut layers throughout your hair to remove weight and create movement. This allows the curls at the crown to have more volume, resulting in a rounder, more flattering shape instead of one that is flat on top and wide at the bottom.
Should I get layers with medium curly hair?
Absolutely. Getting layers is highly recommended for most people with medium length curly hair. Layers remove bulk, enhance movement, and create volume. They are essential for shaping the hair and preventing it from looking heavy. Whether you want a soft, blended look or a choppy shaggy style, layers are crucial for a successful curly cut.
How do I manage frizzy medium curly hair?
Managing frizz comes down to two things: moisture and technique. Ensure you’re using a leave-in conditioner and a strong-hold gel on soaking wet hair to seal the hair’s cuticle. Avoid regular towels; use a microfiber towel or t-shirt to plop your hair. Finally, avoid touching your hair as it dries, as friction is the main cause of frizz.
What is the best haircut for curly hair and a round face?
For a round face, the best haircuts add height and length, and a medium length curly style is perfect for this. A curly lob with a deep side part is very flattering as it creates asymmetry and vertical lines. Adding face framing layers that start below the chin also helps to elongate the face.
Can you have bangs with curly hair?
Yes, you can definitely have bangs with curly hair, and they can be incredibly stylish. The most popular and easiest-to-manage option is curtain bangs, which are longer and sweep to the sides. The key is to have them cut by a professional who understands shrinkage and cuts them dry, curl by curl, to ensure they fall correctly.
How do I get more volume in my curly hair?
To get more volume, focus on your roots. Style with your head flipped upside down and use a diffuser with a “pixie diffusing” technique (drying the roots first). Using a volumizing mousse and a hair pick to fluff the roots once dry are also essential steps. Finally, styling with a side part instantly creates lift.
What is the difference between a gel and a mousse for curls?
A gel primarily provides hold and definition, while a mousse primarily provides volume and light hold. Gels are great for creating a “cast” on your curls that locks in the pattern and fights frizz. Mousses are lighter and can be great for those with fine hair who find gels too heavy or want a softer, more voluminous look.
How do I refresh day 2 curly hair?
To refresh day 2 curls, you just need to rehydrate and lightly restyle. Mix some water with a bit of your leave-in conditioner in a spray bottle. Lightly mist your hair—don’t soak it. Gently scrunch your hair to reactivate the product and reform the curls. You can also spot-treat any frizzy sections with a tiny bit of cream or gel.
How do you sleep with medium curly hair to protect it?
The best way to sleep with curly hair is to use the “pineapple” method. Gather your hair in a very loose, high ponytail on top of your head using a gentle tie like a scrunchie. This protects your curls from being crushed. Sleeping on a silk pillowcase is also critical as it reduces friction, frizz, and tangles.
Final Thoughts on Your Medium Length Curls
Your medium length curly hair is not a problem to be solved; it’s a beautiful feature with incredible potential for style and expression. As you’ve seen, from the chic curly lob to the elegant braided crown, there is no shortage of effortless ways to style your tresses. The key is to stop fighting your natural texture and start working with it. By embracing a great haircut with layers, mastering a few core techniques like the wash and go, and protecting your curls at night, you can unlock a world of low-maintenance, beautiful hair days.
Remember that your natural hair journey is one of experimentation. Try a new style, play with a different product, and see what makes you feel the most confident.
What is your go-to hairstyle for your medium-length curls? Share your favorites in the comments below
Last update on 2026-04-27 / Affiliate links / Images from Amazon Product Advertising API