Struggling with flat, uninspired hair and craving a serious refresh? You’re seeing those bouncy, layered looks everywhere and wondering how to make them work for you without looking dated. Getting that perfect mid length 90s haircut can feel like a mystery.
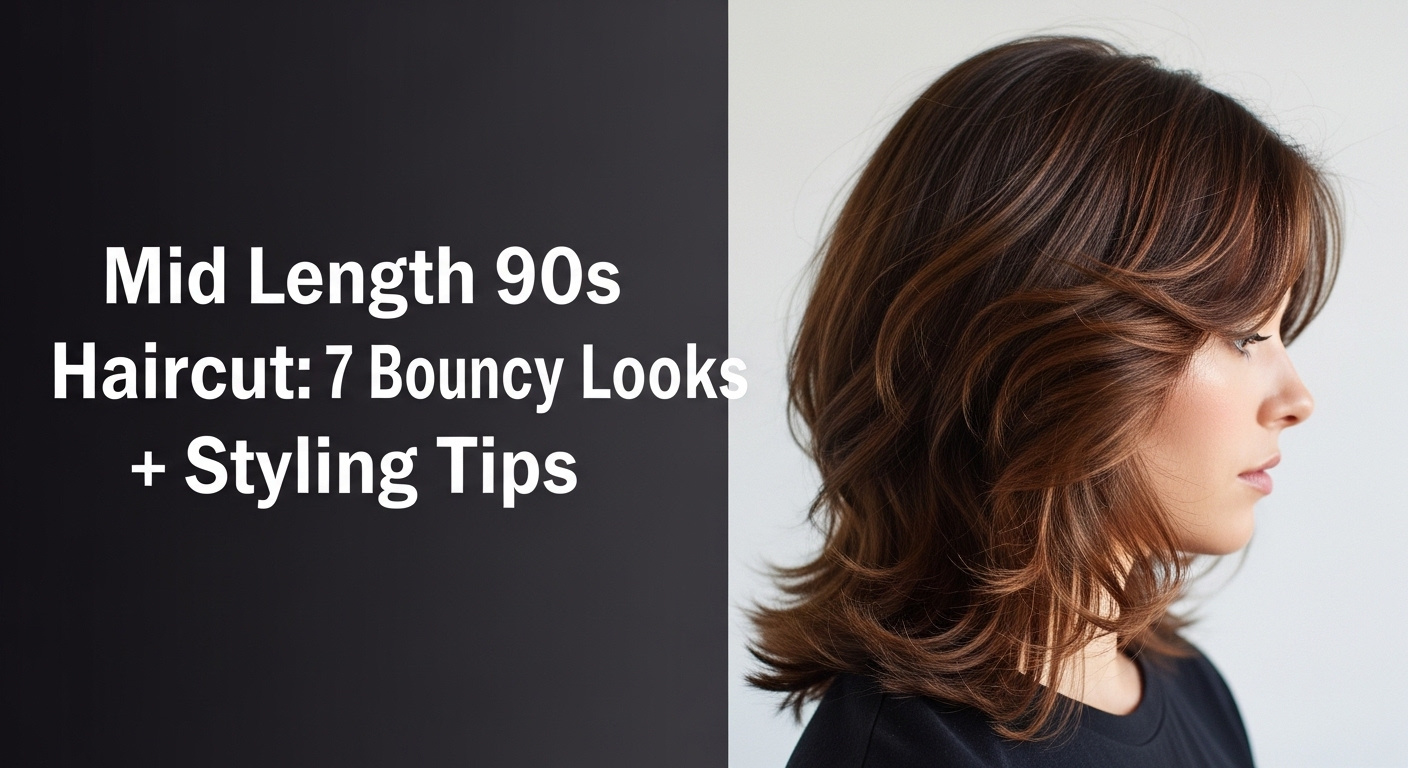
A mid length 90s haircut is a shoulder-to-collarbone length style defined by heavy internal and face-framing layers designed to create maximum volume and movement. Often called “The Rachel 2.0,” its core features are a voluminous crown, bouncy layers that flick at the ends, and a soft silhouette that adds texture.
Drawing from comprehensive analysis of proven methodologies, this guide breaks it all down. This hairstyle is a versatile archetype characterized by its architectural layers that add incredible movement. You’ll discover 7 distinct variations and get the exact steps to achieve that iconic 90s hair inspiration at home.
Why the Mid Length 90s Haircut is the Ultimate Hair Refresh for 2026
The resurgence of the mid length 90s haircut is no accident; it’s the perfect antidote to the problem of flat hair solution. This iconic style, once made famous by figures like Jennifer Aniston and Cindy Crawford, is back with a modern twist. It’s all about creating movement and life in the hair, using a combination of bouncy layers and strategic face framing pieces to add dimension and shape. Unlike some retro trends that can feel stuck in the past, this 90s hair trend has evolved. Its DNA is now seen in wildly popular modern cuts like the Butterfly haircut and C-shape layers, proving its timeless appeal. The core principle remains the same: to achieve that signature 90s supermodel volume and an effortlessly chic silhouette that feels both nostalgic and completely current for 2026. It’s a versatile look that can be polished and sleek or edgy and textured, making it a fantastic choice for anyone looking to update their style.
How to Ask Your Stylist for the Perfect 90s Layers
Walking into a salon with a vision is one thing, but leaving with the haircut you actually wanted is another. The fear of miscommunication is real, but you can eliminate it by learning to speak your stylist’s language. To get an authentic 90s layered haircut, it’s about more than just showing a picture; it’s about using the right technical terms to describe the shape, texture, and volume you’re after. Using precise language ensures your stylist understands the mechanics behind the look, from the 90-degree elevation needed for volume to the point cutting required for feathery ends.
Your Cheat Sheet for the Salon:
* Use the Magic Words: Start by saying you want a “modern 90s haircut” or “The Rachel 2.0” with lots of “bouncy layers.”
* Specify the Face Frame: Clearly state where you want the shortest face framing layers to begin. Say, “I want the face-framing to start at my chin for a soft look,” or “at my cheekbones to highlight them.”
* Ask for Technical Layers: Request “heavy internal layering” or “round layers” to remove weight and create movement. Mention you want “90-degree projection” for maximum volume, which is a core authentic 90s technique.
* Talk About Texture: Ask for “point cutting” on the ends instead of a blunt cut. This creates the feathery texture and wispy ends that are essential for the style.
* Bring a Visual Moodboard: Show photos of the specific 90s hair inspiration you love, pointing out the voluminous crown or the flicked ends you want to replicate.
7 Bouncy Mid Length 90s Haircuts to Try in 2026
The beauty of the mid length 90s haircut is its versatility. It’s not a single, one-size-fits-all style but a framework for creating volume and movement that can be adapted to your personal aesthetic. From the polished, iconic “Rachel” 2.0 to the edgy, grunge-inspired shag, there’s a version of this trend for everyone. Below, we’ll explore seven distinct looks that capture the essence of the 90s hair trend. Each one comes with a complete guide, including the specific tools you’ll need and a step-by-step tutorial to help you master the styling at home, delivering on the promise of bouncy, beautiful hair.
1. The Classic “Rachel” 2.0 with Bouncy, Face-Framing Layers

Pin this iconic haircut to your ‘Dream Hair’ board!
This is the modern version of the 90s rachel haircut, the one that started it all. Defined by its signature bouncy layers and rounded shape, this look is all about polished volume. The key is the heavy internal layering that creates movement and the distinct inward curve of the face framing layers. Its enduring popularity was recently confirmed by Jennifer Aniston herself, who sported an updated version at the 2024 Golden Globes, proving its timeless appeal.
Products & Tools Used
- Volumizing Mousse: A golf-ball sized amount for lift at the roots without crunchiness.
- Heat Protectant Spray: A non-negotiable to shield hair during the blowout.
- Medium Round Brush (1.5-2 inch barrel): The key tool for creating the iconic rounded ends and layers + volume.
- Sectioning Clips: To make the blowout process manageable.
- Light-Hold Hairspray: To set the style without making it stiff.
Application/Styling Steps
- Start with 70-80% dry hair and apply volumizing mousse to the roots and a heat protectant spray all over.
- Section your hair into four parts using clips.
- Take a 2-inch section and, using the round brush, begin blow drying with round brush, pulling hair up and away from the scalp at a 90-degree angle to create root lift.
- As you reach the ends, roll the brush inwards towards your face, concentrating the heat to create that signature “Rachel” curve.
- Once a section is dry, roll it back up in the brush or a large velcro roller and let it “cool down” for at least 5-10 minutes. This is the secret to locking in volume.
- Repeat for all sections, then gently brush out and finish with a light mist of hairspray.
Pro-Tip: For that authentic 90s supermodel volume, apply the mousse with your head flipped upside down. This professional salon technique ensures the product is concentrated at the roots for maximum, long-lasting lift.

2. The Bouncy “Midi Flick” for Effortless Cool

Save this chic and easy style for your next salon visit!
The 90s midi haircut is the effortlessly cool cousin to the polished “Rachel.” This style is all about a collarbone length cut with flicked ends that create a carefree, airy vibe. Popularized by modern icons like Matilda Djerf, this look features tapered ends and subtle layers on top, making it especially suitable for medium to thick hair. It’s the perfect choice for someone who wants to embrace the 90s hair trend without looking over-styled.
Products & Tools Used
- Texturizing Sea Salt Spray: To enhance the messy, effortless look.
- Blow Dryer Brush or Large Barrel Curling Iron: To easily create the outward flick.
- Lightweight Hair Oil or Serum: For a glossy, expensive-looking finish without weighing hair down.
- Heat Protectant: Essential for any heat styling.
Application/Styling Steps
- Apply a heat protectant to damp hair. If you have fine hair, add a little volumizing mousse at the roots.
- Rough-dry your hair until it’s about 80% dry, focusing on lifting the roots.
- Using a blow dryer brush, take a section of hair and smooth it down from root to mid-length.
- As you approach the last 2-3 inches, twist the brush outwards and away from your face, holding for a few seconds to set the styling the flick.
- For extra hold, let the section cool before moving on.
- Once all sections are done, mist with a texturizing spray and tousle with your fingers to break it up. Finish with a drop of hair oil on the ends for shine.
Pro-Tip: A key professional salon technique to achieve a natural-looking flick is to alternate the direction on a few small, underlying pieces. While most ends flick out, turning one or two small sections inward creates more dimension and movement.

3. The Modern “Butterfly Cut”: A 90s vs. 2026 Hybrid

Pin this guide to finally understand the difference between the Rachel and the Butterfly cut!
One of the most talked-about modern styles, the Butterfly haircut, is a direct descendant of the 90s layered look. It masterfully creates the illusion of a shorter cut from the front while keeping length in the back. This is achieved with shorter cascading layers that have a feathery texture and are more disconnected than a traditional “Rachel.” Understanding the rachel cut vs butterfly cut difference is key to asking for the right look.
The Difference: Rachel vs. Butterfly
| Feature | The Classic “Rachel” | The Modern “Butterfly” |
|---|---|---|
| Layers | Blended, heavy internal layering that connects. | Disconnected; short, chin-length face-framing layers plus long layers in the back. |
| Shape | A more uniform, rounded shape. | A “V-shape” from the back with two distinct “wings” at the front. |
| Illusion | Creates overall volume and bounce. | Gives the illusion of a short haircut from the front, while keeping length in the back. |
| Best For | Adding volume to fine to medium hair. | Removing weight from thick, heavy hair while maintaining length. |
Products & Tools Used
- Volumizing Root Lift Spray: To specifically target the crown for that supermodel lift.
- Large Velcro Rollers (2-3 inches): Essential for setting the voluminous shape of the “wings.”
- Round Brush: For the initial blowout and smoothing.
- Shine Spray: To give the finished look a glossy, expensive finish.
Application/Styling Steps
- Prep damp hair with heat protectant and a root lift spray at the crown.
- Blow dry your hair smooth using a round brush. For the shorter, front layers, curl them inwards towards the face. For the longer, back layers, you can curl them inwards or outwards.
- While the hair is still warm from the blow dryer, take the short face-framing sections and wrap them in large velcro rollers, rolling away from the face to create the “wing” effect.
- Set the hair at the crown in another roller for maximum occipital bone volume.
- Let the rollers + bounce set for at least 15-20 minutes until completely cool.
- Remove rollers, shake out the hair, and finish with a generous mist of shine spray.
Pro-Tip: The key to the Butterfly haircut is the separation between the short and long layers. When styling, physically separate the short front “wings” and style them first. Treat the long back section as a separate blowout to emphasize the dual-length effect.

4. The 90s Shag with Wispy, Feathered Layers

Get that cool, effortless vibe. Pin this 90s shag tutorial!
For those who prefer an edgier, more low-maintenance vibe, the shaggy mid length cut is the perfect choice. Inspired by 90s grunge icons like Winona Ryder, this style is all about choppy texture and wispy ends. Unlike the polished blowout, this cut is designed to be air-dried and embraces natural movement. It’s a fantastic low maintenance 90s layered haircut that relies on the right products to enhance its piecey, feathered layers.
Products & Tools Used
- Matte Texturizing Paste or Wax: The hero product for creating piecey, defined layers.
- Leave-in Conditioner/Air-Dry Cream: To control frizz and encourage natural waves.
- Diffuser Attachment (Optional): To enhance natural texture without creating frizz.
- Dry Shampoo: To add grit and second-day volume at the roots.
Application/Styling Steps
- On damp hair, apply a generous amount of leave-in conditioner or air-dry cream from mid-lengths to ends.
- Scrunch your hair upwards towards the scalp to encourage natural wave patterns.
- Either let your hair air-dry completely or use a diffuser on low speed and medium heat, holding it under the hair and pushing upwards.
- Once 100% dry, spray dry shampoo at the roots for lift and a slightly matte, grunge-inspired texture.
- Take a pea-sized amount of matte hair wax and rub it between your palms until it’s warm and transparent.
- Use your fingertips to rake through your hair, focusing on twisting and defining the ends of the choppy texture layers to create that signature piecey, shaggy mid length look.
Pro-Tip: Don’t overdo it with the wax! The goal is definition, not grease. A common mistake is applying it directly from the container. The tested styling routine is to always warm it in your hands first; this emulsifies the product for invisible hold and texture.

5. The Supermodel Blowout with 90s Curtain Bangs

Unlock Cindy Crawford-level volume! Pin this supermodel hair guide.
This is the epitome of 90s glamour. The Supermodel Blowout is all about achieving that iconic, gravity-defying 90s supermodel volume, inspired by legends like Cindy Crawford. This look is defined by a highly voluminous crown, soft bouncy locks, and sweeping curtain bangs that frame the face perfectly. The combination of a 90s medium length haircut with curtain bangs and a flawless 90s style blowout creates a powerful and polished statement.
Products & Tools Used
- Root Lift Spray: A targeted spray for maximum voluminous crown.
- Velcro Rollers (various sizes): Large for the crown, medium for the bangs.
- Round Brush (medium): For initial drying and shaping.
- Strong Hold Hairspray: To lock in the gravity-defying volume.
- Duckbill Clips: To secure rollers in place.
Application/Styling Steps
- On damp hair, spray a root lift spray directly onto the scalp area, focusing on the crown and front hairline.
- Blow drying with round brush, lift the root sections straight up at a 90-degree angle from the scalp, concentrating heat for 15-20 seconds to build a strong foundation for volume.
- For the curtain bangs, use a medium round brush to blow dry them forward and down, then roll them up and away from the face.
- While the hair is hot, place a large velcro roller at the crown, rolling backwards. Place a medium roller in your curtain bangs, also rolling backwards and away from your forehead. Secure both with duckbill clips.
- Style the rest of your hair as desired, either with rollers or a round brush.
- Wait for the rollers to cool completely (20+ minutes). Gently remove them, and use your fingers to position the bangs. Finish with a strong-hold hairspray.
Pro-Tip: To get that signature curtain bang “swoop,” the secret is in the cooling. After removing the roller, use your fingers to pinch the base of the bangs together while pushing them back. Hold for 10 seconds. This tested styling routine creates the perfect face-framing curve.

6. The 90s Grunge Cut with Choppy, Disconnected Layers

For the cool and effortless. Pin this grunge hair tutorial now.
Channeling the angsty, cool aesthetic of the 90s music scene, this haircut is all about embracing imperfection. It features a choppy texture with a disconnected layer technique, meaning the layers don’t blend seamlessly, creating bold, piecey ends. This is the ultimate wash-and-go style that serves as a fantastic alternative to the Wolf Cut. Instead of fighting frizz, this cut works with it to achieve its signature lived-in, nostalgic 90s hair vibe.
Products & Tools Used
- Air-Dry Cream or Wave Spray: To manage frizz and enhance natural movement.
- Light Hold Pomade or Styling Cream: For defining the choppy ends without a greasy look.
- A Wide-Tooth Comb: For detangling without disrupting the texture.
Application/Styling Steps
- After washing, gently detangle with a wide-tooth comb. Do not use a brush.
- Squeeze out excess water with a microfiber towel or an old t-shirt to minimize frizz.
- Apply a generous amount of air-dry cream, scrunching it into the hair.
- Let the hair air-dry completely. The less you touch it, the better.
- Once dry, take a dime-sized amount of light hold pomade, warm it in your hands, and use your fingertips to twist and separate the ends of the chunky layers.
- The goal is a slightly messy, lived-in look. Don’t aim for perfection.
Pro-Tip: This is the one haircut where second-day hair is often better. If your freshly washed hair is too soft, use a bit of dry shampoo or texturizing spray on the dry mid-lengths to add the necessary grit for that authentic grunge aesthetic.

7. The Voluminous Cut with 90s Round Layers

The secret to soft, blended volume. Pin this round layers guide!
For those seeking a softer, more classic interpretation, the cut with round layers is the answer. This technique involves blending the layers seamlessly to create a soft, uniform “C” shape that cups the face beautifully. It’s a core component of the modern C-shape haircut. The styling focuses on creating one cohesive, rounded curve rather than distinct flicks, making it perfect for a polished and sophisticated vintage hair silhouette.
Products & Tools Used
- Smoothing Blowout Cream: To fight frizz and help the hair take on a smooth, rounded shape.
- Boar Bristle Round Brush: Ideal for creating high tension and incredible shine.
- Finishing Serum: To add a final touch of gloss and tame any flyaways.
- Sectioning Clips: To ensure each layer is styled correctly.
Application/Styling Steps
- Apply a quarter-sized amount of smoothing blowout cream to clean, damp hair from roots to ends.
- Section the hair. Starting from the bottom, take a 2-inch wide section.
- Place the boar bristle round brush at the root and aim the blow dryer nozzle downwards along the hair shaft to create smoothness.
- As you pull the brush through the hair, continuously rotate it inwards. This is the key to creating the “C” shape.
- When you reach the end, hold the rounded shape with the brush for 10 seconds under the heat, then use the cool shot button to set it.
- Repeat this process, working your way up. Ensure all sections are being curled inwards to create one cohesive, voluminous curve.
Pro-Tip: The angle of your brush matters. For maximum roundness and volume, hold the brush horizontally. To create a softer, more elongated curve, hold the brush vertically. This subtle change in professional salon technique allows you to customize the roundness of your layers.

Key Takeaways
- Layers Are Everything: The heart of any mid length 90s haircut is the layering. Whether you choose the blended round layers of “The Rachel” or the disconnected Butterfly haircut, volume comes from well-executed layers.
-
Communicate with Your Stylist: Don’t just show a photo. Use specific terms like “heavy face framing layers,” “90-degree elevation,” and “point cutting” to get the exact nostalgic 90s hair you want.
-
The Cool Down is Crucial: The secret to long-lasting volume is letting your hair cool down completely while it’s shaped on a round brush or in velcro rollers. Heat shapes the hair, but cool air locks it in place.
-
Choose Products for Volume: Start your routine with a volumizing mousse or root lift spray. These products provide the foundation needed to fight flat hair and achieve that signature 90s supermodel volume.
-
There’s a 90s Cut for Every Vibe: You don’t have to go for the ultra-polished blowout. A shaggy mid length cut offers a low-maintenance, grunge alternative that embraces natural texture.
-
Modern Tools Make It Easier: You can achieve the look with modern tools like a blow dryer brush, which simplifies the process of getting a salon-quality 90s style blowout at home.
FAQs About mid length 90s haircut
What is a 90s mid length haircut called?
The most famous mid length 90s haircut is called “The Rachel,” inspired by Jennifer Aniston’s character in Friends. Modern versions are often referred to as the “Butterfly Cut” or a “C-Shape Cut.” Other variations include the “90s midi flick” and the “90s shag.” All these styles share the core elements of shoulder-to-collarbone length and heavy layering for volume.
Are 90s layers good for thin hair?
Yes, 90s layers can be excellent for thin or fine hair, as they are specifically designed to create the illusion of more volume and movement. The key is to ask your stylist for blended, round layers rather than overly choppy or disconnected ones. This technique removes weight strategically, allowing the hair to have more lift and bounce, effectively providing a thickening fine hair aesthetic.
How do you ask a stylist for 90s layers?
Bring photos and use specific language. Ask for a “mid length 90s haircut” with “heavy face-framing layers” starting at your chin or cheekbones. Mention you want “90-degree elevation” for volume and “point cutting” for soft, wispy ends. Using these professional salon technique terms ensures your stylist understands the exact texture and shape you want.
What is the difference between a 90s cut and a wolf cut?
A 90s cut is softer and more voluminous, while a wolf cut is a much choppier hybrid of a shag and a mullet. The 90s blowout focuses on rounded, bouncy layers and a polished finish. In contrast, the wolf cut has very short, heavily textured layers on top and longer, thinned-out lengths at the back, creating a much edgier and more disconnected silhouette.
What products are best for 90s hair volume?
The essential products for achieving 90s volume are a volumizing mousse and a root lift spray. Apply mousse to damp hair before styling to add all-over body. A root lift spray is perfect for targeting the crown for that signature 90s supermodel volume. A good heat protectant is also crucial, and a light-hold hairspray will lock in the style without stiffness.
How do you maintain 90s layers?
Maintenance involves regular trims every 6-8 weeks to keep the layers sharp and prevent split ends. At home, the key to managing heavy hair and maintaining the style is using the right products (like volumizing mousse) and styling techniques (like a round brush blowout or setting with velcro rollers). Using a clarifying shampoo once a week can also prevent product buildup that weighs layers down.
Will 90s layers suit a round face?
Yes, 90s layers are incredibly flattering for a round face shape. The signature soft face-frame and layers starting around the chin or cheekbones help to elongate the face and define the jawline. The volume at the crown also draws the eye upwards, creating a more balanced and oval-like silhouette.
How do you do velcro rollers on mid length hair?
On hair that is still warm from blow-drying, take a 2-inch section and roll the velcro roller down from the end to the root. For volume, roll away from the face. For a rounded-in look, roll towards the face. Secure with a duckbill clip if needed. Let the rollers cool completely for at least 20 minutes before removing them for a long-lasting, bouncy set.
How to style a 90s blowout at home?
Start with a volumizing mousse on damp hair, then rough-dry to 80%. Working in sections, use a round brush to lift hair at the roots and smooth it to the ends, curling the brush to create shape. For maximum volume, set each warm section in a velcro roller and allow it to cool completely before removing. Finish with a light hairspray.
Can men wear 90s mid length hair?
Absolutely. The 90s mid length haircut for men is often called the “curtain haircut” or the “90s heartthrob haircut.” This style, popularized by actors like Leonardo DiCaprio and Johnny Depp, features a center or side part with hair falling to the sides, often grazing the ears or collarbone, with subtle layering to add movement and texture.
Final Thoughts on Your Bouncy 90s Haircut
Embracing the mid length 90s haircut is about more than just a new style; it’s about reclaiming volume, movement, and a sense of effortless cool. You’re now equipped with the knowledge to not only choose the perfect look for your vibe—from the polished “Rachel 2.0” to the edgy shaggy mid length cut—but also to confidently communicate that vision to your stylist. Remember that the magic lies in the details: the right layering technique, the perfect volumizing product, and the crucial step of letting your hair cool to lock in that incredible bounce. This trend is incredibly versatile and, with these expert tips, completely achievable.
Which 90s look are you most excited to try?
Last update on 2026-03-27 / Affiliate links / Images from Amazon Product Advertising API