Tired of choosing between the short, edgy pixie cut and the classic, chic bob? What if the perfect haircut for you lies somewhere in between, offering style without the high maintenance? This common dilemma leads many to a style that’s taking the hair world by storm.
The bixie haircut is a trendy, hybrid hairstyle that combines the length of a short bob with the layers and texture of a pixie cut. It typically sits between the ear and jawline, featuring shorter layers in the back and longer, face-framing pieces in the front. This versatile cut is celebrated for being low-maintenance while providing significant volume and movement.
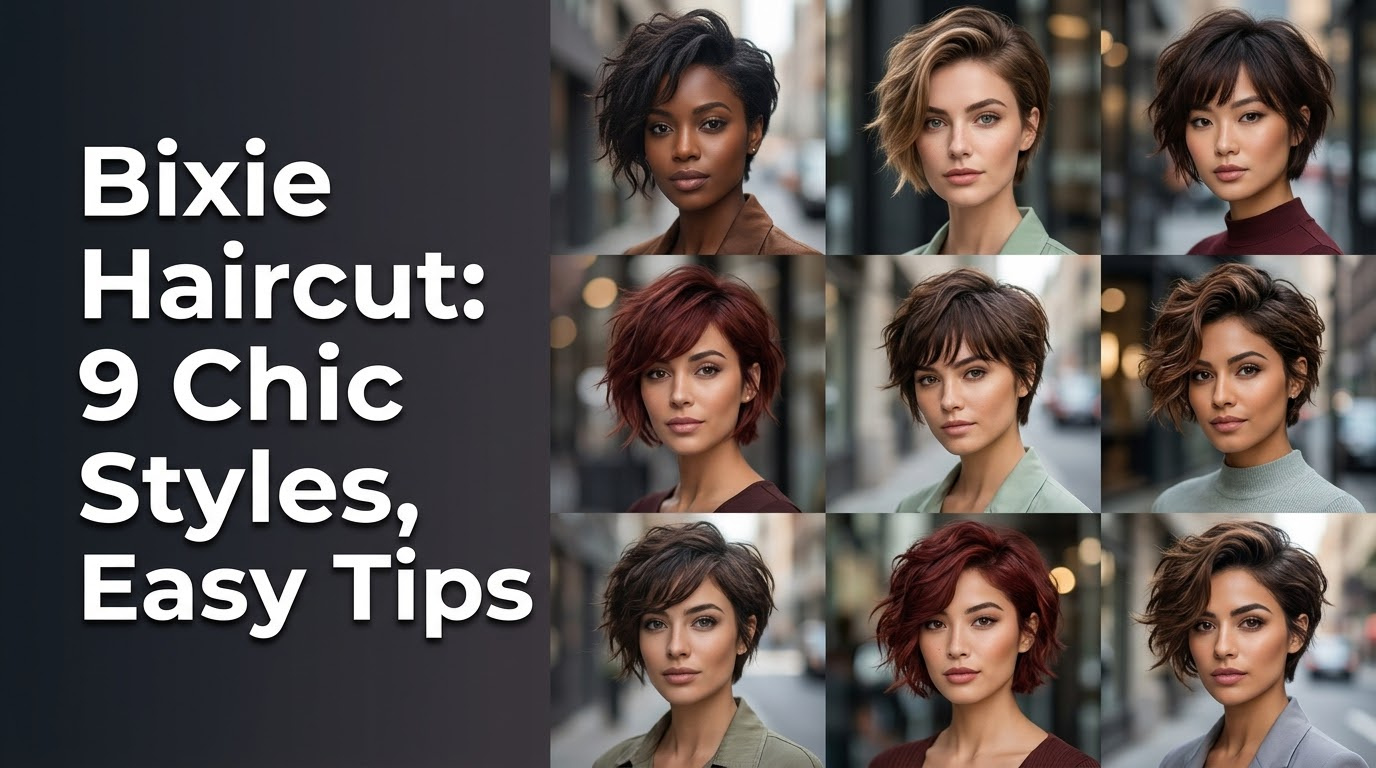
Drawing from established best practices and current hair trends, this guide breaks down everything you need to know about the bixie haircut. You will discover nine distinct styles, learn how to achieve each look, and get expert tips for making this cut work for your unique hair type and face shape. It’s time to find your perfect, effortless style for 2026.
What is a Bixie Haircut and Why Is It the Perfect Style for 2026?
The bixie haircut is the ultimate hybrid haircut, masterfully blending the most beloved features of two iconic styles: the bob cut and the pixie cut. Imagine the length and face-framing elegance of a short bob combined with the volume, texture, and playful layers of a pixie—that’s the bixie. This style first gained popularity with the effortless cool of 90s fashion and has made a major comeback in 2026 because it perfectly answers the modern call for styles that are both chic and genuinely low-maintenance. Its signature characteristics include choppy layers for movement, a shorter back that tapers at the nape, and a slightly longer front to create flattering face-framing pieces. Unlike a true pixie, a bixie offers more styling versatility, and unlike a bob, it provides more texture and built-in volume, making it a go-to stylist recommended option for those looking to address issues like thinning hair or add life to flat styles.
| Feature | Bixie Cut | Bob Cut | Pixie Cut |
|---|---|---|---|
| Length | Between ear & jawline | Jawline or longer | Very short, above the ear |
| Layers | Heavy, shaggy & textured | Often minimal or long layers | Short, cropped layers |
| Shape | Rounded with volume | Typically blunt or A-line | Follows the head shape |
| Vibe | Playful, textured, versatile | Classic, polished, structured | Edgy, bold, minimal |
This haircut is incredibly versatile, making it suitable for a wide range of hair types and ages. It’s a fantastic solution for those with fine hair as the layers create the illusion of density and volume. For those with thick hair, strategic thinning and layering can remove unwanted bulk. Furthermore, it has become a favored style for women over 50 and 60, offering a youthful appearance that is modern and easy to manage.
9 Chic Bixie Haircut Styles to Inspire Your Next Look
The true beauty of the bixie haircut lies in its incredible versatility. It’s not a one-size-fits-all style but a flexible framework that can be adapted to your personal taste, hair type, and lifestyle. From the effortlessly cool shaggy bixie to a polished and professional look, there’s a variation for everyone. This section serves as your visual lookbook, showcasing nine distinct hair cut ideas that you can take directly to your stylist. Each style includes actionable styling steps and product recommendations, providing you with everything you need to not just find your inspiration, but also bring it to life every day.
1. Master the Classic Shaggy Bixie

Pin this effortless style to your ‘Short Hair Inspo’ board!
The classic shaggy bixie is the heart of the trend, perfectly capturing the 90s inspired hair vibe made iconic by stars like Winona Ryder. This style is defined by its heavy choppy layers, textured ends, and an overall tousled appearance that looks intentionally undone. It’s the ultimate wash-and-go cut, designed to enhance your hair’s natural movement and create an airy texture. It’s the ideal choice for anyone seeking a short layered hair look that is both stylish and effortlessly low-maintenance.
Products & Tools Used
- A high-quality texturizing spray or sea salt spray for grip and texture
- A lightweight styling cream or pomade with a matte finish
- A blow dryer with a diffuser attachment (optional)
- A professional-grade razor comb for maintaining texture (for stylists)
Styling Steps
- Start with damp, towel-dried hair. Lightly mist a texturizing spray from mid-lengths to ends to encourage separation.
- If you have fine hair, apply a small amount of root-lifting mousse at the crown for added volume.
- Use your fingers to scrunch and twist small sections of hair to enhance the shaggy texture.
- Either let your hair air-dry for a natural, low-maintenance finish or use a blow dryer with a diffuser on low speed to gently dry the hair, minimizing frizz.
- Once dry, take a pea-sized amount of matte pomade, rub it between your palms, and work it through the ends to define the choppy layers and create a tousled effect.
Pro-Tip: Ask your stylist for point cutting on the ends instead of a blunt cut. In my experience, this technique removes bulk, enhances the airy texture, and is the secret to a truly shaggy bixie that doesn’t look bulky as it grows.

2. Embrace the Bouncy Curly Bixie

Love your curls? Pin this gorgeous bixie idea!
A curly bixie haircut is a game-changer for those with natural waves and coils. The structure of the bixie cut enhances a curly texture by incorporating manageable layers that build shape and prevent the dreaded “triangle” look that can happen with shorter cuts. This style is all about taming unruly curls and achieving great definition with proper frizz control, resulting in a bouncy, lively silhouette that celebrates your hair’s natural pattern.
Products & Tools Used
- A sulfate-free shampoo and conditioner for curly hair
- A leave-in conditioner for moisture
- A high-quality curl defining cream or lightweight gel
- A microfiber towel or cotton t-shirt for drying
- A blow dryer with a large diffuser bowl
Styling Steps
- Wash and condition your hair with products designed for curls. Do not fully rinse out the conditioner to leave some slip.
- While your hair is still soaking wet, apply a generous amount of leave-in conditioner, raking it through with your fingers.
- Follow immediately with a curl cream or gel. Use the “praying hands” method to smooth the product over your curls, then gently scrunch upwards towards the scalp.
- Use a microfiber towel or an old t-shirt to gently scrunch out excess water. Avoid rubbing, which causes frizz.
- Hover-diffuse on low heat and low speed. Hold the diffuser a few inches from your hair, moving it around your head until your hair is about 80% dry. Then, gently tip your head to each side and upside down, cupping sections of curls in the diffuser bowl for 30 seconds each to enhance volume and definition.
Pro-Tip: A common issue with curly bixie styles is losing shape. A stylist recommended technique is to ask for internal layering. This removes weight from the inside of the cut without sacrificing length on top, allowing curls to spring up and create a rounded, bouncy shape.

3. Achieve the Sleek & Polished Bixie

For a sharp, professional look, pin this sleek bixie style guide!
Wondering are bixie cuts professional? Absolutely. The sleek and polished modern bixie variation transforms the typically shaggy bixie into a sharp, sophisticated style perfect for the office or any formal occasion. This look focuses on creating a smooth, glossy finish that highlights the clean lines of the chin length cut and the deliberate blending of its layers. It proves that a short, textured haircut can be just as elegant and professional as any longer style.
Products & Tools Used
- A high-quality heat protectant spray
- An anti-frizz smoothing serum or cream
- A slim, 1-inch flat iron with adjustable temperature
- A fine-tooth comb
- A shine spray for finishing
Styling Steps
- Begin with clean, completely dry hair. Mist a lightweight heat protectant spray evenly throughout your hair.
- Apply a dime-sized amount of anti-frizz serum to your hands and distribute it from the mid-lengths to the ends.
- Sectioning your hair is key. Use clips to separate the top sections from the bottom.
- Set your flat iron to a medium heat setting. Working in small, 1-inch sections, slowly pass the flat iron from roots to ends. Use a fine-tooth comb to lead the flat iron (the “comb chase” method) for an ultra-sleek finish.
- When you reach the face-framing layers, gently bevel the flat iron inward to create a soft curve that frames the face.
- Finish with a light mist of shine spray for a glossy, polished look that tames any flyaways.
Pro-Tip: The difference between a sleek bixie and a flat one is in the crown volume. An expert guide tip is to flat iron the sections at the crown by pulling them straight up (90 degrees from the scalp) instead of down. This builds subtle lift at the root before you smooth the ends.

4. Style the Bixie with Flattering Curtain Bangs

Add this curtain bang bixie to your hair goals board!
Adding a fringe is a fantastic way to customize your cut, and a short bixie haircut with curtain bangs is a particularly chic combination. The long, wispy bangs frame the face beautifully and blend seamlessly into the existing face-framing layers of the bixie. This pairing softens the overall look and draws attention to the eyes, adding a touch of romanticism to the otherwise playful cut. Mastering the styling of these bang styles is key to making them look integrated and effortless.
Products & Tools Used
- A volumizing mousse or root spray
- A small (1 to 1.5-inch) round brush
- A blow dryer with a nozzle attachment
- A light-hold hairspray
Styling Steps
- On damp hair, always style your bangs first. Apply a golf ball-sized amount of volumizing mousse directly to the root area of your bangs.
- Using your blow dryer with the nozzle attached, blow-dry your bangs forward, brushing them from side to side with your fingers to remove any cowlicks.
- Once they are about 80% dry, take your small round brush. Place it under your bangs at the root and lift upwards and forward as you dry.
- To get the classic “curtain” sweep, roll the brush away from your face on each side for the last few seconds of drying. This creates the outward flick.
- Style the rest of your bixie haircut as desired. Finish with a light mist of hairspray on the bangs to hold the shape without making them stiff.
Pro-Tip: The key to perfect curtain bangs is in the perimeter weight. Ask your stylist to slightly over-direct the bangs when cutting and use slide cutting to blend them into the sides. This advanced technique ensures the bangs feel like a part of the haircut, not just an add-on.

5. Create a Youthful Bixie for Women Over 60

Chic at any age! Pin this guide to a youthful bixie.
The bixie haircut for fine thin hair over 60 is one of the most requested styles, and for good reason. For mature women, the bixie haircut acts as a powerful solution that adds volume to thinning hair and creates a youthful appearance. The soft layers around the face prevent the style from looking harsh, while the texture on top directly combats a lack of volume. It’s a modern, sophisticated, and wonderfully low-maintenance choice that exudes confidence.
Products & Tools Used
- A high-quality volumizing shampoo and conditioner
- A root lifting spray or volumizing mousse
- A set of velcro rollers (medium size)
- A blow dryer
Styling Steps
- Wash hair with volumizing products to create a strong foundation. Towel-dry gently.
- Spray a root lifting product directly onto the scalp area, focusing on the crown and top sections of your head.
- Rough-dry your hair with a blow dryer until it’s about 80% dry, using your fingers to lift the roots as you go.
- Take the top section of your hair (the “mohawk” section) and, while still warm, wrap 2-inch sections around medium-sized velcro rollers, rolling away from your face.
- Let the rollers sit and cool for at least 10-15 minutes while you finish getting ready. This is the key to locking in volume.
- Gently remove the rollers and use your fingers to tousle and shape the hair. Avoid brushing, which can pull out the volume you just created.
Pro-Tip: The secret to a youthful bixie on mature hair is a soft, tapered nape. A hard, blunt line at the back can look severe. Ask your stylist to use precision cutting to create soft, wispy edges at the neckline for a more graceful grow-out and a softer overall look.

6. Rock the Edgy Bixie with an Undercut

Feeling bold? Save this edgy undercut bixie to your style board!
For those with very heavy hair or who simply crave a bolder look, the bixie haircut with undercut for thick hair is a fantastic option. The undercut is a technique that removes bulk from the sides or nape, allowing the longer top layers of the bixie to fall with more movement and shape. This contrast creates a striking, fashion-forward look that significantly reduces weight and styling time, offering a practical yet edgy solution.
Products & Tools Used
- A strong-hold pomade, wax, or styling paste
- A blow dryer with a nozzle
- A comb for creating a clean part
- A finishing spray for hold
Styling Steps
- On damp hair, create a clean, deep side part to separate the longer top section from the undercut side.
- Apply a small amount of styling paste to the longer top section.
- Using your blow dryer and fingers, direct the hair on top up and over, away from the undercut. This creates volume and emphasizes the disconnection.
- Once dry, take a small amount of a high-hold wax stick or pomade.
- Apply the wax directly to the top section, using your fingers to create piecey, textured ends and directional movement.
- Lightly smooth down any flyaways on the undercut side and finish the entire style with a strong-hold spray.
Pro-Tip: The success of an undercut bixie depends on managing the parietal ridge. This is the rounded bone on the side of the head. For a flattering look, a professional tutorial would advise starting the undercut just below this ridge, not above it, to maintain a balanced head shape.

7. Perfect the Low-Maintenance “Wash-and-Go” Bixie

Easy morning routine? Pin this low-maintenance bixie guide!
The ultimate dream for many is a haircut that looks amazing with almost zero effort. The low maintenance bixie haircut for wavy hair delivers on that promise. This versatile style requires minimal styling, relying on a precision cut and a single air-dry product to enhance texture naturally. Learning how to air dry a bixie cut correctly is the key to unlocking this low effort styling potential, making your morning routine faster and simpler.
Products & Tools Used
- A leave-in conditioner spray
- An air-dry styling cream formulated for your hair type (wavy, straight, etc.)
- A wide-tooth comb
Styling Steps
- After showering, gently squeeze excess water from your hair. Avoid rough towel-drying.
- While hair is still quite damp, spritz with a leave-in conditioner to detangle and add a base layer of moisture.
- Use a wide-tooth comb to gently detangle and create your desired part.
- Dispense a nickel-sized amount of air-dry cream into your palm. Rub your hands together and gently scrunch the product into your hair from the ends upwards.
- This is the most important step: Do not touch your hair again as it dries! Playing with it while it’s damp will disrupt the pattern and create frizz. Let it air-dry completely.
- Once 100% dry, you can gently shake out the roots with your fingers for a bit of lift.
Pro-Tip: The key to a great wash-and-go bixie is the cut’s texture density. A stylist can use thinning shears or a razor cutting technique not just on the ends, but within the layers (internal texturizing) to create space for the hair to move and fall into place naturally without styling.

8. Try the Bixie for a Round Face Shape

Got a round face? This bixie style is for you! Pin it now.
One of the most common questions is, what face shape suits a bixie? While it’s highly adaptable, the bixie haircut for round face and glasses is a particularly effective choice. This variation compliments a round face shape by using strategic face-shaping techniques. The goal is to build crown volume to add height and use diagonal face-framing layers to create the illusion of a longer, more oval face shape, beautifully balancing your features.
Products & Tools Used
- A volumizing mousse or root lifter
- A texturizing powder or dry shampoo
- A blow dryer with nozzle
- A teasing comb (optional)
Styling Steps
- Apply volumizing mousse to damp hair, concentrating the product at the roots on the top of your head.
- When blow-drying, use your fingers to lift the hair at the crown straight up to create maximum crown volume. Keep the sides smoother by directing the airflow downwards.
- Create a deep side part. This diagonal line helps break up the roundness of the face.
- Once the hair is completely dry, sprinkle a small amount of texturizing powder directly onto the roots at the crown.
- Use your fingertips to massage the powder in. This will create instant, gritty texture and significant lift that lasts all day. For even more height, gently backcomb the under-layer at the crown.
- Arrange the front pieces to fall diagonally across the cheekbones to further enhance the elongating effect.
Pro-Tip: According to hair industry standards, the cut itself is more important than the styling for a round face. Ask your stylist to keep the longer front pieces beginning at the cheekbone or below and ensure the cut has significant internal layering on top to make achieving crown volume easy.

9. Grow Out a Pixie into a Bixie Gracefully

Growing out your pixie? Pin this guide for the awkward stages!
The bixie haircut is not just a destination; it’s also the perfect transitional style. It effectively solves the dreaded growing out awkward stages of a pixie cut. Instead of months of unmanageable hair, strategic trimming and shaping can turn your grow-out process into a stylish journey. The bixie becomes an intentional stop along the way, making you look chic at every length.
Supplies Needed
- Small, stylish hair clips or barrettes
- A set of thin headbands
- A light-hold pomade or wax
- A good relationship with your hairstylist!
Steps & Strategy
- The first rule of growing out a pixie is to focus on growing the top and front sections first. Book a “shaping” appointment with your stylist every 6-8 weeks.
- Ask your stylist to only trim the very bottom of the neckline and around the ears. This prevents the back from turning into a mullet shape while allowing the top to gain length.
- Use small, decorative clips or a bobby pin to secure any front pieces that are at an awkward length (e.g., constantly falling in your eyes).
- A thin headband can be a lifesaver. Use it to push all the hair back for a clean, chic look on days when it feels unmanageable.
- Use a light-hold pomade to slick back the sides or create a more piecey, directed style. This gives the impression that the “messiness” is intentional. Once the front and top have enough length to connect with the sides, you have officially arrived at a bixie haircut!
Pro-Tip: The most common grow-out complaint is the hair around the occipital bone getting puffy. A salon-tested trick is to ask your stylist to use thinning shears to debulk just this area, which will help the hair lie flatter as it grows longer.

Key Takeaways: Your Quick Guide to the Bixie Haircut
Here’s a quick-reference summary of the most important things to know about the versatile and stylish bixie haircut.
- A True Hybrid: The bixie haircut is the perfect middle ground, offering more length and versatility than a pixie cut but less weight and maintenance than a traditional bob.
- Volume and Texture are Key: Its signature choppy layers and shaggy texture are designed to solve the problem of flat hair, making it an excellent choice for those with fine or thinning hair.
- Versatility for Face Shapes: A bixie is not one-size-fits-all. It can be tailored with crown volume to elongate a round face or cut softer to complement an angular jawline.
- Styling is Product-Dependent: Whether you want a tousled, air-dried look or a sleek, polished style, success depends on using the right products, like texturizing spray for shag or smoothing serum for shine.
- Low Maintenance, Not No Maintenance: The bixie is a wash-and-go hero, but regular trims every 6-8 weeks are essential for shaping and maintaining the cut’s integrity.
FAQs About bixie haircut
What is the difference between a pixie and a bixie?
A bixie is significantly longer than a classic pixie cut. A pixie is very short, often cropped close to the head with short layers. A bixie haircut, however, is a bob-pixie hybrid that retains enough length to have the movement and face-framing pieces of a short bob, typically falling somewhere between the ears and the jawline.
Is a bixie cut good for fine hair?
Yes, a bixie is exceptionally good for fine or thinning hair. The style’s signature choppy layers and shaggy texture create movement and the illusion of fullness. By removing weight, the layers help provide natural lift at the root, combating the flat hair problem that many people with fine hair experience.
Is a bixie high maintenance?
No, the bixie is considered a low-maintenance haircut. Its textured, layered nature is designed to look good even when messy or air-dried, making it a true wash-and-go style. While daily styling is minimal, it does require regular trimming every 6-8 weeks to maintain its shape.
What face shape suits a bixie?
The bixie is versatile and can be adapted for almost any face shape. For a round face, a bixie with more volume on top creates length. For square or angular faces, softer, wispier layers can add balance. A good stylist can adjust the face framing geometry of the cut to flatter your specific features.
How do you style a bixie haircut?
Styling a bixie typically involves enhancing its natural texture. For a shaggy look, use a texturizing spray on damp hair and scrunch as it dries. For a sleeker style, use a flat iron and smoothing serum. For volume, apply a root-lifting spray and blow-dry the hair at the crown upwards.
Is the bixie trend still popular in 2026?
Yes, the bixie remains one of the most popular short hair trends in 2026. Its blend of ’90s nostalgia and modern, low-effort styling makes it a favorite for all age groups. Celebrities continue to adopt the style, and its adaptability ensures it stays fresh and relevant in the hair industry.
What does a bixie look like from the back?
From the back, a bixie haircut features shorter, stacked layers at the nape of the neck. These layers are gradually longer towards the crown to build volume. The bixie back view is typically softer and more tapered than a blunt bob, which helps create a more rounded, flattering silhouette and allows for a graceful grow-out.
Does a bixie haircut need bangs?
Bangs are optional but very popular with bixie haircuts. Soft, wispy bangs or longer curtain bangs can help blend the layers and further frame the face. However, a bixie can also be worn without bangs, often styled with a deep side part and swept over for an equally chic look.
Can you have a bixie with curly hair?
Absolutely, a bixie can be fantastic for curly hair. The key is getting a cut with the right manageable layers to create shape and prevent the hair from becoming too triangular. A curly bixie can reduce bulk and make curls feel lighter and bouncier, but it’s essential to use products designed for frizz control.
How often should I trim a bixie?
To maintain the distinct shape, a bixie should be trimmed every 6 to 8 weeks. Because it’s a short, precise style, waiting too long between appointments can cause it to lose its shape, especially around the neckline and ears. Regular trims keep the textured ends looking healthy and the overall style sharp.
Final Thoughts on Embracing Your Perfect Bixie Haircut
The bixie haircut proves that you don’t have to choose between the playful freedom of a pixie cut and the classic elegance of a bob. This perfect hybrid haircut offers the best of both worlds: effortless volume, modern texture, and a surprisingly low-maintenance routine that adapts to your life. Throughout this guide, we’ve explored how this single cut can be transformed into 9 unique styles, from a shaggy bixie that channels ’90s cool to a chic, youthful appearance perfect for women over 60.
The ultimate takeaway is that the bixie is defined by its versatility. It’s a haircut that compliments face shape, works with nearly every hair texture, and solves common hair problems like a lack of volume or unruly curls. By using the right styling products and communicating effectively with your stylist about details like internal layering and a tapered nape, you can achieve a look that feels both timeless and perfectly current for 2026.
Now that you’re equipped with inspiration and expert tips, which bixie hairstyle are you most excited to try? Share your favorite look in the comments below.
Last update on 2026-04-27 / Affiliate links / Images from Amazon Product Advertising API