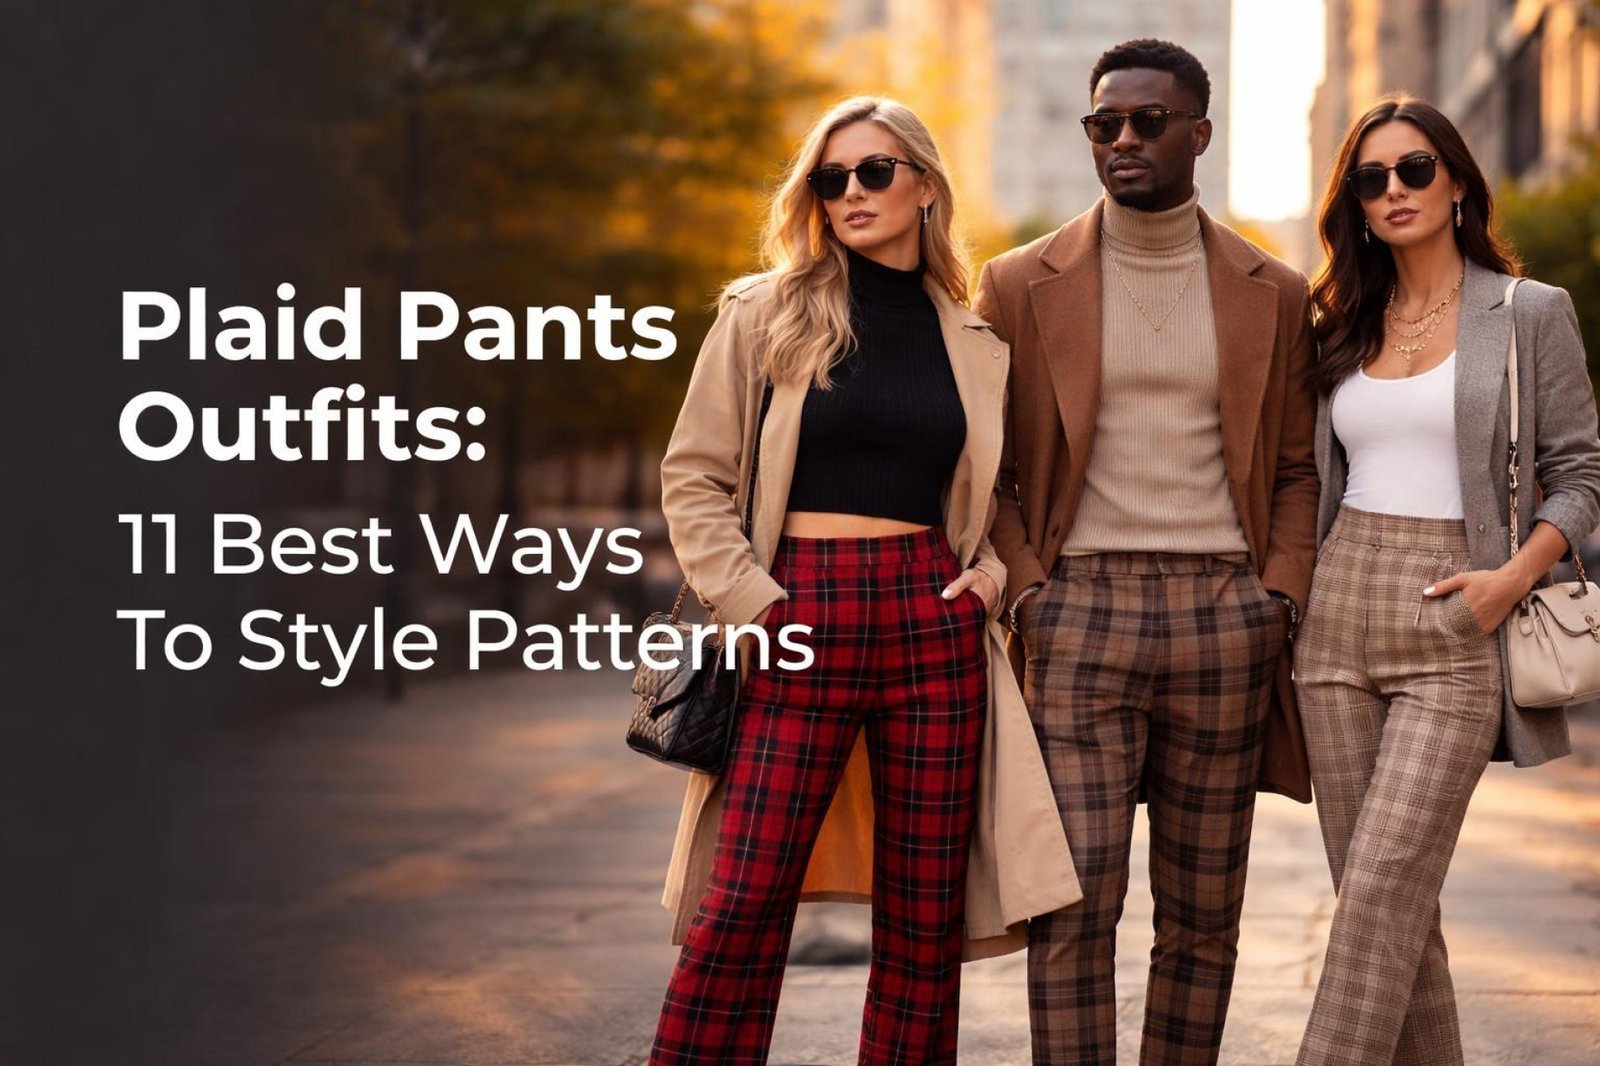
Ready to unlock your main character energy and slay your next look? Scrolling through flawless social media feeds often leaves us wanting those exact hairstyle ideas baddie vibes. Replicating that perfect, frizz-free finish at home can feel totally overwhelming.
A baddie hairstyle is a bold, polished hair look popular on TikTok and Instagram. It is characterized by sleek finishes, perfectly laid baby hairs, and streetwear fashion influences. These striking looks require precision tools to master styles like sleek high ponytails and slick-back buns.
Drawing from comprehensive analysis of current data and proven styling methodologies, we break down these looks. You will discover easy step-by-step tutorials to achieve an authentic baddie look at home. Get ready to master salon-quality results that perfectly match your fierce streetwear outfits.
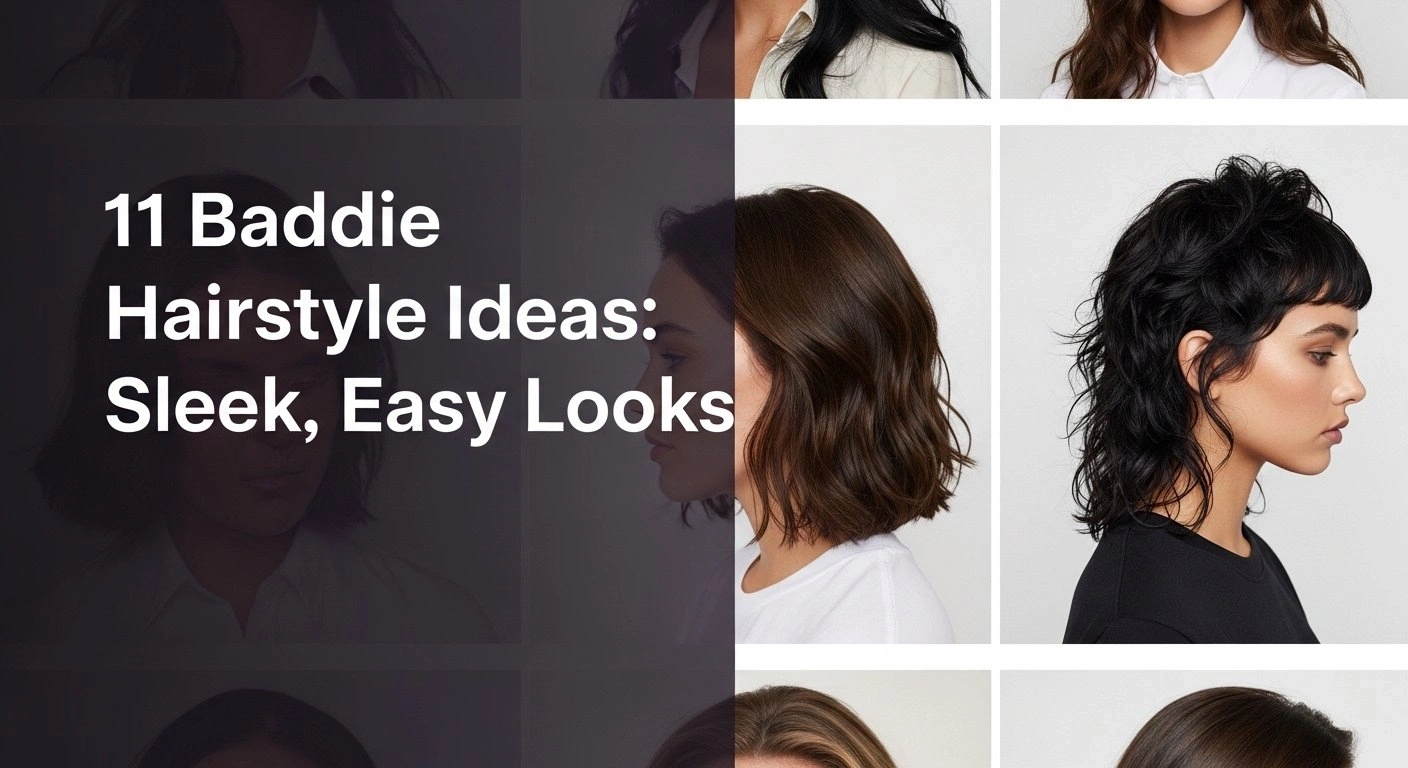
What Are Baddie Hairstyle Ideas and How Do You Get the Look?
Getting the baddie look requires combining high-glam aesthetics with urban streetwear trends through precision hair styling and flawless edge control.
The baddie hair aesthetic represents a massive cultural shift in modern beauty standards. It is less about a single haircut and more about projecting unapologetic confidence and a powerful vibe. These instagram baddie hairstyles rely heavily on high-contrast elements, immaculate precision, and long-lasting hold. Whether you are rocking edgy baddie styles with intricate protective braids or a simple, ultra-smooth bun, the secret lies in the execution.
Achieving this bold baddie hair means mastering the art of flyaway control and understanding how your hair texture interacts with specific holding gels. By focusing on precision tools like an edge control gel and incorporating Y2K fashion accessories, you can easily transform your everyday routine into a high-glam, authentic baddie look.
11 Baddie Hairstyle Ideas to Master in 2026
Finding the perfect baddie hairstyles for your specific hair type and skill level does not have to be a struggle. We have curated a massive visual gallery of the top trending styles to elevate your daily routine in June 2026. Each look below functions as a mini-tutorial, providing exact steps to achieve those Y2K inspired baddie hair looks and protective styles without leaving your house.
From controlling frizz to finding the right hair wax sticks and claw clips, these guides focus on proper technique and hair health first. Whether you need easy baddie hairstyles for beginners or stylish baddie hairstyles for school with natural hair, this comprehensive list has you covered. By applying these tried and true methods, you can confidently recreate these flawless looks.
1. Sculpting the Flawless Sleek High Ponytail

Pin this iconic sleek high ponytail to your ‘Hair Goals’ board!
To get that ultra-smooth, tight high ponytail, you need the right mix of strong-hold products and tension control. A sleek high ponytail demands a perfectly polished finish that lasts all day without a single frizz in sight. Mastering this look sets the foundation for almost all sleek baddie looks.
Products & Tools Used
- Strong-hold edge control: Look for a non-flaking formula designed for sweat-proof edges.
- Hair wax stick: Essential for flyaway control and achieving that high-gloss, uniform surface.
- Boar bristle brush: For slicking hair down without causing breakage.
- Heat protectant spray: A crucial step for hair health if you flat iron.
- Multiple strong hair ties.
- Got2b Glued Blasting Freeze Spray or similar for maximum long-lasting hold.
Application/Styling Steps
- Sectioning: Start with clean, detangled, and straightened hair. Section off your baby hairs at the front.
- Brushing: Brush all your hair upwards towards the crown of your head, using the boar bristle brush for a smooth surface.
- Gelling: Apply a generous amount of gel around your hairline and nape, brushing it in to create a sleek base.
- Securing: Secure the ponytail tightly with a hair tie. For extra lift, use a second tie.
- Styling: Rub the hair wax stick over the top and sides of your head, smoothing down any remaining flyaways with your brush or the back of a comb.
- Laying Edges: Use a small amount of edge control gel and an edge brush for sculpting your baby hairs into your desired pattern.
- Spraying: Finish with a light mist of holding spray for a flawless, all-day hold.
Pro-Tip: To prevent scalp tension and headaches from a tight style, avoid pulling the hair too taut at the very front. Instead, focus the tension on the hair from the back and sides, which provides the lift without straining your front hairline. This is a key hairstylist recommended technique for scalp tension prevention.

2. Styling Y2K Half Up Half Down with Butterfly Clips

Save this cute Y2K inspired baddie hair looks idea for your next outing!
This playful half up half down style integrates nostalgic Y2K elements to create a fun, accessory-driven vibe. Utilizing butterfly clips adds a vibrant pop of color while keeping the overall aesthetic sharp and clean. It’s perfect for achieving that effortless influencer appearance.
Products & Tools Used
- Rat-tail comb for precise parting.
- Small, clear hair elastics.
- A pack of colorful butterfly clips or other mini claw clips.
- Light-hold hairspray.
- Optional: Flat iron for straightening the face-framing tendrils.
Application/Styling Steps
- Parting: Create a clean middle part from your hairline to the crown of your head using the rat-tail comb.
- Sectioning: On one side, take a 2-inch section of hair from the front. Comb it smooth and pull it back into a high pigtail, securing it with a clear elastic. Repeat on the other side.
- Styling the Top: You can either leave the two sections as pigtails or twist them into two mini buns (space buns style).
- Pinning: Strategically place 3-5 butterfly clips along the base of the pigtails or around the mini buns.
- Finishing Touches: Ensure your two face-framing tendrils are smooth. You can run a flat iron over them for a sleek, pin-straight look.
- Spraying: Lightly mist the entire style with hairspray to keep everything in place without looking stiff.
Pro-Tip: For the most authentic baddie look, don’t place the butterfly clips randomly. Create a deliberate pattern. A expert hair tips approach is to cluster them near the elastic for impact or create a “trail” of clips down one of the pigtails.

3. Mastering the Polished Slick Back Bun

Need a chic look? Pin this slick back bun tutorial for later.
The slick back bun is the ultimate clean-girl hybrid style, blending minimal effort with a high-glam, glossy aesthetic. Creating this sophisticated look requires a quality boar bristle brush to smooth out bumps and a strong-hold product to lock in that flawless shine without looking like a messy gym bun.
Products & Tools Used
- Hair gel or styling cream with strong hold.
- Boar bristle brush.
- Rat-tail comb for a sharp part.
- Hair tie and bobby pins.
- Edge control gel and edge brush.
- High-shine hairspray or oil mist.
Application/Styling Steps
- Parting: Decide on your part. A sharp middle part gives a classic baddie hair aesthetic, while no part is great for a quicker style. Use the rat-tail comb for precision.
- Slicking: Working with damp hair helps control frizz. Apply your styling gel from the roots to mid-lengths. Use the boar bristle brush to slick the hair back towards the nape of your neck.
- Securing the Ponytail: Gather all your hair into a low ponytail and secure it tightly with a hair tie.
- Creating the Bun: Twist the ponytail, then wrap it around the base to form a bun. Secure the end with bobby pins, hiding them within the bun.
- Refining: Use more gel or a hair wax stick to smooth down any stubborn flyaways on the top and sides of your head.
- Laying Edges: Apply edge control gel to your baby hairs and style them to frame your face.
- Spraying for Shine: Finish with a high-shine spray to get that glossy, almost-wet look.
Pro-Tip: The great debate: gel vs wax stick. Use gel for the initial slicking process on damp hair to get a uniform, molded base. Use a wax stick as the final touch on dry, styled hair to tame individual flyaways and add shine without disturbing the base. This tried and true methods gives salon-quality results.

4. Braiding Intricate Knotless Box Braids

Love protective styles? Pin these knotless box braids tips to your hair board!
Knotless box braids are essential protective baddie hairstyles for natural hair that promote hair health by drastically reducing tension on your scalp. This tangle-free braids method provides a flatter, more natural look at the root while allowing for stunning length, seamless parting, and styling versatility.
Products & Tools Used
- 3-5 packs of pre-stretched braiding hair.
- Rat-tail comb for sharp parting.
- Shine ‘n Jam or other braiding gel for grip.
- Mousse for setting the braids.
- Bonnet silk or scarf for nighttime protection.
- Optional: Beads or hair jewelry.
Application/Styling Steps
- Prep: Start with freshly washed, moisturized, and fully stretched/blown-out hair for tangle-free braids.
- Parting: Use the rat-tail comb to create your desired parting grid (e.g., box, triangle parts). Precision is key for a flawless look.
- Braiding: For each section, apply braiding gel to the root. Begin braiding your natural hair for about half an inch.
- Feeding in Hair: Start feeding in small pieces of the pre-stretched braiding hair, gradually adding more as you braid down. This “feed-in” method is what makes the braid “knotless.”
- Sealing the Ends: Once the braid is complete, dip the ends in hot water to seal them and prevent unraveling.
- Setting: Apply a generous amount of mousse over all the braids to set the style and tame flyaways.
- Nighttime Care: Always wear a bonnet silk or scarf to bed to protect your braids and reduce frizz.
Pro-Tip: The difference between good and great knotless box braids is the knotless braid density. For a fuller look, start adding hair closer to the root. For a flatter, more natural look that’s better for scalp tension prevention, start feeding in the hair a little further down. This is an advanced masterclass styling secret.

5. Achieving the Voluminous 90s Blowout

Channel your inner supermodel! Pin this 90s blowout tutorial.
The 90s blowout is a timeless it-girl hairstyles staple that maximizes volume + length with bouncy, face-framing layers. Often paired with a layered butterfly cut, this voluminous look requires careful heat styling and proper setting techniques to maintain its glamorous movement all day without falling flat.
Products & Tools Used
- Volumizing mousse.
- Heat damage protection spray.
- A hair dryer brush (like the Revlon One-Step) OR a round brush and blow dryer.
- Large velcro rollers (2-inch diameter or more).
- Sectioning clips.
- Light-hold, flexible hairspray.
Application/Styling Steps
- Prep: Start with 80% dry, towel-dried hair. Apply volumizing mousse from roots to ends, followed by a thorough coating of heat protectant spray.
- Sectioning: Divide your hair into 3-4 manageable horizontal sections using clips.
- Drying & Curling: Working from the bottom section up, take a 2-inch wide piece of hair. Use your hair dryer brush to dry the hair, pulling upwards at the root for volume and curling the brush inwards at the ends.
- Setting: While the hair is still hot from the dryer, immediately wrap the section around a large velcro roller and secure it. This is the key to getting long-lasting bounce.
- Repeat: Continue this process for your entire head, rolling the hair away from your face for the front sections.
- Cooling: Let the rollers sit for at least 15-20 minutes, or until your hair is completely cool to the touch. This sets the shape.
- Finishing: Gently remove the rollers. Flip your hair upside down and shake out the curls. Flip back up, arrange the layers with your fingers (not a brush!), and set with a flexible hairspray.
Pro-Tip: Don’t skip the cool-down phase! According to thermal protection science, hair sets its shape as it cools. Removing rollers when the hair is still warm will cause the curls to fall flat within minutes. Patience is a key part of these long-lasting techniques.

6. Laying Edges for Curly Hair Baddie Styles

Curly hair with edges on point! Pin this tutorial now.
Combining curly hair with sculpted edges creates a stunning contrast between soft, voluminous curls and sleek, intentional details. Perfecting baddie hairstyles for curly hair girls means knowing exactly how to lay your edges without disrupting your natural curl pattern or causing unwanted frizz around your hairline.
Products & Tools Used
- A strong-hold edge control gel that dries clear.
- A dedicated edge tool (brush/comb combo).
- A silk or satin scarf.
- A spray bottle with water.
Application/Styling Steps
- Isolate: After styling your defined curls, use clips to gently hold your curly hair back, fully exposing your hairline.
- Dampen: Lightly mist your baby hairs with water. This makes them more pliable for sculpting.
- Apply Product: Take a small amount of edge control on the back of your hand. Use the comb side of your edge tool to apply a thin layer to your baby hairs.
- Brush & Swoop: Use the brush side of the tool to brush the hairs forward, then create your desired swoops and swirls, pressing them against your skin. The edges + gel combination is key.
- Set: Once you are happy with the design, tie a silk or satin scarf firmly around your hairline for 10-15 minutes.
- The Reveal: Gently remove the scarf. Your edges will be perfectly laid, dry, and set in place, creating a beautiful contrast with your voluminous curls.
Pro-Tip: To prevent damaged edges and dryness, always look for an alcohol-free edge control. Alcohols can be very drying on fine baby hairs. A focus on ph-balanced hair gels is a dermatologist approved secret for maintaining true follicle health styling.
7. Rocking Bold Money Piece Highlights

Feeling bold? Pin this money piece highlights inspo!
Money piece highlights, often styled as a striking blonde skunk stripe, deliver incredible color + contrast for an undeniably edgy look. This high-impact bold baddie hair trend perfectly frames the face but requires careful bleaching and toning to maintain the hair’s integrity and vibrancy over time.
Products & Tools Used
- Professional bleaching service: This is not a recommended DIY!
- Purple or blue toning shampoo to fight brassiness.
- A deep conditioning mask or protein treatment.
- Color-safe shampoo and conditioner.
Application/Styling Steps
- Consult a Pro: This is step one, two, and three. Bleaching can cause severe damage if done incorrectly. Book a consultation with a colorist to discuss your goal and assess your hair’s health.
- Get the Service: Your stylist will section out the two front face-framing pieces and lighten them to the desired level.
- Initial Toning: The stylist will apply a toner to achieve the target shade (e.g., icy platinum, honey blonde).
- At-Home Maintenance: To keep your blonde skunk stripe from turning yellow or brassy, wash with a purple shampoo once every 1-2 weeks.
- Moisturizing: Bleached hair is fragile. Use a deep conditioning mask at least once a week to restore moisture and strength. This is key to preventing breakage.
- Styling: Style your hair as usual! The money piece looks amazing with sleek straight hair, waves, or a high ponytail that shows off the contrast.
Pro-Tip: Before committing, ask your stylist for a “strand test.” They will take a small, hidden piece of your hair and apply the bleach to see how your hair reacts and how much it will lift. This is a professional stylist advice non-negotiable step in professional gradient hair coloring and prevents disastrous results.

8. Creating Edgy Jumbo Cornrows

For a bold, protective style, pin these jumbo cornrows.
Jumbo cornrows are dramatic, bold baddie braids that perfectly mirror urban streetwear trends. This low-maintenance protective style features sharp, clean parting and thick braids that beautifully complement oversized streetwear outfits and statement jewelry, ensuring you stand out while keeping your natural hair safely tucked away.
Products & Tools Used
- Professional braiding service or a skilled friend.
- Pre-stretched braiding hair.
- Braiding gel for neat parts.
- Mousse for setting.
- Scalp oil or braid spray for maintenance.
- Bonnet silk.
Application/Styling Steps
- Prep: Arrive at your appointment with clean, detangled, and stretched hair. This makes the braiding process smoother and faster.
- Parting: Your stylist will create 4 to 8 large, straight-back parts. Clear communication about the size you want is key.
- Braiding: The stylist will apply braiding gel along the parts for a clean look and cornrow each section, feeding in hair for length and thickness.
- Setting the Style: After braiding, mousse is applied to set the hair and tame flyaways. You may be placed under a hooded dryer for a few minutes.
- Daily Maintenance: Lightly mist your braids and scalp with a braid spray or apply a lightweight scalp oil every 2-3 days to combat dryness and promote itchy scalp relief.
- Night Care: Always protect your cornrows at night with a bonnet silk or a long braid bonnet to keep them looking fresh.
Pro-Tip: When talking to your braider, don’t just say “jumbo.” Show them a picture. Also, be vocal about tension. If a braid feels painfully tight as it’s being done, say something! A good stylist will prioritize your scalp health and adjust their technique. This is crucial for low tension styles.

9. Nailing the Playful Bubble Braids

For a fun and easy look, pin this bubble braids tutorial!
Bubble braids are the ultimate easy baddie hairstyles for beginners who want a voluminous, intricate look without needing advanced braiding skills. By styling two pigtails and systematically securing multiple hair elastics, you can quickly achieve this fun, textured aesthetic for an elevated casual look.
Products & Tools Used
- A pack of small, clear or colored hair elastics.
- A boar bristle brush for a sleek base.
- Optional: Texturizing spray for extra volume.
Application/Styling Steps
- Create Pigtails: Part your hair down the middle and create two high or low pigtails. Brush the base to make it sleek.
- Place Elastics: About 1-2 inches down from the base of one pigtail, add another elastic.
- Pancake: Gently pull on the sides of the hair section between the two elastics. This “pancaking” technique creates the round “bubble” shape. Be careful not to pull too hard.
- Repeat: Continue adding elastics every 1-2 inches down the length of the pigtail, “pancaking” each section as you go until you reach the end.
- Repeat on Other Side: Do the exact same process on the second pigtail.
- Finishing: If you want extra volume + length illusion, spray a bit of texturizing spray on the bubbles.
Pro-Tip: To remove the elastics without ripping out your hair, don’t try to unwind them. Instead, use a seam ripper or a small pair of cuticle scissors to carefully snip each elastic. This is a game-changing quick morning routine hack.

10. Installing a Flawless Middle Part Sew-In

For long-lasting length, pin this middle part sew-in guide.
A middle part sew-in offers unparalleled length and volume by seamlessly blending your natural leave-out with high-quality hair extensions. Mastering this protective hairstyle requires advanced weaving techniques to properly execute the installing phase and completely hide hair tracks for a flawless, undetectable finish.
Products & Tools Used
- Professional hairstylist specializing in weaves.
- 2-3 bundles of quality human hair extensions.
- A wide-tooth comb and a paddle brush.
- Heat protectant for your leave-out.
- A lightweight hair oil.
- Bonnet silk or silk pillowcase.
Application/Styling Steps
- Consultation: Find a stylist experienced in weaves. Discuss the look you want and have them assess your natural hair to ensure it’s healthy enough for the style.
- Braid Down: Your stylist will braid most of your natural hair into a flat foundation of cornrows. A small section along the middle part will be left out (the “leave-out”).
- Installing: The stylist will then sew the wefts of the hair extensions onto the braided foundation. This is a skilled process to ensure the tracks are flat and secure.
- Blending: The stylist will flat iron your leave-out to match the texture of the extensions and blend it seamlessly over the tracks to hide hair tracks.
- Daily Care: Brush your hair gently from the ends up. Pay special attention to your leave-out, ensuring it stays moisturized with a tiny drop of lightweight oil.
- Night Care: Protect your investment! Either wrap your hair or sleep in a bonnet silk to prevent tangling and preserve the style.
Pro-Tip: Ask your stylist about the difference between a standard sew-in and a vixen sew-in methodology. A vixen sew-in uses a four-part braid pattern that allows for much more styling versatility, including high ponytails and half-up styles, but requires more of your natural hair to be left out. This is a key difference in braids versus sew-in discussions.

11. Accessorizing with a Baddie Bandana Style

The easiest baddie accessory! Pin this bandana baddie way look.
Incorporating a bandana is one of the quickest ways to elevate your look into the authentic baddie hair aesthetic. As essential hair accessories, bandanas look incredible when paired with perfectly laid edges, oversized hoop earrings, and a confident streetwear attitude, creating instant visual interest.
Products & Tools Used
- A square cotton bandana.
- Edge control gel and an edge brush.
- Bobby pins.
Application/Styling Steps
- Base Style: This look works perfectly over a slick back bun or with your hair down and straightened. Prepare your base hairstyle first.
- Lay Your Edges: Before placing the bandana, perfectly style your baby hairs. This is what makes the look intentionally baddie instead of just casual.
- Folding: Lay the bandana flat in a diamond shape. Fold the top corner down to meet the bottom corner, creating a large triangle.
- Folding Again: Starting from the long, flat edge of the triangle, make 2-inch wide folds until you have a long, flat band.
- Placement: Place the center of the band at the nape of your neck, underneath your hair. Bring the two ends up to the front of your head.
- Tying: Tie the two ends into a double knot just above your hairline, slightly off to one side.
- Securing: Tuck the ends of the knot under the band for a clean look. If needed, use a couple of bobby pins behind your ears to keep the bandana from slipping.
Pro-Tip: To achieve the full baddie hair aesthetic, coordinate your bandana. The key to an authentic baddie look is intentionality. Match the color of your bandana to your sneakers, your handbag, or even your acrylic nails. This shows you’ve mastered the entire outfit + aesthetic connection.

Key Takeaways: Your Quick Guide to Baddie Hairstyles
Looking for a fast recap of everything we just covered? Whether you are short on time or just need a refresher on the foundational principles of a baddie hair aesthetic, these takeaways consolidate the core techniques. By understanding these concepts, you can adapt virtually any hairstyle into a fierce, camera-ready look.
Key Takeaways:
- Sleekness is Non-Negotiable: The foundation of most baddie hairstyles is a sleek, ultra-smooth finish. Achieving this requires the right tools, like a hair wax stick for flyaway control and a strong-hold gel.
- Edges Are the Main Event: Perfectly laying and sculpting your baby hairs is what elevates a simple style into the baddie hair aesthetic. Invest in a quality edge control gel and an edge brush.
- Tension and Health Matter: Whether it’s a sleek high ponytail or knotless box braids, understanding scalp tension prevention is key. Low tension styles and proper maintenance are crucial for hair health first.
- Product Layering is a Pro Technique: Don’t just use one product. A hairstylist recommended method is to use gel on damp hair for hold, and a wax stick on dry hair for shine and final touch-ups.
- Accessorize with Intention: Accessories like butterfly clips and bandanas are not random. They are intentional choices that tie into the broader Y2K and streetwear outfits, completing the look.
- Night Care is Everything: To maintain these polished styles, nighttime protection is essential. A bonnet silk or silk pillowcase is your best friend for preserving braids, sew-ins, and sleek styles.
FAQs About Hairstyle Ideas Baddie
Mastering these looks often sparks highly specific questions about maintenance, products, and adapting the styles for different textures. Below, we address the most common inquiries to ensure you have all the information needed for flawless execution.
What is a baddie hairstyle?
A baddie hairstyle is a modern, confident hair look defined by its polished, sleek finish and intentional styling, often inspired by Instagram, TikTok, and Y2K trends. Core characteristics include perfectly laid edges, high-shine textures, and bold silhouettes like the sleek high ponytail or knotless box braids. It’s less about a single style and more about an overall aesthetic that projects a powerful vibe and complements soft glam makeup and streetwear outfits.
How do you lay edges for a baddie look?
To lay edges like a baddie, start by isolating your baby hairs and dampening them with water for better control. Apply a small amount of strong-hold edge control gel with an edge brush. Use the brush to swoop and sculpt the hairs into your desired design against your skin. For a long-lasting hold, tie a silk scarf around your hairline for 10-15 minutes to set them in place until they are completely dry.
Can you do baddie hairstyles with natural hair?
Absolutely. Many popular baddie hairstyles are either designed for or can be adapted for natural hair. Styles like knotless box braids and jumbo cornrows are protective styles for natural textures. For sleek looks like a slick back bun, you can work with your natural hair stretched or use strong-hold gels designed for coily hair. The key is using the right products to achieve either a defined curly look or a sleek straight look.
What hair products are essential for baddie styles?
The top three essential products are a strong-hold, non-flaking edge control gel, a hair wax stick for flyaways, and a high-shine finishing spray. For protective styles, a good braiding gel and scalp oil are crucial. For sleek styles, a boar bristle brush is non-negotiable for achieving a smooth, bump-free surface. Investing in these key items is fundamental to achieving the polished baddie aesthetic.
How do you do a sleek high ponytail?
Start with straightened hair and section off your edges. Brush all your hair up to the crown, applying gel as you go for a sleek base. Use a boar bristle brush for maximum smoothness. Secure the ponytail very tightly with an elastic. Go over the surface with a hair wax stick to eliminate any flyaways, then style your edges. Finish with a freeze-hold spray for salon-quality results that lasts all day.
What are Y2K baddie hair trends?
Y2K baddie hair trends revive styles from the late 90s and early 2000s with a modern, polished twist. Key looks include half up half down styles with spiky ends, the use of butterfly clips and mini claw clips, face-framing tendrils (often bleached), and playful looks like bubble braids and high pigtails. It’s all about a fun, slightly nostalgic aesthetic with a sharp, baddie execution.
How do you get the ‘wet hair look’?
The baddie ‘wet look’ is achieved by layering products, not just using water. On damp hair, apply a generous amount of hair gel from roots to ends, combing it through. Then, layer a high-shine hair oil or serum on top. For wet look curls, use a curl-defining cream mixed with gel and scrunch. The key is to use enough product to maintain the wet appearance as it dries.
What is the difference between baddie vs clean girl aesthetic?
While both aesthetics value a polished look, the baddie aesthetic is bolder and edgier, while the clean girl aesthetic is more minimalist and natural. A baddie might have intricate braids or a dramatic high ponytail with sculpted edges. A clean girl would opt for a simple, low slick back bun with soft, fluffy edges. Baddie styles often have more contrast and volume, while clean girl styles are about understated elegance.
How do you maintain baddie braids?
To maintain braids like knotless or cornrows, sleep with a silk or satin bonnet every night to prevent frizz and friction. During the day, apply a lightweight scalp oil or braid spray every 2-3 days to moisturize your scalp and prevent itchiness. Avoid over-washing, which can cause frizz at the roots. When you do wash, focus on the scalp and let the shampoo run down the braids.
What are easy baddie hairstyles for beginners?
The easiest baddie hairstyles are those that rely on simple techniques and accessories. Bubble braids are a great start as they require no braiding skills. A slick back bun is also relatively easy with the right gel and brush. Accessorizing with a bandana over a simple bun or ponytail is another quick way to achieve the aesthetic without complex styling.
Final Thoughts on Your Baddie Hair Journey
Embracing the baddie hair aesthetic is about much more than just following a visual trend; it is a powerful form of self-expression that demands precision, creativity, and unapologetic confidence. Throughout this guide, we have decoded the exact techniques required to elevate your everyday look into something extraordinary.
To recap the core elements of this journey:
* Precision is Power: From razor-sharp parts to flawlessly laid edges, meticulous attention to detail defines the aesthetic.
* Invest in the Right Tools: Quality edge control, wax sticks, and boar bristle brushes are non-negotiable for achieving that signature sleekness.
* Protect Your Crown: Prioritizing hair health through tension control and protective styles ensures your hair remains as healthy as it looks.
Armed with these step-by-step methodologies and expert insights, you are fully equipped to replicate these bold styles at home. The only question left is: which of these fierce baddie hairstyles will you experiment with first?
Last update on 2026-04-27 / Affiliate links / Images from Amazon Product Advertising API