Struggling to find styles that protect your delicate coils from breakage and dryness? The constant battle for moisture and length retention with 4C hair is real, leaving you searching for beautiful looks that don’t compromise your hair’s health. You need inspiration that works with your texture, not against it.
The best hairstyle ideas black women love for healthy hair growth are protective styles like knotless braids, twist outs, and bantu knots. These low-tension natural hairstyles tuck the ends away, lock in essential moisture, and prevent daily manipulation, effectively stopping breakage and helping 4C hair thrive. This approach combines stunning aesthetics with a solid foundation for hair health.
Drawing from trichologist-recommended principles and proven styling methodologies, this guide is more than just a gallery. We will explore 11 easy, work-friendly protective hairstyles for black women that are not only beautiful but are scientifically designed to support your hair journey. Get ready to discover your next favorite look that nurtures your crown.
Looking for Hairstyle Ideas Black Women Love to Protect 4C Hair and Prevent Breakage?
Finding the perfect hairstyle ideas black women can feel like a delicate balancing act. On one hand, you desire versatility, creativity, and styles that express your identity. On the other, the health of your hair, especially fragile 4C hair, is paramount. The primary challenges of dryness, breakage, and shrinkage often dictate your styling choices, making it seem like you have to choose between length retention and a chic look. The frustration of seeing progress stall due to split ends or thinning edges from high-tension styles is a shared experience. This is where the concept of protective styles becomes a game-changer, bridging the gap between hair health and aesthetic freedom. By focusing on low-manipulation looks that tuck away your ends and lock in moisture, you can effectively prevent damage and create an optimal environment for growth.
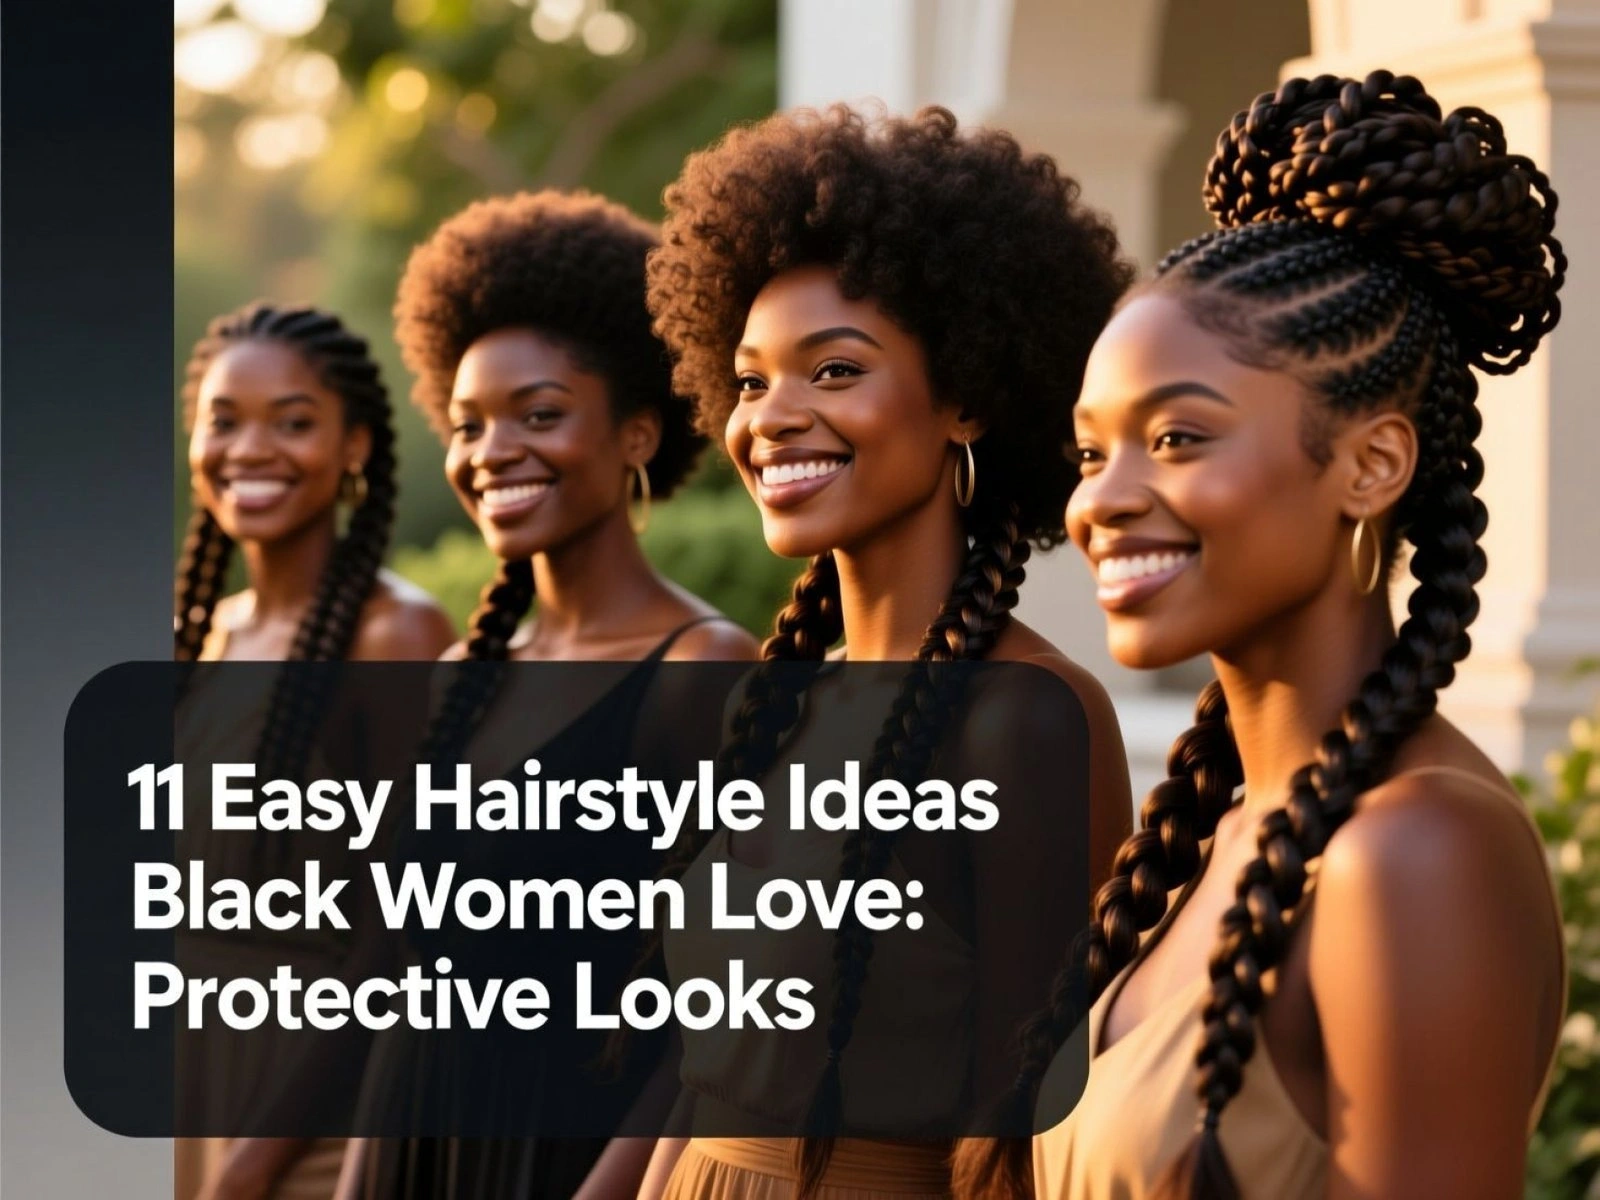
11 Easy Hairstyle Ideas Black Women Love: Protective Looks
Moving beyond just a simple gallery, this is your comprehensive visual guide to the most effective and stylish protective looks for 2026. Each of the 11 styles featured below is broken down with a focus on both aesthetic appeal and the science of hair health. We’ll provide you with the exact tools you’ll need and the step-by-step routines required to install, maintain, and protect your hair. This list is designed to be your go-to resource for everything from quick and easy work friendly hairstyles for black hair to intricate braided designs, ensuring every choice you make supports your goal of healthy, thriving natural hair. Let’s dive into the styles that will transform your hair care regimen.
1. Install Tension-Free Knotless Braids for Ultimate Protection

Pin this gorgeous tension-free knotless braid look to your Protective Styles board!
Knotless braids are a revolutionary take on the classic box braids, designed specifically to eliminate scalp tension. Unlike traditional braids that start with a tight knot at the root, the knotless method begins with your natural hair and gradually feeds in braiding hair. This results in a flat, lightweight, and flexible style that protects edges and allows for immediate, pain-free updos. This technique is one of the best protective styles for hair growth because it minimizes the pulling and weight that can lead to follicle damage.
What You Need
- 4-5 packs of hypoallergenic, pre-stretched synthetic braiding hair
- Strong-hold, flake-free edge control gel for sleek parting
- Rat-tail comb for precise, neat square sections
- Lightweight scalp oil (tea tree or peppermint based)
- Silk or satin bonnet for nightly preservation
Routine Steps
- Detangle freshly washed and deep-conditioned hair thoroughly using a wide-tooth comb.
- Section the hair into clean, uniform squares starting from the nape of the neck.
- Apply a small dab of edge control to the root of the section to sleek the natural hair.
- Braid the natural hair for about half an inch before gradually feeding in the synthetic braiding hair to ensure a flat, tension-free base.
- Seal the ends by dipping them carefully into boiling water for a flexible, finished look.
- Moisturize the scalp between parts with a lightweight oil to prevent dryness.
Pro-Tip: As an expert stylist, I always remind clients that traditional box braids can lead to traction alopecia due to the heavy knot at the root. Knotless braids protect the fragile anagen phase of your hair follicles by reducing that initial weight.

2. Refresh a Classic Hydrated Wash and Go

Save this perfectly defined wash and go routine to your Natural Hair board!
The wash and go is the ultimate celebration of your natural hair texture. While the name implies simplicity, achieving a defined, moisturized, and frizz-free look on type 4 hair requires a specific product layering technique. The key is moisture retention. By applying products to soaking wet hair, you can trap water inside the hair’s cuticle layer, leading to clumped, defined curls and minimized shrinkage. The LCO method (Liquid, Cream, Oil) is essential for this style’s longevity.
What You Need
- Hydrating sulfate-free shampoo and deep conditioner
- Botanical leave-in conditioner (Liquid)
- Curl enhancing smoothie or twisting butter (Cream)
- Botanical curl defining gel or custard (for hold)
- Lightweight sealing oil like jojoba or argan (Oil)
- Continuous fine mist spray bottle for water
Routine Steps
- Wash and deep condition hair in the shower, detangling thoroughly while soaking wet.
- Section soaking wet hair into 4 to 6 workable quadrants.
- Rake the leave-in conditioner evenly through the first section from root to tip.
- Smooth the curl-defining gel down the hair shaft using the “praying hands” method to clump the curls together and minimize frizz.
- Seal the moisture into the strands by scrunching a few drops of lightweight oil over the gel.
- Diffuse on low heat or air dry completely before touching to prevent frizz and combat extreme shrinkage.
Pro-Tip: If you have high porosity hair, your cuticle layer is lifted, meaning moisture escapes quickly. Always use heavy humectants in your gel phase and robust protective sealants as your final step to lock that hydration in for days.

3. Style Sleek, Protective Bantu Knots

Pin this stunning Bantu knot tutorial to your Natural Hairstyles board!
Bantu knots are a bold, edgy, and incredibly versatile hairstyle. This look is dual-purpose: it’s a stunning standalone style that highlights features, and it also serves as a perfect heat-free method to achieve gorgeous, defined curls (a “Bantu knot out”). The key to sleek, lasting knots is using a product with hold, like a foaming mousse, and wrapping the hair tightly enough to secure it without causing a headache. The intricate parting patterns—often in triangles or diamonds—add an extra layer of creative, unapologetic flair.
What You Need
- Foaming styling mousse for a sleek, fast-drying hold
- Styling cream or butter for deep moisture
- Fine-tooth rat-tail comb for precision geometric parting
- Small, snag-free rubber bands (optional, for the base)
- Bobby pins to secure the ends of the knots
Routine Steps
- Part stretched, detangled hair into small to medium diamond or triangle sections.
- Apply a mix of styling cream and foaming mousse to the section for maximum moisture and hold.
- Twist the section of hair tightly from the root all the way down to the very ends like a rope.
- Wrap the twisted hair repeatedly around its own base, building a neat, stacked knot.
- Tuck the ends under the base of the knot and secure firmly with a bobby pin.
- Slick down your edges with gel and tie a silk scarf over your head until the mousse dries completely.
Pro-Tip: For the best Bantu knot out later in the week, ensure your hair has a proper protein-moisture balance. Too much moisture makes the knots mushy; incorporating a light protein leave-in ensures the cortex holds the curly shape once unraveled.

4. Achieve a Defined Two-Strand Twist Out

Save this step-by-step twist out routine to your Hair Care regimen board!
A twist out is a classic, low maintenance staple for natural hairstyles for black women. This style defines curls beautifully, offering volume and elegance that can last for several days. The success of a twist out hinges on two critical factors: deep moisture retention during installation and a careful, patient takedown process. Many people create frizz by unraveling their twists while they are still damp or without using oil on their fingertips. Ensuring the hair is 100% dry is the non-negotiable rule for maximum definition.
What You Need
- Rich, moisturizing twisting butter or thick cream
- Lightweight separating oil (like sweet almond or jojoba)
- Detangling brush or wide-tooth comb
- Alligator clips for sectioning
- Satin bonnet for overnight setting
Routine Steps
- Section freshly washed, damp hair into manageable quadrants using alligator clips.
- Detangle each section thoroughly, then apply a generous amount of twisting butter from root to tip.
- Divide a small piece of hair into two equal halves and wrap them tightly around each other down to the ends.
- Twirl the very ends around your finger with a dab of extra product to prevent unraveling.
- Dry the twists completely under a hooded dryer or overnight. Do not touch them while damp!
- Coat your fingertips in a lightweight oil and gently untwist the strands in the opposite direction they were twisted to separate without frizz.
Pro-Tip: The secret to a frizz-free takedown is ensuring your hands are coated in an oil that mimics natural sebum production. This acts as a protective sealant, reducing friction against the delicate cuticle layer as you separate the curls.

5. Install Classic Medium Box Braids

Pin this timeless box braid inspiration to your Favorite Hairstyles board!
Medium box braids are a timeless, protective, and incredibly low maintenance style. As one of the most popular long hairstyles for black women, they offer unmatched versatility and save time on daily styling. To ensure your box braids promote hair health rather than cause damage, the focus must be on proper scalp preparation and diligent maintenance. Preventing product buildup and keeping your natural hair moisturized underneath the extensions are crucial for ensuring a healthy takedown.
What You Need
- 6-8 packs of Kanekalon braiding hair
- Edge control or heavy jam for gripping the roots
- Anti-itch scalp soothing spray or oil
- Braid sheen conditioning spray
- Extra-large silk bonnet or long silk scarf
Routine Steps
- Wash and blow-dry natural hair straight to ensure a smooth blend with the extensions.
- Part the hair into sharp, precise squares using a rat-tail comb and styling jam.
- Grip the natural hair at the root with the synthetic hair, crossing the pieces tightly to secure the base knot.
- Braid firmly but safely all the way down, adding holding gel midway to tuck away natural flyaways.
- Spray the finished look with a conditioning braid sheen to add luster and soften the synthetic hair.
- Soothe your scalp weekly with an anti-itch spray to prevent dandruff and product buildup.
Pro-Tip: Leaving box braids in longer than 6-8 weeks can damage your hair’s anagen phase (growth cycle). Keep the style safe by using a sulfate-free cleansing rinse on your scalp every two weeks to remove damaging product buildup without causing frizz.

6. Create a Quick, Low-Tension Afro Puff

Save this easy 5-minute Afro puff tutorial to your Quick Hairstyles board!
The afro puff is the quintessential quick and work-friendly style for natural hair. It’s the perfect way to look put-together in under five minutes, especially on old twist-out or wash-and-go hair. The key to a healthy puff is avoiding high tension that can lead to thinning edges. Instead of using tight elastic bands, opt for gentle tools like a large silk scrunchie, an adjustable puff cuff, or even a simple shoelace to gather your hair without causing breakage.
What You Need
- Continuous spray water bottle to reactivate products
- Soft boar bristle brush for smoothing
- Eco-styler gel or thick edge control
- Adjustable puff cuff, silk scrunchie, or a clean black shoelace
- Hair pick to fluff the crown
Routine Steps
- Mist the perimeter of your hairline lightly with water to soften the old product.
- Smooth a generous layer of gel along the front, sides, and nape of your neck.
- Brush the hair gently upward toward the crown of your head using the boar bristle brush.
- Gather the hair using the adjustable puff cuff or shoelace method, securing it just tight enough to hold, but loose enough to prevent headaches.
- Pick the puff gently at the roots to maximize volume and shape the afro into a perfect halo.
- Tie a silk scarf around the slicked perimeter for 10 minutes to set the gel flawlessly.
Pro-Tip: Never use thin elastic bands for puffs on type 4 hair. They saw through the cuticle layer and cause severe thinning edges. A tension-free adjustable puff cuff provides the necessary hold while keeping the follicles completely safe from mechanical damage.

7. Braid Neat, Low-Tension Cornrow Feed-Ins

Pin this flawless feed-in cornrow inspiration to your Braids and Twists board!
Feed-in braids are the modern, healthier alternative to traditional cornrow braids. This technique creates a more natural, sleek appearance by starting with your own hair at the hairline and gradually adding small pieces of extension hair. This method prevents the bulky, heavy knot at the root of the braid, significantly reducing scalp tension and protecting your delicate hairline. It’s a neat, sporty, and protective style that saves time and looks effortlessly chic.
What You Need
- 2-3 packs of pre-stretched braiding hair, separated into very small pieces
- Extra-hold conditioning braiding jam
- Metal rat-tail comb for razor-sharp parting
- Edge brush
- Mousse for setting the final style
Routine Steps
- Part the hair into 5 to 8 vertical rows stretching from the forehead down to the nape of the neck.
- Slick down the length of the row using a generous amount of braiding jam to ensure all flyaways are tucked.
- Braid the natural hair alone for the first two stitches at the very front of the hairline.
- Feed in the tiny, separated pieces of synthetic hair progressively as you braid backward, gradually increasing the size of the pieces to build thickness.
- Secure the ends with hot water once the braids reach your desired length.
- Apply foaming mousse down the length of the braids and tie them down with a durag or scarf to set the style flat.
Pro-Tip: The “feed-in” technique is a dermatologist tested approach to protecting the hairline. By starting with just your natural hair and gradually feeding in extensions, you avoid placing sudden, heavy weight on the fragile edges, preventing traction alopecia.

8. Install Lightweight Crochet Faux Locs

Save these beautiful bohemian faux locs to your Protective Styles board!
Crochet faux locs offer the beautiful, bohemian aesthetic of locs without the long-term commitment or hours of installation time. This low tension method involves cornrowing your natural hair and then looping pre-made locs through the braids with a latch hook. It’s an incredibly protective style as your own hair is completely tucked away. The result is a lightweight and voluminous look that is significantly faster and less stressful on the scalp than individually wrapped faux locs.
What You Need
- 6-7 packs of pre-looped soft faux locs crochet hair
- Crochet latch hook tool
- Hair growth oil with applicator tip
- Edge control
- Small rubber bands (optional for individual perimeter method)
Routine Steps
- Cornrow your natural hair straight back into 10-12 neat braids, sewing the tails up flat against your scalp.
- Oil your scalp thoroughly using an applicator bottle to ensure moisture is locked in before the install.
- Slide the crochet latch hook under the cornrow, keeping the latch open.
- Hook the pre-looped end of the faux loc onto the needle, close the latch, and pull it halfway under the cornrow.
- Loop the tail of the loc through its own pre-made hole and pull securely to knot it onto the cornrow.
- Repeat this process, spacing the locs closer together at the crown for volume and slightly further apart at the back to keep the style lightweight.
Pro-Tip: A full head of wrapped faux locs can be incredibly heavy, causing strain on your anagen phase roots. Opting for damage-free lightweight crochet locs provides the same bohemian aesthetic but allows for tension-free styling that keeps your roots intact.

9. Twist Protective Passion Twists

Pin these gorgeous, bouncy passion twists to your Next Hairdo board!
Passion Twists are a glamorous, bohemian twist style known for their bouncy, silky texture. The secret to their unique look is the use of water wave crochet braiding hair, which gives them a curly, almost undone finish that’s both elegant and carefree. As one of the top protective hairstyles for black women, they offer incredible versatility and prevent damage by tucking natural hair away. The main challenge is preventing tangles, which can be managed by using a good mousse and separating the twists regularly.
What You Need
- 6-8 packs of water wave crochet braiding hair
- Thick edge control or braiding jam for grip
- Styling mousse to set the final look
- Heavy moisturizing cream for your natural hair
- Rat-tail comb for parting
Routine Steps
- Part the hair into uniform squares or diamonds, applying edge control to sleek the roots of each section.
- Moisturize your natural strand heavily with cream to ensure it stays hydrated while tucked away.
- Fluff and gently separate a strand of the water wave hair to enhance its volume and texture.
- Grip your natural hair and the synthetic hair together at the root, braiding for the first inch to secure the base firmly.
- Split the hair into two even sections and begin twisting firmly, keeping tension as you work your way down to the ends.
- Apply a generous pump of mousse to the finished twists to eliminate frizz and set the curl pattern.
Pro-Tip: Because passion twists use highly textured synthetic hair, it can draw moisture out of your natural strands. Always coat your natural hair in heavy emollients before twisting to act as a barrier, supporting overall hair health while your hair is concealed.

10. Style an Elegant Flat Twist Halo Crown

Pin this timeless, work-friendly halo twist to your Updo Hairstyles board!
The flat twist halo crown is one of the most elegant updos for natural black hair. This formal, work-friendly style is a true protective champion because it completely tucks ends away, shielding them from friction and the elements. It’s a quick, low maintenance look that requires no extensions and relies on proper hydration and a good styling gel for its polished finish. It’s the perfect go-to for a sophisticated look that takes only minutes to create.
What You Need
- Moisturizing leave-in conditioning cream
- Soft-hold styling gel or edge control
- Double-sided edge brush and comb
- Bobby pins
- Wide-tooth comb for initial detangling
Routine Steps
- Create a deep side part on stretched or blow-dried natural hair.
- Apply your leave-in cream and a light layer of gel along the entire perimeter of your hairline.
- Begin flat twisting at the start of the deep part, picking up hair from the hairline and the crown as you twist backward.
- Continue the flat twist all the way around the perimeter of your head, working toward the nape of the neck, and back up the other side.
- Twist the remaining tail of hair to the very end once you have completed the circle.
- Tuck the tail underneath the beginning of the twist and secure it invisibly with bobby pins.
Pro-Tip: The ends of your hair are the oldest, driest, and most fragile parts of the hair shaft. The halo crown is a trichologist recommended true protective style because it physically hides 100% of your ends from the elements, preventing mechanical friction against your clothes.

11. Braid Creative Tribal Fulani Braids with Beads

Pin these stunning Fulani braids with beads to your Braided Hairstyles board!
Fulani braids, also known as tribal braids, are a creative black hairstyle rich in cultural heritage. This intricate style is characterized by a unique parting pattern: a cornrow braided straight down the center part, with other cornrows braided from the middle toward the temples. The style often integrates extensions and is beautifully adorned with accessories like braids + beads, cuffs, and shells. It’s an unapologetic and eye-catching look that highlights features and makes a powerful statement.
What You Need
- 4-5 packs of pre-stretched braiding hair
- Extra-hold edge control
- Rat-tail comb for sharp, creative parting
- Assorted wooden or clear hair beads
- Plastic hair beader tool
- Small, snag-free clear rubber bands
Routine Steps
- Section the hair into two halves horizontally: the front crown and the back.
- Part the front half with a sharp middle part, and create intricate cornrows braiding downward toward the ears (the signature Fulani style).
- Braid the back half of the head into standard individual box braids or knotless braids.
- Slide 3 to 5 beads onto the plastic hair beader tool.
- Thread the very end of the finished braid through the eye of the beader tool and push the beads up onto the hair.
- Fold the tiny tail of the braid upward over the last bead and secure it tightly with a clear rubber band to lock the beads in place.
Pro-Tip: When applying beads, ensure your actual natural hair ends well above where the beads sit. If your natural hair is clamped by the rubber band or rubs inside the wooden beads, the friction will completely strip the cuticle layer, leading to severe breakage.

Key Takeaways: Your Quick Guide to Hairstyle Ideas Black Women Love
- Prioritize Tension-Free Installs: Always opt for knotless braids or feed-in cornrows over traditional methods to protect your fragile edges from traction alopecia.
- Master Moisture Retention: Natural 4C hair requires layered hydration; always use the LCO method (Liquid, Cream, Oil) before installing any protective style to lock in moisture.
- Respect the Timeline: Never leave braided extensions or faux locs in for longer than 6 to 8 weeks to prevent severe product buildup and interruption of your natural hair growth cycle.
- Protect the Ends: True protective styles, like the halo flat twist or tucked updo buns, physically hide the oldest, most fragile ends of your hair from mechanical damage and friction.
- Match Products to Porosity: Use heavy humectants and thick sealants for high porosity hair to ensure your twist outs and wash and go styles remain frizz-free and deeply hydrated.
- Nighttime Care is Non-Negotiable: Every style on this list requires nightly protection using a silk scarf, bonnet, or satin pillowcase to prevent moisture-robbing friction while you sleep.
People Also Ask About Hairstyle Ideas Black Women
What are protective hairstyles for black hair?
Protective hairstyles for black hair are specific styles—like box braids, twists, and wigs—that completely tuck the fragile ends of the hair away from environmental exposure. By minimizing daily manipulation, combing, and exposure to friction from clothing, these styles effectively prevent breakage and split ends. According to healthy hair guides, a true protective style requires little to no daily styling and locks in moisture, allowing the natural hair to rest and retain length.
How to maintain 4C hair?
To maintain 4C hair effectively, you must prioritize aggressive moisture retention and gentle, low-tension handling. Because the tight kinky-curly coils make it difficult for natural scalp sebum to travel down the hair shaft, 4C hair is prone to extreme dryness. You should deep condition weekly, use the LOC or LCO method to seal in hydration, sleep on a satin pillowcase, and keep the hair in protective styles to minimize detangling sessions.
Which braids last the longest?
Traditional box braids and micro braids generally last the longest, often holding their neat appearance for up to 8 weeks. However, knotless braids and feed-in cornrows are highly recommended by professional braiders because, while they may only last 4 to 6 weeks before frizzing, they place significantly less tension on your scalp. Leaving any braid in past the 8-week mark risks severe tangles and hair matting at the root.
What is a wash and go?
A “wash and go” is a natural hairstyle where you wash, condition, and define your natural curl pattern without using heat or protective stretching techniques. Despite the name, it is a multi-step process for type 4 hair. It involves layering leave-in conditioners and botanical gels on soaking wet hair to clump the coils together, followed by air-drying or diffusing to lock the natural curl definition in place for several days.
How to stop hair breakage?
To stop hair breakage, you must balance your protein and moisture levels while eliminating mechanical damage from excessive combing and tight styles. Start by trimming any existing split ends, as they will continue to split up the hair shaft. Transition into low-tension protective styles, deep condition with heat bi-weekly, and always detangle damp hair with a wide-tooth comb starting from the ends, working your way up to the roots gently.
How to do bantu knots?
To do bantu knots, section your hair into geometric shapes, twist the section tightly like a rope, and wrap it around itself to form a neat, stacked knot. Secure the ends by tucking them underneath the base or using a bobby pin. Using a foaming styling mousse and twisting butter ensures the knots are sleek and moisturized. You can wear them as an edgy style, or unravel them later for a curly Bantu knot out.
Which hairstyles are work-friendly?
Sleek low buns, flat twist halo crowns, neat knotless braids, and well-defined twist outs are highly work-friendly hairstyles for black women. These styles are elegant, professional, and keep the hair out of your face while requiring minimal touching throughout the day. A sleek updo or center part bun is particularly quick for busy mornings while still maintaining a polished, corporate-appropriate aesthetic.
What is the LOC method vs LCO method?
The LOC method layers Liquid, Oil, then Cream to moisturize hair, while the LCO method layers Liquid, Cream, then Oil. The right choice depends on your hair porosity. High porosity hair, which loses moisture quickly, benefits from the LCO method because the heavy oil acts as a final protective sealant over the cream. Low porosity hair often prefers the LOC method to prevent heavy creams from sitting unabsorbed on the cuticle layer.
How to style short natural black hair?
Short natural black hair, often called a TWA (Teeny Weeny Afro), is best styled using finger coils, sponge twists, or a simple hydrated wash and go. Since the hair is too short for extensions or elaborate braiding, the focus should be on defining the natural texture. Using a botanical curl-defining gel and a curl sponge can quickly create beautiful, coiled texture, while a sleek side part can add a touch of elegance.
How to moisturize natural hair?
You moisturize natural hair by introducing water-based hydration first, followed by emollients to seal that moisture into the hair shaft. Never apply oils to dry hair; oil alone does not moisturize, it only coats. Start with a water-based leave-in conditioner (your humectant), smooth on a hydrating cream or twisting butter, and finally seal the ends with a natural oil like jojoba or argan to prevent the water from evaporating throughout the day.
Final Thoughts on Hairstyle Ideas Black Women
Finding the perfect hairstyle ideas black women love doesn’t have to be a battle between looking gorgeous and protecting your hair health. Whether you are transitioning, rocking a fresh big chop, or managing waist-length natural coils, this curated list of protective hairstyles offers the ultimate versatility for your unique hair journey. From the sleek elegance of a halo flat twist to the bold, unapologetic beauty of tribal Fulani braids, our crowns are meant to be celebrated and protected.
The secret to maximizing these styles lies entirely in your foundational routine. By utilizing the tension-free installation methods, prioritizing intense moisture retention through the LCO method, and protecting your anagen phase with careful detangling, you ensure that your hair thrives underneath any style. An expert stylist approved regimen is what transforms a simple braided look into a powerful, damage-free growth phase.
As you plan your next wash day or salon visit, remember that true hair care is a form of self-care. Choose the style that best fits your lifestyle, your porosity, and your schedule. Which of these 11 protective styles are you planning to install next? Let us know in the comments below, and don’t forget to save your favorite looks to Pinterest for your stylist
Last update on 2026-04-27 / Affiliate links / Images from Amazon Product Advertising API