Struggling with greasy roots on day three hair? You need quick, easy hairstyle ideas slick back that look intentional and chic, not like you’ve given up. It’s the ultimate modern dilemma: wanting a polished look without committing to a full hair wash routine.
A slick back hairstyle is a polished, tightly pulled look achieved by smoothing the hair away from the face using a boar bristle brush and stronghold products like wax sticks or gel. It is the perfect low-maintenance style to conceal greasy roots on wash day while achieving a chic, snatched aesthetic. This single technique can transform your hair in minutes.
Leveraging tested frameworks and stylist-recommended methods, this guide breaks it all down. You will discover 11 distinct slick back styles, from the classic bun to trendy braids. We’ll show you exactly how to achieve a damage-free, salon-quality finish that lasts all day.
How to Master the Perfect Hairstyle Ideas Slick Back for a Snatched Look
The secret to mastering the slicked back hairstyles seen all over social media lies in understanding the core technique. It’s more than just pulling your hair back; it’s a strategic process of smoothing, shaping, and securing to achieve that coveted snatched look. This style is the ultimate solution for managing unwashed hair or greasy roots, transforming them into a high-shine, intentional feature of the clean girl aesthetic. The right tools are non-negotiable. A high-quality boar bristle brush is essential for creating tension and distributing product evenly, while a strong-hold hair wax stick or alcohol-free hair gel is key to taming flyaways and preventing stubborn bumps. However, it’s crucial to employ these techniques safely. According to stylist recommended methods, consistently pulling hair too tight can lead to tension alopecia. By following our dermatologist tested approaches, you can achieve a flawless look while prioritizing your long-term scalp care.
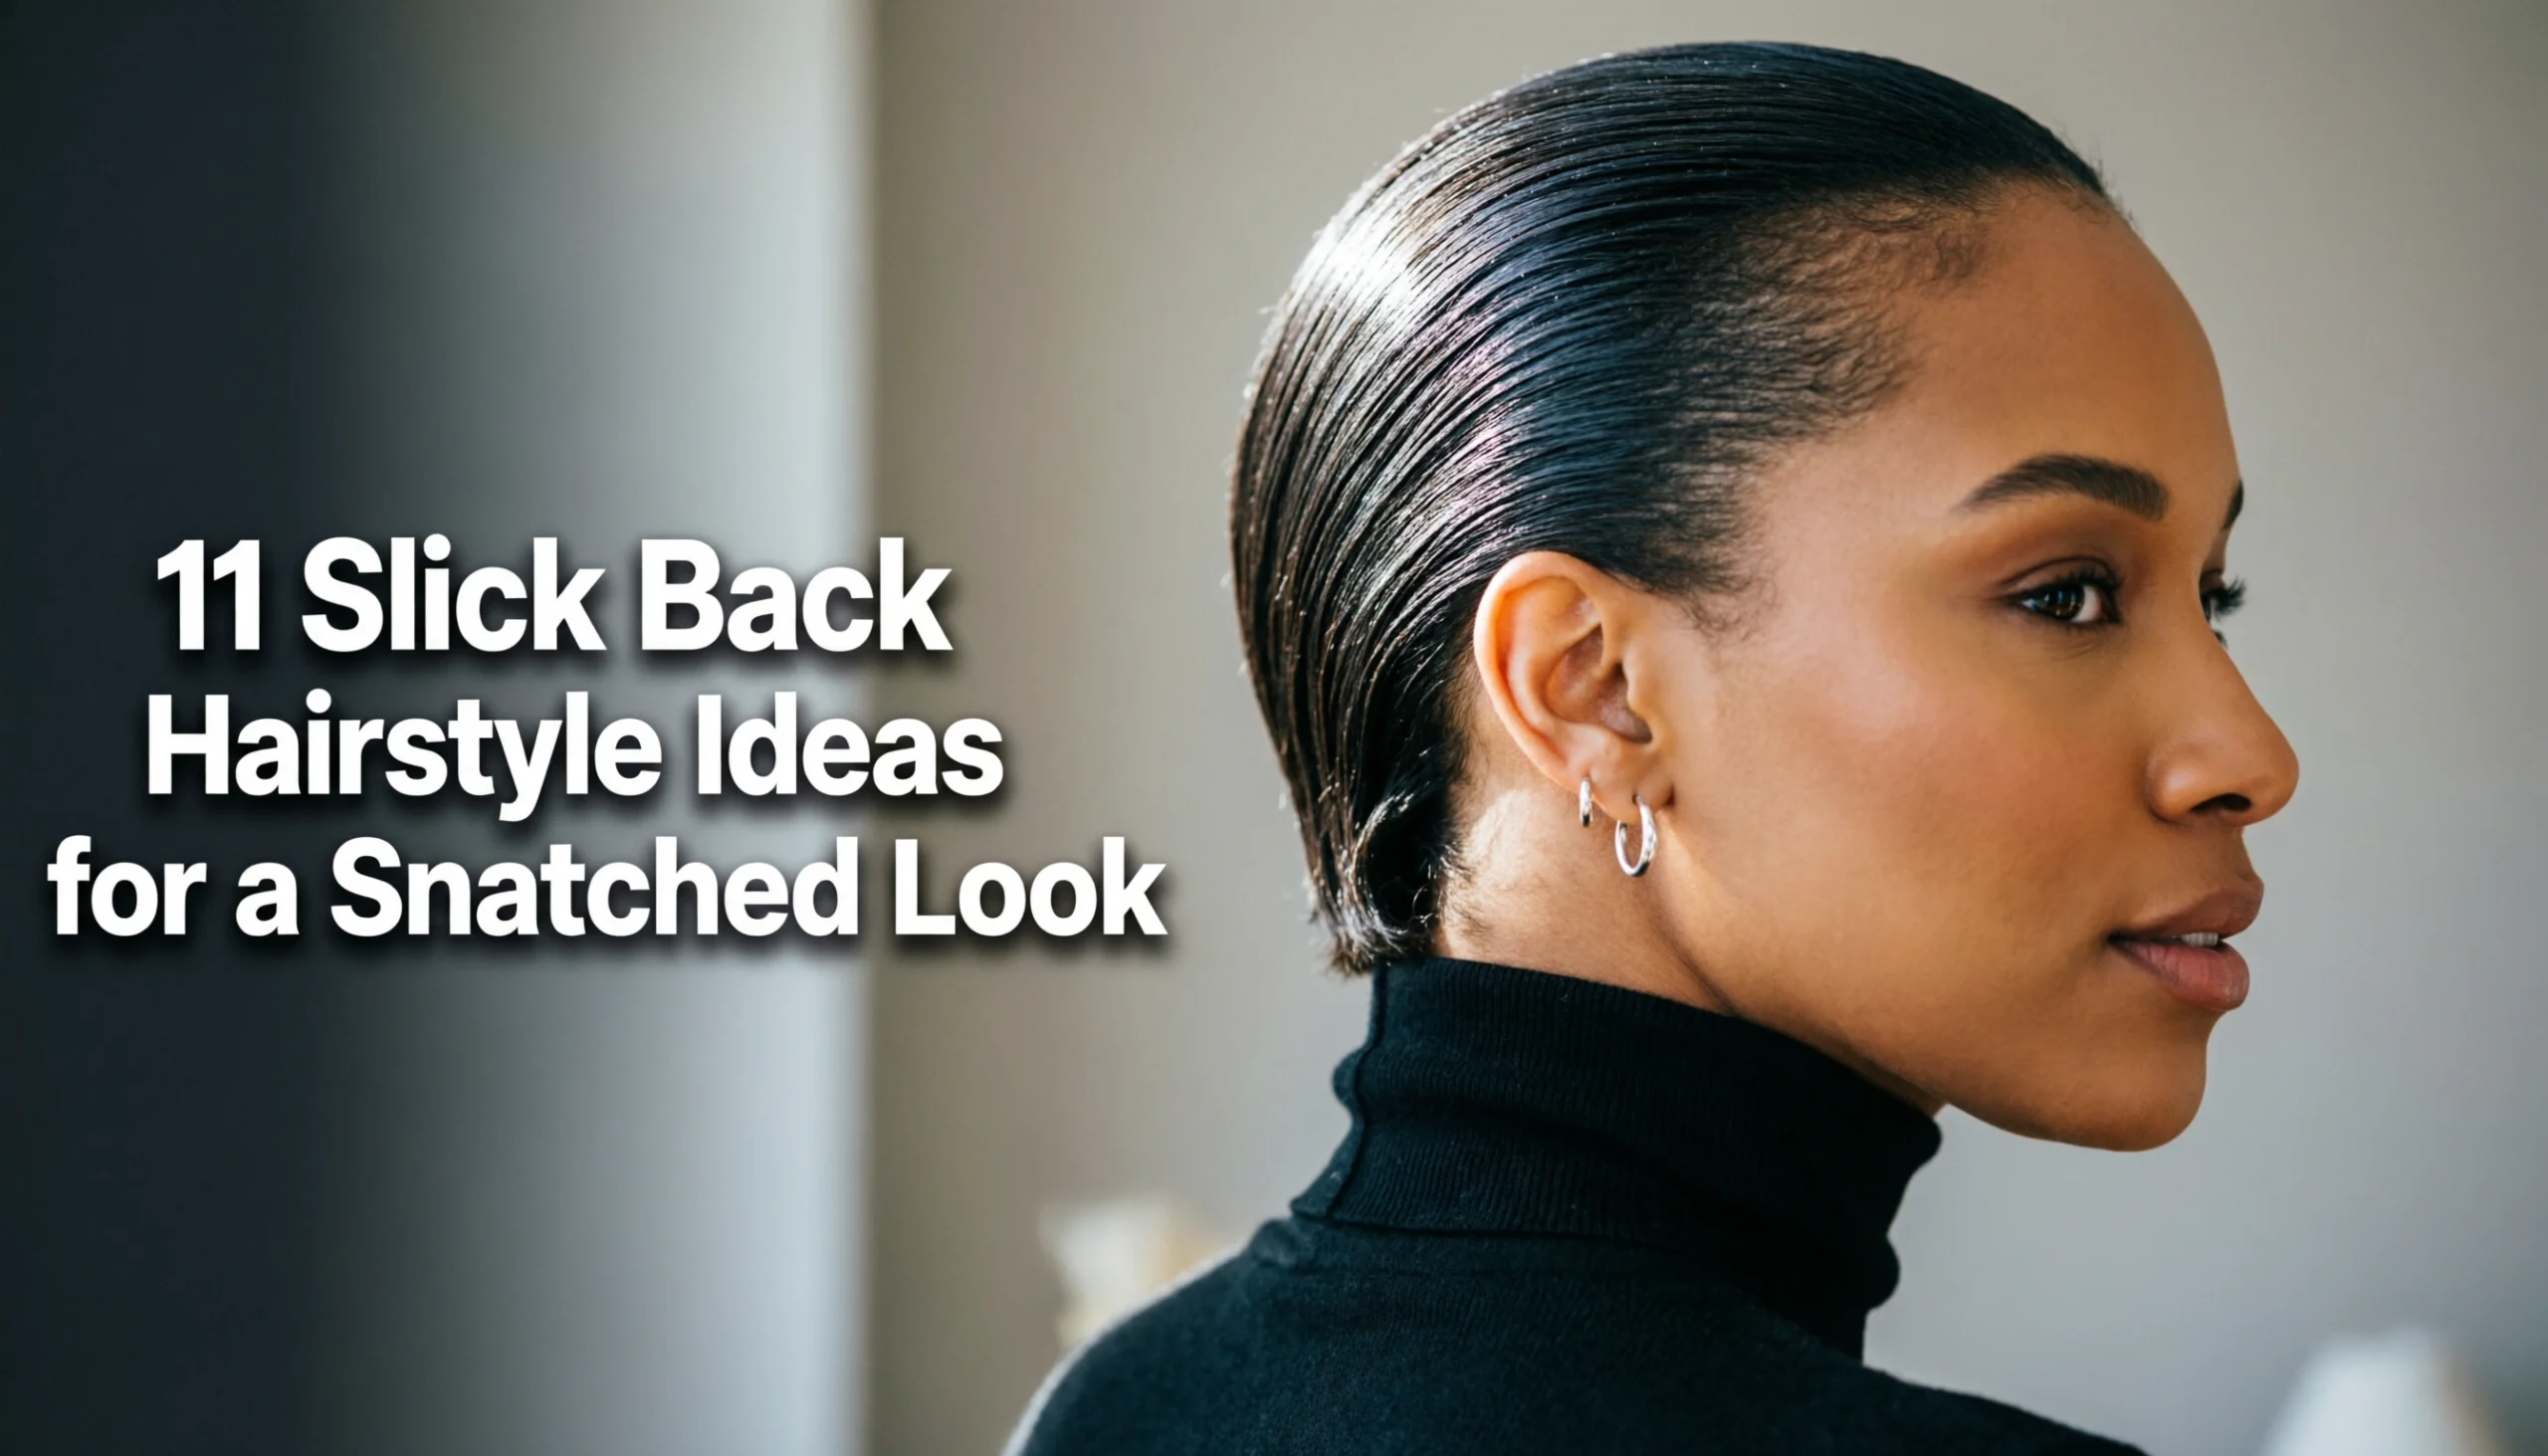
11 Slick Back Hairstyle Ideas for a Snatched Look in 2026
Now that you understand the fundamentals, let’s dive into the inspiration. This is your ultimate gallery for every hair type and occasion. From the timeless slick back low bun to an edgy slicked back bob, each style comes with a precise, step-by-step tutorial. We’ll cover the exact products and application steps for perfecting a high-shine finish and a secure hold, ensuring your look stays flawless from your morning coffee to your evening plans.
1. Master the Classic Slick Back Low Bun

Pin this clean girl aesthetic staple to your “Wash Day Hairstyles” board!
Products & Tools Used
- A heavy-duty hair wax stick to tame flyaways and establish a glossy texture
- 100% boar bristle brush for ultimate smoothing without snagging
- Strong, snag-free hair elastics
- Fine-tooth comb for precise parting
- Optional: Microfiber towel for dampening hair slightly before styling
Application Steps
- Brush and thoroughly detangle your hair to remove any knots that could cause hidden bumps.
- Apply a light mist of water if your hair is completely dry; a slightly damp base makes molding much easier.
- Part your hair down the center using a fine-tooth comb for that classic clean girl aesthetic.
- Distribute the hair wax stick directly along your roots, focusing on the hairline and crown.
- Smooth the hair backward toward the nape of your neck using the boar bristle brush, applying firm, even tension.
- Secure tightly with a hair elastic, then twist the tail into a tight coil, wrapping it around the base and pinning it into a bun.
Pro-Tip: To prevent mechanical damage and tension alopecia, always use silk or seamless nylon elastics, and avoid securing your bun in the exact same spot on your scalp every single day.

2. Elevate With a Snatched Slick Back High Ponytail

Save this high-fashion ponytail hack for your next formal event!
Products & Tools Used
- Heavy-duty edge control or stronghold hair gel
- A dense edge brush for baby hairs
- Stiff boar bristle brush
- Two strong hair ties (bungee cords work best for thick hair)
- Firm hold hair spray
Application Steps
- Section the hair horizontally from ear to ear, creating a top half and a bottom half.
- Slick the top half up into a small, tight ponytail at the crown of your head, applying edge control to the roots for a frizz-free base.
- Brush the bottom section of hair upward to join the top ponytail, ensuring the back is completely flat and bump-free.
- Secure both sections together with a second, heavy-duty hair tie to create an ultra-secure, snatched look that will not drop throughout the day.
- Tame your hairline by taking an edge brush dipped in gel and gently swooping your baby hairs.
- Spray the finished look generously with a firm-hold hairspray.
Pro-Tip: The secret to a truly salon quality high pony is the dual-ponytail method. This distributes the weight of the hair, significantly reducing scalp tension and preventing the ponytail from sagging after a few hours.

3. Try the Effortless Slick Back Half Up Half Down

Pin this romantic, half-up style for your next date night!
Products & Tools Used
- Clear, snag-free mini hair elastics
- Lightweight styling cream or leave-in conditioner
- Rat tail comb for perfectly straight sectioning
- Edge taming brush
- Curling iron or waver (for the bottom section)
Application Steps
- Part your hair horizontally starting from the tops of your ears, tilting slightly upward toward the crown.
- Clip the bottom section out of the way to prevent accidental tangles.
- Distribute a lightweight styling cream through the top section; avoid heavy gels here so the style doesn’t look stiff against the flowing bottom hair.
- Brush the top section straight back, ensuring it is smoothly tucked behind ears, and secure with a clear mini elastic.
- Release the bottom section and use a heat tool to add soft waves or curls, ensuring a beautiful contrast between the streamlined hair on top and the volume below.
- Apply a drop of hair oil to the ends of the loose hair for a cohesive, shiny hair finish.
Pro-Tip: When mixing a wet look on top with dry styling on the bottom, use emollients vs humectants carefully. An emollient-based cream on top provides flexible shine without flaking into the dry hair below.

4. Perfect the Sleek Middle Part Slick Back

Tap to save this razor-sharp middle part tutorial!
Products & Tools Used
- Metal-pin rat tail comb (crucial for a razor-sharp line)
- Pomade or strong-hold hair gel
- Boar bristle brush
- Sturdy hair ties
- Small claw clip (for sectioning)
Application Steps
- Detangle all hair completely, as bumps will ruin the sleekness of a center part.
- Part your hair using the metal pin of a rat tail comb, starting directly at the center of your hairline and drawing a straight line back to the crown.
- Section the front two pieces (the hair framing your face) away from the rest of your hair and clip them forward.
- Slick the back section of your hair into your desired bun or ponytail first, creating a solid anchor.
- Apply pomade to the front two sections, then brush each side completely flat, pulling them back to join your anchor ponytail.
- Wrap the ends of the front sections around the base of your bun/pony and secure with bobby pins.
Pro-Tip: Tying the back section first before pulling back the front pieces is a certified stylist secret. It prevents a messy parting and guarantees the front pieces lay perfectly flat against your scalp, creating the ultimate aerodynamic hair look.

5. Rock the Edgy Slick Back Bob

Short hair girls, pin this slick back hack for your next night out!
Products & Tools Used
- Volumizing mousse (for a strong, flexible base)
- Heavy-duty, non-slip bobby pins
- Fine-tooth comb
- Flexible hold hair spray
- Hair oil for the ends
Application Steps
- Apply a generous amount of mousse to damp hair, focusing entirely on the roots and the front sections.
- Comb all the hair straight back, away from the face, using a fine-tooth comb to ensure the product coats every strand.
- Mold the hair behind your ears, using your hands to press the hair flat against your scalp.
- Secure the hair just behind the ears with strategically placed bobby pins. Cross the pins in an “X” shape to lock down loose strands.
- Spray a flexible hold hairspray over the top to freeze the style in place.
- Apply a tiny drop of hair oil just to the very ends of the bob to give it a polished, glass hair finish.
Pro-Tip: When styling a slicked back bob, rely on a technique called “product layering.” Start with a wet mousse for grip, shape the hair, and finish with a dry hair spray. This provides a secure hold that won’t flake into white residue.

6. Create a Chic Slick Back Braided Ponytail

Gym girls, pin this ultra-secure braided style to your workout board!
Products & Tools Used
- Stiff boar bristle brush
- Stronghold hair gel (alcohol-free)
- Two durable hair elastics
- Small clear elastic for the braid end
- Leave-in conditioner
Application Steps
- Apply leave-in conditioner through the mid-lengths and ends of your hair to ensure the braid is smooth and hydrated.
- Distribute stronghold hair gel generously at the roots.
- Brush your hair back into a mid-height ponytail using the boar bristle brush, smoothing down any bumps, and secure with an elastic.
- Section the ponytail into three equal parts.
- Twist and weave the sections into a tight, neat three-strand braid, keeping the tension consistent all the way down.
- Secure the very end of the braid with a small clear elastic, and smooth any flyaways down the braid with residual gel on your hands.
Pro-Tip: If you’re wearing this slick back + gym style, always use an alcohol-free ingredient gel. Sweat mixed with alcohol-heavy gels can cause severe scalp irritation and leave a chalky white residue on your hairline.

7. Try the Messy-Meets-Sleek Slick Back Messy Bun

Save this “effortless chic” off-duty model look for your weekend errands!
Products & Tools Used
- Medium-hold pomade or wax stick
- Boar bristle brush
- Large, plush scrunchies
- Texturizing spray or dry shampoo
- Bobby pins
Application Steps
- Part your hair as desired (middle or side), leaving the lengths completely dry.
- Apply your wax stick only to the first 3-4 inches of hair starting from the root.
- Brush the roots tightly against your head and gather all the hair into a ponytail at the crown, securing it firmly.
- Spray texturizing spray generously through the loose tail of the ponytail to add grip and volume.
- Twist the textured tail loosely around the base of the ponytail, deliberately allowing pieces to fall out and look undone.
- Pin the messy bun loosely into place with bobby pins, securing the heavy parts while keeping the effortless chic volume.
Pro-Tip: The key to the slick back vs messy bun hybrid is dual-texture styling. By using a heavy pomade on the roots and a dry, gritty texturizing spray on the ends, you maximize hair density styling without the bun looking stringy or greasy.

8. Playful & Trendy Slick Back Bubble Ponytail

Tap to save this fun, voluminous bubble ponytail tutorial!
Products & Tools Used
- Heavy-duty hair gel
- Boar bristle brush
- One strong base hair tie
- A pack of small, clear hair elastics
- Fine-tooth comb (for teasing)
Application Steps
- Slick your hair into a high, extremely secure ponytail using hair gel and a boar bristle brush.
- Brush through the length of the ponytail to ensure it is completely smooth and tangle-free.
- Secure a small clear elastic about two inches down from the base of the ponytail.
- Pull gently on the edges of the hair between the two elastics to puff it outward, shaping your first “bubble.”
- Tease the remaining tail slightly with a fine-tooth comb for extra volume if you struggle with flat hair.
- Repeat this process—tying an elastic every two inches and fluffing—until you reach the end of the ponytail.
Pro-Tip: To protect your hair’s tensile strength, never rip the clear elastics out at the end of the day. Use a heated tool (like a warm curling iron barrel) to quickly tap and snap the plastic elastics, preventing painful pulling and damage.

9. Master the Sophisticated Side Part Slicked Back

Pin this elegant, deep side part for your next wedding guest look!
Products & Tools Used
- Rat tail comb
- Strong, pliable pomade or styling cream
- Boar bristle brush
- Duckbill hair clips (for setting)
- Firm-hold hair spray
Application Steps
- Part your hair deeply to one side using a rat tail comb, aligning the part with the arch of your eyebrow for the most flattering angle.
- Apply a generous scoop of styling cream to the heavier side of the part.
- Slick the heavy side across your forehead in a slight swoop, pulling it tight behind your ear.
- Place a duckbill clip right behind your ear to hold the swoop flat against your head while it sets.
- Smooth the rest of your hair into a low bun or ponytail at the nape of your neck.
- Remove the duckbill clip after 10 minutes and lock the style in with a firm-hold hairspray to combat any cowlicks.
Pro-Tip: For a truly professional hairstyle that lasts through events, apply your pomade to damp hair. The water helps the product distribute evenly and creates a hydrophobic coating as it dries, locking out humidity and frizz all night.

10. Y2K-Inspired Slick Back with Bangs Left Out

Tap to save this trendy Y2K aesthetic to your hair inspiration board!
Products & Tools Used
- Pointed rat tail comb
- Small hair clip (to isolate bangs)
- Hair gel
- Double-sided edge brush
- Mini flat iron (for styling tendrils)
Application Steps
- Section out your curtain bangs or two front tendrils using the tail of your comb, clipping them completely out of the way.
- Apply your hair gel starting just behind the isolated bang section.
- Brush the rest of your hair back into a tight ponytail or spiky slick back knot.
- Perfect the hairline using a double-sided edge brush to swoop any baby hairs, being careful not to merge gel into the clean bangs.
- Release the front pieces and use a mini flat iron to bend them slightly away from or toward your face.
- Spray a tiny bit of dry shampoo into the bangs to ensure they stay fluffy and don’t absorb oil from your forehead.
Pro-Tip: If you are doing this style on “dirty hair” days, wash only your bangs in the sink with a drop of shampoo. A certified stylist knows that clean, fluffy bangs combined with a gelled back creates the ultimate clean girl aesthetic illusion.

11. Protective Slick Back on Natural Curly Hair

Save this protective, ultra-sleek puff for natural hair wash days!
Products & Tools Used
- Hydrating leave-in conditioner
- Thick styling gel or heavy-duty edge control
- Hard boar bristle brush
- Large satin scrunchie or shoelace (for a puff)
- Silk scarf (for setting)
Application Steps
- Dampen the perimeter of your hair heavily with a spray bottle; natural hair must be wet to mold smoothly without snapping.
- Apply a generous layer of leave-in conditioner to protect the hair shaft and provide deep moisture.
- Layer a thick, alcohol-free styling gel over the conditioner, focusing purely on the roots and edges.
- Brush the hair back gently but firmly using a hard boar bristle brush, working in sections if your hair is very thick.
- Secure the hair into a bun or a high puff using a satin scrunchie to prevent friction.
- Wrap your hairline tightly with a silk scarf for 15-20 minutes to melt the product and set the style flat.
Pro-Tip: The “scarf method” is mandatory for highly textured hair. Wrapping the hair allows body heat to activate the occlusive ingredients in your gel, sealing the hair cuticle flat and preventing any white residue or flaking once it dries.

Key Takeaways
- Prep is Everything: Always start by thoroughly detangling your hair; hidden knots are the primary cause of bumps and an uneven, messy parting.
- Choose the Right Brush: A 100% boar bristle brush is non-negotiable for this style, as it provides the dense tension required for a smooth, glass hair finish without snapping strands.
- Layer Your Products Wisely: To avoid white residue and flaking gel, always layer a hydrating leave-in conditioner under your stiffer pomade or wax stick.
- Protect Your Edges: Combat tension alopecia by varying the placement of your bun or ponytail, and always use snag-free, silk, or seamless nylon hair elastics.
- Embrace the Scarf Method: Tie a silk scarf around your finished hairline for 10 minutes; your body heat will melt the occlusive ingredients into the hair, locking the style flat.
- Wash Out Properly: Prevent product buildup by using a clarifying shampoo or doing a double-cleanse on your next hair wash routine to keep your scalp microbiome healthy.
- Water is Your Friend: If your hair isn’t naturally greasy on wash day, slightly dampening your roots will make molding and shaping the hair significantly easier.
People Also Ask About Slick Back Hairstyles
How to slick back hair without gel?
You can successfully slick back hair without gel by using a combination of a hydrating leave-in conditioner and a heavy hair wax stick. Start by dampening the hair and applying the leave-in conditioner to provide slip and moisture. Then, rub the wax stick directly against the roots and use a boar bristle brush to smooth the hair back. This provides a flexible, matte hold that avoids the crunchiness or flaking often associated with heavy gels.
What is the best gel for slick back hair?
The best gel for a slick back is an alcohol-free, stronghold edge control gel or a professional-grade pomade. Alcohol-heavy gels dry out the hair shaft and cause severe flaking and white residue as the day goes on. Look for gels containing hydrating ingredients like aloe vera, argan oil, or castor oil, which provide a high-shine, glossy texture while keeping the hair healthy and preventing breakage.
How to do a slick back bun on thin hair?
To do a slick back bun on thin hair, use lightweight styling creams instead of heavy pomades, and tease the ponytail before wrapping it into a bun. Heavy gels will make thin hair look sparse and expose the scalp. Use a volumizing mousse at the roots for grip, brush the hair back gently, and use a root touch-up powder along your hairline to create the illusion of density before securing the bun.
Are slick back hairstyles bad for your hair?
Slick back hairstyles can be bad for your hair if done incorrectly, primarily leading to tension alopecia and breakage. Pulling the hair too tightly every single day stresses the hair follicles, especially around the fragile hairline. To prevent damage, avoid doing the style on consecutive days, never sleep with your hair slicked back in tight elastics, and thoroughly wash out heavy products to avoid scalp irritation.
How to avoid bumps in slick back hair?
To avoid bumps, you must thoroughly detangle the hair first, work in small sections, and use a stiff boar bristle brush. Most bumps are caused by hidden tangles beneath the top layer of hair. If you have very thick hair, section the hair horizontally into two halves. Slick the bottom half into a ponytail first, then smooth the top half over it to guarantee a perfectly flat, streamlined finish.
Why does my slick back hair look greasy?
Your slick back may look excessively greasy if you are applying heavy oils or oil-based pomades to hair that is already deeply unwashed. While slick backs are great for dirty hair, layering heavy products on top of natural sebum can create an unappealing, wet look. Instead of gel, try using a dry texturizing spray or a matte-finish wax on wash day to absorb some of the natural oils while still providing hold.
How to slick back hair for a dance competition?
For a dance competition, you must use the “layering method”: start with wet gel, shape the hair, and lock it in with a freeze-hold hairspray. Dancers require extreme durability. Apply a heavy-duty gel to damp roots, comb it flat, and secure with bungee cords (which hold tighter than standard elastics). Finish by blow-drying the gelled hair on a cool setting to freeze it, then douse the style in an aerosol hairspray.
What can I use to slick back my hair naturally?
You can slick back your hair naturally using aloe vera gel, flaxseed gel, or natural shea butter. Flaxseed gel is an incredible natural alternative that provides a surprisingly strong hold and high-shine finish without chemical polymers. Simply boil whole flaxseeds in water until a thick gel forms, strain it, and apply it to damp hair using a brush just as you would with a commercial edge control product.
How to fix a messy slick back?
To fix a messy slick back without starting over, lightly mist the bumpy area with water and use the tail of a rat tail comb to gently push the bump flat. Do not try to aggressively brush a dried slick back, as this will break the product cast and cause white flakes. Once you have smoothed the bump with the comb, apply a tiny amount of fresh gel over the top and tie a silk scarf over it for five minutes to reset the style.
How to slick back baby hairs?
To properly slick back baby hairs, use a designated edge control product and a specialized mini edge brush or a clean toothbrush. Regular hair gel is often too watery to hold down fine baby hairs. Apply a tiny dab of thick edge control paste directly to the hairline. Use the fine bristles of the edge brush to gently swoop the hairs down toward your face, then curve them back into the main body of hair for a neat, snatched look.
Final Thoughts on Slick Back Hairstyle Ideas
Mastering the perfect slick back hairstyle is the ultimate styling cheat code. Whether you are trying to stretch an extra day out of your hair wash routine, heading to a grueling gym session, or attending a formal event, this versatile look guarantees a polished, snatched look in under ten minutes. By integrating the right tools—like a trusty boar bristle brush and an alcohol-free wax stick—you can easily replicate the coveted clean girl aesthetic at home.
Remember, the key to a flawless slick back isn’t just about the visual result; it’s about employing professional techniques that prioritize your hair’s health. By rotating between low buns, high ponies, and braids, and making sure to thoroughly cleanse your scalp of product buildup, you can enjoy these sleek styles without the risk of hair breakage.
Which of these 11 slick back ideas are you going to try on your next wash day? Are you team classic low bun, or are you ready to experiment with the trendy bubble ponytail? Let us know your favorite style—and your go-to smoothing products—in the comments below
Last update on 2026-04-27 / Affiliate links / Images from Amazon Product Advertising API