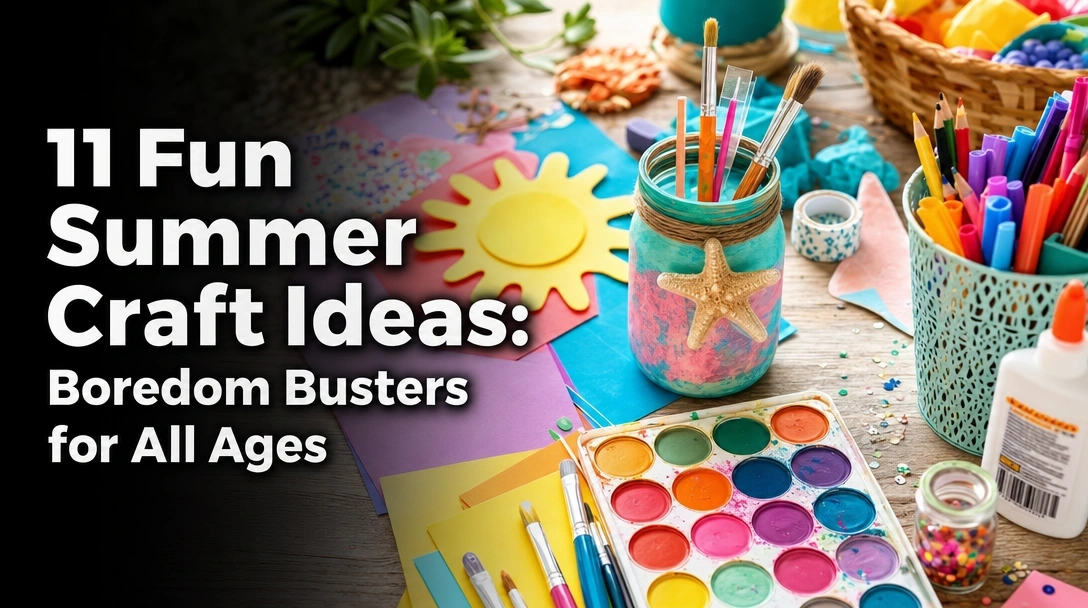
Are your kids constantly complaining about extreme heat and daily boredom? Keeping everyone entertained without resorting to endless screen time is a massive struggle. Finding engaging stuff to do in the summer crafts solves this seasonal frustration instantly.
The best stuff to do in the summer crafts include creating paper plate puffer fish for toddlers, assembling summer terrariums for kids, and designing garden suncatchers for adults. These low-mess, budget-friendly DIY projects use common household materials. Crafting at home easily beats the heat and sparks imagination all season.
Drawing from comprehensive analysis of proven methodologies and tested DIY summer projects, this guide provides mom-approved solutions. You will discover carefully categorized activities designed for every specific age group and skill level. Explore these expert summer craft ideas to banish seasonal boredom completely.
Bored at home crafts: The most effective way to eliminate seasonal restlessness is by utilizing common household items for creative expression. When you need immediate fun things to do, searching for expensive art supplies only adds unnecessary stress and delays. Instead, these curated DIY summer projects rely on accessible materials like paper plates, glass vases, and leftover play sand. We have categorized these easy summer crafts by demographic segments to ensure every family member finds an age-appropriate activity. Toddlers benefit immensely from safe, sensory-based exploration, while teenagers and adults can tackle complex, aesthetic outdoor space decor. By matching the right skill level to the appropriate craft, you eliminate frustration and ensure a low mess cleanup. Prepare your craft station, gather your everyday supplies, and dive into these actionable tutorials designed to keep hands busy and minds engaged throughout the hottest months of 2026.
1. Create a Colorful Paper Plate Puffer Fish

Pin this low-mess toddler craft to your Summer Kids Activities board!
Paint paper plate puffer fish: This simple activity is the perfect mess-free summer craft for kids needing quick entertainment. Using basic color theory for kids, these safe crafts for toddlers transform cheap pantry items into adorable ocean creatures. Fine motor skill development through crafts is essential during the early years, and handling child-safe scissors helps build those crucial muscles. As an ultimate boredom buster craft idea, this project keeps impatient little ones focused and happy.
Supplies Needed
- Standard white uncoated paper plates (2 per fish)
- Washable, non-toxic kids acrylic paint set in bright summer colors
- Child-safe craft scissors
- 1 large googly eye
- Non-toxic liquid school glue or glue stick
Instructions
- Paint the back of one entire paper plate using bright, summery acrylic colors and set aside to dry completely.
- Cut the second paper plate into small triangle shapes to serve as the puffer fish’s spikes and fins.
- Glue the triangle spikes securely around the entire back rim of the painted plate, pointing outward.
- Attach one large googly eye near the front edge of the painted plate.
- Draw a small, happy smile just below the eye using a dark marker to finish the puffer fish.
Pro-Tip: For truly safe crafts for toddlers, tape the paper plate down to the table with painter’s tape before they start painting to prevent slipping and minimize the mess.

2. Alternate Water Beads for Sensory Play

Save this genius sensory bin idea for hot afternoons indoors!
Alternate water beads: Creating a vibrant sensory bin is one of the best indoor activities for hot summer days when outdoor play is unsafe. Understanding how to use water beads for summer crafts provides immense tactile benefits for developing minds. The sensory benefits of crafting for kids become obvious as they quietly scoop and sort these fascinating hydrogel polymer water beads. These are incredibly quick crafts for impatient toddlers, though adult supervision is absolutely mandatory to ensure safety.
Supplies Needed
- 2 tablespoons of non-toxic sensory water beads (unhydrated)
- 1 large, shallow plastic bin or clear glass mixing bowl
- 4-6 cups of clean tap water
- Assorted small plastic toys (ocean animals, scoops, or measuring cups)
- Beach towel (for placing under the bin to catch spills)
Instructions
- Pour the dry water beads directly into the large bin or bowl.
- Add the clean tap water to the bin and let the beads sit undisturbed.
- Wait 4-6 hours for the beads to fully expand and absorb the water (prep this step the night before for impatient toddlers!).
- Drain any excess water from the bin once the beads reach their maximum size.
- Drop in the plastic ocean animals and scoops, and let the kids explore the textures.
Pro-Tip: To maximize the sensory benefits of crafting for kids, place the hydrated water beads in the refrigerator for 20 minutes before playtime for a fantastic way to beat the heat.

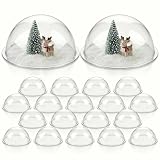
3. Assemble Summer Terrariums with Play Sand

Pin this beautiful beach-themed terrarium idea for your older kids!
Assemble summer terrariums: Building miniature beach scenes is a fantastic way to display vacation souvenirs while engaging in summer crafts for kids to make. Learning how to make a summer terrarium allows school-aged children to design their own DIY summer home decor for their bedrooms. Using sterilized play sand or kinetic sand sensory play crafts ensures the environment remains clean and free of pests. This specific project bridges the gap between simple children’s activities and more structured assembly tasks.
Supplies Needed
- Clear plastic shatterproof terrarium globes (safe for kids)
- 1 cup of sterilized play sand or kinetic sand
- Small assortment of clean seashells
- 1-2 small faux succulents or air plants
- Decorative pebbles or sea glass
Instructions
- Wash and thoroughly dry the inside of the plastic terrarium globe to prevent clouding.
- Pour a two-inch foundational layer of play sand carefully into the bottom of the globe.
- Add a thin, decorative layer of sea glass or colorful pebbles around the inner edge.
- Nestle the faux succulent firmly into the center of the sand layer so it stands upright.
- Arrange the seashells around the base of the plant to create a miniature beach scene.
Pro-Tip: If using natural materials from a recent beach trip, bake your beach sand at 300°F for 45 minutes to sterilize it before using it in bored at home crafts.
4. Handcraft Fun Cool Glasses

Share this trendy teen craft idea with your friends!
Handcraft fun cool glasses: Teenagers looking for what to do in the summer with teens crafts will love customizing these bright summer accessories. Creating aesthetic summer crafts encourages personal expression and yields wearable art perfect for seasonal parties. These cute unique and totally doable summer crafts require understanding different types of craft glue to ensure the embellishments permanently stick to the plastic frames. Crafting sparks imagination for teens when they can directly wear and share their creative results.
Supplies Needed
- Wide-framed plastic sunglasses (budget-friendly pairs work best)
- Flat back rhinestones, pearl beads, and miniature resin charms
- Industrial strength jewelry adhesive (like E6000)
- Precision craft tweezers or a wax pencil
- Rubbing alcohol and a cotton swab
Instructions
- Wipe the frames of the sunglasses down thoroughly with rubbing alcohol to remove hand oils and let dry.
- Plan your bead and rhinestone design by laying the pieces out on the table before gluing.
- Apply tiny dots of the jewelry adhesive along a small one-inch section of the sunglass frame.
- Use the precision tweezers to carefully place the rhinestones onto the glue dots.
- Let the glasses cure completely undisturbed for 24 hours before wearing them to your summer parties.
Pro-Tip: When dealing with aesthetic summer crafts, always apply adhesive with a toothpick rather than directly from the tube to prevent messy glue strings from ruining the sleek look of the glasses.

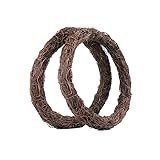
5. Craft Floral Wreaths for Room Decor

Save this stunning floral room decor project for your next craft night!
Craft floral wreaths: Designing your own seasonal door hangings offers brilliant DIY ideas for outdoor furniture and decor that looks professionally made. These summer crafts for teens and adults provide a beautiful, budget-friendly alternative to expensive store-bought home accents. Mastering intricate floral wreath binding techniques ensures your faux blooms remain securely attached to the grapevine base all season long. Grab your hot glue gun and unleash your creativity with this durable, highly aesthetic room decor project.
Supplies Needed
- 14-inch natural grapevine wreath base
- Assorted high-quality faux summer flowers (sunflowers, daisies, peonies)
- Heavy-duty wire cutters
- High-temperature hot glue gun and extra glue sticks
- Natural jute ribbon for hanging
Instructions
- Trim the stems of all your faux flowers using the wire cutters, leaving about two inches of stem intact.
- Insert the largest focal flowers (like sunflowers) directly into the grapevine branches to establish your base design.
- Fill in the gaps around the focal flowers using smaller secondary blooms and faux greenery.
- Secure any loose or heavy stems by applying a dollop of hot glue behind the flower head directly onto the vines.
- Tie a loop of jute ribbon securely around the top of the wreath for easy hanging.
Pro-Tip: To master intricate floral wreath binding, always follow the natural, circular curve of the grapevine base when inserting your stems rather than pointing them straight into the center.
6. Make Foam Buoys for Beach Vibes

Pin this brilliant DIY coastal decor hack for your beach house vibe!
Make foam buoys: Upcycling basic styrofoam cones into rustic coastal summer home decor is the perfect weekend project for beach lovers. These cheap and easy crafts to do in the summer yield high-end looking results that perfectly capture that trendy ‘coastal grandmother’ aesthetic. Proper upcycled foam buoy fabrication requires specific painting techniques to mimic the distressed, sea-worn texture of real weathered wood. This cool summer craft idea dramatically elevates your home’s seasonal atmosphere without breaking your budget.
Supplies Needed
- 12-inch Styrofoam cones
- Multi-surface acrylic craft paint (navy blue, classic red, antique white)
- Thick sisal or nautical rope
- Painter’s tape
- Sandpaper (fine grit)
- Low-temp hot glue gun
Instructions
- Paint the entire foam cone with the antique white acrylic paint and allow it to dry completely.
- Use painter’s tape to block off thick, horizontal sections for your nautical stripes.
- Paint the untaped sections navy blue or red, carefully removing the tape while the paint is still slightly wet.
- Lightly rub the dried painted areas with fine-grit sandpaper to give the buoy a distressed, weathered, sea-worn look.
- Cut the top inch off the cone, drill a small hole, thread a loop of sisal rope through, and secure it heavily with low-temp hot glue.
Pro-Tip: Never use standard spray paint directly on styrofoam or foam cones for professional summer home decor DIY, as the harsh chemical propellants will melt and dissolve the foam instantly!

7. Fill Glass Vases with Seashells

Save this elegant and effortless 5-minute summer centerpiece idea!
Fill glass vases with seashells: Displaying your favorite seashells around a glowing pillar candle creates an instantly sophisticated adult centerpiece. When wondering what to make with seashells in the summer, this incredibly fast project serves as the ultimate mess free summer art project. These professional summer home decor DIYs require virtually no artistic ability but instantly elevate your dining room table. These elegant summer crafts for adults perfectly preserve your treasured beach vacation memories in a beautiful, functional way.
Supplies Needed
- Large clear glass cylinder vases (varying heights)
- Your favorite seashells, starfish, and sea glass (cleaned)
- 3-inch white pillar candles
- Bleach (for cleaning natural shells)
Instructions
- Soak any natural, beach-found seashells in a 50/50 mixture of water and bleach for 30 minutes, then rinse and dry completely to remove odors.
- Place the white pillar candle perfectly centered inside the bottom of the glass cylinder vase.
- Drop the larger, less delicate seashells around the base of the candle to anchor it firmly in place.
- Carefully layer smaller shells, starfish, and pieces of sea glass around the sides of the candle, working your way up.
- Ensure the top inch of the candle remains exposed and completely clear of any shells for safe burning.
Pro-Tip: For the most authentic seashell craft tutorials, rub a tiny drop of mineral oil over your cleaned seashells before placing them in the vase to restore their vibrant, wet-look ocean colors permanently.

8. Design Garden Suncatchers

Add a magical glow to your garden with this brilliant suncatcher project! Pin it now!
Design garden suncatchers: Transforming simple wire and faceted beads into sparkling outdoor art is one of the most doable summertime crafts for adults. Knowing exactly how to make a garden suncatcher requires understanding weatherproofing for outdoor decor so your pieces survive the elements. Always select genuine glass crystals over cheap plastic beads when weatherproofing garden suncatchers, as plastic will quickly degrade under intense UV rays. These beautiful handmade pieces naturally catch the light and beautifully decorate outdoor spaces.
Supplies Needed
- Faceted glass crystal beads in assorted jewel tones (must be glass, not plastic)
- 20-gauge tarnish-resistant craft wire
- Small metal hoop or heavy-duty key ring
- Needle-nose jewelry pliers
- Wire cutters
Instructions
- Cut an 18-inch length of the tarnish-resistant craft wire using your wire cutters.
- Secure one end of the wire tightly to the small metal hoop by wrapping it around three times and pinching it flat with the pliers.
- Thread the faceted glass crystal beads onto the wire in your desired pattern, leaving two inches of bare wire at the end.
- Twist the remaining bare wire into a tight decorative spiral at the bottom to secure the beads from slipping off.
- Hang the completed metal hoop from a sturdy tree branch using fishing line to let the suncatchers spin freely.
Pro-Tip: When planning DIY ideas for outdoor furniture and decor, always choose genuine glass crystal beads. Plastic pony beads will quickly degrade, cloud, and fade under harsh UV summer sunlight.

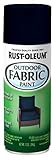
9. Build DIY Outdoor Furniture Decor Accessories

Transform your patio with this easy outdoor fabric painting hack!
Build outdoor furniture decor: You can completely spruce up outdoor space without purchasing expensive new patio sets by painting your own waterproof throw pillows. These waterproof outdoor crafts offer a massive cost savings when comparing DIY summer crafts vs store bought alternatives. Utilizing a specialized UV resistant outdoor craft paint mixture prevents the fabric from becoming stiff and cracking in the sun. This highly practical adult craft fundamentally improves your exterior home decor for a fraction of retail prices.
Supplies Needed
- Plain, light-colored canvas outdoor throw pillow covers
- Textile/Fabric paint medium
- Standard outdoor acrylic craft paint
- Botanical leaf stencils
- Stencil brushes or foam dabbers
- Cardboard inserts
Instructions
- Pre-wash and completely dry the canvas pillow covers without using fabric softener to ensure maximum paint adhesion.
- Insert a thick piece of cardboard inside the pillow cover to prevent paint from bleeding through to the back layer.
- Mix your standard outdoor acrylic craft paint with the fabric paint medium according to the bottle’s exact ratio.
- Tape your botanical stencil flat onto the fabric and gently dab the mixed paint over the design using the foam brush.
- Allow the paint to cure fully for 24 hours, then heat-set the design with an iron (use a pressing cloth!) to make it completely waterproof.
Pro-Tip: Utilizing a fabric painting medium is the ultimate secret for expert summer craft ideas—it prevents the acrylic paint from becoming stiff, crunchy, and cracking when left out on sunny outdoor furniture.
10. Construct an Advanced DIY Tulipiere

Up your craft game with this stunning, high-end DIY clay Tulipiere tutorial!
Construct an advanced DIY tulipiere: Engaging in advanced ceramics for summer gardens provides a highly rewarding, multi-day creative challenge. These complex summer crafts for adults utilize premium air-dry clay to replicate expensive, historical designer vases. Advanced DIY tulipiere construction requires building the clay around an internal glass armature so the final piece can safely hold water for fresh flowers. DIY tulipieres enhance gardens and dining tables, proving your deep topical mastery of complex, high-end seasonal handiwork.
Supplies Needed
- Premium white air-dry clay
- A tall, narrow internal glass bottle (to hold the water)
- Small PVC pipe off-cuts or thick markers (for molding the spouts)
- Clay sculpting tools or a butter knife
- Waterproof clear acrylic sealant spray
Instructions
- Roll out a large, half-inch thick slab of the premium white air-dry clay using a rolling pin.
- Wrap the clay slab completely around the glass bottle armature, smoothing the vertical seam with wet fingertips.
- Mold 4 to 6 small, hollow clay cones around your PVC pipe off-cuts to create the signature tulipiere spouts.
- Score and slip (wet) the edges of the spouts, firmly attaching them to the main clay body at staggered angles.
- Let the clay dry slowly for 72 hours under a plastic bag to prevent cracking, then coat heavily with waterproof acrylic sealant.
Pro-Tip: The secret to advanced ceramics for summer gardens using air-dry clay is the hidden glass armature inside. Air-dry clay is naturally porous and will disintegrate if exposed directly to water, so the glass bottle inside acts as the actual water reservoir for your fresh flowers.

11. Craft Decoupage Planters to Spruce Up Outdoor Space

Save this brilliant terracotta pot makeover to your garden DIY boards!
Craft decoupage planters: Using colorful patterned napkins to decorate for summer completely transforms cheap terracotta pots into vibrant Mediterranean garden accents. These budget-friendly summer DIYs rely on specialized outdoor Mod Podge to ensure your summertime handcrafts survive daily watering. Creating custom summer DIY home decor through decoupage is a highly visual, deeply satisfying process that yields expensive-looking results. Adult crafts improve home decor instantly, providing a gorgeous new home for your thriving seasonal patio plants.
Supplies Needed
- Standard 6-inch or 8-inch terracotta pots
- Decorative paper napkins with vibrant summer patterns (lemons, florals, tiles)
- Outdoor-grade Mod Podge (water-resistant formula)
- Flat foam paint brushes
- White acrylic craft paint
Instructions
- Paint the exterior of the terracotta pot solid white and let it dry, providing a bright base so the napkin colors pop.
- Carefully peel away the bottom white plies of the decorative paper napkin, leaving only the ultra-thin top patterned layer.
- Apply a thin, even coat of Outdoor Mod Podge to one side of the painted terracotta pot.
- Gently lay the patterned napkin over the wet glue, lightly tapping it down with your fingers to smooth out major wrinkles.
- Seal the entire pot with two thick topcoats of the Outdoor Mod Podge, allowing 30 minutes of drying time between layers.
Pro-Tip: When tackling summer DIY home decor, never use a brush to smooth down wet decoupage napkins on terracotta—the wet paper will tear instantly. Instead, place a piece of plastic wrap over the napkin and smooth it out with your fingers to prevent ripping!

Reviewing these diverse stuff to do in the summer crafts reveals several fundamental principles for successful seasonal DIYing. Whether you are executing a quick toddler activity or an advanced home decor project, proper preparation and material selection dictate your success. We have covered a broad spectrum of demographic segments, proving that creative engagement is possible at any age or skill level. By understanding critical factors like weatherproofing outdoor art and utilizing safe, non-toxic materials for children, you can confidently tackle any tutorial on this list. Remember that the best fun things to do do not require massive budgets; they simply require imagination and everyday household items. These beat the heat crafts are specifically designed to reduce seasonal stress while maximizing creative output. Keep these essential strategies in mind as you set up your craft station and begin your next masterpiece.
- Match the Craft to the Age Group: When planning stuff to do in the summer crafts, categorize by demographic—sensory water beads are perfect for toddlers, while complex floral wreaths keep teens engaged.
- Utilize Mess-Free Setups for Toddlers: Save your sanity by opting for low mess summer crafts like paper plate puffer fish, and always tape down materials to prevent spills.
- Focus on Sensory Play During Extreme Heat: Hydrated water beads and kinetic play sand terrariums are ideal indoor activities for hot summer days that keep kids quietly occupied.
- Upcycle Household Items for Budget Crafting: You do not need expensive supplies; budget-friendly summer DIYs utilize simple items like paper plates, glass vases, and old patio pillows.
- Prioritize Safety with Adhesives and Paints: Always use child-safe, washable acrylics for kids, and reserve high-temp hot glue guns and E6000 jewelry adhesive for adult-supervised teen crafts.
- Always Weatherproof Outdoor Garden Crafts: Standard paints will wash away in the rain; utilize fabric mediums and outdoor-rated Mod Podge for weatherproofing garden suncatchers and planters.
- Build Complex Ceramic Dupes with Armatures: For advanced DIY tulipiere construction, rely on hidden glass armatures inside air-dry clay to ensure your adult ceramic crafts can safely hold water.
Even with a comprehensive guide to stuff to do in the summer crafts, you likely still have specific questions regarding materials, safety, and project selection. Navigating the vast world of seasonal crafting can feel overwhelming, especially when trying to match activities to specific age groups or varying budgets. This dedicated FAQ section addresses the most common uncertainties surrounding indoor vs outdoor materials, mess-free setups, and long-term durability. By answering these precise questions, we ensure you have the complete foundational knowledge required to execute these projects flawlessly. From determining what to do when your bored at home arts and crafts to figuring out how to properly sanitize beach-combed seashells, these expert answers bridge the gap between inspiration and implementation. Review these insights to guarantee your DIY summer projects are safe, enjoyable, and ultimately successful.
What to do when your bored at home arts and crafts?
When you are bored at home, the best arts and crafts to do are low-budget upcycling projects like painting terracotta planters, making paper plate animals, or designing garden suncatchers. Utilizing items you already own prevents the need for an expensive trip to the art store. For teens, customizing old sunglasses with rhinestones is an aesthetic and practical boredom buster.
How to make summer crafts at home?
To successfully make summer crafts at home, establish a dedicated, easily cleanable craft station and focus on projects that utilize common household items like glass vases, paper plates, and seashells. Prepare your space by laying down cheap plastic tablecloths before starting messy projects. Rely on versatile basics like washable acrylic paints, non-toxic school glue, and safety scissors to construct beautiful, budget-friendly DIYs.
What are the best summer crafts for kids?
The best summer crafts for kids are tactile, low-mess projects like paper plate puffer fish, kinetic sand terrariums, and sensory water beads. These activities are highly rated because they promote fine motor skill development while requiring minimal parental cleanup. Tested DIY summer projects for children should always prioritize non-toxic materials, short assembly times, and engaging, bright colors to maintain their attention.
Why are summer crafts good for toddlers?
Summer crafts are excellent for toddlers because they actively develop fine motor skills, introduce basic color theory, and provide vital sensory stimulation during hot indoor days. Engaging in mom approved summer crafts like finger painting or organizing water beads helps toddlers practice hand-eye coordination safely. Furthermore, crafting acts as an excellent screen-free activity to calm impatient toddlers down before naptime.
How to do easy summer crafts?
To do easy summer crafts, you should break the project down into simple, pre-planned steps and gather all your crafting supplies before you begin. Avoid projects requiring complex power tools or advanced sewing. Instead, focus on assembly-based activities like filling glass vases with seashells or taping together foam buoys, which guarantee a beautiful finished product regardless of your prior artistic skill level.
Which summer crafts are best for adults?
The best summer crafts for adults are functional DIY home decor projects like constructing air-dry clay tulipieres, decoupaging outdoor planters, or painting waterproof patio pillows. These professional summer home decor DIYs elevate adult crafting from simple pastimes into rewarding, cost-saving interior design hacks. They require slightly more advanced techniques, like weatherproofing, but yield high-end, designer-looking results for a fraction of retail prices.
Can you make summer crafts with stuff at home?
Yes, you can easily make beautiful summer crafts using everyday household stuff like empty glass vases, leftover paper plates, natural seashells, and old patio throw pillows. By upcycling items destined for the trash or sitting unused in your cupboards, you save money while being environmentally conscious. Adding a simple coat of acrylic paint or some hot glue can transform basic household recycling into trendy summer decorations.
How to decorate outdoor space with summer crafts?
You can brilliantly decorate your outdoor space by crafting UV-resistant garden suncatchers, weatherproofing decoupaged terracotta planters, and painting custom outdoor canvas pillows. The key to outdoor DIY success is understanding weatherproofing for outdoor decor. Always use specialized outdoor Mod Podge, fabric mediums mixed with acrylics, and heavy-duty sealants to ensure your handmade summer accessories survive the harsh sun and summer rainstorms.
What to make with seashells in the summer?
The fastest and most elegant thing to make with seashells in the summer is to clean them and layer them inside tall glass cylinder vases alongside pillar candles. You can also use heavy-duty jewelry adhesive to attach small seashells to picture frames, bathroom mirrors, or the rims of terracotta planters. Always ensure you sanitize natural, beach-combed seashells in a mild bleach solution before bringing them indoors.
How to beat the heat with indoor crafts?
You can beat the heat by setting up cooling indoor crafts like refrigerated sensory water beads, no-bake clay sculpting, or indoor terrarium building on your kitchen table. When the summer temperatures become dangerous, shifting to mess-free summer art projects in an air-conditioned room keeps imaginations active without physical exhaustion. Preparation is key; have a rainy summer day craft ideas box pre-stocked for unexpected heatwaves.
When the days get long and the heat drives everyone indoors, having a reliable list of stuff to do in the summer crafts is the ultimate lifesaver. You do not need a massive budget or an entire room dedicated to art supplies to create beautiful, engaging projects. As we have explored throughout this complete guide to summer crafting, the absolute best boredom buster craft ideas often utilize items you already have lying around the house. By upcycling everything from plain paper plates and styrofoam cones to old patio pillows and empty glass vases, you can easily create DIY summer projects.
Whether you are a parent desperately seeking low mess summer crafts to keep a toddler quietly occupied, a teenager wanting to create aesthetic room decor with friends, or an adult looking to completely spruce up outdoor space on a tight dime, there is a seasonal DIY project perfectly suited to your specific skill level. The true secret to successful summer crafting is simply matching the right project to the right age group and taking a few moments to properly prepare your workspace beforehand.
Do not let the seasonal slump stall your family’s creativity this year. Grab your basic crafting supplies, choose your favorite tutorial from our list of tested DIY summer projects, and start creating today! We would absolutely love to see how your fun things to do turn out. Which of these highly engaging boredom busters are you going to try first? Let us know your thoughts in the comments below, and do not forget to share your amazing results!
Last update on 2026-04-27 / Affiliate links / Images from Amazon Product Advertising API