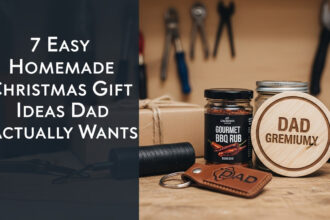
Tired of giving the same old gifts that get tucked away in a closet? This Christmas, imagine the joy on a loved one’s face when they unwrap a present that you poured your creativity and heart into—something truly unique, personal, and made by your own two hands. It’s a special kind of magic that store-bought items just can’t replicate.
Many of us feel the pressure to find that perfect, meaningful gift, but often end up overwhelmed by crowded stores and generic options. We want our presents to feel special, not like an afterthought. The desire for a budget-friendly yet thoughtful solution can be a real challenge during the busy holiday season, leaving us wishing for a simpler, more authentic way to show we care.
Crafting with clay is a fantastic way to create personalized homemade Christmas gifts that are both beautiful and budget-friendly. Popular and easy ideas include marbled clay ring dishes for her, festive holiday coasters for the home, and custom tree ornaments that become cherished keepsakes. The best part? Both air-dry and polymer clay are incredibly beginner-friendly, making these heartfelt projects accessible to everyone.
Tired of Giving the Same Old Gifts? Discover Unique Clay Ideas!
The search for meaningful, personalized Christmas gifts can be exhausting, but crafting with clay offers a versatile and accessible solution. As a passionate crafter who’s spent countless hours exploring different mediums, I’ve found that clay holds a special kind of magic for creating heartfelt, homemade gifts. It’s a forgiving medium that invites creativity, allowing you to make everything from elegant home decor to whimsical ornaments. This guide will walk you through nine easy and inspiring ideas, proving that you don’t need to be a professional artist to create something truly beautiful and memorable this holiday season. We’ll cover everything from the best type of clay to use to step-by-step instructions that guarantee a wonderful finished product.
First, Let’s Talk Clay: Air-Dry vs. Polymer
Choosing the right material is the first step to a successful clay project, and it really comes down to what you want to make. From my experience, the choice is quite simple once you know the key differences. For simple ornaments you might make with kids, air-dry is a dream because it requires no baking. For more durable, vibrant gifts like jewelry or coasters, polymer clay is the clear winner due to its strength and water resistance.
- Air-Dry Clay: This type of clay is incredibly user-friendly because it dries and hardens when exposed to air, completely eliminating the need for an oven. It’s often a mixture of paper fibers and glue, making it lightweight and perfect for projects like Christmas ornaments, simple sculptures, and wall hangings. While it’s easy to paint with acrylics once dry, it is not naturally waterproof and will require a sealant if it needs to withstand moisture.
- Polymer Clay: Made from a PVC base, polymer clay is a plastic-based clay that hardens permanently in a standard home oven. It comes in a vast array of brilliant colors that can be mixed and marbled. Once baked, it is durable, water-resistant, and can hold incredibly fine details, making it the ideal choice for creating professional-looking jewelry, detailed charms, durable coasters, and magnets.
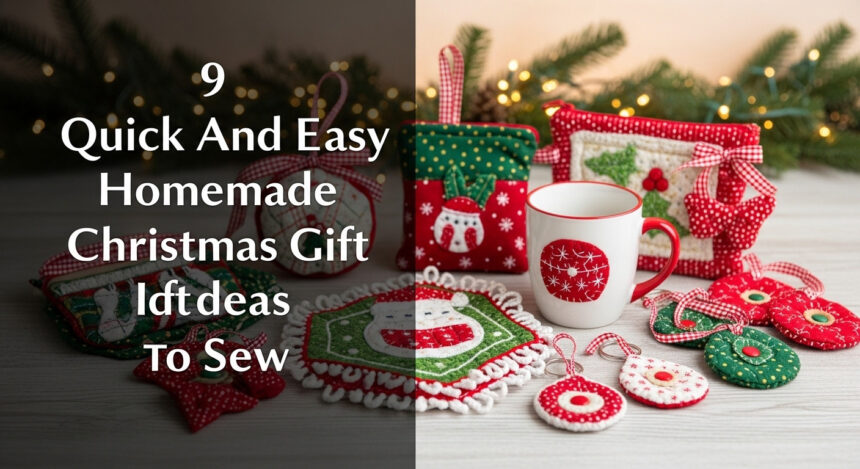
9 Easy Homemade Christmas Gift Ideas From Clay You Can Make This Weekend
Ready to get your hands dirty and create some unforgettable gifts? This list features nine distinct, beautiful, and achievable clay projects perfect for Christmas gifting. I’ve personally made and gifted several of these items, and they’re always a huge hit! They are designed to be fun, budget-friendly, and suitable for crafters of all skill levels. I’ll share clear instructions and some of my favorite pro-tips along the way to help you get that polished, professional look, ensuring your handmade presents are treasured for years to come.
1. Elegant Marbled Clay Ring Dishes
A marbled clay ring dish is a stunning and functional gift that looks far more complicated to make than it is. These elegant bowls are perfect for holding rings, earrings, or other small trinkets on a nightstand or dresser, adding a touch of handmade sophistication to any space.

Save this idea to your ‘DIY Christmas Gifts’ board!
- Materials Needed: White air-dry clay, a small amount of black or colored air-dry clay, a rolling pin, a small oven-safe bowl to use as a mold, a craft knife, fine-grit sandpaper, gold acrylic paint, and a clear gloss sealant or glaze.
- Step-by-Step Directions:
- Take a piece of white clay and add a few small pieces of the colored clay to it.
- Twist, fold, and roll the clay together, but don’t fully mix. Stop when you see a beautiful marbled pattern you love.
- Using a rolling pin, roll the clay out to about 1/4-inch thickness on a non-stick surface.
- Drape the rolled clay over the bottom of your small bowl mold and press gently to shape it. Use the craft knife to trim the excess clay for a clean, even edge.
- Let the clay dry while still in the bowl for 24-48 hours, or until it is completely hard and no longer cool to the touch.
- Once dry, gently remove the dish from the mold. Use fine-grit sandpaper to smooth any rough edges.
- With a fine-tipped brush, carefully paint a gold rim around the edge of the dish. Let it dry completely.
- Apply a coat of clear gloss sealant to protect the dish and give it a beautiful, finished shine.
Pro-Tip: For a more luxurious look, gently press tiny pieces of gold leaf into the clay before you roll it out. The effect is stunning!

2. Whimsical Cone & Cactus Ring Holders
These whimsical ring holders are a playful and practical gift, perfect for anyone who loves unique decor. Whether you opt for a minimalist cone or a cute cactus, this project allows for endless personalization and is surprisingly simple to sculpt with oven-bake clay.

Pin this cute gift idea for later!
- Materials Needed: Oven-bake polymer clay (green and/or white), a small clay tool set, parchment paper, and a baking sheet. Optional: white and gold acrylic paint. A good quality oven-bake clay like Sculpey Premo or Souffle works best for durability.
- Step-by-Step Directions:
- Condition the clay by kneading it in your hands until it’s soft and pliable.
- For the cone: Roll the clay into a ball, then gently roll one end to create a cone shape. Flatten the bottom so it stands securely on its own.
- For the cactus: Roll a thicker cylinder for the main body. Roll two smaller cylinders for the arms and bend them into a gentle ‘U’ shape.
- Gently but firmly press the arms onto the main body, smoothing the seams with your fingers or a clay tool for a clean join.
- Place your finished shapes on a parchment-lined baking sheet.
- Bake according to the clay package’s instructions (typically around 275°F for 15 minutes per 1/4-inch of thickness).
- Let the holders cool completely before handling.
- If desired, use a fine-tipped brush to paint a gold tip on the cone or tiny white “spines” on the cactus for a charming finishing touch.
Lesson Learned: Ensure the base of your holder is wide enough to be stable. A top-heavy cactus will tip over easily if the base isn’t solid and flat.

3. Personalized Stamped Christmas Ornaments
Creating personalized ornaments is a classic Christmas craft that results in a truly heartfelt and timeless gift. These simple, rustic ornaments can be stamped with names, dates, or festive words, turning them into cherished keepsakes that will hang on the tree for years to come.
Save this classic Christmas craft to your holiday board!
- Materials Needed: Air-dry clay, a rolling pin, Christmas-themed cookie cutters, letter and number stamps, a skewer or straw, and twine or ribbon. An all-in-one air dry clay ornament kit can make this project even easier.
- Step-by-Step Directions:
- On a non-stick surface, roll out the air-dry clay to an even thickness of about 1/4 inch.
- Use cookie cutters to cut out your desired shapes like stars, circles, or gingerbread men.
- Gently press letter stamps into the clay to add names, the year, or festive words like “Joy” or “Peace.” You can also use stamps with designs like snowflakes.
- Use a skewer or the end of a straw to poke a clean hole at the top of each ornament for hanging.
- Carefully transfer the ornaments to a flat surface lined with parchment paper. Let them air dry for 24-72 hours, flipping them over halfway through to ensure they dry evenly and prevent curling.
- Once completely dry and hard, thread a piece of rustic twine or festive ribbon through the hole for hanging.
Pro-Tip: If small cracks appear as the clay dries, you can easily fix them by rubbing a small amount of wet clay into the crack with your finger. Smooth it out with a damp cloth before it dries completely.

4. Modern & Festive Holiday Coasters
Handmade coasters are a thoughtful and highly practical gift that anyone can appreciate. Using polymer clay, you can create modern terrazzo or marbled designs that are not only beautiful but also durable and waterproof, perfect for protecting furniture in style.
Share this stylish DIY gift idea on Pinterest!
- Materials Needed: Polymer clay in various colors (e.g., white, red, green, gold), a rolling pin, a square cookie cutter or craft knife, parchment paper, a baking sheet, a strong waterproof sealant, and self-adhesive cork backing sheets.
- Step-by-Step Directions:
- Create tiny shavings or crumbles from your colored clay—these will be your terrazzo flecks. Set them aside.
- Condition a larger piece of white clay and roll it into a thick slab, about 1/4-inch thick.
- Sprinkle the colored shavings generously onto the white slab.
- Place a piece of parchment paper over the slab and use the rolling pin to gently press the colored pieces into the white clay, creating one smooth, integrated surface.
- Use a square cutter for a uniform look, or a craft knife for a more organic shape, to cut out your coasters.
- Bake on a parchment-lined sheet according to the clay’s specific instructions.
- Once completely cooled, apply 2-3 coats of a strong, waterproof sealant to the top and sides, allowing each coat to dry completely. This step is crucial for durability and protection against drink condensation.
- Finish by applying a self-adhesive cork backing to the bottom of each coaster to prevent slipping and protect furniture.
Pro-Tip: To get perfectly uniform coasters, use acrylic guide sticks or two stacks of playing cards of the same height on either side of your clay when rolling. This ensures the slab is the exact same thickness all the way across.

5. Quirky & Custom Clay Fridge Magnets
Custom fridge magnets are a small, fun, and endlessly customizable gift that can bring a smile every day. This is a fantastic project for using up leftover scraps of polymer clay, and you can tailor the designs to perfectly match the recipient’s personality or interests.
Add this fun DIY to your ‘Crafty Ideas’ board!
- Materials Needed: Various colors of polymer clay, a craft knife or small cookie cutters, parchment paper, a baking sheet, strong super glue (like E6000), and small craft magnets. It’s important to use strong neodymium magnets so they can confidently hold up paper.
- Step-by-Step Directions:
- Condition your clay and shape it into your desired designs—think initials, favorite foods, cute animals, plants, or abstract shapes. Keep them relatively small with a flat back for easy magnet attachment.
- Use clay tools or a simple toothpick to add small, charming details.
- Place your finished shapes on a parchment-lined baking sheet.
- Bake according to the package directions and let them cool completely.
- Once cooled, apply a small dab of strong super glue to the back of each clay piece.
- Press a magnet firmly into the glue and let it dry completely, usually for a full 24 hours, before testing it out on the fridge.
Lesson Learned: Don’t use hot glue to attach the magnets! The heat from a sunny spot on the fridge or the warmth from the appliance itself can soften the glue, causing the magnet to detach. A strong, permanent craft adhesive is a must for a lasting gift.

6. Natural Stamped Clay Leaf Decorations
This project allows you to capture the delicate beauty of nature in a lasting piece of art. By pressing real leaves into air-dry clay, you can create stunningly detailed impressions that make beautiful ornaments, wall decorations, or unique gift tags.
Save this beautiful nature craft idea!
- Materials Needed: Air-dry clay, a rolling pin, a variety of fresh leaves with prominent veins (ferns, maple, and oak leaves work wonderfully), a craft knife, a skewer, and optional metallic acrylic paint. You can also use rubber stamps designed with leaf patterns for a perfect impression every time.
- Step-by-Step Directions:
- Roll out your clay to about 1/8 to 1/4-inch thickness.
- Place a real leaf, with the vein-side facing down, onto the clay.
- Gently but firmly roll over the leaf with your rolling pin. This will press the beautiful vein pattern into the clay’s surface.
- Carefully peel the leaf off to reveal the detailed impression.
- Use a craft knife to carefully cut around the leaf shape.
- Use a skewer to poke a hole at the top if you want to use it as a hanging tag or ornament.
- Let it dry completely on a flat surface for 24-48 hours.
- Once dry, you can leave it in its natural, plain white state or lightly brush metallic paint over the surface to accentuate the stunning texture.
Pro-Tip: Use freshly picked leaves for the best results. Older, drier leaves tend to be brittle and won’t leave as deep or clean of an impression in the clay.

7. Simple & Chic Clay Candle Holders
A handmade candle holder is a sophisticated and stylish gift that adds a cozy, minimalist touch to any home decor. Using air-dry clay, you can sculpt modern, boho-inspired shapes like arches or simple dishes to hold taper or tea light candles.
Pin this chic home decor DIY for later!
- Materials Needed: Air-dry clay, a rolling pin, a craft knife, a small bowl of water, and fine-grit sandpaper. A beginner-friendly pottery kit often includes all the necessary shaping and smoothing tools.
- Step-by-Step Directions:
- Knead and condition your clay until smooth. Roll it into a thick slab, about 1/2-inch thick for good stability.
- For a taper holder, cut a long rectangle and form it into an arch, a wave, or another stable shape. Use the base of your taper candle to press a perfectly sized hole into the top.
- For a tea light holder, cut a circle for the base. Roll a long, thin strip of clay and wrap it around the base to create the walls. Use water to score and slip the pieces together (scratch both surfaces, apply water, and press) for a strong bond.
- Dip your finger in water and use it to smooth all seams and surfaces for a seamless finish.
- Let the holder dry for 48-72 hours. Thicker pieces of clay will take longer to harden completely.
- Once fully dry, use sandpaper to smooth any rough spots for a professional, polished look.
Pro-Tip: Air-dry clay shrinks slightly as it dries. When making the hole for a taper candle, press the candle in a little deeper and wider than you think you need to. This will ensure a snug and perfect fit after the clay has finished drying.

8. Minimalist Geometric Clay Wall Hanging
A geometric clay wall hanging is a trendy and artistic gift that looks like it came from a high-end boutique. This project is all about playing with shapes and composition, using terracotta and white clay to create a beautiful piece of modern art for any wall.
Save this trendy decor idea to your ‘DIY Home’ board!
- Materials Needed: Air-dry clay (in white and terracotta colors), a rolling pin, geometric cookie cutters or a craft knife, a skewer, fine-grit sandpaper, a small wooden dowel rod, and cotton cord or twine.
- Step-by-Step Directions:
- Roll out your white and terracotta clays to about 1/4-inch thickness.
- Cut out a variety of geometric shapes like circles, semi-circles, arches, and rectangles from both colors.
- Use a skewer to make holes in each shape for hanging. Some pieces might need a hole at the top and bottom so they can be linked together in a sequence.
- Let all the clay pieces dry completely on a flat surface for 24-48 hours.
- Once dry, gently smooth any rough edges with sandpaper for a clean finish.
- Cut your cotton cord into various lengths for assembling your design.
- Lay out your wooden dowel and arrange your clay pieces below it to plan your composition before you start tying.
- Thread the cord through the clay pieces and tie them securely onto the dowel. You can secure the knots with a tiny dab of glue on the back if needed.
- Tie a longer piece of cord to both ends of the dowel for hanging the entire piece.
Pro-Tip: Plan your entire layout on a table before you start tying anything to the dowel. This allows you to play with the balance, spacing, and composition to get it just right before committing with knots.

9. Unique Polymer Clay Charms & Jewelry
Creating jewelry with polymer clay is an incredibly rewarding project that allows for infinite creativity. From modern terrazzo earrings to delicate floral pendants and cute keychain charms, you can craft truly unique and professional-quality accessories that make for a wonderfully personal gift.
Share this post for polymer clay jewelry inspiration!
- Materials Needed: A polymer clay starter kit is the best way to begin, as it typically includes multiple clay colors, basic tools, cutters, and essential jewelry findings like earring hooks, posts, and jump rings. You will also need a set of small jewelry pliers for assembly.
- Step-by-Step Directions:
- First, design your jewelry pieces. Think about the shapes, colors, and patterns you’d like to create.
- Condition the polymer clay by kneading it until soft, then roll it out. Use small cutters or a craft knife to create your desired shapes.
- Before baking, use a needle tool or a toothpick to create any necessary holes for the jump rings. Make the holes slightly larger than the wire, as they may shrink a tiny bit during baking.
- Bake your clay pieces on a parchment-lined tray according to the package directions. Allow them to cool completely.
- Use your jewelry pliers to gently twist open a jump ring (never pull it apart). Loop it through the hole in your clay piece, add your earring hook or necklace chain, and then twist the jump ring closed securely.
Lesson Learned: Invest in a dedicated set of jewelry pliers. Trying to open and close jump rings with your fingers or regular household pliers will likely lead to frustration, scratched metal, and misshapen findings. The right tools make all the difference.

Key Takeaways: Your Quick Guide to home made christmas gift ideas clay
To make your crafting journey as smooth as possible, keep these key points in mind. This quick summary will help you choose the right materials and techniques to ensure your homemade gifts turn out beautifully.
- Choose the Right Clay: Use Air-Dry Clay for simple, no-bake projects like ornaments and decorations. Opt for Polymer Clay for durable, waterproof, and colorful items like jewelry, coasters, and magnets that need to withstand more handling.
- Start Simple: Projects like stamped ornaments, marbled ring dishes, and basic coasters are perfect for beginners and require minimal tools to achieve a stunning result.
- Personalization is Key: The best part of a handmade gift is the personal touch. Use letter stamps to add names, initials, or meaningful dates to make your gift a true one-of-a-kind treasure.
- Proper Finishing is a Must: For functional items like coasters that will be exposed to moisture, always use a waterproof sealant to protect your creation. For decorative pieces, a simple gloss or matte glaze can add a professional polish.
- Don’t Fear Mistakes: Clay is a very forgiving medium! Most imperfections can be smoothed out with a bit of water while the clay is still wet, or with some light sanding after it has fully dried.
People Also Ask About home made christmas gift ideas clay
Have more questions? You’re not alone! Here are answers to some of the most common queries people have when starting out with clay crafts for Christmas.
How do you make Christmas things with clay?
Making Christmas items with clay is easy and incredibly fun. For ornaments, simply roll out air-dry clay, use Christmas-themed cookie cutters to create festive shapes, poke a hole at the top for hanging with a skewer, and let it dry completely. You can press stamps into the soft clay before it dries to add names, dates, or beautiful designs.
What kind of gifts can you make with clay?
Clay is incredibly versatile for gift-making of all kinds. You can create functional items like jewelry dishes, unique ring holders, custom coasters, and playful magnets. Decorative gifts are also very popular, including personalized ornaments, modern wall hangings, and small, artistic sculptures. Polymer clay is especially excellent for making detailed jewelry like earrings and charms.
Is air-dry clay permanent?
Once fully hardened, air-dry clay is permanent and surprisingly durable for decorative items. However, it is naturally porous and not waterproof, which means it can be damaged if it gets wet. To make an air-dry clay project water-resistant for items like coasters or dishes, it is essential to seal it with a waterproof varnish or sealant.
How do you make a simple handmade Christmas gift?
A simple and classic handmade Christmas gift is a set of personalized air-dry clay ornaments. All you need is a block of clay, your favorite cookie cutters, and a set of letter stamps. It’s a low-cost, high-impact gift that requires no special skills or equipment like an oven, making it the perfect festive project for crafters of all ages.
Final Thoughts
Stepping away from the chaos of holiday shopping to create something with your own hands is a gift in itself. It’s a chance to slow down, get creative, and pour a little bit of yourself into the presents you give. The beauty of these clay projects is that they are more than just objects; they are stories, memories, and tangible pieces of your affection that will be cherished far longer than any mass-produced item.
Whether you make a single, special ornament or a whole batch of marbled dishes, the joy is in the making as much as the giving. So, embrace the imperfections, have fun with the process, and get ready to create gifts that truly come from the heart.
Which of these clay gift ideas are you most excited to try this Christmas? Let me know in the comments below
Last update on 2026-04-27 / Affiliate links / Images from Amazon Product Advertising API