Tired of giving the same old gift cards or store-bought items for Christmas? You want to give something from the heart, a present that feels personal, thoughtful, and unique.
The problem is, many handmade gift ideas are either too complicated, require expensive supplies, or end up being things people don’t actually use. You spend hours crafting something, only for it to be tucked away in a closet. You need a project that’s not only easy and affordable but results in a beautiful, practical gift that your friends and family will love and use every day.
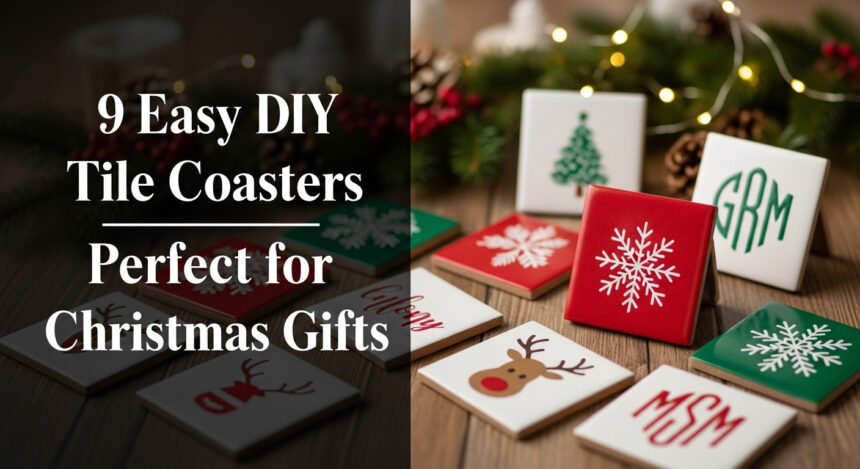
DIY tile coasters are a perfect handmade Christmas gift because they are budget-friendly, highly customizable, and easy for beginners to make. The final product is a durable, practical item that protects furniture and adds a personal touch to any home decor, ensuring your thoughtful gift gets used and appreciated long after the holidays.
Looking for a Handmade Christmas Gift That’s Actually Useful?
In a world of mass-produced everything, a handmade gift stands out. It carries a piece of you—your time, your creativity, and your care. For years, creating homemade gifts has been a cherished holiday tradition in my own family, and I’ve found that the best ones are a blend of personal touch and practical utility. That’s where DIY tile coasters come in. They solve the common problem of finding a craft that is simple enough for anyone to master but results in a professional-quality, genuinely useful item. I’ve tested and perfected these techniques to ensure you get the best, most durable results every time.
Why DIY Tile Coasters Make the Perfect Holiday Gift
DIY coasters are excellent gifts because they are inexpensive to make, can be personalized for any recipient, and serve a practical purpose in the home. They are a thoughtful, handmade present suitable for friends, family, teachers, and coworkers.
- Incredibly Personal: You can tailor them to literally anyone. Use family photos for grandparents, favorite comic book pages for a friend, or elegant paper that matches your coworker’s home decor. The possibilities are endless.
- Budget-Friendly: You can create a stunning, custom set of four coasters for a fraction of the cost of a single store-bought one. It’s a high-impact gift on a low budget.
- Beginner-Friendly: You don’t need to be a seasoned crafter. The basic process is incredibly simple, making this a relaxing and fun project for all skill levels.
- Practical & Useful: This is the best part. Unlike some handmade gifts, everyone needs coasters! Your gift will actively protect furniture from drink rings, making it a present that is both beautiful and functional. I’ve found these are always a huge hit, especially with teachers and family members.
9 Easy DIY Tile Coaster Ideas Perfect for Christmas Gifts 2026
Ready to create a gift that will truly wow them? Here are nine distinct, easy-to-follow tutorials for creating beautiful and durable tile coasters. Each idea includes a full materials list, step-by-step directions, and a special pro-tip from my own experience to guarantee a perfect, professional-looking finish—even if you’ve never crafted a thing in your life.
1. The Classic: Scrapbook Paper Decoupage Coasters

This classic decoupage method is the most popular way to make tile coasters using simple scrapbook paper and Mod Podge.
Pin this classic gift idea to your “DIY Christmas” board!
Materials Needed:
* 4×4 inch smooth ceramic tiles
* Festive scrapbook paper
* Mod Podge (matte finish recommended for this look)
* Foam brush
* Scissors or a paper trimmer
* Clear acrylic sealer spray
* Felt pads or cork backing
Step-by-Step Directions:
1. Clean the tiles thoroughly with rubbing alcohol and a paper towel to remove any dust or oils. Let them dry completely.
2. Cut your scrapbook paper into squares slightly smaller than the tiles. I find 3.75 x 3.75 inches is the perfect size.
3. Apply a thin, even coat of Mod Podge to the top surface of a tile using your foam brush.
4. Carefully place the paper square onto the wet Mod Podge. Start from the center and smooth outwards with your fingers to remove any air bubbles.
5. Let the tile dry for at least 20-30 minutes.
6. Apply 2-3 top coats of Mod Podge directly over the paper, allowing each coat to dry completely before applying the next. This seals the paper.
7. Once the final coat is fully cured (I recommend waiting at least 24 hours), take the coasters to a well-ventilated area and spray them with 2-3 light coats of a clear acrylic sealer. This is the crucial step for waterproofing.
8. Attach felt pads to the bottom four corners to protect furniture.
Pro-Tip: To avoid bubbles, use an old credit card or a craft brayer tool to smooth the paper down firmly. If a stubborn bubble appears, use a small pin to gently prick it and then smooth it out before the Mod Podge dries.

2. The Personal Touch: DIY Photo Coasters

To create a deeply sentimental gift, transfer your own photos onto tiles for a truly custom present.
A perfect gift for grandparents! Save this idea now.
Materials Needed:
* 4×4 ceramic tiles
* Photos printed on regular paper with a laser printer
* Mod Podge
* Foam brush
* Clear epoxy resin kit
* Felt pads
Step-by-Step Directions:
1. Edit and size your photos to fit the tiles. Print them on standard copy paper using a laser printer. This is critical!
2. Follow the same initial steps as the classic decoupage method: clean the tile, apply a layer of Mod Podge, carefully place the photo, and smooth out all bubbles. Let it dry completely.
3. Apply at least three top coats of Mod Podge to seal the photo, allowing ample drying time (at least an hour) between each coat.
4. For a professional, ultra-durable, and completely waterproof finish, mix and pour a thin layer of a clear epoxy resin kit over the top. Follow the package directions carefully. Use a small kitchen torch or a heat gun to gently pop any bubbles that rise to the surface.
5. Let the resin cure undisturbed for 48-72 hours in a dust-free area.
6. Once fully hardened, attach felt pads to the bottom.
Lesson Learned: Inkjet-printed photos will bleed and smear the moment you apply wet Mod Podge. I learned this the hard way. If you only have an inkjet printer, take your photo files to a local copy shop and have them printed on their laser printer. It’s a small extra cost that saves the entire project!

3. The Artistic Flair: Sharpie & Alcohol Ink Coasters

This technique uses oil-based Sharpies and rubbing alcohol to create a stunning, abstract watercolor effect that looks incredibly high-end.
Unleash your inner artist! Pin this for later.
Materials Needed:
* 4×4 ceramic tiles
* Oil-based Sharpie paint markers in various colors
* 91% isopropyl alcohol
* A small dropper or straw
* High-heat clear enamel spray sealant
* Cork or felt backing
Step-by-Step Directions:
1. Wipe the tiles clean with alcohol to ensure a perfect surface for the ink.
2. Scribble, dot, or draw your design directly onto the tile using the oil-based Sharpies. Abstract splotches of color work beautifully for this.
3. Using a dropper or straw, apply small drops of the 91% rubbing alcohol onto the Sharpie ink.
4. Watch the magic happen! Tilt the tile to let the colors run, blend, and create a gorgeous watercolor pattern. Add more ink or alcohol as you see fit.
5. Let the tiles dry completely for several hours until all the alcohol has evaporated. The design will be set.
6. To make the coasters heat and waterproof, they need to be sealed properly. In a well-ventilated space, apply several light coats of a high-heat clear enamel spray (the kind used for car engines works great).
7. Add a cork or felt backing once the sealant is fully cured.
Pro-Tip: Do not use regular Sharpies for this project. They are water-based and will wipe right off. You absolutely must use oil-based paint markers for the design to adhere to the smooth tile surface before you seal it.

4. The Cozy Vibe: Fabric-Covered Coasters

A great way to use up fabric scraps is to decoupage them onto tiles for a soft, textured coaster with a cozy, rustic feel.
The perfect way to use up fabric scraps! Save this cozy idea.
Materials Needed:
* 4×4 ceramic tiles
* Cotton fabric scraps (like flannel or quilting cotton)
* Fabric Mod Podge
* A rotary cutter or sharp scissors
* Foam brush
* Clear acrylic sealer spray
* Full cork backing squares
Step-by-Step Directions:
1. Start by washing and ironing your fabric scraps to get them perfectly clean and wrinkle-free.
2. Cut the fabric into 4×4 inch squares.
3. Apply a medium coat of Fabric Mod Podge to a clean tile.
4. Firmly press the fabric square onto the tile, smoothing out any wrinkles or bubbles as you go.
5. Let it dry for one hour. Then, apply two more coats of the Fabric Mod Podge directly over the top of the fabric, allowing it to dry between coats. This step stiffens and seals the fabric fibers.
6. Once fully cured, spray with a clear acrylic sealer for extra water resistance.
7. Attach a full cork backing for a clean, professional finish.
Pro-Tip: Thinner cotton fabrics work much better than thick or bulky ones like canvas or denim. They adhere more smoothly to the tile surface and create cleaner edges.

5. For the Kids: Fingerprint & Handprint Art Coasters

Turn your child’s artwork into a cherished keepsake by making coasters with their fingerprints to create adorable Christmas characters.
The sweetest keepsake gift! Pin this idea for your next craft day.
Materials Needed:
* 4×4 ceramic tiles
* Non-toxic, washable acrylic paint
* Fine-tipped permanent markers (black, red, etc.)
* Mod Podge or a clear spray sealer
* Felt backing
Step-by-Step Directions:
1. Clean the tiles and let your little one get ready for fun.
2. Help your child press their thumb or finger into the paint and then press it firmly onto the center of the tile.
3. Get creative with the prints! A brown thumbprint can become a reindeer, a few white fingerprints can be a snowman, and a series of green ones can form a Christmas tree.
4. Once the paint is completely dry, use fine-tipped markers to add the details: antlers and a red nose for the reindeer, a top hat and scarf for the snowman, or a star for the tree.
5. Don’t forget to write the child’s name and the year on the edge or back of the tile for a lasting memory.
6. Seal the finished artwork with a few coats of Mod Podge or a kid-safe, non-toxic clear sealer to protect it.
7. Finish by adding a felt backing.
Lesson Learned: Keep plenty of wet wipes on hand for quick and easy clean-ups between colors! To avoid smudging, it’s best to complete one tile at a time and set it aside to dry before starting the next.

6. The Modern Look: Custom Vinyl Lettering Coasters

For a clean, professional look, use a vinyl cutting machine like a Cricut to create coasters with custom monograms, names, or modern designs.
Love your Cricut? This is the project for you! Save this idea.
Materials Needed:
* 4×4 ceramic tiles
* Permanent adhesive vinyl
* A Cricut or other cutting machine
* Weeding tools and transfer tape
* Mod Podge or other sealer
* Felt backing
Step-by-Step Directions:
1. Design your monogram, word, or image in your cutting machine’s software. I recommend sizing it to around 3.5 x 3.5 inches to fit nicely on the tile.
2. Cut the design onto high-quality permanent adhesive vinyl.
3. “Weed” the design by removing all the excess vinyl that isn’t part of your final image.
4. Apply transfer tape over the vinyl design and press down firmly. This lifts the design from its paper backing.
5. Carefully position the design onto a clean tile. Use a scraper tool to burnish it, ensuring it adheres strongly without any bubbles.
6. Slowly peel the transfer tape away, leaving the vinyl design on the tile.
7. To protect the vinyl from moisture and peeling, apply 2-3 coats of Mod Podge over the entire top surface of the tile. Let it dry completely between coats.
8. Attach felt pads to the bottom.
Pro-Tip: Ensure you are using permanent, not removable, vinyl. Removable vinyl is great for wall decals but will peel off a coaster as soon as it gets wet from drink condensation.

7. The Effortless Elegance: Napkin Decoupage (Iron-On Method)

The secret to a perfectly smooth, wrinkle-free finish with thin paper napkins is the iron-on decoupage method, which uses heat to activate the glue.
The secret to no wrinkles! Pin this game-changing hack.
Materials Needed:
* 4×4 ceramic tiles
* Decorative paper napkins
* Mod Podge
* Foam brush
* A standard clothes iron
* Parchment paper
* Clear polyurethane varnish
Step-by-Step Directions:
1. Most decorative napkins are 2 or 3-ply. Carefully separate the layers until you have only the top, printed layer. This is the most crucial step.
2. Apply a thin, even coat of Mod Podge to a clean tile and let it dry completely. It must be 100% dry to the touch.
3. Place the separated napkin layer on top of the dry Mod Podge, positioning the design as desired.
4. Lay a piece of parchment paper over the napkin and tile to protect them.
5. Using a clothes iron on a medium-high setting (with NO steam), press down firmly on the parchment paper. The heat will reactivate the dry Mod Podge underneath, bonding the napkin smoothly to the tile without a single wrinkle.
6. Once the tile has cooled, apply 2-3 top coats of Mod Podge or a high-gloss polyurethane varnish to seal the coaster and make it durable.
7. Add a cork or felt backing.
Pro-Tip: This method is an absolute game-changer for avoiding the wrinkles and tears that often happen with the traditional wet application of thin napkins. The key is patience: you must ensure that first layer of Mod Podge is completely dry before you bring out the iron.

8. The Glamorous Gift: Resin Pour Coasters

For a truly luxurious gift, use epoxy resin to create a thick, glossy, geode-like finish that looks incredibly expensive.
Create a high-end gift for less! Pin this luxe idea.
Materials Needed:
* 4×4 ceramic tiles
* A two-part epoxy resin kit
* Mica powders or acrylic paint for color
* Optional: gold leaf flakes
* Mixing cups and stir sticks
* A heat gun or small kitchen torch
* Painter’s tape and small cups (to prop up tiles)
Step-by-Step Directions:
1. Cover the back of your tiles with painter’s tape to catch any drips. Prop them up on small cups on a protected, level surface.
2. In a well-ventilated area, carefully mix the resin and hardener according to the package directions. Stir slowly but thoroughly.
3. Divide the mixed resin into smaller cups and stir in your chosen mica powders or a single drop of acrylic paint for color.
4. Begin pouring the colored resin onto the tiles. You can pour it in stripes, puddles, or layers to create your desired abstract design.
5. Sprinkle on gold leaf flakes if you’re using them.
6. Gently tilt the tile to help the resin spread to the edges, or guide it with a stir stick.
7. Use a heat gun or torch to gently warm the surface. This will pop any air bubbles that rise to the top, giving you a crystal-clear finish.
8. Let the coasters cure for 48-72 hours in a clean, dust-free environment before handling.
9. Once fully hardened, peel off the tape from the back and add a cork backing.
Lesson Learned: Work in a warm room. Cold temperatures can prevent resin from curing properly, leaving it sticky and soft. The single most critical step is ensuring your work surface is perfectly level; otherwise, all the resin will pool to one side.

9. The Minimalist: Painted Geometric Pattern Coasters

For a chic and modern gift, use painter’s tape and paint pens to create clean, sharp geometric designs.
A chic and easy gift idea! Pin it for inspiration.
Materials Needed:
* 4×4 ceramic tiles
* High-quality painter’s tape
* Fine-tip acrylic paint pens (e.g., black, gold, white)
* Clear acrylic sealer spray
Step-by-Step Directions:
1. Clean the tiles with rubbing alcohol and let them dry completely.
2. Use painter’s tape to mask off sections of the tile, creating sharp lines for your geometric pattern. Think triangles, color blocks, and stripes.
3. Press down the edges of the tape firmly to prevent any paint from bleeding underneath.
4. Use your acrylic paint pens to color in the un-taped sections. Let the first coat dry, then apply a second coat for full, opaque coverage.
5. For the crispest lines, carefully remove the painter’s tape while the paint is still slightly wet.
6. Let the paint cure completely according to the pen’s instructions, which is typically 24 hours.
7. Seal the finished design with 2-3 light coats of clear acrylic sealer spray to protect it from moisture.
8. Attach a felt or cork backing.
Pro-Tip: For perfectly straight lines and corners, use a ruler and a pencil to lightly sketch your design on the tile before you start taping. The pencil marks will be completely covered by the paint.

Key Takeaways: Your Quick Guide to Perfect DIY Tile Coasters
Feeling inspired? Before you start crafting, keep these essential tips in mind to guarantee your coasters turn out beautifully.
- Start Clean: No matter which method you choose, always clean your tiles with rubbing alcohol first. A clean surface is key to good adhesion.
- Seal, Seal, Seal: Mod Podge is a great adhesive and sealer, but it is not fully waterproof or heatproof on its own. Always finish your project with a proper final sealer like clear acrylic spray, high-heat enamel, or epoxy resin for maximum durability.
- Protect Your Furniture: This is a non-negotiable step! Don’t forget to add felt or cork pads to the bottom of your finished coasters to prevent them from scratching tables.
- Choose the Right Method for Your Medium: Use laser-printed photos to avoid ink smears with Mod Podge. Use oil-based paint pens for longevity on smooth ceramic. The right materials make all the difference.
- Give It Time: The number one cause of imperfections is rushing the process. Allow adequate drying and curing time between each step, especially between layers of Mod Podge and before applying the final sealant.
https://www.tiktok.com/@creativecuriosityy/video/7439796830931799342
People Also Ask About home made christmas gift ideas diy tile coasters
How do you properly seal DIY ceramic tile coasters?
To properly seal ceramic tile coasters, you must use a waterproof and heat-resistant topcoat. While Mod Podge provides some water resistance, a final sealer is essential. The best options are a clear acrylic spray sealer, a brush-on polyurethane varnish, or a two-part epoxy resin for a thick, ultra-durable, glassy finish. Apply multiple thin coats for the best protection.
Are DIY coasters a good gift?
Yes, DIY coasters are an excellent gift. They are inexpensive to make but look thoughtful and high-quality when done well. You can personalize them with photos, monograms, or designs that match the recipient’s home decor, making them a unique and practical present for Christmas, housewarmings, or birthdays for friends, family, and teachers.
What can I use besides Mod Podge for coasters?
While Mod Podge is popular, you can also use other mediums. For adhering paper or photos, any good quality PVA glue or a specific decoupage medium will work. For sealing, your best options are clear acrylic spray, polyurethane varnish, or epoxy resin. For designs applied directly onto the tile, you can use alcohol inks, acrylic paints, or oil-based paint markers without any decoupage medium at all.
How do you make DIY coasters waterproof?
The key to making DIY coasters waterproof is the final sealing step. After applying your design (paper, photo, paint), you must apply several coats of a waterproof sealer. A clear acrylic spray is a good option, but for maximum protection against both water condensation and heat from hot mugs, a high-gloss polyurethane varnish or an epoxy resin coating is highly recommended.
Final Thoughts
Creating your own DIY tile coasters is more than just a craft project; it’s a fun, relaxing way to pour a little bit of love into a gift that is both beautiful and practical. This Christmas, instead of browsing crowded stores, consider spending a quiet afternoon making something truly special. A handmade gift tells a story and shows a level of care that money simply can’t buy.
Which coaster idea are you most excited to try for your Christmas gifts this year? Let me know in the comments below
Last update on 2026-04-27 / Affiliate links / Images from Amazon Product Advertising API