Tired of giving the same old generic Christmas gifts that get forgotten by New Year’s? Imagine the look on a loved one’s face when they unwrap a beautiful, handcrafted gift made of wood—something you poured your time, creativity, and heart into. It feels different, more substantial, and infinitely more personal than anything you can grab off a shelf.
The holiday rush often pushes us toward convenient, mass-produced items that lack warmth and personality. We want to give something meaningful, but we worry about the cost, the time, or whether we have the skills to create something truly special. It’s easy to feel stuck between wanting to give a thoughtful present and the reality of a busy schedule and a tight budget.
Crafting homemade wooden Christmas gifts offers a unique, personal touch that store-bought items simply cannot replicate. It is a wonderfully cost-effective way to create cherished, customized presents for friends and family, with accessible projects ranging from simple beginner crafts that take less than an hour to more detailed designs that will become family heirlooms. As a lifelong crafter, I’ve learned that the most cherished gifts are the ones made with love and a little bit of sawdust. This guide is a collection of my favorite, fail-proof projects, updated for 2026.
Why Choose a DIY Wooden Gift This Christmas?
Choosing to make a gift is a decision to give something truly meaningful and one-of-a-kind. Unlike store-bought items, a handmade wooden gift carries a story—the story of its creation and the care you put into it.
Handmade wooden gifts are special because they are:
* Highly Personal: You can tailor every aspect, from the type of wood to the finish, to perfectly match the recipient’s taste and style.
* Cost-Effective: Many incredible gifts can be made from affordable lumber or even scrap wood you might already have, making it a budget-friendly option.
* Truly Unique: No two pieces of wood are exactly alike, and your personal touch ensures that your gift will be a true one-of-a-kind treasure.
* Meaningful: The effort and time you invest are a tangible representation of your affection, showing a level of care that money can’t buy.
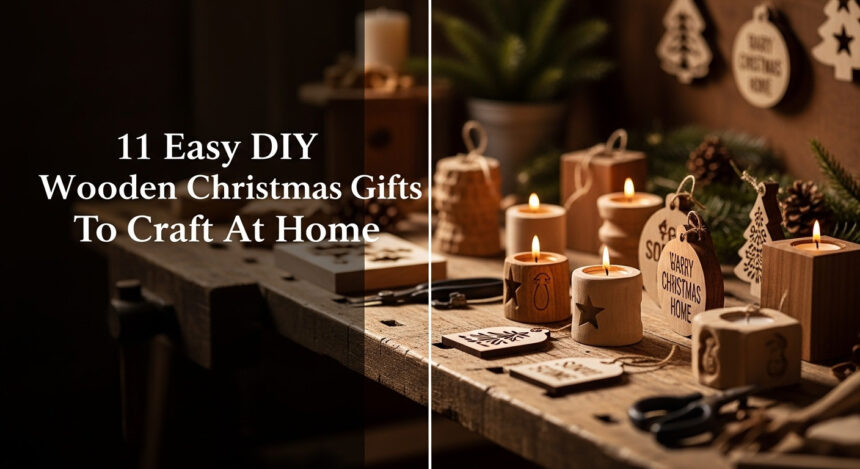
11 Easy DIY Wooden Christmas Gifts To Craft At Home This Weekend
Ready to start creating? Here is a curated list of beautiful and achievable wooden gifts perfect for the holiday season. I’ve selected these projects for their high success rate and popularity within DIY communities, ensuring you can achieve fantastic results, regardless of your skill level. Most require minimal tools and can be completed in a single weekend, making them the perfect solution for thoughtful, last-minute presents.
1. Rustic Wood Bead Snowman Ornaments

These charming wood bead snowmen are an incredibly simple, kid-friendly craft that can be made in large batches. They are perfect for gifting to teachers, coworkers, or for using as adorable gift toppers.
- Materials Needed: Natural wood beads in three graduating sizes, black and orange fine-tip paint pens, small scraps of fabric or felt for scarves, twine or ribbon for hanging, hot glue gun. For best results, look for a craft wood beads kit that includes assorted sizes.
- Step-by-Step Directions:
- Thread three beads (large, medium, small) onto a piece of twine, leaving extra at the top for a hanging loop.
- Tie a knot at the bottom bead to secure them. Tie another knot at the top, forming a loop.
- Use the black paint pen to draw eyes and buttons on the snowman’s body.
- Use the orange paint pen to draw a small carrot nose.
- Cut a thin strip of fabric or felt and tie it between the top two beads to create a scarf. Secure with a dot of hot glue if needed.
Pro-Tip: Before drawing faces, use a bit of fine-grit sandpaper to lightly scuff the bead surface. This helps the paint pen ink adhere better and prevents smudging.

2. Rustic Log Tealight Candle Holders

This project turns a simple wood log into an elegant and sophisticated piece of home decor. A set of these candle holders makes a stunning gift that brings a touch of rustic warmth to any space.
- Materials Needed: A thick branch or small log (3-4 inches in diameter), a saw (miter or hand saw), a drill or drill press, tealight candles. A 1.5-inch Forstner drill bit is essential for creating a clean, flat-bottomed hole for the candles.
- Step-by-Step Directions:
- Cut the log into several pieces of varying heights (e.g., 3″, 5″, 7″) to create a staggered set. Ensure the bottom of each piece is perfectly flat so it stands securely.
- Mark the center on the top of each log piece.
- Carefully use the Forstner bit to drill a recess about half an inch deep into the top of each log. This will hold the tealight candle.
- Lightly sand the top edges to remove any splinters.
- Leave the bark on for a rustic look or apply a coat of Tung oil for a more finished appearance. Place a tealight in each holder.
Lesson Learned: Use a drill press if you have one for a perfectly straight hole. If using a hand drill, clamp the log securely in a vise to prevent it from spinning.

3. Minimalist Baltic Birch Plywood Rings

This is a surprisingly easy way to craft a unique and stylish piece of modern jewelry. The beautiful layered edge of Baltic birch plywood creates a stunning visual effect that looks far more complex to make than it actually is.
- Materials Needed: A small scrap of 1/2″ or 3/4″ Baltic birch plywood, a drill, a set of spade or Forstner bits, a hole saw or scroll saw, sandpaper (120, 220, 400 grit), Tung oil or a beeswax polish. You’ll need a good quality drill bit set to match finger sizes.
- Step-by-Step Directions:
- Select a drill bit that matches the recipient’s ring size for the inner hole.
- Drill the center hole through the plywood scrap first. This helps prevent tear-out.
- Use a hole saw or trace a circle (about 1/4″ larger than the inner hole all around) and cut out the ring’s exterior shape with a scroll saw or coping saw.
- Begin sanding. Round over all the sharp edges and smooth all surfaces, working your way up from 120-grit to 400-grit sandpaper for a silky finish.
- Apply a small amount of Tung oil with a clean cloth to make the wood grain pop and protect the ring. Let it cure completely.
Pro-Tip: To prevent the plywood from splitting when drilling, place a sacrificial piece of scrap wood underneath it and apply steady, even pressure.

4. Custom Hardwood Wooden Coasters

A set of handmade hardwood coasters is a classic, practical, and always-appreciated gift. This is a perfect project for using up small, beautiful scraps of woods like oak, walnut, or maple.
- Materials Needed: Scraps of hardwood (1×4 boards are perfect), saw, ruler, sander, and a waterproof finish. For a durable, water-resistant seal, a high-quality wipe-on polyurethane is an excellent choice.
- Step-by-Step Directions:
- Cut your wood scraps into perfect squares, typically 4 inches by 4 inches. Make a set of 4 or 6.
- Thoroughly sand all faces and edges of each coaster, moving up to a 220-grit paper for a smooth finish.
- Slightly round over the edges and corners with the sander for a more professional look.
- Wipe away all dust with a tack cloth or damp rag.
- Apply 2-3 coats of wipe-on polyurethane, allowing each coat to dry completely and lightly sanding with 400-grit paper between coats. This builds up a protective layer against moisture.
Pro-Tip: For a fun design, glue together thin strips of contrasting woods (like maple and walnut) before cutting the squares to create a striped pattern.

5. Modern Plywood Pencil Holder Block
This modern desk accessory is made by stacking and gluing layers of plywood to create a solid, functional block. It’s a fantastic way to turn cheap materials into a high-end, minimalist desk organizer.
- Materials Needed: Scraps of 3/4″ Baltic birch plywood, wood glue, clamps, drill or drill press, various sizes of drill bits. A high-quality wood glue is critical to ensure the layers don’t separate.
- Step-by-Step Directions:
- Cut 4-5 identical square or rectangular pieces of plywood (e.g., 4×4 inches).
- Spread a thin, even layer of wood glue on the face of one piece and place another on top, ensuring the edges are perfectly aligned. Repeat for all layers.
- Clamp the stack together tightly and wipe away any excess glue that squeezes out. Let it dry for several hours or overnight.
- Once dry, sand the block smooth on all sides, paying attention to the layered edges.
- Use a drill press to drill holes of various sizes and depths into the top of the block for pencils, pens, and other desk items.
Pro-Tip: Arrange your drill bit pattern on paper first to ensure a pleasing and functional layout before you start drilling into your finished block.

6. Personalized Scrap Wood Business Card Holder
A small, professional-looking business card holder is an ideal gift for a coworker, boss, or entrepreneurial friend. Using contrasting scrap woods creates a beautiful and impressive result with very little material.
- Materials Needed: Various scraps of interesting wood, wood glue, clamps, a table saw or miter saw. A table saw is ideal for making the precise angled groove.
- Step-by-Step Directions:
- Arrange your wood scraps into a pleasing pattern and glue them together to form a solid block. Clamp firmly and let dry completely.
- Once dry, use a planer or sander to make the block smooth and flat on all sides.
- Cut the block to its final size, typically around 4 inches long and 2 inches tall.
- Tilt the blade on your table saw to about 15 degrees.
- Set the blade height to about 1/4 inch and run the block through the saw to create a shallow, angled groove for the cards to sit in.
- Sand the entire piece to a very fine grit and apply an oil finish to enhance the different wood colors.
Lesson Learned: Make several of these at once from a single glued-up block. It’s much safer and more efficient to cut the groove in a longer piece of wood and then cut the individual holders from it.

7. Charming 2×4 Wood Block Gnomes
These adorable wood block gnomes are a whimsical and festive craft made from cheap and readily available 2×4 scraps. They are incredibly popular and make for cute decorations or charming gifts.
- Materials Needed: A scrap piece of a 2×4, a saw, acrylic paint, craft faux fur, felt, a small wooden bead or pom-pom for the nose, and a hot glue gun. A high-temp hot glue gun will provide the strongest bond for the fur and felt.
- Step-by-Step Directions:
- Cut the 2×4 into blocks. For the gnome’s hat, make a 45-degree angle cut at the top of the block. Sand any rough edges.
- Paint the body of the gnome in a festive color, leaving the angled “hat” section natural or painting it a different color.
- Cut a triangle shape from the faux fur for the beard and hot glue it onto the front of the block, just below the hat line.
- Glue the small wooden bead onto the top edge of the beard to serve as the nose.
- Optionally, create a cone-shaped hat from felt and glue it over the top angled section of the wood block.
Pro-Tip: When cutting faux fur, use a craft knife to cut only the backing fabric. This avoids trimming the long fur fibers and gives you a much fluffier, more natural-looking beard.

8. Minimalist DIY Blanket Ladder
A DIY blanket ladder is a surprisingly simple project that results in a large, impressive, and functional piece of furniture. It’s a stylish way to store throws and blankets and makes a fantastic gift for anyone who loves a cozy home.
- Materials Needed: Two 6-foot long 2×3 boards, four or five 1-inch wooden dowels (cut to 18 inches each), a drill with a 1-inch spade bit, wood glue, and your choice of wood stain or paint. A pocket hole jig can be very useful for a stronger assembly but is not required.
- Step-by-Step Directions:
- Lay the two 2×3 boards parallel on the floor. Measure and mark the locations for your dowel “rungs,” spacing them about 12 inches apart. Start the first rung about 6 inches from the top.
- Use the 1-inch spade bit to drill holes about 3/4 of the way through the 2x3s at each mark. Do not drill all the way through.
- Apply a small amount of wood glue inside each hole.
- Insert the ends of the dowels into the holes on one of the 2x3s. Then, carefully align and insert the other ends into the second 2×3.
- Use clamps or gentle taps with a rubber mallet to bring everything together tightly. Let the glue dry.
- Once dry, stain or paint the ladder to your desired finish.
Pro-Tip: To lean the ladder against the wall at the correct angle, cut the bottom of the 2×3 legs at a slight angle (around 10-15 degrees) so they sit flat on the floor.

9. Classic End-Grain Cutting Board
For a more ambitious project, an end-grain cutting board is a stunning and high-quality kitchen tool that will last for years. The checkerboard pattern is not only beautiful but also easier on knives than a standard cutting board.
- Materials Needed: Scraps of closed-grain hardwood (like maple or walnut), wood glue, lots of clamps, a table saw, a sander. It is absolutely essential to use a waterproof, food-safe wood glue for this project.
- Step-by-Step Directions:
- Mill your boards so they have flat faces and square edges.
- Arrange boards into a striped pattern and glue them together along the edges. Clamp tightly and let dry.
- Once dry, scrape off excess glue and sand the panel flat.
- Cut this panel into cross-cut strips of equal width (e.g., 2 inches).
- Flip each strip 90 degrees so the end grain is facing up. Arrange them in a checkerboard pattern.
- Glue this final arrangement together, clamp securely, and let it cure completely.
- Sand the finished board perfectly smooth, up to 400-grit.
- Liberally apply a food-safe mineral oil or board butter finish, letting it soak in overnight.
Lesson Learned: End-grain boards require a lot of glue and clamping pressure. Use parallel clamps if possible for the most even pressure to avoid gaps in your final board.

10. Mid-Century Modern Plant Stand
This trendy and functional plant stand fits perfectly with the popular mid-century modern design style. It’s a very simple build, relying on a clever interlocking joint that requires minimal hardware.
- Materials Needed: One 1×3 hardwood board (about 4 feet long), wood glue, and a saw. A dowel joinery kit can make the center joint incredibly strong and easy to align.
- Step-by-Step Directions:
- Cut the 1×3 board into four equal-length pieces for the legs (e.g., 12 inches each).
- Find the exact center of each leg piece.
- Using a saw, cut a notch halfway through the width of each board at the center mark. The notch should be the exact thickness of the board itself.
- Take two leg pieces and interlock them at the notches to form an ‘X’ shape. Do the same with the other two pieces.
- Apply wood glue in the notches and fit the two ‘X’ shapes together to create the stand. Clamp if necessary and let dry.
- Sand the entire stand smooth and apply a finish like Danish oil to bring out the wood’s natural beauty.
Pro-Tip: Before you cut, test the fit of your notches on scrap pieces. You want a snug fit that slides together without being too tight or too loose.

11. Magnetic Wall-Mounted Bottle Opener
This is a fun, practical, and slightly “magical” gift that’s perfect for a kitchen, bar, or man cave. A hidden magnet catches the bottle caps as they fall, making it a unique and entertaining present.
- Materials Needed: A nice piece of wood (about 10″ x 4″), wall-mount bottle opener hardware with screws, a drill, and a strong magnet. You will need very powerful rare earth neodymium magnets to catch the caps through the wood.
- Step-by-Step Directions:
- Sand your piece of wood smooth and finish it with oil or polyurethane.
- Attach the metal bottle opener hardware to the top front of the wood block with the included screws.
- Flip the block over. Using a Forstner bit that’s slightly larger than your magnet, drill a shallow hole in the back of the wood, directly behind the area below the opener. Do not drill all the way through.
- Mix a small amount of 5-minute epoxy and use it to glue the magnet into the hole. Ensure the magnet is flush with the back surface.
- Drill keyhole slots or attach a hanger to the back for easy wall mounting.
Pro-Tip: The thinner the wood between the magnet and the front face, the stronger the magnetic “catch” will be. Test the depth on a scrap piece first to find the sweet spot where it’s strong but doesn’t risk breaking through the front.

Key Takeaways: Your Quick Guide to home made christmas gift ideas out of wood
- Start Simple: Don’t be afraid to begin with easy projects like ornaments, coasters, or candle holders. They are quick, satisfying, and make wonderful gifts.
- Use What You Have: Many of the best gifts, like gnomes and business card holders, can be made from scrap wood you already have in your workshop.
- Focus on the Finish: The difference between a “homemade” and “handcrafted” look is often in the sanding and finishing. Take your time to make it smooth and protected.
- Personalize It: The true value of a DIY gift is the thought behind it. Choose woods, colors, or designs that you know the recipient will love.
- Safety First: Always use appropriate safety gear, and ensure any items for the kitchen (like cutting boards) are made with food-safe glues and finishes.
People Also Ask About home made christmas gift ideas out of wood
What’s the easiest thing to make out of wood?
For absolute beginners, the easiest things to make are projects that require simple cuts and basic finishing. Wood bead ornaments, rustic log candle holders, and simple square coasters are excellent starting points. These projects often use scrap wood, require minimal tools, and can be completed in under an hour, providing a quick and satisfying result.
What are some unique woodworking gift ideas?
To create a truly unique woodworking gift, think beyond the basics. Consider a minimalist plywood ring, a mid-century modern plant stand, or a burr puzzle. An exotic wood letter opener or a magnetic bottle opener that catches the caps also make for memorable and unexpected presents that showcase creativity and skill.
How do you make a handmade Christmas gift meaningful?
A handmade gift’s meaning comes from personalization. Incorporate the recipient’s favorite colors, initials, or a design that reflects their hobbies. Making a functional item they’ll use daily, like a cutting board or a blanket ladder, also adds meaning. Ultimately, the time and care you invest in creating the gift is the most meaningful part.
What is the least wanted Christmas gift?
According to surveys, some of the least wanted Christmas gifts include generic beauty product sets, ill-fitting clothing, and novelty items that have no practical use. The beauty of a handmade wooden gift is that it’s inherently personal and functional, helping you avoid these common gift-giving pitfalls and ensuring your present is cherished.
Final Thoughts
This holiday season, step away from the crowded stores and into the creative peace of your workspace. Crafting a gift from wood is more than just a project; it’s a way to give a piece of your time and heart. Each of these ideas is a starting point for your own creativity. Don’t be afraid to experiment and make them your own.
What amazing wooden gift are you planning to make first? Share your ideas in the comments below
Last update on 2026-03-17 / Affiliate links / Images from Amazon Product Advertising API