Feeling the pressure to have the most festive house on the block but staring at a blank yard? You’re not alone. Every year, countless homeowners dream of a magical, magazine-worthy Christmas display but get overwhelmed by the sheer number of options and the fear of it looking cluttered or underwhelming. It’s easy to feel stuck between wanting a simple, elegant glow and a fun, whimsical wonderland, leading to decision paralysis. The result? You either do nothing, or you throw a few things together that don’t quite capture the holiday spirit you envisioned.
This guide is designed to change that. We’ve curated these 11 ideas by analyzing hundreds of top-rated designs and products, focusing on what truly creates that ‘wow’ factor for the holiday season. Decorating your home’s exterior for Christmas involves layering three key elements: foundational lighting on rooflines and trees, statement pieces like yard decor or inflatables to create a focal point, and personal accents on porches and pathways to welcome guests up close. By following these brilliant, achievable ideas, you can confidently transform your outdoor space into a welcoming and magical Christmas display that reflects your personal style.
Feeling Uninspired by Your Yard? How to Create a Magical Outdoor Christmas Display
Creating a cohesive and impressive outdoor Christmas display is a common challenge, but it’s entirely achievable with a bit of planning. The key is to think in layers: start with foundational lighting, add a central focal point, and finish with welcoming details. This approach works for any home, budget, or style, helping you transform a plain exterior into a festive atmosphere that will delight family, friends, and neighbors. We’ve curated 11 brilliant ideas that cover everything from classic rooflines to charming DIY projects, ensuring you can create that magical ‘wow’ factor for the holiday season.
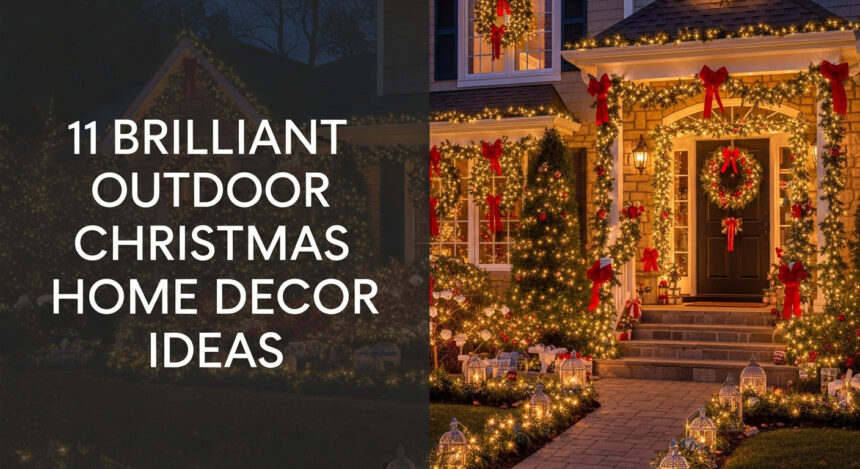
11 Brilliant Outdoor Christmas Decor Ideas to Wow Your Neighbors This 2026
To create a truly stunning outdoor Christmas display, you need a mix of different elements working in harmony. The best approach involves combining classic lighting techniques, a large-scale statement piece, charming porch accents, and a touch of personal DIY flair. This list offers a comprehensive look at specific, actionable, and visually inspiring ideas that cover everything from your roofline to your walkway. Each idea is paired with pro-tips on installation, durability, and product selection, ensuring your display not only looks great but also withstands winter weather.
1. Create a Classic Glow with C9 Roofline Lights

Save this classic lighting idea to your ‘Holiday Exteriors’ board!
Achieving the timeless, bold look of large-bulb lights on your roofline is straightforward with the right materials. The process involves measuring your roofline, testing your lights, attaching clips to each bulb, and carefully securing them to your gutters or shingles. This method ensures a professional, clean, and festive outline for your home.
- Materials Needed: C9 String Lights (LED recommended for energy efficiency), All-Purpose Light Clips, Outdoor Extension Cords, Ladder.
- Step-by-Step Directions:
- Measure your roofline to determine the length of string lights needed. Always buy a little extra.
- Test all your light strands on the ground before you start hanging them.
- Attach an all-purpose light clip to the base of each C9 bulb socket. These clips are versatile and can typically be oriented to grip either gutters or shingles.
- Starting at one end near an outdoor power source, carefully begin attaching the clipped lights to your roofline, ensuring the strand is taut but not stretched.
- Connect strands as you go, making sure the connections are secure and rated for outdoor use.
Pro-Tip: For a professional, clean look, ensure your bulbs are all facing the same direction (e.g., all pointing straight up or straight out) as you clip them on.

2. Design an Enchanting Entrance with Cascading Icicle Lights

Pin this magical entrance idea for later!
To create a sophisticated “dripping ice” effect, you can hang LED icicle lights along porch overhangs, awnings, or window frames using gutter hooks or universal clips. This elegant lighting solution transforms your entrance into a magical, shimmering focal point.
- Materials Needed: LED Icicle Lights, Gutter Hooks or Universal Clips, Outdoor Extension Cord.
- Step-by-Step Directions:
- Measure the length of the area you wish to decorate (e.g., the front edge of your porch roof).
- Unbox your icicle lights and let them hang for a bit to allow the “drips” to straighten out. Test the strands.
- Attach clips every 6-8 inches along the gutter or overhang edge.
- Carefully hang the main horizontal wire of the icicle lights onto the clips.
- For a fuller look, consider layering two strands, offsetting them slightly to fill in any gaps. Some modern icicle lights even have built-in “falling rain” effects for a dynamic display.
Lesson Learned: Cheaper icicle lights often have very uniform, repetitive drop lengths. For a more natural, organic look, invest in a set that features varied and randomized strand lengths.

3. Add Whimsy with Illuminated Pathway Markers

Love this candy cane lane? Save it to your ‘Christmas Yard Ideas’ board!
For a fun and easy way to illuminate walkways, simply stake illuminated markers like candy canes or snowflakes along the border of your path. This method provides a big impact with minimal effort, creating an inviting guide for guests.
- Materials Needed: Set of Christmas Pathway Markers with stakes.
- Step-by-Step Directions:
- Lay out your markers along the path to plan your spacing before staking them into the ground. A distance of 2-3 feet apart usually looks best.
- Firmly press the stake of the first marker into the ground near your power source. If the ground is frozen, you may need to pour a little warm water to soften it first.
- Continue placing the rest of the markers, connecting the wires between them as you go.
- Tuck any excess wire neatly along the edge of the path or under a layer of mulch or snow to prevent tripping hazards. Popular options include classic candy canes, but also look for modern color-changing candies or globe pathway lights for a different style.
Pro-Tip: To create a grander entrance, place the markers closer together near the start of the walkway and gradually increase the spacing as they get closer to the house. This creates a forced perspective that makes the path feel longer and more dramatic.

4. Make a Statement with an Extra Large Inflatable Character

Add this fun idea to your ‘Outdoor Christmas Inflatables’ board!
To get a high-impact decoration that’s easy to set up, use a large, self-inflating character and secure it firmly with the included stakes and tethers. This will create a fun and impressive focal point in your yard in just a few minutes.
- Materials Needed: Inflatable Decoration Kit (includes inflatable, stakes, tethers, and built-in fan).
- Step-by-Step Directions:
- Choose a flat, open area in your yard with clear access to an outdoor GFCI outlet. Remove any sharp sticks or rocks.
- Unroll the inflatable and lay it out. Zip up all zippers or vents on the inflatable itself.
- Attach the fan to the power cord and plug it in. The character will begin to self-inflate, which usually takes a few minutes.
- Once fully inflated, use the included stakes to secure the base to the ground through the provided loops.
- For extra large outdoor Christmas decorations, you must use the tether ropes. Attach them to the upper loops on the inflatable and stake them into the ground at a 45-degree angle for maximum stability against wind.
Lesson Learned: In windy or snowy conditions, it’s wise to unplug and deflate your inflatable to prevent damage to the fan motor or fabric. Most are made from durable, waterproof materials, but high winds are their biggest enemy.

5. Create an Elegant Scene with a Lighted Deer Family

Save this elegant yard decor idea to your ‘Luxury Christmas’ board.
To add sophisticated, classic woodland charm to your yard, arrange a set of lighted wire-frame deer in a natural grouping and secure them firmly with ground stakes. This creates an elegant and serene scene that glows beautifully at night.
- Materials Needed: Lighted Deer Set, Metal Ground Stakes (usually included).
- Step-by-Step Directions:
- Carefully unpack the deer pieces; they usually require minor assembly, such as attaching the head and legs to the body.
- Arrange the deer in a natural-looking grouping in your yard. A classic setup is the buck standing tall, with the doe and fawn nearby as if grazing.
- Use the included metal stakes to secure the feet of each deer firmly into the ground. This is crucial to prevent them from tipping over in the wind.
- Connect the power cords together and run a single extension cord back to your power source. Look for sets made with durable, waterproof materials and coated frames to resist rust.
Pro-Tip: To make the scene even more magical, aim a small, cool-white spotlight at the deer family from a low angle. This will make the glitter finish sparkle intensely at night.

6. Dazzle with a High-Impact Light Show Tree

Want a showstopper? Pin this light show tree idea!
For maximum “wow” factor with minimal effort, assemble a pre-programmed light show tree, which typically involves setting up a center pole and attaching light strands to a base. This single decoration provides a fully animated, high-impact display with one plug.
- Materials Needed: Light Show Tree Kit (includes center pole, circular base, light strands, and topper).
- Step-by-Step Directions:
- Assemble the center pole and attach it to the circular base frame.
- Place the star or other topper on the pole.
- Attach the pre-wired light strands to the topper and then extend them down to the base frame, clipping them in place. The result is a perfect cone shape.
- Stake the base frame securely to the ground.
- Plug it in and use the remote or controller to cycle through the various pre-programmed animations. These trees are designed for fast assembly and offer the impact of a complex light show without any of the programming.
Pro-Tip: Place your light show tree in the most prominent part of your yard where it can be seen from the street without obstruction. It’s designed to be a standalone centerpiece, so it doesn’t need many other decorations nearby.

7. Hang an Oversized Wreath for a Grand Entrance

Pin this grand wreath idea to your ‘Christmas Exteriors’ board.
To make a bold and luxurious statement, hang a single oversized wreath on a large, blank exterior wall like a garage or gable using a heavy-duty, no-drill hanger. This one elegant piece can serve as the primary focal point for your entire home.
- Materials Needed: Oversized Wreath (36 inches or larger), Heavy-Duty Wreath Hanger or Siding Hook, Weatherproof Ribbon/Bow, Floral Wire.
- Step-by-Step Directions:
- Fluff the branches of your wreath to make it look full and three-dimensional. If it’s not pre-lit, wrap it with a strand of battery-operated outdoor micro-lights.
- Create or attach a large, weatherproof bow. Use floral wire to secure it tightly to the wreath’s frame.
- Choose a secure hanging method. For siding, you can use specialized vinyl siding hooks that slip between the panels without drilling. For brick, a heavy-duty brick clamp hanger is an excellent no-drill option.
- Carefully hang the wreath on a prominent exterior feature like the peak of a gable or centered above the garage doors.
Lesson Learned: An “oversized” wreath should be proportional to the space. A 36-inch wreath looks huge on a door but might be just right for the space above a two-car garage. Measure your space first to ensure the scale is right.

8. Frame Your Front Door with Lush Garland

Save this timeless front door idea to your ‘Christmas Porch’ board!
For a full, professional, and welcoming look, hang thick, pre-lit garland around your door frame using a series of small, strategically placed hooks. By layering the pieces and fluffing the branches, you can create a lush, seamless frame for your entrance.
- Materials Needed: 2-3 lengths of thick, pre-lit outdoor garland; small cup hooks or clear adhesive hooks; green floral wire.
- Step-by-Step Directions:
- Measure the sides and top of your door frame. You’ll likely need one garland for the top and one for each side.
- Install your hooks. Place one hook at each top corner of the door frame and one in the top center. Then, place hooks every 2-3 feet down each side.
- Start by hanging the horizontal piece of garland across the top, letting the ends drape down slightly past the corners.
- Hang the side pieces, starting from the top hooks. Use floral wire to connect the side garlands to the draped ends of the top garland for a seamless, layered look.
- Fluff all the branches to hide the hooks and create a lush, full appearance. A high-quality, pre-lit outdoor garland is essential for durability and ease of use.
Pro-Tip: For an extra-luxe look, buy un-decorated garland and add your own embellishments. Weave in a strand of oversized plastic ornaments and a wide, wired ribbon that matches your wreath and other decor.

9. Assemble Festive Holiday Porch Planters

Pin this gorgeous planter idea for your winter porch!
To create beautiful, long-lasting winter porch planters, use the “Thriller, Filler, Spiller” design rule with natural elements like birch branches, evergreen boughs, and colorful twigs. This method creates a lush, professional-looking arrangement that will look good all season.
- Materials Needed: Large Outdoor Planters, Potting Soil or Floral Foam, Fresh Evergreen Boughs (pine, fir, cedar), Tall Birch Branches or Logs, Red Dogwood Twigs, Large Pinecones, Faux Berry Sprays.
- Step-by-Step Directions:
- Fill your planters with potting soil, which will hold the branches firmly in place once it freezes.
- Follow the “Thriller, Filler, Spiller” design rule. Start with your “thriller”: insert 3-5 tall birch branches into the center for height.
- Next, add your “filler”: arrange the evergreen boughs around the birch branches, packing them in tightly to create a full base.
- Finally, add your “spiller”: let some of the longer evergreen pieces drape over the edges of the pot.
- Insert the red dogwood twigs and berry sprays throughout the arrangement for pops of color and texture. Place large pinecones on top to finish the look. For extra sparkle, you can add a set of battery-powered micro-dot fairy lights.
Pro-Tip: Water the soil well after you finish arranging. Once the soil freezes, your arrangement will be locked in place for the entire winter season.

10. Wrap Outdoor Trees and Columns Like Candy Canes

Add this clever wrapping idea to your ‘DIY Christmas Decor’ board!
For a creative and inexpensive way to decorate porch columns or trees, wrap them diagonally with wide, weatherproof red ribbon to create a candy cane effect. Secure the ends discreetly with a staple gun or strong tape for a festive look that holds up all season.
- Materials Needed: Rolls of Wide (4-inch or wider) Red Weatherproof Craft Mesh or Ribbon, Heavy-Duty Staple Gun or Clear Packing Tape, Scissors.
- Step-by-Step Directions:
- Start at the top of the column or tree trunk. Secure the end of the ribbon with a staple on the backside (or use a strong piece of tape).
- Begin wrapping the ribbon downwards in a diagonal spiral, keeping the tension even and the spacing consistent to create the candy cane stripes.
- If one roll runs out, simply overlap the new roll and secure the ends together on the back with another staple or piece of tape.
- When you reach the bottom, cut the ribbon and secure the end firmly on the backside. For this project, you need a truly weatherproof ribbon; craft stores sell a plastic-like mesh ribbon that is perfect for this as it doesn’t absorb water.
Lesson Learned: While tape works, a staple gun (used discreetly on the back of a wooden column) provides a much more secure hold that will withstand wind and rain all season long.

11. Craft a Simple & Charming Pine Cone Kissing Ball

Save this sweet DIY project for a cozy weekend!
For a simple, budget-friendly DIY project, create a rustic kissing ball by hot-gluing small pinecones onto a styrofoam ball and adding a ribbon for hanging. This charming craft adds a personalized, natural touch to your porch or entryway.
- Materials Needed: 1 Styrofoam Ball (6-inch is a good size), 50-60 Small Pinecones, Hot Glue Gun & Glue Sticks, Wide Satin Ribbon for hanging, Scissors, Small sprigs of faux greenery/berries (optional).
- Step-by-Step Directions:
- Cut a long piece of ribbon (about 3 feet), fold it in half to make a loop, and hot glue the two ends to the “bottom” of the styrofoam ball. This will be your hanger.
- Start at the top, near the ribbon loop, and begin hot gluing pinecones onto the ball. Place them tightly together to completely cover the styrofoam.
- Continue working your way around and down the ball until the entire surface is covered.
- (Optional) Once the ball is covered in pinecones, use a small dab of hot glue to tuck in sprigs of greenery or faux berries into the small gaps. A high-temperature hot glue gun will provide the most durable bond for outdoor conditions.
- Let it dry completely, then hang it from a porch ceiling hook or a tree branch.
Pro-Tip: Before you begin, bake your collected pinecones on a foil-lined baking sheet at 200°F for about 30 minutes. This kills any bugs and helps open up the scales beautifully.

Key Takeaways: Your Quick Guide to Outdoor Christmas Decor
- Layer Your Lighting: Combine foundational roofline lights (like C9s) with elegant accents (like icicles) and whimsical pathway markers for a dimensional look.
- Choose a Focal Point: Don’t clutter your yard. Select one major statement piece, like an extra-large inflatable or a dazzling light show tree, to be the star of the show.
- Focus on the Entrance: Make your front door and porch feel extra welcoming with lush garland, oversized wreaths, and festive planters. This creates major curb appeal.
- Mix Store-Bought with DIY: Blend impressive store-bought items with simple, charming DIYs (like a pine cone kissing ball) for a display that feels both professional and personal.
- Prioritize Durability: Always choose products specifically rated for outdoor use, made from weatherproof materials, and secure everything firmly with stakes and tethers to withstand winter weather.
People Also Ask About christmas home decor outdoor
How can I make my outdoor Christmas decor look expensive on a budget?
To make your decor look expensive, focus on fullness and light. Use more of one thing, like extra-thick garland around the door, rather than many small, scattered items. Stick to a cohesive color scheme, often warm white lights, which tend to look more elegant and high-end. Finally, a single, large statement piece like an oversized wreath will have more impact than dozens of smaller trinkets.
What is the most popular outdoor Christmas decoration for 2026?
For 2026, large-scale, high-impact pieces continue to be popular. This includes extra-large inflatables with dynamic elements and elegant, lighted wire-frame sculptures like deer and sleighs in champagne gold or glitter finishes. There is also a strong trend towards warm, classic lighting over multi-colored lights for a timeless, sophisticated look.
What’s the easiest outdoor Christmas decoration to put up?
The easiest decorations for maximum impact are yard inflatables and light show trees. Inflatables self-inflate in minutes and just need to be staked down. Light show trees are designed for quick pole-and-clip assembly and provide a fully animated light display with a single plug, saving you hours of stringing lights.
Final Thoughts
Transforming your home’s exterior for Christmas is all about creating a feeling of joy and welcome for your family, friends, and neighbors. Whether you go for a classic, elegant glow or a yard full of whimsical fun, the best displays come from layering different elements and adding your own personal touch. We hope these 11 ideas have sparked your imagination to create your most magical display yet! What’s your favorite way to decorate your home’s exterior for the holidays? Let us know in the comments below.
Last update on 2026-04-27 / Affiliate links / Images from Amazon Product Advertising API