Feeling that familiar urge to switch things up as the seasons change? When the air gets crisp and you start reaching for cozy sweaters, it’s natural to feel like your bright, summery manicure just doesn’t fit the vibe anymore. It’s easy to get stuck in a rut, defaulting to the same old shades year after year, and finding true inspiration can feel like a challenge.
You’re looking for something more than just a new color. You want a look that feels current, sophisticated, and perfectly in tune with the autumn aesthetic. You need ideas that are classy enough for the office, cozy enough for a weekend by the fire, and stylish enough to make you feel polished and put-together. You want inspiration that is both beautiful and achievable, whether you’re a DIY pro or heading to the salon.
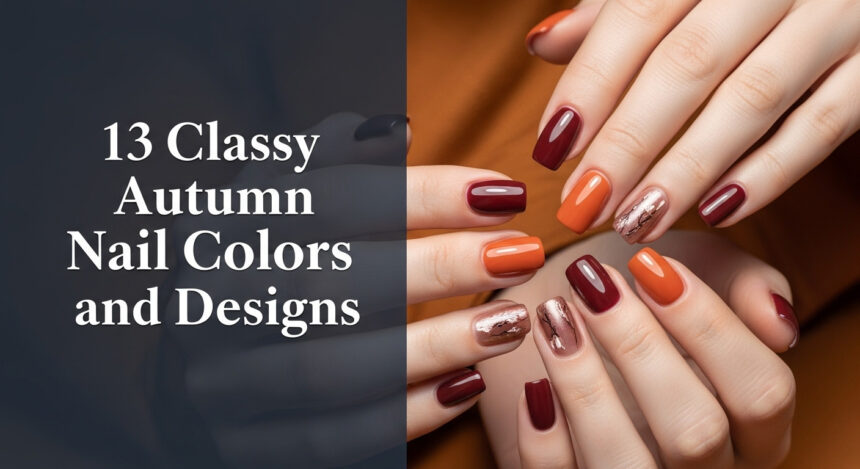
The top nail colors for autumn 2026 are rich, earthy tones like deep chocolate brown, plum, and forest green, along with sophisticated finishes like chrome and pearly sheens. Minimalist designs such as micro French tips and simple dots are also trending for a chic, modern look that perfectly complements the cozy season. This guide will walk you through 13 stunning and classy ideas, complete with how-to steps, so you can find your perfect fall manicure.
13 Classy Autumn Nail Colors and Designs To Try in 2026
This isn’t just another list of nail polish colors. This is your curated guide to the biggest trends for autumn 2026, focusing on sophistication, dimension, and timeless elegance. We’re moving beyond flat colors and embracing rich textures and minimalist art that make a statement. From the deepest, vampiest shades to chic, modern takes on classic designs, you’ll find an idea here that fits your personal style and skill level. Let’s dive into the looks you’ll be saving to your Pinterest board all season long.
1. Classic Deep Plum

Save this rich plum nail idea to your ‘Fall Beauty’ board!
A classic deep plum is the perfect simple yet sophisticated solid color for autumn. It’s darker and moodier than summer purples but still has a richness that feels luxurious and elegant. This shade is universally flattering and works beautifully on any nail shape, from short and square to long and almond.
- Materials Needed: Nail file, cuticle pusher, base coat, a high-quality deep plum gel nail polish, glossy top coat, UV/LED lamp.
- Step-by-Step Directions:
- Prep your nails by filing them into your desired shape and gently pushing back your cuticles.
- Apply a thin layer of base coat and cure under your UV/LED lamp as directed.
- Apply the first coat of the deep plum polish. For a truly rich and saturated look, choose a polish known for its excellent color payoff. Cure completely.
- Apply a second coat to achieve a flawless, deep color. Cure again.
- Finish with a high-shine glossy top coat and cure for the final time.
Pro-Tip: For an extra-plush look, apply a matte top coat first, cure it, and then apply a glossy top coat. This adds incredible depth to dark colors like plum.

2. Mesmerizing Plum Cat Eye

Pin this dimensional cat eye look for your next salon visit!
The cat eye effect adds a captivating, dimensional shimmer to a deep plum base by using a special magnetic polish. The result is a sharp, reflective line that moves with the light, giving your manicure an almost magical quality that’s perfect for the enchanting vibes of autumn.
- Materials Needed: Base coat, black or dark base color (optional), plum cat eye gel polish, nail magnet wand, glossy top coat, UV/LED lamp.
- Step-by-Step Directions:
- After prepping and applying a base coat, apply a dark base color like black (this makes the cat eye effect pop) and cure.
- Apply a thick coat of the special plum cat eye gel polish, which contains metallic particles. Do NOT cure yet.
- Immediately take your nail magnet wand and hold it close to the nail (without touching) for 5-10 seconds. Position it diagonally, horizontally, or vertically to create the reflective line.
- Once you’re happy with the effect, cure the nail immediately to lock the design in place.
- Finish with a glossy top coat and cure.
Lesson Learned: Don’t wave the magnet around! Hold it steady in one position for a crisp, sharp line. Moving it will muddy the metallic particles.

3. Ethereal Plum Aura

Love this aura trend? Save it to your ‘Nail Art Inspo’ board!
Aura nails create a beautiful, soft gradient effect that looks like a glowing orb in the center of your nail. Using a deep plum on the outside with a lighter, ethereal plum in the center gives this trendy design a mystical and moody feel that’s perfect for fall.
- Materials Needed: Base coat, dark plum polish, light plum polish, blooming gel (optional but recommended), small nail art brush or sponge, glossy top coat, UV/LED lamp.
- Step-by-Step Directions:
- After your base coat, apply one full coat of the darker plum shade and cure.
- Apply a thin layer of blooming gel (do not cure). This special gel helps the colors bleed into each other for a seamless blend.
- Place a small dot of the lighter plum polish in the center of the nail. The blooming gel will start to diffuse it outwards.
- (Optional) Use a small, clean brush to gently feather the edges of the light plum dot to perfect the gradient.
- Once you like the aura effect, cure immediately.
- Finish with a glossy top coat and cure.
Pro-Tip: If you don’t have blooming gel, you can achieve a similar effect by applying the light plum dot onto the uncured dark plum base coat and using a small sponge to gently dab the center, blending the colors.

4. Futuristic Plum Chrome

Add this stunning chrome look to your ‘Bold Nails’ Pinterest board!
For a bold, futuristic take on autumn nails, plum chrome delivers an incredible mirror-like, reflective finish. This look is achieved by buffing a special iridescent powder over a gel polish base, transforming the deep plum into a high-impact, liquid metal masterpiece.
- Materials Needed: Base coat, plum gel polish, no-wipe gel top coat, purple or iridescent chrome powder, small eyeshadow applicator or silicone tool, UV/LED lamp.
- Step-by-Step Directions:
- Prep nails and apply your base coat and two coats of plum gel polish, curing after each layer.
- Apply a thin layer of a no-wipe gel top coat. This is the critical step. Cure it for only half the recommended time (e.g., 30 seconds instead of 60). It needs to be firm but slightly tacky.
- Dip your applicator into the chrome powder and firmly rub it onto the nail surface. The powder will adhere to the semi-cured top coat, creating the mirror effect.
- Use a soft brush to dust off any excess powder.
- Apply a final layer of the no-wipe top coat to seal the powder and cure for the full recommended time.
Pro-Tip: The key to a smooth chrome finish is the no-wipe top coat. A regular top coat will be too sticky or too slick, and the powder won’t buff to a mirror shine.

5. Rich Deep Chocolate Brown

Pin this perfect neutral for a chic autumn look!
Deep chocolate brown is arguably the most elegant and versatile neutral nail color for fall. It’s a warm, creamy, and sophisticated shade that evokes the feeling of a cozy latte. This color looks exceptionally chic on shorter, well-manicured nails and pairs beautifully with autumn’s wardrobe of knits and leather.
- Materials Needed: Nail file, base coat, a rich chocolate or espresso brown polish, glossy top coat.
- Step-by-Step Directions:
- This look is all about a clean, polished finish. Start by meticulously prepping your nails and cuticles. This shade looks particularly chic on shorter, well-shaped nails.
- Apply your base coat to prevent staining and help the manicure last.
- Apply two thin coats of your chosen deep brown polish. Look for a warm, creamy formula for the most luxurious finish. Allow each coat to dry thoroughly.
- Seal with a high-shine glossy top coat for that ‘fresh from the salon’ look.
Pro-Tip: To find your perfect brown, look at the undertones. If you have cool-toned skin, a brown with grayish or purple undertones (like espresso) will be flattering. For warm-toned skin, a true chocolate or caramel-infused brown is stunning.

6. Minimalist Micro French Tips

Save this modern take on the classic French manicure!
The micro French tip is a subtle, modern, and work-appropriate design for autumn. This trend updates the classic French manicure by swapping the thick white band for a razor-thin, barely-there line in a deep seasonal tone like burgundy, forest green, or chocolate brown. It’s minimalist chic at its finest.
- Materials Needed: Base coat, sheer nude or pink polish, a deep autumn color polish (e.g., brown, burgundy, green), an ultra-fine nail art liner brush, glossy top coat.
- Step-by-Step Directions:
- After applying your base coat, apply one or two coats of your sheer nude polish and let it dry completely.
- Pour a small drop of your deep accent color onto a palette.
- Dip the very end of your ultra-fine liner brush into the polish. The key is to use a high-quality brush with long, flexible bristles for a steady hand.
- With a light and steady hand, paint a very thin line across the free edge of your nail. Don’t press hard; let the brush do the work.
- Clean up any mistakes with a small brush dipped in acetone before the polish dries.
- Finish with a glossy top coat to smooth everything out.
Lesson Learned: It’s easier to paint the thin line if you anchor your pinky finger on the table or your other hand to stabilize your drawing hand.

7. Chic and Simple Dot Designs

Pin this effortlessly chic dot manicure for your next DIY nail night!
For an extremely easy yet stylish nail art idea, a single dot design is perfect. A small, perfectly placed dot in a rich autumn hue at the base of a sheer nude nail looks incredibly chic, modern, and intentional. It’s proof that you don’t need complex skills to have trendy nails.
- Materials Needed: Base coat, sheer nude polish, an autumn accent color polish, a dotting tool (or the end of a bobby pin), top coat.
- Step-by-Step Directions:
- Apply your base coat and one or two coats of the sheer nude polish. Let it dry completely.
- Pour a small drop of your accent color onto a piece of foil or a palette.
- Dip the end of your dotting tool straight down into the polish to pick up a small, even amount.
- Carefully place the tool onto the base of your nail where you want the dot, and lift it straight up. Don’t press too hard.
- Repeat for all nails, wiping the tool clean and re-dipping for each dot to ensure they are uniform in size.
- Allow the dots to dry fully before applying your top coat to prevent smearing.
Pro-Tip: For a playful twist, use two or three different fall colors (like terracotta, mustard, and brown) and create a small, asymmetrical cluster of dots at the base of an accent nail.

8. Modern Autumn Ombré

Save this cozy ombré idea for your ultimate fall vibes!
A fall-themed ombré manicure creates a stunning gradient effect using cozy, complementary colors. Imagine a seamless blend from a creamy beige to a warm terracotta or a deep brown to a rich caramel. This design captures the essence of changing leaves and pumpkin spice lattes.
- Materials Needed: Base coat, two or three complementary fall polishes (e.g., cream and terracotta), a small makeup sponge, liquid latex or tape for skin protection, top coat.
- Step-by-Step Directions:
- Apply a base coat and then one coat of the lightest color to all nails. Let it dry completely.
- Apply liquid latex or tape to the skin around your nails to make cleanup easier.
- On a flat, non-porous surface, paint stripes of your chosen colors right next to each other.
- Take your makeup sponge and dab it directly onto the polish stripes a few times.
- Gently dab the sponge onto your nail. Roll it slightly from side to side to blend the colors and cover the nail.
- Repeat the dabbing process to build up the opacity.
- While the polish is still wet, remove the liquid latex. Use a cleanup brush and acetone for any remaining mess. Finish with a glossy top coat.
Pro-Tip: To make the gradient even smoother, slightly dampen the makeup sponge before dabbing it in the polish. This helps the polishes blend more seamlessly.

9. Timeless Dark Red & Burgundy

Pin this timeless burgundy shade for an instantly chic look!
A deep, vampy burgundy or dark red is the ultimate classic and reliable nail color for autumn. It’s eternally chic, sophisticated, and adds a touch of moody romance to any look. When you’re unsure what to choose, a flawless burgundy manicure is always the right answer.
- Materials Needed: Base coat, a high-quality dark red or burgundy nail polish, glossy top coat, a cleanup brush.
- Step-by-Step Directions:
- Dark polishes can be unforgiving, so a perfect base is key. Ensure nails are filed evenly and cuticles are neat.
- Always use a base coat to prevent the rich pigments from staining your natural nails.
- Apply the first coat of burgundy polish carefully, trying to get as close to the cuticle as possible without touching the skin. Use the three-stroke method (one down the middle, one on each side).
- Apply a second coat for full, even coverage.
- Use a small, flat brush dipped in nail polish remover to create a crisp, clean line around the cuticle.
- Finish with a plumping, high-shine top coat to give the color depth and a gel-like finish.
Pro-Tip: If you find your dark manicure chips easily at the tips, try “capping the free edge.” After your final color coat, run the brush horizontally along the very tip of your nail to seal it.

10. Cozy Coffee-Inspired Manicures

Save this delicious coffee swirl design to your ‘Cute Nails’ board!
Capture the cozy feeling of your favorite fall beverage with a cute, themed nail art idea like a “coffee and cream” swirl. This design uses shades of espresso, caramel, and off-white to create a delicious-looking marbled effect that is pure autumn comfort.
- Materials Needed: Base coat, sheer nude base polish, dark brown, caramel, and off-white polishes, a fine liner brush, blooming gel (optional), top coat.
- Step-by-Step Directions:
- Apply your base coat and sheer nude polish.
- For the swirl: on an uncured layer of base coat or blooming gel, place small, random dots of the brown, caramel, and off-white polishes.
- Use the tip of your liner brush to gently drag through the dots, creating a marbled or swirled pattern. Don’t overmix!
- Cure immediately once you’re happy with the swirl.
- For the French tip: use the dark brown polish and a liner brush to paint a classic tip over the swirled design.
- Seal everything with a glossy top coat and cure.
Lesson Learned: The key to a good swirl is a wet base. If you don’t have blooming gel, just work on top of a fresh, uncured layer of your nude polish. This allows the colors to blend softly.

11. Earthy Green with Gold Accents

Pin this chic green and gold combo for a touch of luxury!
Pairing a deep forest green with a touch of gold is a simple way to make a solid color more interesting and elegant. A gold foil accent nail adds a touch of edgy luxury to the earthy, timeless green, creating a sophisticated look that feels both natural and glamorous.
- Materials Needed: Base coat, deep forest green polish, gold nail foil/leaf, tweezers, a small brush, top coat.
- Step-by-Step Directions:
- Apply your base coat and two coats of the forest green polish to all nails, letting them dry.
- For the accent nail, while the second coat of green is still slightly tacky, use tweezers to carefully place small pieces of gold leaf onto the nail.
- Gently press the foil down with your fingertip or a soft, dry brush to ensure it adheres flat against the nail.
- You can create a random pattern or concentrate the foil near the cuticle or tip for different effects.
- Apply a generous layer of top coat to smooth over the texture of the foil and seal the design. You may need two coats for a perfectly smooth finish.
Pro-Tip: A little gold foil goes a long way. It’s better to start with smaller pieces and add more if needed, rather than trying to remove a large piece that’s already stuck to the polish.

12. Cozy Plaid Nail Designs

Get cozy and save this classic plaid nail art idea!
Nothing says autumn quite like plaid, and it makes for a festive, cozy nail art design that is surprisingly easy to achieve. While free-handing intricate lines can be difficult, nail stamping plates make creating a perfect, layered plaid pattern simple and fun.
- Materials Needed: Base coat, base color polish (e.g., beige), several stamping polishes (e.g., brown, orange, red), a plaid-patterned nail stamping plate, a scraper, a clear jelly stamper, top coat.
- Step-by-Step Directions:
- Apply your base coat and base color, allowing it to dry completely.
- Apply a dark stamping polish (e.g., brown) over the desired plaid design on the stamping plate.
- Quickly scrape the excess polish off the plate with your scraper card held at a 45-degree angle.
- Immediately press your clear jelly stamper onto the plate with a firm rolling motion to pick up the design.
- Look through the clear stamper to aim, then press it onto your nail with another rolling motion to transfer the image.
- Repeat the process with other colors to layer the plaid effect.
- Clean up the edges and seal with a top coat.
Pro-Tip: Work quickly! Stamping polish is designed to dry very fast, so the time between scraping, picking up the design, and transferring it to your nail should only be a few seconds.

13. Elegant Pearly Translucent Nails

Pin this effortlessly elegant look for any occasion!
For a low-maintenance look that is still incredibly elegant, a sheer, pearly translucent polish is the perfect choice. This “your nails but better” style provides a clean, sophisticated, and versatile finish that enhances the natural beauty of your nails with a soft, iridescent glow.
- Materials Needed: Nail buffer, base coat, a sheer pearlescent or milky white nail polish, glossy top coat.
- Step-by-Step Directions:
- The success of this look is all in the prep. Start with perfectly clean, buffed, and shaped nails. Healthy cuticles are a must.
- Apply a smoothing or ridge-filling base coat to create a flawless canvas.
- Apply one thin coat of your sheer pearly polish. This shouldn’t be opaque; it’s meant to give a hint of color and a beautiful iridescent finish.
- Let it dry completely. A second coat is optional if you want a slightly more milky look, but one coat is often perfect for the translucent effect.
- Finish with an ultra-shiny top coat to enhance the pearly glow.
Pro-Tip: This look is a fantastic “palate cleanser” between more dramatic manicures. It helps your nails look polished and put-together while allowing your natural nail to show through.

Key Takeaways: Your Quick Guide to Classy Autumn Nails for 2026
- Embrace Rich Tones: Deep colors like plum, chocolate brown, burgundy, and forest green are the foundation of a classy autumn manicure.
- Play with Dimension: Don’t just stick to flat color. Trends like cat eye, aura, and chrome finishes add a sophisticated, modern twist to classic fall shades.
- Minimalism is Key: For nail art, less is more. Micro French tips and simple dot designs offer a chic, understated elegance that’s easy to achieve.
- Texture is In: From the mirror-like shine of chrome to the delicate feel of gold leaf and the cozy look of plaid, incorporating different textures elevates your manicure.
- When in Doubt, Go Classic: A simple, pearly translucent or a deep, vampy red are timeless choices that will never go out of style for the autumn season.
People Also Ask About Autumn Nails
What nail colors are good for autumn?
The best nail colors for autumn 2026 include deep, earthy, and warm tones. Think rich chocolate brown, sophisticated plum, classic burgundy and dark red, moody forest green, and warm terracotta oranges. Neutral shades like creamy beige and pearly off-whites are also incredibly chic and versatile for the season.
What is the rich girl nail trend?
The “rich girl nail” trend focuses on a minimalist, “your nails but better” aesthetic. It involves sheer, nude, or milky polishes that enhance the natural look of the nail, making them appear healthy, clean, and perfectly groomed. The key is a flawless application, impeccable cuticle care, and a high-shine finish.
What nail shape is trending this fall?
For fall 2026, classic and elegant shapes are trending. Oval and almond shapes are particularly popular as they are universally flattering and pair beautifully with the season’s sophisticated color palette. Shorter, well-groomed square or “squoval” nails also remain a timeless and practical choice.
Are French tip nails in style for autumn?
Yes, French tips are definitely in style for autumn, but with a modern twist. Instead of the classic pink and white, the trend is a “micro French” with a very thin line. Popular variations use a sheer nude base with a deep autumn color for the tip, like burgundy, brown, or even a metallic gold.
Final Thoughts
Autumn is the perfect season to step away from the bright neons of summer and embrace a richer, more sophisticated color palette. It’s a time to experiment with deep, cozy colors, elegant textures, and chic, minimalist designs that reflect the mood of the season. Whether you opt for a simple, glossy chocolate brown manicure that goes with everything or a detailed plaid accent nail for a touch of fun, the most important rule is to choose the look that makes you feel confident and ready to welcome the crisp autumn air.
Which of these autumn nail ideas are you most excited to try first? Let us know in the comments below
Last update on 2026-03-04 / Affiliate links / Images from Amazon Product Advertising API


