Dreaming of sun-kissed dimension but terrified of bleach damage? You’re not alone in wanting a healthy way to lighten up your look. The fear of straw-like strands and endless breakage keeps many from trying beautiful, graduated color.
Yes, you can absolutely get a beautiful balayage without bleach by using a professional high-lift hair color instead. This method is gentler on the hair, as it uses oxidative dyes to lift natural pigment up to 4 shades, creating a soft, dimensional look. It’s the perfect low-damage option for those with virgin (uncolored) dark hair seeking a subtle, sun-kissed effect.
Drawing from professional colorist methodologies and hair science, this guide unlocks the secrets to a stunning balayage without bleach. You will discover nine gorgeous, achievable looks and the exact steps to get them. Get ready to embrace dimension without the damage.
Can You Get a Beautiful Balayage Without Bleach?
Absolutely, a gorgeous and healthy-looking balayage without bleach is not only possible but is a preferred method for many salon professionals on the right candidate. The secret lies in using a high-lift color instead of a traditional lightener. This professional-grade product is a type of permanent hair dye specifically formulated with a higher concentration of ammonia and pigment to lift natural hair color 3-4 shades lighter while depositing a new tone in a single step. This process offers a gentle lift that is significantly less stressful on the hair cuticle compared to the aggressive stripping action of bleach. It’s the ideal healthy hair option for achieving a dimensional brunette finish, but it’s crucial to understand its primary limitation: this technique requires virgin hair for predictable, beautiful results, as high-lift dye cannot lift previously applied artificial color.
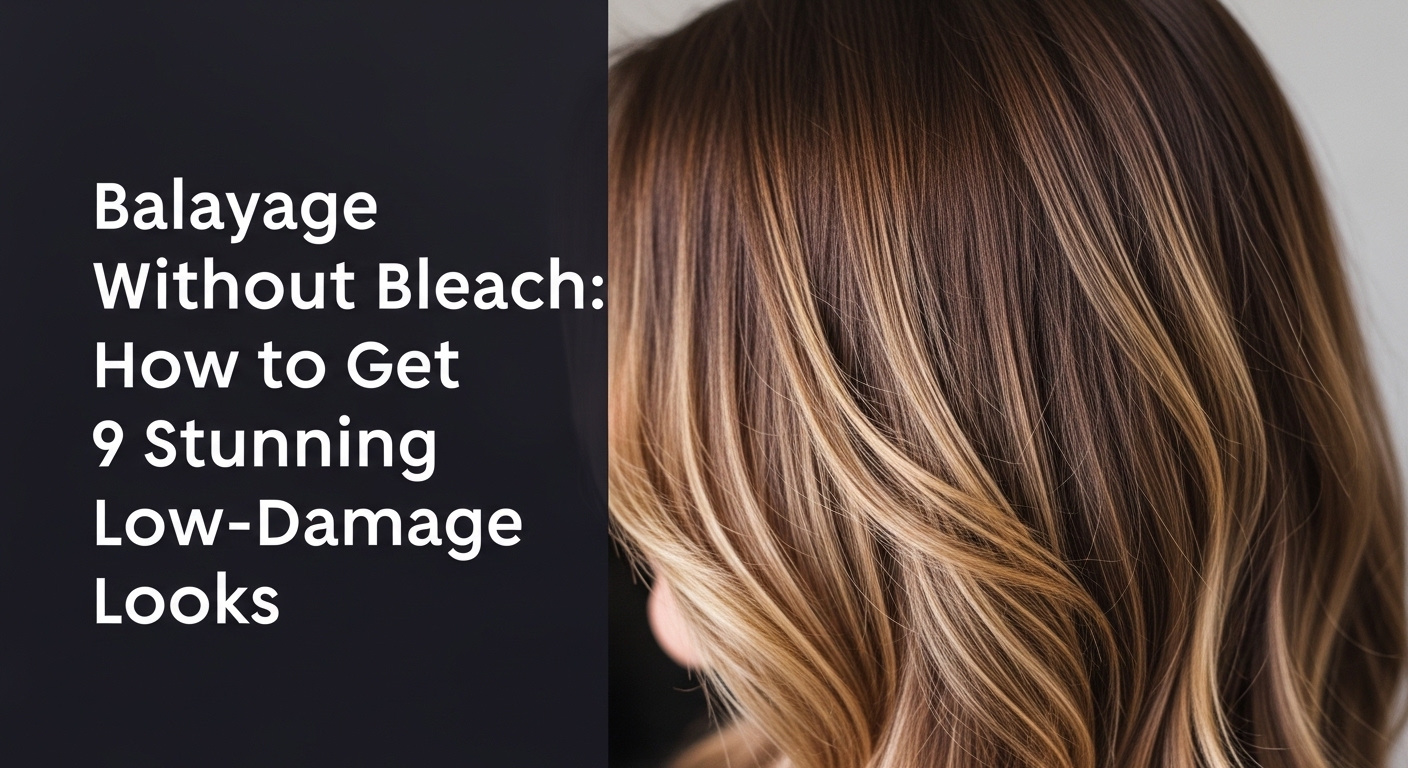
Balayage Without Bleach: How to Get 9 Stunning Low-Damage Looks
This section is your visual and practical guide to achieving the most popular no bleach balayage looks. Each of the following nine styles is designed to work with the natural warmth that emerges when lifting dark hair, resulting in a beautiful, seamless blend and a low maintenance grow-out. We’ll break down the products, tools, and step-by-step application for each, providing a “recipe” for your desired outcome. Whether you’re aiming for a rich chocolate, a warm caramel, or a fiery copper, these techniques show you how to get a stunning, sun-kissed look while prioritizing your hair’s integrity.
1. Achieve a Rich Chocolate Brown Balayage

Pin this gorgeous, healthy hair idea to your ‘Hair Goals’ board!
This look is perfect for those who want a subtle transition that adds richness and depth. A chocolate brown balayage creates a sophisticated, dimensional brunette effect with high shine, making it one of the most requested no bleach balayage on dark hair styles. The goal is to achieve a cool-to-neutral brown that’s only 2-3 levels lighter than the base, providing an elegant and understated lift.
Products & Tools Used
- High-Lift Professional Hair Color (e.g., a neutral or cool-toned brown shade like 6.1 or 7.1 from a pro line)
- 30 Volume (9%) Cream Developer
- Non-metallic mixing bowl and tint brush
- Gloves and cape
- Sectioning clips
- Color-safe shampoo and deep conditioning mask
Application/Styling Steps
- Mixing the Color: Following the manufacturer’s instructions, mix your high-lift color and 30 volume developer in the bowl. The consistency should be like yogurt.
- Sectioning: Divide clean, dry virgin hair into four equal quadrants.
- Hand-Painting: Starting in a front quadrant, take a diagonal slice of hair. Use the tint brush to apply the color, feathering lightly near the root area and fully saturating the mid-lengths and ends.
- Blending: Use your fingers (with gloves) to gently blend the painted sections for a seamless blend.
- Processing: Let the color process for the time recommended by the manufacturer (typically 30-45 minutes), keeping a close eye on the lift.
- Rinsing and Toning: Thoroughly rinse the hair, shampoo, and apply a deep conditioning hair masking treatment. If any unwanted warmth appears, a blue-based toning gloss can be used.
Pro-Tip: The key to a rich chocolate and not a warm brown is understanding underlying pigment. Dark hair lifts to red/orange. Using a high-lift color with a built-in cool tone (ash or violet base) will neutralize this residual warmth as it lifts, resulting in a truer chocolate finish.

2. Create a Warm Caramel Melt

Save this sweet caramel look for your next salon visit!
A caramel balayage no bleach is a timeless classic that delivers a beautiful, sun-kissed warmth. This look embraces the natural golden-orange tones that emerge when lifting dark hair, using them to create soft, buttery ribbons of color. It’s one of the easiest and most flattering no bleach balayage results, giving the hair a healthy glow and incredible dimension.
Products & Tools Used
- High-Lift Professional Hair Color (e.g., a gold or warm beige shade like 8.3 or 9.3)
- 30 or 40 Volume (12%) Cream Developer (use 40 for darker, more resistant hair)
- Non-metallic mixing bowl and tint brush
- Gloves, cape, and sectioning clips
- Sulfate-free shampoo and a hydrating hair mask
Application/Styling Steps
- Formulating the Color: Mix your golden-based high-lift color with the appropriate developer. For a stronger lift on very dark hair, a 40-volume developer might be necessary, but exercise caution as it’s more aggressive.
- Sectioning: Divide hair into four quadrants.
- Sweeping Application: Take thin weaves of hair and use a sweeping motion with your brush. Focus the application away from the roots, concentrating on the areas where the sun would naturally hit.
- Connecting the Pieces: To create a “melt,” ensure some pieces are painted higher up (like face framing layers) while others start lower down, creating a gradient effect.
- Processing: Allow to process for up to 50 minutes, checking the hair every 10 minutes to assess the level of lift.
- Rinsing: Rinse thoroughly, shampoo, and follow with a deep conditioning mask to restore moisture and seal the cuticle. A toner is often not needed for this warm look.
Pro-Tip: For a true “melt,” your hand-painting technique is key. Hold the brush at a 45-degree angle and use V-shaped patterns on the surface of each hair section. This creates that signature seamless blend with no harsh lines.

3. Get a Vibrant Copper Glow

Feeling fiery? Pin this stunning copper balayage for a bold new look!
For those who want a bolder, more high-impact result, a copper balayage no bleach is the perfect choice. This look leans into the natural red-orange pigments in dark hair, enhancing them to create a vibrant hair color that glows. It’s a fantastic way to achieve a fashion-forward look that’s still rooted in warm, natural tones, proving that no bleach balayage can still be incredibly striking.
Products & Tools Used
- High-Lift Professional Hair Color with a strong copper base (e.g., a shade like 7.4 or 8.44)
- 30 Volume (9%) Cream Developer
- Color additives for vibrancy (optional)
- Mixing bowl, brush, clips, gloves
- Color-safe shampoo and conditioner for red/copper hair
Application/Styling Steps
- Mixing for Vibrancy: Mix your copper high-lift tint and developer. For an extra pop, you can add a few drops of a pure copper color concentrate if compatible with your color line.
- Strategic Placement: Section the hair. For a high-impact copper glow, focus your hand-painting on the ends and the “money piece” sections framing the face.
- Saturating for Intensity: Unlike more subtle looks, fully saturate the sections you want to be the most vibrant. Don’t be shy with the product on the mid-lengths and ends.
- Using Foil for More Lift: For brighter copper pieces, you can encase a few painted sections in foil. This is a foilayage technique that traps heat and can provide an extra level of lift without bleach.
- Processing and Checking: Process for 35-45 minutes. Check a strand by wiping away the color to see if the desired level of copper vibrancy has been reached.
- Rinsing and Sealing: Rinse with lukewarm water, shampoo, and use a conditioner specifically designed to seal the cuticle and prevent copper molecules from fading quickly.
Pro-Tip: Copper tones are notorious for fading. To maintain your vibrant hair color, use a color-depositing conditioner or hair gloss treatment with a copper tint once a week. This will refresh the color and keep it from looking dull.

4. Formulate a Subtle Honey Brown Balayage

Pin this sweet and subtle honey brown look for a touch of sunshine in your hair!
A honey brown balayage for brunette hair no bleach offers the most delicate, natural looking balayage imaginable. It’s the perfect “first-time” color for those who are nervous about a big change, delivering fine sun-kissed ribbons of soft gold. This is the ultimate low maintenance hair color idea, designed to create a very subtle, “is she or isn’t she?” effect on light to medium virgin hair.
Products & Tools Used
- High-Lift Professional Hair Color (a neutral-gold shade, like 9.03 or 10.3)
- 20 or 30 Volume (6%-9%) Cream Developer (use 20 vol for subtle lift on lighter brown hair)
- Fine-toothed comb for feathering
- Tint brush, bowl, gloves
- A clarifying shampoo (to use before) and a sulfate free shampoo (for after)
Application/Styling Steps
- Prep the Hair: Start with very clean hair, washed with a clarifying shampoo to remove any buildup that could cause uneven lifting.
- Mixing the Color: Mix your high-lift color with the 20 or 30-volume developer. For this subtle look, a lower volume is often sufficient and gentler.
- Micro-Weaving: Take very fine “babylight” sections. Instead of painting large panels, you’ll be applying color to tiny weaves of hair.
- Feather-Light Strokes: Use feather-light strokes near the top of the strand and apply more pressure towards the ends. This creates a very soft, natural-looking gradient.
- Surface Painting: Focus on painting only the surface of the hair sections, letting the natural darker color underneath create dimension.
- Quick Processing: This look may not require the full processing time. Check the hair after 20 minutes. You’re looking for a gentle tonal shift, not a dramatic lift. Rinse when the desired honey tone is visible.
Pro-Tip: To keep the highlights fine and separated, use the end of your tail comb to paint on the color. This gives you more control than a wide brush and is perfect for creating delicate sun-kissed ribbons. This is an advanced airtouch technique adaptation.

5. Paint a Deep Mahogany Hue

Add a touch of mystery! Pin this rich mahogany balayage idea.
A mahogany hair color offers a sophisticated twist on red tones. Unlike copper, which is warm and fiery, mahogany incorporates red violet tones for a cooler, deeper, and more mysterious effect. It’s an excellent choice for a balayage for curly hair, as the deep dimensional color can make curls pop without looking overly bright. This look is achieved with a high lift tint that has a violet-red base.
Products & Tools Used
- High-Lift Professional Hair Color (a red-violet shade, often denoted with .5 or .6 in pro lines)
- 30 Volume (9%) Cream Developer
- Curl-specific styling cream for aftercare
- Wide-tooth comb for blending
- Standard application tools (bowl, brush, gloves)
Application/Styling Steps
- Formula Mix: Combine the red-violet high-lift shade with your 30-volume developer.
- Curl-by-Curl Painting: On curly hair, it’s best to work with the natural curl pattern. Instead of sectioning in straight lines, pick individual curl clumps that you want to highlight.
- Follow the “C” Shape: Apply the color following the natural curve of the curl. This ensures the color looks natural when the hair is styled.
- Avoid Over-Saturation: Don’t fully saturate the entire curl clump. Paint the “top” of the curve to create a highlight that catches the light.
- Processing: Let the color process, checking a curl periodically. Curls can be more porous, so processing time may vary.
- Rinse and Hydrate: Rinse thoroughly and follow with a very hydrating mask. Curls need extra moisture after any color process to maintain their bounce and prevent frizz.
Pro-Tip: For curly hair balayage, always apply color to dry, styled hair as you would normally wear it. This allows you to see exactly where the highlights will fall and prevent the color from getting lost inside the curls, which often happens if you paint on wet or un-styled hair.

6. Develop a Toffee Swirl Effect

Sweeten your look! Pin this delicious toffee swirl balayage.
The toffee brown hair look pushes the limits of light brown balayage no bleach, aiming for a “bronde” or dark blonde result. This buttery, beige-brown shade requires getting the maximum lift from a high-lift color, and it works best on a natural light or medium brown base. This is a multi-step process that often requires toning to achieve that perfect, creamy lived-in hair color without unwanted orange tones.
Products & Tools Used
- High-Lift Professional Hair Color (a neutral or beige shade, like 10.0 or 12.0 from a pro line)
- 40 Volume (12%) Cream Developer
- A high-quality toner (e.g., a beige or natural ash toner to be used after)
- All necessary application tools (bowl, brush, etc.)
- Bonding treatment additive for your color (like Olaplex No. 1)
Application/Styling Steps
- Maximum Lift Formula: Mix your neutral high-lift shade with 40-volume developer. Add your bonding treatment to the formula to protect the hair shaft integrity during the strong lift.
- Backcombing for Blend: For a soft swirl, use a backcombing or “teasy lights” technique. Take a thin slice of hair, gently backcomb the roots, and apply color to the hair that is left out.
- Incubate in Foils: After painting, place each section in a piece of foil. This foilayage method traps heat and maximizes the lifting power of your formula.
- Process to Pale Yellow: You need to lift the hair to a pale yellow stage (like the inside of a banana peel) for the toner to work correctly. This can take the full processing time (50-60 mins).
- Rinse, then Tone: Rinse the high-lift color out completely. Do not condition. Apply your chosen beige/toffee toner to the lightened pieces and process for 10-20 minutes.
- Final Rinse and Treatment: Rinse the toner and finish with a bonding treatment sealer (like Olaplex No. 2) and a deep conditioner.
Pro-Tip: A toffee/bronde color is all about the tonality neutralization. Lifting dark hair with high-lift color will always expose warmth. The real magic happens with the second step: the toner. A high-quality toner is not optional for this look; it’s what takes the hair from warm yellow to creamy toffee.

7. Blend a Natural Chestnut Brown

Love a classic? Pin this timeless and natural chestnut brown balayage.
Chestnut brown hair color is the perfect middle ground of warm browns. It has a beautiful balance of red and golden tones, making it universally flattering and delivering a very natural looking balayage. This is a fantastic low maintenance hair color choice because it doesn’t stray too far from a natural brunette base, ensuring a soft grow-out.
Products & Tools Used
- High-Lift Professional Hair Color (a balanced warm brown, like a .34 or .75 in a pro line)
- 30 Volume (9%) Cream Developer
- A balayage board or paddle for clean application
- Standard application tools
Application/Styling Steps
- Mix the Perfect Warmth: Combine your chosen chestnut shade with a 30-volume developer.
- Use a Balayage Board: For a clean application, take a section of hair and place it flat on a balayage board.
- Surface Painting: Using your brush, paint the surface of the hair resting on the board. This prevents the color from bleeding through and creating blotches, ensuring a natural, sun-kissed look.
- Build Gradually: Start with fewer, more subtle highlights. You can always add more in a future session. The goal is a natural fade and a lived-in hair color feel.
- Process and Watch: Let the hair process openly (no foils). Check every 15 minutes. You are looking for a soft, warm brown lift.
- Rinse and Condition: Rinse well, shampoo, and apply a color-safe conditioner to leave the hair shiny and healthy.
Pro-Tip: The key to a natural chestnut is a light hand. Think about where the sun would lighten your hair if you spent a summer outdoors—mostly around the face and on the top layers. Replicate that pattern for the most believable, damage-free result.

8. Craft a Sun-Kissed Auburn Look

Perfect for autumn! Pin this gorgeous sun-kissed auburn balayage.
An auburn hair color no bleach look provides a rich, sophisticated red-brown dimension. It’s less fiery than copper, with more brown in its base, making it a very wearable red. This red brown balayage is particularly stunning and complements dark skin or olive undertones, as the brown base keeps the red from appearing too harsh. It’s one of the top warm hair color ideas for fall.
Products & Tools Used
- High-Lift Professional Hair Color (a red-brown shade, often denoted with .45 or .65)
- 30 Volume (9%) Cream Developer
- Gloves, cape, bowl, brush
- Color-safe, UV protection for hair spray for maintenance
Application/Styling Steps
- Formulate the Auburn: Mix your red-brown high-lift color with a 30-volume developer.
- Focus on Mid-lengths: For the most natural auburn look, start your application at the mid-lengths, blending upwards lightly and fully saturating the ends.
- Use Freehand Painting: This look is perfect for true freehand highlights. Use your brush to paint “ribbons” of color where you want the red tones to appear.
- Vary Your Placement: Paint some sections thicker and some thinner to create natural-looking dimension and movement in the hair.
- Process in Open Air: Allow the color to process without foils to ensure a softer, more blended lift. Check after 30 minutes.
- Rinse and Protect: Rinse, condition, and once styled, use a UV protectant spray. Red tones are susceptible to sun-fading, and this will help maintain the color’s richness.
Pro-Tip: Not sure where to place the highlights? A stylist recommended trick is to have the client flip their hair to their preferred parting first. Then, paint the highlights based on how their hair naturally falls. This ensures the color is visible and flattering in their everyday style.

9. Design a Soft Golden Brown Finish

For a touch of warmth, pin this ultra-subtle golden brown balayage.
This look is the definition of subtle balayage without bleach. A soft golden brown hair color is less about a noticeable color change and more about a “tonal enrichment.” The goal is to achieve the slightest natural hair lightening with minimal contrast, adding just a hint of warmth and shine. This is achieved by using a gentle formula and a short processing time.
Products & Tools Used
- High-Lift Professional Hair Color (a gold or neutral-gold shade, like 8.3 or 9.03)
- 20 Volume (6%) Cream Developer
- A gloss treatment for extra shine
- Standard application tools
Application/Styling Steps
- Gentle Formula: Mix your golden high-lift shade with a low-volume 20 developer. This is all about a gentle, controlled lift.
- Skimming the Surface: Instead of saturating sections, lightly “skim” the surface of the hair with your brush. Imagine you’re just dusting it with color.
- Focus on the Ends: Concentrate the minimal color you’re using on the last 2-3 inches of the hair for a very subtle, grown-out look.
- Short Processing Time: This is the key. Start checking the hair after just 15 minutes. You are not looking for a significant lift, just a slight change in tone. Rinse as soon as you see a soft golden-brown shift.
- Rinse and Gloss: Rinse thoroughly. Instead of a heavy conditioner, apply a clear or golden gloss treatment for 5-10 minutes. This will add immense shine and seal in the subtle color.
Pro-Tip: For the most subtle result, try the “wet balayage” technique. Lightly mist the hair with water before painting. The water will dilute the color slightly and help it spread more diffusely, creating an incredibly soft, melted hair color effect with absolutely no harsh lines.

Key Takeaways
Here’s a quick summary of everything you need to know about getting a balayage without bleach:
- It’s Done with High-Lift Color, Not Bleach: Balayage without bleach uses professional high-lift color (a type of permanent dye) to lift and deposit color in one step, offering a gentler, low damage alternative to traditional lighteners.
- Best Results are on Virgin Hair: This technique requires virgin hair (hair that has never been colored). High-lift dye cannot lift artificial color pigments, so it will not work on previously dyed hair.
- Expect a Warm, Subtle Lift: You can realistically achieve 2-4 levels of lift, resulting in beautiful warm tones like caramel, copper, and chocolate. It will not create platinum or ash blonde looks from a dark base. This is about achieving a dimensional brunette look.
- A Toner Might Be Necessary: To fix brassiness or achieve a specific tone like “toffee,” a second step with a professional toner after the initial lift is often required. This helps to neutralize unwanted residual warmth.
- Technique is Everything: The final look depends heavily on application techniques like hand-painting, feathering, and backcombing to create that signature seamless blend and soft grow-out.
- Maintenance is Lower, But Still Key: While more low maintenance than bleached hair, using sulfate free shampoo and color-safe products is essential to maintain the vibrancy of your new color and overall hair health.
- Always Do a Patch Test: As with any chemical service, performing a patch test 48 hours before application is a critical safety precaution to check for any allergic reactions.
People Also Ask About Balayage Without Bleach
Does balayage without bleach damage hair?
Balayage without bleach is significantly less damaging than traditional bleach, but it is not damage-free. It uses high-lift color, which still contains ammonia or a substitute to swell the hair cuticle and alter the natural pigment. However, it’s considered a gentle lift and a healthy hair option for those looking to prevent breakage associated with harsher lighteners.
Can you do balayage on dark hair without bleach?
Yes, balayage without bleach is specifically designed for dark, virgin hair. It’s the ideal method for creating dimensional brunette looks like caramel, chocolate, and copper on natural base colors from black to light brown. The results will be warm-toned and about 2-4 shades lighter than your natural color.
How many levels can you lift without bleach?
With professional high-lift color, you can typically lift hair 3-4 levels on virgin hair. Some high-lift blonde series used with a 40-volume developer claim up to 5 levels of lift, but this is the maximum. This is less than bleach, which can lift 7+ levels, but it’s perfect for a subtle transition.
Will no-bleach balayage turn my hair orange?
It can, if not done correctly. Dark hair naturally lifts through red and orange stages. The key to avoid orange hair is using the right professional color formula. A colorist will choose a high-lift shade with a blue or green base (ashy secondary tones) to neutralize that underlying warmth as it lifts. Toning after the service is also a crucial step to fix brassiness.
How long does balayage without bleach last?
The color itself is permanent, but the “look” lasts until it grows out, typically 3-6 months. One of the biggest benefits is the soft grow-out. Because the color is blended seamlessly and not applied directly to the root, there are no harsh regrowth lines, making it very low maintenance.
What’s the difference between high-lift color and bleach?
Bleach (lightener) strips all pigment from the hair, while high-lift color lifts and deposits color in one step. Bleach is a more aggressive chemical that offers more lift but also causes more damage. High lift tint uses a higher concentration of ammonia and developer to lift the natural melanin while also depositing oxidative dye molecules.
Can you do balayage without bleach on previously colored hair?
No, this is a critical limitation. High-lift color cannot lift artificial pigment. Attempting to use it on already-dyed hair will result in uneven, unpredictable, and often undesirable color. This technique requires virgin hair for the chemical process to work as intended.
Do I need a toner for no-bleach balayage?
It is highly recommended, especially if you are prone to brassiness or want a specific cool or neutral tone. While warm looks like copper may not need it, achieving a neutral “toffee” or a less-warm chocolate brown often relies on a toner to refine the color after the high-lift has done its job. Think of it as the finishing touch.
Who is a good candidate for no-bleach balayage?
The ideal candidate has uncolored (virgin) hair, a dark natural base (levels 3-6), and wants a subtle, warm, sun-kissed look. It’s perfect for someone who prioritizes hair integrity, wants a low maintenance color, and is trying hair color for the first time.
Can I do ash brown balayage without bleach?
Achieving a true “ash” brown without any bleach is extremely difficult, if not impossible, on very dark hair. Ash tones require lifting the hair past the orange and yellow stages to a very pale base, which high-lift color typically cannot do on its own. A no-bleach balayage will produce warm-toned results; for an ash result, some form of lightener is usually necessary.
Final Thoughts on Your Low-Damage Balayage Journey
Embracing the beauty of balayage without bleach is a wonderful step towards achieving your hair goals while prioritizing hair integrity. As you’ve seen, by using high-lift color and the right techniques, it’s entirely possible to get stunning, dimensional brunette looks that are both beautiful and kind to your hair. From a rich chocolate brown to a warm caramel melt, the options are plentiful for those with virgin hair seeking a soft grow-out and a natural, sun-kissed glow.
Remember that the success of this technique lies in understanding its capabilities and limitations. It’s about enhancing your natural beauty with a gentle lift, not a dramatic transformation. Your journey to the perfect low damage balayage starts with a clear goal and realistic expectations.
For the best and safest results, we always recommend consulting with a salon professional. A certified colorist can properly assess your hair’s history and condition, formulate the perfect custom shade, and use their expertise to give you the seamless, healthy balayage you’ve been dreaming of.
What no-bleach balayage look are you most excited to try? Share your favorite in the comments below
Last update on 2026-03-29 / Affiliate links / Images from Amazon Product Advertising API