Tired of the same predictable pastel polishes every spring? You want something that feels fresh and seasonal, but still matches your edgy, sophisticated style. It’s the classic dilemma: how to wear your favorite dark shades without looking out of place as the world blooms around you.
Yes, black nails are a stunning and stylish choice for spring, offering a chic, moody alternative to traditional pastels. By incorporating spring-themed elements like delicate florals, shimmering chrome finishes, or subtle glitter accents, a black manicure can be transformed into a sophisticated, season-appropriate statement that feels both edgy and elegant.
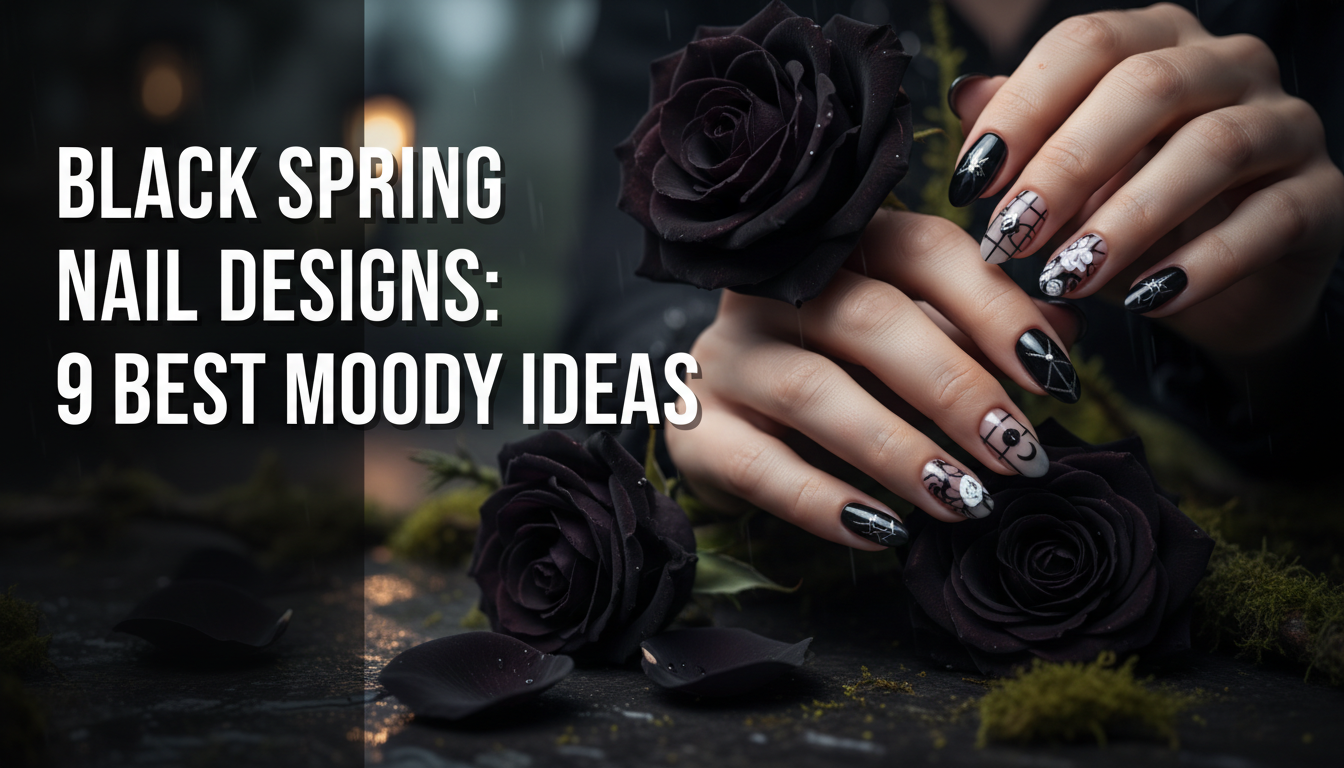
Drawing from current beauty trends and proven nail artist techniques, this guide unlocks the secret to mastering black spring nail designs. You’ll discover how to pair this classic shade with seasonal motifs for a look that’s anything but basic. Get ready to find your perfect moody manicure.
Are Black Nails Okay for Spring? Redefining Seasonal Style
The short answer is a resounding yes. While pastels have long dominated the spring season, spring fashion trends 2026 are increasingly embracing moodier, more contrasted palettes. A black spring manicure is no longer a rebellious choice; it’s a sophisticated one. It signals confidence and a high-fashion sensibility, moving beyond outdated color rules. The key is not the color itself, but how you style it. By integrating elements of the season—florals, delicate patterns, and touches of light—you transform a simple dark spring nail design into an intentional, chic statement. Think of it as the “cool-girl” approach to seasonal beauty, a choice that contrasts with the expected while still feeling perfectly appropriate.
9 Best Moody Black Spring Nail Designs to Try in 2026
Ready for some inspiration? This is your ultimate gallery of the best moody spring nail art ideas for 2026. Each design is broken down with the exact products, tools, and step-by-step instructions you need to either achieve the look at home or show your nail technician. We’ll cover everything from intricate florals to shimmering chrome, proving that black is one of the most versatile colors for a fresh spring set. These styles are perfect for various nail shapes, including popular almond nails and coffin shape styles.
1. Create a Moody Matte Black Floral Manicure

Pin this moody floral look to your ‘Spring Nail Inspo’ board!
The matte black floral design is the quintessential moody spring look. The deep, velvety finish of the matte top coat provides the perfect canvas, making the delicate pastel flowers pop. This style features a beautiful contrast between the edgy base and the soft, romantic details, making it one of the most popular black and pink floral spring nails ideas.
Products & Tools Used
- Opaque jet black gel polish
- High-quality matte top coat (non-wipe recommended)
- Tiny-tipped nail art brush
- Dotting tools in various small sizes
- Pastel pink and crisp white acrylic paint or gel polish
- UV/LED nail lamp
Application/Styling Steps
- Apply two thin coats of the jet black polish, curing for 60 seconds each.
- Seal with the matte top coat and cure fully. This creates your canvas.
- Using the smallest dotting tool, place five tiny white dots in a circle to create a simple flower base.
- With the nail art brush, add a small pink dot in the center of each flower.
- Design small green leaves next to a few of the flowers for a pop of color. Let air dry if using paint, or cure if using gel.
- Finish by applying cuticle oil to hydrate the surrounding skin.
Pro-Tip: For the most delicate floral designs, use acrylic paint instead of gel polish for the details. It has a higher pigment load and doesn’t spread before you can cure it, giving you salon-grade results.

2. Achieve Elegant Sheer Black Nails with Gold Leaf

Save this luxe look for your next special occasion!
For a truly elegant black nail art with gold accents, the sheer black or “pantyhose” nail is unmatched. This technique creates a translucent, smoky effect that feels light and airy, while the embedded gold leaf accents add a touch of luxury. It’s a sophisticated design that highlights the beauty of a longer nail shape and is perfect for a spring event.
Products & Tools Used
- A high-gloss top coat
- A standard black gel polish
- A small pot of nail art gold leaf flakes
- A pair of fine-tipped tweezers
- A UV/LED nail lamp
Application/Styling Steps
- On a palette, mix one drop of black polish with 3-4 drops of top coat to create a translucent wash of color.
- Paint one thin layer of your sheer mix onto the nail and cure.
- Apply a second, slightly more pigmented layer (2 drops black to 3 drops top coat) but do not cure.
- Using tweezers, gently place tiny flakes of gold leaf onto the wet polish.
- Cure the nail for 60 seconds to lock the foil in place.
- Seal everything with a final, thick layer of glossy top coat for a smooth, durable finish.
Pro-Tip: To avoid chipping on the tips where foil is placed, make sure to ‘cap’ the free edge of the nail with your final top coat layer. This is a proven technique for extending the life of your manicure.

3. Style Edgy Black Chrome French Tips

Pin this cool-girl chrome look for an edgy spring update!
The black chrome french tip spring nails are the epitome of modern cool. This design takes the classic French manicure and gives it a futuristic, edgy twist. The magic happens when the black chrome powder adheres to a special non-wipe top coat, creating a flawless, mirror-like shine that is impossible to ignore.
Products & Tools Used
- A sheer nude or pink base gel polish
- Black gel polish
- A high-quality non-wipe top coat
- Black nail chrome powder
- A silicone applicator or eyeshadow sponge
Application/Styling Steps
- Paint two coats of your nude base polish and cure.
- Using a fine brush, design the french tip shape with the black gel polish and cure for 60 seconds.
- Apply the non-wipe top coat ONLY over the black tip area. This is the most critical step. Cure for only 30 seconds.
- Immediately dip your silicone tool into the chrome powder and rub it firmly onto the partially cured top coat until a mirror finish appears.
- Dust off any excess powder with a soft brush.
- Seal the entire nail with a final layer of your regular glossy top coat to prevent fading.
Pro-Tip: The key to a perfect chrome application is the cure time of the non-wipe top coat. If you cure it for the full 60 seconds, the surface will be too slick. An under-cured surface provides the right tackiness for the powder to adhere to, a result of its unique polymerization process.

4. Master Minimalist Abstract Black Swirls

Add this artsy, minimalist design to your ‘Short Nail Ideas’ board!
For lovers of simple black minimalist spring nails, abstract black swirls on a black negative space background are a perfect choice. This artistic and understated look is incredibly chic, especially on short nails. The design contrasts with the bare nail, creating a modern, graphic statement that looks effortlessly cool.
Products & Tools Used
- A clear or sheer nude base coat
- A highly pigmented black gel polish
- A long, thin striper or liner nail art brush
- A glossy top coat
Application/Styling Steps
- Apply one coat of your sheer nude base and cure. This creates a smooth canvas.
- Place a small drop of black gel polish on a palette.
- Dip your long striper brush into the polish, ensuring it’s evenly coated but not dripping.
- Starting at one side of the nail, press the brush down and paint a single, flowing “S” shape across the nail. Don’t overthink it! The beauty is in the imperfection.
- Cure immediately to prevent the line from spreading.
- Finish with a glossy top coat to make the black line pop against the nude base.
Pro-Tip: The key to a perfect swirl is using a black gel polish with a medium viscosity. A polish that is too thin will bleed, while one that is too thick will be difficult to drag into a smooth, elegant line.

5. Design a Subtle Black Butterfly Accent Nail

Save this whimsical butterfly idea for a touch of springtime magic!
Black butterfly nails offer a whimsical and delicate way to wear black in the spring. The easiest way to achieve this intricate look is with nail stamps or decals. A high-quality decal transfers a perfect butterfly outline onto your nail, giving you a stunning black accent nail without any drawing skills required.
Products & Tools Used
- A base color of your choice (e.g., milky white or sheer pink)
- Black butterfly nail decals or a stamping plate with butterfly designs
- Black stamping polish (if stamping)
- A clear jelly stamper and scraper (if stamping)
- A glossy top coat
Application/Styling Steps
- Apply two coats of your chosen base color to all nails and cure.
- For Stickers: Carefully peel a butterfly sticker with tweezers and place it on your desired accent nail. Press firmly from the center outwards to remove air bubbles.
- For Stamping: Apply black stamping polish to the butterfly design on your plate. Scrape away the excess.
- Press the jelly stamper onto the plate to pick up the design, then roll it gently onto your accent nail to transfer the image.
- Let the stamp/sticker set for 30 seconds.
- Seal the design with two layers of a glossy top coat to ensure a smooth application and prevent peeling.
Pro-Tip: To make nail stickers look like they were hand-painted, apply a “soak-off” or traditional top coat (not a gel top coat) first. Let it dry for a minute until tacky, then apply the sticker. The solvents in the top coat will slightly melt the sticker’s edges, blending it seamlessly into the nail. Then, seal with your final gel top coat.

6. Rock a Goth-Glam Black Velvet Manicure

Pin this glamorous velvet nail look to your ‘Night Out’ board!
Don’t confuse matte with velvet. The trendy black velvet nails look is a shimmering, goth-glam style achieved with magnetic polish. A special magnet wand activates metallic particles in the polish, pulling them into a concentrated line that mimics the light-catching dimension of crushed velvet texture. This design is pure luxury and drama.
Products & Tools Used
- A standard opaque black gel polish
- A black velvet or cat-eye magnetic gel polish
- A strong nail magnet wand (bar or dual-ended)
- A glossy top coat
Application/Styling Steps
- Apply one coat of regular black gel polish as a base. This makes the velvet effect deeper. Cure.
- Paint a thick layer of the black velvet magnetic polish over the base, but do not cure.
- Immediately hold the magnet wand close to the nail (without touching it) for 10-15 seconds. Hold it flat over the nail to create the all-over velvet look, or on an angle to create a sharp line.
- You will see the magnetic particles gather. Once you’re happy with the effect, cure for 60 seconds.
- Apply your glossy top coat. For an even more intense 3D effect, you can use the magnet on the wet top coat layer as well before the final cure.
- Finish with a final cure to lock in the shimmering, velvet texture.
Pro-Tip: For a diffused, all-over velvet effect instead of a sharp cat-eye line, hold the circular end of a dual-ended magnet wand about an inch above the center of the nail. This will push the magnetic particles to the edges, creating a soft, luminous glow from within.

7. Try a Chic Black & White Negative Space Design

Pin this modern black and white look for a graphic statement!
For a modern, graphic look, try black and white spring nail art ideas that use black negative space. This geometric design relies on precision, and the secret is using thin striping tape. The tape is used for masking off a section of the nail, which you leave unpolished to create a crisp, clean line that makes the design feel light and airy.
Products & Tools Used
- A clear base coat
- Opaque black gel polish
- Opaque white gel polish
- Thin nail art striping tape
- A glossy top coat
Application/Styling Steps
- Apply the clear base coat to your natural nail and cure. This protects your nail and gives the tape a smooth surface to adhere to.
- Place a piece of striping tape vertically or diagonally across the nail where you want the negative space to be. Press it down firmly.
- Paint one side of the tape with black polish and the other side with white polish. Be careful not to flood the tape.
- CRITICAL STEP: Carefully remove the striping tape before you cure the polish. This ensures a crisp, clean line.
- Now, cure the nail for 60 seconds.
- Finish with a glossy top coat to smooth everything out and add shine.
Pro-Tip: For a truly salon-quality at home finish, use a structural gel like builder gel as your base. This creates a perfectly smooth and strong foundation, so your negative space lines look exceptionally sharp and the manicure lasts longer.

8. Add a Touch of Spring with Black and Pastel Daisies

Save this cute daisy design for a fun spring vibe!
Nothing says spring like flowers, and a black daisy mani is the easiest way to blend moody and cheerful. This beginner-friendly design is all about the dotting tool, which is used for creating perfect petals and centers with minimal effort. Pairing black and pastel yellow creates a fun, high-contrast look that’s playful yet stylish.
Products & Tools Used
- An opaque glossy finish black gel polish
- An opaque white gel polish
- A pastel yellow gel polish
- A dual-ended dotting tool
Application/Styling Steps
- Paint two coats of the black polish as your base and cure fully.
- Place a small drop of white polish on a palette. Dip the larger end of your dotting tool into it.
- Design the flower by placing 5-6 white dots in a circle on the nail. Don’t worry about them being perfect.
- Wipe the tool clean. Place a drop of yellow polish on your palette.
- Using the smaller end of the dotting tool, place a single yellow dot in the center of your white dots.
- Repeat to create as many daisies as you like. Cure the design, then seal with a glossy top coat.
Pro-Tip: If you only have one dotting tool, you can still create different dot sizes. For a larger dot (like the petals), dip the tool and press straight down. For a smaller dot (like the center), press down and slightly pull up at the same time. This is a certified nail artist trick for working with minimal tools.

9. Create a Mystical Celestial Black Manicure

Pin this magical celestial design for a touch of cosmic beauty!
Embrace a mystical vibe with celestial black nails. This dreamy star and moon nail art is all about creating a tiny galaxy on your fingertips. A shimmering midnight black or navy polish represents the night sky, while a fine liner brush and silver chrome polish are used to create delicate constellations, moons, and stars. For extra sparkle, tiny rhinestones can be added as twinkling stars.
Products & Tools Used
- A dark navy or shimmering obsidian black gel polish
- A fine liner brush
- Silver chrome polish or silver acrylic paint
- A dotting tool
- Optional: Tiny silver star-shaped glitter or rhinestones
- Optional: Celestial-themed nail stickers
Application/Styling Steps
- Paint two coats of your dark, shimmering base color and cure.
- Using the liner brush and silver paint, design a small crescent moon on one nail.
- Use the smallest dotting tool to create tiny stars and constellation dots on other nails. You can connect some dots with thin lines to form constellations.
- For extra sparkle, place a tiny rhinestone or star glitter in the center of a few “stars” while the top coat is wet.
- Alternatively, simply apply silver celestial stickers over the cured base color.
- Seal your galaxy with a high-gloss top coat and cure for a final time.
Pro-Tip: Before your final top coat, apply one thin layer of a holographic or fine-particle glitter polish. This transforms the look by adding depth and mimicking a star-filled nebula, providing a true long-lasting manicure with a professional touch.

Key Takeaways: Your Quick Guide to Moody Spring Nails
Feeling inspired? Here are the main takeaways to remember when planning your next moody manicure. This quick guide will help you recall the core principles for making black polish look incredible for the spring season.
- Black is Spring-Ready with the Right Accents: The key to wearing black nails in spring is to pair the dark spring nail design with seasonal motifs. Think matte black floral, delicate butterflies, or pastel color blocking.
- Texture is Everything: A simple black manicure is instantly transformed for spring by changing the texture. Try a matte top coat for a velvety, sophisticated feel or a black velvet magnetic polish for a shimmering, luxe look.
- Negative Space Makes it Lighter: Incorporating black negative space or creating sheer “pantyhose” nails allows your natural nail to peek through, making the overall look feel less heavy and more appropriate for the season.
- Don’t Be Afraid to Use Decals: For intricate designs like black butterfly nails or celestial black nails, high-quality stickers and stamps are an expert nail technician tip for achieving a perfect, salon-grade result at home.
- Contrast is Your Friend: The power of black spring nail designs comes from contrast. Pairing bold jet black with soft pastels, crisp whites, or shimmering gold leaf accents creates a visually stunning, moody yet fresh aesthetic.
People Also Ask About Black Spring Nail Designs
Still have questions? You’re not alone. Here are answers to some of the most common queries about wearing black nail polish during the spring months.
Are black nails in style for spring 2026?
Yes, black nails are definitely in style for spring 2026, especially for those seeking a “cool-girl” or moody aesthetic. The trend moves away from solid black and focuses on black spring nail designs that incorporate lighter elements like florals, pastels, sheer finishes, or chrome details to feel seasonally appropriate and chic.
How do you make black nails look like spring?
To make black nails look like spring, focus on adding contrasting elements that feel fresh and light. You can create a matte black floral accent nail, use dotting tools to add pastel-colored daisies, try black and white geometric patterns with negative space, or add shimmering gold leaf accents for a touch of elegance.
What colors go with black for spring nails?
Soft pastels, crisp whites, and metallics are perfect complements for black spring nails. A black and pink spring combination is very popular, as is the classic black + white. For a more luxurious look, pairing black + gold leaf or silver chrome is a sophisticated choice that works beautifully.
Which black nail design is best for short nails?
Minimalist designs are often best for short nails as they don’t overwhelm the smaller space. A minimalist black lines or abstract black swirls design on a nude or negative space base is very chic. A simple black daisy mani on one or two accent nails is also a great option.
How do you get the black velvet nail look?
The “black velvet” look is achieved using a special magnetic nail polish, often called cat-eye polish. You apply the polish and then hold a magnet wand over the wet nail. This pulls the metallic particles in the polish together, creating a shimmering, textured finish that looks like crushed velvet texture.
Are black French tips in style for spring?
Absolutely. Black French tips, especially with a modern twist, are very stylish for spring. Instead of a classic glossy tip, try chrome French tips for a mirror-like finish or a matte black tip for an understated, edgy look. These offer a contemporary update to a timeless design.
How do you prevent black polish from staining your nails?
To prevent staining from a highly pigmented color like black, always use a high-quality base coat. Applying one or two layers of a good base coat creates a protective barrier between the polish and your natural nail. For removal, use an acetone-based remover and wipe from cuticle to tip to avoid spreading pigment onto the skin.
Can you wear black nails to a spring wedding?
Yes, you can wear black nails to a spring wedding, provided the design is elegant and sophisticated. A design like sheer black nails with gold leaf, a minimalist swirl, or a delicate black lace tip can look incredibly chic and formal, pairing beautifully with spring wedding guest attire.
What nail shape is best for black polish?
Black polish is versatile and looks stunning on virtually any nail shape. A sharp stiletto or coffin shape enhances the edgy, goth-glam feel. An almond shape gives it a sophisticated, elongated look, while a simple short, squared-off nail makes a bold, clean statement.
How do you do matte black floral nails?
First, paint your nails with black polish and seal with a matte top coat. Once that’s cured, use a very fine nail art brush and a dotting tool with white or pastel polish to create the flowers. The contrast between the soft flowers and the matte black base is what makes the design so beautiful.
Final Thoughts on Your Moody Spring Manicure
This spring, give your nails a sophisticated edge by embracing the beauty of black spring nail designs. As we’ve explored, you don’t have to stick to a palette of pastels to celebrate the season. By incorporating delicate matte black florals, shimmering gold leaf accents, or modern chrome French tips, you can create a look that is both moody and perfectly in tune with the fresh energy of spring.
With the techniques and inspiration from these 9 ideas, you now have a complete guide to achieving a long-lasting manicure that reflects your unique style. Whether you’re a DIY enthusiast armed with dotting tools and decals or you’re taking this inspiration to your trusted nail technician, you’re ready to rock a salon-grade result. Embrace the chic, “cool-girl” vibe and redefine what seasonal beauty means to you.
Which of these moody spring nail art ideas are you most excited to try first? Let us know in the comments below.
Last update on 2026-02-19 / Affiliate links / Images from Amazon Product Advertising API


