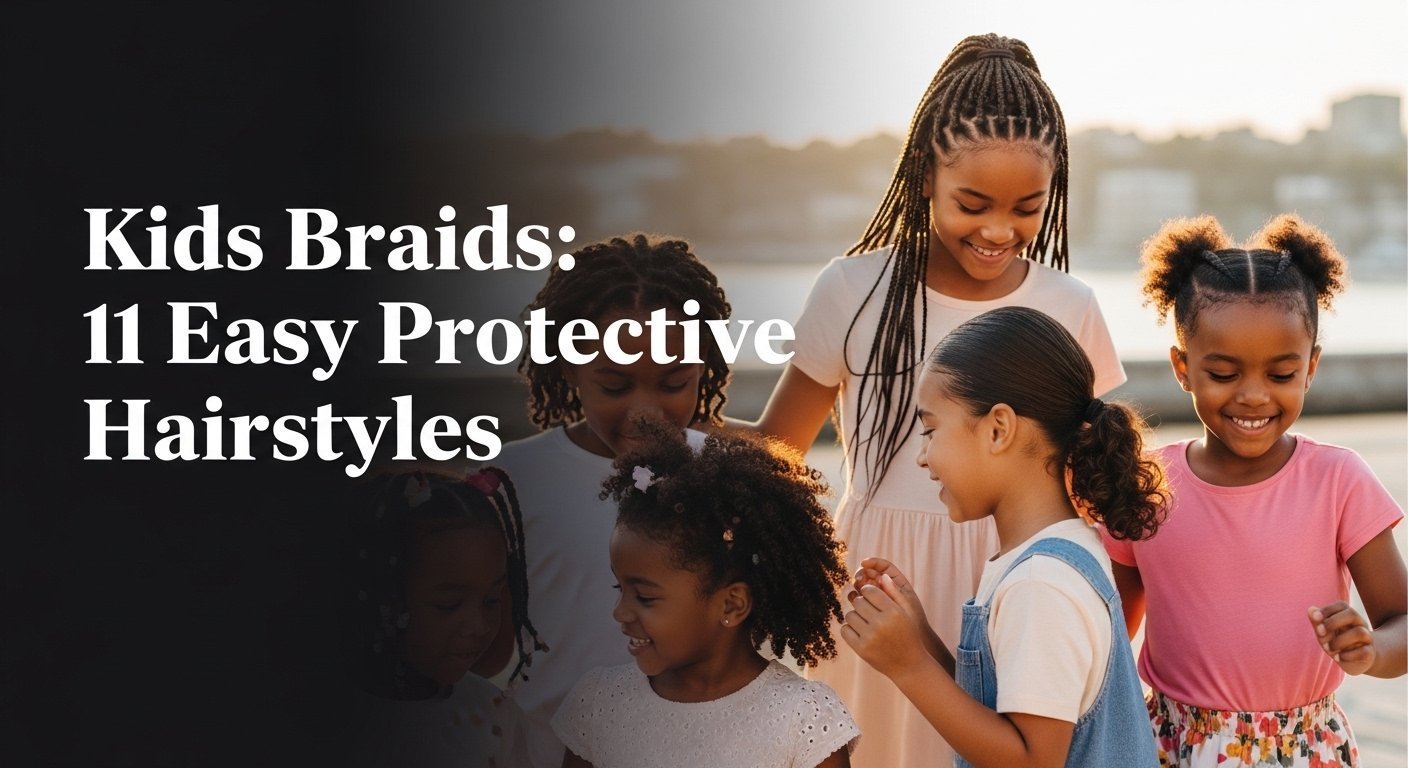
Tired of the morning scramble to tame your child’s hair? If you’re searching for beautiful, long-lasting solutions that stop battles with tangles and frizz, you’ve come to the right place. Finding the perfect braid hairstyles for kids that are both cute and protective can feel like a challenge.
The best braid hairstyles for kids are protective, low-maintenance styles like cornrows with beads, knotless box braids, and simple two-strand twists. These styles prevent breakage, reduce morning styling time, and can be decorated with accessories for a cute, age-appropriate look perfect for school and play. They are a fantastic way to keep hair neat and healthy.
Based on established best practices and parent-approved methods, this guide provides more than just inspiration. These are protective styles designed to promote healthy hair and simplify your morning routine. You’ll discover 11 easy-to-follow tutorials for creating beautiful, comfortable, and durable braids your child will absolutely love.
What Are The Best Braid Hairstyles for Kids?
The best braids are those that serve as a true protective styling for kids, meaning they safeguard the hair from damage caused by daily manipulation. Styles like cornrows and box braids are fantastic because they keep the hair’s delicate ends tucked away, which helps with moisture retention and prevents common problems like tangles, frizz, and breakage. Furthermore, the versatility of these styles is a major benefit. You can easily elevate a simple set of plaits by adding fun hair accessories like colorful hair beads or shiny hair cuffs, turning a practical hairstyle into a creative expression. This guide focuses on styles that are not only beautiful but also prioritize the health and comfort of your child’s scalp.
11 Easy Protective Braid Hairstyles for Kids in 2026
Ready to find your next go-to hairstyle? This list delivers on the promise of cute, easy, and protective braids for kids. Each hairstyle below is a complete mini-tutorial, designed to be both visually inspiring and incredibly practical. We’ll cover everything from the products you’ll need to step-by-step instructions and pro-tips that focus on gentle methods and long-term hair health, including crucial advice on traction alopecia prevention. This is your blueprint for creating beautiful styles that both you and your child will adore.
1. Create Classic Cornrows with Colorful Beads

Pin this adorable back-to-school style to your “Kids Hairstyles” board!
Classic cornrows with beads are a timeless and practical choice for kids. This style keeps hair neatly tucked away, making it perfect for active school days and saving precious time in the mornings. The addition of colorful hair beads makes it a fun way for children to express their personality.
Products & Tools Used
- Rat-tail comb for neat, precise parting
- Detangling spray for natural hair to minimize pulling
- Kid-friendly edge control for a smooth finish
- A selection of colorful hair beads
- A plastic beading tool or a crochet hook
- Small, durable elastic bands
Application/Styling Steps
- Wash, condition, and thoroughly detangle your child’s hair. For best results, work on slightly damp or fully dried and stretched hair.
- Use the rat-tail comb to part the hair into straight rows from front to back. The number of rows depends on your desired braid size. Clip away the sections you aren’t working on.
- Take the first section and apply a small amount of edge control to the hairline for a clean start.
- Begin to braid the hair close to the scalp (cornrow). As you braid back, gather small amounts of hair into each of the three strands to keep the braid attached to the head.
- Once you braid past the scalp, continue with a regular three-strand plait to the ends.
- To bead the ends, slide your desired beads onto the beading tool, hook the end of the braid, and push the beads onto the hair.
- Secure the end by tying a small elastic band below the last bead or by looping the end of the hair back through the last bead if it’s wide enough.
Pro-Tip: To avoid follicular tension, don’t braid too tightly at the scalp. The braids should be firm but not pull on the skin. A stylist-recommended trick is to ensure you can comfortably slide the tip of your comb under the start of the cornrow.

2. Achieve Painless & Trendy Knotless Box Braids

Save this guide for a lightweight, protective style your kid will love!
Knotless box braids are a game-changer, especially for kids who are tender headed. Unlike traditional box braids kids might find heavy, the knotless technique starts with the child’s natural hair, which prevents the tension and pulling at the scalp. This makes the style significantly more lightweight and painless.
Products & Tools Used
- Pre-stretched, lightweight Kanekalon braiding hair
- Rat-tail comb and hair clips for sectioning
- A high-quality, non-flaking braiding gel or edge control
- Hair moisturizer and scalp oil
- A small pair of scissors
- Mousse for setting the braids
Application/Styling Steps
- Begin with clean, moisturized, and stretched hair.
- Part the hair into square sections (box parts). The size of the boxes will determine the size of the braids. Clip away other sections.
- Take one section of natural hair and apply a small amount of braiding gel for grip.
- Braid the natural hair for about half an inch from the scalp. This is the crucial first step.
- Now, begin the “feed-in” method: take a small piece of the Kanekalon hair, fold it, and feed it into your natural braid, incorporating it into two of the three strands.
- Braid down another half-inch, then feed in another small piece of extension hair. Continue this process until the braid reaches your desired thickness.
- Continue braiding down to the ends and seal by dipping the ends in hot water (adult supervision required) or by using a small elastic band. Repeat for the entire head.
Pro-Tip: The key to painless knotless braids is starting with the child’s natural hair first. This low-tension technique is a game-changer for traction alopecia prevention and is highly recommended for children.

3. Style Simple & Elegant Twin French Braids

A timeless classic! Pin this easy French braid tutorial for later.
The two braids style using a French braid technique is a timeless classic for a reason. It’s a durable and elegant look that’s perfect for any occasion, from the classroom to a special event. Learning how to braid kids hair this way is a foundational skill that simplifies the morning routine and works for all hair types.
Products & Tools Used
- A detangling brush or wide-tooth comb
- A comb for parting
- Two strong, no-slip hair elastics
- A small amount of smoothing cream or water in a spray bottle to control flyaways
Application/Styling Steps
- Detangle the hair completely. For a super straight part, use a rat-tail comb to divide the hair into two equal halves from forehead to nape. Clip one side away.
- Take the side you’re working on and grab a small section of hair at the hairline. Divide this into three equal strands.
- Begin a traditional braid: cross the right strand over the middle, then cross the left strand over the new middle.
- Now, begin the French braid motion. Before you cross the right strand over again, gather a small, new piece of hair from the right side and add it to that strand. Then, cross the combined piece over the middle.
- Repeat on the left side: gather a new piece of hair from the left, add it to the left strand, and cross the combined piece over the middle.
- Continue this pattern, adding hair to your outer strands before crossing them over the middle, until you have gathered all the hair on that side.
- Once you reach the nape of the neck, finish with a regular three-strand braid and secure with an elastic. Repeat on the other side.
Pro-Tip: For a tighter, longer-lasting braid, use slightly damp hair or a light-hold smoothing cream. This helps grip the strands better and minimizes the frizz that can appear after a day of play.

4. Design a Cute Half-Up, Half-Down with Braids

The perfect mix of pretty and practical! Pin this for your next special occasion.
The half-up, half-down style is the perfect compromise when you want the neatness of braids but also want to show off your child’s beautiful curls or length. It’s a go-to for birthday hair ideas or family photos because it combines the practicality of keeping hair out of the face with an elegant, dressy look, making it an ideal choice among fancy braids.
Products & Tools Used
- Comb for parting
- Hair clips for sectioning
- Small elastic bands
- Curl-defining cream or leave-in conditioner
- A decorative bow or hair clips
Application/Styling Steps
- Start with clean, moisturized hair. If your child has curly hair, apply curl cream to the entire head to define the curls.
- Part the hair horizontally from ear to ear, separating the top section from the bottom. Clip the bottom section out of the way.
- With the top section, create a center part, dividing it into two halves.
- On one side, braid a neat cornrow or French braid from the hairline back towards the crown of the head. Secure with a small elastic.
- Repeat the braid on the other side.
- Join the ends of the two braids together at the crown with another elastic band. You can leave them as a simple ponytail or twist them into a small bun.
- Cover the elastic with a pretty bow or decorative clip. Let the bottom section of hair flow freely.
Pro-Tip: To keep the loose curls from getting tangled overnight, loosely pineapple the hair on top of the head using a scrunchie and have your child sleep on a silk or satin bonnet or pillowcase. This helps with moisture retention and reduces frizz.

5. Weave a Creative Heart Braid Design

The perfect birthday or Valentine’s Day hair! Pin this cute idea.
A heart braid is one of the most popular creative cornrow designs and looks much more complex than it is. The secret isn’t in the braiding, but in the parting. By creating a precise heart-shaped part first, you create a simple roadmap to follow, resulting in a stunning design that’s perfect for special occasions.
Products & Tools Used
- A precision rat-tail comb
- Strong-hold, non-flaking braiding gel
- Hair clips for sectioning
- A hair elastic for the final ponytail
Application/Styling Steps
- Start with clean, detangled, and moisturized hair.
- Choose where you want the heart design (e.g., on the side of the head). In that area, use the tip of your rat-tail comb to carefully draw a heart shape. This initial part is the most important step.
- Separate the hair inside the heart outline from the hair outside of it. Clip the hair outside the heart away.
- Apply a small amount of braiding gel along the heart-shaped part line to make it crisp and to tame flyaways.
- Begin to braid the hair from inside the heart, starting at the top curve. Create a small cornrow that follows the part line all the way around the heart shape.
- As you braid, feed in small amounts of hair only from inside the heart.
- Once the heart is fully braided, you can either tuck the end of the braid under or let it join the rest of the hair.
- Gather all the remaining hair, including the end of the heart braid, into a high ponytail and secure it.
Pro-Tip: For an ultra-crisp design, after parting, go over the part line with a firm-hold gel on a small brush. This is an industry standard technique used by professional braiders to make patterns pop.

6. Make Fun & Easy Bubble Braids

No braiding skills required! Pin this super quick and cute hairstyle.
Bubble braids are the ultimate hack for a trendy, braided look without any actual plaiting. This style is one of the best alternatives to braiding because it’s incredibly quick and easy, making it a lifesaver for busy school mornings. All you need are a few rubber bands to create this fun, bouncy ponytail.
Products & Tools Used
- A hairbrush for smoothing
- A large elastic for the initial ponytail
- Multiple small, colorful rubber bands or elastics
- Optional: Smoothing cream or hairspray
Application/Styling Steps
- Brush the hair to remove all tangles and gather it into a high, smooth ponytail. Secure it firmly with a large elastic.
- About one to two inches down from the base of the ponytail, place a small, colorful elastic.
- Gently pull and fluff the section of hair between the two elastics. Tug outwards on the strands to create a round “bubble” shape.
- Continue down the ponytail, placing another elastic one to two inches below the previous one.
- Fluff out the new section to create your second bubble.
- Repeat this process until you reach the end of the hair, leaving a small tail at the bottom.
- For extra hold, you can lightly spritz the finished style with a flexible-hold hairspray.
Pro-Tip: The secret to big, round bubbles is to pull the strands out from the center of the section, not just the sides. Use your thumb and index finger to gently tug the hair outwards all around the elastic to get a perfect sphere shape.

7. Braid a Stylish & Secure High Ponytail

A sporty, chic, and ultra-durable style! Save this for your active kid.
A braided ponytail with an upward cornrow base is one of the most durable braids for kids. This style is perfect for sports, dance, or just an active day at the playground because the cornrows create a secure, tension-distributed base that won’t get messy. It’s a sleek and stylish look that truly lasts.
Products & Tools Used
- A brush and a rat-tail comb
- Strong-hold braiding pomade or gel
- Hair clips for sectioning
- A large, sturdy hair elastic
- Optional: Hair cuffs or ribbons for decoration
Application/Styling Steps
- Start with clean, detangled, and moisturized hair.
- Have your child flip their head forward. Starting at the nape of the neck, begin creating upward-pointing parts. You can do 4-6 large sections.
- For each section, apply pomade and create a French braid or cornrow, braiding upwards from the nape towards the crown of the head.
- Don’t finish the braids; stop braiding once you reach the crown, where the ponytail will sit. Secure each unfinished braid with a clip.
- Once all the sections are braided up to the crown, gather all the hair (the loose ends of the braids and any remaining hair) into a high ponytail.
- Secure the ponytail very firmly with a strong elastic band.
- Now, take the loose hair in the ponytail and create one large, traditional three-strand braid.
- Secure the end of the large braid and decorate with hair cuffs if desired.
Pro-Tip: This is a very secure style. When taking it down, don’t just pull the elastic out. To prevent breakage, carefully snip the elastics with small scissors and gently un-braid each section after applying a detangling spray.

8. Twist Simple Two-Strand Twists with Extensions

A great alternative to braids! Pin this lightweight, protective twist style.
When considering braids vs twists, two-strand twists offer a wonderful alternative to braiding. They are generally faster to install and remove, and the hair twisting motion is often gentler on the stylist’s hands and the child’s scalp. This is a fantastic protective styling option that promotes growth by keeping ends protected.
Products & Tools Used
- Lightweight twisting hair extensions (e.g., Marley hair or Spring Twist hair)
- Comb for parting and clips for sectioning
- Moisturizing twisting cream or butter
- Scalp oil for maintenance
Application/Styling Steps
- Start with clean, moisturized, and sectioned hair. For this style, square or triangular parts work well.
- Take one section of natural hair and apply a generous amount of twisting cream from root to tip.
- Take a piece of the extension hair and place it at the root of the natural hair section.
- Divide the natural hair and the extension hair together into TWO equal strands.
- Begin to twist the two strands around each other, from the root all the way to the ends. Keep the tension firm but not tight on the scalp.
- As you twist, make sure you are twisting each individual strand in one direction (e.g., to the right) while wrapping them around each other in the opposite direction (e.g., to the left). This locks the twist in place.
- Repeat for the entire head. The ends can be sealed by dipping in hot water (with an adult’s help) or by rolling them between your palms with gel (a method called palm-rolling).
Pro-Tip: To prevent slipping braids (or in this case, unraveling twists), ensure the natural hair is well-moisturized with a good cream. Dry hair will fight the twist. For extra security on 4c hair, you can create a tiny, one-inch braid at the base before you start twisting.

9. Create Lemonade Braids for a Stylish Side-Sweep

Get the celebrity look! Pin this trendy Lemonade braids tutorial.
Lemonade braids, made famous by Beyoncé, are a trending and stylish side-swept cornrow style. This look features a pattern of neat, often small cornrows that all flow in one direction, creating a dramatic and fashionable asymmetric look. It’s a fun way to do a full head of cornrows with a modern twist.
Products & Tools Used
- Rat-tail comb
- Braiding gel with a strong hold
- Hair clips
- Optional: kanekalon hair for added length
- Optional: Beads or hair cuffs
Application/Styling Steps
- On clean, moisturized, and detangled hair, create a deep side part. This will be the starting point for your design.
- Apply braiding gel to the part line for a clean look.
- Begin your first cornrow right at the part, braiding along the hairline towards the opposite side of the head.
- Part your next section directly behind the first one. Braid this section in the same direction, following the curve of the first braid.
- Continue this process, creating parallel, curved cornrows that all sweep from the deep side part over to the other side of the head.
- If you are adding extensions, use the feed-in method for a more natural, knotless look.
- Once all the hair is braided, you can decorate the ends with beads or cuffs. Seal the ends appropriately.
Pro-Tip: For a more dynamic look, you can vary the size of the braids. A common hair design technique is to have very thin braids near the part and gradually make them thicker as you move down the side of the head.

10. Install a Beaded Fulani Braid Style

A beautiful, culturally rich style. Pin this guide to Fulani braids.
Fulani braids are a stunning style rich in cultural heritage. The style is defined by its unique pattern: a central braid running down the middle part, with side cornrows braided towards the back, and often one or two braids braided forward towards the face. This style is traditionally decorated with an abundance of hair beads, making it a truly iconic look.
Products & Tools Used
- Rat-tail comb for precise parting
- Braiding gel
- Hair clips
- A variety of wooden, metal, or clear hair beads
- A beading tool
Application/Styling Steps
- On clean, moisturized hair, create a clean middle part from your forehead to the crown of your head.
- Braid a single cornrow straight back along the middle part. This is a signature element of the style. You can add beads to this braid.
- On both sides of the center part, create horizontal parts and braid the hair in straight-back cornrows.
- Another key element: at the temples, create one or two small, thin braids on each side that are braided forward towards the face. These are often heavily decorated with beads.
- The rest of the hair at the back can be braided into individual box braids or twists.
- Use your beading tool to add a generous amount of beads to the ends of all the braids, especially the forward-facing ones. Secure the ends.
Pro-Tip: This beautiful style originates with the Fula people of West Africa. To honor its cultural heritage, consider using traditional-style wooden or amber-colored beads. Maintaining the specific braid pattern is key to an authentic look.

11. Braid Short Hair with Simple Side Braids

Even short hair can be braided! Pin this adorable idea for toddlers.
A common question is how to braid short hair for kids, and the answer is simpler than you think! You don’t need a full head of long locks for a cute style. A simple side braid is a perfect toddler braid style because it’s quick, functional, and adorable. It works for short hair by simply keeping those flyaway strands out of their eyes.
Products & Tools Used
- A fine-tooth comb
- A light-hold, waxy pomade or gel for grip
- A small snap clip or tiny elastic band
Application/Styling Steps
- This style works best on slightly damp hair, which provides better grip.
- Create a deep side part. On the side with more hair, take a small section near the temple.
- Apply a small dab of pomade to this section. This is the key to getting a good grip on short or fine hair.
- Divide the section into three small strands.
- Begin to French braid or cornrow, keeping the braid very close to the scalp. The trick is to pick up very small new pieces of hair to add in.
- Braid back just a few inches, until you are past the child’s eye-line. You don’t need to go all the way to the back of the head.
- Once you’ve braided far enough, secure the end of the tiny braid with a small snap clip or a tiny, clear elastic. Let the rest of the hair be free.
Pro-Tip: Working with a toddler requires speed. Have all your supplies ready beforehand. Giving them a toy or a snack can provide just enough distraction to finish the small braid before they get restless. This is a perfect morning routine style that takes less than 5 minutes.

Key Takeaways
- Prioritize Health Over Style: Always choose low-tension techniques like knotless braids to prevent breakage and protect your child’s delicate hairline. A braid should be firm, not painfully tight.
- Moisture is Key: Start with clean, well-moisturized hair and continue to lightly spritz the braids and oil the scalp every few days. This prevents a dry scalp and keeps the natural hair healthy.
- “Protective” Means Low Manipulation: The main benefit of protective braids for kids is giving the hair a break from daily combing and styling. A good braided style should last for several days or even weeks.
- Nighttime Care is Crucial: A satin bonnet or silk pillowcase is non-negotiable. It reduces frizz, prevents snags, and helps the style last longer while protecting the hair.
- Gentle Takedown Prevents Damage: When removing braids, be patient. Use a detangling spray or conditioner with slip, and gently un-braid and comb from the ends up to the roots to avoid causing hair loss.
- Even Short Hair Can Be Braided: For toddlers or kids with short hair, a small side cornrow or French braid is a perfect way to keep hair out of their face, proving that you don’t need long hair for a cute braid hairstyle for kids.
People Also Ask About Braid Hairstyles for Kids
How long do kids’ braids last?
Most kids’ braid styles should last between one to three weeks. The longevity depends on the braid type, the child’s activity level, and how well they are maintained. Simple cornrows may last a week, while smaller knotless braids can last up to three weeks before needing to be refreshed.
Are braids good for kids’ hair growth?
Yes, braids can be excellent for promoting hair growth when done correctly. They are a form of protective styling that reduces daily manipulation, combing, and breakage, which helps with length retention. The key is ensuring the braids are not too tight, as excessive tension can cause damage (traction alopecia prevention).
How do you keep kids’ braids neat and prevent frizz?
A satin bonnet or silk pillowcase at night is the most effective way to keep braids neat. You can also apply a small amount of braid mousse or setting foam every few days and smooth it over the braids to tame flyaways and frizz. Avoid constant touching of the braids.
How do you wash kids’ hair in braids?
Focus on washing the scalp, not the braids themselves. Dilute a gentle shampoo with water in a squeeze bottle and apply it directly to the scalp between the parts. Massage gently with your fingertips (not nails), rinse thoroughly, and then gently squeeze excess water from the braids. Always follow with a leave-in conditioner spray.
What age is appropriate to start braiding a child’s hair?
You can start simple, loose braids around age two or three, once the hair has enough length and strength. For toddlers, it’s crucial to opt for very simple, painless styles that don’t take long and don’t put any tension on their fine hair follicles. Avoid heavy extensions until they are older.
What are knotless braids and why are they better for kids?
Knotless braids are a braiding technique where the extension hair is fed into the braid gradually, rather than starting with a tight knot at the scalp. This low-tension technique makes them significantly more lightweight, flexible, and painless, making them the stylist recommended choice for children and anyone who is tender headed.
How can I stop my child’s scalp from itching in braids?
Itching is often caused by a dry scalp or a reaction to the braiding hair. To prevent it, moisturize the scalp every 2-3 days with a light scalp oil. If using extensions, consider rinsing the kanekalon hair in an apple cider vinegar solution before installing to remove alkaline residue that can cause irritation.
How do I add beads to braids safely?
Use a plastic beading tool, which is safer and faster than forcing beads on. Slide the beads onto the tool, hook the tip of the braid, and then push the beads from the tool onto the hair. Secure the end with a small, sturdy elastic, ensuring it’s not too tight.
Can my child swim with braids?
Yes, children can swim with braids, which is a major advantage. After swimming, it’s important to rinse the hair thoroughly with fresh water to remove chlorine or salt. Gently squeeze out excess water and apply a leave-in conditioner to re-moisturize the hair.
How do you take out kids’ braids without causing breakage?
Patience and lubrication are key. First, trim the ends of the braids just above where your child’s natural hair ends. Then, apply a generous amount of detangling spray or a conditioner mixed with water to the braid. Use a rat-tail comb to gently un-braid and detangle from the bottom up.
Final Thoughts on Choosing the Perfect Kids Braids
Choosing a braid hairstyle for kids is about so much more than just looks; it’s about simplifying your life, protecting your child’s precious hair, and celebrating their unique style. By focusing on gentle methods and prioritizing scalp health, you can create beautiful looks that promote strong, healthy hair growth. Braiding can be a wonderful bonding time and a way to instill confidence and a love for their natural hair.
We’ve explored everything from simple two-strand twists to intricate Fulani braids. Now you have the tools and techniques to tackle any of these styles with confidence. Which of these adorable and practical braid hairstyles will you try first on your little one?
Last update on 2026-03-13 / Affiliate links / Images from Amazon Product Advertising API


