Struggling to create beautiful braid hairstyles for long hair that actually last? It’s frustrating when your perfect plait starts to frizz or slip out just a few hours after you’ve styled it, leaving you with a look that’s more messy than chic.
Achieve stunning, long-lasting braid hairstyles for long hair by mastering foundational techniques like proper sectioning and tension, choosing the right products to combat frizz, and learning expert finishing touches to ensure a secure hold all day. This unlocks a world of styles from simple and quick to elegant and intricate.
Drawing from established best practices and proven methodologies, this guide breaks down everything you need to know. We’ll explore 11 gorgeous braid designs for long hair with step-by-step instructions. You’ll discover how to transform your long locks into beautiful, durable braided art.
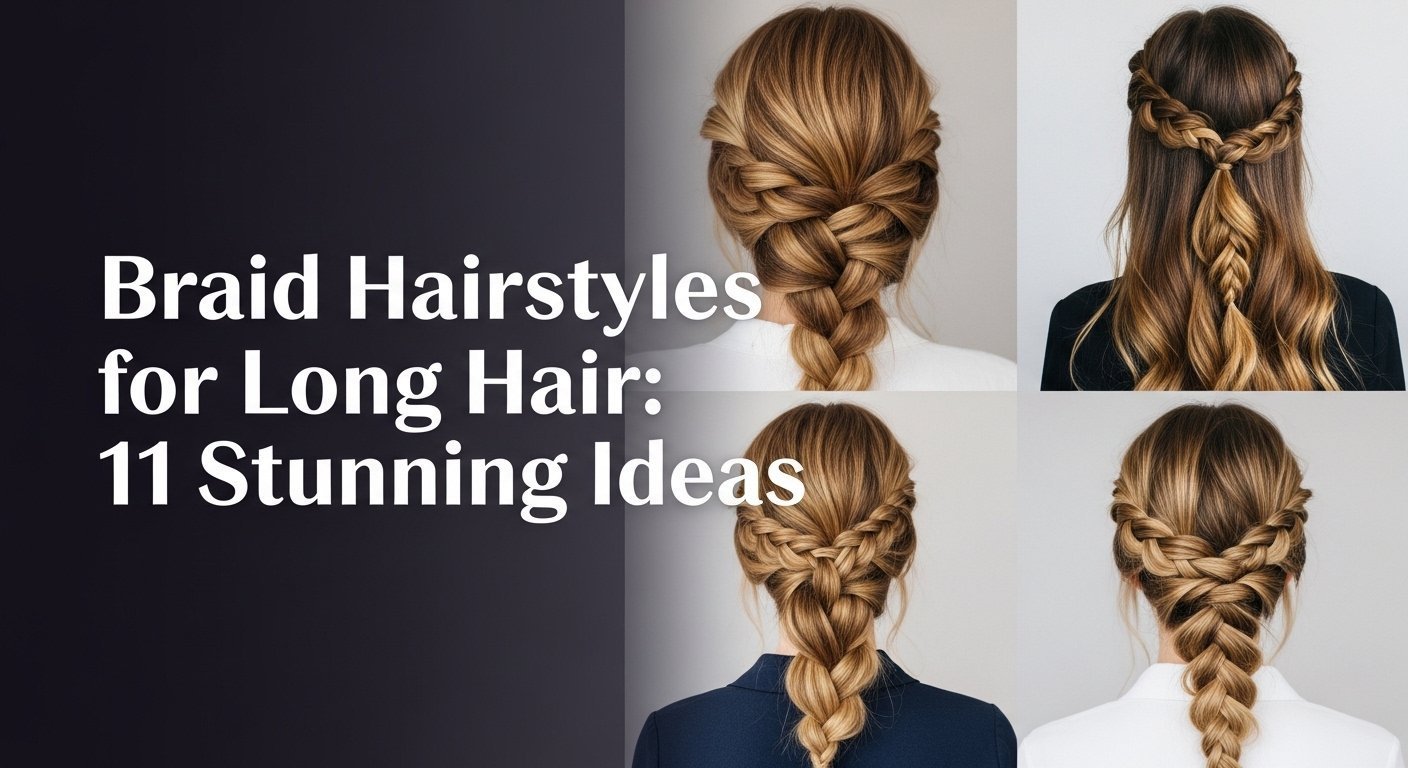
11 Stunning Braid Hairstyles for Long Hair to Master This 2026
Long hair offers a fantastic canvas for a huge variety of braided hairstyles, from the timeless and elegant to the modern and edgy. Mastering a few core braiding techniques can unlock endless possibilities, allowing you to create the perfect look for any occasion. Whether you need a quick and easy braided hairstyle for work, an intricate braided updo for a wedding, or a durable style for the gym, there’s a braid for you. This guide provides a comprehensive list of 11 distinct long hair braid ideas, complete with detailed, actionable tutorials. Each section is designed to be a mini-guide, helping you perfect the style while addressing common problems like frizz and ensuring your creation has a secure hold. We’ll move from foundational styles that are easy for beginners to more complex designs that showcase your skill.
1. The Classic French Braid

Pin this timeless French braid look to your ‘Everyday Hairstyles’ board!
The French braid is a cornerstone of classic braids, known for its sleek and elegant appearance. This braiding technique creates a smooth, interwoven pattern that sits flat against the head, making it perfect for both casual and professional settings. Mastering the French braid tutorial is a fundamental skill that opens the door to many other complex styles. It requires precise sectioning and even tension to achieve that polished, neat finish. While it may seem tricky at first, a little practice will help you perfect the rhythmic motion of adding hair to each strand, creating a beautiful hairdo that is both secure and stylish.
What You Need
- Detangling brush
- Fine-tooth comb
- Hair elastics
- Light-hold hairspray
- Edge control
Instructions
- Prep hair by detangling thoroughly with a detangling brush for a smooth finish.
- Section off a triangular piece of hair from the crown, approximately 1-2 inches back from the hairline.
- Divide this section into three equal strands.
- Begin a basic three-strand braid, weaving the right strand over the middle, then the left strand over the new middle.
- Before bringing the right strand over again, collect a small section of loose hair from the right side of your head and add it to the right strand. Then, weave the combined strand over the middle.
- Repeat on the left side: collect a small section of loose hair from the left, add it to the left strand, and weave over the middle.
- Continue this process of adding hair from each side as you braid, ensuring even tightening with each pass to prevent slipping.
- Once you’ve incorporated all desired hair into the braid, continue with a regular three-strand braid to the ends.
- Secure with a hair elastic, then gently mist with hairspray for a long lasting hold.
Pro-Tip: To prevent frizz and flyaways, apply a small amount of styling cream or hair oil to each section before weaving. This enables a sleek, professional finish. Using an ergonomic comb during sectioning can significantly reduce arm fatigue.

2. The Versatile Dutch Braid

Save this versatile Dutch braid tutorial for your next gym session!
Often called an inverted braid, the Dutch braid is the bold counterpart to the French braid. Instead of weaving strands over the middle, you weave them under, which creates a prominent, 3D effect that makes the braid pop off the scalp. This technique is fantastic for creating a voluminous look and is especially suited for long thick hair. The secure hold of Dutch braids makes them a go-to braid for school or athletic activities, as they are a great way to find out how to make braids stay in all day. Its versatility allows it to be styled tightly for a sporty look or loosened for a more romantic, full-bodied hairdo.
What You Need
- Texturizing spray
- Sectioning clips
- Hair elastics
- Bobby pins
- Volumizing mousse
Instructions
- Prep hair by spraying with texturizing spray for added grip and texture.
- Section off a triangular piece of hair from the crown, similar to a French braid.
- Divide this section into three equal strands.
- Begin by weaving the right strand under the middle strand.
- Then, weave the left strand under the new middle strand. This ‘under’ motion is key to the Dutch braid.
- Before bringing the right strand under again, collect a small section of loose hair from the right side and add it to the right strand. Then, weave the combined strand under the middle.
- Repeat on the left side: collect a small section of loose hair from the left, add it to the left strand, and weave under the middle.
- Continue this process of adding hair from each side as you braid, always weaving the side strands under the middle. Maintain even tension for a neat and prominent braid.
- Once all desired hair is incorporated, continue with a regular three-strand braid (still weaving under) to the ends.
- Secure with a hair elastic. For added volume, gently pancake or pull-through the loops of the braid for a wider, fuller appearance.
Pro-Tip: For maximum volume and definition, lightly mist each section with a texturizing spray before weaving. This enables the braid to appear thicker and more voluminous, especially if you have thin ends.

3. The Intricate Fishtail Braid

Pin this intricate fishtail braid for your next special occasion!
The fishtail braid is an intricate braiding technique that looks far more complicated than it actually is. This beautiful hair design creates a unique, herringbone-like pattern by weaving together just two main sections of hair. It’s a fantastic option when you want a style that’s more delicate and detailed than a regular braid. This side braid tutorial is perfect for showcasing the braid’s fine texture, and it can be styled as a sleek, tight plait or pulled apart for a wonderfully boho messy braid. The continuous intertwining of small strands is what gives the fishtail its signature look.
What You Need
- Wide-tooth comb
- Hair ties
- Hair serum or oil
- Pintail comb
Instructions
- Prep hair by detangling and applying a small amount of hair serum or oil to help with smooth finish and reduce frizz.
- Divide your long hair into two equal sections. You can start this at the nape of your neck, or higher up for a side fishtail.
- Take a small strand of hair (about a quarter to half-inch thick) from the outside of the right section.
- Cross this small strand over the top of the right section and add it to the inside of the left section.
- Now, take a small strand of hair from the outside of the left section.
- Cross this small strand over the top of the left section and add it to the inside of the right section.
- Continue this process of crossing small strands from the outside of one section to the inside of the other, always keeping the two main sections distinct.
- Maintain consistent tension as you weave to ensure an even and neat braid.
- Once you reach the ends, secure the fishtail braid with a hair tie.
- For a messy, boho look, gently pancake the braid by pulling-through the loops to make it appear wider and softer.
Pro-Tip: To make your fishtail braid appear thicker and more voluminous, use the pancaking method: gently pull-through on the edges of each interwoven section. This creates a softer, more boho look and can hide minor imperfections.

4. The Waterfall Braid for a Romantic Look

Pin this stunning waterfall braid to your ‘Romantic Hairstyles’ board!
The waterfall braid is a stunningly romantic braid that creates a beautiful cascading effect. It’s a unique braiding technique that functions as a half up half down waterfall braid, where a portion of the hair is braided horizontally across the head while strands are dropped through the plait to flow down with the rest of the hair. This style is particularly beautiful on wavy hair, as it enhances the natural hair texture and adds an ethereal, fairy-tale quality. Learning how to do a waterfall braid is perfect for those seeking an elegant braid for a special occasion that isn’t a full updo.
What You Need
- Heat protectant spray
- Curling iron or wand
- Small hair elastic
- Bobby pins
- Flexible-hold hairspray
Instructions
- Prep hair by detangling. If desired, add soft waves using a curling iron after applying heat protectant spray to enhance the waterfall effect.
- Create a side parting, then section off a piece of hair from the front, near your temples.
- Divide this section into three equal strands, just like you would for a traditional French braid.
- Begin a French braid by weaving the top strand over the middle, then the bottom strand over the new middle.
- Now, here’s the waterfall part: take the new top strand, drop it down, letting it fall freely, and replace it by picking up a new section of hair from directly underneath the dropped strand.
- Continue the braid: weave the new top strand over the middle, then the bottom strand over the new middle.
- Again, take the new top strand, drop it down, and replace it by picking up a new section of hair from underneath.
- Keep repeating this process of dropping the top strand and picking up a new one. Weave the remaining two strands (middle and bottom) as you move across the head.
- Once you reach the desired point (e.g., the back of your head, or wrap it around further), secure the remaining two strands with a small hair elastic or bobby pin underneath a section of hair to hide it.
- Gently mist with flexible-hold hairspray for a long lasting hold.
Pro-Tip: For the most ethereal waterfall effect, start with wavy hair or add soft curls with a large-barrel curling iron beforehand. This enhances the cascading look of the dropped strands and creates a more romantic overall hairdo.

5. The Elegant Crown Braid (Halo Braid)

Pin this elegant crown braid inspiration for your next formal event!
The crown braid, also known as the halo braid, is a truly elegant braided updo that wraps around the head like a regal halo. This formal hairstyle creates a stunning coiffure that is perfect as wedding hair inspiration or for any other special occasion where you want a sophisticated look. While this intricate braid appears complex, learning how to do a crown braid is achievable with practice. It requires careful sectioning and a secure pinning technique to ensure the braid stays in place all day. The result is a timeless and beautiful style that keeps all of your long hair neatly and elegantly contained.
What You Need
- Fine-tooth comb
- Hair grip or strong-hold styling cream
- Small hair elastics
- Bobby pins
- Strong-hold finishing spray
Instructions
- Prep hair by applying a small amount of styling cream for better grip and a smooth finish.
- Create a deep side parting. Begin braiding just behind one ear, taking three small strands.
- Start a Dutch braid (or French braid if preferred), weaving the side sections under (for Dutch) or over (for French) the middle strand, and gradually adding small sections of hair from both above and below the braid as you work your way around the hairline.
- Maintain a consistent height and tension, aiming to keep the braid close to the hairline as you weave it around your entire head.
- When you reach the starting point, braid the remaining hair into a regular three-strand braid (without adding any new hair).
- Secure the end of this braid with a small hair elastic.
- Tuck the tail of the braid underneath the beginning of the crown braid, using bobby pins to invisibly secure it in place.
- Gently adjust the braid for desired volume or tightness. Finish with a strong-hold finishing spray to ensure the braided updo stays in all day.
Pro-Tip: For a truly long lasting and secure hold, use a technique known as ‘backcombing’ a small section of hair where the tail will be pinned. This creates a sturdy anchor for the bobby pins, preventing the crown braid from slipping.

6. The Trendy Bubble Braid

Pin this fun bubble braid idea for an easy and quick style!
Looking for a stylish alternative in the braid vs ponytail debate? The bubble braid is a fun, modern hair design that delivers a big impact with minimal effort. This quick hairstyle creates a series of voluminous, rounded “bubbles” down the length of a ponytail. It requires no actual braiding, just a series of elastic bands, making it an incredibly easy braid for anyone to master. The bubble braid tutorial is perfect for those who want a playful and trendy look without the complexity of traditional weaving, making it a fantastic quick and easy braided hairstyle for work or a casual day out.
What You Need
- Hairbrush
- Hair elastics
- Volumizing spray or dry shampoo
- Light-hold hairspray
Instructions
- Prep hair by detangling and brushing it smooth. Decide if you want a high ponytail base, a low one, or multiple bubble braids.
- Gather the top section of your long hair into a ponytail (or half-up ponytail) and secure it with a hair elastic.
- Approximately 2-3 inches below the first elastic, secure another hair elastic around the ponytail.
- Between the two elastics, gently pull-through the hair outwards to pancake and create a ‘bubble’ effect. The more you pull-through, the larger the bubble will be.
- Continue this process of securing an elastic, then pancaking the section above it, down the entire length of your ponytail.
- Adjust each bubble to achieve your desired volume and shape.
- Finish with a light mist of hairspray to smooth finish any flyaways and help the bubble braid maintain its shape.
Pro-Tip: To maximize volume in your bubble braid, spray each section with volumizing dry shampoo before pancaking it. This creates added texture and grip, helping the bubbles hold their shape without slipping or looking flat.

7. The Illusion of Fullness: Pull-Through Braid

Pin this pull-through braid for long fine hair to instantly add volume!
The pull-through braid is a genius hack for anyone wanting to create a thick hair illusion. This clever braiding technique is especially suited for long fine hair as it creates incredible volume and the appearance of a much fuller braid. Like the bubble braid, it doesn’t involve traditional weaving but instead requires a series of stacked ponytails and elastic bands. Learning the pull-through braid technique enables you to achieve a voluminous braid with a secure hold and minimal scalp tension, making it a fantastic option for those looking to add body to their braids for long hair.
What You Need
- Hairbrush
- Small hair elastics
- Volumizing powder or texture spray
- Bobby pins
Instructions
- Prep hair by detangling and applying volumizing powder or texture spray if desired, especially at the roots, for added grip.
- Gather a section of hair from the crown into a half-up ponytail and secure it with an elastic.
- Take a new section of hair from below the first ponytail and gather it, including the first ponytail, into a second ponytail directly below the first. Secure with an elastic.
- Split the first ponytail (the one on top) into two equal halves.
- Pull-through the second ponytail (the one below) upwards through the split in the first ponytail.
- Secure the split sections together with a new elastic below the pulled-through ponytail, forming a new ponytail.
- Repeat this process of splitting the top ponytail, pulling-through the lower one, and securing the split sections with a new elastic, working your way down the length of your long hair.
- As you go, gently pancake each section (or ‘bubble’) to achieve your desired volume and fullness.
- Secure the end of the braid with a final elastic.
Pro-Tip: The key to a truly voluminous pull-through braid is generous pancaking. After securing each elastic, gently pull-through the loops of hair outwards. This creates a wider, fuller appearance, effectively combating flat hair and giving the illusion of fullness.

8. The Boho Chic Messy Braid

Pin this boho messy braid for effortless festival vibes!
The messy braid embraces imperfection and turns it into a style statement. This casual braid is all about creating a relaxed, effortless look that’s perfect for a boho aesthetic. The key is to start with a loose braid and then use techniques like pancaking to make it voluminous and artfully undone. Instead of asking “why do my braids look messy?” as a problem, boho braid hairstyles make it the goal. This style complements wavy hair beautifully and enables a soft, romantic coiffure that looks like you just threw it together, even though there’s a method to the beautiful madness.
What You Need
- Dry shampoo or texture spray
- Hair elastic
- Bobby pins
- Fine-tooth comb
Instructions
- Prep hair by spraying with dry shampoo or texture spray for added grip and a matte finish, especially if your hair is freshly washed.
- Choose your preferred braid type (e.g., a loose French braid, Dutch braid, or a simple three-strand braid).
- Begin braiding loosely, ensuring not to tighten the sections too much. The key is to start with a relaxed foundation.
- Once the braid is complete and secured with a hair elastic, gently begin to pancake the braid. Starting from the top, carefully pull-through small loops of hair outwards, working your way down.
- Continue pulling-through until you achieve your desired level of messy and voluminous texture. Don’t be afraid to let a few strands fall out around your face for a softer, boho look.
- If you have any specific flyaways or sections you want to keep neat, use a couple of bobby pins to tuck them in.
- Optionally, gently backcomb some sections around the crown before braiding for extra volume at the roots.
- Lightly mist with a flexible hairspray to secure the style without making it stiff.
Pro-Tip: The trick to a perfectly boho messy braid is to embrace imperfections. After pancaking, gently rub your palms together and lightly brush over the braid to create subtle frizz and a truly effortless texture. This enhances the boho aesthetic.

9. The Edgy Boxer Braids (Double Dutch Braids)

Pin these fierce boxer braids for your next workout!
Boxer braids, also known as double Dutch braids, are a powerful and edgy athletic hairstyle. This look features two tight, symmetrical Dutch braids that run close to the scalp, creating a clean, fierce, and incredibly secure hold. It’s the ultimate protective styling for an active lifestyle, as it prevents frizz and tangles during workouts or a busy day. This braid for work or play is both practical and stylish, offering a long lasting look that keeps every strand of your long hair perfectly in place. Mastering this style requires precise parting and consistent tightening.
What You Need
- Rat-tail comb
- Strong-hold hair gel or edge control
- Hair elastics
- Bobby pins
- Hair spray
Instructions
- Prep hair by detangling and applying hair gel or edge control to create a smooth finish and reduce frizz.
- Using a rat-tail comb, create a sharp, clean center parting from your forehead all the way down to the nape of your neck, effectively dividing your long hair into two equal sections.
- Clip one section out of the way. On the other section, take a small triangular piece of hair from the front (near the hairline).
- Divide this section into three equal strands.
- Begin a Dutch braid by weaving the right strand under the middle, then the left strand under the new middle.
- As you continue braiding, add small, even sections of hair from only that side of the head to the active strand before weaving it under the middle. Keep the braid tight and close to the scalp.
- Continue this process of adding hair and weaving under until you reach the nape of your neck. From there, finish with a regular three-strand braid (still weaving under) down to the ends.
- Secure the end with a hair elastic.
- Repeat the entire process on the other side of your head, aiming for symmetry.
- Finish by lightly misting with hairspray to secure any flyaways and ensure the boxer braids are long lasting.
Pro-Tip: For the cleanest and most long lasting boxer braids, use a rat-tail comb for ultra-precise parting and apply a thin layer of edge control along the sections as you braid. This prevents frizz and flyaways, enabling a sleek, professional look that maintains structural integrity for days.

10. The Half-Up Half-Down Braid

Pin this gorgeous half-up half-down braid for a chic look!
The half-up half-down braid offers the best of both worlds: the elegance of a braid and the beauty of loose, flowing tresses. This versatile hairdo creates a romantic and elegant coiffure by pulling the top section of hair into a braid while leaving the rest to fall freely. It’s a style that requires careful sectioning to create a clean distinction between the braided top and the loose bottom. Whether you use a French braid, Dutch braid, or even a fishtail, a braided half updo is suited for almost any occasion, from a daily hair routine to long hair wedding ideas.
What You Need
- Hairbrush
- Sectioning clips
- Small hair elastic
- Bobby pins
- Light-hold hairspray
- Curling iron or wand
Instructions
- Prep hair by detangling. If desired, add soft curls or waves to the entire head of long hair using a curling iron after applying heat protectant spray.
- Section off a desired amount of hair from the top of your head (e.g., from temple to temple, or a smaller section at the crown). This will be the hair you braid.
- Choose your preferred braid type (e.g., a French braid, Dutch braid, or a simple three-strand braid) and begin braiding this top section. You can braid straight back, or diagonally for a unique look.
- Once the braid reaches the desired point (e.g., the back of your head), secure it with a small hair elastic.
- Gently pancake the braid to add volume and soften the look.
- Take a small section of loose hair from underneath the braid and wrap it around the hair elastic to conceal it, securing the ends with a bobby pin.
- Adjust the loose hair below the braid, ensuring it falls naturally.
- Mist with light-hold hairspray to smooth finish any flyaways and secure the style.
Pro-Tip: To make your half-up half-down braid look more professionally styled, use two bobby pins in an ‘X’ shape to secure the braid underneath the loose hair, rather than a single pin. This creates a more secure hold that prevents slipping throughout the day.

11. The Artistic Four-Strand Braid

Pin this advanced four-strand braid for a truly unique look!
Ready to level up your braiding techniques? The four-strand braid is an advanced braiding technique that creates a wider, flatter, and more dimensional hair design compared to its three-strand cousin. This intricate braid has a beautiful, almost woven appearance that looks incredibly sophisticated. It requires precise sectioning of your long thick hair into four distinct strands and a bit of concentration to master the pattern. Once you get the hang of it, this braid enables you to create a unique coiffure with excellent structural integrity, guaranteed to turn heads.
What You Need
- Paddle brush
- Styling cream or mousse
- Sectioning clips
- Hair elastic
Instructions
- Prep hair by detangling thoroughly with a paddle brush. Apply styling cream or mousse for better grip and to minimize flyaways.
- Gather your long hair into a ponytail (or begin from a section at the nape of your neck) and secure with a hair elastic if desired.
- Divide the ponytail (or section) into four equal strands. Let’s number them 1, 2, 3, and 4 from left to right.
- Weaving begins: Take strand 4 (far right) over strand 3.
- Then, take strand 2 (far left) under strand 3 (which is now in the second position from the right).
- Now, take strand 1 (new far left) over strand 2 (new second from left).
- Repeat the pattern: Strand 4 (new far right) over strand 3.
- Strand 2 (new far left) under strand 3.
- Strand 1 (new far left) over strand 2.
- Continue this alternating over and under weaving pattern, ensuring you maintain even tension throughout the process to achieve a consistent and intricate braid.
- Once you reach the ends of your hair, secure the four-strand braid with a hair elastic.
- Gently pancake the braid for a wider, more voluminous look if desired, being careful not to lose the distinct pattern.
Pro-Tip: Mastering the four-strand braid requires consistent tension and practice. To prevent arm fatigue, use a mirror setup that allows you to see the back of your head clearly. Applying a small amount of styling cream to each strand before weaving can significantly improve grip and reduce slipping.

Key Takeaways
- Mastering the fundamentals of braiding techniques like sectioning and maintaining even tension is crucial for any braid hairstyle on long hair. – Consistent technique prevents uneven sections and slipping, ensuring a neat finish and long lasting hold, especially for an easy French braid or versatile Dutch braid styles.
- The right hair accessories and styling products are essential for a secure hold and frizz-free results. – Using damage-free hair elastics, strong-hold hairspray, and edge control can significantly improve the structural integrity and appearance of your braid designs for long hair, combating flyaways.
- Each braid style offers unique benefits and caters to different occasions, from casual to formal events. – Whether you opt for an elegant crown braid for wedding hair inspiration or edgy boxer braids for your daily hair routine, understanding the appropriate braid variations maximizes style versatility.
- Techniques like pancaking and the pull-through technique are game-changers for adding volume and fullness, especially for thin ends or fine hair. – These advanced braiding techniques create the illusion of fullness and transform seemingly simple braids for long hair into voluminous statements.
- Addressing common challenges like frizz, slipping, and hair breakage ensures healthier, more beautiful long hair braids in the long run. – Expert tutorial advice focuses on damage prevention and proper scalp health when prepping and securing any braid hairstyle.
- Experiment with intricate braid styles like the four-strand braid or the waterfall braid to elevate your long hair game and demonstrate advanced braiding techniques. – These styles offer unique aesthetics and challenge your skills, resulting in truly stunning and memorable braid designs for long hair.
FAQs About braid hairstyles for long hair
How to braid long hair for beginners?
For beginners, start with a simple three-strand braid, then progress to the French braid or Dutch braid by practicing sectioning and consistent tension. Focus on clear parting and taking even sections of long hair, gradually adding hair as you weave for a smooth finish. Use a mirror and a detangling brush beforehand. Don’t be discouraged by initial messy attempts; consistent practice enables smoother, neater results.
What are easy braids for long hair to do yourself?
Some of the easiest braid hairstyles for long hair to do yourself include the classic three-strand braid, a simple side braid tutorial, and the bubble braid which requires minimal braiding techniques. The pull-through braid is also surprisingly easy for beginners and creates significant volume. These styles often rely on basic ponytails or fewer strands, reducing complexity.
How to make braids stay in all day on long hair?
To make braid hairstyles for long hair stay in all day, ensure proper prepping with texture spray or mousse for grip, maintain even tightening during weaving, and secure with strong, small hair elastics and bobby pins. Finish with a strong-hold finishing spray to combat frizz and flyaways. Avoid slipping by starting on slightly ‘dirty’ hair or using products that add texture.
Are braids good for hair growth and health?
Braids can be good for hair growth and health by offering protective styling, minimizing daily manipulation, and reducing hair breakage from styling or environmental damage. However, scalp tension and overly tight braids can lead to traction alopecia or damage. It’s crucial to ensure the braids are not too tight and to give your hair breaks.
What is the difference between French and Dutch braids?
The primary difference between French and Dutch braids lies in the weaving technique: a French braid involves crossing strands over the middle, while a Dutch braid crosses strands under the middle, creating a raised, inverted effect. Both techniques require adding hair as you go, but the direction of weaving dictates their distinct appearance, with the Dutch braid often looking more voluminous.
How long does hair need to be for braids?
For most basic braid hairstyles, hair needs to be at least 3-4 inches long, though styles like French braids on yourself generally require 6 inches or more for easier manipulation. The ideal length also depends on the complexity of the braiding technique. Longer hair enables a wider variety of braid designs.
How to do a fishtail braid on your own long hair?
To do a fishtail braid on your own long hair, divide your hair into two sections, then continually pull a small strand from the outside of one section over to the inside of the other, repeating this process down the length of your hair. Practice in front of a mirror, starting with a side fishtail braid for easier access.
Can I braid wet hair, and is it beneficial?
While you can braid wet hair, it is generally recommended to braid hair that is damp, not soaking wet, to prevent hair breakage and excessive scalp tension as wet hair is more fragile. Braiding damp hair can create beautiful heatless waves and minimize frizz. Ensure your hair is about 70-80% dry before braiding.
What are the best braids for a wedding with long hair?
For long hair wedding inspiration, elegant braid hairstyles like the crown braid (halo braid), a romantic waterfall braid with loose curls, or an intricate braided updo are popular choices. A half-up half-down braid also offers a beautiful balance of formality and natural flow.
How to stop braids from frizzing and looking messy?
To stop braid hairstyles from frizzing, apply a smooth finish styling cream or edge control before braiding, maintain consistent tension, and finish with a light-hold hairspray or anti-frizz serum. Using a silk pillowcase overnight also prevents frizz. For an intentionally messy look, use a texture spray.
Final Thoughts on Braid Hairstyles for Long Hair
Mastering braid hairstyles for long hair is a journey of creativity and skill that transforms your hair into a versatile accessory. As we’ve explored, the possibilities are nearly endless, from the foundational French braid to the voluminous pull-through braid. The key to success lies not just in copying a style, but in understanding the core braiding techniques—proper sectioning, consistent tension, and the artful use of products and hair accessories. By embracing proven methods for prepping your hair and addressing common issues like frizz and slipping, you empower yourself to create beautiful, durable styles.
Remember that every braid you attempt is a step toward perfecting your craft. Don’t be afraid to experiment with a boho messy braid one day and an elegant crown braid the next. With the insights and step-by-step tutorials in this guide, you have everything you need to express your personal style and achieve salon-quality results at home.
Which long hair braid idea are you most excited to try first?
Last update on 2026-03-13 / Affiliate links / Images from Amazon Product Advertising API


