Are you searching for a style that gives you a break from daily manipulation without setting your hair health back? The journey to find beautiful braid hairstyles natural hair that also protect your delicate strands can feel endless, often leaving you worried about tension and breakage.
Protective braid hairstyles for natural hair are styles that tuck away the ends of your hair to minimize manipulation and shield it from environmental damage. These styles, such as knotless box braids and cornrows, help prevent breakage, retain moisture, and can promote healthy hair growth by reducing daily styling stress.
Leveraging tested frameworks and data-driven insights, this guide goes beyond just pictures. We’ll explore genius protective styles that are both stunning and promote hair health. You will discover stylist-recommended techniques to achieve these looks while ensuring the integrity of your natural hair.
What Are The Best Braid Hairstyles for Natural Hair?
When searching for the best braid hairstyles for natural hair, the goal is twofold: achieving a beautiful look while embracing a true protective style. The best braids are those that minimize tension on your scalp and edges, tuck away your fragile ends to prevent them from drying out or splitting, and reduce the need for daily combing and styling. This combination is what truly helps with length retention and overall hair health. Styles that accomplish this, like knotless box braids or elegant cornrow updos, are considered superior because they serve a functional purpose beyond their aesthetic appeal. They provide a much-needed rest for your hair, shielding it from environmental stressors and the mechanical damage of constant handling.
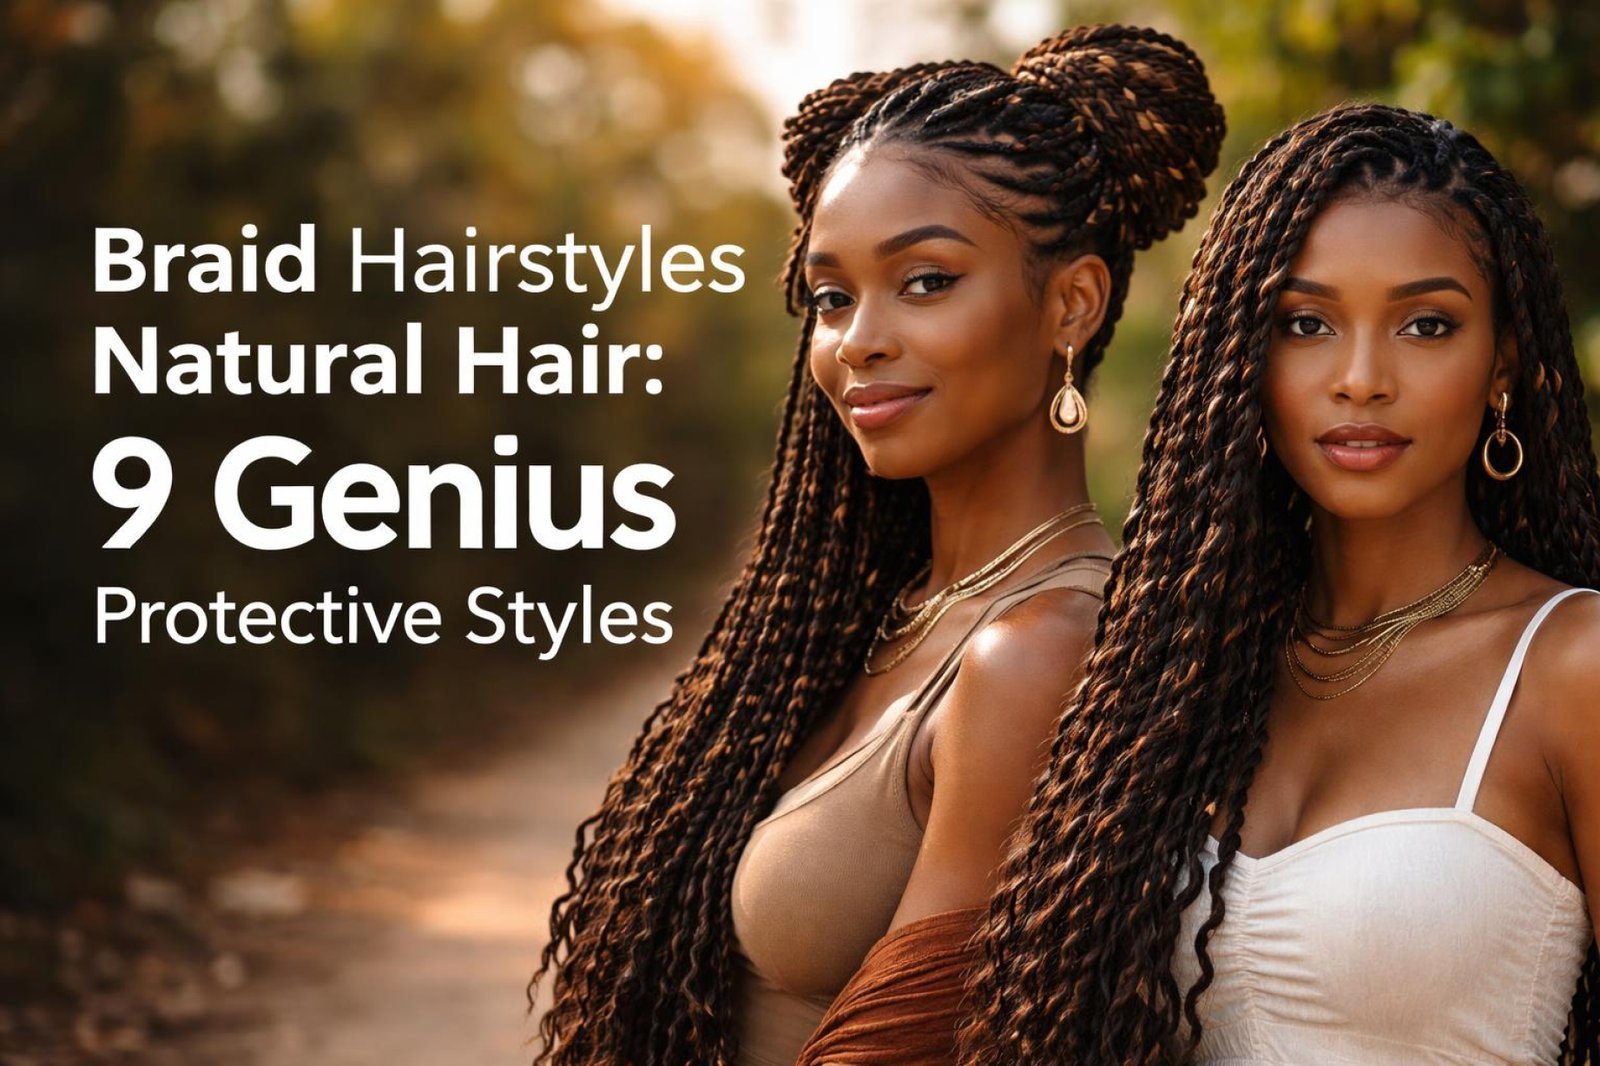
9 Genius Protective Braid Hairstyles for Natural Hair
Here, we’ll dive into nine genius styles that masterfully blend beauty with hair preservation. Each of these protective braided styles offers a unique look while adhering to the core principles of low-manipulation and end protection. From intricate updos perfect for special occasions to easy braided hairstyles you can master for everyday wear, you’ll find a perfect match. This curated list focuses on techniques that are stylist recommended for promoting healthy hair, including no weave options and methods tested on 4c hair. Get ready to find your next go-to style that not only looks incredible but also supports your hair growth journey.
1. Create Classic Cornrows in a Protective Updo

Pin this elegant and protective updo for your next special occasion!
Classic cornrows are a timeless and versatile option that can be styled into a sophisticated updo. This style keeps all of your ends tucked away, making it an ultimate protective style. The key to flawless cornrows on natural hair is clean parting and maintaining consistent, but not excessive, tension. When done correctly, this braided updo natural hair style can last for weeks and serve as a perfect base for wigs or as a standalone elegant look.
Products & Tools Used
- Rat Tail Comb for precise parting and clean lines
- Edge Control with a strong, non-flaking hold
- Braiding Gel or Mousse to provide slip and keep hair neat
- Sectioning clips to keep loose hair out of the way
- Hair oil to moisturize the scalp after braiding
Application/Styling Steps
- Cleanse & Condition: Start with freshly washed, detangled, and stretched hair for the smoothest result.
- Part: Use the tail of your rat tail comb to create your desired parting pattern. Section away the hair you aren’t immediately working with.
- Moisturize: Apply a small amount of braiding gel or mousse to the section you’re about to braid to provide moisture and hold.
- Braid: Begin braiding the cornrow, keeping your fingers close to the scalp to maintain neatness but avoiding pulling too tightly to ensure a low tension style.
- Secure: Continue braiding to the ends and secure the updo with bobby pins.
- Edge: Apply edge control to the hairline and style as desired for a polished finish.
Pro-Tip: In my experience, the key to preventing breakage with cornrows is to not braid the first 1/4 inch of your hairline. This small change dramatically reduces tension on fragile edges.

2. Install Flawless Knotless Box Braids

Say goodbye to tension headaches! Pin these knotless braids for a healthier protective style.
Knotless braids natural hair have revolutionized the world of protective styling. Unlike traditional box braids that start with a knot at the base, the knotless technique begins with your natural hair and gradually feeds in extensions. This results in a flat, flexible, and significantly low tension style that lays comfortably from day one. This method is highly stylist recommended for those prone to traction alopecia or scalp sensitivity, as it prevents breakage associated with heavy, tight installations.
Products & Tools Used
- Pre-stretched braiding hair (human or synthetic)
- Leave-in conditioner to hydrate your natural hair
- Braiding mousse for a smooth, frizz-free finish
- Rat tail comb for clean, geometric parting
- Small rubber bands (optional, for securing ends)
Application/Styling Steps
- Prepare: Start with clean, moisturized, and fully detangled natural hair.
- Part: Create a clean square or triangle part for one braid using your comb.
- Start the Braid: Begin braiding with your own natural hair for the first few stitches, right at the scalp.
- Feed-In Hair: After 2-3 stitches, start feeding in small pieces of the pre-stretched braiding hair into your natural braid. Continue adding hair until you reach the desired thickness.
- Braid Down: Once all hair is added, continue braiding down the length of the plait.
- Seal Ends: Seal the ends by dipping them in hot water (with caution) or securing with a small rubber band.
Pro-Tip: The key to a truly tension-free technique is to not grip the base of the braid too tightly. Your natural hair should lie flat against the scalp, not be pulled upwards into the braid.

3. Style Two Stunning Feed-In “Goddess” Braids

Feel like a goddess! Pin this quick and easy braided style.
Goddess braids are a bold and beautiful statement style, characterized by their thickness and the romantic, curly tendrils left out along the length of the braids. This style, often done as two large Dutch braids or French braids, is surprisingly quick to install compared to smaller individual braids. The feed-in method is crucial for achieving that thick, dramatic look without creating a bulky, unnatural start at the hairline. It’s a chic protective style that significantly reduces daily styling time.
Products & Tools Used
- Braiding hair (2-3 packs, depending on desired thickness)
- A strong-hold braiding gel or pomade
- Detangling brush
- Sheen spray for a glossy finish
- A few packs of curly crochet hair for the tendrils
Application/Styling Steps
- Part Hair: Create a sharp center part from your forehead all the way to the nape of your neck. Clip one side away.
- Apply Product: On the loose side, apply your braiding gel along the hairline and the first few inches of the part.
- Begin Braiding: Start a Dutch or French braid with a small section of your own hair at the hairline.
- Feed-In: After the first stitch, begin adding pieces of braiding hair to make the braid thicker as you go down.
- Add Curls: As you braid down, randomly feed in small pieces of the curly crochet hair, leaving the ends out to create the goddess tendrils.
- Repeat: Braid all the way to the end, then repeat the entire process on the other side.
- Finish: Lightly mist the entire style with sheen spray for a beautiful shine.
Pro-Tip: To make the style last longer, sleep with a satin bonnet or silk scarf. This prevents breakage and reduces frizz caused by friction against cotton pillowcases.

4. Achieve Jumbo Side-Swept Braids (No Weave)

Your own hair is the main event! Pin this stunning no weave braided style.
Who says you need extensions for a dramatic look? A jumbo side-swept braid is one of the best natural hair braids no weave styles to showcase the beauty and volume of your own hair. This easy and quick look is the ultimate in low-manipulation styling, perfect for a chic look that takes minutes to create. The key to a full, thick-looking braid is starting with properly stretched hair and using a technique called “pancaking” to add visual volume.
Products & Tools Used
- A rich leave-in conditioner
- A moisturizing curl cream or butter
- A wide-tooth comb or detangling brush
- Bobby pins or a hair tie
Application/Styling Steps
- Prep Hair: Start with moisturized and stretched hair. You can achieve a stretched look overnight with twists or large braids on damp hair.
- Gather Hair: Gently brush all of your hair to one side of your head.
- Section: Divide your hair into three equal sections.
- Braid Loosely: Begin a regular three-strand braid. Keep the braid loose to maximize its volume and prevent tension.
- Secure: Braid down to the ends and secure with a hair tie that matches your hair color.
- Pancake the Braid: Gently pull on the sides of the braid, starting from the bottom and working your way up. This will make the braid look much thicker and fuller.
Pro-Tip: For maximum volume, ensure your hair is fully detangled before you begin. Any knots or tangles will cause the braid to look thinner and less uniform. This is a great style for showing off the results of a good deep conditioning treatment.

5. Form an Elegant and Royal Crown Braid

The perfect royal look. Pin this elegant crown braid tutorial now!
The crown braid is an elegant and regal updo that is perfect for formal events like weddings or any time you want to feel a little royal. This style is the epitome of a protective style because it wraps around the head, tucking every single strand away securely. While it looks incredibly intricate, a crown braid on natural hair is often created with a simple “cheat” method using two braids, making it accessible even for beginners.
Products & Tools Used
- Moisturizing mousse
- Bobby pins (in your hair color)
- A soft bristle brush for smoothing
- A hair tie
Application/Styling Steps
- Prep and Part: Start with stretched hair. Part your hair down the middle into two large sections.
- Braid One Side: Take one section and begin a Dutch braid (braiding “under” instead of “over”) starting behind your ear and directing it towards your forehead. Continue the braid along your hairline.
- Braid Down: Once you run out of hair to add, continue with a regular three-strand braid to the end and secure with a hair tie.
- Repeat: Do the exact same thing on the other side. You should now have two long braids.
- Create the Crown: Take the end of one braid and wrap it over the top of your head, tucking the end and securing it with bobby pins.
- Finish the Crown: Take the second braid and wrap it around the back of your head, covering the start of the first braid and tucking the end. Secure everything with bobby pins.
Pro-Tip: The secret to a secure crown braid is anchor pins. Place the first bobby pin through the braid and into the base of the hair underneath in an ‘X’ shape. This creates a solid foundation.

6. Adorn Your Hair with Fulani Braids and Beads

Add a touch of tradition! Pin this gorgeous Fulani braids with beads look.
Fulani braids are a beautiful and traditional style that has become incredibly trendy. This style is distinguished by its unique pattern: a central cornrow braided down the middle part, with more cornrows braided towards the face on the sides, and the rest of the hair in braids or twists. The style is often decorated with hair jewelry, and adding beads is a classic way to finish the look. This style not only protects ends but also serves as a canvas for cultural expression.
Products & Tools Used
- Braiding gel
- Rat tail comb
- Hair jewelry like wooden or metal beads and gold cuffs
- A hair beader tool or a bent bobby pin
Application/Styling Steps
- Part: Create the signature Fulani look with a cornrow braided straight down the center part.
- Side Braids: Braid two or more thin cornrows on each side of your head, directing them from the hairline towards your ear.
- Back Braids: The remaining hair at the back can be done in box braids or additional cornrows.
- Accessorize: Once braids are complete, add cuffs to the cornrows for decoration.
- Add Beads: To add beads, slide them onto your hair beader tool. Latch the tool onto the end of a braid, and slide the beads from the tool onto the hair.
- Secure Beads: Secure the beads by tying a small knot at the end of the braid or using a small rubber band.
Pro-Tip: To prevent mechanical damage, choose smooth, lightweight beads and don’t place too many on a single braid. The weight can cause breakage over time, especially on fine hair integrity.

7. Define Your Look with Mini Braids on Short Natural Hair

Short hair, big style! Pin this chic idea for styling a TWA.
Having short natural hair doesn’t mean you’re left out of braiding fun. Mini braids are a fantastic way to add a simple, stylish accent to a Teeny Weeny Afro (TWA) or other short styles. These braid hairstyles for short natural hair 4c can be used to create patterns, add definition, or simply keep your hair out of your face. It’s a quick style that adds a lot of personality and solves the problem of limited styling options for shorter lengths.
Products & Tools Used
- A strong-hold defining gel or pomade
- A fine-tooth comb
- Small, clear rubber bands (optional)
Application/Styling Steps
- Start with Moist Hair: This style works best on slightly damp, moisturized hair to help the braids hold their shape.
- Section: Using your comb, create a small, clean section at your hairline or on the side where you want the braid accent.
- Apply Gel: Apply a small amount of defining gel to the section to make it smooth and easy to grip.
- Braid Tightly: Create a small, tight three-strand braid or cornrow. Because the hair is short, grip is key.
- Secure the End: Braid as far as you can. The end can be secured with a tiny clear rubber band, or if your hair is coily enough, simply smooth it with more gel and it will hold.
- Repeat: Create 2-4 more mini braids parallel to the first one for a stylish, patterned effect.
Pro-Tip: For extra definition on coily 4c hair, twist the end of the mini braid around your finger with a dab of gel (a “finger coil”). This will keep the very end from unraveling and blending back into your afro. This tip was tested on 4c hair and provides proven results.

8. Craft Edgy & Fun Braided Bantu Knots

Two styles in one! Pin this braided bantu knot guide for a cool look now and a great braid out later.
Braided bantu knots are a fun, edgy, and incredibly clever two-in-one style. First, you get the cool, sculptural look of the knots themselves, which is a fully protective style. Then, after you take them down, you’re left with a gorgeous, deeply defined wavy texture known as a braid out on natural hair. By braiding the hair before knotting it, you create a unique wave pattern that’s different from a traditional twist-out.
Products & Tools Used
- Moisturizing twisting cream or setting lotion
- Rat tail comb for parting
- Small rubber bands
- Edge control
Application/Styling Steps
- Part: Section your clean, damp hair into squares, diamonds, or triangles. The size of the section will determine the size of the knot.
- Moisturize: Apply a generous amount of twisting cream or setting lotion to a section.
- Braid: Braid the entire section from root to tip and secure the end with a small rubber band.
- Twist the Knot: Take the completed braid and begin twisting it around its own base. Keep wrapping it tightly around itself.
- Secure the Knot: Continue wrapping until you run out of braid, then tuck the end securely under the knot. The tension should hold it in place.
- Repeat: Continue this process for all sections of your hair.
Pro-Tip: When you take the knots down after a day or two, you’ll have a beautiful, defined braid out. To minimize frizz when taking them down, apply a small amount of hair oil to your fingertips first.

9. Design a Quick Half-Up, Half-Down Braided Style

Best of both worlds! Pin this quick and versatile half-up braided style.
The half up half down braided hairstyles for natural hair offers the perfect compromise when you want a partially protective style that’s also quick to install. This versatile look keeps the hair around your hairline and crown neatly tucked away in cornrows or flat twists, while allowing you to showcase the texture and length of your natural coils in the back. It’s an ideal style for when you’re short on time but still want a polished and put-together appearance.
Products & Tools Used
- Braiding gel
- Rat tail comb
- Curl refreshing spray
- A hair tie or decorative clip
Application/Styling Steps
- Part Horizontally: Create a part from ear to ear, separating the top half of your hair from the bottom half. Clip the bottom half away.
- Style the Top: On the top section, create your desired braid pattern. This could be 4-6 straight-back cornrows, or flat twists for an even quicker option.
- Secure the Braids: Braid the cornrows just past the crown of your head, then secure them together with a hair tie or a decorative clip.
- Define the Bottom: Unclip the bottom half of your hair. If needed, spritz it with water and apply a curl cream or use a curl refreshing spray to redefine your natural coils.
- Final Touches: Gently pick the roots of the loose hair for volume and apply edge control to the front for a polished look.
Pro-Tip: To keep this style looking fresh, sleep with your hair in a “pineapple” (a high, loose ponytail on top of your head) inside a satin bonnet. This protects both the braids and the loose curls from getting crushed.

Key Takeaways
- Preparation is Paramount: Always start with clean, moisturized, and well-detangled natural hair. This is the non-negotiable foundation that prevents breakage during the braiding process.
- Low Tension is the Goal: The most important rule for protective styling is to avoid tight pulling, especially at the hairline. Styles like knotless braids are specifically designed to be a low tension alternative.
- Moisture is Still a Must: Even in braids, your hair and scalp need moisture. Regularly use a leave-in spray or light oil to prevent dryness and maintain hair elasticity.
- Nighttime Care is Crucial: Protect your investment and prevent frizz by sleeping in a satin bonnet or on a silk pillowcase. This reduces friction and helps the style last longer.
- “No Weave” Styles are Powerful: Don’t underestimate the beauty of styles using just your own hair. Jumbo braids and crown braids can be incredibly stunning and are excellent for giving your hair a break from extensions.
- Listen to Your Scalp: If a style feels too tight, painful, or causes an itchy scalp, take it down. A truly protective style should never cause discomfort.
People Also Ask About Braid Hairstyles on Natural Hair
Are braids actually good for natural hair growth?
Yes, braids can be excellent for promoting hair growth by enabling length retention. They are protective styles that minimize daily manipulation, friction, and breakage, which are major causes of hair appearing not to grow. By protecting the ends of your hair and reducing styling stress, braids allow you to retain the length you grow.
How do I prepare my natural hair for braids?
Proper preparation is key to a healthy braided style. You should start by thoroughly cleansing your scalp and hair, followed by a deep conditioning treatment to maximize moisture. Afterwards, detangle your hair completely and stretch it using a heatless method like large twists or braids overnight. This makes parting and braiding much easier and reduces breakage.
What’s the difference between knotless vs traditional box braids?
The main difference is the installation technique and tension level. Traditional box braids start with a knot of braiding hair at the scalp, which can cause high tension. Knotless braids, on the other hand, start with your own hair and gradually feed in the braiding hair, creating a flatter, more flexible, and significantly low tension start to the braid.
How long should you keep braids in natural hair?
According to most stylists, the maximum time you should keep braids in is 6-8 weeks. Keeping them in longer can lead to product buildup, scalp issues, and matting of your new growth, which can cause severe breakage upon removal. For finer hair, a shorter duration of 4-6 weeks is often recommended.
How can I stop my braids from itching?
An itchy scalp in braids is usually caused by dryness, product buildup, or a reaction to the braiding hair. To stop it, you can spritz your scalp with a mix of water and a few drops of tea tree oil, which is naturally antiseptic. You can also use a designated anti-itch scalp spray or wipe your scalp with an apple cider vinegar-soaked cotton ball to clarify it.
How do you wash braids and natural hair?
Focus on washing your scalp, not the braids themselves. Dilute your shampoo with water in a nozzle-tip bottle and apply it directly to your scalp. Gently massage your scalp with your fingertips (not nails) to lift dirt and oil. Rinse thoroughly, allowing the suds to run down the length of the braids. Follow up by spraying a liquid leave-in conditioner.
Can I get braids with no weave or extensions?
Absolutely! There are many beautiful braid hairstyles for natural hair with no weave. Styles like crown braids, jumbo side braids, braided bantu knots, and accent cornrows all work wonderfully with just your own hair. The key is to start with well-moisturized and stretched hair to maximize fullness and length.
How do I protect my edges while wearing braids?
The best way to protect your edges is to ensure a low-tension installation. Always tell your stylist if the braids feel too tight. Avoid styles that pull the hairline excessively. At home, you can apply castor oil to your edges regularly and avoid brushing them too aggressively. Sleeping with a satin bonnet also reduces friction.
What are the best braids for 4c hair?
Knotless box braids and twists are often considered the best for 4c hair. Their gentle, low tension installation is ideal for coily textures that can be prone to breakage. Cornrows and Fulani braids are also great options, as long as they are installed without excessive pulling at the root.
How do you safely take down braids to prevent breakage?
Patience and moisture are essential for safe removal. Start by cutting the braid a safe distance below where your own hair ends. Then, generously apply a “takedown spray,” oil, or conditioner to the braid. Use a rat tail comb to gently unbraid the hair and work through any matted sections from the bottom up. Never rip or pull at knots.
Final Thoughts on Your Natural Hair Braid Journey
Embracing braid hairstyles for natural hair is about more than just finding a new look; it’s a strategic part of a healthy hair growth journey. By choosing styles that protect ends and minimize manipulation, you are actively investing in the health and length retention of your hair. Whether you opt for low tension knotless braids or an elegant no weave crown braid, the key is always to prioritize the health of your scalp and strands. This guide for 2026 has provided the tools and techniques to do just that.
Which of these protective styles will you be trying first?
Last update on 2026-03-13 / Affiliate links / Images from Amazon Product Advertising API


