Struggling to find a holiday nail design that’s both festive and truly elegant? You want a sophisticated look that lasts through every party, but often end up with chunky art or a manicure that chips right before the main event. It’s frustrating when your vision for classy Christmas nails doesn’t match the outcome.
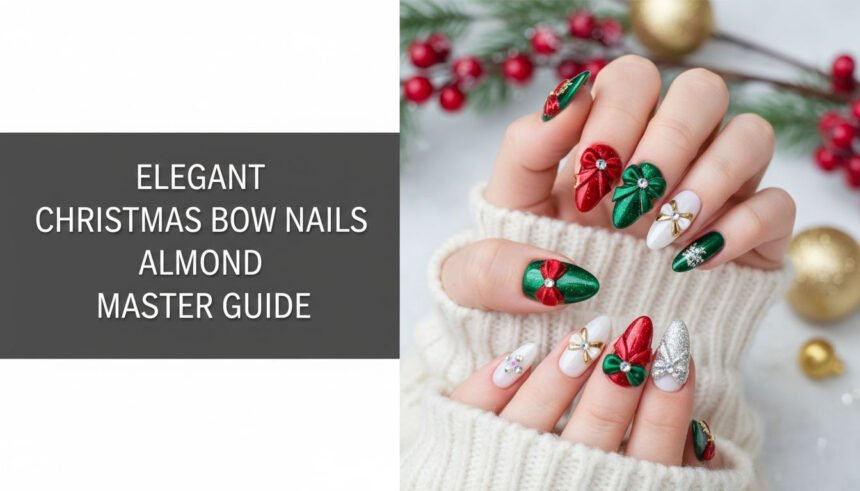
Christmas bow nails almond are a sophisticated, seasonal nail design utilizing holiday color palettes and bow motifs, applied to the slender, tapered almond nail shape. This aesthetic is favored for its ability to elongate fingers and provide a refined canvas for detailed art, making it the top choice for an elegant 2026 holiday look. This combination ensures your manicure is both festive and flawlessly chic.
Based on proven, professional nail technician standards for safety and longevity, this guide breaks down everything you need to know. You’ll discover how to master the perfect almond shape, apply proportional bow designs, and ensure your art remains flawless. Get ready to create the most stunning holiday nails of the season.
Are Christmas Bow Nails Almond the Most Elegant Look of 2026?
When it comes to holiday manicures, the search for a design that is both festive and genuinely sophisticated can be a challenge. For 2026, the consensus among nail professionals and style enthusiasts points overwhelmingly to one look: the Christmas bow design on a perfectly tapered almond nail. This combination isn’t just a fleeting trend; it’s a masterclass in balance, proportion, and seasonal charm.
The magic lies in the synergy between the two core components. The almond nail shape, with its tapered sides and soft, rounded tip, is universally flattering. It creates a natural, slimming effect on the fingers, providing an elegant canvas that’s more refined than a square or coffin shape. Nail professionals agree that when filed correctly, this shape can even enhance the structural integrity of the nail.
When you place a delicate bow design—whether it’s a flat painted ribbon, a sculpted 3D gel bow, or a minimalist charm—onto this canvas, it becomes an intentional accent rather than a bulky addition. Set against a festive Christmas color palette of deep reds, emerald greens, or shimmering golds, the look is complete. It’s this thoughtful combination of an elegant shape with a timeless holiday motif that makes it the definitive choice for a sophisticated festive look.
9 Master Techniques to Achieve Flawless Almond Bow Nails for the Holidays
Achieving a salon-quality Christmas bow manicure at home requires more than just a steady hand; it demands a deep understanding of structure, proportion, and application. This master guide takes you on a comprehensive journey through nine essential techniques, covering every stage from building a strong foundation to adding the final, durable touches. Each step is grounded in professional nail technician standards, ensuring your festive look is not only beautiful but also safe and long-lasting. Whether you’re a beginner working with press-ons or an intermediate artist sculpting with gel, these expert-backed methods will help you create flawless, elegant almond bow nails for the holidays.
1. Mastering the Symmetrical Almond Shape for a Strong Foundation

Pin this genius hack to your ‘Nail Art Tutorials’ board!
Products & Tools Used:
- Nail Clippers (for initial length reduction)
- Professional Nail File (180/240 grit recommended for precision filing)
- Soft Buffer Block (for smoothing the surface after shaping)
- Cuticle Pusher and Nippers (for pre-filing prep)
Application/Styling Steps:
- Start the Taper: Identify the stress points (where the free edge extends past the finger) and begin filing the side walls at a consistent 45-degree angle inward.
- Center the Tip: Focus strokes toward the center point, ensuring the final tip is rounded and perfectly aligned with the center of the nail bed, avoiding a stiletto appearance.
- Check Symmetry: Stop frequently and look straight down the barrel of the nail from the tip and from the side to check that the taper is equal on both lateral sides.
- Smooth the Edges: Once the shape is established, lightly buff the entire free edge and the surface of the nail plate with the buffer block to eliminate sharpness and prep for product adhesion.
Pro-Tip: Never file back and forth—use long, unidirectional strokes to prevent fraying or weakening the nail plate. The proper taper starts at the distal edge of the nail bed, not halfway down the nail.
2. Flawless Nail Plate Prep to Ensure Maximum Holiday Longevity

Save this tip for your ‘Long-Lasting Manicure’ board!
Products & Tools Used:
- Nail Dehydrator/Cleanser (Essential for removing oil and moisture)
- Acid-Free Primer (to maximize adhesion for gel or acrylic)
- Lint-Free Wipes (Crucial for wiping the tacky layer)
- Base Coat Gel Polish (High-quality, flexible base coat)
Application/Styling Steps:
- Cuticle Clean-Up: Gently push back or trim excess cuticle skin. Use nippers for hangnails, keeping the nail plate clear of any non-living tissue.
- Light Buffing: Use a soft buffer block (240 grit) to lightly remove the shine from the entire nail plate, creating a porous surface for adhesion. Do not over-buff.
- Dehydrate: Apply a professional nail dehydrator/cleanser to the entire nail surface, ensuring all oil and dust is removed. Allow to fully air dry (it will look chalky white).
- Primer Application: Apply a thin layer of acid-free primer, focusing only on the free edge and tips, avoiding the cuticle area.
- Base Coat and Cap: Apply a thin, even layer of base coat, brushing it meticulously across the free edge (“capping the edge”) to seal it, then cure under a UV/LED lamp.
Pro-Tip: The most common cause of premature chipping is skipping Step 5 (capping the free edge). This step is mandatory for every layer of gel polish (base, color, and top coat).
3. The Proportionality Rule: Bow Placement on Almond Nails

Save this clever organization idea!
The elegant success of the Christmas bow on an almond shape relies entirely on proportionality. The tapered nail shape requires a more restrained application of 3D or flat art than square or coffin shapes.
Key Proportionality Rules for Almond Nails:
- The 50% Max Rule: The bow element (especially 3D pieces) should never take up more than 50% of the visible nail plate length. For the most elegant look, aim for 30-40% or less.
- Optimal Placement (Medium Almond): Place the bow centrally on the nail bed, or slightly toward the cuticle, using the natural symmetry of the cuticle line as a guide. This maximizes the visual slimming effect of the tapered tip.
- Optimal Placement (Short Almond): On shorter almond nails, place the bow near the cuticle or use a smaller, minimalist ‘micro-bow’ decal. Placing large art on a short nail overwhelms the shape and appears chunky rather than refined.
- Focus on the Accent: Limit detailed bow art to 1-2 accent nails per hand (typically the ring or middle finger). Keep the remaining nails in solid, complementary holiday colors (red, green, nude) to maintain balance and sophistication.
Lesson Learned: Overly large bows are the fastest way to make an elegant almond shape look childish or unrefined. Always choose a smaller bow than you think you need.

4. Step-by-Step Guide to the Classic Flat Painted Gel Bow

Pin this flat bow tutorial to your ‘Simple Christmas Nail Art’ board!
Products & Tools Used:
- High-Pigment Gel Color (Red or Gold recommended)
- Fine-Tip Striping Brush (Crucial for crisp edges)
- Dotting Tool (Optional, for the center knot)
- No-Wipe Top Coat (Glossy or Matte finish)
Application/Styling Steps:
- Base and Color: Apply your chosen base color (e.g., nude, white, or red chrome) and cure completely, wiping off the tacky layer if required by your gel system.
- Mark the Center: Use a dotting tool and a tiny bead of the bow color to mark the exact center point where the bow knot will sit (consult the proportionality rules).
- Draw the Loops: Using the striping brush, draw a figure-eight shape starting from the center mark. Ensure the lines are clean, thin, and the loops are equal size.
- Add Ribbons: Add the two ribbon tails extending downward from the center mark, often with a v-shape cut at the ends. Cure under the lamp for 60 seconds.
- Seal and Finish: Apply a generous layer of top coat over the entire nail, meticulously capping the free edge to protect the delicate art, and then cure fully.
Lesson Learned: Use high-pigment gel paint specifically designed for art. Standard gel polish is often too thin and runny, leading to fuzzy, indistinct bow edges.

5. Advanced Application: Sculpting the Perfect 3D Gel Bow

Save this pro 3D nail art secret to your ‘Advanced Manicure’ board!
Products & Tools Used:
- Thick, Non-Runny Builder/Sculpting Gel (Clear or tinted)
- Specialized 3D Sculpting Brush (small, round tip)
- 99% Isopropyl Alcohol or Slip Solution (for shaping the gel)
- UV/LED Curing Lamp (Minimum 48W for full cure)
Application/Styling Steps:
- Base Layer: Ensure your base color and top coat are applied and cured. Apply a thin layer of builder gel where the bow will sit and do not cure yet.
- Form the First Loop: Scoop a bead of sculpting gel and place it on the nail. Dip your brush into the slip solution, pat off excess, and gently push and shape the gel into a smooth, structured loop (like a sideways ‘C’). Flash cure for 10 seconds.
- Form the Second Loop: Repeat Step 2 on the opposite side, ensuring the two loops are symmetrical and centered against the first. Flash cure for 10 seconds.
- Add the Knot and Ribbons: Place a smaller bead of gel in the center to form the knot. Use the slip solution to sculpt and smooth the knot. Add thin lines of gel for the two tails. Full cure under the lamp for 120 seconds.
- Seal: Apply a thin layer of top coat around the base of the 3D bow (but not over the top unless a smooth finish is desired) and cure fully to ensure maximum durability and reduce snagging edges.
Pro-Tip: Proper curing time is crucial. Always cure 3D art for 120 seconds to ensure the thick center of the gel is fully polymerized, preventing softening or breakage.

6. The Beginner’s Secret: Securing Pre-Made Bow Charms & Press-Ons

Pin this instant holiday look to your ‘Last-Minute Christmas Nails’ board!
Products & Tools Used:
- Pre-Sized Almond Press-On Nails (Optional, pre-made kit)
- High-Quality 3D Bow Charms (Micro or Small size)
- Nail Charm Adhesive Gel or Resin (Strongest hold)
- Tweezers or Wax Pen (for precise charm placement)
Application/Styling Steps:
- Prep the Canvas: Apply and fully cure your base color layer (or prep the press-on nail surface). Ensure the surface is tack-free. For press-ons, file the tip to refine the almond shape.
- Adhesive Base: Apply a small, centralized bead of specialized nail charm adhesive gel or strong builder gel onto the exact spot where the bow will sit (following the Proportionality Rule). Do not cure yet.
- Place the Charm: Using tweezers or a wax pen, gently pick up the 3D bow charm and press it down firmly but gently into the bead of adhesive gel.
- Flash Cure and Clean: Flash cure the nail for 10-15 seconds to hold the bow in place. Use a detail brush dipped in alcohol to remove any excess gel seeping from under the charm before the final, full cure (120 seconds).
- Secure Edges: Once fully cured, apply a thin layer of no-wipe top coat around the edges of the charm’s base, without coating the charm itself, to create a seamless, snag-free seal.
Pro-Tip: If using press-ons, apply liquid nail glue to both the natural nail and the back of the press-on for maximum 7-10 day wear. Custom file the press-on tips after application for a more natural almond silhouette.
7. Integrating High-Impact Seasonal Styles: Red Chrome and Velvet

Pin this velvet texture idea to your ‘Luxury Holiday Nail Trends’ board!
The Christmas season calls for high-impact finishes that leverage light and texture. The elegance of the almond shape is the perfect foil for these glamorous seasonal accents.
Achieving the Iconic Red Chrome Base:
- Base Coat: Apply and cure a highly pigmented red gel polish (usually two coats).
- No-Wipe Top Coat: Apply a special “no-wipe” top coat and cure for slightly less time than recommended (e.g., 20 seconds instead of 30) to leave a slight tack.
- Rub in Chrome: Use a foam eyeshadow applicator to vigorously rub the red chrome powder onto the warm, partially cured surface until a mirror finish is achieved.
- Seal: Brush off excess powder and seal the entire nail meticulously with a final, durable no-wipe top coat, capping the free edge.
Creating a Velvet-Finish Bow:
- Sculpt the Bow: Use the 3D sculpting gel method (H3 5) or apply a thick layer of top coat in the shape of the bow loops.
- Flock the Bow: While the top coat or gel is still wet, generously sprinkle velvet flocking powder (red or white) over the entire bow shape until the gel is completely covered.
- Cure and Dust: Cure the entire nail under the lamp. Once cured, use a soft, dry fan brush to gently dust away the excess powder, revealing a soft, textured velvet bow.
Pro-Tip: For the best visual result, always use a matte top coat over the base color before adding a glossy 3D bow, or vice versa (like a glossy chrome base with a matte velvet bow) to ensure the textures don’t blend.

8. The Secret to No-Snag 3D Art: Troubleshooting and Maintenance

Pin this essential maintenance guide to your ‘Nail Health & Durability’ board!
The biggest challenge with 3D bow art on almond nails is that the delicate elements can snag on hair or clothing, causing them to rip off. Structural integrity is paramount, especially on the tapered free edge.
Common Problems and Expert Solutions:
| Problem | Root Cause | Expert Solution (3D Bows) |
|---|---|---|
| Snagging/Catching | Sharp, exposed edges of the bow charm or lifted gel corners. | Apply a thin, flexible sealing gel around the entire perimeter of the bow base and cure, creating a smooth transition. |
| Bow Falls Off | Weak adhesive (regular top coat or nail glue is insufficient) or application over an oily surface. | Use only specialized resin or thick builder gel as the adhesive and ensure the nail surface is properly dehydrated and buffed first (H3 2). |
| Almond Tip Cracks | Over-filing the side walls during shaping, leading to weak stress points. | Use a softer file (240 grit) and reinforce the stress points with a thin layer of builder gel or clear acrylic before adding the color. |
| Gel Lifting | Improper base coat application or failure to ‘cap’ the free edge of the nail. | Remove the lifted area, re-prep, and reapply the base coat, ensuring meticulous capping on every layer. |
Pro-Tip: For maximum structural integrity on almond nails, ensure the apex (the highest point of the nail curve) is placed slightly forward of the center to support the tapered tip, which is the most fragile part of the shape.

9. Safe Removal and Nail Health Maintenance Post-Holiday

Pin this removal guide to your ‘Nail Care & Health’ board!
Products & Tools Used:
- Coarse Nail File (80/100 grit, for breaking the seal)
- Pure Acetone (MANDATORY for gel/acrylic removal)
- Cotton Balls/Pads and Aluminum Foil Squares (for soak-off wraps)
- Cuticle Oil and Hand Lotion (for rehydration post-removal)
Application/Styling Steps:
- Break the Seal: Use a coarse file to aggressively file away the top coat and the 3D bow element. Continue filing until the base color layer is visible and the entire top layer seal is broken.
- Soak and Wrap: Saturate a cotton ball in pure acetone, place it directly on the nail plate, and wrap the fingertip tightly with a square of aluminum foil (foil traps heat, accelerating removal).
- Wait and Scrape: Wait 15-20 minutes. Unwrap one finger; the gel should flake off easily. Use a metal pusher or wooden stick to gently scrape the dissolved product. Never force or peel the product.
- Rehydrate: Once all product is removed, gently buff the nail surface. Wash hands thoroughly, then immediately apply generous amounts of high-quality cuticle oil to the nail bed and surrounding skin to counteract the drying effects of the acetone.
CRITICAL SAFETY WARNING: Always perform gel/acrylic removal in a well-ventilated area, as acetone fumes can be harsh. Never attempt to peel off gel polish or 3D art, as this rips off layers of your natural nail plate.

Key Takeaways: Your Quick Guide to Elegant Almond Bows
For a Flawless Almond Bow Manicure:
- Foundation First (Shape): Invest 15 minutes per hand to file the perfect, symmetrical almond shape, starting the taper at the stress points with a 180-grit file.
- The Durability Rule: Always prep the nail plate with dehydrator/primer and meticulously ‘cap’ the free edge with every single layer (base, color, top coat) to prevent chipping and lifting.
- Proportionality is Elegance: Ensure your bow design (flat or 3D) occupies no more than 50% of the nail plate length; use smaller, micro-bows for the most sophisticated look on the tapered almond silhouette.
- Secure the Dimension: Use only specialized builder gel or resin to secure 3D charms. Seal the edges of the base with top coat to prevent snagging.
- Post-Holiday Care: Always remove gel polish by soaking in pure acetone after breaking the top seal, and immediately rehydrate the nails with cuticle oil to maintain nail health.
People Also Ask About Christmas Bow Nails
What is the difference between almond and oval shape for nail art?
The key difference is the taper: Oval nails maintain the natural width of the nail bed before rounding, whereas the almond shape tapers noticeably inward from the sides toward the tip, creating a more slender and elongated silhouette, which is generally more flattering for delicate bow art placement.
How long should 3D bow nail art typically last on almond nails?
Professionally applied 3D bow art using builder gel or strong resin on a properly prepped nail base should last 2-3 weeks without lifting. For high-quality press-on bows secured with liquid glue, expect 5-10 days of durable wear, provided you avoid prolonged water exposure.
Is it difficult to sculpt a symmetrical 3D bow using gel?
Sculpting a symmetrical 3D bow is an intermediate-to-advanced technique that requires practice, a steady hand, and the use of specialized, thick builder gel. Beginners should start with pre-made charms or high-quality flat decals, progressing to sculpted designs once comfortable with gel viscosity and curing processes.
How can I make my almond nails look longer with the bow design?
To maximize the slimming and lengthening effect of the almond shape, use nude or sheer pink base colors, keep the bow design small (micro-bows), and ensure the bow is placed near the cuticle rather than the free edge, which draws the eye upward.
Final Thoughts
You now possess the foundational shaping techniques, the expert proportionality rules, and the step-by-step guidance for three distinct application methods—from quick press-ons to advanced 3D sculpting—needed to create the definitive Christmas bow nails almond look. This holiday season, commit to both elegance and durability. With the right tools and attention to detail, your festive manicure will remain flawless throughout the celebration.
Which of the nine master techniques are you most excited to try first for your sophisticated holiday manicure? Share your plans in the comments below
Last update on 2026-03-21 / Affiliate links / Images from Amazon Product Advertising API